# Unified.to – Complete Documentation
Unified.to provides a single API to integrate multiple B2B SaaS platforms. This file contains the full documentation for the Unified.to API.
Source: https://docs.unified.to
OpenAPI spec: https://api.unified.to/swagger.json
---
# Getting Started
## Unified.to Documentation
URL: https://docs.unified.to/
# Unified.to Documentation
The [Unified.to API](/concepts/what-is-a-unified-api) allows you to add multiple integrations to your application by using a single (i.e. unified) API. Focus on your core product instead of developing and maintaining different integrations.
## Access your customer's data however you want
:::grid
:::gridhightlight
[Unified REST API](/reference/rest)
:::
:::gridhightlight
[Unified MCP Server](/mcp)
:::
:::gridhightlight
[Unified Webhooks](/reference/webhooks)
:::
:::gridhightlight
[Unified SDKs](/reference/sdks)
:::
:::gridhightlight
[Unified CLI](https://github.com/unified-to/unified-cli)
:::
:::
## How to use these docs
Our documentation is organized as follows:
- **How-to guides**: These guides provide the answers to “How do I...?” types of questions. Accomplish common task flows like getting OAuth 2 credentials or testing connections.
- **API Basics**: Get to know the fundamentals for interacting with our API, such as pagination, webhooks, and rate limits.
- **Concepts**: Gain a deeper understanding of topics that are core to the Unified.to platform, such as virtual webhooks, scopes, and unified APIs.
- **Reference**: Look up API specs for each of our unified integration categories as well as examples of API requests.
If you're new, we recommend starting with our tutorial: [Build a simple Javascript app that calls the Unified.to API](/tutorials/build-a-simple-javascript-app).
## Accessing documentation programmatically
The developer documentation at this website is published for human developers. If you need to access the documentation programmatically, via HTTP clients, curl, LLM client, or any non-browser tooling during development, use the following options instead:
- Markdown exports: All pages can be accessed with a .md suffix which would provide a markdown version. (for example, this Introduction page is at https://docs.unified.to/index.md). A GET request for these URLs returns Markdown suitable for version control, search, and offline use.
- Documentation index: Use the https://docs.unified.to/llms.txt which lists curated links to Markdown versions of guides and reference pages, including webhooks and API definitions. Use it as a stable entry point when you need to discover or bulk-fetch machine-friendly documentation.
- OpenAPI definitions: Endpoint and webhook reference specifications can be found at https://docs.unified.to/reference/sdks.md.
## Additional resources
Curious about Unified.to's security posture? Learn more at [Security](https://unified.to/security){:target="\_blank"}.
Have a question or just want to chat? Join our [Discord](https://discord.gg/85z7HF7JbD){:target="\_blank"} server.
Watch guided video walkthroughs on our [YouTube](https://www.youtube.com/@unified_api){:target="\_blank"} channel, such as [How to get started with Unified.to](https://youtu.be/arTwN_OT8Do) or [How to use Webhooks in Unified.to](https://youtu.be/_zbUplmJd84).
## Get started with Unified.to
URL: https://docs.unified.to/quick-start
# Get started with Unified.to
This quick start guides you through connecting your application to third-party platforms using Unified.to. You'll see how to:
- Set up your Unified.to account and credentials
- Activate integrations in the sandbox environment
- Add the Authorization component to your app
- Make your first API call
::callout
Want to play around with the Unified API right away? Download [Postman](https://www.postman.com/downloads/) and import our [Postman collection](/reference/sdks) to start making API calls. You'll need your workspace ID and API key first.
::
## Set up your workspace
::callout
Building with an AI coding agent? The agent can create a workspace and API key itself with [Agent Signup](/mcp/agent-signup), then hand it to you to claim.
::
1. Create your Unified.to account
- Sign up at [app.unified.to/login](https://app.unified.to/login)
- Log in to your dashboard
2. Get your API credentials
- Navigate to **Settings > API Keys**
- Copy your **Workspace ID** and **API Key**
- Store these securely where you can reference them in your app, such as in an `.env` file - you'll need them for API calls
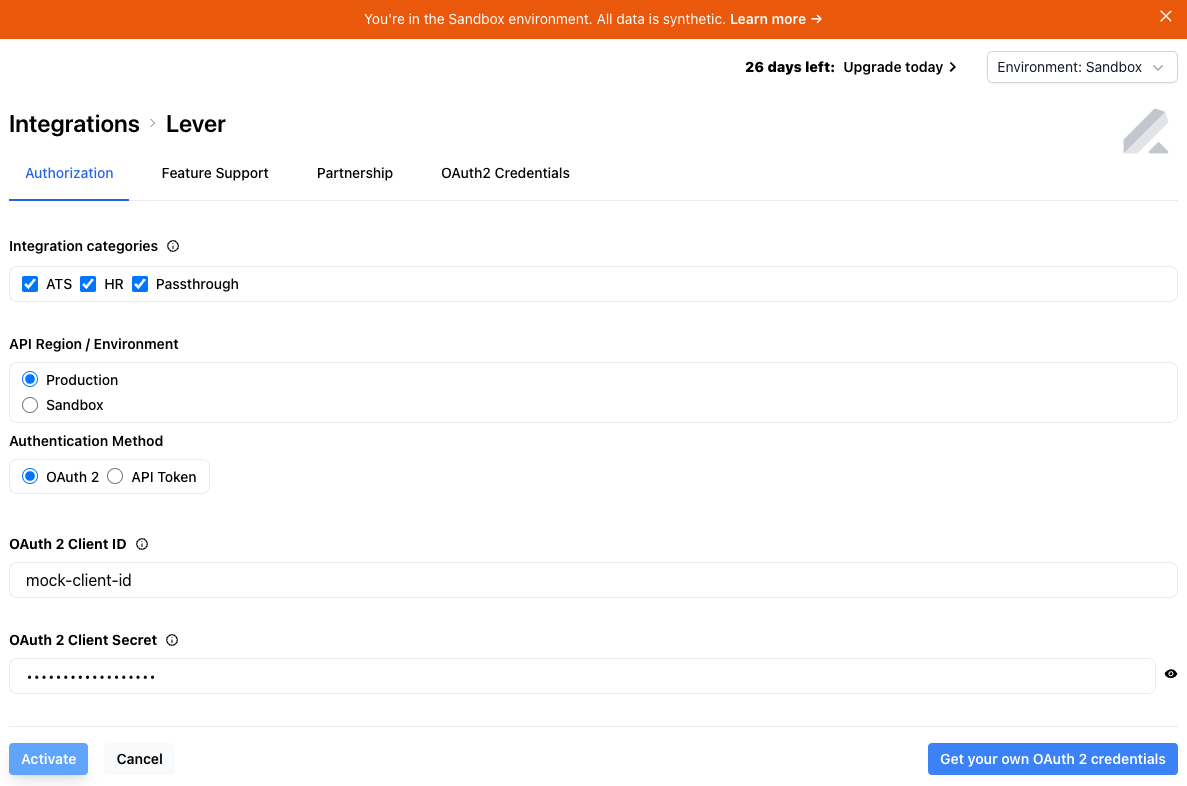
3. Activate an integration in the sandbox environment
- Go to **Integrations**
- Select **Sandbox** from the environment dropdown in the top-right corner of the screen
- Search for your desired integration
- Click the integration card and select **Activate** (don't worry about filling in credentials - they're all mocked in the sandbox environment)
## Add authorization to your app
Your users need to authorize your application to access their third-party accounts (like Lever, HubSpot, etc.). Unified.to provides an embedded Authorization component that handles this process securely. When users click on an integration in this component, they'll be redirected to an authorization page, then returned to your app with a unique connection ID that you'll use for making API calls.
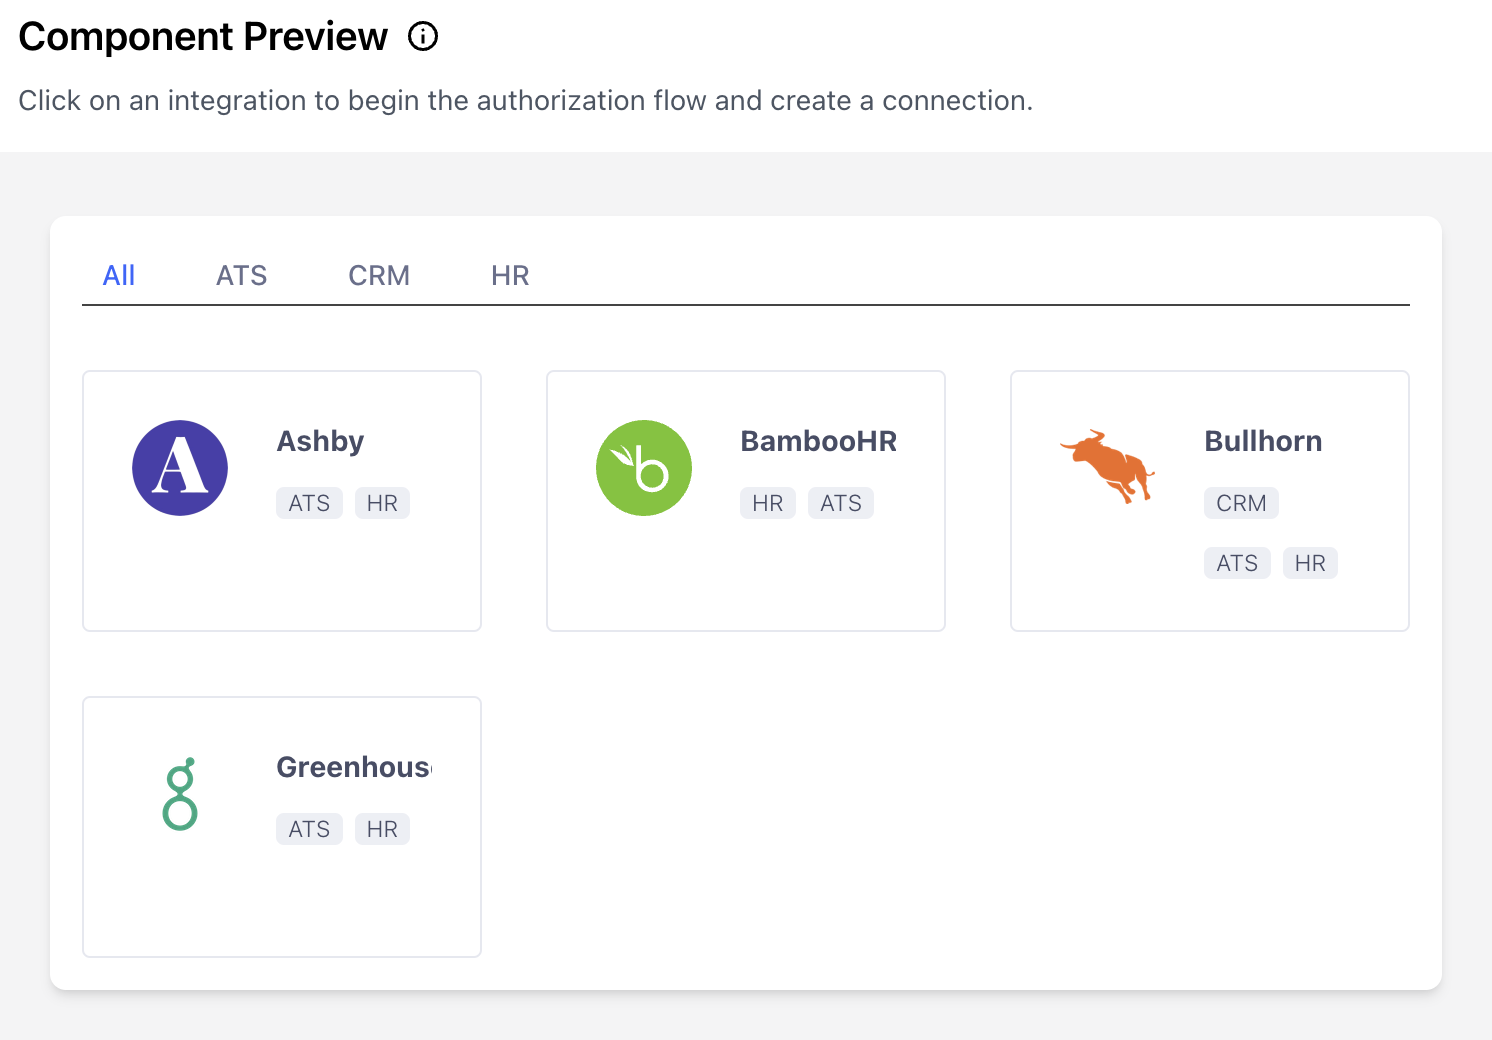
Add this to your app:
```html
```
Replace `YOUR_WORKSPACE_ID` with the Workspace ID you copied earlier.
(Want to use a Javascript framework or make the API call from your server? Discover more options at [app.unified.to/embed](https://app.unified.to/embed?tab=Authorization))
## Make your first API call
After successful authorization, you'll receive a connection ID in the callback URL e.g. `localhost:3000?id={connection_id}`. Save this in your database and use it to make API calls.
Our Unified endpoints generally follow the pattern of `{API_CATEGORY}/{CONNECTION_ID}/{DATA_OBJECT}`. For example:
### CRM (HubSpot, Salesforce, etc.)
```javascript
// Fetch contacts
const response = await fetch(`https://api.unified.to/crm/${connectionId}/contact`, {
headers: {
Authorization: `Bearer ${API_KEY}`,
},
});
```
### ATS (Lever, Greenhouse, etc.)
```javascript
// Fetch candidates
const response = await fetch(`https://api.unified.to/ats/${connectionId}/candidate`, {
headers: {
Authorization: `Bearer ${API_KEY}`,
},
});
```
### HRIS (BambooHR, Workday, etc.)
```javascript
// Fetch employees
const response = await fetch(`https://api.unified.to/hris/${connectionId}/employee`, {
headers: {
Authorization: `Bearer ${API_KEY}`,
},
});
```
Refer to our **API Reference** for the category and data object you are interested in.
## Go to production
When you're ready to launch:
1. **Register your app with each vendor.** Create a developer app with the vendor to get OAuth or API-key credentials. This is the only step that happens outside Unified.to.
2. **Activate the integration in your Production environment** and enter those credentials.
3. **Configure scopes.** Enable the scopes in your vendor developer account that match the Unified.to scopes you're requesting. See [Scopes](/concepts/scopes).
4. **Switch the Authorization component to Production** by changing `env=Sandbox` to `env=Production` in the embed snippet.
Copying activated integrations from one environment to another isn't available yet. If you need it, [contact us](https://unified.to/contact).
## Add more integrations
Your API code doesn't change when you add an integration: endpoints and SDKs are the same across vendors, so calls to HubSpot and Salesforce differ only by connection ID. To add an integration, repeat the vendor registration, activation and scope steps above for that vendor. The Authorization component shows newly activated integrations automatically.
## Next steps
When you're ready to move on to production environments, review these guides to set yourself up for success:
- [Learn how to work with webhooks](https://docs.unified.to/reference/webhooks)
- [Configure scopes for your authorization flow](https://docs.unified.to/concepts/scopes)
- [Associate your end-users with connections](https://docs.unified.to/guides/how_to_associate_a_connection_id_with_your_end_user)
- [SDKs for popular languages](https://docs.unified.to/reference/sdks)
Need help?
- Join our [Discord](https://discord.gg/2nsAPmbx)
- Email [hello@unified.to](mailto:hello@unified.to)
---
# Concepts
## Unified.to Architecture
URL: https://docs.unified.to/concepts/architecture
# Unified.to Architecture
[Unified.to](https://unified.to/) is a real-time pass-through unified API. Every request routes directly to the source API and returns current data. End-customer data isn't stored, cached, or logged at rest on our side.
Put our architecture next to a sync-and-store unified API and the high-level boxes may look the same, but the difference is in the flows: their order, number, and direction.
## Unified.to architecture
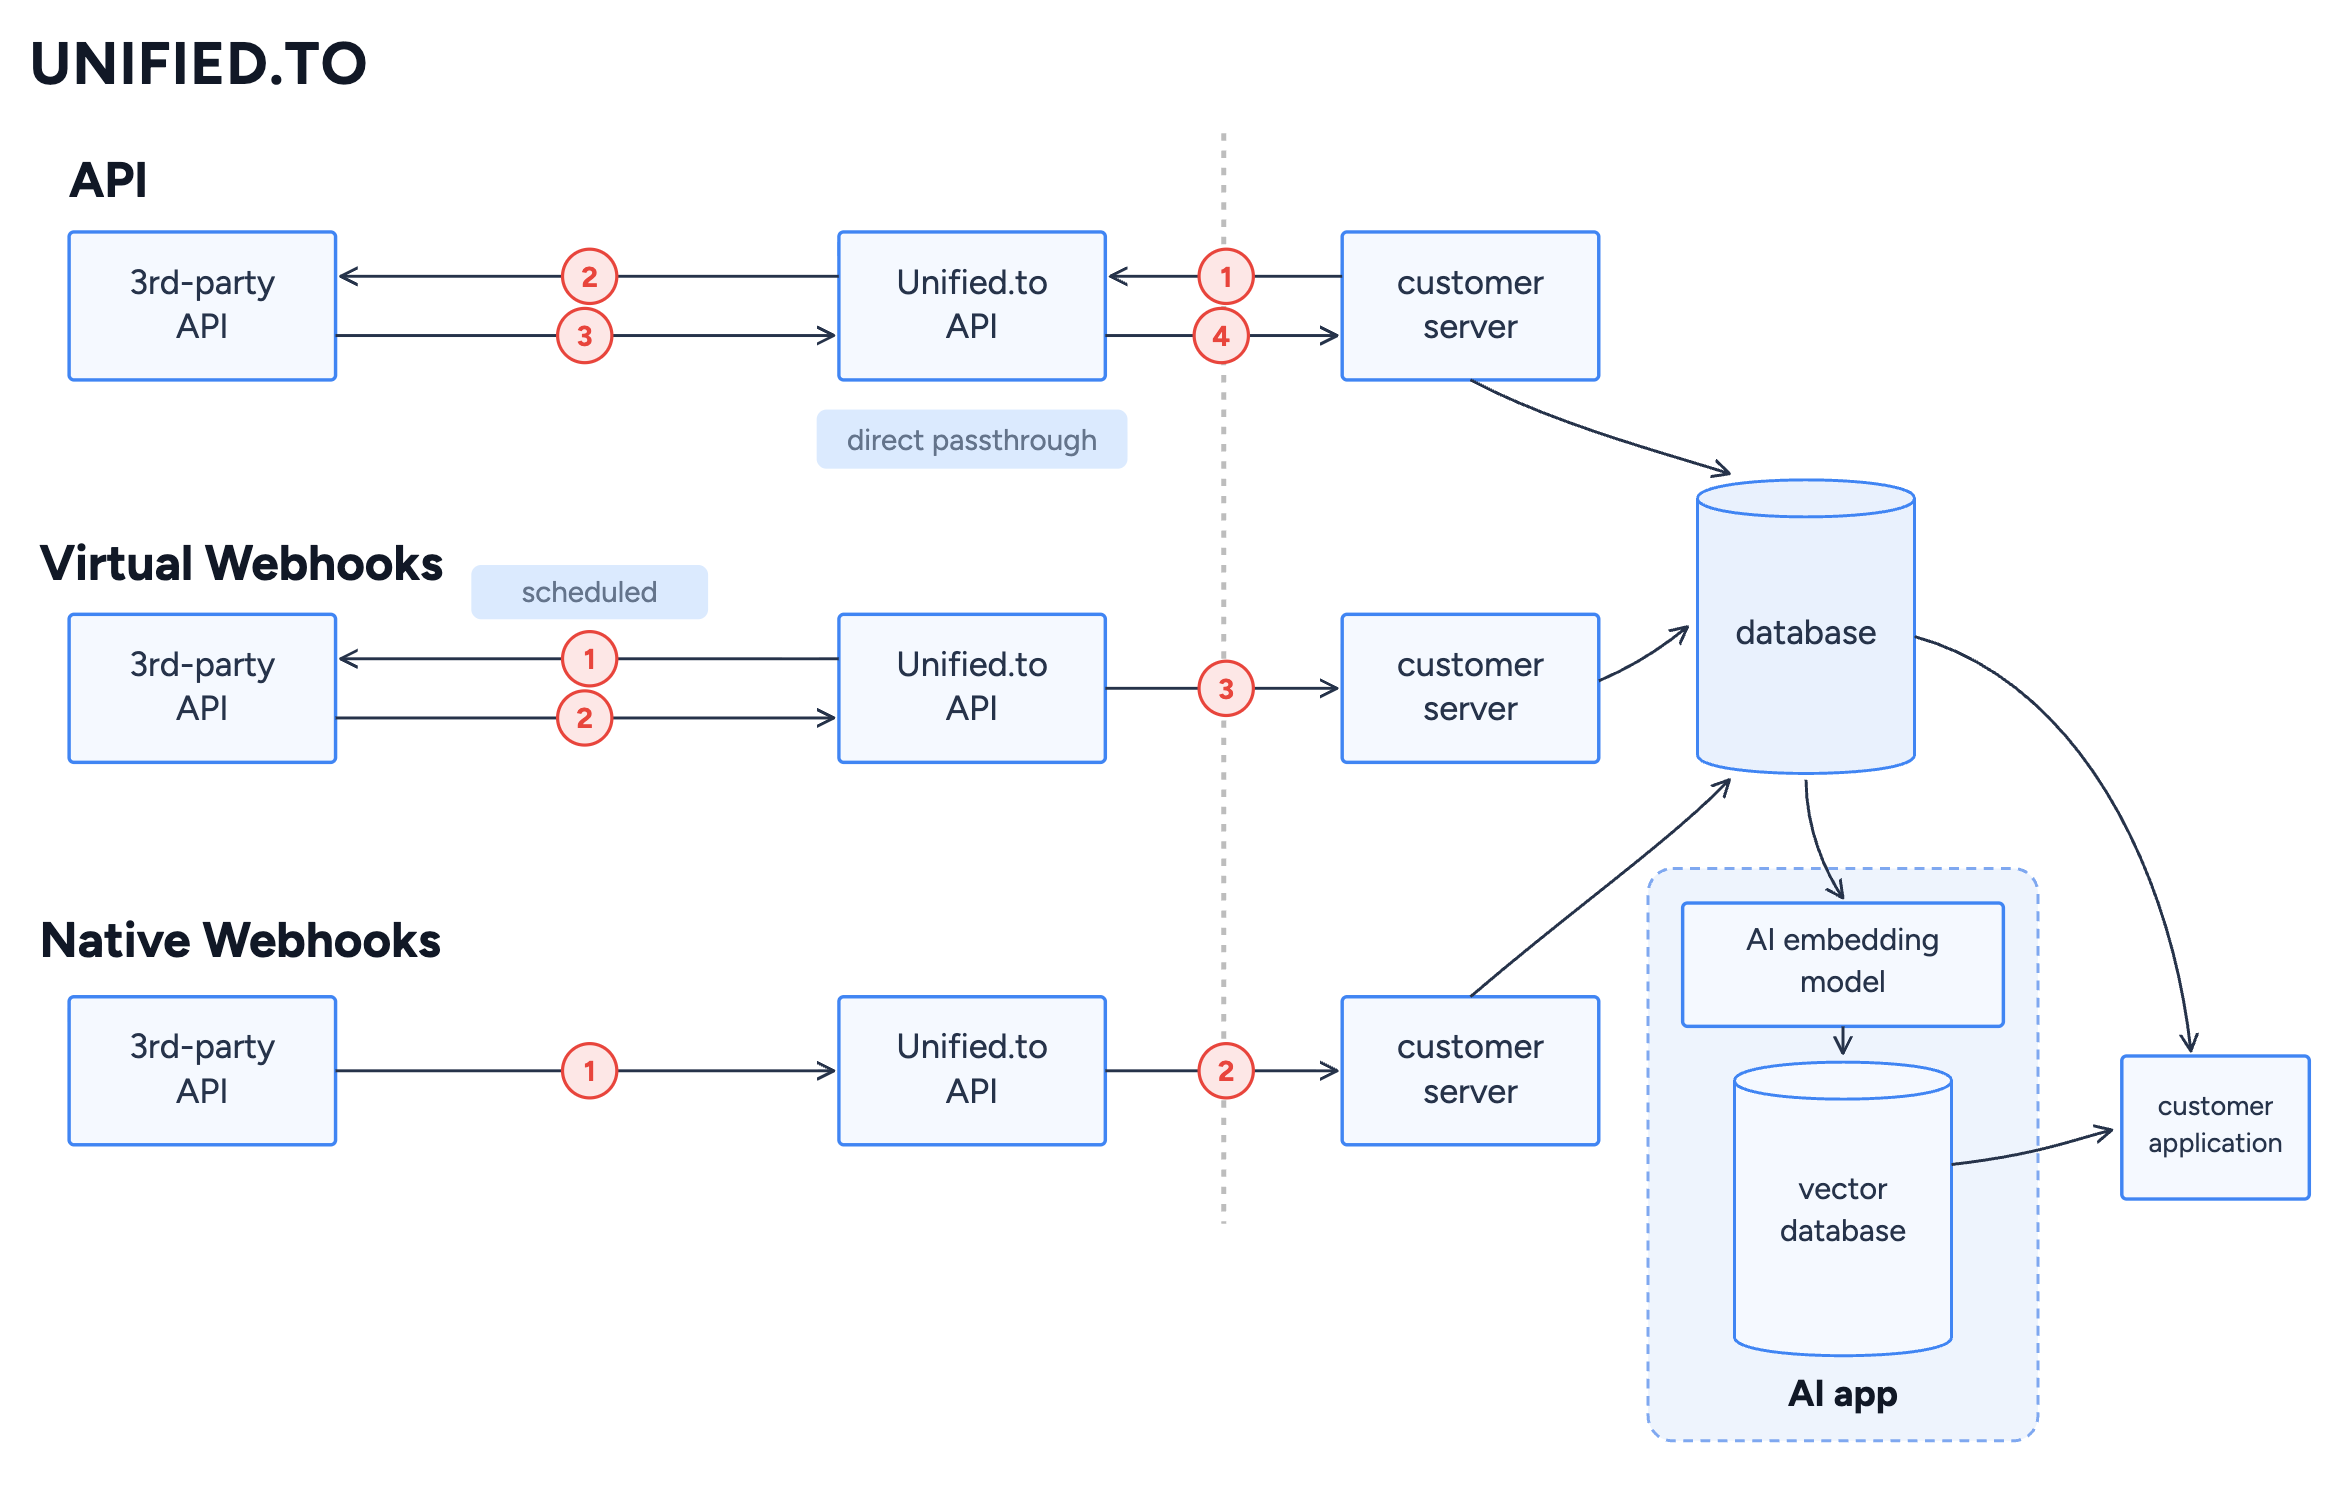
The dashed line marks the boundary between our infrastructure and yours. Everything to the left, the source API and the Unified.to API, holds no data at rest. Everything stored, your database and any vector store feeding your AI app, sits on your side. We move the data; we don't keep it. The only things that persist are the connection ID and minimal operational metadata.
### API: direct passthrough
An on-demand read or write. Following the numbered path in the diagram:
1. Your server calls the Unified.to API, using the connection ID to identify the account.
2. [Unified.to](https://unified.to/) transforms the call (its pagination, query parameters, and payload) into the source API's format and routes it to the source.
3. The source API responds.
4. Unified.to transforms the response in memory into a normalized object and returns it to your server.
You paginate and filter using a single unified method (offset/limit/query/updated_gte), regardless of how the source API expects those parameters. Dates are ISO, values are validated, and raw source data is returned alongside the normalized object.
### Virtual webhooks: scheduled
Most source APIs don't offer native webhooks. For those, Unified.to delivers events on a schedule you set:
1. On an interval you configure, as frequent as every minute, Unified.to checks the source API for changes.
2. Changed records return to Unified.to.
3. Unified.to delivers the event to your endpoint, with the changed records in the payload.
There's usually no follow-up fetch, because the event carries the data. Checks that find no change are not billed.
Rate limits, backoff, and retries are handled for you. If your endpoint is unavailable, we retry three times immediately from memory, then switch to a Fibonacci backoff that continues for up to two weeks.
Those longer retries hold a cursor, not your records: each attempt re-reads the page from the source and dispatches it fresh. Nothing sits in a delivery queue, and no end-customer data is stored, even on failure.
→ [**Understanding virtual webhooks**](/concepts/virtual_webhooks#virtual-vs-native-webhooks-comparison)
### Native webhooks
Where the source API supports native [webhooks](/reference/webhooks):
1. The source API pushes the event to Unified.to.
2. Unified.to delivers it to your endpoint on the same interface as virtual webhooks.
Your code consumes one event model and never branches on which delivery path an integration uses.
### Where the data lands
All three paths deliver to your server, not ours. From there the data flows into your own database and, for AI products, into your embedding model and vector store feeding your application. The storage happens in your infrastructure. Unified.to holds none of it.
## Sync-and-store: the difference is custody
Same boxes, different flows. Sync-and-store unified APIs store a normalized copy of your customers' data. Call that platform **the vendor**: it sits between your server and the source API, the same position Unified.to occupies above.
A database sits on the vendor's side of the boundary, and reads are served from that copy rather than the source. The record you read is a copy of what was true at the last sync. The record you write lands in their database first and reaches the source later.
### API path:
1. On a schedule the vendor sets, typically every 3 to 24 hours, it syncs data from the source API into its own database.
2. That stored copy is what serves your every read.
3. Your server requests data from the vendor API.
4. The vendor API reads from its database.
5. The database returns the cached copy.
6. The vendor API returns it to your server.
The read never reaches the source.
### Native webhooks path:
1. The source pushes the event into the vendor's database.
2. The vendor reads the change from that store.
3. The vendor delivers it to your server.
The store is in the path either way.
### Write path:
1. Your server sends the update to the vendor API.
2. The vendor writes it to its own database.
3. The update reaches the source on the vendor's next sync.
Many sync-and-store vendors cache your update for up to 24 hours before it reaches the source. Some may push it through sooner.
Both patterns push where the source pushes and check on a schedule where it doesn't. Polling isn't the difference. Custody is: who holds your customers' records, and where they rest.
When a platform holds the copy, that copy is theirs to scope, reconcile, secure, and delete, and your customers' records sit in their infrastructure as a sub-processor. When it holds nothing, there is nothing to scope, nothing to reconcile, and nothing to delete.
Two questions separate the approaches:
**Does the event carry the records, or a pointer?** Poll-store-notify detects a change in the vendor's copy and tells you to call back for it. Poll-detect-deliver puts the changed records in the payload. Unified.to does the latter.
**Where does the data rest between detection and delivery?** Anything that polls into a store holds a copy. Unified.to holds none.
For the full comparison across all four generations of integration architecture, ETL, iPaaS, first-generation unified APIs, and real-time, see [Technology overview](https://unified.to/technology).
## Integration Authorization
URL: https://docs.unified.to/concepts/embedded-components
# Authorization
Authorization is the process of asking customers to authorize access to their third-party accounts.
Unified provides several options to accomplish this, from easy 1-line embedded components to a full-featured API, and even CNAMEd domains.
## Embedded Authorization Component
Unified.to provides a suite of pre-built front-end authorization components that support React, Angular, Vue, and Svelte (and plain JavaScript) for you to use in your app.
These authorization components display a list of your activated integrations, returned directly from our API. Once the end-user clicks on an integration, they will be redirected to the authorization page for that integration, regardless if it is OAuth2, API Token and any other type of authorization.
in their File Storage connection.
### Instructions
To use any one of these components in your app:
- Make sure you've activated some integrations first. You can do so at [app.unified.to/integrations](https://app.unified.to/integrations).
- On app.unified.to, click on Embedded components and select which of the widgets you want to use from the tab.
- Configure how you want the component to behave under the Configuration tab.
- View and copy the code to add to your app under the Embedded Code tab.
- Important: Under the Options tab, be sure to select the correct permissions scopes that the integrations you activated are expecting to receive. By leaving these options blank, Unified.to will request access to all possible scopes. To learn more about scopes, see: [Understanding scopes](/concepts/scopes).
### Front-end Frameworks
| | |
| ----------- | ------------------------------------------------------------------------------------------------------------------------------- |
| **React** | [npmjs.com/package/@unified-api/react-directory](https://www.npmjs.com/package/@unified-api/react-directory){:target="\_blank"} |
| **Angular** | [npmjs.com/package/@unified-api/angular-directory](https://npmjs.com/package/@unified-api/angular-directory){:target="\_blank"} |
| **VueJS** | [npmjs.com/package/@unified-api/vuejs-directory](https://npmjs.com/package/@unified-api/vuejs-directory){:target="\_blank"} |
| **Svelte** | [npmjs.com/package/@unified-api/svelte-directory](https://www.npmjs.com/package/@unified-api/svelte-directory) |
## Manually Authorizing Connections
If you do not want to use our pre-built authorization components, nor want to copy our component source code and make changes, then you can use our [API](https://docs.unified.to/unified/integration/Authorize_or_re-authorize_a_connection)
This is the flow to follow in your application with your end-user:
1. You redirect your user to our authorization URL. Make sure to include a `success_redirect`, `failure_redirect`, and `permissions`. Also include either `state` or `external_xref`.
2. Your end-user will authorize the connection
3. If they cancel, then we return them to the `failure_redirect`
4. If they authorize the connection, we then test their API credentials to see if it has the valid permissions
5. If that fails, then we redirect them back to the `failure_redirect` and also include an `error` message with a string denoting the error
6. If it succeeds, then we redirect them to the `success_redirect` and add additional parameters to the URL
## Successful authorization
If the authorization is successful (either via our authorization components or via the API), we redirect the user to the specified `success_redirect` URL and add the following URL parameters:
- `id`: the connection ID (the newly created connection, or the same existing connection when [re-authorizing](#re-authorize-an-existing-connection))
- `state`: the state value you provided
- `nonce`: a random nonce value
- `type`: the integration type of connection
- `sig`: a security signature to ensure that this information has not been tampered with;
### Signature calculation
The signature is calculated as follows:
```javascript
sig = HmacSha256(workspace.secret).update(connection.id).update(nonce).update(state).digest('hex');
```
## Re-authorize an existing connection
When a connection becomes unhealthy because its credentials were revoked or expired (for example, a `CONNECTION_UNHEALTHY` event with an HTTP `401`), ask your end-user to re-authorize **the same connection** instead of creating a new one. The connection keeps its ID, so your stored connection IDs, webhooks, and `external_xref` keep working.
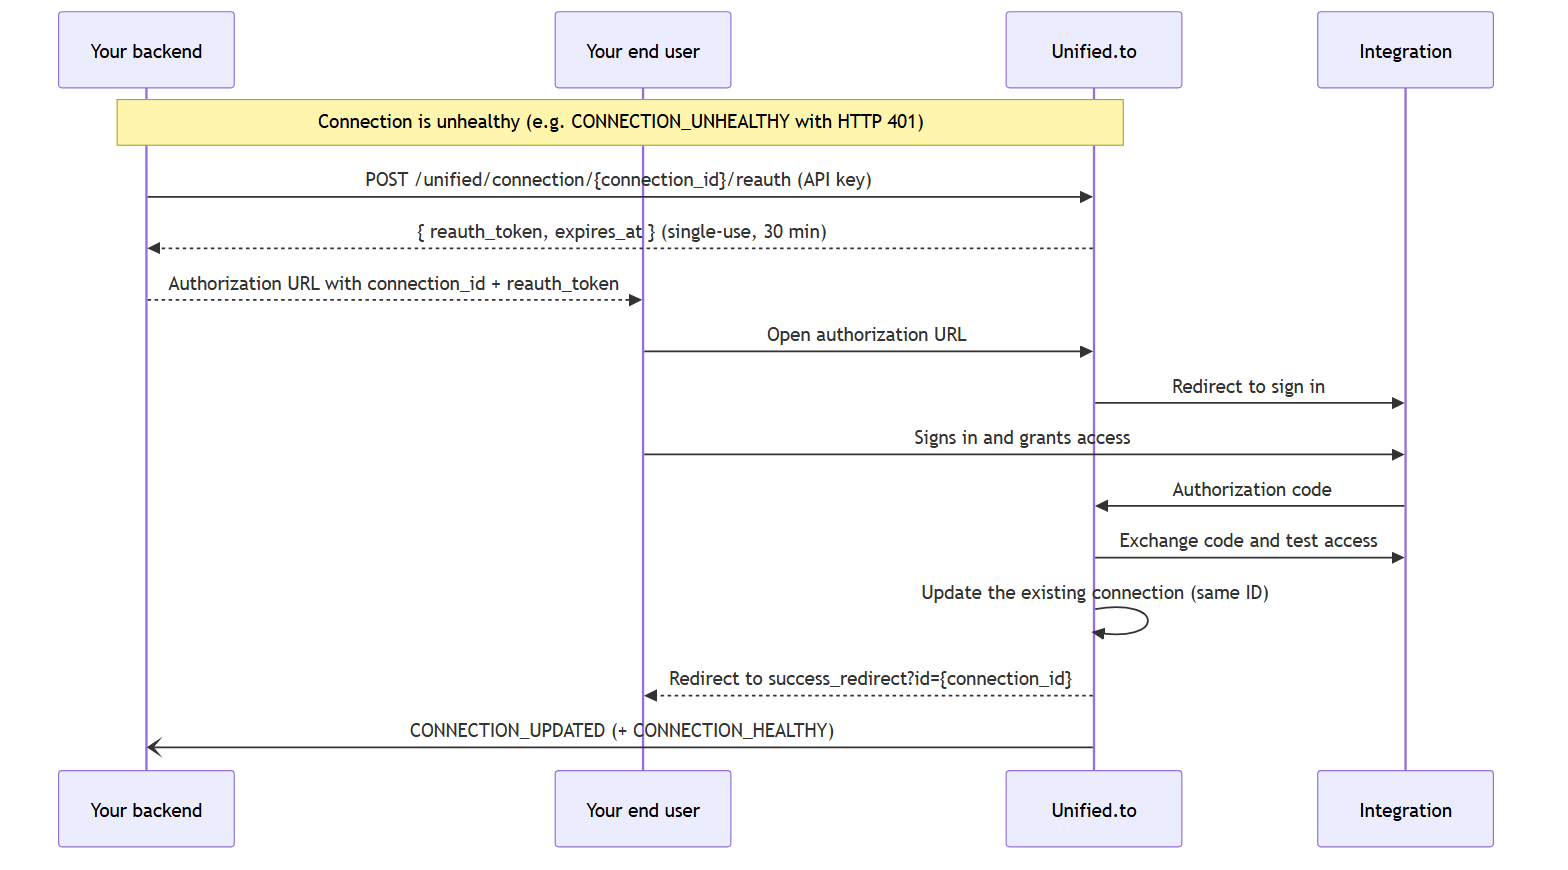
1. From your backend, create a re-authorization token with your API key using [Create a re-authorization token for a connection](https://docs.unified.to/unified/connection/Create_a_re-authorization_token_for_a_connection):
```bash
curl -X POST https://api.unified.to/unified/connection/{connection_id}/reauth \
-H "Authorization: bearer {your_api_key}"
```
```json
{ "reauth_token": "6650...e1.9f2c...", "expires_at": "2026-10-01T17:45:00.000Z" }
```
2. Redirect your end-user to the usual [authorization URL](https://docs.unified.to/unified/integration/Authorize_or_re-authorize_a_connection), adding `connection_id` and `reauth_token`:
```
https://api.unified.to/unified/integration/auth/{workspace_id}/{integration_type}
?connection_id={connection_id}
&reauth_token={reauth_token}
&success_redirect=...
&failure_redirect=...
```
3. Your end-user signs in to the integration again. We test the new credentials the same way as for a new connection.
4. If it succeeds, we update the existing connection and redirect to `success_redirect` with the **same** `id`. You also receive a `CONNECTION_UPDATED` webhook (and `CONNECTION_HEALTHY` if the connection was unhealthy). No `CONNECTION_CREATED` event is sent.
Things to know:
- The token is single-use and expires after 30 minutes. Create it right before you send the end-user to the authorization URL. If you email the link, create a fresh token when the end-user clicks it rather than embedding one in the email.
- `connection_id` and `reauth_token` must be sent together, for the same connection, integration, and environment (`env`) the token was created for.
- If the token is missing, invalid, expired, or already used, we redirect to `failure_redirect` with `error=authorization error: invalid or expired re-authorization link` (or return a `400` when there is no `failure_redirect`). Create a new token and try again.
- If the end-user cancels or the credential test fails, the token is not used up, so they can retry with the same link until it expires.
- Without a `scopes` parameter, re-authorizing asks for the permissions the connection already has, and its permissions and categories stay unchanged. Pass `scopes` to change them; the categories then come from your activated integration, as they do for new connections.
- A paused connection stays paused after re-authorizing.
- If your workspace has `trusted_domains` set, `success_redirect` and `failure_redirect` must use one of those hosts, for new connections and re-authorization alike. See [Restrict redirect hosts](/tutorials/customize-auth-flow#restrict-redirect-hosts-with-trusted_domains).
## Other Embedded Components
Unified also has non-authorization components that you can embed into your app. These components are:
- **Sign-in**: Authenticate users so they can sign into your app; [info](https://app.unified.to/embed?tab=Sign-in){:target="\_blank"}. Restrict where the login JWT can be sent with workspace `trusted_domains` — see [Authentication](/auth/overview).
- **Public Directory**: Display a list of your integration so your users can learn about your third-party API offerings; [info](https://app.unified.to/embed?tab=Directory){:target="\_blank"}
- **FileManager**: Display a list of files in a directory so your users can pick a file; [info](https://app.unified.to/embed?tab=FileManager){:target="\_blank"}
- **CalendarScheduler**: Display a calendar so your users can schedule events in their Calendar connection; [info](https://app.unified.to/embed?tab=CalendarScheduler){:target="\_blank"}
- **MessagingManager**: Display a list of channels/folders and messages; [info](https://app.unified.to/embed?tab=Messaging){:target="\_blank"}
## Multi-region synchronization
URL: https://docs.unified.to/concepts/multi_region_synchronization
# Multi-Region Workspace Synchronization
## Overview
Multi-region synchronization keeps selected workspace settings consistent across Unified data regions (US, EU, AU).
You can manage it from:
**Settings → Workspace → Multi-region synchronization**
This feature is for workspace configuration. It does not copy your customers' integration data between regions.
## Availability
- Multi-region synchronization is available only on the Scale plan.
- Only workspace admins can update workspace settings.
- Your workspace is billed once, in the region where synchronization was first turned on. API usage from all your synced regions is combined on that invoice.
## How to turn it on
1. Go to **Settings → Workspace → Multi-region synchronization**.
2. First select **Workspace**. After Workspace is enabled, the full list of sync options appears.
3. Select the options you want, then click **Update**.
| UI option | What it syncs |
| --- | --- |
| Workspace | General workspace settings, such as the workspace name and IP restrictions. |
| Workspace Secrets Manager | Workspace credentials, such as your Datadog API key, Secrets Manager configuration, and SAML configuration. Select this together with Workspace. |
| Workspace Integrations | Integrations that are enabled in this workspace. |
| Users | Workspace users. |
| Keys | Workspace API keys. |
| Notifications | Workspace notifications. |
## Workspace Secrets Manager
By default, workspace credentials are not included when you enable Workspace sync. These include:
- Log and monitoring credentials, such as your Datadog API key and your AWS, Azure, GCP, Grafana, and ClickHouse logging settings
- Your Secrets Manager configuration (AWS, Azure, GCP, HashiCorp Vault, etc.)
- Your SAML configuration
To sync workspace credentials, select both:
- **Workspace**
- **Workspace Secrets Manager**
Use this when you want the same credentials to be available across your enabled regions.
## What is synced
Multi-region synchronization can sync:
| Category | Synced data |
| --- | --- |
| Workspace | General workspace settings, such as IP restrictions, workspace name, etc. |
| Workspace Secrets Manager | Workspace credentials, such as your Datadog API key, Secrets Manager configuration, and SAML configuration. Synced when enabled together with Workspace. |
| Workspace Integrations | Integrations that are enabled in this workspace. |
| Users | Workspace users. |
| Keys | Workspace API keys. |
| Notifications | Workspace notifications. |
## What is not synced
Multi-region synchronization does not sync:
| Not synced | Meaning |
| --- | --- |
| Connections | Individual customer connections are not copied between regions. |
| Webhooks | Webhook subscriptions, webhook events, and webhook delivery history are not copied by this setting. |
| API logs | API request logs are not copied by this setting. |
| Customer integration data | Contacts, jobs, employees, files, messages, tickets, and other third-party object data are not copied between regions. |
| Sandbox data | Sandbox records are not copied by this setting. |
| Billing records | Billing records are not copied by this setting. |
## How updates sync
When you create, update, or delete a synced item in one region, Unified syncs that change to all your other regions. There may be a brief delay before all regions reflect the update.
If the same item is changed in two regions at about the same time, the most recent change wins.
## Initial sync
When you enable a new sync option, Unified also syncs the existing records for that option.
For example, if you enable **Users**, existing workspace users are synced to your other regions.
If you enable **Workspace Secrets Manager**, make sure **Workspace** is also selected.
## How to turn it off
1. Go to **Settings → Workspace → Multi-region synchronization**.
2. Unselect the options you no longer want to sync, then click **Update**.
To fully turn off multi-region synchronization, unselect all options and click **Update**.
Turning sync off stops future changes from syncing. It does not automatically delete settings that were already synced to other regions.
:::callout
**Important notes**
Multi-region synchronization is intended for workspace setup and access configuration.
It should not be used to migrate customers' integration data, connections, webhook history, or logs.
:::
## Sandbox / Synthetic Data environment
URL: https://docs.unified.to/concepts/sandbox
# Sandbox / Synthetic Data environment
The synthetic data (ie. sandbox) environment is a controlled, isolated testing space provided by Unified.to. It allows developers to activate integrations, create connections, and make API calls without interacting with real third-party services or affecting production data.
Key points to understand about the synthetic data environment:
- It is specific to Unified.to and separate from any sandbox accounts you might have with third-party service providers.
- All API calls made in the sandbox environment return synthetic, mock data.
- At no point do you communicate with actual third-party providers when using the synthetic data environment.
## Using the synthetic data environment
There are two ways to use the synthetic data environment:
1. **From the web app:**
- On [app.unified.to](https://app.unified.to/), in the top right corner of the page, click on the **Env** dropdown.
- Select **Synthetic Data** from the options.
2. **When calling the Core API:**
- When calling the Unified Core API e.g. to query integrations or generate an authorization URL, include `env=Sandbox` in the query parameters. For example:
```
https://api.unified.to/unified/integration/auth/{workspaceId}/{integration}?env=Sandbox
```
**API reference:** [Core API overview](https://docs.unified.to/unified/overview)
**Note**: If you use the Core API and do not specify `env`, we will default to using the environment that is currently active on app.unified.to. As a best practice, be explicit about the environment you want to use when working with this API.
## Sandbox vs Production environments
| | **Synthetic Data / Sandbox** | **Production** |
| ----------------- | ------------------------------------------------ | --------------------------------------------------- |
| **Purpose** | For testing and development | For live, real-world usage |
| **Data** | Synthetic, mock data generated by Unified.to | Real data from integrated services |
| **Integrations** | Can be activated with mock credentials | Requires real credentials from third-party services |
| **API Calls** | Return synthetic data | Interact with actual third-party services |
| **Risk** | No risk of affecting real data or services | Can affect real data and services |
| **Authorization** | Can use any mock credentials and bypasses scopes | Requires valid credentials and correct scopes |
**Note**: Production environment refers to any non-sandbox environment.
## Key considerations about the sandbox environment
### Synthetic data generation
- Mock data is generated when you activate an integration in the Sandbox environment.
- If you deactivate and reactivate an integration, it will be populated with new synthetic data.
### Isolated testing environment
- Each activated integration and connection in the Sandbox has its own isolated set of synthetic data.
- This isolation allows you to test various scenarios without affecting real data or services.
### Mock credentials
- In the sandbox environment, you can use any mock values for OAuth client IDs, secrets, API tokens, and other credentials.
- When creating a connection for an integration in the sandbox environment, you can also use any mock values when asked for them.
### Integration-specific environments vs. [Unified.to](https://unified.to/) Synthetic Data / Sandbox
An important distinction to be aware of:
- Some integrations allow you to choose an "API region / environment" when activating them. This refers to that specific API provider's environment, not Unified.to's environment.
- Choosing "Sandbox" when activating an integration this way is **not** the same as using the Unified.to sandbox environment.
### Environment-specific integrations and connections
- Activated integrations are tied to the active environment at the time of their activation.
- If you activate an integration (e.g., HubSpot) in the sandbox environment, it won't be available in the production environment, and vice versa.
- Similarly, a connection created for an integration in the sandbox environment will only return synthetic mock data and won't be accessible in the production environment.
## When to use the sandbox environment
The Synthetic Data / Sandbox environment is ideal for:
1. Initial integration testing and exploration
2. Developing and debugging your application without affecting real data
3. Running automated tests that don't require real-world data
4. Demonstrating functionality without needing access to actual third-party services
## Best practices
1. Clearly distinguish between your sandbox and production environments in your code and workflows.
2. Use the sandbox environment for initial testing before moving to production.
3. When seeking support or reporting issues, specify which environment you're working in.
## Additional information
- [Tutorial: Build a simple Javascript app that calls the Unified API](https://docs.unified.to/tutorials/build-a-simple-javascript-app)
- See how to build an app entirely in the synthetic data / sandbox environment
## sandboxes
URL: https://docs.unified.to/concepts/sandboxes
# Sandbox Accounts
This directory provides guidance for obtaining sandbox accounts for integrations supported by Unified.to. These accounts can be used for testing your app with live data.
:::callout
Note: These sandbox accounts are different from Unified.to's [synthetic data sandbox environment](/concepts/sandbox). While our sandbox environment generates synthetic data for trying out he Unified API, these sandbox accounts are for testing with real integration endpoints in production.
:::
:::sandboxes
:::
For integrations requiring partner program enrollment or special access, we recommend:
1. Starting the application process early in your development cycle
2. Having a clear description of your integration use case ready
## Understanding scopes
URL: https://docs.unified.to/concepts/scopes
# Understanding scopes
In the world of API integrations and OAuth, scopes play a crucial role in managing access to resources. This guide explains the concept of scopes, their importance in OAuth, and how they are handled specifically at Unified.to.
## What are scopes?
Scopes are a way to limit an application's access to a user's account. Instead of granting complete access to an account, scopes allow for fine-grained permission control.
Think of scopes as permission slips. When you use an app that integrates with another service (like signing in with Google), scopes define exactly what that app is allowed to do with your account. It's like telling the bouncer at a club, "This person can enter the main area, but not the VIP lounge."
## Why are scopes important?
1. **Security**: Scopes ensure that applications only have access to the specific data and actions they need, reducing the risk of unauthorized access.
2. **User Control**: Users can make informed decisions about what access they're granting to applications.
3. **Compliance**: Scopes help applications adhere to data protection regulations by implementing the principle of least privilege.
## How scopes work in OAuth
In the OAuth flow:
1. An application requests one or more scopes.
2. The user is presented with these scope requests during the authorization process.
3. If the user approves, an access token is issued that's limited to the approved scopes.
For example, an application might request the scope `https://www.googleapis.com/auth/drive.readonly` to read files from Google Drive, but not edit or delete them.
## Scopes at Unified.to
Unified.to acts as a conduit between your application and various API providers. We use a unified set of scopes that map to provider-specific scopes. This abstraction simplifies the integration process across multiple providers.
### Unified scopes
Unified.to uses its own set of scopes, which are then mapped to provider-specific scopes. For example:
- `storage_file_read` maps to `https://www.googleapis.com/auth/drive.readonly` for Google Drive
- `crm_company_read` maps to `oauth, crm.objects.owners.read, crm.objects.companies.read` for HubSpot
You may notice that some Unified scopes map to multiple provider-specific scopes. This is done to ensure that all the necessary permissions are requested for the integration to function correctly.
The mappings for all scopes are found under their respective Integration page at app.unified.to under OAuth 2 Credentials e.g. [here](https://app.unified.to/integrations/googledrive?tab=oauth2) are the mappings for Google Drive.
### Platform scopes
When setting up your developer account and/or developer app, you will need to define your scopes with the API providers themselves - Unified.to is unable to do this for you. How this is done varies on a case-by-case basis, but it is usually configured while generating your OAuth credentials. We have several how-to guides for generating credentials and setting scopes for our most popular integrations. If you think any are missing, please let us know.
## Requesting scopes
When using Unified.to, you can request scopes in one of two ways, depending on how you intend to authorize your users:
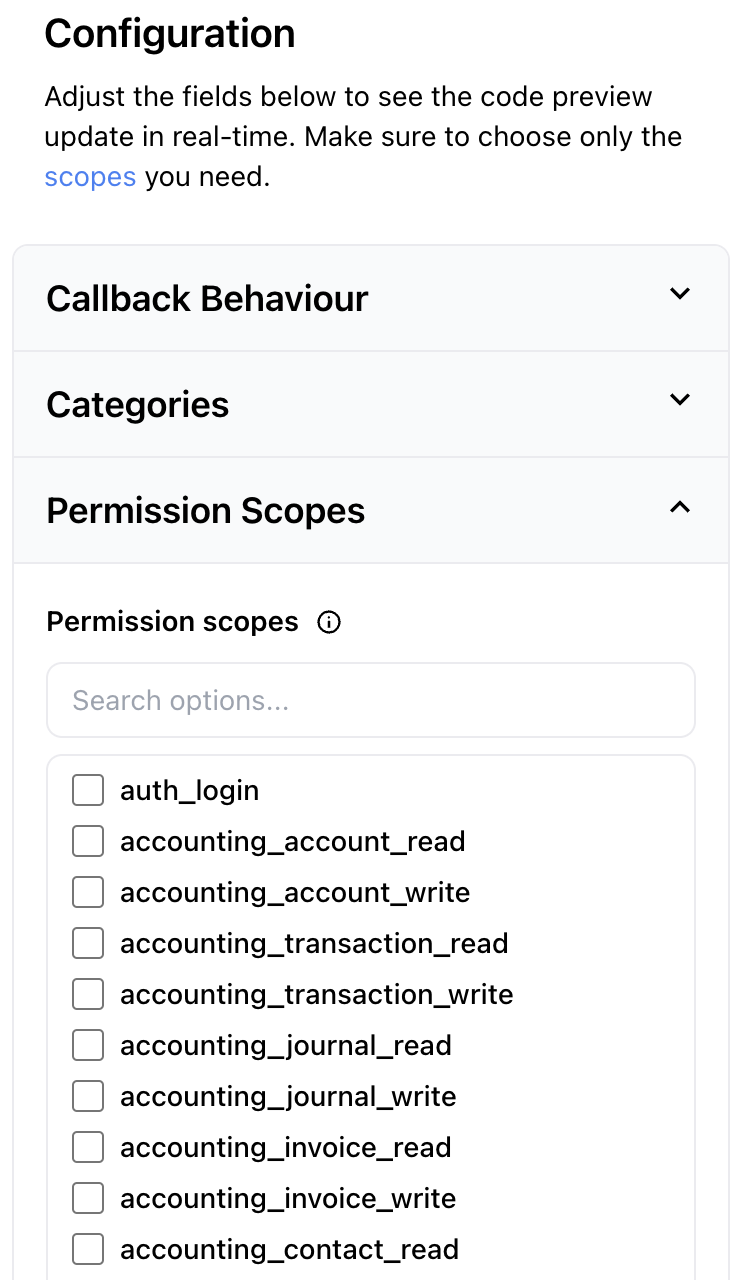
1. **(Recommended) Using the Authorization component**: On app.unified.to, you can select the scopes you need under Embedded components > Permission scopes.
Example of the scope interface on app.unified.to
2. **Using the Authorization URL**: When generating an auth URL, you can include the scopes as a query parameter. For example:
```
https://api.unified.to/unified/integration/auth/{WORKSPACE_ID}/{INTEGRATION}?scopes=webhook,crm_deal_read,crm_event_read
```
### Requesting custom or platform-specific scopes
In addition to passing Unified scopes in the query parameter, you can also specify scopes that are specific to the integration only. Behind the scenes, Unified scopes are "unfurled" to map to the integration's scopes, and anything else that is passed in will be used as-is. For example:
```
https://api.unified.to/unified/integration/auth/{WORKSPACE_ID}/{INTEGRATION}?scopes=webhook,crm_deal_read,crm_event_read,hubspot_scope_1,hubspot_scope2s
```
:::callout
**Note**: If you do not specify any scopes at all, then Unified.to will attempt to request _all_ the scopes available for the integration. We strongly advise you to consider which scopes you actually need and then intentionally specify them using one of the above two methods. The next section will go over best practices when requesting scopes.
:::
### Overriding scopes per integration
Each Unified permission (like `ats_job_read`) maps to a default set of the integration's raw scopes. You can replace that default on a per-integration basis using the integration's scope override setting.
If you want to use our API to change these scopes, update the WorkspaceIntegration object by adding the value in a map keyed by the Unified permission, where each value is a comma-separated list of the integration's raw scopes:
```json
{
"overriden_scopes": {
"ats_job": "jobs_r"
}
}
```
In this example, Unified requests the provider's `jobs_r` scope for the `ats_job` permission instead of its default. At authorization time, the override replaces the default scopes for that permission in the OAuth authorize URL. To revert, change the value back to the default scope or remove the override entirely.
You can also change the default scopes for the activation workspace integration in app.unified.to inside the integration's page.
You can also change the default scopes for the activation workspace integration in app.unified.to inside the integration's page.
:::callout
**Note**: Scope overrides apply to the OAuth authorization flow. For API-key based integrations, scopes are determined by the key itself, so the override will not change runtime behavior.
:::
### Best practices for scope usage
1. **Request Only What You Need**: Always request the minimum set of scopes required for your application to function.
2. **Check Provider Requirements**: Some providers may require certain scopes to always be enabled. Check the Unified.to documentation for provider-specific requirements.
3. **Include the Webhook Scope**: If you're setting up webhooks, always include the `webhook` scope in your requests.
4. **Verify Scope Mappings**: You can view the mapping of Unified.to scopes to provider-specific scopes in the Unified.to dashboard for each integration.
## Conclusion
Understanding and correctly implementing scopes is crucial for secure and efficient API integrations. By leveraging Unified.to's scope system, you can simplify the process of working with multiple providers while maintaining granular control over access permissions.
## Virtual Webhooks
URL: https://docs.unified.to/concepts/virtual_webhooks
# Understanding virtual webhooks
This guide explains what virtual webhooks are, how they differ from native webhooks, and when you would want to use a virtual webhook.
## What are virtual webhooks?
Virtual webhooks are [Unified.to](https://unified.to/)'s solution for providing webhook functionality even when an integration doesn't natively support it. They detect changes in your customers' connected applications on a schedule you set, for new or updated records, and for deleted records where the integration supports it, and deliver those changes as events to your webhook URL.
While native webhooks are great when they're available, many software vendors either don't support webhooks or have limitations with their webhook implementations. Virtual webhooks bridge this gap by providing a consistent webhook experience across the integrations that support them.
## How virtual webhooks work
Virtual webhooks work by:
1. Monitoring your connections for updates to specific objects (e.g., CRM deals, ATS jobs, etc) at regular intervals (polling)
2. Detecting when data has changed or new data has come in since the last check
3. Sending updates to your webhook URL only when changes are found
4. Managing rate limits automatically
Each check reads what has changed since the last successful delivery. Nothing is stored between checks; if a delivery fails, the next attempt re-reads the same page from the integration.
The key difference from native webhooks is that virtual webhooks use polling behind the scenes, but this complexity is managed by us so that you, the developer, don’t have to worry about it. You interact with virtual webhooks as you would with native webhooks.
## Virtual vs native webhooks comparison
| | **Virtual Webhooks** | **Native Webhooks** |
| --------------------- | ----------------------------------------------------------------------------- | ------------------------------------------------------------------------------ |
| **Implementation** | Detects changes on your interval and delivers events | Forwards events as the integration sends them |
| **Setup** | Configured entirely through Unified.to | May require configuration in the integration's own settings |
| **Cost Structure** | No charge for checks that find nothing. One API call per page of changes successfully delivered to your webhook URL. You set the interval. | One API call per successful delivery to your webhook URL |
| **Event Types** | Created and updated; deleted where the integration supports it (see Feature Support) | Supports created, updated, and deleted events if the integration supports them |
| **Retry Logic** | 3 immediate delivery retries, then progressive backoff for up to about two weeks; reads from the integration are retried with the same backoff | 3 immediate delivery retries; no extended backoff. Further delivery depends on the integration sending the event again |
| **Health Monitoring** | Built-in is_healthy tracking | Built-in is_healthy tracking |
## When to use virtual webhooks
Virtual webhooks are ideal for:
- Tasks where 1+ minute delays are acceptable and you don’t need the data immediately
- When you want greater control over costs by setting the frequency the integration is polled
- Integrations that don't offer native webhook support
When an integration offers both virtual and native webhooks, consider native webhooks when:
- You need immediate updates as soon as they arrive
## How to identify webhook support
You can check what type of webhook support an integration offers:
1. Navigate to the integration's page in the [Unified.to](https://unified.to/) dashboard
2. Click on **Feature Support**
3. Look under the **Webhooks** section:
- Each event shows which types support it, for example "native & virtual created event" or "native deleted event"
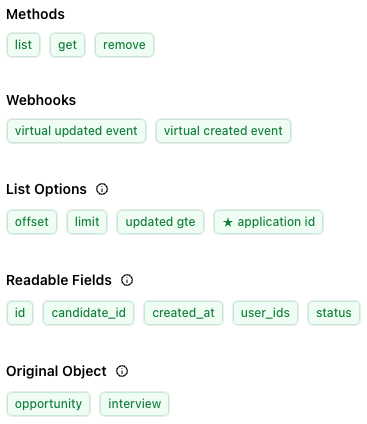
_In this example, the integration supports virtual updated and virtual created events._
## Creating and configuring virtual webhooks
You create and configure virtual webhooks the same as you would with any other webhook, with the exception of also being able to set an interval, and filters where the integration supports them. The minimum interval is 1 minute. To see how to do that, refer to: [How to create and configure webhooks](https://docs.unified.to/guides/how_to_create_and_configure_webhooks)
## Additional resources
- [How to troubleshoot unhealthy webhooks](https://docs.unified.to/guides/how_to_troubleshoot_unhealthy_webhooks)
- [Introduction to webhooks](https://docs.unified.to/reference/webhooks)
## What is a Unified API?
URL: https://docs.unified.to/concepts/what-is-a-unified-api
# What is a Unified API?
A unified API is a single API interface that aggregates multiple third-party APIs in the same software category — CRM, accounting, HRIS, ATS, payroll, and others — behind one standardized endpoint. With a unified API, applications authenticate once, integrate once, and receive normalized data from any supported integration in that category.
Unified APIs vary in their underlying architecture. Real-time pass-through unified APIs route every request live to the source system without storing customer data. Sync-based unified APIs cache data from source systems on a schedule and serve reads from that cache. The architectural choice has implications for data freshness, compliance scope, latency, and AI agent compatibility — covered in detail below.
## Key takeaways
- A unified API gives applications one endpoint, one auth flow, and one data model across many vendors in the same category — instead of building per-vendor integrations.
- Real-time pass-through unified APIs route requests live to source systems with no customer data stored at rest. Sync-based unified APIs cache data on a schedule and serve reads from that cache.
- The architectural choice affects data freshness, compliance scope, latency profile, and AI agent compatibility. These trade-offs are concrete, not stylistic.
- Most unified APIs handle the lowest-common-denominator critique through a "raw" passthrough mechanism that preserves vendor-specific custom fields and objects outside the normalized schema.
- Pricing models vary substantially: per linked account, per active consumer, per API call, and consumption-based. Each scales differently with customer count and integration breadth.
## What problem does a unified API solve?
Different APIs represent the same concepts in different ways, even within a single category. One CRM API refers to an end-user as a "User"; another calls them a "Contact"; a third uses "Lead." Each representation has different properties, field names, authentication schemes, pagination patterns, rate limits, and error formats.
For an application that needs to integrate with several vendors in the same category, this fragmentation translates directly into engineering cost. Every integration requires reading new documentation, mapping a new data schema, handling new authentication flows, and building error-handling for new edge cases. Maintenance compounds: each vendor's API evolves independently, and breaking changes must be tracked and adapted to per integration.
A unified API addresses this by providing an abstraction layer between an application and the underlying APIs in a category. The application interacts with a single, consistent interface; the unified API translates each request into the appropriate vendor-specific call and normalizes the response into a common schema.
## How does a unified API speed up development?
A unified API reduces the number of integrations and the work associated with them. Instead of writing integration code per vendor, applications write integration code once against the unified data model. New vendors in the same category become available without additional integration work — the unified API vendor handles the mapping.
For an application supporting a handful of integrations, the time savings are modest. For an application supporting dozens, savings are substantial — typically reducing months of engineering work per integration to days or hours.
## What complexity does a unified API actually remove?
A unified API removes per-vendor variance in four specific areas:
- **Authentication and authorization** — different OAuth2 flows, API key schemes, scope models, and token refresh behaviours collapse into a single authentication interface.
- **Data representation** — different schemas, field names, and data types collapse into a normalized data model per category.
- **Endpoint structure** — different URL patterns, HTTP methods, and request formats collapse into consistent endpoints across the category.
- **Error handling** — different error codes, response formats, and rate-limit behaviours collapse into consistent error semantics.
What a unified API does not remove: the underlying differences in vendor capability. If one vendor in a category supports a feature that others do not, the unified API still has to make a choice about how to surface that feature — typically through a "raw" passthrough mechanism (covered below).
## How does a unified API enhance functionality beyond raw aggregation?
Some vendor APIs lack features that simplify integration — webhooks for change notifications, consistent pagination, predictable rate limits, or filtering. A well-designed unified API can add these capabilities as a layer above the underlying APIs:
- Polling-based event delivery for vendors without native webhooks ("virtual webhooks").
- Consistent pagination patterns across all integrations in a category.
- Centralized rate-limit management that handles per-vendor quotas transparently.
- Standardized filtering and field selection.
This is the difference between a unified API and a request proxy: a unified API can provide features the underlying APIs do not natively support.
## Real-time pass-through vs. sync-based architectures
Unified APIs fall into two architectural categories. The choice has concrete implications for application design.
| Property | Real-time pass-through | Sync-and-cache |
|---|---|---|
| Data freshness | Live; reflects source-system state at request time | Bounded by sync interval; can be hours stale |
| Customer data storage | None; only operational metadata stored | Customer records cached for serving reads |
| Compliance scope | Not a sub-processor for payload data | Full sub-processor for cached records |
| Latency profile | Full source-system round-trip per request | Local cache reads (fast); source delays on writes |
| Write-back behaviour | Synchronous; success/failure known immediately | Instant write, but reads may lag sync interval |
| AI agent compatibility | Agents reason on current source-system state | Risk of agent acting on stale cached data |
| Typical pricing model | Per API call or per request | Per linked account or per consumer |
Note on operational metadata: real-time pass-through unified APIs typically store connection identifiers, encrypted OAuth credentials, and API call logs — but not customer payload data (records like contacts, employees, or invoices). This distinction is what determines compliance scope.
### When real-time pass-through is the right choice
Real-time pass-through is appropriate when:
- The application requires current data on every read (financial reconciliation, AI agent integrations, live dashboards).
- The application's compliance posture benefits from minimizing stored customer data.
- Write-back operations need immediate confirmation of success or failure at the source.
- The application's latency budget can accommodate a full source-API round-trip per request.
### When sync-and-cache is the right choice
Sync-and-cache is appropriate when:
- The application's read patterns tolerate data being minutes or hours stale.
- The application requires sub-100ms read latency that local cache reads provide.
- The application performs high-volume historical analytics that would be expensive to execute against live source APIs.
- The application's compliance framework already accommodates a unified API vendor as a data sub-processor.
## What should you look for in a unified API?
### How are unified API endpoints structured?
A unified API needs unified endpoints for each integration category. An API call to retrieve CRM contacts should be identical regardless of which underlying CRM is providing the data. The endpoint structure should be predictable, RESTful, and consistent across all integrations in the category.
### How does data normalization work across vendors?
Data models must be unified, not just endpoints. A CRM contact returned from one vendor should have the same field structure as a CRM contact returned from another. The normalized schema needs sufficient depth to support real use cases — names and emails are not enough for most applications.
Two depth dimensions to evaluate:
- **Field coverage**: how many fields per object are normalized into the unified schema?
- **Object coverage**: how many distinct object types per category are supported (e.g., for CRM: contacts, companies, deals, pipelines, activities, notes)?
### How is authentication handled?
The unified API should provide a single authentication flow across all integrations in a category. Common authentication metadata (vendor name, account name, scopes granted) should be available programmatically so the application can display connection state natively.
A pre-built authorization UI component is often provided to handle the OAuth2 handshake with end users, reducing the application's auth implementation burden to a single integration.
### How are permission scopes managed?
Along with unified authentication, a unified API should provide abstracted permission scopes so the application does not need to research per-vendor OAuth2 scopes for each use case. Scope abstraction maps the application's intent (e.g., "read contacts") to the appropriate per-vendor scope automatically.
### How do unified APIs handle vendors that don't support webhooks?
Most SaaS APIs do not support native webhooks. A unified API should provide a consistent event-delivery model regardless of whether the underlying vendor supports webhooks natively.
The common implementation pattern is "virtual webhooks": the unified API polls source APIs at configurable intervals, detects changes via timestamps or diffs, and delivers events to the application's endpoint only when changes are found. From the application's perspective, native and virtual webhooks use the same subscription model, the same event format, and the same retry semantics.
This differs from sync-based notification systems, where data is first cached on a schedule and a notification fires after sync completion — requiring the application to fetch the changed data in a separate request. With virtual webhooks, change detection and event delivery are unified: detect changes at the source, deliver events directly.
Polling intervals should be configurable. Default intervals vary substantially across unified API vendors (some default to 24 hours; others support per-minute polling).
### How are custom fields and custom objects handled?
The "lowest common denominator" critique of unified APIs is that normalization across many vendors loses vendor-specific features, custom fields, and custom objects. Most modern unified APIs address this through three mechanisms:
- **Custom field support** in the normalized schema, allowing per-customer field definitions.
- **Metadata APIs** that surface vendor-specific schema information programmatically.
- **Raw passthrough** that allows direct calls to vendor-specific endpoints while still using the unified API's authentication and connection management.
Evaluating these mechanisms requires testing against specific use cases. The ability to handle Salesforce custom objects, HubSpot custom properties, or industry-specific HRIS fields varies meaningfully across unified API vendors.
### How does pricing scale with usage?
Unified API pricing models vary substantially. The four common patterns:
- **Per linked account**: priced by the number of customer-vendor connections (one customer using three integrations = three linked accounts).
- **Per active consumer**: priced by the number of active end-customers using any integration.
- **Per API call**: priced by request volume, with unlimited connections.
- **Consumption-based**: priced by data volume transferred (typically GB).
The right pricing model depends on the application's own pricing structure and customer-integration ratio. Per-linked-account pricing scales with customer × integration count, which can be predictable for low-integration applications and prohibitive for multi-integration ones. Per-API-call pricing scales with actual data activity, which favours applications with many connections but low per-connection volume.
## When is a unified API the wrong choice?
A unified API is not the right architectural choice in every case. Three common scenarios where alternatives are better:
### Single-vendor or two-vendor integrations
If an application only integrates with one or two vendors and has no near-term plans to add more, building per-vendor integrations directly against the source API is often faster and cheaper than adopting a unified API. The amortized engineering savings of a unified API only materialize at three or more integrations in a category.
### Workflow automation across internal applications
If the integration use case is internal workflow automation (e.g., "when a Salesforce deal closes, create a Jira ticket and update an internal database"), an iPaaS platform like Workato, Zapier, or MuleSoft is typically a better fit than a unified API. iPaaS platforms are built for workflow orchestration; unified APIs are built for customer-facing data access.
### Deep per-customer customization
If each customer requires unique integration logic — different field mappings, different sync schedules, different transformation rules — an embedded iPaaS platform (Paragon, Workato Embedded, Tray Embedded) is often a better fit. Embedded iPaaS gives end-users a configuration interface for their own integrations; unified APIs give developers a programmatic interface for standardized integrations.
### Use cases requiring full vendor-specific feature depth
If the application needs deep access to vendor-specific features that are not represented in the unified schema (e.g., Salesforce Apex triggers, HubSpot workflow automation, Workday's full reporting framework), the unified API's normalized layer may not provide sufficient depth. The raw passthrough mechanism partially addresses this, but at the cost of losing the unified abstraction for those operations.
## Security considerations
A unified API sits in the data path between an application and its customers' third-party data. Security evaluation should cover:
- **Customer data storage**: does the unified API store customer payload data at rest, or pass requests through statelessly? This determines compliance scope and audit surface.
- **Credential storage**: where are OAuth2 client credentials and customer access tokens stored? External secret management (e.g., AWS Secrets Manager) is preferable to in-platform storage for high-security applications.
- **Encryption**: at-rest encryption for stored credentials and operational metadata; in-transit encryption (TLS 1.2+) for all API traffic.
- **Compliance certifications**: SOC 2 Type II, GDPR, HIPAA, PIPEDA, ISO 27001 as applicable to the application's regulated data categories.
- **Data residency**: regional infrastructure for applications subject to data residency requirements (US, EU, AU, etc.).
## Reliability considerations
The unified API becomes a critical dependency for the application. Evaluation should cover:
- **SLA and uptime history**: published uptime targets and historical performance.
- **Connection health monitoring**: does the unified API detect broken third-party vendor connections proactively, before the application's customers do?
- **Error reporting and observability**: API call logs, error categorization, retry visibility.
- **Hosting and scaling**: where the unified API is hosted and how it scales under load.
## Use case compatibility: breadth, depth, and clustering
Three dimensions to evaluate against the application's use case:
- **Breadth**: number of supported vendors in any one category. Higher breadth supports more customer-vendor combinations.
- **Depth**: number of fields and object types in the normalized data model. Higher depth supports more sophisticated use cases (e.g., full HRIS payroll vs. just employee directory).
- **Clustering**: support for multiple categories with linked data models. Applications that span CRM + Support + Marketing benefit from clustering; single-category applications do not.
## Unified.to
Unified.to provides a real-time, stateless pass-through unified API across 856 integrations and 34 categories — including CRM, accounting, HRIS, ATS, payroll, ticketing, e-commerce, messaging, and others. Every request is routed live to the source system. No customer payload data is stored at rest.
Unified.to additionally provides a hosted MCP (Model Context Protocol) server with 43,456 callable MCP tools, allowing AI agents to read and write across customer SaaS integrations through a single connection-scoped interface.
### How Unified.to handles your customers' data
Unified.to doesn't store your customers' payload data. When you make an API request, Unified.to fetches only the data you asked for from the vendor, processes it in memory, and discards it when the request completes.
**What Unified.to stores:**
- Connection records
- Connection credentials
- API call logs, which never include payloads. See [How long are logs retained](https://docs.unified.to/guides/how_long_are_logs_retained).
**Shared responsibilities**
You're responsible for:
- Registering OAuth applications with each vendor and providing the credentials when you activate integrations
- Integrating your application with the Unified API, through an SDK or REST
- How you store and handle customer data, including personal information, in your systems
Unified.to is responsible for:
- Maintaining integrations as vendor APIs change
- OAuth flows and token management
- The stability, scalability, and uptime of the Unified API
### SLAs
Unified.to doesn't currently offer a formal SLA on the API or webhooks. Custom agreements can include uptime or error-rate guarantees on a case-by-case basis.
For pricing details, see [unified.to/pricing](https://unified.to/pricing). For full API documentation, see [docs.unified.to](https://docs.unified.to).
---
# Guides
## Advertising Report Metrics by Integration
URL: https://docs.unified.to/guides/advertising_report_metrics_by_integration
# Advertising Report Metrics by Integration
------
_June 12, 2026_
**Endpoint:** `GET /ads/{connection_id}/report` — [List all reports](https://docs.unified.to/ads/report/List_all_reports)
This is a reference for the metrics returned by the Advertising **Report** endpoint: which metrics each supported integration populates, and how each platform's native field maps onto Unified.to's single normalized reporting model.
## How reports return metrics
A call to `GET /ads/{connection_id}/report` returns an array of [Report objects](https://docs.unified.to/ads/report/model). Each report describes the performance of an advertising entity over a window, and carries its metrics in a single normalized array:
The value of the `metrics` array is that it is **the same shape regardless of which platform** **`connection_id`** **points to**. Whether the connection is Meta Ads or LinkedIn, a `CLICKS` metric means the same thing and is read the same way. Behind the scenes, Unified.to handles the platform-specific renaming, the nested-field extraction, and the unit conversions — and where a platform doesn't return a value directly, it computes it. If you ever need the original platform field, it remains available under `raw`.
## The unified metric model
Each ad platform reports the same fundamental ideas — a click, an impression, a dollar spent — but names and shapes them differently. A click is `clicks` in Meta, `METRIC_CLICKS` in Google DV360, and `Clicks` in Microsoft Ads. Cost arrives as raw currency in some platforms and as micro-units (millionths of a currency unit) in Google Ads, which must be divided by 1,000,000 before it means anything.
[Unified.to](https://unified.to/) collapses all of that into one vocabulary of **92 normalized metrics** (written in `UPPER_SNAKE_CASE`). The tables below show, for each normalized metric, the native field it is sourced from on each of the five integrations mapped in this reference: **Meta Ads, Google Ads, Google DV360, LinkedIn, and Microsoft Ads**. A `—` means that integration does not expose the metric, so it will not appear in the `metrics` array for that connection.
## Coverage at a glance
The breadth of the `metrics` array depends entirely on which integration the connection is for. Not all platforms expose data at the same depth:
| Integration | Metrics returned | Character of the data |
| ----------------- | ---------------- | -------------------------------------------------------------------------------------------------------- |
| **LinkedIn** | 57 / 92 | Deepest coverage, driven by a large set of social, lead-gen, and "viral" (organic amplification) metrics |
| **Google DV360** | 45 / 92 | Strong on viewability, video engagement, and cost/financial breakdowns |
| **Google Ads** | 30 / 92 | Broad core coverage plus search-specific and viewability metrics |
| **Meta Ads** | 19 / 92 | Focused on core performance and detailed video-watch metrics |
| **Microsoft Ads** | 14 / 92 | Core performance metrics only |
Coverage is highly uneven across the metric set. Of the 92 normalized metrics, **60 are returned by only a single integration**, while just **8 are returned by all five**. The long tail is dominated by LinkedIn's social and viral metrics and DV360's financial and viewability metrics, which have no equivalent elsewhere. Write your code defensively: check for a metric's presence rather than assuming every report contains it.
## The universal core
These eight metrics are the common denominator: every integration mapped here returns them, making them the safe foundation for any cross-connection report or comparison:
`CLICKS` · `IMPRESSIONS` · `CONVERSIONS` · `COST` · `CTR` · `CPC` · `CONVERSION_VALUE` · `CPA`
Even within this universal set, the source data differs. `COST` is `spend` in Meta but arrives in micro-units in Google Ads and as `costInLocalCurrency` in LinkedIn (all normalized to the report's `currency`). `CONVERSIONS` is a clean field in most platforms but is pulled from Meta's nested `actions[purchase]`. And `CTR`, `CPC`, and `CPA` are all **derived** for LinkedIn — a reminder that "returned" sometimes means "computed for you," not "delivered by the platform."
Two near-universal ratios fall just short of full coverage: `ROAS` is derived everywhere it exists but is absent from DV360, and `CPM` is missing only from Google Ads.
## Core performance metrics
The headline numbers most reports are built on — volume, cost, and the efficiency ratios derived from them.
| Unified Metric | Meta Ads | Google Ads | Google DV360 | LinkedIn | Microsoft Ads |
| ------------------ | ------------------------------ | -------------------------- | -------------------------------------------------- | ------------------------------ | ----------------- |
| `CLICKS` | clicks | clicks | METRIC_CLICKS | clicks | Clicks |
| `IMPRESSIONS` | impressions | impressions | METRIC_IMPRESSIONS | impressions | Impressions |
| `CONVERSIONS` | actions[purchase] | conversions | METRIC_TOTAL_CONVERSIONS | externalWebsiteConversions | Conversions |
| `COST` | spend | cost_micros (/1e6) | METRIC_REVENUE_ADVERTISER | costInLocalCurrency | Spend |
| `CTR` | ctr | ctr | METRIC_CTR | derived | Ctr |
| `CPC` | cpc | average_cpc (/1e6) | METRIC_REVENUE_ECPC_ADVERTISER | derived | AverageCpc |
| `CONVERSION_VALUE` | action_values[purchase] | conversions_value | METRIC_TRUEVIEW_TOTAL_CONVERSION_VALUES_ADVERTISER | conversionValueInLocalCurrency | Revenue |
| `CPA` | cost_per_action_type[purchase] | cost_per_conversion (/1e6) | METRIC_REVENUE_ECPA_ADVERTISER | derived | CostPerConversion |
| `ROAS` | derived | derived | — | derived | derived |
| `CPM` | cpm | — | METRIC_REVENUE_ECPM_ADVERTISER | derived | AverageCpm |
| `ECPM` | — | — | METRIC_REVENUE_ECPM_ADVERTISER | — | — |
## Conversion detail
Beyond the headline conversion count, platforms differ on how they attribute and segment conversions. Google Ads and Microsoft Ads add "all conversions" totals and their revenue counterparts; DV360 and LinkedIn distinguish post-click from view-through (post-view) conversions; and Google Ads alone exposes cross-device conversions and raw `interactions`.
| Unified Metric | Meta Ads | Google Ads | Google DV360 | LinkedIn | Microsoft Ads |
| -------------------------- | -------- | ------------------------ | ----------------------------- | ----------------------------------- | ---------------------- |
| `POST_CLICK_CONVERSIONS` | — | — | METRIC_POST_CLICK_CONVERSIONS | externalWebsitePostClickConversions | — |
| `VIEW_THROUGH_CONVERSIONS` | — | view_through_conversions | METRIC_POST_VIEW_CONVERSIONS | externalWebsitePostViewConversions | ViewThroughConversions |
| `ALL_CONVERSIONS` | — | all_conversions | — | — | AllConversions |
| `ALL_CONVERSION_VALUE` | — | all_conversions_value | — | — | AllRevenue |
| `CROSS_DEVICE_CONVERSIONS` | — | cross_device_conversions | — | — | — |
| `INTERACTIONS` | — | interactions | — | — | — |
## Video engagement
Video is the most fragmented category, because each platform instruments playback in its own way. Quartile completion (25/50/75/100%) is the one widely shared concept, supported across Meta, Google Ads, DV360, and LinkedIn — though Google Ads reports quartiles as _rates_ while the others report counts. From there the platforms diverge: Meta uniquely tracks `VIDEO_AVG_TIME_WATCHED` and `VIDEO_THRUPLAY`; DV360 captures rich-media interaction signals like pauses, mutes, skips, and companion-banner activity; and Google Ads surfaces search-driven views.
| Unified Metric | Meta Ads | Google Ads | Google DV360 | LinkedIn | Microsoft Ads |
| ------------------------- | ------------------------------ | -------------------------------------- | ------------------------------------------------ | ----------------------------- | ------------- |
| `VIDEO_VIEWS` | — | video_views | METRIC_TRUEVIEW_VIEWS | videoViews | VideoViews |
| `VIDEO_PLAYS` | video_play_actions | — | METRIC_RICH_MEDIA_VIDEO_PLAYS | videoStarts | — |
| `VIDEO_COMPLETIONS` | — | — | METRIC_RICH_MEDIA_VIDEO_COMPLETIONS | videoCompletions | — |
| `VIDEO_QUARTILE_25` | video_p25_watched_actions | video_quartile_p25_rate | METRIC_RICH_MEDIA_VIDEO_FIRST_QUARTILE_COMPLETES | videoFirstQuartileCompletions | — |
| `VIDEO_QUARTILE_50` | video_p50_watched_actions | video_quartile_p50_rate | METRIC_RICH_MEDIA_VIDEO_MIDPOINTS | videoMidpointCompletions | — |
| `VIDEO_QUARTILE_75` | video_p75_watched_actions | video_quartile_p75_rate | METRIC_RICH_MEDIA_VIDEO_THIRD_QUARTILE_COMPLETES | videoThirdQuartileCompletions | — |
| `VIDEO_QUARTILE_100` | video_p100_watched_actions | video_quartile_p100_rate | METRIC_RICH_MEDIA_VIDEO_COMPLETIONS | — | — |
| `VIDEO_AVG_TIME_WATCHED` | video_avg_time_watched_actions | — | — | — | — |
| `VIDEO_THRUPLAY` | video_thruplay_watched_actions | — | — | — | — |
| `AVERAGE_CPV` | — | average_cpv (/1e6) | — | — | — |
| `EARNED_VIEWS` | — | — | METRIC_TRUEVIEW_EARNED_VIEWS | — | — |
| `UNIQUE_VIEWERS` | — | — | METRIC_TRUEVIEW_UNIQUE_VIEWERS | — | — |
| `VIDEO_VIEWS_FROM_SEARCH` | — | video_views_from_google_search_results | — | — | — |
| `VIDEO_FULLSCREENS` | — | — | METRIC_RICH_MEDIA_VIDEO_FULL_SCREENS | fullScreenPlays | — |
| `VIDEO_PAUSES` | — | — | METRIC_RICH_MEDIA_VIDEO_PAUSES | — | — |
| `VIDEO_MUTES` | — | — | METRIC_RICH_MEDIA_VIDEO_MUTES | — | — |
| `VIDEO_SKIPS` | — | — | METRIC_RICH_MEDIA_VIDEO_SKIPS | — | — |
| `COMPANION_CLICKS` | — | — | METRIC_RICH_MEDIA_VIDEO_COMPANION_CLICKS | — | — |
| `COMPANION_VIEWS` | — | — | METRIC_RICH_MEDIA_VIDEO_COMPANION_VIEWS | — | — |
## Social engagement
Likes, shares, comments, and follows are native to the social-first platforms. LinkedIn reports them directly, and DV360 exposes the YouTube "earned" equivalents (earned likes, shares, and subscribers). Curiously, Google Ads maps `SHARES` and `SAVES` onto Gmail-specific forward and save actions — an artifact of how Gmail Ads engagement was instrumented.
| Unified Metric | Meta Ads | Google Ads | Google DV360 | LinkedIn | Microsoft Ads |
| ------------------- | -------- | -------------- | ----------------------------------------- | ---------------- | ------------- |
| `ENGAGEMENT` | — | — | METRIC_ENGAGEMENT_RATE | derived (sum) | — |
| `ENGAGEMENTS` | — | engagements | METRIC_ENGAGEMENTS | — | — |
| `TOTAL_ENGAGEMENTS` | — | — | — | totalEngagements | — |
| `OTHER_ENGAGEMENTS` | — | — | — | otherEngagements | — |
| `LIKES` | — | — | METRIC_TRUEVIEW_EARNED_LIKES | likes | — |
| `SHARES` | — | gmail_forwards | METRIC_TRUEVIEW_EARNED_SHARES | shares | — |
| `COMMENTS` | — | — | — | comments | — |
| `FOLLOWS` | — | — | METRIC_TRUEVIEW_EARNED_SUBSCRIBERS | follows | — |
| `SAVES` | — | gmail_saves | METRIC_TRUEVIEW_EARNED_PLAYLIST_ADDITIONS | — | — |
| `COMMENT_LIKES` | — | — | — | commentLikes | — |
| `OPENS` | — | — | — | opens | — |
## Click and impression breakdowns
Most of these granular click types are LinkedIn-specific, reflecting its sponsored-content and document-ad formats (card clicks, company-page clicks, text-URL clicks, and so on). Meta contributes `LANDING_PAGE_CLICKS` (its `inline_link_clicks`) and `UNIQUE_CLICKS`, while LinkedIn adds an approximate unique-impression count.
| Unified Metric | Meta Ads | Google Ads | Google DV360 | LinkedIn | Microsoft Ads |
| ------------------------ | ------------------ | ---------------------- | ------------ | ---------------------------- | ------------- |
| `LANDING_PAGE_CLICKS` | inline_link_clicks | — | — | landingPageClicks | — |
| `AD_UNIT_CLICKS` | — | — | — | adUnitClicks | — |
| `CARD_CLICKS` | — | — | — | cardClicks | — |
| `CARD_IMPRESSIONS` | — | — | — | cardImpressions | — |
| `COMPANY_PAGE_CLICKS` | — | — | — | companyPageClicks | — |
| `ACTION_CLICKS` | — | — | — | actionClicks | — |
| `TEXT_URL_CLICKS` | — | — | — | textUrlClicks | — |
| `GMAIL_SECONDARY_CLICKS` | — | gmail_secondary_clicks | — | — | — |
| `UNIQUE_CLICKS` | unique_clicks | — | — | — | — |
| `UNIQUE_IMPRESSIONS` | — | — | — | approximateUniqueImpressions | — |
## Lead generation
Native lead-form metrics are exclusive to LinkedIn in this mapping, tied to its one-click Lead Gen Forms.
| Unified Metric | Meta Ads | Google Ads | Google DV360 | LinkedIn | Microsoft Ads |
| ----------------- | -------- | ---------- | ------------ | --------------------- | ------------- |
| `LEADS` | — | — | — | oneClickLeads | — |
| `LEAD_FORM_OPENS` | — | — | — | oneClickLeadFormOpens | — |
## Viewability and measurement
Viewability — whether an impression was actually seen — is a Google ecosystem strength. Google Ads and DV360 share the Active View family (viewable, measurable, and percent-viewable impressions), DV360 adds billable and eligible impression counts plus average viewable time, and Google Ads contributes top-of-page impression share metrics from search.
| Unified Metric | Meta Ads | Google Ads | Google DV360 | LinkedIn | Microsoft Ads |
| ------------------------------- | -------- | ---------------------------------- | ------------------------------------------- | -------- | ------------- |
| `VIEWABLE_IMPRESSIONS` | — | active_view_impressions | METRIC_ACTIVE_VIEW_VIEWABLE_IMPRESSIONS | — | — |
| `MEASURABLE_IMPRESSIONS` | — | active_view_measurable_impressions | METRIC_ACTIVE_VIEW_MEASURABLE_IMPRESSIONS | — | — |
| `VIEWABILITY_RATE` | — | active_view_viewability | METRIC_ACTIVE_VIEW_PCT_VIEWABLE_IMPRESSIONS | — | — |
| `BILLABLE_IMPRESSIONS` | — | — | METRIC_BILLABLE_IMPRESSIONS | — | — |
| `ELIGIBLE_IMPRESSIONS` | — | — | METRIC_ACTIVE_VIEW_ELIGIBLE_IMPRESSIONS | — | — |
| `ACTIVE_VIEW_AVG_TIME` | — | — | METRIC_ACTIVE_VIEW_AVERAGE_VIEWABLE_TIME | — | — |
| `ABSOLUTE_TOP_IMPRESSION_SHARE` | — | absolute_top_impression_percentage | — | — | — |
| `TOP_IMPRESSION_SHARE` | — | top_impression_percentage | — | — | — |
## Cost and financial breakdowns
DV360 is the only integration that decomposes cost into its component fees — media cost, data fees, platform fees — and reports advertiser-level revenue and profit. This reflects its role as a programmatic buying platform where margin transparency matters.
| Unified Metric | Meta Ads | Google Ads | Google DV360 | LinkedIn | Microsoft Ads |
| ------------------ | -------- | ---------- | ---------------------------------- | -------- | ------------- |
| `REVENUE` | — | — | METRIC_REVENUE_ADVERTISER | — | — |
| `MEDIA_COST` | — | — | METRIC_MEDIA_COST_ADVERTISER | — | — |
| `TOTAL_MEDIA_COST` | — | — | METRIC_TOTAL_MEDIA_COST_ADVERTISER | — | — |
| `DATA_FEES` | — | — | METRIC_DATA_COST_ADVERTISER | — | — |
| `PLATFORM_FEES` | — | — | METRIC_PLATFORM_FEE_ADVERTISER | — | — |
| `PROFIT` | — | — | METRIC_PROFIT_ADVERTISER | — | — |
## Viral / organic amplification (LinkedIn)
LinkedIn's "viral" metrics measure the organic spread of sponsored content — engagement that happens when someone's network sees an ad because a connection interacted with it. This entire 19-metric family is exclusive to LinkedIn and mirrors its standard metrics (impressions, clicks, conversions, video quartiles, leads) but for organically-amplified reach. No other integration models this concept.
| Unified Metric | Meta Ads | Google Ads | Google DV360 | LinkedIn | Microsoft Ads |
| -------------------------------- | -------- | ---------- | ------------ | ---------------------------------------- | ------------- |
| `VIRAL_IMPRESSIONS` | — | — | — | viralImpressions | — |
| `VIRAL_CLICKS` | — | — | — | viralClicks | — |
| `VIRAL_LIKES` | — | — | — | viralLikes | — |
| `VIRAL_COMMENTS` | — | — | — | viralComments | — |
| `VIRAL_SHARES` | — | — | — | viralShares | — |
| `VIRAL_FOLLOWS` | — | — | — | viralFollows | — |
| `VIRAL_VIDEO_PLAYS` | — | — | — | viralVideoStarts | — |
| `VIRAL_VIDEO_VIEWS` | — | — | — | viralVideoViews | — |
| `VIRAL_VIDEO_COMPLETIONS` | — | — | — | viralVideoCompletions | — |
| `VIRAL_VIDEO_QUARTILE_25` | — | — | — | viralVideoFirstQuartileCompletions | — |
| `VIRAL_VIDEO_QUARTILE_50` | — | — | — | viralVideoMidpointCompletions | — |
| `VIRAL_VIDEO_QUARTILE_75` | — | — | — | viralVideoThirdQuartileCompletions | — |
| `VIRAL_LEADS` | — | — | — | viralOneClickLeads | — |
| `VIRAL_LEAD_FORM_OPENS` | — | — | — | viralOneClickLeadFormOpens | — |
| `VIRAL_LANDING_PAGE_CLICKS` | — | — | — | viralLandingPageClicks | — |
| `VIRAL_CONVERSIONS` | — | — | — | viralExternalWebsiteConversions | — |
| `VIRAL_POST_CLICK_CONVERSIONS` | — | — | — | viralExternalWebsitePostClickConversions | — |
| `VIRAL_VIEW_THROUGH_CONVERSIONS` | — | — | — | viralExternalWebsitePostViewConversions | — |
| `VIRAL_ENGAGEMENTS` | — | — | — | viralTotalEngagements | — |
## Integration-by-integration takeaways
**LinkedIn** is the deepest integration by a wide margin. Beyond solid core coverage, it owns two large metric families that exist nowhere else: native lead-form metrics and the complete "viral" organic-amplification set. If a report needs B2B lead data or organic-reach attribution, LinkedIn is the only source.
**Google DV360** is the choice for media-buying transparency. It uniquely breaks cost into media, data, and platform fees and reports profit, and it offers the richest video-interaction signals (pauses, mutes, skips, companion banners) alongside full Active View viewability.
**Google Ads** provides broad, dependable core coverage plus search-native metrics — impression share, cross-device conversions, and "all conversions" rollups. Watch for its two quirks: micro-unit cost fields that need dividing by a million, and quartile metrics expressed as rates rather than counts.
**Meta Ads** concentrates on core performance and granular video-watch behavior. Its conversion and value figures come from nested action breakdowns rather than flat fields, so the `purchase` action type must be extracted explicitly.
**Microsoft Ads** is the leanest integration, covering the universal core plus video views, view-through conversions, and "all conversions" totals — sufficient for standard performance reporting but without engagement, viewability, or social depth.
## Working with the response
- **Build cross-connection reports on the universal eight.** `CLICKS`, `IMPRESSIONS`, `CONVERSIONS`, `COST`, `CTR`, `CPC`, `CONVERSION_VALUE`, and `CPA` are the only metrics guaranteed to appear in the `metrics` array for every integration mapped here.
- **Check for presence, don't assume it.** With 60 of 92 metrics returned by only one integration, code that reads the `metrics` array should handle a metric being absent rather than expecting a fixed set.
- **Read currency from the report, not the metric.** All monetary metrics are normalized into the report's `currency` field; Google Ads micro-units (`/1e6`) and per-platform conventions are already resolved for you.
- **Some metrics are computed.** Ratios like `ROAS`, and several of LinkedIn's rates, are derived by Unified.to rather than supplied by the platform — they arrive in the `metrics` array all the same.
- **Drop to** **`raw`** **when you need the original.** Anything platform-specific that the normalized model doesn't capture remains available on the report's `raw` field.
## ATS to Vector DB: How to Power Talent Intelligence with Real-Time Data
URL: https://docs.unified.to/guides/ats_to_vector_db_how_to_power_talent_intelligence_with_real_time_data
# ATS to Vector DB: How to Power Talent Intelligence with Real-Time Data
------
_October 14, 2025_
_Updated October 2026_
With [Unified.to](https://unified.to/), you can build candidate search on your customers' ATS data (Greenhouse, Lever, Workable and other supported ATS integrations) by integrating once with [Unified.to](https://unified.to/)'s ATS API.
You read candidate records through the ATS API, turn each candidate profile (title, skills, experience, education) into text, embed it with [Unified.to](https://unified.to/)'s GenAI API, and upsert the vectors into a vector database such as Pinecone for semantic search and recruiter agents. The ATS data is read at request time.
This guide shows you how to go from ATS to vector DB, step by step, using Unified.to, its GenAI API, and Pinecone.
## What does this build?
1. Fetch candidate data from an ATS in one common schema.
2. Turn each candidate profile into text and embed it.
3. Store embeddings in a vector database.
4. Retrieve the most relevant candidates at query time.
5. Use the retrieved context to power recruiter search, ranking, or AI agents.
[Unified.to](https://unified.to/) reads and maps the candidate records from each ATS at request time; chunking, embeddings and vector storage stay in your infrastructure. [Unified.to](https://unified.to/) keeps no customer records at rest; connection credentials and operational metadata are encrypted at rest.
---
## Prerequisites
- Node.js 22 or later (required by the current Pinecone TypeScript SDK, v9, as of 21 October 2026)
- A Unified.to account with an ATS integration enabled (e.g., Lever, Greenhouse)
- A [Unified.to](https://unified.to/) API key, set as the `UNIFIED_API_KEY` environment variable
- Your customer's ATS connection ID
- A [Unified.to](https://unified.to/) GenAI connection for an integration that supports embeddings, such as OpenAI (used below), Azure OpenAI, Cohere, Google Gemini or MistralAI
- A Pinecone API key and an index created with dimension 1536, the default output size of `text-embedding-3-small`
---
## Step 1: Set up your project
```bash
mkdir ats-vector-demo
cd ats-vector-demo
npm init -y
npm install @unified-api/typescript-sdk dotenv @pinecone-database/pinecone
```
Add your credentials to `.env`:
```plain text
UNIFIED_API_KEY=your_unified_api_key
CONNECTION_ATS=your_customer_ats_connection_id
CONNECTION_GENAI=your_genai_connection_id
PINECONE_API_KEY=your_pinecone_api_key
PINECONE_INDEX=your_pinecone_index
```
---
## Step 2: Initialize the SDKs
```typescript
import 'dotenv/config';
import { UnifiedTo } from '@unified-api/typescript-sdk';
import { Pinecone } from '@pinecone-database/pinecone';
const {
UNIFIED_API_KEY,
CONNECTION_ATS,
CONNECTION_GENAI,
PINECONE_API_KEY,
PINECONE_INDEX,
} = process.env;
const sdk = new UnifiedTo({
security: { jwt: UNIFIED_API_KEY! },
});
const pinecone = new Pinecone({ apiKey: PINECONE_API_KEY! });
const index = pinecone.index({ name: PINECONE_INDEX! });
```
---
## Step 3: Get your customer's connection ID
Before you can fetch candidates, your customer authorizes your app to access their ATS (e.g., Lever, Greenhouse) through Unified.to's embedded authorization flow. Once authorized, you receive a **connection ID** for that customer's integration. Store it securely and use it in all API calls for that customer.
---
## Step 4: Fetch candidate records and turn each into text
Read candidates from the ATS and flatten each profile into one text block for embedding. Building the same text shape for every candidate keeps embeddings comparable across ATS integrations; fields are filled only where the integration returns them (skills on 44 of 141 candidate integrations, experiences on 54, education on 60, as of 19 October 2026). Leave the name and email out of the embedded text: matching doesn't need them, so store them as metadata if you need them.
```typescript
import type { AtsCandidate } from '@unified-api/typescript-sdk/sdk/models/shared';
export async function fetchCandidates(connectionId: string): Promise {
return await sdk.ats.listAtsCandidates({
connectionId,
limit: 50,
});
}
export function normalizeResume(candidate: AtsCandidate): string {
const experiences = (candidate.experiences ?? [])
.map((exp: any) => `${exp.title ?? ''} at ${exp.companyName ?? ''}`)
.join('; ');
const education = (candidate.education ?? [])
.map((edu: any) => `${edu.degree ?? ''} in ${edu.fieldOfStudy ?? ''} from ${edu.institution ?? ''}`)
.join('; ');
return [
`Title: ${candidate.title ?? ''}`,
`Skills: ${(candidate.skills ?? []).join(', ')}`,
`Experience: ${experiences}`,
`Education: ${education}`,
].join('\n');
}
```
---
## Step 5: Embed candidate profiles with the GenAI API
Use [Unified.to](https://unified.to/)'s GenAI embedding endpoint. Note `content` is an array of `{ text }` objects. The encoding field is spelled `enconding_format` in the API schema (`encondingFormat` in the TypeScript SDK) and takes `FLOAT`; `type` distinguishes documents you index (`SEARCH_DOC`) from the recruiter query (`SEARCH_QUERY`). The `embeddings` field returns a JSON string, so parse it before use.
```typescript
export async function embed(text: string, kind: 'SEARCH_DOC' | 'SEARCH_QUERY'): Promise {
const result = await sdk.genai.createGenaiEmbedding({
connectionId: CONNECTION_GENAI!,
genaiEmbedding: {
modelId: 'text-embedding-3-small',
content: [{ text }],
encondingFormat: 'FLOAT', // spelled this way in the API schema
type: kind,
dimension: 1536,
},
});
// `embeddings` is a JSON string: one vector, or a list holding one vector per content item.
const parsed = JSON.parse(result.embeddings ?? '[]');
return Array.isArray(parsed[0]) ? parsed[0] : parsed;
}
```
### Keeping the vector index current
To keep the index current, subscribe to candidate created and updated events on supported integrations: 92 ATS integrations emit candidate events (as of 20 October 2026), including Greenhouse, Lever and Workable. When a candidate changes, re-read it, re-embed and upsert. Where the ATS sends no webhooks, [Unified.to](https://unified.to/)'s virtual webhooks check at an interval you set, as often as every minute on paid plans.
---
## Step 6: Upsert embeddings to Pinecone
```typescript
export async function upsertCandidate(candidate: AtsCandidate, values: number[]) {
await index.upsert({
records: [
{
id: candidate.id!,
values,
metadata: {
name: candidate.name ?? '',
email: candidate.emails?.[0]?.email ?? '',
candidate_id: candidate.id ?? '',
},
},
],
});
}
```
---
## Step 7: Retrieval
Given a recruiter query, embed it with `SEARCH_QUERY` and search Pinecone for the closest candidates.
```typescript
export async function searchCandidates(query: string) {
const queryVector = await embed(query, 'SEARCH_QUERY');
const results = await index.query({
vector: queryVector,
topK: 5,
includeMetadata: true,
});
return results.matches;
}
```
---
## Step 8: Putting it together
```typescript
async function main() {
const candidates = await fetchCandidates(CONNECTION_ATS!);
for (const candidate of candidates) {
const resumeText = normalizeResume(candidate);
const values = await embed(resumeText, 'SEARCH_DOC');
await upsertCandidate(candidate, values);
}
const matches = await searchCandidates('Senior Python developer with fintech experience');
console.log('Top matches:', matches);
}
main();
```
---
## What did you build?
- One list call per connection reads candidate records from the customer's ATS (Greenhouse, Lever and other supported integrations); page with limit and offset for more than one page.
- Candidate profiles are embedded through [Unified.to](https://unified.to/)'s GenAI API, then upserted into Pinecone.
- Recruiters search in natural language and retrieve the closest candidates from your index, built from ATS data read at request time; [Unified.to](https://unified.to/) keeps no customer records at rest.
Related: [How to Build a RAG Pipeline for Live SaaS Data](https://unified.to/blog/how_to_build_a_rag_pipeline_for_live_saas_data) · [How to Match Candidates to Jobs Using ATS Data](https://unified.to/blog/how_to_match_candidates_to_jobs_using_ats_data_with_unified_ats_api)
For the product-level walkthrough, see [How to Build a Candidate Assessment Product with Unified.to](https://unified.to/blog/how_to_build_a_candidate_assessment_product_with_unified). To wire up sourcing, see [How to Source Candidates Externally](https://unified.to/blog/how_to_source_candidates_externally_and_push_them_into_an_ats_using_unified_ats_api).
Ready to build? [Sign up for a free 30-day trial](https://app.unified.to/) or [book a demo](https://calendly.com/d/cph9-g8n-jzg/connect-with-unified).
## Building AI applications with Unified and Langbase
URL: https://docs.unified.to/guides/building_ai_applications_with_unified_and_langbase
# Building AI applications with Unified and Langbase
------
_February 27, 2025_
Developers building AI applications for their customers face a common challenge: they need to juggle many different APIs and authorization flows, configure and manage multiple data pipelines, and deal with complex data models. What if you could focus on building amazing AI experiences without getting bogged down by all that complexity?
That's where the power of Unified.to's APIs combined with [Langbase's](https://langbase.com/) serverless AI developer platform comes in. In this article, we'll look at how you can leverage these platforms to build sophisticated AI applications using your customers' data while writing significantly less integration and AI boilerplate code.
## Why use Unified.to with Langbase?
When you pair Unified.to's normalized data access with Langbase's AI capabilities, you get:
- **One API, many integrations:** Instead of building separate integrations for each platform, use [Unified.to](https://unified.to/)'s unified APIs to access normalized data from multiple data sources through a single, unified API. Langbase does the same for AI—with multi-agent orchestration and advanced long-term memory, seamlessly integrating AI capabilities. It supports 250+ LLMs through one API, ensuring a unified developer experience with easy model switching and optimization. It's an API-first platform, with simple Pipe and Memory Agent APIs for effortless integration.
- **Unified authorization:** Seamlessly handle authorization with Unified.to's pre-built components, creating a secure link between your app and your customers' data with just a few lines of code.
- **Production-ready AI:** Langbase Pipes and Memory Agents (serverless RAG agents with long-term memory) eliminate infrastructure management, making scaling and deployment seamless for all developers—not just AI/ML experts. Its composable AI infrastructure lets developers chain multiple models into AI pipelines, optimizing cost, performance, and personalization at every step.
- **Real-time updates:** Build dynamic applications using Unified.to's webhook system. Fine-tine AI models on the fly when your customers have new data, allowing your AI agent to provide more relevant responses.
## Real-world applications you can build
Let's look at some practical applications you can create by combining these platforms.
**Intelligent support bots**
Build an AI-powered support bot that can answer questions using your customer's knowledge base, handle real-time inquiries, and maintain context across conversations. By combining Unified.to's KMS (Knowledge Management System) and messaging APIs with [Langbase's Memory Agents](https://langbase.com/docs/memory) , you can create a bot that gets smarter as your knowledge base grows.
The best part? Since you're using unified APIs, you can easily adapt this pattern for different platforms:
- Use Notion, Confluence or other KMS platforms for your knowledge base
- Deploy your bot on Slack instead of Discord
Want to build your own? Check out our step-by-step [guide on building a Discord support bot.](https://docs.unified.to/guides/how_to_build_a_discord_support_bot_with_unified_and_langbase#how-to-build-a-discord-support-bot-with-unifiedto-and-langbase)
**AI-powered recruitment assistant**
Create an intelligent recruiting assistant that streamlines your hiring process by automatically screening candidates, conducting initial interviews, updating candidates' application statuses, and providing detailed summaries to your hiring team. Using Unified.to's [ATS integrations](https://unified.to/ats) and Langbase [Pipe agents](https://langbase.com/docs/pipe/quickstart), your assistant can handle the time-consuming parts of recruitment while maintaining a personal touch.
The unified approach means you can support multiple ATS platforms (Lever, Greenhouse, Workday, etc.) without rewriting your core logic.
**Enhanced email agents**
With Unified.to and Langbase, you can automate email responses and streamline communication. By combining Unified.to's email integrations with Langbase's composable multi-agent architecture, you can build an AI-powered email workflow that enhances efficiency and personalization.
**Intelligent sales assistant**
Supercharge your sales team with an AI assistant that understands your customer relationships, helps qualify leads, and generates personalized follow-ups based on past interactions. Using Unified.to's CRM integrations with [Langbase's Memory Agents](https://langbase.com/docs/memory) (that dynamically attach private data to any LLM at scale, with industry-leading accuracy in advanced agentic routing and intelligent reranking), you can create an assistant that becomes an invaluable part of your sales process. Create leads and deals in your CRM automatically and tap into Unified.to's Enrichment API to add extra contextual data for the Memory Agent.
## Getting started
Ready to start building? Here's how to get going:
1. Sign up for accounts on [Unified.to](https://unified.to/) and[ Langbase](https://langbase.com/)
2. Join our [Discord community](https://discord.gg/85z7HF7JbD) to connect with other developers
3. Keep an eye on our blog for upcoming guides in this series
## Looking ahead
The combination of Unified.to and Langbase opens up exciting possibilities for AI application development. As both platforms continue to evolve, you can expect:
- More supported platforms and integrations
- Enhanced AI capabilities through Langbase's Memory Agents
- New unified APIs for different use cases
- Expanded tutorials and example applications
Stay tuned for our upcoming tutorials that will dive deep into each use case, providing concrete examples and code you can use in your own applications.
## Concur & Concur (Company) — Connection Guide
URL: https://docs.unified.to/guides/concur_and_concur_company_connection_guide
# Concur & Concur (Company) — Connection Guide
------
_April 10, 2026_
## Overview
There are two SAP Concur integrations are available. You will need to choose which one to use based off of the authentication type and required data objects.
### Integrations
- **Concur**
- End-user OAuth (authorization code flow)
- Categories: Accounting, Storage, Auth
- **Concur (Company)**
- Company-level authentication
- Uses credentials instead of user OAuth
- Categories: Accounting, HRIS, Storage, Auth
---
## Concur vs Concur (Company)
### Concur
- **Authentication:** OAuth 2.0 (user-based)
- **Credentials:**
- Client ID
- Client Secret
- Redirect URI
- **Supported Objects:**
- Accounting — Expense
- Accounting — Invoice
- Accounting — Contact
- Storage — File
- Accounting — Expense report
- Expense type: reads map type=USER (employee T&E / Quick Expense)
- **Use Case:**
- User connects their own account and grants access
---
### Concur (Company)
- **Authentication:** Company token flow (server-to-server)
- **token_names:**
- Client ID
- Client Secret
- Company UUID
- Request Token
- **Supported Objects:**
- Accounting — Expense
- Accounting — Invoice
- Accounting — Contact
- HRIS — Employee
- Storage — File
- Accounting — Expense report
- Expense type: reads map type=COMPANY (company-scoped reports)
- **Use Case:**
- Company-wide access
- Backend integrations
- Employee data access
---
## When to Use Which
- **Use Concur**
- When a user signs in and authorizes access
- **Use Concur (Company)**
- When you need company-wide access
- When working with employee data
- When SAP requires Company UUID + Request Token
---
## OAuth Scopes
| Object | Read | Write |
| ------- | --------------------------------------------------- | --------------------------------------------------- |
| Expense | EXPRPT | EXPRPT |
| Invoice | INVPMT | INVPMT |
| File | IMAGE | IMAGE |
| User | `identity.user.ids.read`, `identity.user.core.read` | `identity.user.ids.read`, `identity.user.core.read` |
| Vendor | INVVEN | INVVEN |
---
## Concur (Company) — Credential Details
### Required Fields
- **Client ID:** From SAP Concur OAuth Application Management
- **Client Secret:** From the same OAuth application
- **Company UUID:** Unique identifier for your company in SAP Concur
- **Request Token:** Temporary token generated via SAP Concur Company Request Token tool (Guide: [https://developer.concur.com/api-reference/authentication/company-refresh-tool.html](https://developer.concur.com/api-reference/authentication/company-refresh-tool.html))
- Not long-lived
- Must be regenerated when expired
---
## Region Reference
Select the correct API region based on your tenant:
- Production (US2 default)
- EU2
- APJ1
- US Government
- Sandbox / Implementation
If unsure, confirm with your SAP Concur administrator.
---
## Network Requirements
To ensure successful API communication, you may need to whitelist Unified IP addresses on your SAP Concur account.
You can find the list of IP addresses here:
[https://app.unified.to/apikeys](https://app.unified.to/apikeys)
Failure to whitelist these IPs may result in connection or data access issues.
## Accounting expense create (Concur)
Personal Concur create routing for accounting_expense (do not use user_id to choose the path):
- type=USER and omit name → Quick Expense v4 (create-only). The returned id cannot be retrieved with get; use accounting_expensereport / report list for reads.
- type=USER with a name (or any create that includes name) → Expense Report v3 create.
- Concur (Company) expense reads use type=COMPANY; personal Concur reads use type=USER.
- Prefer accounting_expensereport for expense reports when available.
## Configure Greenhouse Native Candidate Webhooks
URL: https://docs.unified.to/guides/configure_greenhouse_native_candidate_webhooks
# Configure Greenhouse Native Candidate Webhooks
------
_July 15, 2026_
Greenhouse Recruiting requires native webhooks to be created manually in its **Dev Center**.
This guide explains how to connect Greenhouse candidate events to a Unified webhook subscription.
---
## Before you begin
You need:
- An active Greenhouse connection in Unified
- The Greenhouse connection ID
- A public HTTPS endpoint in your application that can receive Unified webhook payloads
- Greenhouse's **Manage and configure webhooks** developer permission
- A Unified API key
---
## How the webhook flow works
1. Greenhouse sends a candidate event to Unified.
2. Unified converts the event into the unified `ats_candidate` format.
3. Unified sends the normalized webhook payload to your application's webhook URL.
> **Note**
>
> For `created` and `updated` events, Unified retrieves the latest candidate record from Greenhouse before sending the payload to your application.
>
>
> For `deleted` events, the payload contains the deleted candidate ID.
>
>
---
## Step 1: Create Unified webhook subscriptions
Create one native Unified webhook subscription for each event type you need:
- `created`
- `updated`
- `deleted`
### Example: Created candidate subscription
```plain text
curl --request POST \
--url 'https://api.unified.to/unified/webhook' \
--header 'Authorization: Bearer YOUR_UNIFIED_API_KEY' \
--header 'Content-Type: application/json' \
--data '{
"connection_id": "YOUR_GREENHOUSE_CONNECTION_ID",
"object_type": "ats_candidate",
"event": "created",
"webhook_type": "native",
"hook_url": "https://your-app.example.com/webhooks/unified"
}'
```
The `hook_url` is your application's endpoint. Unified sends normalized webhook payloads to this URL.
Repeat the request with `event` set to `updated` and `deleted` when those events are required.
Save the `id` returned for each webhook subscription.
[Create webhook subscription](https://docs.unified.to/unified/webhook/Create_webhook_subscription)
---
## Step 2: Build the Greenhouse endpoint URLs
Build a separate Greenhouse endpoint URL using each Unified webhook subscription ID.
| Unified region | Greenhouse endpoint |
| -------------- | ----------------------------------------------------------------- |
| US | `https://api.unified.to/webhook/greenhouse/UNIFIED_WEBHOOK_ID` |
| EU | `https://api-eu.unified.to/webhook/greenhouse/UNIFIED_WEBHOOK_ID` |
| Australia | `https://api-au.unified.to/webhook/greenhouse/UNIFIED_WEBHOOK_ID` |
Use:
- The `created` subscription ID for Greenhouse creation triggers
- The `updated` subscription ID for Greenhouse update triggers
- The `deleted` subscription ID for Greenhouse deletion triggers
> **Important**
>
> Do not enter your application's `hook_url` in Greenhouse.
>
>
> Greenhouse must send its payload to the Unified endpoint shown above. Unified will then normalize the event and forward it to your application.
>
>
---
## Step 3: Open Greenhouse webhook settings
In Greenhouse Recruiting:
1. Select **Configure**.
2. Select **Dev Center**.
3. Select **Web Hooks**.
4. Select **Web Hooks** again.
5. Select the option to create a new webhook.
> **Permission required**
>
> If you cannot access this page, ask a Greenhouse administrator to grant you the **Manage and configure webhooks** developer permission.
>
>
---
## Step 4: Create the Greenhouse webhooks
Greenhouse allows only one trigger per webhook.
Create a separate Greenhouse webhook for every trigger you want to receive.
For each webhook, enter the following:
| Field | Value |
| ------------------------- | ---------------------------------------------------------------------- |
| **Name this webhook** | A descriptive name, such as `Unified – Candidate hired` |
| **When** | One of the supported triggers listed below |
| **Endpoint URL** | The Unified endpoint for the corresponding Unified event |
| **Secret Key** | A unique, randomly generated secret stored securely |
| **Error recipient email** | A Greenhouse administrator who should receive delivery failure notices |
| **Disabled?** | `No` |
| **Advanced settings** | Leave blank unless your organization has additional requirements |
### Created candidate events
Point the following Greenhouse triggers to the endpoint containing your Unified `created` webhook ID:
- Application created
- Prospect created
### Updated candidate events
Point the following Greenhouse triggers to the endpoint containing your Unified `updated` webhook ID:
- Candidate/Prospect updated
- Candidate hired
- Candidate/Prospect rejected
- Candidate stage change
- Candidate unhired
- Candidate/Prospect unrejected
### Deleted candidate events
Point the following Greenhouse triggers to the endpoint containing your Unified `deleted` webhook ID:
- Candidate deleted
- Candidate merged
> **Important**
>
> Use the correct Unified endpoint for each trigger group.
>
>
> For example, do not send a **Candidate hired** trigger to the endpoint associated with a Unified `created` subscription.
>
>
---
## Trigger mapping reference
| Greenhouse trigger | Unified event |
| ----------------------------- | ------------- |
| Application created | `created` |
| Prospect created | `created` |
| Candidate/Prospect updated | `updated` |
| Candidate hired | `updated` |
| Candidate/Prospect rejected | `updated` |
| Candidate stage change | `updated` |
| Candidate unhired | `updated` |
| Candidate/Prospect unrejected | `updated` |
| Candidate deleted | `deleted` |
| Candidate merged | `deleted` |
---
## Step 5: Confirm that each webhook is active
When a Greenhouse webhook is created, Greenhouse sends a test ping to the configured endpoint.
- If the ping succeeds, Greenhouse activates the webhook.
- If the ping fails, Greenhouse saves the webhook in a disabled state.
### Retry a failed webhook
1. Open the webhook in Greenhouse.
2. Confirm that the endpoint contains the correct Unified webhook subscription ID.
3. Set **Disabled?** to **No**.
4. Save the webhook again.
---
## Test the integration
Perform a Greenhouse action matching one of the configured triggers.
For example, update a test candidate after configuring the **Candidate/Prospect updated** trigger.
Confirm that your application receives a Unified webhook payload containing:
- `type` set to `NATIVE`
- `webhook.object_type` set to `ats_candidate`
- `webhook.event` set to the expected Unified event
- The normalized candidate record in the `data` array
Deleted candidate events contain an object with the deleted candidate's `id`.
---
## Remove the webhooks
Deleting a Unified webhook subscription does not delete the manually configured Greenhouse webhooks.
To fully remove the integration:
1. Disable or delete each corresponding webhook in Greenhouse.
2. Delete the Unified webhook subscriptions.
---
## Troubleshooting
### The Greenhouse webhook is disabled immediately
The initial endpoint ping failed.
Check that:
- The endpoint starts with `https://`.
- The Unified webhook ID is correct.
- The endpoint uses the API hostname for the correct Unified region.
- The Unified webhook subscription still exists.
### No webhook arrives after a candidate change
Check that:
- You configured the specific Greenhouse trigger for that action.
- The trigger points to the Unified endpoint for the correct `created`, `updated`, or `deleted` subscription.
- The Greenhouse webhook is not disabled.
- The Greenhouse connection still has permission to retrieve candidates.
- The configured error recipient has not received a Greenhouse delivery failure email.
### Duplicate deliveries
Check that the same Greenhouse trigger was not created more than once.
Greenhouse may also retry failed deliveries, so your application should process webhook deliveries idempotently.
---
## Additional documentation
- [Greenhouse: Create a webhook](https://support.greenhouse.io/hc/en-us/articles/360005574531-Create-a-webhook)
- [Greenhouse Recruiting webhooks](https://developers.greenhouse.io/webhooks.html)
- [Unified: Introduction to webhooks](https://docs.unified.to/reference/webhooks)
- [Unified: Create webhook subscription](https://docs.unified.to/unified/webhook/Create_webhook_subscription)
For creating the webhook in Unified, see [How to create and configure webhooks](https://docs.unified.to/guides/how_to_create_and_configure_webhooks).
## Connect Amazon Seller Central to Unified.to
URL: https://docs.unified.to/guides/connect_amazon_seller_central_to_unified
# Connect Amazon Seller Central to Unified.to
------
_May 13, 2026_
**What this integration covers**
| Area | Unified objects | Typical use |
| -------------- | ----------------------------------------------------------------------------- | -------------------------------------------------------------------------- |
| **E‑Commerce** | commerce_item, commerce_collection, commerce_inventory, commerce_saleschannel | Catalog, product types, FBA inventory summaries, marketplace participation |
| **Accounting** | commerce_account, accounting_salesorder, accounting_contact | Orders and related account/contact style data from SP-API |
| **Metadata** | metadata_metadata | Custom / structured metadata mapping where supported |
Exact read/write support follows your workspace permissions and the integration's object support matrix in the Unified app.
---
**Prerequisites (Amazon side)**
1. **Active Seller Central** account for the marketplaces you care about.
2. **SP-API developer registration** — create and configure a **Selling Partner API** application in the Amazon developer / SP-API flow. Please follow this guide: [https://developer-docs.amazon.com/sp-api/docs/registering-your-application](https://developer-docs.amazon.com/sp-api/docs/registering-your-application)
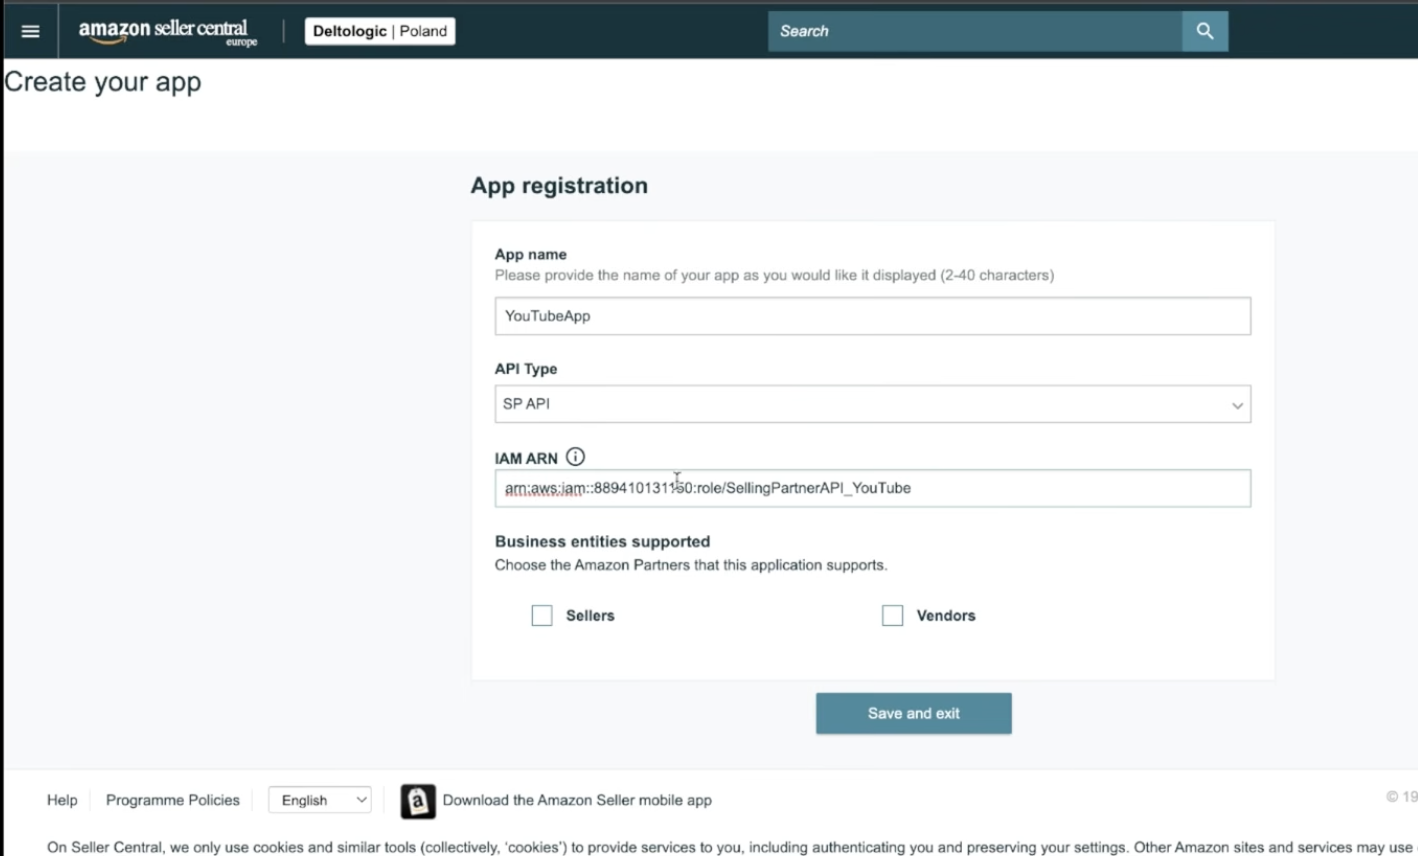
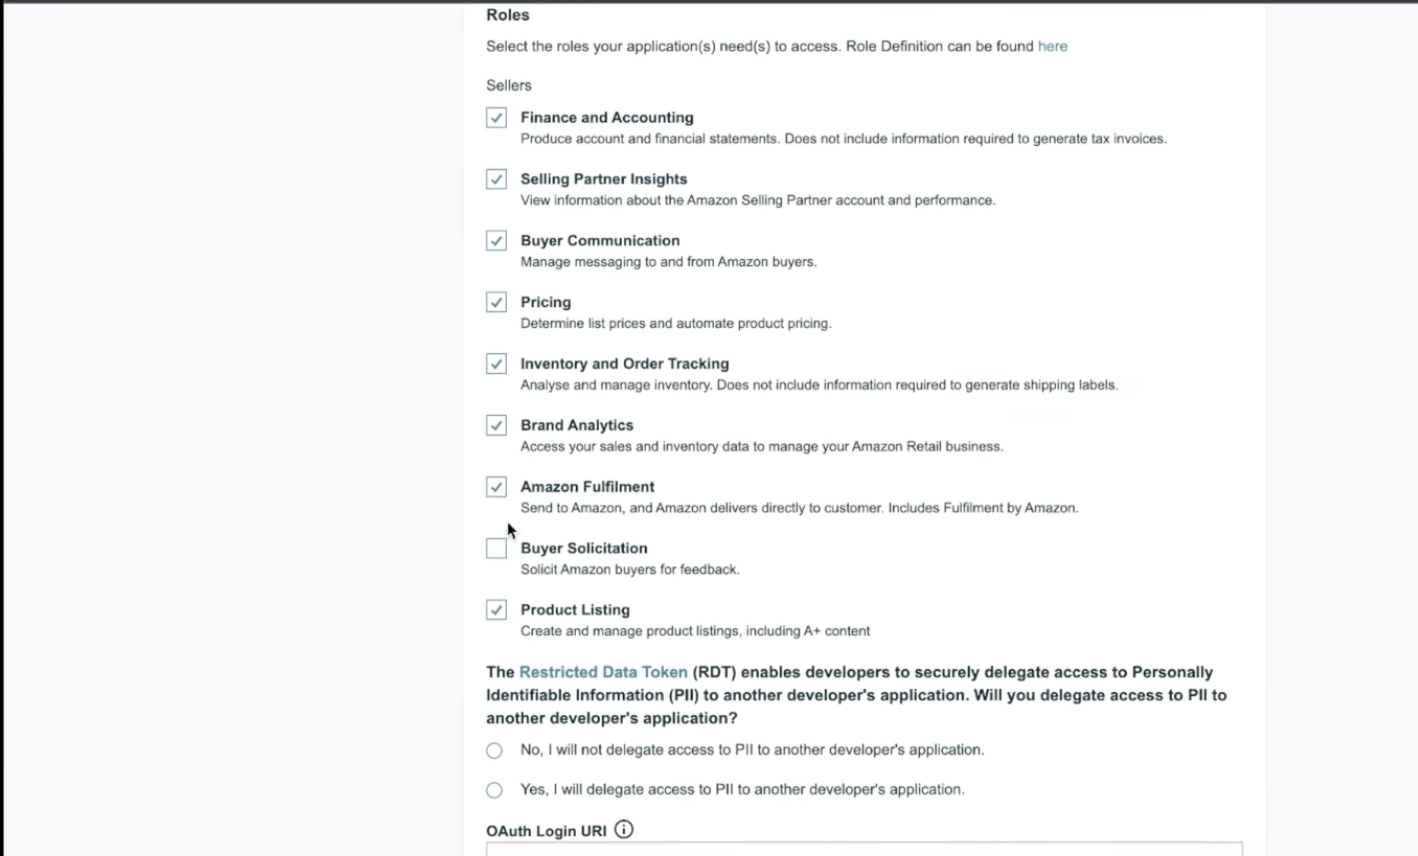
Put the redirect_url as shown here: [https://app.unified.to/integrations/amazonsellercentral?tab=oauth2](https://app.unified.to/integrations/amazonsellercentral?tab=oauth2)
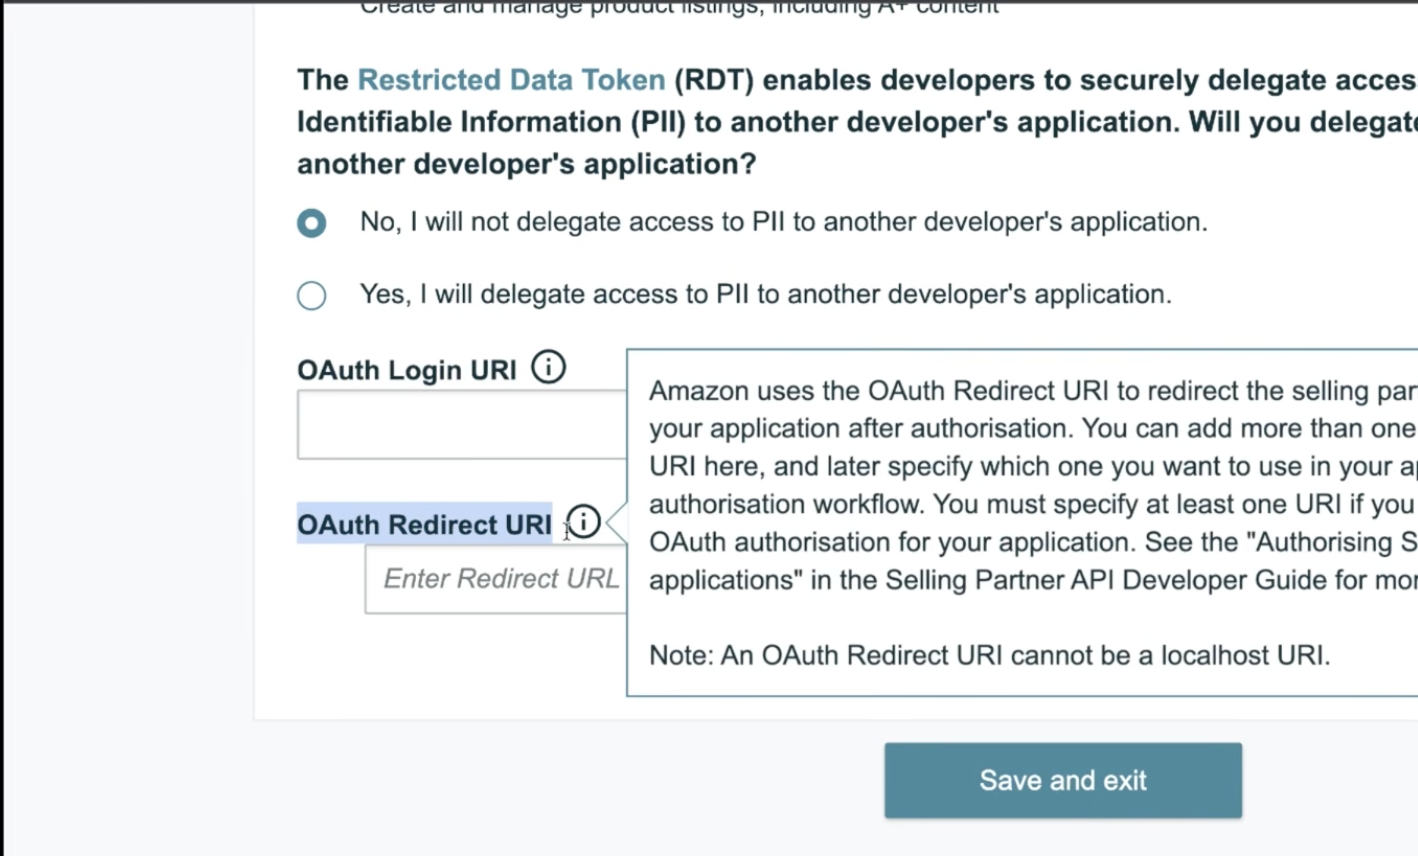
3. **LWA (Login with Amazon) security profile** linked to that application so you obtain:
- **LWA Client ID**
- **LWA Client Secret**
1. **Marketplace ID(s)** for each marketplace (e.g. US). Reference: Marketplace IDs.
2. **Correct region** for the SP-API endpoint you will use (see below).
**NOTE:** Amazon's SP-API documentation also describes **IAM users/roles and request signing** for many operations. Follow Amazon's current SP-API onboarding for your app (including any **IAM / signing** requirements Amazon still enforces for certain endpoints). If calls fail with auth errors, verify the app's SP-API roles and Amazon's latest auth requirements.
---
**Choose the SP-API region (must match your selling region)**
When connecting, pick the environment that matches where you sell (this selects **authorize URL** and **SP-API base URL**):
| Region | Host |
| ----------------- | -------------------------------- |
| **North America** | **Seller Central** host : .com |
| **Europe** | **Seller Central** host : .co.uk |
| **Far East** | **Seller Central** host : .co.jp |
---
**Connect in Unified (step-by-step)**
1. **Open Integrations** (or your product's connection UI) and activate **Amazon Seller Central**.
2. **Enter OAuth app credentials** from Amazon (LWA **Client ID** and **Client Secret**) in the fields your Unified workspace uses for this integration (same pattern as other OAuth2 apps).
3. **Set Marketplace ID** in the field Unified uses as the developer / connection key for this integration (**labeled as Marketplace ID** in vendor config).
4. **Select the correct regional URL** (North America vs Europe vs Far East) so authorize and API hosts align with your seller account.
5. **Start OAuth** — you will be sent to **Seller Central** to approve the app (/apps/authorize/consent).
---
**Sandbox**
Amazon documents an SP-API sandbox: [https://app.unified.to/integrations/amazonsellercentral?tab=partnership](https://app.unified.to/integrations/amazonsellercentral?tab=partnership)
Use it if you are testing before production seller data.
## Connecting BambooHR via OAuth 2
URL: https://docs.unified.to/guides/connecting_bamboohr_via_oauth_2
# Connecting BambooHR via OAuth 2
------
_July 28, 2026_
# BambooHR OAuth Setup Guide
## Overview
First, register an application in the BambooHR Developer Portal to obtain OAuth credentials.
Next, configure those credentials in Unified.
After the setup is complete, your end users can authorize their own BambooHR accounts through your embedded Unified connection flow.
---
# Part A — Set Up Your App in the BambooHR Developer Portal
> **One-time setup**
## 1. Open the BambooHR Developer Portal
Go to:
[https://developers.bamboohr.com/home/applications](https://developers.bamboohr.com/home/applications)
Sign in to your BambooHR Developer Portal account.
## 2. Create a New Application
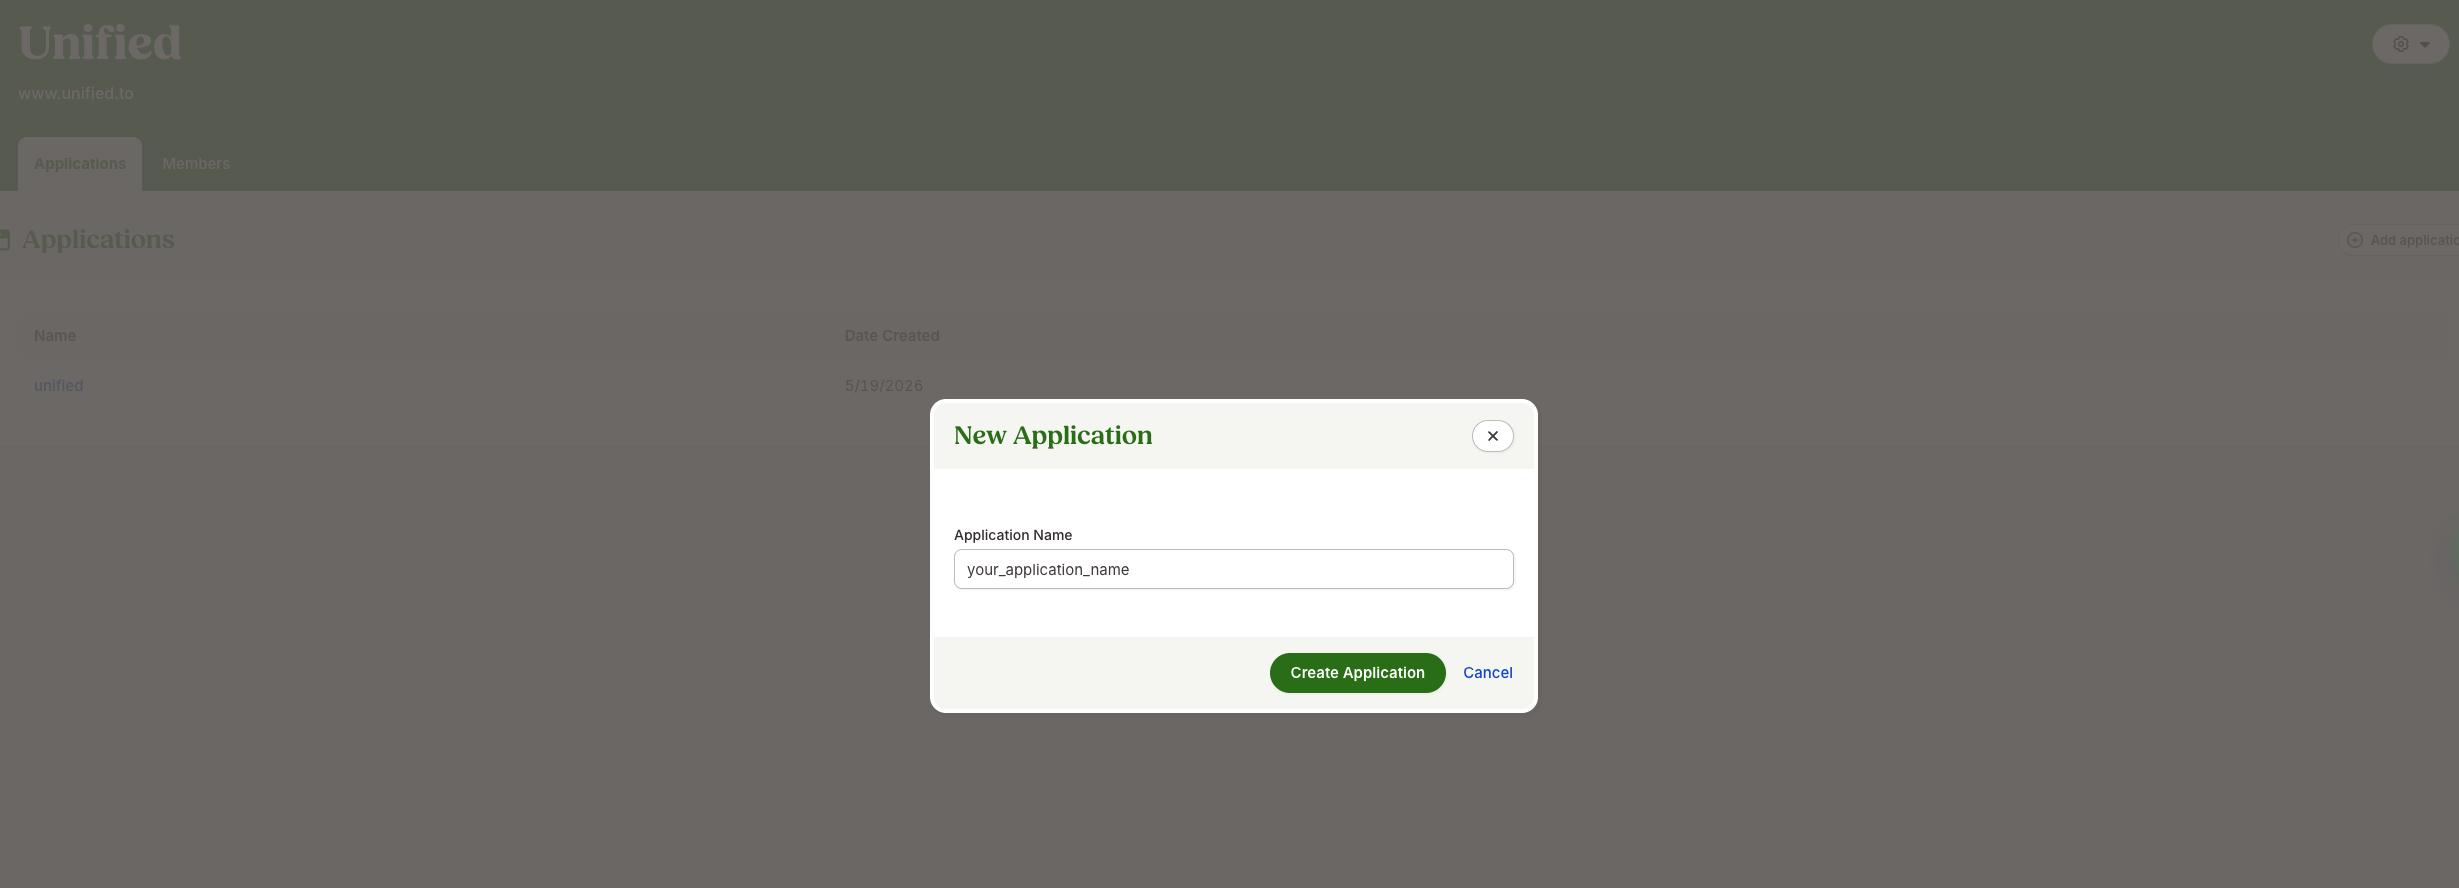
1. Click **Add application** in the top-right corner.
2. Enter an **Application Name**, for example: `unified`
3. Click **Create Application**.
## 3. Collect Your Application Details
After creating the application, note the following values:
- **Application Key**
- **Application ID**
You will need the **Application Key** when configuring the integration in Unified.
## 4. Copy Your OAuth Credentials
Under **App Credentials**, copy the following:
- **Client ID**
- **Client Secret**
Use the eye icon to reveal the Client Secret.
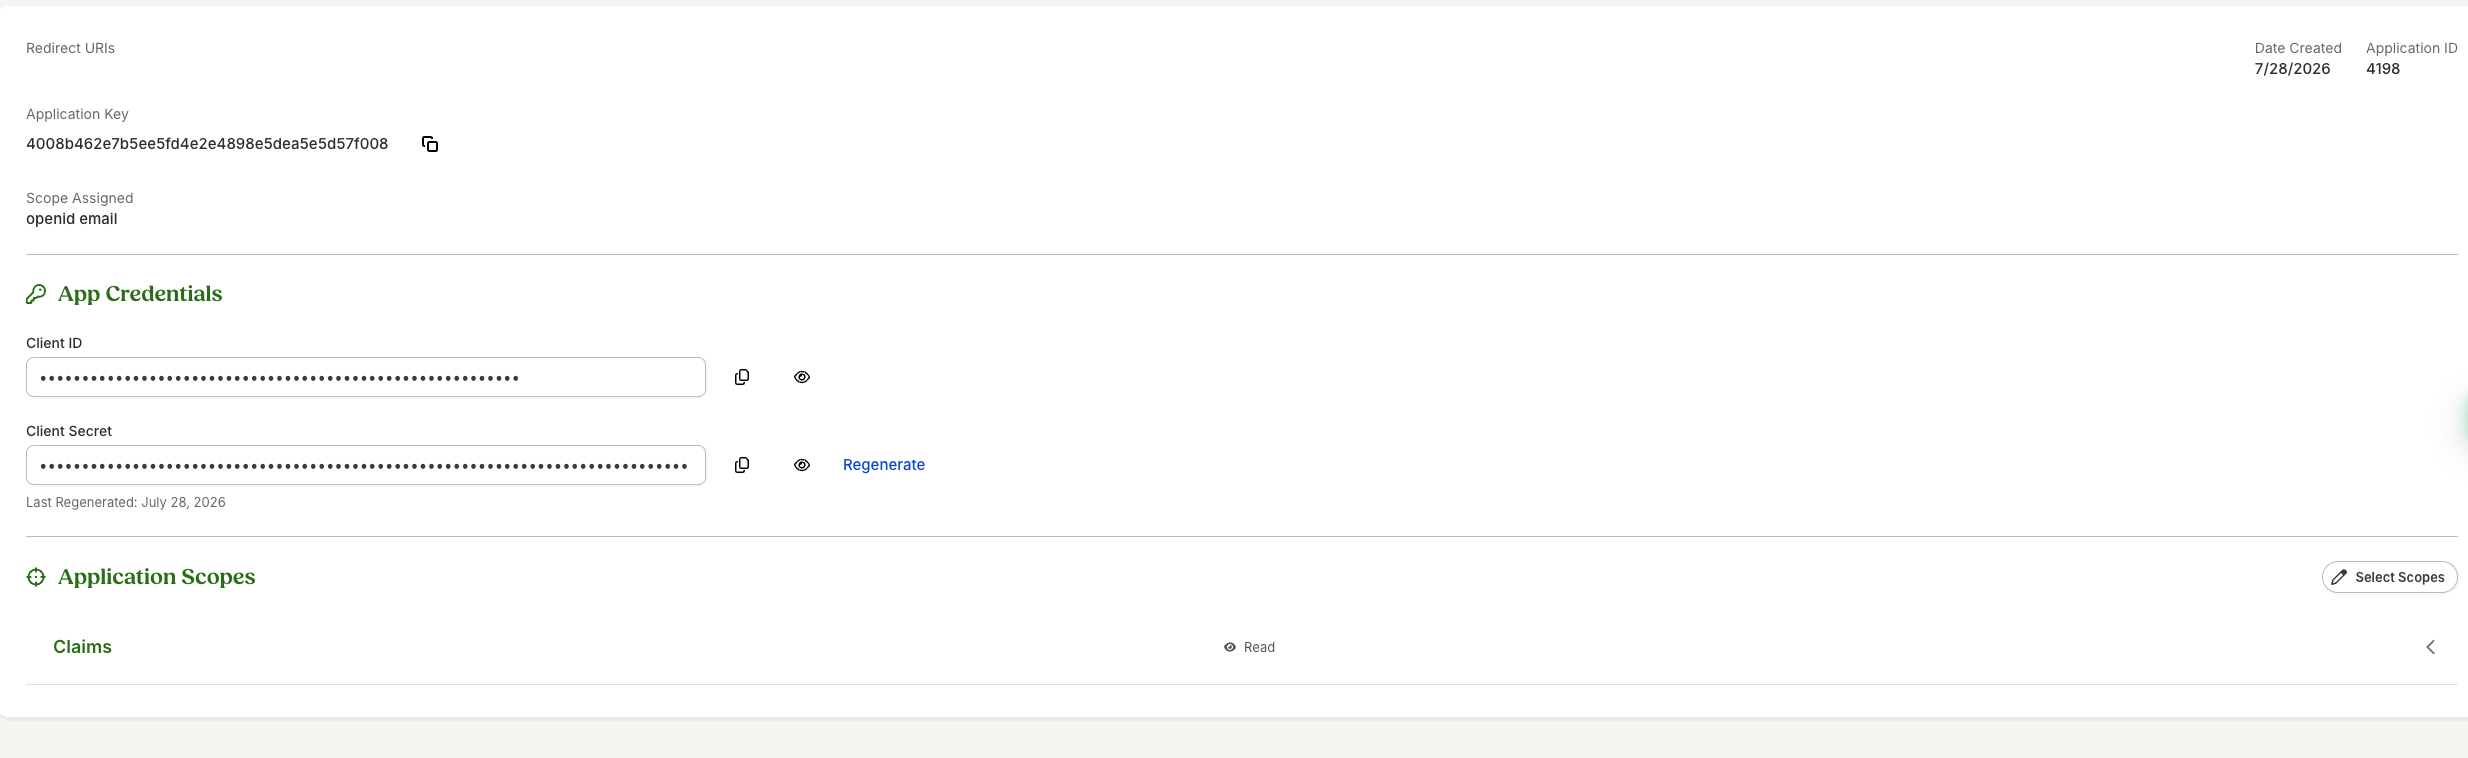
You can use **Regenerate** to create a new Client Secret when required.
> **Important:** Treat the Client Secret like a password. If you regenerate it, you must also update the Client Secret in Unified.
## 5. Add the Redirect URI
Under **Redirect URIs**, add the OAuth callback URL provided by Unified.
## 6. Select the Required Scopes
Go to:
**Application Scopes → Select Scopes**
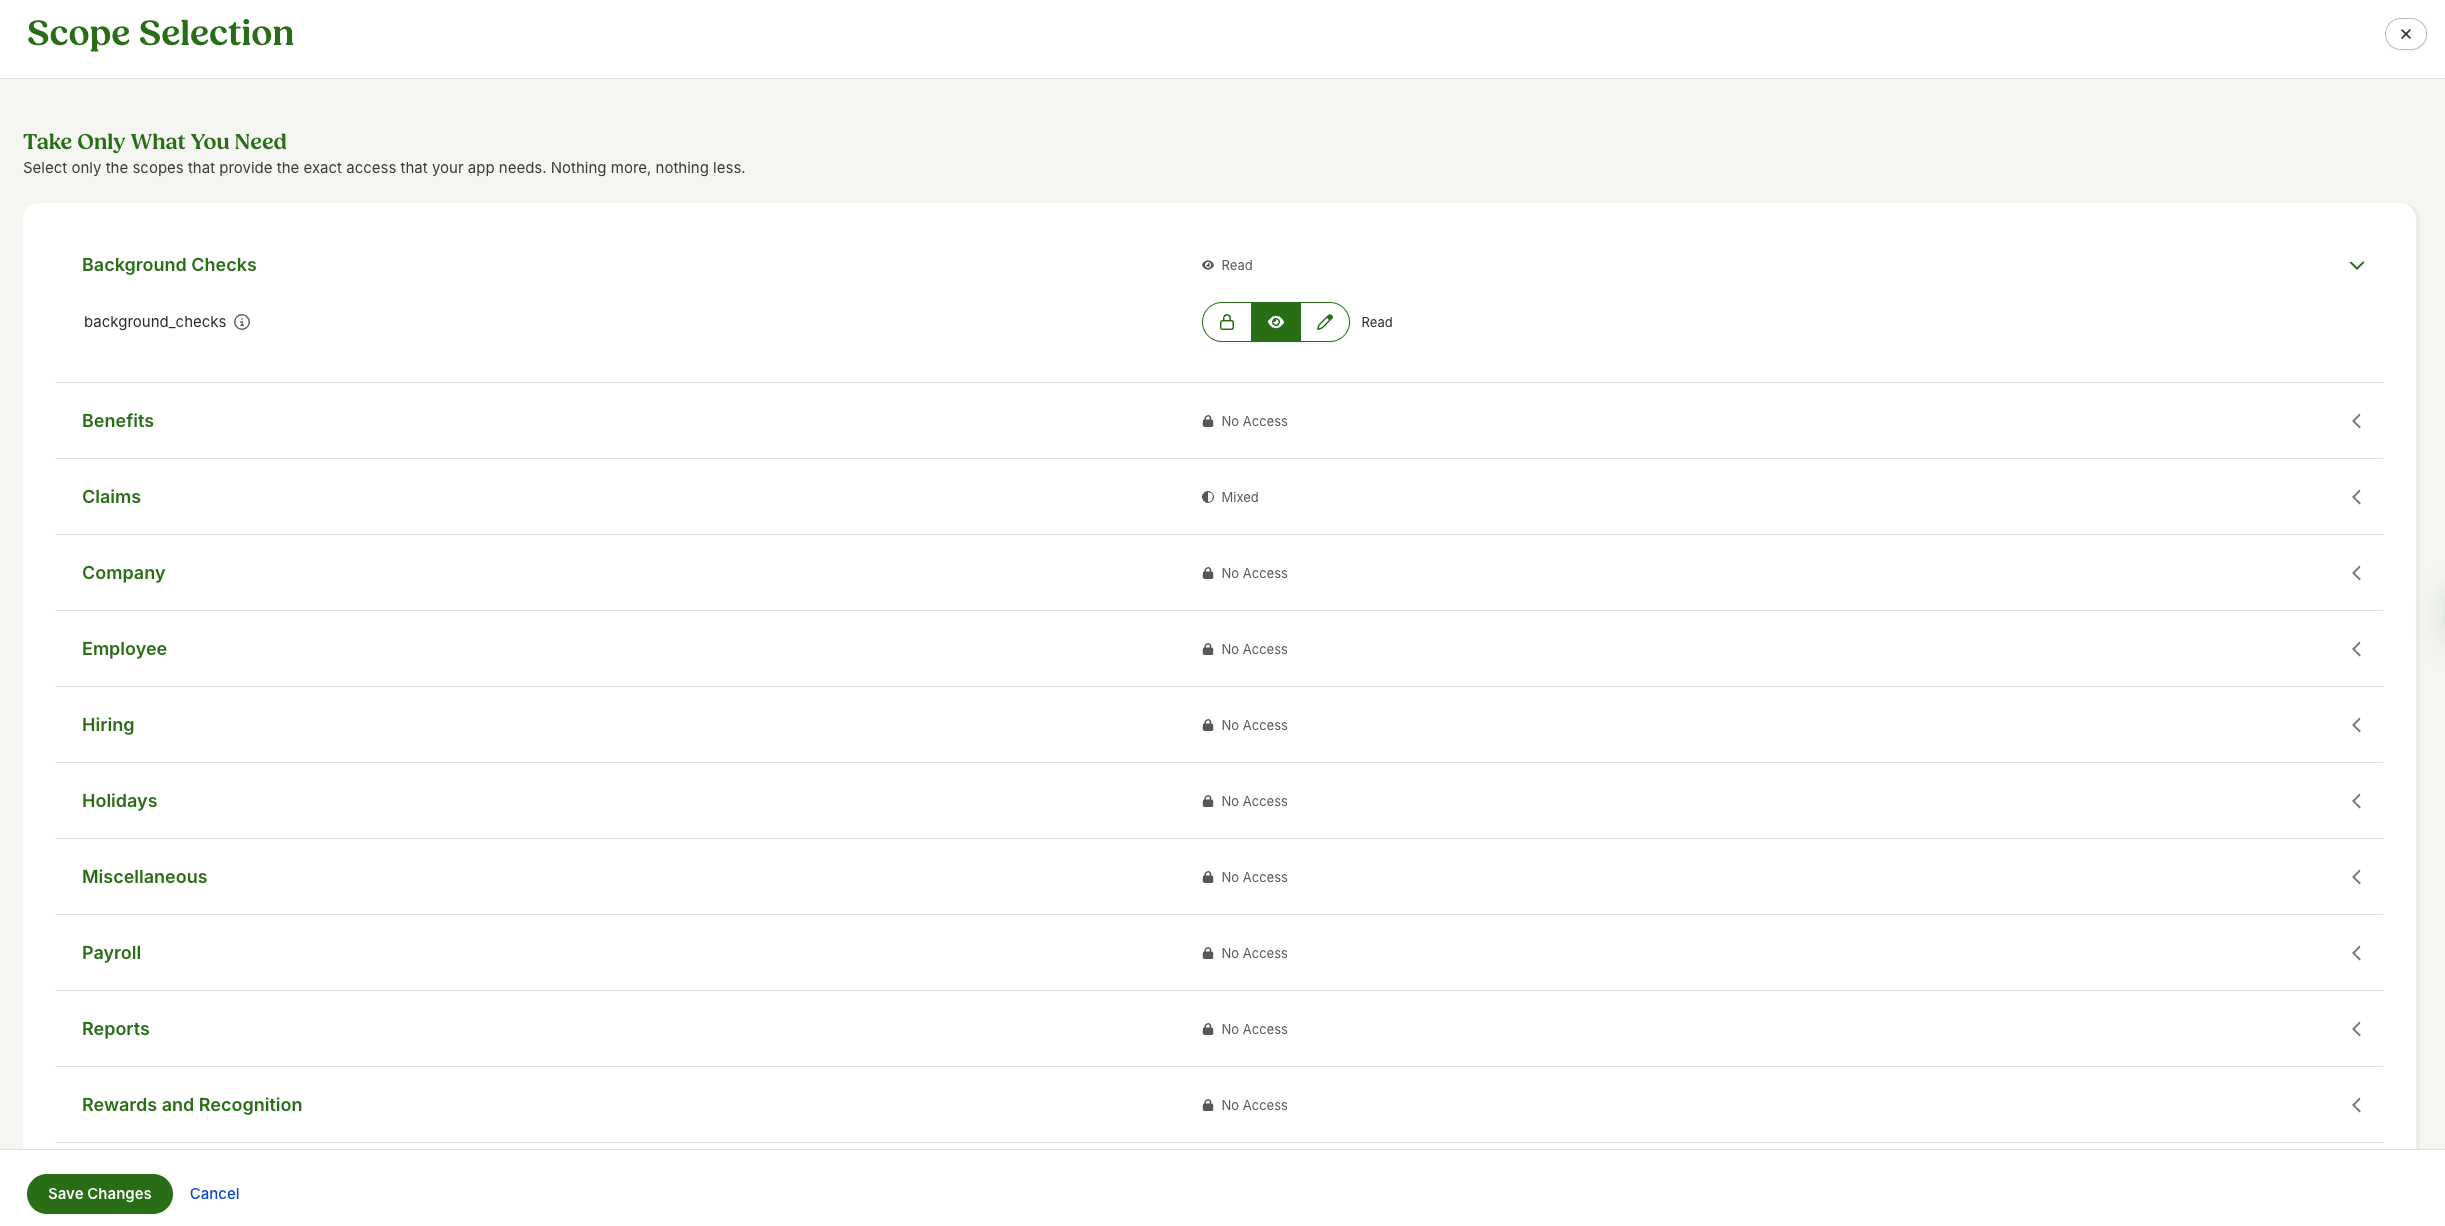
For each available category, such as Employee, Company, Hiring, Time Off, and Reports, choose the appropriate permission level:
- **No Access**
- **Read**
- **Read / Write**
Configure the following scopes as required by your implementation:
```plain text
email
openid
company:info
company_file
company_file.write
employee
employee.write
employee:assets
employee:assets.write
employee:compensation
employee:compensation.write
employee:contact
employee:contact.write
employee:custom_fields
employee:custom_fields.write
employee:custom_fields_encrypted
employee:custom_fields_encrypted.write
employee:demographic
employee:demographic.write
employee:dependent
employee:dependent.write
employee:dependent:ssn
employee:dependent:ssn.write
employee:education
employee:education.write
employee:emergency_contacts
employee:emergency_contacts.write
employee:file
employee:file.write
employee:identification
employee:identification.write
employee:job
employee:job.write
employee:management
employee:management.write
employee:name
employee:name.write
employee:payroll
employee:payroll.write
employee:photo
employee:photo.write
employee:providers
employee:providers.write
employee:providers:payroll
employee:providers:payroll.write
employee:vaccination
employee:vaccination.write
employee_verifications
employee_verifications.write
goal
goal.write
onboarding
onboarding.write
performance:assessments
performance:assessments.write
performance:feedback
performance:feedback.write
performance:one_on_ones
performance:one_on_ones.write
sensitive_employee:address
sensitive_employee:address.write
sensitive_employee:creditcards
sensitive_employee:creditcards.write
sensitive_employee:protected_info
sensitive_employee:protected_info.write
tasks
tasks.write
hiring:applications
hiring:applications.write
hiring:job_openings
hiring:job_openings.write
offline_access
user
user.write
report
report.write
time_off
time_off.write
time_off:requests
time_off:requests.write
```
---
# Part B — Configure BambooHR in Unified
## 7. Configure the BambooHR Integration
In the Unified dashboard, go to:
**Integrations → BambooHR → Authorization**
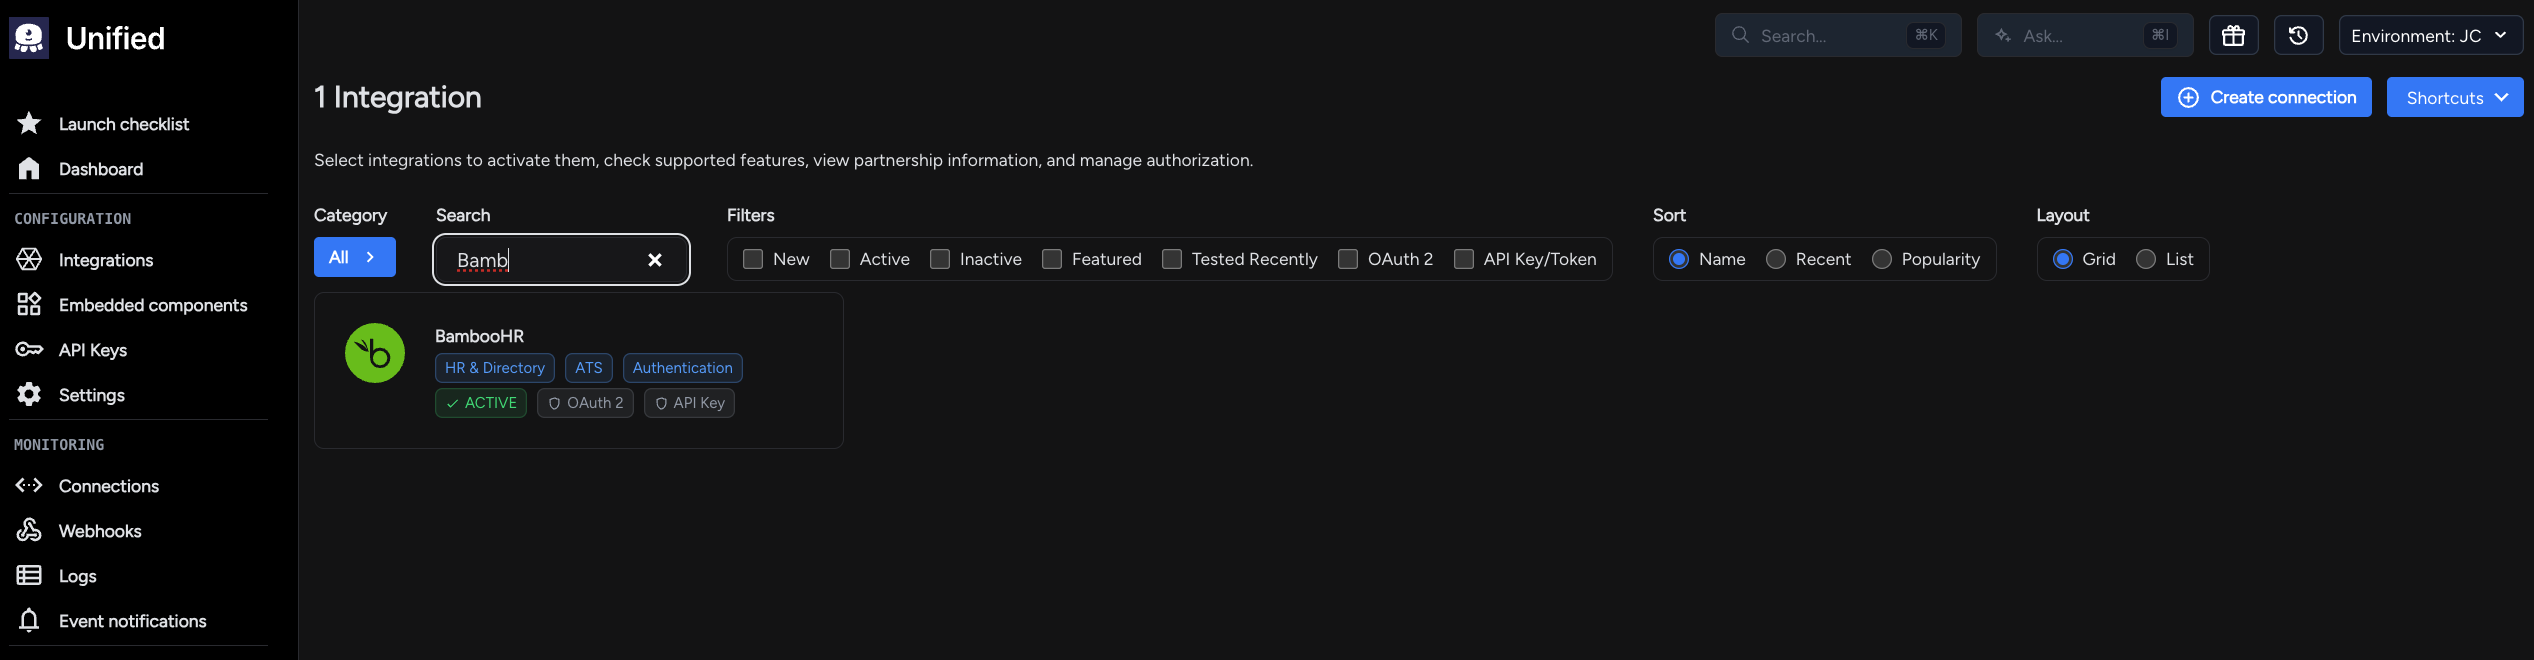
Configure the following fields:
- Set the authorization method to **OAuth 2**
- Paste the **OAuth 2 Client ID** from Step 4
- Paste the **OAuth 2 Client Secret** from Step 4
- Enter the **Developer API Key**
- Use the **Application Key** collected in Step 3
Click **Update** to save the configuration.
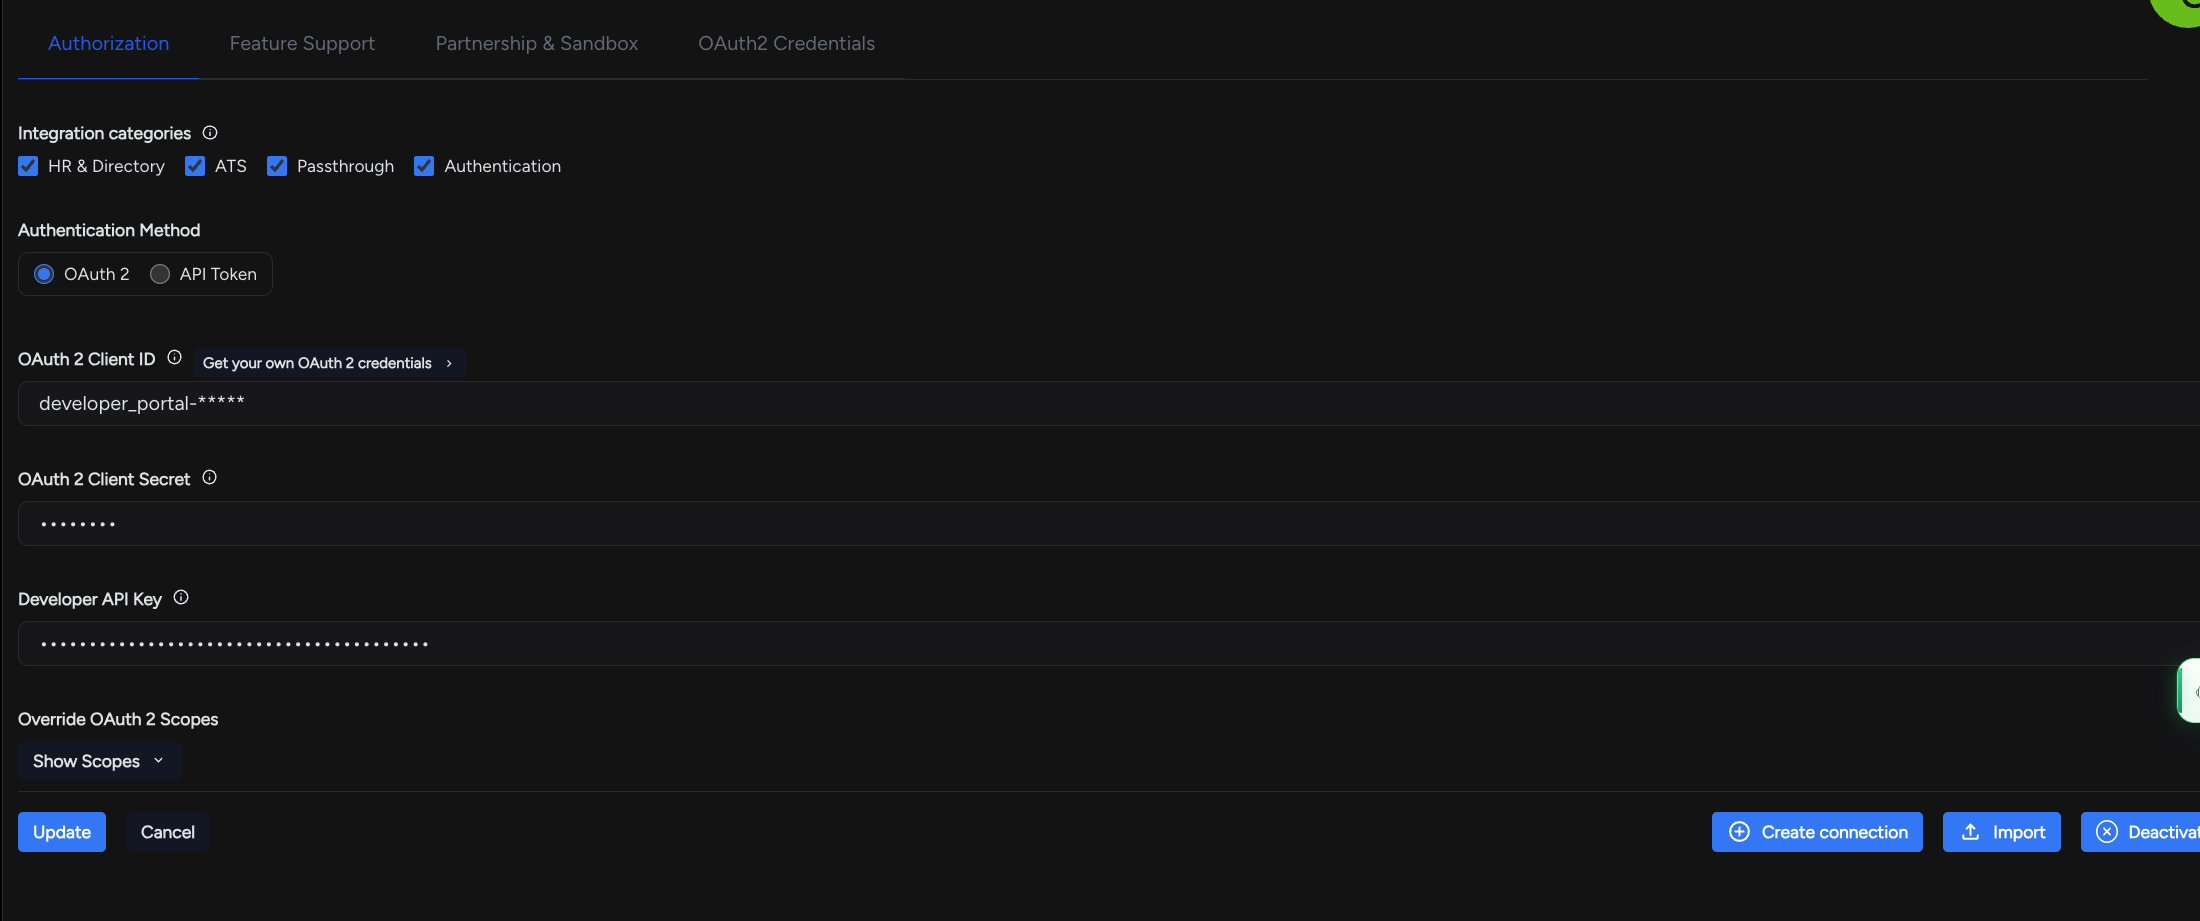
## 8. Configure the Embedded Component
In the Unified dashboard, go to:
**Embedded components**
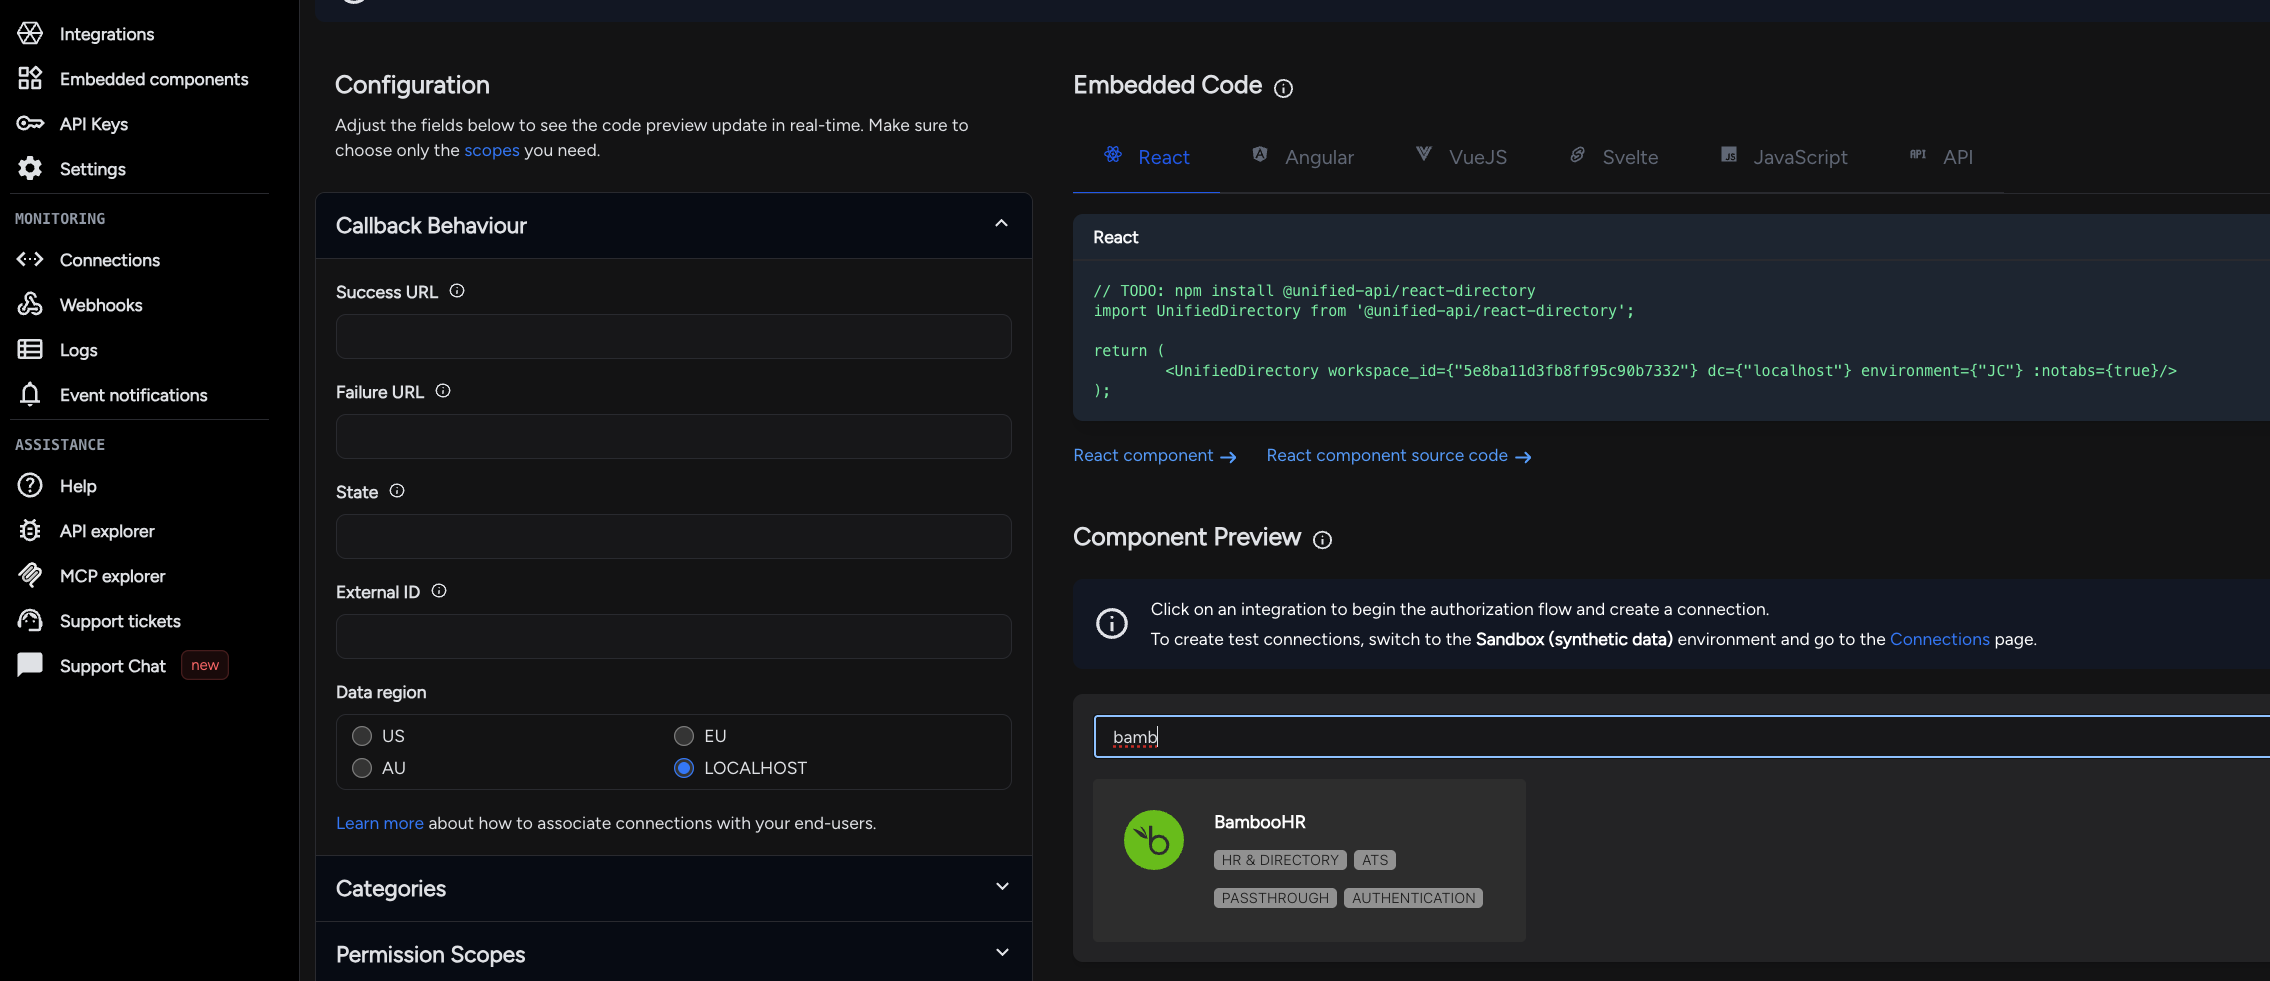
Configure the following settings:
- **Success URL**
- **Failure URL**
- **Data region**, such as:
- US
- EU
- AU
- **Permission Scopes / Categories**
Copy the appropriate embed code into your application.
Unified provides embed options for:
- React
- Angular
- Vue
- Svelte
- JavaScript
- API-based implementations
---
# Part C — End-User Authorization Flow
## 9. Enter the BambooHR Domain
In the embedded authorization flow, the end user sees the **Authorize Access** screen.
The user enters their **BambooHR Domain** and clicks **Authorize**.
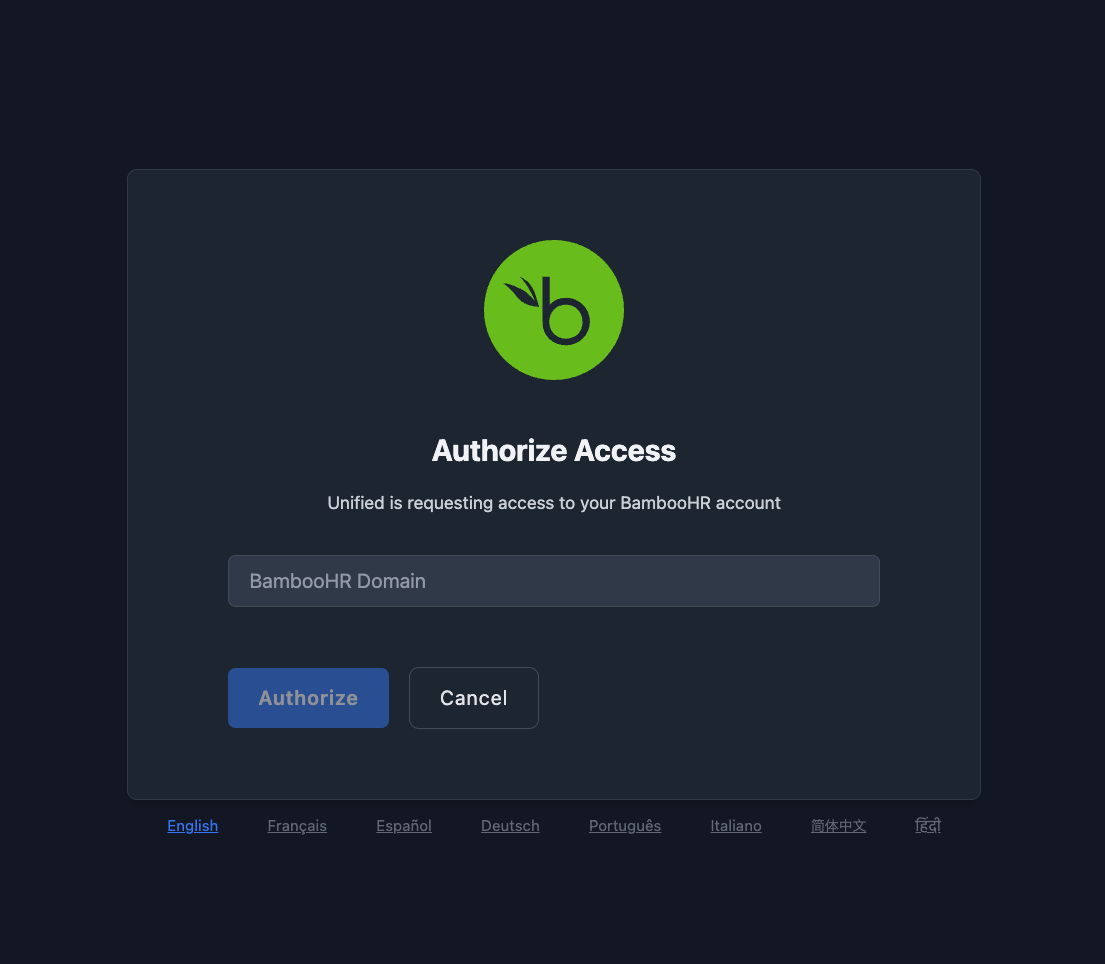
## 10. Approve Access
BambooHR displays a consent screen similar to:
> **Share access with unified?**
The user reviews the requested scopes and clicks **Allow Access**.
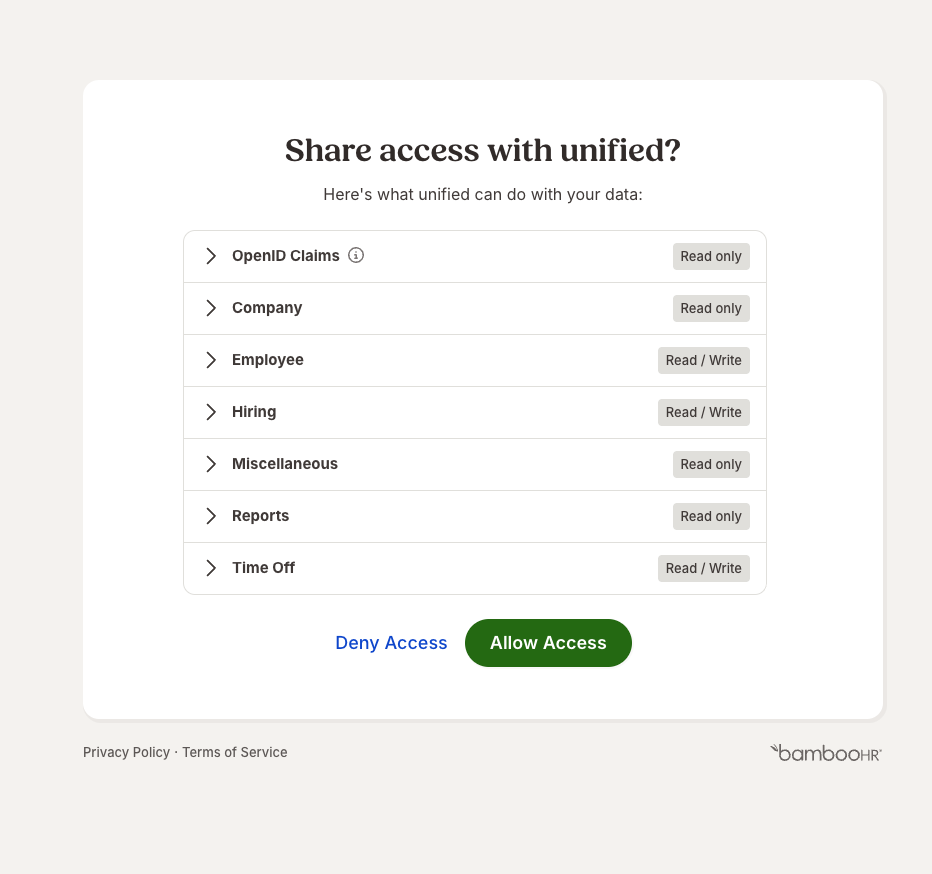
## 11. Confirm the Connection
After authorization is completed, the connection appears in Unified under:
**Settings → Connections**
The connection should display a **Healthy** status.

## Connecting Google Workspace Integrations with a Service Account
URL: https://docs.unified.to/guides/connecting_google_workspace_integrations_with_a_service_account
# Connecting Google Workspace Integrations with a Service Account
------
_May 21, 2026_
Unified API supports two ways to authenticate Google integrations: the standard interactive **OAuth2** flow (a user clicks "Allow"), or a **service account** for server-to-server access with no human in the loop. This guide covers the service account path: how to create one, how to grant it access to your data, and what to enter in Unified API.
## **When to use a service account**
Use a service account when you want a backend system to access Google data without a user logging in each time — for example, syncing every mailbox in your company, reading a shared Drive, or managing your Workspace directory. For most Workspace data (Gmail, Calendar, Drive files owned by users, etc.) the service account must **impersonate** a user via **domain-wide delegation (DWD)**. For a few APIs (Analytics, Merchant Center, Campaign Manager) you instead just **share** the resource with the service account's email — no delegation needed.
---
## **Step 1 — Create a Google Cloud project**
1. Go to the [Google Cloud Console](https://console.cloud.google.com/).
2. Create a new project (or select an existing one) using the project picker at the top.
3. Note the **Project ID** — you'll see it referenced in the key file later.
## **Step 2 — Enable the APIs you need**
1. Navigate to **APIs & Services → Library**.
2. Search for and **Enable** the API for each integration you'll use:
| **Integration** | **API to enable** |
| ------------------- | ------------------------------------- |
| Google Drive | Google Drive API |
| Gmail | Gmail API |
| Google Calendar | Google Calendar API |
| Google Sheets | Google Sheets API |
| Google Docs | Google Docs API |
| Google Slides | Google Slides API |
| Google Forms | Google Forms API |
| Google Tasks | Google Tasks API |
| Google Contacts | People API |
| Google Meet | Google Meet API + Google Calendar API |
| Workspace Directory | Admin SDK API |
If an API isn't enabled, calls will fail with a `403 ... API has not been used in project` error.
## **Step 3 — Create the service account**
1. Go to **APIs & Services → Credentials → Create credentials → Service account**.
2. Give it a name (e.g. `unified-api-sync`) and click **Create and continue**.
3. You can skip the optional "grant access" steps for now. Click **Done**.
4. You'll land on the service account list. Note its **email** — it looks like:`unified-api-sync@your-project-id.iam.gserviceaccount.com`
## **Step 4 — Generate a key**
1. Click the service account, then open the **Keys** tab.
2. **Add key → Create new key → JSON → Create.**
3. A `.json` file downloads. **Store it securely** — Google does not let you re-download it.
The file looks like this (the two fields you need are highlighted):
```json
{
"type": "service_account",
"project_id": "your-project-id",
"private_key_id": "abc123...",
"private_key": "-----BEGIN PRIVATE KEY-----\nMIIEv...\n-----END PRIVATE KEY-----\n", ← Service Account Private Key
"client_email": "unified-api-sync@your-project-id.iam.gserviceaccount.com", ← Service Account Email
"client_id": "11223344...",
"token_uri": "https://oauth2.googleapis.com/token",
...
}
```
---
## **Step 5 — Grant the service account access to your data**
This is the step that differs by API. Pick the path that matches your integration.
### **Path A — Domain-wide delegation (Workspace user data)**
Required for **Gmail, Calendar, Drive (user files), Sheets, Docs, Slides, Forms, Tasks, Contacts, Meet, and Directory**. This lets the service account act _as_ a specific user in your Workspace.
1. On the service account's detail page, note its **Client ID** (the numeric `client_id` from the JSON, also called "Unique ID").
2. As a Workspace **super admin**, go to the [Admin Console → Security → Access and data control → API controls → Domain-wide delegation](https://admin.google.com/ac/owl/domainwidedelegation).
3. Click **Add new** and enter:
- **Client ID**: the service account's numeric Client ID.
- **OAuth scopes**: a comma-separated list of the scopes for the APIs you'll use (see the scope table below).
4. **Authorize.** Changes can take a few minutes to propagate.
> Only the scopes you authorize here will work. If you add the Drive integration later, you must come back and add the Drive scope.
### **Path B — Resource sharing (no delegation)**
For APIs where data is owned by an account/property rather than a user, you skip DWD and just grant the service account's **email** access inside the product:
- **Google Analytics** — add the service account email as a user on the GA4 property.
- **Merchant Center** — add it as a user in Merchant Center settings.
- **Campaign Manager / Display & Video 360** — add it as a user in the platform.
(These integrations aren't part of the Workspace set covered here but follow the same key-creation steps.)
---
## **Step 6 — Scopes per integration**
When configuring domain-wide delegation (Path A), authorize the matching scope(s). These are exactly the scopes Unified API requests when minting tokens:
| **Integration** | **Scope(s) to authorize** |
| ------------------- | ------------------------------------------------------------------------------------------------------------------------------------------------------------------------------- |
| Google Drive | `https://www.googleapis.com/auth/drive` |
| Gmail | `https://mail.google.com/` |
| Google Calendar | `https://www.googleapis.com/auth/calendar` |
| Google Sheets | `https://www.googleapis.com/auth/spreadsheets` |
| Google Docs | `https://www.googleapis.com/auth/documents` |
| Google Slides | `https://www.googleapis.com/auth/presentations` |
| Google Forms | `https://www.googleapis.com/auth/forms.body`, `https://www.googleapis.com/auth/forms.responses.readonly` |
| Google Tasks | `https://www.googleapis.com/auth/tasks` |
| Google Contacts | `https://www.googleapis.com/auth/contacts` |
| Google Meet | `https://www.googleapis.com/auth/calendar`, `https://www.googleapis.com/auth/meetings.space.readonly` |
| Workspace Directory | `https://www.googleapis.com/auth/admin.directory.user`, `https://www.googleapis.com/auth/admin.directory.group`, `https://www.googleapis.com/auth/admin.directory.group.member` |
---
## **Step 7 — Configure the connection in Unified API**
When creating the connection, choose the **Service Account** authentication option and fill in three fields:
| **Field** | **Value** |
| ------------------------------- | -------------------------------------------------------------------------------------------------------------------------------------------------------------------------------------------------------------------------------------------------------------------------- |
| **Service Account Email** | The `client_email` from the JSON key file. |
| **Service Account Private Key** | The `private_key` from the JSON key file — paste it whole, including the `-----BEGIN PRIVATE KEY-----` and `-----END PRIVATE KEY-----` lines. |
| **Subject** | _(Optional)_ The email of the Workspace user to impersonate via domain-wide delegation. **Required for most Workspace data** (e.g. Gmail needs a mailbox owner). Leave blank only if the service account itself owns the data or you've shared resources directly with it. |
That's it. Unified API signs a short-lived JWT with your private key, exchanges it with Google for an access token (caching it until it expires), and uses it for all API calls — no further interaction needed.
---
## **Troubleshooting**
| **Error** | **Likely cause** |
| -------------------------------------------------------- | --------------------------------------------------------------------------------------------------------------- |
| `unauthorized_client` | The scope isn't authorized in domain-wide delegation, or the Client ID is wrong. Re-check Step 5A. |
| `403 ... has not been used in project` | The API isn't enabled for the project (Step 2). |
| `400 invalid_grant` / `Invalid JWT Signature` | The private key was pasted incorrectly (truncated, or newlines lost). Re-copy the full `private_key` value. |
| Empty results / `404` for a user's data | Missing or wrong **Subject** — you're querying as the service account itself instead of impersonating the user. |
| `403 Not Authorized to access this resource` (Directory) | The impersonated **Subject** must be a Workspace **admin** with rights to the directory data. |
### **Security notes**
- The private key grants standing access to your data — store it in a secret manager, never in source control.
- Authorize only the scopes you actually use; broad scopes increase blast radius if the key leaks.
- Rotate keys periodically (create a new key, update the connection, delete the old key).
## Correct WelcomeKit Scopes for Jungle Integration
URL: https://docs.unified.to/guides/correct_welcomekit_scopes_for_jungle_integration
# Correct WelcomeKit Scopes for Jungle Integration
------
_April 14, 2026_
This guide outlines the required WelcomeKit scopes per Unified object for the Jungle integration.
## Scope Mapping (by Unified Object)
| Unified Object | Required Scope(s) | Partnership (su_*) Needed? |
| --------------------------------------------- | --------------------------------------------------------------------------------------------------------------------------------------- | -------------------------- |
| **ATS · Job (**`ats_job`**)** | `su_jobs_r` | Yes |
| **ATS · Candidate (**`ats_candidate`**)** | **Read:** `candidates_r` AND `my_candidates_r` **Write:** `candidates_rw` AND `my_candidates_rw` | No |
| **ATS · Document (**`ats_document`**)** | **Read:** `documents_r` AND (`candidates_r` & `my_candidates_r`) **Write:** `documents_rw` AND (`candidates_rw` & `my_candidates_rw`) | No |
| **ATS · Activity (**`ats_activity`**)** | **Read:** `emails_r` AND (`candidates_r` & `my_candidates_r`) **Write:** `comments_w` AND (`candidates_rw` & `my_candidates_rw`) | No |
| **HRIS · Company (**`hris_company`**)** | **Read:** `su_organizations_r` | Yes |
| HRIS · Location (hris_location) | Read: `offices_r` & `su_offices_r` Write: `offices_rw` | Yes |
| HRIS · Group (hris_group) | Read: `departments_r` & `departments_rw` & `su_departments_r` Write: `departments_rw` | Yes |
---
## Important Notes
### Partnership-only scopes
- `su_jobs_r` → Required for listing jobs
- `su_organizations_r` → Required for listing organizations
- `su_offices_r` → Required for listing locations
- `su_departments_r` → Required for listing groups
These require WelcomeKit partnership approval.
### **Non-partner access (scope overrides)**
If you do **not** have WelcomeKit partnership approval, you won't be able to use the partnership-only scopes. Instead, request the standard non-partner scopes by overriding the defaults for this integration. Each Unified permission (like `ats_job_read`) maps to a default set of the provider's raw scopes, and you can replace that default per integration via the integration's scope override setting. Update the `WorkspaceIntegration` object with an `overriden_scopes` map keyed by the Unified permission, where each value is a comma-separated list of the provider's raw scopes:
`{ "overriden_scopes": { "ats_job": "jobs_r" } }`
With this override, Unified requests `jobs_r` (org-scoped jobs) instead of `su_jobs_r`. At runtime, the connector lists jobs via `GET /jobs?organization_reference=...` using the organization cached on the connection during auth setup, and falls back to `GET /users/current` for organization discovery — so non-partner keys never depend on the `su_*` scopes. For full details, see [Overriding scopes per integration](https://docs.unified.to/concepts/scopes#overriding-scopes-per-integration).
---
### Candidate-dependent scopes
The following always require candidate access:
- Documents → require candidate read/write scopes
- Emails → require candidate read scopes
- Comments → require candidate write scopes
---
## How to Get Partnership Access (Jungle / WelcomeKit)
To access partnership-only scopes (`su_*`), you will need to be approved by WelcomeKit.
### Steps:
1. **Reach out to WelcomeKit support or your account manager (**[https://help.welcometothejungle.com/en](https://help.welcometothejungle.com/en))
- Request access to partnership scopes
- Clearly mention your use case (e.g. job syncing, org-level data access)
2. **Provide integration details**
- Your application name
- What data you intend to access
- Whether access is read-only or includes write operations
3. **Explain your end-user flow**
- How users connect their WelcomeKit account
- Why elevated (partnership) access is required
4. **Await approval**
- Once approved, the scopes will be enabled for your app
- You can then include `su_*` scopes in your OAuth flow
## Creating Ads using the Unified Ads API
URL: https://docs.unified.to/guides/creating_ads_using_the_unified_ads_api
# Creating Ads using the Unified Ads API
------
_March 14, 2026_
# Unified Ads API Overview
The Unified API Ads category models advertising structures across Meta, Google, Amazon, Twitter, LinkedIn, and other providers. Understanding how objects relate helps you build the correc flows.
### Core Hierarchy
Most integrations follow a hierarchy from organization → campaign → ad group → ad:
```plain text
ads_organization (ad account)
└── ads_campaign
└── ads_group (ad set, line item, etc.)
└── ads_ad
```
| Object | Description | Parent(s) | Typical use |
| -------------------- | -------------------------------------------------------------------------------------------------------------- | -------------------------------------------- | ------------------------------------------------------------------------- |
| **ads_organization** | The ad account (e.g., Meta ad account, Google Ads customer). Billing and access are scoped here. | — | List accounts, select which account to use |
| **ads_campaign** | A campaign groups ad sets under a goal, budget, and schedule. | `organization_id` | Set campaign-level budget, dates, objective |
| **ads_group** | An ad set or line item. Holds targeting, bid, and budget. Often called "ad set" (Meta) or "line item" (DV360). | `campaign_id`, `organization_id` | Define who sees ads (targeting), bid strategy, promoted object |
| **ads_ad** | The actual ad creative + placement. What users see. | `group_id`, `campaign_id`, `organization_id` | Creative content, destination URL, promoted entity (e.g., tweet, product) |
### Creatives and Insertion Orders
| Object | Description | Parent(s) | Notes |
| ---------------------- | ------------------------------------------------------------------------------------------------------------------- | -------------------------------------------- | ------------------------------------------------------------------ |
| **ads_creative** | The creative asset (image, video, copy). Some providers treat it as a separate resource; others embed it in the ad. | `group_id`, `campaign_id`, `organization_id` | Meta: can be shared across ads. Amazon/Twitter: often 1:1 with ad. |
| **ads_insertionorder** | DV360-specific. Sits between campaign and line item. | `campaign_id`, `organization_id` | Similar to a purchase order for a campaign. |
### Discovery
| Object | Description | Purpose |
| --------------- | ------------------------------------------------------------------ | ----------------------------------------------------------------------- |
| **ads_target** | Targeting options (countries, regions, interests, etc.). | Look up valid IDs to use in `targeting` when creating campaigns/groups. |
| **ads_promote** | Promoted entities (pages, apps, products, tweets, ad group types). | Look up or pass IDs for `promoted` when creating groups/ads/creatives. |
### Reporting
| Object | Description | Purpose |
| -------------- | -------------------- | ---------------------------------------------------------------------- |
| **ads_report** | Performance metrics. | Fetch impressions, clicks, spend, etc. by org, campaign, group, or ad. |
### Provider Mapping
Naming varies by provider:
| Unified API | Meta Ads | Google Ads | Amazon Ads | Twitter Ads | LinkedIn |
| ---------------- | ----------- | ---------- | ---------- | -------------- | ----------------- |
| ads_organization | Ad Account | Customer | Profile | Account | Sponsored Account |
| ads_campaign | Campaign | Campaign | Campaign | Campaign | Campaign Group |
| ads_group | Ad Set | Ad Group | Ad Group | Line Item | Campaign |
| ads_ad | Ad | Ad | Product Ad | Promoted Tweet | Creative |
| ads_creative | Ad Creative | Ad | Product Ad | Promoted Tweet | Creative |
_Some integrations collapse levels (e.g., LinkedIn's "Campaign" maps to our ads_group)._
### Creating Ads: Required Parent IDs
When creating objects, you typically need parent IDs:
- **Create campaign:** `organization_id`
- **Create ad group:** `organization_id`, `campaign_id`
- **Create ad:** `organization_id`, `campaign_id`, `group_id`
- **Create creative:** `organization_id`, `campaign_id`, `group_id` (varies by provider)
The `promoted` field is required when creating ad groups or ads that need a promoted entity (e.g., Meta ad set with a page, Twitter promoted tweet with a tweet ID). Use `ads_promote` to discover options, or pass IDs manually when the provider has no list API.
---
# Promoted Explained
The new `promoted` field specifies promoted entities (pages, apps, products, tweets, ad group types) when creating and managing ads across the Unified API.
Ads, Campaigns, and AdGroups have a `promoted` field to specify an ID of an entity to promote. There is also a `ads_promote` endpoint that provides a clean way to query the promoted entities.
```json
{
"organization_id": "act_123",
"campaign_id": "456",
"name": "My Ad Group",
"promoted": [
{ "id": "789", "type": "PAGE_ID" }
]
}
```
---
## The AdsPromoted Object
Each promoted entity has a simple structure:
| Field | Type | Required | Description |
| ------ | ------ | -------- | ----------------------------------------------- |
| `id` | string | Yes | The entity ID (e.g., page ID, ASIN, tweet ID) |
| `name` | string | No | Display name (optional, used in list responses) |
| `type` | string | Yes | One of the supported promoted types (see below) |
### Supported Promoted Types
| Type | Integration(s) | Description |
| --------------- | -------------------- | ----------------------------------------------------------------- |
| `PAGE_ID` | Meta Ads | Facebook Page to promote |
| `APP_ID` | Meta Ads | App to promote |
| `PIXEL_ID` | Meta Ads | Conversion pixel |
| `CATALOG_ID` | Meta Ads | Product catalog |
| `STORE_URL` | Meta Ads | Store URL (manual input) |
| `PRODUCT_ID` | Amazon Ads | Product ASIN (manual input) |
| `TWEET_ID` | Twitter Ads | Tweet to promote |
| `AD_GROUP_TYPE` | LinkedIn, Google Ads | Campaign/ad group type (e.g., SPONSORED_UPDATES, SEARCH_STANDARD) |
---
## GET /ads/{connection_id}/promoted Endpoint
Use the `ads_promote` list endpoint to discover available promoted entities that the integration supports.
**Endpoint:** `GET /ads/{connection_id}/promote`
**Query parameters:**
| Parameter | Type | Description |
| --------- | ------ | ----------------------------------------------------- |
| `type` | string | Filter by promoted type (e.g., `PAGE_ID`, `TWEET_ID`) |
| `org_id` | string | Organization/account I |
| `query` | string | Optional search filter |
| `limit` | number | Max results (default 100) |
| `offset` | number | Pagination offset |
### Example: List Facebook Pages (Meta Ads)
```bash
GET /ads/{connection_id}/promote?type=PAGE_ID
```
Response:
```json
[
{ "id": "123456789", "name": "My Business Page", "type": "PAGE_ID" },
{ "id": "987654321", "name": "Another Page", "type": "PAGE_ID" }
]
```
### Example: List User Tweets (Twitter Ads)
```bash
GET /ads/{connection_id}/promote?type=TWEET_ID
```
### Example: List Ad Group Types (Google Ads, LinkedIn)
```bash
GET /ads/{connection_id}/promote?type=AD_GROUP_TYPE
```
Some integrations will return static options (e.g., `SEARCH_STANDARD`, `DISPLAY_STANDARD` for Google; `SPONSORED_UPDATES`, `TEXT_ADS` for LinkedIn).
### When ads_promoted Returns Empty
Some promoted types have no discovery API (e.g., Amazon `PRODUCT_ID`, Meta `STORE_URL`). In those cases, `ads_promote` returns an empty array. You can still create ads by passing `promoted` manually with IDs you already know (e.g., ASINs for Amazon, store URLs for Meta).
---
## Quick Reference: Create Examples
### Meta Ads – Create Ad Group with Page
```json
POST /ads/{connection_id}/group
{
"organization_id": "act_123",
"campaign_id": "456",
"name": "My Ad Group",
"promoted": [{ "id": "789", "type": "PAGE_ID" }]
}
```
### Amazon Ads – Create Product Ad
```json
POST /ads/{connection_id}/ad
{
"organization_id": "profile_123",
"campaign_id": "456",
"group_id": "789",
"name": "Product Ad",
"promoted": [{ "id": "B08N5WRWNW", "type": "PRODUCT_ID" }]
}
```
### Twitter Ads – Create Promoted Tweet
```json
POST /ads/{connection_id}/ad
{
"organization_id": "account_123",
"group_id": "line_item_456",
"name": "Promoted Tweet",
"promoted": [{ "id": "1234567890", "type": "TWEET_ID" }]
}
```
### LinkedIn – Create Ad Group (Campaign)
```json
POST /ads/{connection_id}/group
{
"organization_id": "123",
"campaign_id": "456",
"name": "Sponsored Updates Campaign",
"promoted": [{ "id": "SPONSORED_UPDATES", "type": "AD_GROUP_TYPE" }]
}
```
### Google Ads – Create Ad Group
```json
POST /ads/{connection_id}/group
{
"organization_id": "123",
"campaign_id": "456",
"name": "Search Ad Group",
"promoted": [{ "id": "SEARCH_STANDARD", "type": "AD_GROUP_TYPE" }]
}
```
---
## Using Targeting
Targeting lets you define who sees your ads (geography, demographics, interests, etc.). Use the `ads_target` endpoint to look up valid targeting IDs, then pass them in the `targeting` field when creating campaigns, ad groups, or ads.
### The ads_target Endpoint
Look up targeting options (countries, regions, cities, interests, etc.) before creating ad objects.
**Endpoint:** `GET /ads/{connection_id}/target`
**Query parameters:**
| Parameter | Type | Required | Description |
| --------- | ------ | -------- | ------------------------------------------------- |
| `type` | string | Yes | Targeting type (see supported types below) |
| `query` | string | Yes* | Search term (*required for most types) |
| `org_id` | string | No | Organization/account ID (required for some types) |
| `limit` | number | No | Max results (default 100) |
| `offset` | number | No | Pagination offset |
**Supported** **`type`** **values:** `countries`, `regions`, `cities`, `zips`, `us_dmas`, `locales`, `interests`, `behaviors`, `topics`, `user_lists`, `age_ranges`, `genders`
_Support varies by integration. Meta Ads supports most types; others (e.g., Amazon, Twitter) may support only_ _`countries`_ _and_ _`locales`__._
### Example: Look Up Countries
```bash
GET /ads/{connection_id}/target?type=countries&query=united
```
Response:
```json
[
{ "id": "US", "name": "United States", "value": "US", "type": "countries" },
{ "id": "GB", "name": "United Kingdom", "value": "GB", "type": "countries" }
]
```
### Example: Look Up Regions (e.g., US States)
```bash
GET /ads/{connection_id}/target?type=regions&query=california
```
Response:
```json
[
{ "id": "3843", "name": "California", "value": "3843", "type": "regions" }
]
```
### Example: Look Up Interests (Meta Ads)
```bash
GET /ads/{connection_id}/target?type=interests&query=technology
```
### Using Targeting IDs When Creating Ads
Pass the `id` (or `value`) from `ads_target` responses into the `targeting` object. The structure matches the targeting type:
- **Countries:** `targeting.geographic.countries` — array of ISO country codes (e.g., `["US", "CA"]`)
- **Regions:** `targeting.geographic.regions` — array of `{ id, name? }` (use `id` from ads_target)
- **Cities:** `targeting.geographic.cities` — array of `{ id, name?, radius?, radius_unit? }`
- **Demographics:** `targeting.demographic` — age and gender (no lookup needed; use values directly)
---
## Targeting Examples
### Geo-Targeting: Countries and Regions
First, look up IDs:
```bash
# Get country codes
GET /ads/{connection_id}/target?type=countries&query=united
# Get regions (e.g., states) — for regions, query often includes country context
GET /ads/{connection_id}/target?type=regions&query=california
```
Then create an ad group with geographic targeting:
```json
POST /ads/{connection_id}/group
{
"organization_id": "act_123",
"campaign_id": "456",
"name": "US & California Ad Group",
"promoted": [{ "id": "789", "type": "PAGE_ID" }],
"targeting": {
"geographic": {
"countries": ["US"],
"regions": [
{ "id": "3843", "name": "California" }
]
}
}
}
```
### Geo-Targeting: Cities with Radius
```json
{
"targeting": {
"geographic": {
"countries": ["US"],
"cities": [
{
"id": "2420379",
"name": "San Francisco",
"radius": 25,
"radius_unit": "MILES"
}
]
}
}
}
```
### Demographic Targeting
Demographic targeting uses simple values; no `ads_target` lookup is needed:
```json
{
"targeting": {
"demographic": {
"age_min": 25,
"age_max": 54,
"male": true,
"female": true
}
}
}
```
- `age_min` / `age_max`: 18–65 typically
- `male` / `female`: `true` to include, `false` or omit to exclude
### Combined Geo + Demographic Targeting
```json
POST /ads/{connection_id}/group
{
"organization_id": "act_123",
"campaign_id": "456",
"name": "US Adults 25-54",
"promoted": [{ "id": "789", "type": "PAGE_ID" }],
"targeting": {
"geographic": {
"countries": ["US"]
},
"demographic": {
"age_min": 25,
"age_max": 54,
"male": true,
"female": true
}
}
}
```
### Audience Targeting (Interests, Custom Audiences)
For interests and custom audiences, look up IDs first:
```bash
GET /ads/{connection_id}/target?type=interests&query=technology
GET /ads/{connection_id}/target?type=user_lists&query=my&org_id=act_123
```
Then use the `id` values in `targeting.audience`:
```json
{
"targeting": {
"audience": {
"interests": [
{ "id": "600313926646746", "name": "Technology" }
],
"custom_audiences": [
{ "id": "12345678", "name": "My Custom Audience" }
]
}
}
}
```
---
## Creating Walmart Items via Unified
URL: https://docs.unified.to/guides/creating_walmart_items_via_unified
# Creating Walmart Items via Unified
------
_July 31, 2025_
Unified allows you to create structured product listings on **Walmart Marketplace** via our Unified data model `commerce_item`. This guide explains the **critical fields** you must understand and provide correctly:
---
### 🧩 Key Concepts
| Field | Description |
| ------------- | -------------------------------------------------------------------------------------------------------------------------------------------------------------------- |
| `type` | This specifies the **Walmart subcategory** your item belongs to. It determines what metadata is required. Must be one of the supported 76 categories (see below). |
| `global_code` | This is your product's **GTIN** (Global Trade Item Number), a required identifier for Walmart. It must be a **valid 12–14 digit string**. |
| `metadata` | A dynamic array of key-value attributes that depends on the selected `type`. This is how you provide structured product details like color, material, warranty, etc. |
---
### 🧠 How Metadata Works
Each `type` (subcategory) has a corresponding schema of fields allowed by Walmart. For example:
- `animal_accessories` allows fields like `animalType`, `petSize`, `isFoldable`, `colorCategory`, etc.
- `computers` allows fields like `processorType`, `screenSize`, `ramMemory`, `operatingSystem`, etc.
**List the metadata fields from Unified** using this API
```typescript
GET /metadata_metadata?type=commerce_item
[
{
"id": "shortDescription",
"name": "shortDescription",
"slug": "shortDescription",
"format": "TEXT",
"original_format": "string",
"object_type": "commerce_item"
},
{
"id": "minimumRecommendedAge",
"name": "minimumRecommendedAge",
"slug": "minimumRecommendedAge",
"format": "MEASUREMENT",
"original_format": "{\"measure\":\"number\",\"unit\":[\"months\",\"years\"]}",
"object_type": "commerce_item"
},
{
"id": "smallPartsWarnings",
"name": "Small Parts Warning Code",
"slug": "smallPartsWarnings",
"format": "MULTIPLE_SELECT",
"original_format": "string[]",
"options": [
"0 - No warning applicable",
"5 - Choking hazard is a marble",
"4 - Choking hazard balloon",
"6 - Choking hazard contains a marble",
"2 - Choking hazard contains small ball",
"3 - Choking hazard contains small parts",
"1 - Choking hazard is a small ball"
],
"object_type": "commerce_item"
},
]
```
You can filter these results by inspecting the supported pagination options.
---
### Supported `type` Values for Walmart Items (commerce_item)
- `Skateboard Risers`
- `Baby Play Yards`
- `Power Hedge Trimmers`
- `Eyeglass Cases`
- `Microphone Splitters`
- `Electric Buffet Servers`
- `Radio Control Vehicle Servos`
- `Sticky Notes`
- `Matcha Tea Bowls & Whisks`
- `Doughs`
- `Taffy Candy`
- `Hair Dryers`
- `Base Layers`
- `Emergency Lighting`
- `Bidet Toilet Seats`
- `Purse Making Supplies`
- `Grill Grid Lifters`
- `Hunting Scents`
- `Automotive Headlight Restorer`
- `Ear Thermometer Replacement Lens Filters`
- `Glassware & Drinkware`
- `Precious Metals`
- `Lab Chromatography Paper`
- `Plant Terrariums`
- `Microphone Cables`
- `Glucose Supplements`
- `Snow Skis`
- `Perineal Cleansers`
- `Soda Maker Kits`
- `Camera Accessory Bundles`
- `Tetherball Equipment`
- `Paint Reducers & Retarders`
- `Pork Rinds`
- `Portable Basketball Systems`
- `Plate Joiners`
- `Other Weight Loss Supplies`
- `Powder Candy`
- `Outdoor Kitchen Serving & Storage Carts`
- `Unitards & Leotards`
- `Lab Sample Bags`
- `Fishing Rod & Reel Combos`
- `Adhesive Tapes`
- `Track & Field Markers`
- `Fruit & Vegetable Corers`
- `Automotive Fuel Tank Caps`
- `Drawing Boards`
- `Hand Dryers`
- `Pregnancy Tests`
- `Cat Litter Mats`
- `Facial Wipes`
- `Exercise Weights`
- `Sewing Pins`
- `Other Makeup Brushes & Tools`
- `Other Shaving Supplies`
- `Sugar Packet Holders`
- `Honey Dippers`
- `Artificial Topiaries`
- `Cupcake Making Kits`
- `Mobility Walker Bags, Baskets & Carriers`
- `Faucet Water Filters`
- `Urinary Tract Infection Test Strips`
- `Baptism Gowns & Outfits`
- `Function Generators`
- `FM Transmitters`
- `Home Brewing Refractometers`
- `Saddle Bags`
- `Track & Field Competitor Numbers`
- `Fuel Distributors`
- `Nicotine Patches`
- `Griddles & Grill Pans`
- `Planter & Stand Sets`
- `Other Pet Health Supplies`
- `Scooter Decks`
- `Knitting & Crochet Stitch Counters`
- `Camera Tool Kits`
- `Eyelash Combs`
- `Blouses & Tops`
- `Knitting & Crochet Stitch Markers`
- `Hand Tool Punches`
- `Climbing Rappel Devices`
- `Kitchen Towels`
- `Homogenizer Accessories`
- `Attendance Time Cards`
- `Digital Camera Parts`
- `Planners & Appointment Book Refills`
- `Herbal Supplements`
- `Hand-Sewing Needles`
- `Weight Bars`
- `Photography Fixers`
- `Massage Table Carrying Cases`
- `Grill Covers`
- `Other Skating Supplies`
- `Maple Syrups`
- `Pizza Stones & Pans`
- `Manual Letter Openers`
- `Water Guns`
- `Manual Can Openers`
- `Electronic Touchpads`
- `String Trimmer Replacement Parts`
- `Baby Bodysuits & One-Pieces`
- `Walking Cane & Crutch Tips`
- `Cutting Mats`
- `Throwing Knives`
- `Skins for Tablets`
- `Serving Utensils & Sets`
- `Photographic Art`
- `Soap Making Kits`
- `Athletic Shirts & Tops`
- `Ticket Rolls`
- `Fireplace Bellows`
- `Travel Plug Adapters`
- `Vacuum Sealers`
- `Small Animal Habitat Decor`
- `Vacuum Tubes`
- `Stroller Connectors`
- `Ceiling Fans`
- `Other Dancing Supplies`
- `Model Train Locomotives`
- `Electronic Cigarette Starter Kits`
- `Bicycle Baskets`
- `Golf Visors`
- `Bicycle Storage Hooks`
- `Handheld Video Games`
- `Cocktail Mixers`
- `Follow-Focus Levers`
- `Embossing Tools`
- `Incentive Charts`
- `Pressure Gauges`
- `Art Paints & Pigment Powders`
- `Replacement Water Filters`
- `Moisture Meters`
- `Other Pet Grooming Supplies`
- `Shopping Cart & High Chair Covers`
- `Nursing Pillows`
- `Disposable Cutlery Sets`
- `Heat Guns`
- `Construction Flashing`
- `Automotive Aerodynamics Kits`
- `Fire Retardants`
- `Gun Snakes`
- `Snow Removal Rakes & Hand Pushers`
- `Costume Wigs`
- `Outdoor Decorative Stones`
- `Lip Stains`
- `Workwear Uniform Badges`
- `Gut Health Tests`
- `Carbon Monoxide Alarms`
- `Cable Covers`
- `Lathe Cylindrical Rollers`
- `Hamburger Patty Makers`
- `Printing Press Accessories`
- `Automotive Light Covers & Guards`
- `Overbed Tables`
- `Artwork Cases & Portfolios`
- `Disposable Storage Bags`
- `Football Helmets`
- `Automatic Transmission Filters`
- `Live Trees`
- `Umpire Leg Guards`
- `Line Conditioners`
- `Cup & Saucer Sets`
- `Rain Barrels`
- `S`
- `,`
- `s Tapes`
- `Indoor Fireplaces`
- `Headphone Cases`
- `Battery Testers`
- `Floor Hockey Carts`
- `T-Shirts`
- `Dunun Drums`
- `Speed Reducers`
- `Percussion Mallets`
- `Pallet Covers`
- `Telescope Cases`
- `Automotive Grilles`
- `Fencing Sport Epee Parts`
- `Emergency Food Kits`
- `Sports Corner Flags`
- `Bird Nests & Nesting Material`
- `Boxing Rings`
- `Paper Sorters`
- `Lollipop & Treat Sticks`
- `Cabin Air Filters`
- `Pool Covers`
- `Video Game Dance Pads`
- `Football Sleds & Chutes`
- `Clay & Dough Extruders & Presses`
- `Baseball Gloves & Mitts`
- `Yeasts & Leaveners`
- `Skins for Aerial Drones`
- `Replacement Faucet Water Filters`
- `Other Electronic Components & Accessories`
- `Lab Coats`
- `Laser Detectors`
- `Baseball Sliding Shorts`
- `Hunting Game Finders`
- `Rain & Snow Gauges`
- `Shapewear Bodysuits`
- `Toiletry Kits & Bags`
- `Photo Enlarger Heads`
- `Athletic Outfit Sets`
- `Combustion Analyzers`
- `Personal Organizer Refills & Accessories`
- `Harmonic Exciters`
- `Billiard Table Felt`
- `Video Game Console Parts`
- `Ham Radio Transceivers`
- `Baby Juices`
- `Hot Dog Machines`
- `Pipe Inspection Cameras`
- `Misting Systems`
- `Sleeping Bag Liners`
- `Kids Gardening Tools`
- `Camera Film Winders`
- `Other Billiard Supplies`
- `Ergonomic Backrests`
- `Balloon Pumps`
- `Lump Charcoals`
- `Pilates Barrels`
- `Surfing Leashes`
- `Dart Shafts`
- `Makeup Blotting Paper`
- `Eye Masks`
- `Welding Helmets`
- `Electronic Coils`
- `Energy Drinks`
- `Push-Up Stands`
- `Photography Stop Baths`
- `Handbag Hook Hangers`
- `Network Security Devices`
- `Stitch Holders`
- `Bicycle Pegs`
- `Outdoor Daybeds`
- `Party Favors`
- `Canning Kits`
- `Molding & Casting Materials & Kits`
- `Musical Instrument Bodies`
- `Other Games`
- `Electrolyte Solutions`
- `Fruit & Wine Crushers & Destemmers`
- `Power Inverters`
- `Jewelry Jump Rings & Split Rings`
- `Table Tennis Paddles`
- `SIM Card Backup Devices`
- `Tie Pins`
- `Billiard Tables`
- `Archery Broadheads`
- `Vehicle Windshields`
- `Jock Straps`
- `Pet Live Animals`
- `DC-to-DC Converters`
- `Transport Drums`
- `Vinyl Figures`
- `Entertainment Centers`
- `Fireplace Tools`
- `Serving Forks`
- `Nut Splitters`
- `Blasters & Foam Play`
- `Garden Border Edging`
- `Gun Holsters & Holders`
- `Spice Racks & Organizers`
- `Stamps & Stamp Sets`
- `Udu Drums`
- `Reception Chairs & Seating`
- `Pepper & Peppercorns`
- `Golf Drivers`
- `CC Cream`
- `Yoga Socks`
- `Vacuum Cleaner Attachments`
- `Planter Liners`
- `Pie & Pastry Fillings`
- `Bed Skirts`
- `Dart Carrying Cases & Wallets`
- `Pizza Ovens`
- `Crepe Spreaders`
- `Hex Tools`
- `Stretch Film & Shrink Wrap`
- `Massage Headrests`
- `Electronics Carrying Cases`
- `Dust Collectors`
- `Decorative Stones`
- `Yoga Straps`
- `Espresso Machines`
- `Lab Face Masks & Shields`
- `Guitar Effects Pedals`
- `Hockey Hip Pads`
- `Pressure Cookers & Canners`
- `Diabetic Foot Care`
- `Nail Top Coat`
- `Wax Molding Materials`
- `Dock Guards`
- `Decoupage Tools & Sets`
- `Rugby Balls`
- `Bra Back Adapters`
- `Other Backyard Wildlife Supplies`
- `Food Peelers`
- `Modular Synthesizers`
- `Mirror Balls`
- `Cricket Wickets`
- `Snatch Rigging Blocks`
- `Rowing Shells`
- `Staple Gun Staples`
- `Golf Rangefinders`
- `Waterbed Liners`
- `Beer Glasses`
- `KVM Switches`
- `Panel Carriers`
- `Sanding Frames`
- `First Aid Tape`
- `Hand Pruners & Loppers`
- `Reusable Training Pants`
- `Outdoor Spas`
- `Air Hockey Pucks`
- `Cat Trees`
- `Surgical Gowns`
- `Baseball Protective Screens`
- `Artificial Plants`
- `Basting Brushes`
- `Archery Arrows`
- `Calibration Weights`
- `Laptop Computers`
- `Chalkboard Chalk`
- `Nasal Aspirators`
- `Instant Coffee`
- `Vanity Tables & Table & Bench Sets`
- `Printer Drums`
- `Automotive Body Paint`
- `Paraffin Treatment Hand & Foot Mitts`
- `Stovetop Espresso Pots`
- `Robotic Lawn Mowers`
- `Phone Grips`
- `Hammock Chairs`
- `Home Brewing Kegs & Keg Supplies`
- `Dishwasher Rack Adjusters`
- `Sculpting Tools & Kits`
- `Mattocks & Pickaxes`
- `Watch & Clock Hands`
- `Umpire Bags`
- `Other Lighting Accessories`
- `Lab Shaker Accessories`
- `Print Servers`
- `Home Brewing Beer Bottle Trees`
- `Football Hand Warmers`
- `Spectrum Analyzers`
- `Hair Perms & Texturizers`
- `Lab Glassware Washers`
- `Trailer Weight Distributing Systems`
- `Digital Cameras`
- `Drum & Pail Mixers`
- `Porch Swings`
- `Gun Choke Tubes`
- `Pet Milk Replacers`
- `Fabric Paints`
- `Other Kiteboarding Accessories`
- `Paper Cups`
- `Bottle Pourers`
- `Golf Divot Tools`
- `Aquarium Cleaning Tools`
- `Fishing Vest & Packs`
- `Die-Cut Cartridges`
- `Kiteboard Control Bars`
- `Welding Tips`
- `Food Tongs`
- `Corn & Callus Remover Cushions`
- `Cocktail Shakers`
- `Inspection Mirrors`
- `Fruit Snacks`
- `Kayak Storage Racks`
- `Cycling Vests`
- `Field Hockey Goggles`
- `Breathalyzer Alcohol Monitors`
- `Dry Erase Markers`
- `Racquet Sport Stringing Machines`
- `Gun Swivels`
- `Power Tool Chargers`
- `Home Brewing Sanitization Kits`
- `Ice Cream, Sorbet & Frozen Yogurt`
- `Underwater Cameras`
- `Hair Color Stain Shields`
- `Roof Gutter Accessories`
- `Bicycle Brake Rotors`
- `Repinique Drums`
- `Camera Film Backs & Holders`
- `Automotive Cigarette Lighters & Plugs`
- `Meal Kits`
- `Lathe Cole Jaws`
- `PBX Phone Systems`
- `Face Serums`
- `Exercise Treadmills`
- `Lawn Sweepers`
- `Sunglasses Replacement Lenses`
- `Pipe Fitting Reducers`
- `Microphone Pop Filters`
- `MiniDisc Players`
- `Audio/Video Cables`
- `Hand Sanitizers`
- `Nail Pullers`
- `Traditional Salwar Kameez`
- `Other Air Tool Accessories`
- `Cymbal Pads`
- `Automotive Winch Mounting Systems`
- `Laptop Bags`
- `Contour Makeup Set`
- `Puzzle Cubes`
- `Plant Covers`
- `Empty Paint Cans`
- `Tableware Knives`
- `Storage Sheds`
- `Window & Door Frames`
- `Paper Plates`
- `Calculator Accessories`
- `Shaving Sets`
- `Microphone Preamplifiers`
- `Baby Feeding Chairs`
- `Rain Ponchos`
- `Aquarium Thermometers`
- `Mini Helmets`
- `RV Awnings`
- `Lawn & Garden Sprayers`
- `Car CD Changers`
- `Selfie Sticks`
- `Calibration Standard Rods`
- `Lab Chromatography TLC Developing Tanks`
- `Poultry Treats`
- `Mechanical Pencil Refills`
- `Dip Stands`
- `Drinkware Accessories`
- `Artist Manikins`
- `Leathercraft Kits`
- `Metalworking Spring Plungers`
- `Marquee Signs`
- `Craft Dyes`
- `Wakesurf Boards`
- `Pool Safety Supplies`
- `Pedal Boats`
- `Snack Crackers`
- `Jewelry Cleaning Machines`
- `Party Supply Sets`
- `Other Decking & Fencing Hardware`
- `Motorcycle Glasses`
- `Art Smocks`
- `Archery Nocks`
- `Diving Regulators`
- `Camera Flash Snoots`
- `Martial Arts Weapon Stands`
- `Automotive Wiper Nozzles`
- `Tea Cozies`
- `Stadium Seats & Cushions`
- `Bear Protection`
- `Flagpole Brackets & Mounts`
- `Patio Umbrella Base Weights`
- `Stretch Film & Shrink Wrap Dispensers`
- `Punching Bag Hangers`
- `Track Lighting Sets`
- `Wheel Chocks & Stops`
- `Itching & Rash Treatments`
- `Automotive Rims`
- `Tire Pressure Gauges`
- `Hair Crimping Irons`
- `Baker`
- `s Helmets`
- `Curtains & Valances`
- `Aquarium Starter Kits`
- `Body Muds`
- `Body Piercing Retainers`
- `Hockey Chest Protectors`
- `Diving Boards`
- `Small Engines`
- `Pet Sofa & Chair Protectors`
- `Tent Accessories`
- `Pedal Covers`
- `Appliance Covers`
- `Vegetable Dips`
- `Hockey Shin Pads`
- `Acne Creams`
- `Mobility Aid Steps`
- `Quilting Frames`
- `Water Heaters`
- `Sound Pressure Level Meters`
- `Glider Rocking Chairs`
- `Punching Bags`
- `Nail Ridge Filler`
- `Yoga Gloves`
- `Jewelry Stringing Materials`
- `Dishwasher Rack Rollers`
- `Other Hair Removal Supplies`
- `Agility Ladders`
- `Watch Winders`
- `Blender Pitchers`
- `Hand Tampers`
- `Dehumidifier Accessories`
- `Punch Bowl Sets`
- `Mini Projectors`
- `Drinkware Sets`
- `Evaporated Milks`
- `Spoon Rests`
- `Juggling Toys`
- `Mixed Spices & Seasonings`
- `Bicycle Child Seats`
- `Water Coolant Systems`
- `Jai Alai Sets`
- `Surveillance Camera Lenses`
- `Chain Hoists`
- `Snack Pudding & Gelatin`
- `Hair Curling Wands`
- `Spa Cover Lifts`
- `Track Lighting Heads`
- `Photo Enlargers`
- `Photo Enlarger Lenses`
- `Plant Cages`
- `DJ Mixers`
- `Condiment Servers`
- `Electric Kettles`
- `Glass Raw Materials`
- `Radio Antennas`
- `Bicycle Front & Rear Racks`
- `Body Oils`
- `ATV Tires`
- `RAM Memory`
- `Pet Toothpaste`
- `Dressing Aid Sticks`
- `Coconut Knives`
- `Sports Pole Holders & Bases`
- `Dock Steps`
- `Bath Toy Storage`
- `Martial Arts Belts`
- `Currency Bands & Straps`
- `Outdoor Playsets`
- `Video Switchers`
- `Brake System Replacement Parts & Hardware`
- `Tennis Shorts`
- `Facial Treatments`
- `Athletic Compression Socks`
- `Brake Booster Filters`
- `Other Knitting & Crochet Supplies`
- `Martini Glasses`
- `Personal Organizers`
- `pH Meters`
- `Parchment Paper`
- `Other Gift Wrapping Supplies`
- `Leathercraft Accessories`
- `Rod Hockey`
- `House Numbers & Letters`
- `Toaster Pastries`
- `Anti-Chafing Creams`
- `Sunshine Recorders`
- `Makeup Sets`
- `Baby Jumping Exercisers`
- `Replacement Appliance Knobs`
- `Hair Removal Waxing Strips`
- `Toaster Ovens`
- `Electric Crepe Makers`
- `Kiteboard Control Lines`
- `Camera Cleaning Equipment`
- `Body Piercing Jewelry`
- `Weatherproofing Pipe Coverings`
- `Plant Misters`
- `Rosin Bags`
- `Plastic Cups`
- `Baby Bouncer & Rocker Chairs`
- `Washing Machines`
- `Ground Coffee`
- `Gun Mounts`
- `Remote Controls`
- `Medicine Dosing Containers`
- `Chainsaw Chains`
- `Climbing Slings`
- `Basketball Storage`
- `Writing Notebooks & Sketch Books`
- `Thermometer Probe Covers`
- `Wall Calendars`
- `Power Tool Batteries`
- `Corded Phones`
- `Desk Lamps`
- `Network-Attached Storage Servers`
- `Slatwall Panels`
- `Golf Push & Pull Carts`
- `Media Storage Cabinets`
- `Stovetop Waffle Irons`
- `Pet Tie-Outs`
- `Toilet Paper Holders`
- `Boating Heads`
- `Movie Cameras`
- `Vanity Lights`
- `Plaques & Signs`
- `Decorative Bottles`
- `Art Paint Sponges`
- `Kayak Carts`
- `Radar Detectors`
- `Outdoor Bar Stools`
- `Piggy Banks & Money Jars`
- `Fog Machines`
- `Food Storage Jars & Containers`
- `Pet ID Tags`
- `Salad Serving Utensils`
- `Bath Rugs`
- `Water Distillers`
- `Sewing Bias Tape`
- `Racquet Vibration Dampeners`
- `Live Shrubs`
- `Cable Tie Guns`
- `Floating Shelves`
- `Empty Camping Stove Fuel Bottles`
- `Toy Billiards`
- `Water Diverters`
- `Powdered Baking Cocoa`
- `Card Shufflers`
- `Tool Sets`
- `Paper Holders & Dispensers`
- `Bed-in-a-Bag`
- `Rail Planters`
- `Glass Markers & Stemware Charms`
- `Poison Ingestion Treatments`
- `Sewing Baskets`
- `Decorative Boxes`
- `Play Tents`
- `Oke Daiko Drums`
- `One-Piece Swimsuits`
- `Bicycle Stands`
- `Photography Flash Heads`
- `Yogurt Makers`
- `Field Hockey Goalie Hand Protectors`
- `Window Shades`
- `Camera Battery Grips`
- `Hunting Game Hoists & Gambrels`
- `Sunglass Visor Clips`
- `Christmas Trees`
- `Edge & Corner Guards`
- `Golf Carts`
- `Screen Houses`
- `Tent Poles`
- `Fish Cleaning Tables`
- `Bicycle Saddle Covers`
- `Plant Seeds`
- `Geographic Globes`
- `Jewelry Making Chain`
- `Figurines & Knick-Knacks`
- `Binder Insert Strips`
- `Hair Clipper Blades`
- `Nutrition Drinks`
- `Musical Bow Cases`
- `Glue Guns`
- `Breast Tape`
- `Automotive Lift Supports`
- `Acoustic Guitars`
- `Therapeutic Light Boxes`
- `Stovetop Espresso Pot Replacement Gaskets & Filters`
- `Beverage Tubs`
- `Lifeguard Swimsuits`
- `Other Backpacking & Camping Supplies`
- `Napkin Rings`
- `Staple Removers`
- `Gravy Boats, Stands & Sets`
- `Bath Pillows`
- `Easter Eggs`
- `Cut Flowers`
- `Traditional Abayas`
- `Air Guns`
- `Electric Fence Insulators`
- `SIM Cards`
- `Oven Mitts`
- `Gun Barrels`
- `Automotive Skid Plates`
- `Sport Starter Pistols`
- `Personal Misters`
- `Telescope Eyepiece & Filter Sets`
- `Cell Phone Radiation Guards`
- `Snowmobile Riser Blocks`
- `Football Target Nets`
- `Memory Card Adapters`
- `Mobility Walkers`
- `Ice Buckets`
- `Skins for Vape Pens`
- `Electrical Ballasts`
- `Bicycle Frames`
- `Cheese Wax`
- `Whole Bean Coffee`
- `Tennis Rebounders`
- `Plaster Hawks`
- `Dance Shoes`
- `Pizza Crusts`
- `Other Fireplaces Accessories`
- `Epoxy Coatings`
- `Automotive Trailers`
- `Gift Wrap Paper`
- `Material Handling Securing Straps`
- `Disposable Cameras`
- `Small Animal Exercise Wheels`
- `Hall Trees`
- `Cash Boxes`
- `Sprinkler Valves`
- `Renewable Energy Controllers`
- `Impact Drivers`
- `Home Brewing Grain & Hop Bags`
- `ATV Cargo Storage`
- `Bicycle Derailleurs`
- `Darkroom Squeegees`
- `Lens Supports`
- `Roller Stands`
- `Breath Fresheners`
- `Leaf & Plant Cleaner`
- `Cricket Balls`
- `Automotive Bumpers`
- `Other Baby Safety Supplies`
- `Confetti Poppers`
- `Swimsuit Sets`
- `Manual Pencil Sharpeners`
- `Toilet Bowls`
- `Art & Blueprint Tubes`
- `Air Fryer Liners`
- `Other Bicycle Parts`
- `Gymnastics Hand Grips`
- `Garlic Presses`
- `GPS Software`
- `Banana Hangers`
- `Animal Grooming Scissors`
- `Dining Tables`
- `DAT Recorders`
- `Decorative Bowls`
- `Dustpans & Dustpan & Brush Sets`
- `Racquet Sport Racquets`
- `Lap Guitars`
- `Construction Siding`
- `Baking Cups`
- `Hair Extensions`
- `Starting Fluid`
- `Chemical Solvents`
- `Pet Training Pad Trays`
- `Fishing Hook Sharpeners`
- `Other Construction Heating & Cooling Supplies`
- `Air Press Coffee Makers`
- `Playground Merry-Go-Rounds`
- `Clothes Iron Rests`
- `Coffee Drippers`
- `Microscope Mechanical Stages`
- `Makeup Palettes`
- `Fish Poachers & Bakers`
- `Power Screwdrivers`
- `Other Bowling Supplies`
- `Hardware Bolts`
- `Gymnastics Rings`
- `Other Occupational Health`
- `Automotive Glow Plugs`
- `Gun Stocks`
- `Ice Fishing Spearing Equipment`
- `Light Timers`
- `Plant Pots & Planters`
- `Camera Rain Covers`
- `Table Place Cards`
- `Door Closers`
- `Commercial Refrigerators`
- `Home Brewing Beer Bottle Caps`
- `Badge & ID Holders`
- `Interdental Brushes`
- `Facial Self-Tanners`
- `Archery Finger Tabs`
- `Hand Drills`
- `Cooking Sauces & Marinades`
- `Conductor`
---
## Walmart Category Metadata Field Mapping
Use this table to understand what metadata fields are allowed for each `type` when creating items via Unified. Please note that these metadata fields are optional, while some categories do need specific metadata fields
[file](https://s3.us-east-2.amazonaws.com/unified-article-images/creating_walmart_items_via_unified-file-0-walmart_schema_fields.md)
---
### Sample Payload
```json
{
"name": "Wireless Earphones with Advanced Features",
"slug": "09876543210987",
"global_code": "06146190200012",
"type": "Exterior Automotive Accessories",
"description": "Totally wireless earphones are built to revolutionize your workouts. The adjustable, secure-fit earhooks are customizable for extended comfort and stability. A reinforced design for sweat and water resistance lets you take it to the next level. Each earbud has full volume and track controls and up to 9 hours of listening time to fuel your training with powerful, balanced sound.",
"media": [
{
"url": "https://i5.walmartimages.com/seo/onn-Wireless-Bluetooth-on-Ear-Headphones-Black-New_07de2d93-505b-4902-8366-388a3f30e3b4.9375c5690645733ec080eef3f4895f7b.jpeg"
}
],
"vendor_name": "Walmart",
"variants": [
{
"sku": "09876543210987",
"weight": 0.57,
"prices": [
{
"price": 249.99
}
]
}
],
"metadata": {
"productName": "Wireless Earphones with Advanced Features",
"brand": "Walmart",
"keyFeatures": [
"Designed to keep up with your workouts",
"Reinforced design for sweat and water resistance with adjustable, secure-fit earhooks for added comfort and stability.",
"Stay connected from a distance with Bluetooth technology, these wireless earphones deliver extended range and fewer dropouts.",
"Powers through long hours of training"
],
"countPerPack": 1,
"multipackQuantity": 1,
"isProp65WarningRequired": "No",
"condition": "New",
"has_written_warranty": "Yes - Warranty Text",
"netContent": {
"productNetContentMeasure": 1,
"productNetContentUnit": "Each"
},
"productSecondaryImageURL": [
"https://i5.walmartimages.com/seo/onn-Wireless-Bluetooth-on-Ear-Headphones-Black-New_07de2d93-505b-4902-8366-388a3f30e3b4.9375c5690645733ec080eef3f4895f7b.jpeg"
],
"assembledProductLength": {
"measure": 4.33,
"unit": "in"
},
"assembledProductHeight": {
"measure": 4.33,
"unit": "in"
},
"assembledProductWeight": {
"measure": 0.57,
"unit": "lb"
},
"assembledProductWidth": {
"measure": 3.15,
"unit": "in"
},
"prop65WarningText": "No",
"manufacturer": "Walmart",
"manufacturerPartNumber": "WM123456",
"count": 1,
"warrantyText": "1 Year",
"color": "Blue",
"aaiaBrandID": "WMTB",
"vehicle_fitment_type": "Specific"
},
"options": {}
}
```
**NOTE**: If item creation **fails** or takes **too long** to process, the **`feed ID`** and any **`error details`** will be returned in the error response.
⚠️ **Important Note on Reading** **`commerce_item`** **Data via Walmart's GET and LIST APIs**
When using Walmart's **GET** or **LIST** endpoints to retrieve `commerce_item` records (i.e., your catalog items), **you will only receive a subset of the full item**. This limitation is imposed by Walmart's public Marketplace APIs and is not configurable.
### What's Missing?
- Fields defined in the **`Visible`** section of your original item feed (e.g., `animalLifestage`, `assembledProductWeight`, `features`, `fabricContent`, etc.) will **not be returned** in full.
- Walmart truncates or omits many **category-specific structured attributes**.
### Why This Happens:
Walmart's GET/LIST endpoints are designed for high-level overviews or simple listing needs, not for reconstructing detailed item payloads. They surface:
- Basic identifiers (e.g., SKU, productName)
- Core logistics info (e.g., price, inventory, brand)
- A _limited set_ of visible attributes
## End-Users, Integrations, and Connections
URL: https://docs.unified.to/guides/end_users_integrations_and_connections
# End-Users, Integrations, and Connections
------
_April 18, 2024_
This guide explains how connections work at [Unified.to](https://unified.to/) and shows you different ways to create connections for your application. You'll learn about the relationship between your end-users, connections, and integrations, as well as how to get started quickly with test connections.
## Overview
At Unified.to, there are three key concepts to understand:
1. **Integrations** - These are the bridges between your application and third-party platforms (a.k.a SaaS apps). These are pre-built for you!
2. **Connections** - These are the authorized links between your end-users and specific integrations
3. **End-users** - These are your application's users whose data you will access from their accounts i.e. HubSpots, Salesforce, Shopify, and so on.
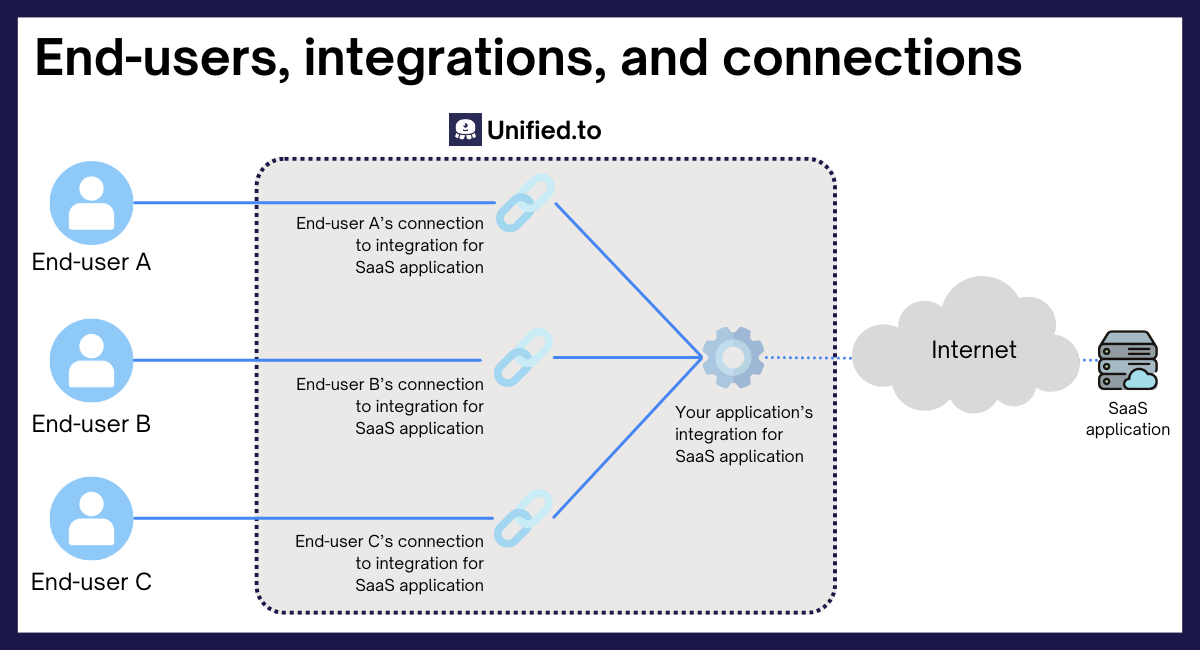
## Understanding integrations
Your application communicates with a SaaS application through an integration.
### Activating an integration in the sandbox environment
1. Navigate to **Integrations** at [app.unified.to/integrations](https://app.unified.to/integrations)
2. Search for the integration you want to use
3. Click on the integration card to view its details
1. For sandbox environment integrations, you don't need to enter any real credentials here.
4. Click **Activate**
All data is synthetic in the sandbox environment, meaning you don't need to sign up for any third-party accounts while you're testing the Unified.to platform.
[Learn more about the sandbox environment →](https://docs.unified.to/concepts/sandbox)
### Activating an integration in production environments
To activate an integration in production environments, you'll need developer credentials from the platform you're integrating with.
### Developer credentials
When activating an integration, you'll be asked to provide credentials like API keys or OAuth 2.0 client IDs and secrets. These credentials should come from **your developer account** with the platform, not your end-users' accounts. Here's how it works:
1. You register your application with the platform (e.g., create a HubSpot developer account and register your app)
2. You receive developer credentials that identify your application
3. You enter these credentials when activating the integration on Unified.to
4. Your end-users will later authorize your application to access their accounts, with or without using their own credentials (depends on the type of auth flow)
For example, if you're building an interview scheduling platform that needs to access your clients' Zoho CRM data:
- You use **your** Zoho developer account credentials to activate the integration
- Your **end-users** will authorize access to their Zoho CRM accounts when creating connections by consenting to give you access to their data
## Understanding connections
Your end-users are connected to integrations through connections_._
A connection is an authorized link between one of your end-users and a specific integration. For example, if your application needs to access a user's HubSpot account, you'll need:
1. The HubSpot integration to be activated in your workspace
2. A connection between that specific user and HubSpot
3. The correct scope configuration for what data you need to access
Each user needs their own connection to each integration you want to use. This ensures proper authorization and data isolation between users.
### About scopes
Scopes determine what data your application can access in your end-users' accounts. You need to:
1. Configure the correct scopes in your developer account with the platform
2. Select the corresponding Unified.to scopes when setting up your integration
For example, if you need to read CRM contacts, you would request the `crm_contact_read` scope. Unified.to has its own set of scopes (called Unified scopes) which have been mapped to the corresponding scopes for every single integration that needs them. When requesting scopes, you only need to pass in Unified scopes in addition to enabling those scopes in your developer account.
[Learn more about configuring scopes →](https://docs.unified.to/concepts/scopes)
## How to create connections
There are three main ways to create connections in Unified.to, each suited for different scenarios:
### 1. Development and testing: Create test connections in the sandbox environment
This is the fastest way to get started and test integrations:
1. Switch to the **Sandbox** environment in the Unified.to app
2. Go to the **Connections** page
3. Click **Create test connection**
4. Select any activated integration you want to test
Test connections are created instantly with mock credentials, perfect for development and testing.
### 2. Production ready: Use the Authorization embedded component
This is the recommended approach for production-ready applications:
1. Navigate to the [**Embedded Authorization**](https://app.unified.to/embed) page
2. Configure your callback settings, permission scopes, and display options
3. Copy the provided code snippet for your preferred tool (React, Angular, Vue, vanilla JavaScript, or an API call)
4. Add the code to your application
5. The Authorization component will be rendered on your app. When users click an integration's logo, they'll be guided through the authorization process
Example code for React:
```javascript
import UnifiedDirectory from '@unified-api/react-directory';
function App() {
return (
);
}
```
### 3. Custom implementation: Build your own authorization flow
For greater control over the user experience:
1. Fetch available integrations using the Unified API
2. Create authorization URLs for selected integrations
3. Handle authorization callbacks
4. Manage connection IDs
This approach requires slightly more implementation work but offers more flexibility. You can find a [complete tutorial for this approach in our documentation](https://docs.unified.to/tutorials/customize-auth-flow).
## Best practices
- **Always test in Sandbox first**: Use test connections to validate your integration logic
- **Store connection IDs securely**: Never store connection IDs in client-side storage in production
- **Handle authorization failures gracefully**: Provide clear feedback when connection attempts fail. Users will be redirected to the failure URL you specified during configuration. [Learn more about handling failure callbacks here](https://docs.unified.to/guides/how_to_troubleshoot_unhealthy_connections#handle-errors-during-connection-creation).
- **Monitor connection health**: Set up [webhook notifications](https://app.unified.to/settings/workspace) for connection status changes
- **Re-authorize instead of recreating**: When a connection becomes unhealthy, ask the end-user to [re-authorize the existing connection](https://docs.unified.to/concepts/embedded-components#re-authorize-an-existing-connection). It keeps the same connection ID, so you don't end up with duplicate connections or need to update stored IDs and webhooks
- **Configure scopes correctly**: Request only the permissions your application needs
- **Use separate environments**: Keep your development and production environments separate
## Troubleshooting
Common issues and solutions:
### Connection creation fails
- Verify your developer credentials are correct
- Check that required scopes are configured both in your platform developer account and Unified.to
- Ensure redirect URLs are properly set up in your platform developer settings
### Authorization flow issues
- Confirm your integration is activated
- Verify environment settings (Sandbox vs Production)
- Check that scopes match between your platform developer account and Unified.to
### A working connection becomes unhealthy
- Check the [API Call Logs](https://app.unified.to/logs) for the connection to find the error (usually `401` or `403`)
- Fix the cause (for example, restore your app's access or correct the scopes)
- [Re-authorize the existing connection](https://docs.unified.to/concepts/embedded-components#re-authorize-an-existing-connection) rather than creating a new one. It keeps the connection's current permissions unless you pass `scopes`, so include `scopes` if you corrected them
For more guidance, see: [How to troubleshoot unhealthy connections](https://docs.unified.to/guides/how_to_troubleshoot_unhealthy_connections)
## Next steps
- Try creating your first test connection in the sandbox environment
- Explore our [Quickstart guide](https://docs.unified.to/quick-start) for a hands-on example
- Read our detailed guide on [understanding and configuring scopes](https://docs.unified.to/concepts/scopes)
## Enriching Unified Objects with Custom Metadata
URL: https://docs.unified.to/guides/enriching_unified_objects_with_custom_metadata
# Enriching Unified Objects with Custom Metadata
------
_July 23, 2025_
## Overview
The metadata_metadata object is a powerful addition to the Unified data model. It enables the definition of **metadata schemas (custom fields)** that can be attached to various unified objects—such as `commerce_item`, `ats_job`, `hris_employee`, and more.
This document explains its structure, how to use it effectively, and best practices for managing dynamic metadata across models.
---
## Purpose
`metadata_metadata` serves as a **schema registry** for custom fields, allowing users to enrich objects with reusable, structured metadata. These definitions dictate the format and structure of metadata values that live inside the `metadata` field of supported Unified objects.
---
## Object Structure
```typescript
interface IMetadataMetadata {
id?: string;
created_at?: (string | Date | number);
updated_at?: (string | Date | number);
name: string; // Required
slug?: string;
format?: string; // One of the supported formats
original_format?: string;
options?: string[];
object_type: string; // e.g. 'commerce_item', 'ats_job'
objects?: { [objectType: string]: string[] }; // Map of object_type to object IDs
}
```
---
## Key Concepts
### `object_type`
This specifies the **unified model** the metadata is associated with. Examples include:
- `"commerce_item"`
- `"ats_job"`
- `"hris_employee"`
- Other Unified Objects
> When listing metadata_metadata entries, you can filter by **type**, which corresponds to the object_type.
---
### `format`
Defines the data type for the metadata field. Supported formats include:
- `'TEXT'`
- `'NUMBER'`
- `'DATE'`
- `'BOOLEAN'`
- `'FILE'`
- `'TEXTAREA'`
- `'SINGLE_SELECT'`
- `'MULTIPLE_SELECT'`
- `'MEASUREMENT'`
- `'PRICE'`
- `'YES_NO'`
- `'CURRENCY'`
- `'URL'`
---
### `objects`
A mapping of object types to the specific object IDs where this metadata is currently applied.
**Example:**
```json
{
"objects": {
"commerce_item": ["item1", "item2"],
"ats_job": ["job1"]
}
}
```
This makes it easy to track which unified records are using each metadata definition.
---
## Usage in Unified Objects
Each unified object includes a `metadata` array, where each entry corresponds to a metadata definition from the `metadata_metadata` registry.
### Example: `IAtsJob`
```javascript
interface IAtsMetadata {
id?: string;
slug?: string;
value?: unknown;
namespace?: string;
format?: string;
extra_data?: unknown;
}
interface IAtsJob {
...
metadata?: IAtsMetadata[];
...
}
```
---
## Workflow Example
### Step 1: Create a `metadata_metadata` Definition
To begin, define the metadata schema by providing **only** the following required fields:
- `name`: Human-friendly label
- `slug`: Unique programmatic identifier (Picked up from name if not given)
- `format`: Expected data format (e.g., `"TEXT"`, `"NUMBER"`, etc.)
```json
POST /metadata_metadata
{
"name": "Binding Mount",
"slug": "binding_mount",
"format": "TEXT"
}
```
---
### Step 2: Review the Created Metadata
Once the metadata is created, the full record might look like this (after automatic enrichment):
```json
GET /metadata_metadata/1
{
"id": "1",
"name": "Binding Mount",
"slug": "binding_mount",
"format": "TEXT",
"original_format": "single_line_text_field"
}
```
---
### Step 3: Attach Metadata to a Unified Object
```json
PATCH /commerce_item/7
{
"metadata": [
{
"id": "1",
"slug": "binding_mount",
"value": "Optimistic"
}
]
}
```
Make sure the id / slug match the schema created in Step 1.
### Step 4: Review the Metadata Again
Once the metadata is used in a Unified object, the full record might be updated to look like this:
```json
GET /metadata_metadata/1
{
"id": "1",
"name": "Binding Mount",
"slug": "binding_mount",
"format": "TEXT",
"original_format": "single_line_text_field",
"object_type": "commerce_item",
"objects": {
"commerce_item": ["7"]
}
}
```
This shows the metadata definition has been associated with the unified object type `commerce_item` and is linked to object with ID `7`.
---
## CRUDL Support
Full **Create, Read, Update, Delete, and List** operations are supported on `metadata_metadata`. This enables:
- Schema-driven form builders
- Reusable definitions across multiple objects
- Consistent data validation and audit trails
---
## Use Cases
| Use Case | Example |
| --------------------------------- | -------------------------------------- |
| Custom field on ATS Job | `"interview_style": "technical panel"` |
| Enrich commerce item with specs | `"binding_mount": "Optimistic"` |
| Add legal identifiers to employee | `"national_id": "IN123456"` |
## Enterprise-managed authorization (EMA) with a static key
URL: https://docs.unified.to/guides/enterprise_managed_authorization_ema_with_a_static_key
# Enterprise-managed authorization (EMA) with a static key
------
_September 22, 2026_
Use a key pair that you generate yourself to sign enterprise-managed authorization assertions. Register only the public key on the trusted issuer, with key source Static Key. Keep the private key on your backend. Unified.to verifies each assertion against that one public key.
> ⚠️ Paste a PEM that starts with -----BEGIN PUBLIC KEY-----. A PKCS#1 block (-----BEGIN RSA PUBLIC KEY-----) or a private key will fail verification. There is only one registered key, so replacing it stops the previous private key immediately.
## Before you start
- You are a workspace admin.
- This key source is for assertions you sign. It does not use the workspace secret or a JWKS URL.
- Supported algorithms: RS256, RS384, RS512, PS256, PS384, PS512, ES256, ES384, and ES512. RS256 is the usual choice. HS256 is only for the Workspace secret key source.
## 1. Turn the feature on
In the app, open Settings, then Enterprise Auth. Turn Enterprise-Managed Authorization on and save.
On EU or AU, use api-eu.unified.to or api-au.unified.to. The audience and resource claims later in this guide must use that same host.
## 2. Generate a key pair
Generate an RSA key on your backend and export the public key in SPKI form. Store `private.pem` where your signing code can read it. Do not send it to Unified.to.
```shell
openssl genpkey -algorithm RSA -pkeyopt rsa_keygen_bits:2048 -out private.pem
openssl pkey -in private.pem -pubout -out public.pem
```
`public.pem` is the value you will paste as the static public key. It looks like this:
```plain text
-----BEGIN PUBLIC KEY-----
MIIBIjANBgkqhkiG9w0BAQEFAAOCAQ8A...
-----END PUBLIC KEY-----
```
## 3. Add a trusted issuer
On Enterprise Auth, choose 'Add trusted issuer' and set:
- Topology: Brokered (ISV)
- Issuer (iss): the exact issuer string you will put in the assertion, for example https://your-app.example
- Key source: Static key
- Static public key (PEM): the full contents of public.pem, including the BEGIN and END lines
- Allowed client IDs: leave blank for a brokered issuer
- Default scopes: the categories the token should receive when the assertion has no scope, for example crm.read
- Just-in-time identity mapping: on, if you want Unified.to to match the assertion email to a workspace user
- Enabled: on
The same record over the API. Put the PEM in static_public_key as one string, with newline characters:
```shell
curl -X POST https://api.unified.to/unified/enterprise-auth/trusted-issuers \
-H "Authorization: Bearer $UNIFIED_WORKSPACE_API_KEY" \
-H "Content-Type: application/json" \
-d '{
"mode": "isv_brokered",
"issuer": "https://your-app.example",
"key_source": "static_key",
"static_public_key": "-----BEGIN PUBLIC KEY-----\nMIIBIjANBgkqhkiG9w0BAQEFAAOCAQ8A...\n-----END PUBLIC KEY-----\n",
"default_scopes": ["crm.read"],
"jit_enabled": true,
"enabled": true
}'
```
A Direct (XAA) issuer can also use Static key. It still needs a non-empty Allowed client IDs list, and each assertion must include a client_id from that list.
## 4. Sign an assertion
Sign with the private key. The header typ must be oauth-id-jag+jwt. The alg must be one of the algorithms listed above and must match the key (RS256 for the RSA key from step 2).
```javascript
const fs = require('fs');
const jwt = require('jsonwebtoken');
const assertion = jwt.sign(
{
resource: 'https://api.unified.to',
email: 'user@your-customer.com',
scope: 'crm.read crm.write',
jti: 'assertion-' + Date.now(),
},
fs.readFileSync('private.pem'),
{
algorithm: 'RS256',
issuer: 'https://your-app.example',
audience: 'https://api.unified.to',
subject: 'customer-user-1',
expiresIn: '5m',
header: { alg: 'RS256', typ: 'oauth-id-jag+jwt' },
}
);
```
Required claims:
- iss matches the trusted issuer string exactly
- aud is the API origin, such as https://api.unified.to
- resource is that same origin for REST calls, or that origin plus /mcp for MCP calls. A token for one resource is rejected by the other
- sub is the end user id in your app
- jti is unique for each redemption. The test panel does not consume jti
- scope is space-separated, such as crm.read crm.write. A comma-separated list is treated as one unknown scope and dropped
- email is a user who already belongs to the workspace, when just-in-time mapping is on
## 5. Test, then exchange
On the issuer row, choose Test and paste the assertion. A passing trace means the signature, issuer, audience, resource, and identity checks succeeded. Test does not issue a token.
Exchange the assertion once at the token endpoint. The access_token starts with ema_. Send it as Authorization: Bearer on integration data routes. It can call only the categories in its scopes. It cannot manage the workspace or create API keys.
```shell
curl -X POST https://api.unified.to/oauth/token \
-H "Content-Type: application/x-www-form-urlencoded" \
-d "grant_type=urn:ietf:params:oauth:grant-type:jwt-bearer" \
--data-urlencode "assertion=$ASSERTION"
```
### What comes back
The signed JWT is only the assertion. Do not put ema_ in front of it. Unified.to mints a separate opaque access token and returns it already prefixed.
```json
{
"access_token": "ema_…",
"token_type": "Bearer",
"expires_in": 3600,
"scope": "crm.read crm.write"
}
```
Sign a new assertion for every exchange. The same jti is rejected as a replay. The Test button checks the assertion and does not return an access token, and it does not consume jti.
> ⚠️ The token endpoint requires the workspace Enterprise Auth switch to be on. Test still runs when that switch is off. A disabled switch returns issuer not trusted.
### Call the API or MCP
The resource claim on the assertion chooses where this access token works. One token does not work for both. Send it as Authorization: Bearer followed by the access_token value.
- REST API: set resource to https://api.unified.to (or the EU or AU host). The token is accepted only on integration data routes such as GET /storage/{connection_id}/file, and only when the scope matches the category and the method (storage.read for GET, storage.write for writes).
- MCP: set resource to that same origin plus /mcp, for example https://api.unified.to/mcp. Send the bearer token to the MCP server. Add ?connection={connection_id} to run the call against one connection in the workspace.
```shell
curl https://api.unified.to/storage/$CONNECTION_ID/file \
-H "Authorization: Bearer $ACCESS_TOKEN"
```
```shell
curl "https://api.unified.to/mcp?connection=$CONNECTION_ID" \
-H "Authorization: Bearer $ACCESS_TOKEN" \
-H "Content-Type: application/json" \
-d '{ "jsonrpc": "2.0", "id": 1, "method": "tools/list" }'
```
A REST token sent to MCP is refused, and an MCP token sent to the REST API returns token issued for another resource. These tokens cannot manage the workspace, create API keys, or change enterprise-auth settings.
## 6. Map the user
The trusted issuer does not store a user id. Each assertion subject gets an identity row. With just-in-time mapping on, Unified.to sets the workspace user id when email matches a user in the workspace. Otherwise the row stays unmapped. Open Identities, choose Map on that subject, and enter the workspace user id. The identity row is created only after an assertion passes signature verification.
## Rotating the key
Generate a new pair, then edit the trusted issuer and replace Static public key with the new public PEM. Assertions signed by the old private key fail as soon as you save. To rotate without a gap, switch the issuer to key source JWKS and publish both keys at jwks_uri.
## Enterprise-managed authorization (EMA) with a workspace secret
URL: https://docs.unified.to/guides/enterprise_managed_authorization_ema_with_a_workspace_secret
# Enterprise-managed authorization (EMA) with a workspace secret
------
_September 22, 2026_
Use your workspace signing secret to sign enterprise-managed authorization assertions. This is the brokered setup: your app signs a short-lived JWT, and Unified.to checks it with the workspace jwt_secret. Your customers do not configure Unified.to in their identity provider.
> ⚠️ The secret shown by Copy on the API keys page is not the signing key. That value is a JWT used for webhook signatures. Assertions must be signed with jwt_secret, a separate hex string on the workspace.
## Before you start
- You are a workspace admin.
- Enterprise-managed authorization is for brokered issuers. Direct (XAA) issuers use a JWKS URL and a client ID allowlist, not the workspace secret.
- Regenerating the workspace secret creates `jwt_secret`. It also rotates the webhook signing secret, so existing webhook signature checks must be updated.
## 1. Turn the feature on
In the app, open Settings, then Enterprise Auth. Turn Enterprise-Managed Authorization on and save.
On EU or AU, use `api-eu.unified.to` or `api-au.unified.to`. The audience and resource claims later in this guide must use that same host.
## 2. Add a trusted issuer
On Enterprise Auth, choose Add trusted issuer and set:
- Topology: `Brokered (ISV)`
- Issuer (`iss`): the exact issuer string you will put in the assertion, for example `https://your-app.example`
- Key source: `Workspace secret`
- Allowed client IDs: leave blank
- Default scopes: the categories the token should receive when the assertion has no scope, for example `crm.read`
- Just-in-time identity mapping: on, if you want Unified.to to match the assertion email to a workspace user
- Enabled: on
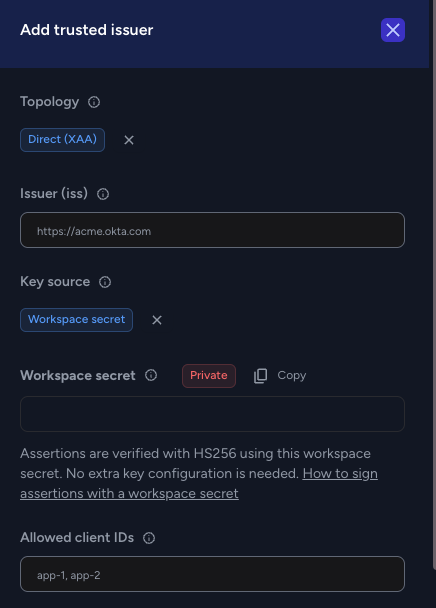
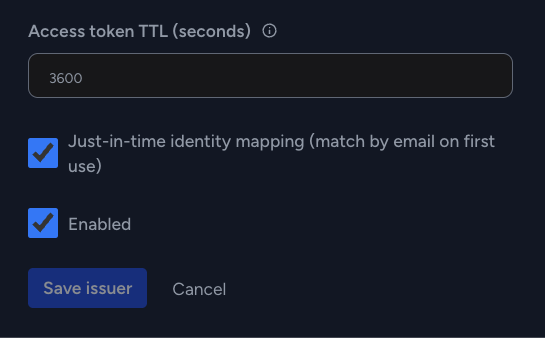
The same record over the API:
```shell
curl -X POST https://api.unified.to/unified/enterprise-auth/trusted-issuers \
-H "Authorization: Bearer $UNIFIED_WORKSPACE_API_KEY" \
-H "Content-Type: application/json" \
-d '{
"mode": "isv_brokered",
"issuer": "https://your-app.example",
"key_source": "workspace_secret",
"default_scopes": ["crm.read"],
"jit_enabled": true,
"enabled": true
}'
```
## 3. Sign an assertion
Sign with HS256 and `jwt_secret`. The header `typ` must be `oauth-id-jag+jwt`. A plain JWT type is rejected.
```javascript
const jwt = require('jsonwebtoken');
const assertion = jwt.sign(
{
resource: 'https://api.unified.to',
email: 'user@your-customer.com',
scope: 'crm.read crm.write',
jti: 'assertion-' + Date.now(),
},
process.env.WORKSPACE_JWT_SECRET,
{
algorithm: 'HS256',
issuer: 'https://your-app.example',
audience: 'https://api.unified.to',
subject: 'customer-user-1',
expiresIn: '5m',
header: { alg: 'HS256', typ: 'oauth-id-jag+jwt' },
}
);
```
Required claims:
- `iss` matches the trusted issuer string exactly
- `aud` is the API origin, such as https://api.unified.to
- resource is that same origin for REST calls, or that origin plus /mcp for MCP calls. A token for one resource is rejected by the other
- sub is the end user id in your app
- `jti` is unique for each redemption. The test panel does not consume jti
- scope is space-separated, such as `crm.read crm.write`. A comma-separated list is treated as one unknown scope and dropped
- email is a user who already belongs to the workspace, when just-in-time mapping is on
## 4. Test, then exchange
On the issuer row, choose Test and paste the assertion. A passing trace means the signature, issuer, audience, resource, and identity checks succeeded. Test does not issue a token.
Exchange the assertion once at the token endpoint. The access_token starts with ema_. Send it as Authorization: Bearer on integration data routes. It can call only the categories in its scopes. It cannot manage the workspace or create API keys.
```shell
curl -X POST https://api.unified.to/oauth/token \
-H "Content-Type: application/x-www-form-urlencoded" \
-d "grant_type=urn:ietf:params:oauth:grant-type:jwt-bearer" \
--data-urlencode "assertion=$ASSERTION"
```
### What comes back
The signed JWT is only the assertion. Do not put ema_ in front of it. Unified.to mints a separate opaque access token and returns it already prefixed.
```json
{
"access_token": "ema_…",
"token_type": "Bearer",
"expires_in": 3600,
"scope": "crm.read crm.write"
}
```
Sign a new assertion for every exchange. The same jti is rejected as a replay. The Test button checks the assertion and does not return an access token, and it does not consume jti.
> ⚠️ The token endpoint requires the workspace Enterprise Auth switch to be on. Test still runs when that switch is off. A disabled switch returns issuer not trusted.
### Call the API or MCP
The resource claim on the assertion chooses where this access token works. One token does not work for both. Send it as Authorization: Bearer followed by the access_token value.
- REST API: set resource to https://api.unified.to (or the EU or AU host). The token is accepted only on integration data routes such as GET /storage/{connection_id}/file, and only when the scope matches the category and the method (storage.read for GET, storage.write for writes).
- MCP: set resource to that same origin plus /mcp, for example https://api.unified.to/mcp. Send the bearer token to the MCP server. Add ?connection={connection_id} to run the call against one connection in the workspace.
```shell
curl https://api.unified.to/storage/$CONNECTION_ID/file \
-H "Authorization: Bearer $ACCESS_TOKEN"
```
```shell
curl "https://api.unified.to/mcp?connection=$CONNECTION_ID" \
-H "Authorization: Bearer $ACCESS_TOKEN" \
-H "Content-Type: application/json" \
-d '{ "jsonrpc": "2.0", "id": 1, "method": "tools/list" }'
```
A REST token sent to MCP is refused, and an MCP token sent to the REST API returns token issued for another resource. These tokens cannot manage the workspace, create API keys, or change enterprise-auth settings.
## 5. Map the user
The trusted issuer does not store a user id. Each assertion subject gets an identity row. With just-in-time mapping on, Unified.to sets the workspace user id when email matches a user in the workspace. Otherwise the row stays unmapped. Open Identities, choose Map on that subject, and enter the workspace user id. The identity row is created only after an assertion passes signature verification.
## Enterprise-managed authorization (EMA) with Microsoft Entra ID
URL: https://docs.unified.to/guides/enterprise_managed_authorization_ema_with_microsoft_entra_id
# Enterprise-managed authorization (EMA) with Microsoft Entra ID
------
_September 24, 2026_
Register a Microsoft Entra ID tenant as a trusted issuer so Entra signs the enterprise-managed authorization assertion. Unified.to checks that signature against the tenant's keys and returns an access token for the end user. Add one trusted issuer per Entra tenant.
> ⚠️ Direct mode accepts an ID-JAG only. The JWT header typ must be oauth-id-jag+jwt. A normal Entra access token or ID token is rejected. Entra does not generally issue that grant yet. If you only have ordinary Entra sign-in, use the brokered setup at the end of this guide. In that setup Entra is the login directory, and your own issuer is the trusted issuer.
## Before you start
- You are a workspace admin.
- You can open the Entra admin center for the customer tenant.
- You have the tenant (directory) id and the application (client) id of the app that will request tokens. These are different ids.
- The issuer string is the Entra v2 issuer, including /v2.0. https://sts.windows.net// does not match.
## 1. Turn the feature on
In the app, open Settings, then Enterprise Auth. Turn Enterprise-Managed Authorization on and save.
On EU or AU, use api-eu.unified.to or api-au.unified.to. The audience and resource claims later in this guide must use that same host. The examples below use the US host.
## 2. Copy the ids from Entra
In the Entra admin center, open the tenant and the app registration that will request tokens for Unified.to.
- **Tenant id** — Entra ID, Overview. This is the directory id. It goes in the issuer URL.
- **Application (client) id** — the requesting app. It goes in Allowed client IDs. A direct issuer with an empty list is rejected.
The issuer you will register is:
```plain text
https://login.microsoftonline.com//v2.0
```
## 3. Add a trusted issuer
On Enterprise Auth, choose 'Add trusted issuer' and set:
- Topology: Direct (XAA)
- Issuer (iss): https://login.microsoftonline.com//v2.0
- Key source: JWKS
- JWKS URL: leave blank. Unified.to loads the keys from the tenant's OpenID configuration. To set it yourself, use https://login.microsoftonline.com//discovery/v2.0/keys
- Allowed client IDs: the Entra application (client) id. Required for a direct issuer.
- Default scopes: the categories the token should receive when the assertion has no scope, for example crm.read
- Environment: optional. Set it when tokens from this tenant must stay in one connection environment, such as Production
- Just-in-time identity mapping: on, if you want Unified.to to match the assertion email to a workspace user
- Enabled: on
The same record over the API:
```shell
curl -X POST https://api.unified.to/unified/enterprise-auth/trusted-issuers \
-H "Authorization: Bearer $UNIFIED_WORKSPACE_API_KEY" \
-H "Content-Type: application/json" \
-d '{
"mode": "direct_xaa",
"issuer": "https://login.microsoftonline.com//v2.0",
"key_source": "jwks",
"client_ids": [""],
"default_scopes": ["crm.read"],
"jit_enabled": true
}'
```
Repeat this for each Entra tenant. The tenant id is part of iss, so two tenants cannot share one row.
## 4. What Entra must put on the assertion
Entra signs the JWT. Your app redeems that JWT. It does not re-sign it. The header typ must be oauth-id-jag+jwt.
- iss matches the trusted issuer string exactly, including /v2.0
- aud is the API origin, such as https://api.unified.to
- resource is that same origin for REST calls, or that origin plus /mcp for MCP calls. A token for one resource is rejected by the other
- sub is the end user. Entra's oid is the stable subject
- client_id is the application id in Allowed client IDs
- jti is unique for each redemption. The test panel does not consume jti
- scope is space-separated, such as crm.read crm.write. A comma-separated list is treated as one unknown scope and dropped
- email is a user who already belongs to the workspace, when just-in-time mapping is on. Unified.to does not read preferred_username or upn
## 5. Test, then exchange
On the issuer row, choose Test and paste the assertion. A passing trace means the signature, issuer, audience, resource, client id, and identity checks succeeded. Test does not issue a token.
Exchange the assertion once at the token endpoint. The access_token starts with ema_. Send it as Authorization: Bearer on integration data routes. It can call only the categories in its scopes. It cannot manage the workspace, create API keys, or change enterprise-auth settings.
```shell
curl -X POST https://api.unified.to/oauth/token \
-H "Content-Type: application/x-www-form-urlencoded" \
--data-urlencode "grant_type=urn:ietf:params:oauth:grant-type:jwt-bearer" \
--data-urlencode "assertion=$ASSERTION_JWT" \
--data-urlencode "scope=crm.read"
```
### What comes back
The signed JWT is only the assertion. Do not put ema_ in front of it. Unified.to mints a separate opaque access token and returns it already prefixed. There is no refresh token. When it expires, redeem a new assertion.
```json
{
"access_token": "ema_…",
"token_type": "Bearer",
"expires_in": 3600,
"scope": "crm.read"
}
```
> ⚠️ The token endpoint requires the workspace Enterprise Auth switch to be on. Test still runs when that switch is off. A disabled switch returns issuer not trusted.
### Call the API or MCP
The resource claim on the assertion chooses where this access token works. One token does not work for both. Send it as Authorization: Bearer followed by the access_token value.
- REST API: set resource to https://api.unified.to (or the EU or AU host). The token is accepted only on integration data routes such as GET /crm/{connection_id}/contact, and only when the scope matches the category and the method.
- MCP: set resource to that same origin plus /mcp, for example https://api.unified.to/mcp. Send the bearer token to the MCP server.
A REST token sent to MCP is refused, and an MCP token sent to the REST API returns token issued for another resource.
## 6. Map the user
The trusted issuer does not store a user id. Each assertion subject gets an identity row. With just-in-time mapping on, Unified.to sets the workspace user id when the email claim matches a user in the workspace. Otherwise open the identity and set the workspace user yourself. No match and no just-in-time mapping returns identity not provisioned.
## When Entra cannot issue an ID-JAG
Sign the user in with ordinary Entra sign-in, then register your own issuer as the trusted issuer. Topology is Brokered (ISV). Key source is JWKS (or Static key, or Workspace secret). Issuer (iss) is your issuer, not the Entra tenant. Put the Entra oid in sub and the user's email in the email claim. aud, resource, and a fresh jti are the same as above. A brokered assertion may omit typ. A direct assertion may not.
```shell
curl -X POST https://api.unified.to/unified/enterprise-auth/trusted-issuers \
-H "Authorization: Bearer $UNIFIED_WORKSPACE_API_KEY" \
-H "Content-Type: application/json" \
-d '{
"mode": "isv_brokered",
"issuer": "https://your-issuer.example.com",
"key_source": "jwks",
"jwks_uri": "https://your-issuer.example.com/.well-known/jwks.json",
"default_scopes": ["crm.read"],
"jit_enabled": true
}'
```
## If the exchange fails
- **issuer not trusted** — iss is not the v2 issuer, the row is disabled, or Enterprise Auth is off.
- **direct_xaa requires typ oauth-id-jag+jwt** — Entra sent an access token or ID token, not an ID-JAG. Use the brokered setup, or wait until Entra issues that grant.
- **resource mismatch** — resource is not this region's API host, or you set /mcp when the call is REST.
- **client_id not allowed** — the assertion client_id is not in Allowed client IDs.
- **identity not provisioned** — no email match, or just-in-time mapping is off and the subject is unmapped.
- **assertion replayed** — that jti was already exchanged. Sign a new one.
- **insufficient_scope** — the token's scopes do not cover that category and method.
## Extended observability — pushing API logs to ClickHouse
URL: https://docs.unified.to/guides/extended_observability_pushing_api_logs_to_clickhouse
# Extended observability — pushing API logs to ClickHouse
------
_September 18, 2026_
You can send API call logs from [Unified.to](https://unified.to/) directly to your own ClickHouse instance. This is the same class of logs we support for [Datadog](https://unified.to/blog/extended_observability_pushing_api_logs_to_your_datadog_instance) and [Grafana / Loki](https://unified.to/blog/extended_observability_pushing_api_logs_to_grafana_loki); you choose where they go in your workspace settings.
ClickHouse is commonly used for high-volume analytics and log-style querying with SQL. Unified writes each API-call log as a row into a table you choose in your cluster, over ClickHouse's HTTP interface.
## Setting it up
### 1. Prepare a ClickHouse database and table
Create a destination table in the database your credentials can write to. You choose the table name (for example `unified_api_logs` or `observability.unified_api_logs`) and enter it in workspace settings.
A minimal schema that accepts Unified's inserts (replace the table name with yours):
```sql
CREATE TABLE IF NOT EXISTS unified_api_logs
(
`id` String,
`created_at` DateTime,
`connection_id` String,
`workspace_id` String,
`integration_type` String,
`external_xref` String,
`name` String,
`path` String,
`size` UInt32,
`status` String,
`error` String,
`ip_address` String,
`type` String,
`method` String,
`environment` String,
`is_billable` Bool
)
ENGINE = MergeTree
ORDER BY (workspace_id, created_at);
```
Notes:
- Use ClickHouse Cloud, self-hosted ClickHouse, or any compatible hosted service.
- Grant the user permission to `INSERT` into your chosen table.
- Table names may be `table` or `database.table`, using letters, numbers, and underscores.
- You can add extra columns, indexes, or TTL policies for retention on your side. Unified only requires that the columns above can accept the values we send.
- Prefer HTTPS for the HTTP interface URL (ClickHouse Cloud typically exposes something like `https://:8443`).
### 2. Collect connection details
You will need:
| Setting | Workspace field | Description |
| -------- | --------------------- | ------------------------------------------------------------------------------------ |
| HTTP URL | `clickhouse_url` | Base URL for the ClickHouse HTTP interface (include protocol and port when required) |
| Username | `clickhouse_username` | Optional; if omitted, Unified uses `default` |
| Password | `clickhouse_password` | Optional; may be empty depending on your cluster |
| Table | `clickhouse_table` | Destination table (`my_logs` or `default.my_logs`) |
### 3. Enter values in workspace settings
1. Open **Workspace settings** (workspace admins only), or update the workspace via the Workspace API.
2. Under **External logging**, choose **Clickhouse**.
3. Enter the URL, username, password, and table name.
In the dashboard, external logging is one destination at a time (None, Datadog, Grafana, or ClickHouse).
### 4. Confirm logs are flowing
1. Make a sample call to the Unified API (for example, list an object on a connection), or trigger a webhook delivery.
2. In ClickHouse, query **your** table, for example:
```sql
SELECT
created_at,
type,
method,
path,
integration_type,
status,
workspace_id,
connection_id
FROM unified_api_logs
ORDER BY created_at DESC
LIMIT 20;
```
You should see recent rows with route `path`, `integration_type`, `status`, and related API-call fields.
## Why ClickHouse matters for [Unified.to](https://unified.to/) users
By sending your logs directly to your own ClickHouse cluster, you get immediate visibility into what's happening in your environment. This allows you to quickly debug issues, get notified about errors, and more. Currently, we support both inbound API calls and webhook calls.
However, we're constantly improving our product, and we're looking forward to supporting more log types in the future. So, please send us feedback so we can better understand what you need.
## About [Unified.to](https://unified.to/)
If you're not familiar with Unified API, it's a single API that you can use to read and write data to third-party integrations using our unified data model. This makes it easy to integrate with multiple systems and eliminates the need for separate API calls for each integration.
We hope this new feature makes your life easier and your work more efficient!
## Related articles
- [Extended Observability - Pushing API Logs to your Datadog Instance](https://unified.to/blog/extended_observability_pushing_api_logs_to_your_datadog_instance)
- [Extended observability — pushing API logs to Grafana / Loki](https://unified.to/blog/extended_observability_pushing_api_logs_to_grafana_loki)
## Extended observability — pushing API logs to Grafana / Loki
URL: https://docs.unified.to/guides/extended_observability_pushing_api_logs_to_grafana_loki
# Extended observability — pushing API logs to Grafana / Loki
------
_April 27, 2023_
We're excited to add another option for external observability: you can send **API call logs** from [Unified.to](https://unified.to/) directly to a **Grafana Loki**–compatible endpoint. directly to a **Grafana Loki**–compatible endpoint. This is the same class of logs we already support for [Datadog](https://docs.unified.to/guides/extended_observability_pushing_api_logs_to_your_datadog_instance); you choose where they go in your [workspace settings](https://app.unified.to/settings/workspace).
[**Grafana Cloud**](https://grafana.com/products/cloud/) and [**Grafana Loki**](https://grafana.com/oss/loki/) are commonly used for log aggregation and querying. Unified delivers logs using Loki's standard HTTP push API.
Setting it up is easy! Here's how:
- **Prepare your endpoint and credentials**
- In [**Grafana Cloud**](https://grafana.com/docs/grafana-cloud/), open your stack and note the **logs / Loki** ingest base URL (no path) — often `https://logs-prod-XX.grafana.net` (your region may differ). If you use **self-hosted Loki**, use that base URL instead.
- Create or copy a **logs token** (or the username + token pair your provider documents for Basic auth). **Set** **`grafana_site`** **explicitly** for EU/regional Grafana Cloud stacks or self-hosted Loki; if you leave it blank, our API falls back to a default US Grafana Cloud logs host, which may not match your region.
- **Enter values in workspace settings**
- Open [Workspace settings](https://app.unified.to/settings/workspace) (or use the Workspace API) and choose **Grafana** under external logging. Configure:
- **Loki base URL** (`grafana_site`): Base URL only (for example [https://logs-prod-XX.grafana.net](https://logs-prod-xx.grafana.net/))
- **Authentication: Basic** (Grafana Cloud: user/instance id + token), **Bearer** (if your gateway expects a bearer token), or **Legacy** (single field — see below).
- **Token / API key** (`grafana_apikey`): Your secret or legacy `user:token` string, depending on mode.
- **Confirm logs are flowing**
- Make a sample call to the Unified API (for example, list an object on a connection). In **Grafana Explore** (or any Loki client), run LogQL such as `{job="unified-api"}`. Log lines include JSON with the route **`path`**, `integration_type`, `status`, and other API-call fields.
## Why does Grafana / Loki matter for [Unified.to](https://unified.to/) users?
By sending your logs directly to your own Loki stack or Grafana Cloud, you get immediate visibility into what's happening in your environment. This allows you to quickly debug issues, get notified about errors, and more.
Currently, we support both inbound API calls and webhook calls.
However, we're constantly improving our product, and we're looking forward to supporting more log types in the future. So, please [send us feedback](https://unified.to/contact) so we can better understand what you need.
## About Unified.to
If you're not familiar with Unified API, it's a single API that you can use to read and write data to third-party integrations using our unified data model. This makes it easy to integrate with multiple systems and eliminates the need for separate API calls for each integration.
We hope this new feature makes your life easier and your work more efficient!
[Get started with Unified.to](https://app.unified.to/)
## Extended Observability - Pushing API Logs to your Datadog Instance
URL: https://docs.unified.to/guides/extended_observability_pushing_api_logs_to_your_datadog_instance
# Extended Observability - Pushing API Logs to your Datadog Instance
------
_April 27, 2023_
We're excited to announce the latest addition to increase observability for our customers — the ability to send API call logs within [Unified.to](https://unified.to/) directly to your Datadog instance.
[Datadog](https://www.datadoghq.com/) is a cloud-based monitoring and analytics platform that provides real-time insights into the performance of IT infrastructure, applications, and logs.
Setting it up is easy! Here's how:
1. Get your Datadog API key: To start sending logs to Datadog, you need to obtain your API key. Here's a [detailed article](https://docs.datadoghq.com/account_management/api-app-keys/) that walks you through the process.
2. Once you have your API key, simply paste it into your Unified.to [workspace settings](https://app.unified.to/settings/workspace).
3. Finally, make a sample API call to Unified API to confirm that logs are being sent to your Datadog instance.
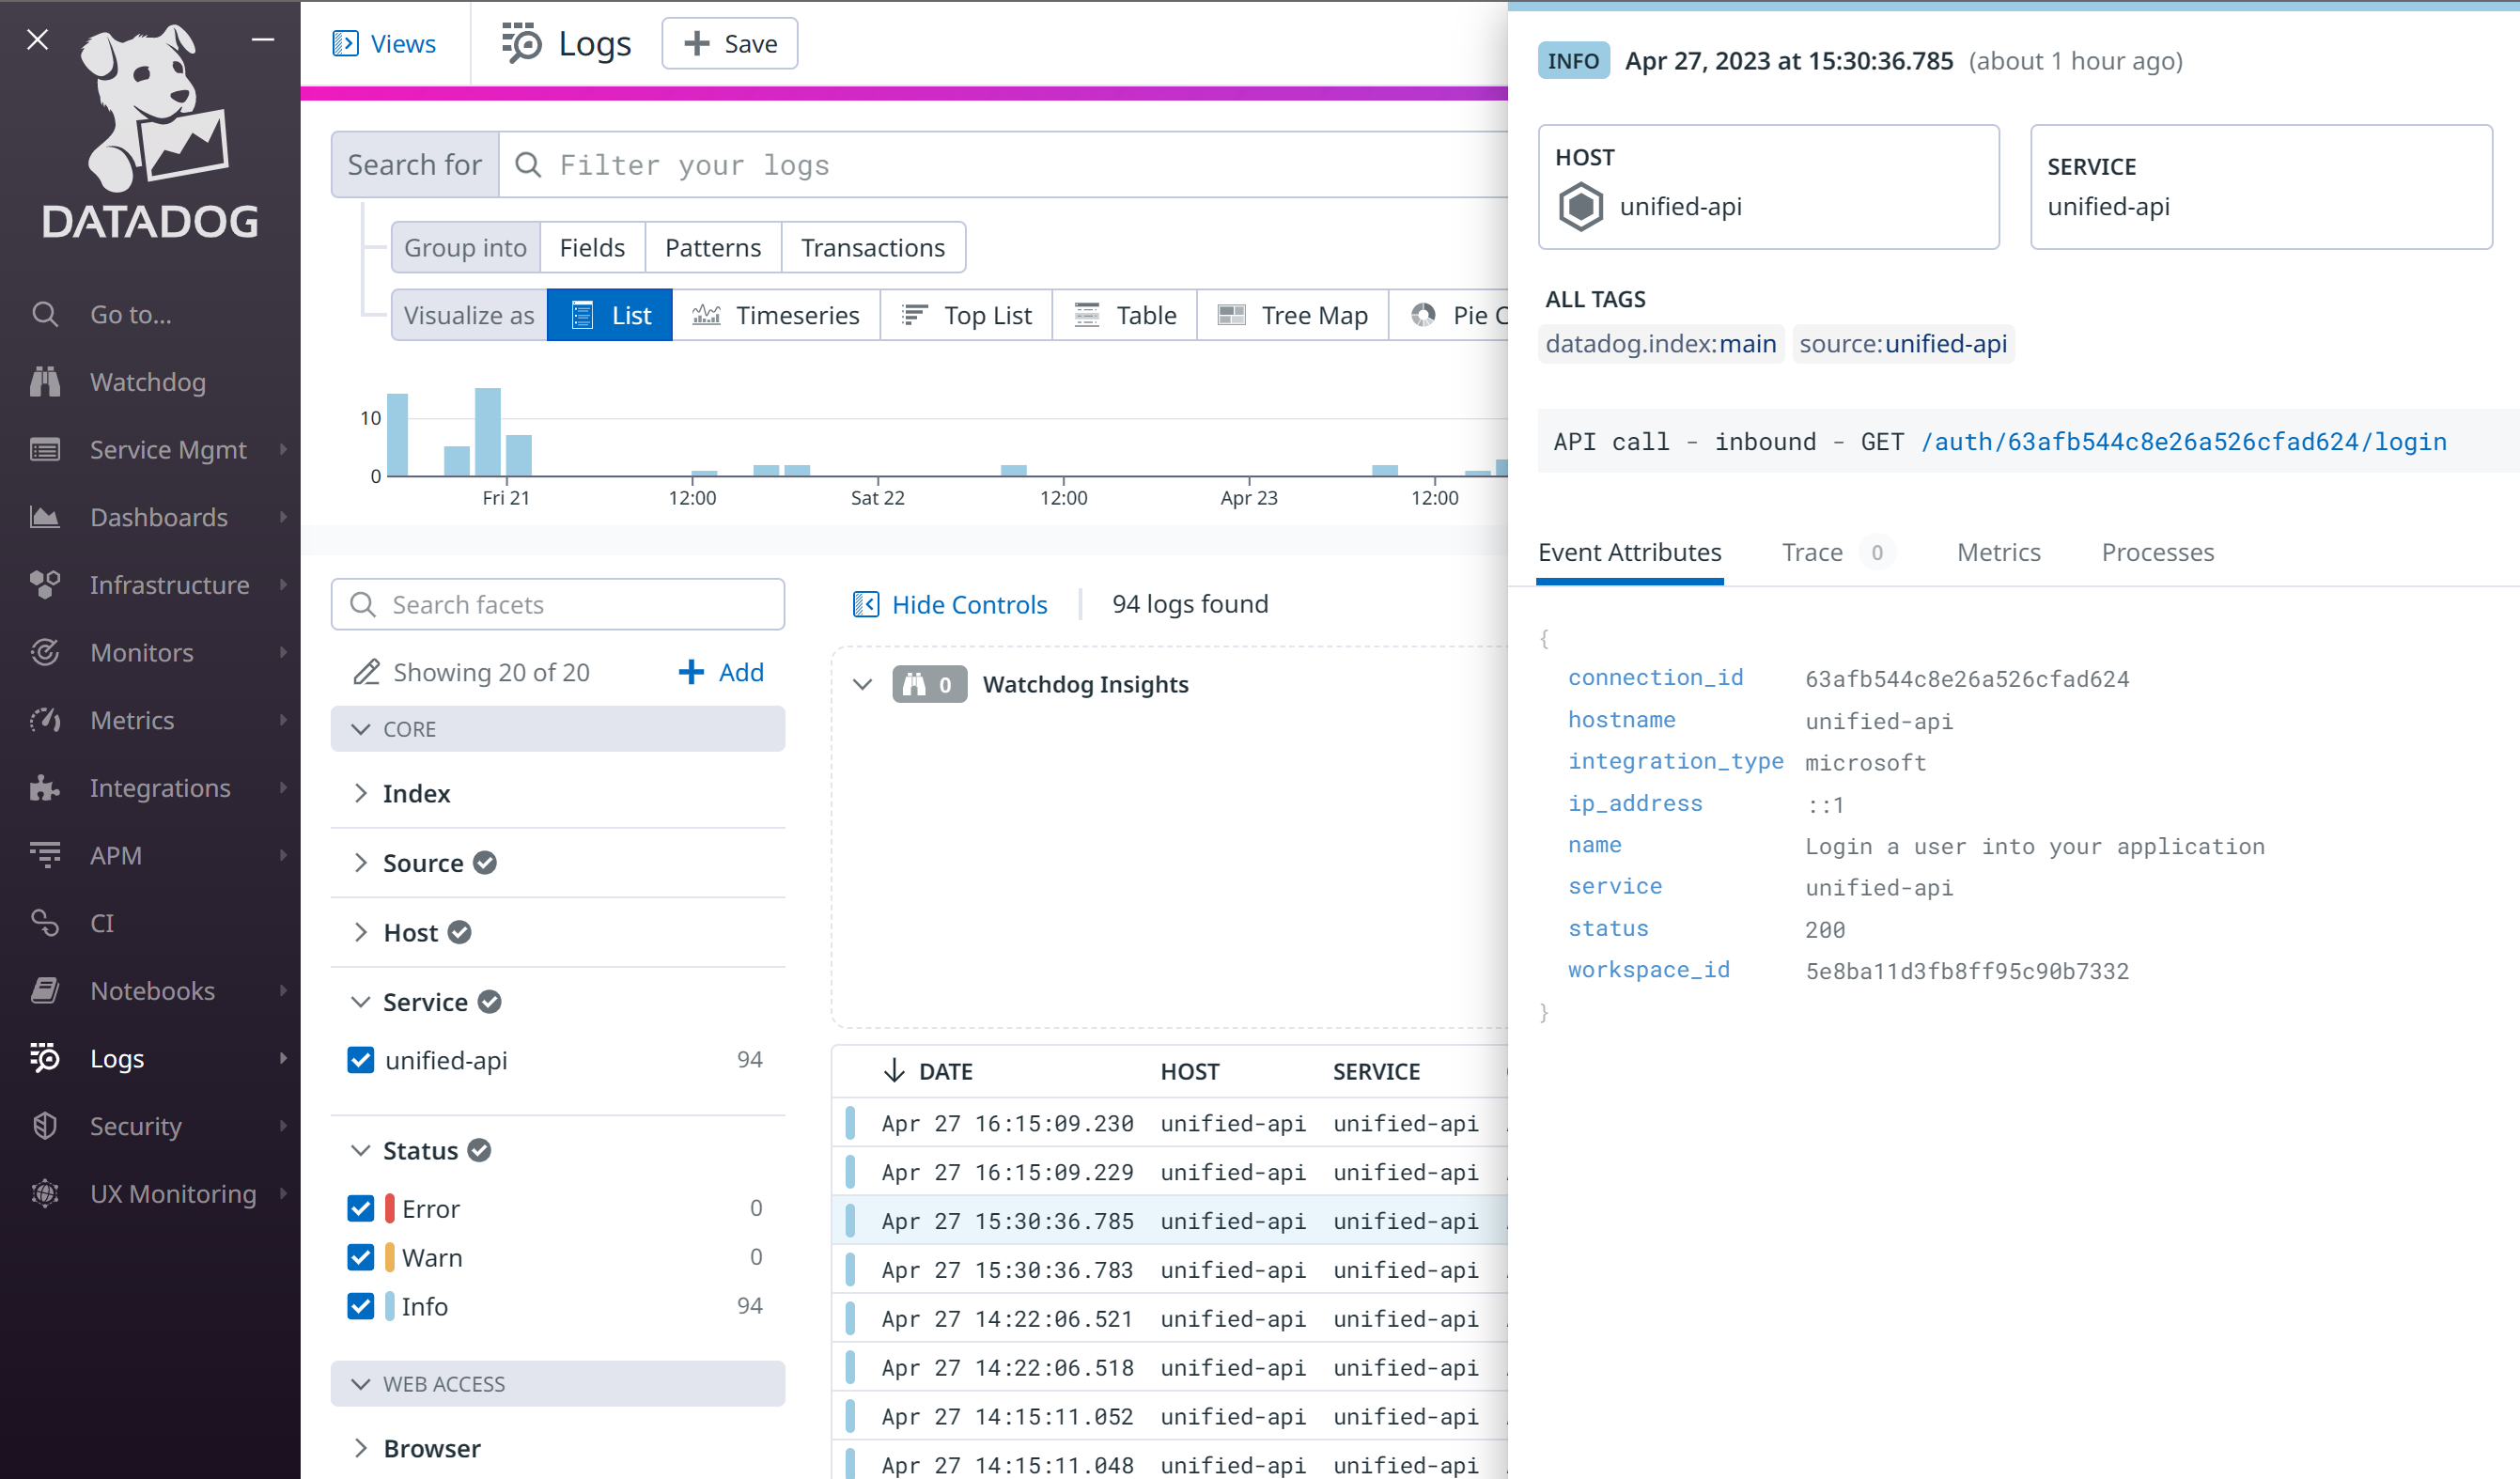
## Why does Datadog matter for Unified.to users?
By sending your logs directly to Datadog, you get immediate visibility into what's happening in your environment. This allows you to quickly debug issues, get notified about errors, and more.
Currently, we support both inbound API calls and webhook calls.
However, we're constantly improving our product, and we're looking forward to supporting more log types in the future. So, please [send us feedback](https://unified.to/contact) so we can better understand what you need.
## About Unified.to
If you're not familiar with Unified API, it's a single API that you can use to read and write data to third-party integrations using our unified data model. This makes it easy to integrate with multiple systems and eliminates the need for separate API calls for each integration.
We hope this new feature makes your life easier and your work more efficient!
[Get started with Unified.to](https://app.unified.to/)
## Facebook Messenger Webhook Setup
URL: https://docs.unified.to/guides/facebook_messenger_webhook_setup
# Facebook Messenger Webhook Setup
------
_August 24, 2026_
Messenger delivers events to a single **app-level** callback URL. Configure it once in the Meta App
Dashboard; each connected Page is then subscribed programmatically by this integration.
## App-level configuration (once per Meta App)
1. In the Meta App Dashboard, add the **Messenger** product.
2. Under **Messenger → Settings → Webhooks** (or **App → Webhooks**, object **Page**), set:
- **Callback URL**: `https://api.unified.to/webhook/workspace/facebookmessenger?workspace_id=`
- **Verify Token**: any non-empty string. The integration echoes `hub.challenge`; token equality is not enforced.
3. Subscribe the Page object to these fields: `messages`, `messaging_postbacks`, `message_reactions`.
4. Ensure the connection's OAuth scopes include `pages_messaging`, `pages_manage_metadata`, and `pages_read_engagement`.
## Routing
- `messages` (non-echo) → `messaging_message` (created) **and** `messaging_event` (MESSAGE_RECEIVED)
- `messaging_postbacks` / quick replies → `messaging_event` (BUTTON_CLICK)
- `message_reactions` → `messaging_event` (REACTION_ADDED / REACTION_REMOVED)
For creating the webhook in Unified, see [How to create and configure webhooks](https://docs.unified.to/guides/how_to_create_and_configure_webhooks).
## Fireflies Integration Guide
URL: https://docs.unified.to/guides/fireflies_integration_guide
# Fireflies Integration Guide
------
_November 5, 2025_
# Fireflies Integration Guide
Learn how to connect an end-customer's [**Fireflies.ai**](https://fireflies.ai/) account to your application using [**Unified.to**](https://unified.to/).
This guide covers how to enable the integration, embed the authorization component, and verify the connection end-to-end.
## Overview
The Fireflies integration allows your app's end users to authorize [Unified.to](https://unified.to/) to access their Fireflies accounts for meeting recordings and user data.
Once connected, your application can access the Fireflies API securely through [Unified.to](https://unified.to/) — without your users ever leaving your app.
## Prerequisites
Before getting started, ensure you have:
- A [**Unified.to**](https://unified.to/) **developer account** and active API credentials
- Your end-customer has a [**Fireflies.ai**](https://fireflies.ai/) **paid plan** (API access required)
- Access to your app's frontend or backend to embed the Unified.to authorization component so that you can get your end-customer to authorize access to Fireflies
- Optional: API Explorer or MCP Server for testing connections
Please note that the Fireflies API is only available to users on a **paid Fireflies plan**. Free-tier accounts cannot authorize API access.
## Step-by-Step Setup
### 1. Enable the Fireflies Integration in [Unified.to](https://unified.to/)
1. Log in to your [Unified.to](https://unified.to/) developer dashboard.
2. Navigate to **Integrations**.
3. Locate **Fireflies** in the catalog.
4. Click **Activate Integration**.
Once enabled, Fireflies becomes available for your end-customer to authorize within your own app.
---
### 2. Embed the Authorization Component
Use the **Embedded Authorization (Authorize Optimization)** component from [Unified.to](https://unified.to/) to create a seamless in-app experience.
1. Add the component to your application UI where users connect integrations.
2. Preview the embedded experience - this is what your customers see when connecting Fireflies.
3. The component displays a button (e.g., 'Authorize Fireflies') and short instructions.
---
### 3. Obtain the Fireflies API Key
Your end-customers/users will need their **Fireflies API key** to complete authorization.
**Steps for your end user:**
1. Log in to their [**Fireflies.ai**](https://fireflies.ai/) account.
2. Go to **Settings → Integrations**.
3. Locate **API Key** and click **Copy**.
4. Return to your app's authorization screen and paste it into the field provided.
---
### 4. Authorize Access
1. In the authorization window, paste the Fireflies API key.
2. Click **Authorize**.
3. [Unified.to](https://unified.to/) will automatically:
- Validate the API key
- Connect to Fireflies
- Run a **test connection**
If successful, [Unified.to](https://unified.to/) creates a new **Connection Object** linked to that customer.
---
### 5. Verify the Connection
Once the test passes, a new connection record appears in your [Unified.to](https://unified.to/) dashboard.
| Field | Description |
| ----------------- | ------------------------------------ |
| **Connection ID** | Unique identifier for API requests |
| **Integration** | [Fireflies.ai](https://fireflies.ai/) |
| **Status** | Connected |
| **Created At** | Timestamp of creation |
Use the **Connection ID** to make authenticated API calls to Fireflies through [Unified.to](https://unified.to/).
---
### 6. Test the Connection (Optional)
You can test the integration in two environments:
a) Using [Unified.to](https://unified.to/) API Explorer
- Open **API Explorer** in your dashboard.
- Use your new Connection ID to query endpoints such as:
- `/hris/{id}/employee` – list Fireflies users
- `/calendar/{id}/recording` – retrieve meeting data
b) Using MCP Server (for AI Agents)
If your use case involves AI agents, test the connection within your **MCP Server** using the same Connection ID.
---
## Example Use Cases
- Retrieve meeting recordings for transcription or analysis
- Sync Fireflies user data into your CRM or analytics system
- Feed Fireflies meeting data into AI summarization or tagging workflows
---
## Troubleshooting
| Issue | Description | Solution |
| -------------------------- | -------------------------------- | ------------------------------------------------------- |
| **Authorization failed** | Invalid or expired API key | Re-copy the key from Fireflies and retry authorization. |
| **Test connection failed** | API access not enabled | Ensure user is on a paid Fireflies plan. |
| **No data returned** | Key valid but no accessible data | Check that the Fireflies workspace contains recordings. |
*Fireflies must have existing data (e.g., recorded meetings) to return results when testing API endpoints.
---
## Next Steps
- Explore the [Unified.to API Reference](https://www.notion.so/api-reference) to interact with `/hris/{id}/employee` and `/calendar/{id}/recording`.
- Monitor performance and connection status under **Integration Health** in your dashboard.
- Repeat these steps for other integrations or customer environments.
---
## Related Articles
- [Embedding the Authorization Component](https://www.notion.so/guides/embedded-authorization)
- [Testing Connections via API Explorer](https://www.notion.so/guides/testing-connections)
- [Managing Customer Connections](https://www.notion.so/guides/manage-connections)
---
_Last updated: November 2025_
## Getting started with Workable
URL: https://docs.unified.to/guides/getting_started_with_workable
# Getting started with Workable
------
_January 11, 2024_
To add Workable to your product with [Unified.to](https://unified.to/), activate the Workable integration in your workspace and choose how customers authorize it: a Workable API token plus the account subdomain, or OAuth 2 with credentials that Workable issues to partners. Then embed the Authorization component and store the connection ID each customer creates. Workable is one of 1682 integrations on [Unified.to](https://unified.to/). This guide is for developers and product teams adding Workable ATS and HR data to their product. It covers [Unified.to's Workable integration](https://unified.to/integrations/workable) from credentials to your first API call.
At the end of this guide, you will have everything you need to activate a Workable integration and begin creating customer connections in production.
## What do you need before you start?
You need a [Unified.to](https://unified.to/) account. [Start a 30-day free trial](https://app.unified.to/login) and follow the onboarding steps. Workable and all pre-built integrations are available on every [Unified.to plan](https://unified.to/pricing).
You also need to choose which Workable credential your customers will use. The API-token method needs nothing from Workable except a customer who is a Workable Admin. OAuth 2 needs partner credentials from Workable.
This guide assumes you know [Workable](https://www.workable.com/) and basic integration concepts. You don't need to be an expert in integration development or in [Unified.to](https://unified.to/).
## Should your customers use a Workable API token or OAuth 2?
Use the API token if you want to start now: each customer creates the token in their own Workable account. Use OAuth 2 once Workable has accepted you as a partner. Your customers then approve access on Workable's sign-in page, and Workable's API docs give OAuth tokens a higher rate limit. [Unified.to](https://unified.to/)'s Workable integration supports both methods.
| | API token and subdomain | OAuth 2 |
| -------------------------------------------------- | -------------------------------------------------------------------------------------------------------------------------------------------------------------------------------- | --------------------------------------------------------------------------------------------------------------------------------------------------- |
| Who issues the credential | Your customer, in their own Workable account (Admin users only) | Workable issues your client ID and client secret after it approves you as a partner; each customer then approves access |
| What your customer provides | The token and their account subdomain | Their account subdomain, then their Workable sign-in and approval of the requested scopes |
| What you enter in [Unified.to](https://unified.to/) | Nothing beyond activation | Your Workable client ID and client secret |
| Workable rate limit | 10 requests per 10 seconds on account tokens. Calls that carry your Workable client ID get partner limits, and [Unified.to](https://unified.to/) sends it when you've entered one | 50 requests per 10 seconds on OAuth tokens |
| Expiry | The customer picks 30 days, 90 days, 6 months, 1 year or 2 years. When it expires, the customer selects **Renew** in Workable, which keeps the same token | Access tokens last 7,200 seconds (2 hours); [Unified.to](https://unified.to/) uses the refresh token to renew them without asking the customer again |
Workable facts in this table come from Workable's documentation, as of 21 October 2026. Workable counts requests per account or per OAuth application in 10-second windows, and returns HTTP 429 when a limit is exceeded.
## How does a customer generate a Workable API token?
A Workable Admin generates the token from their profile icon under **Settings > Integrations > Apps**, in the **API Access Tokens** section (Workable Help Center, as of 21 October 2026). Workable has no separate API permission, so a user who isn't an Admin can't create one.
1. Select the button to generate a new token, name it and choose an expiry.
2. Select the scopes for the data your product uses.
3. Copy the token. Workable shows it only once; if it's lost, the customer generates a new one.
4. Find the account subdomain in Workable's company profile settings. It is the `` in `https://.workable.com`.
The customer enters both values when they connect Workable from your app. A token reaches only the Workable account it was created in, so a customer with two Workable accounts creates two tokens and two connections.
Ask customers to select the scopes that match the [Unified.to](https://unified.to/) objects you use. The Workable scope descriptions are from Workable's Help Center, as of 21 October 2026:
| Workable scope | What Workable says it covers | [Unified.to](https://unified.to/) objects that use it |
| -------------- | ------------------------------------------------------------------------ | ------------------------------------------------------------ |
| `r_candidates` | Candidates, activities, offers | Candidate, application, document, activity, scorecard |
| `r_jobs` | Jobs, stages, members, events, accounts | Job, application status, interview, company |
| `w_candidates` | Creating and changing candidates, comments, copying candidates onto jobs | Writes to candidates, applications, documents and activities |
| `r_account` | Departments | HR & Directory group |
| `r_employees` | Employee records (Workable flags this scope as sensitive) | HR & Directory employee |
Native webhooks also need `r_candidates` (candidates) or `r_employees` (employees). If a customer can't find a scope you asked for, it isn't on Workable's token form: some scopes are only available to partner OAuth apps. When the token expires, the customer selects **Renew** in Workable. The token stays the same, so the connection keeps working. If a token is revoked instead, ask the customer to [re-authorize the same connection](https://docs.unified.to/concepts/embedded-components) with a new token. The connection keeps its ID.
## How do you get Workable OAuth 2 credentials?
Workable issues OAuth 2 credentials only to official partners. Once Workable approves you, it gives you a `client_id` and `client_secret` (Workable OAuth documentation, as of 21 October 2026). There is no self-serve app registration.
1. [Apply to Workable's partnership program](https://www.workable.com/partnership-program/apply?utm_source=unified.to&utm_medium=unified.to%20blog&utm_campaign=unifedto_partner). As of 21 October 2026, Workable's 3rd Party Integration Partner tier has no mutual-customer minimum and accepts integrations built on a unified API; its Native Integration Partner tier requires at least 15 mutual customers.
2. When Workable provisions your credentials, give it the [Unified.to](https://unified.to/) redirect URI for your workspace's region. Every authorization must use exactly the redirect URI you gave Workable at provisioning, so register each region you use:
- US (every plan): `https://api.unified.to/oauth/code`
- EU (Pro and Scale): `https://api-eu.unified.to/oauth/code`
- AU (Pro and Scale): `https://api-au.unified.to/oauth/code`
3. Ask Workable for the scopes your product needs. The **OAuth 2** tab on [Unified.to](https://unified.to/)'s Workable activation page lists the redirect URI and the Workable scopes for each [Unified.to](https://unified.to/) object. Request `w_candidates` only if you create or update candidates, applications or documents.
4. In [Unified.to](https://unified.to/), paste the client ID and client secret on the Workable activation page and select **Activate**.
With OAuth 2, the customer still enters their account subdomain. Workable access tokens last 7,200 seconds, and [Unified.to](https://unified.to/) renews them with the refresh token, which Workable replaces on every refresh. If a customer revokes access in Workable, ask them to [re-authorize the same connection](https://docs.unified.to/concepts/embedded-components).
For help with a Workable partnership, email [hello@unified.to](mailto:hello@unified.to) or ask on [Discord](https://discord.gg/85z7HF7JbD).
## How do you activate Workable in [Unified.to](https://unified.to/)?
Sign in to [app.unified.to](https://app.unified.to/), open **Integrations**, and search for Workable. You can also find it under the **ATS** or **HR & Directory** category.
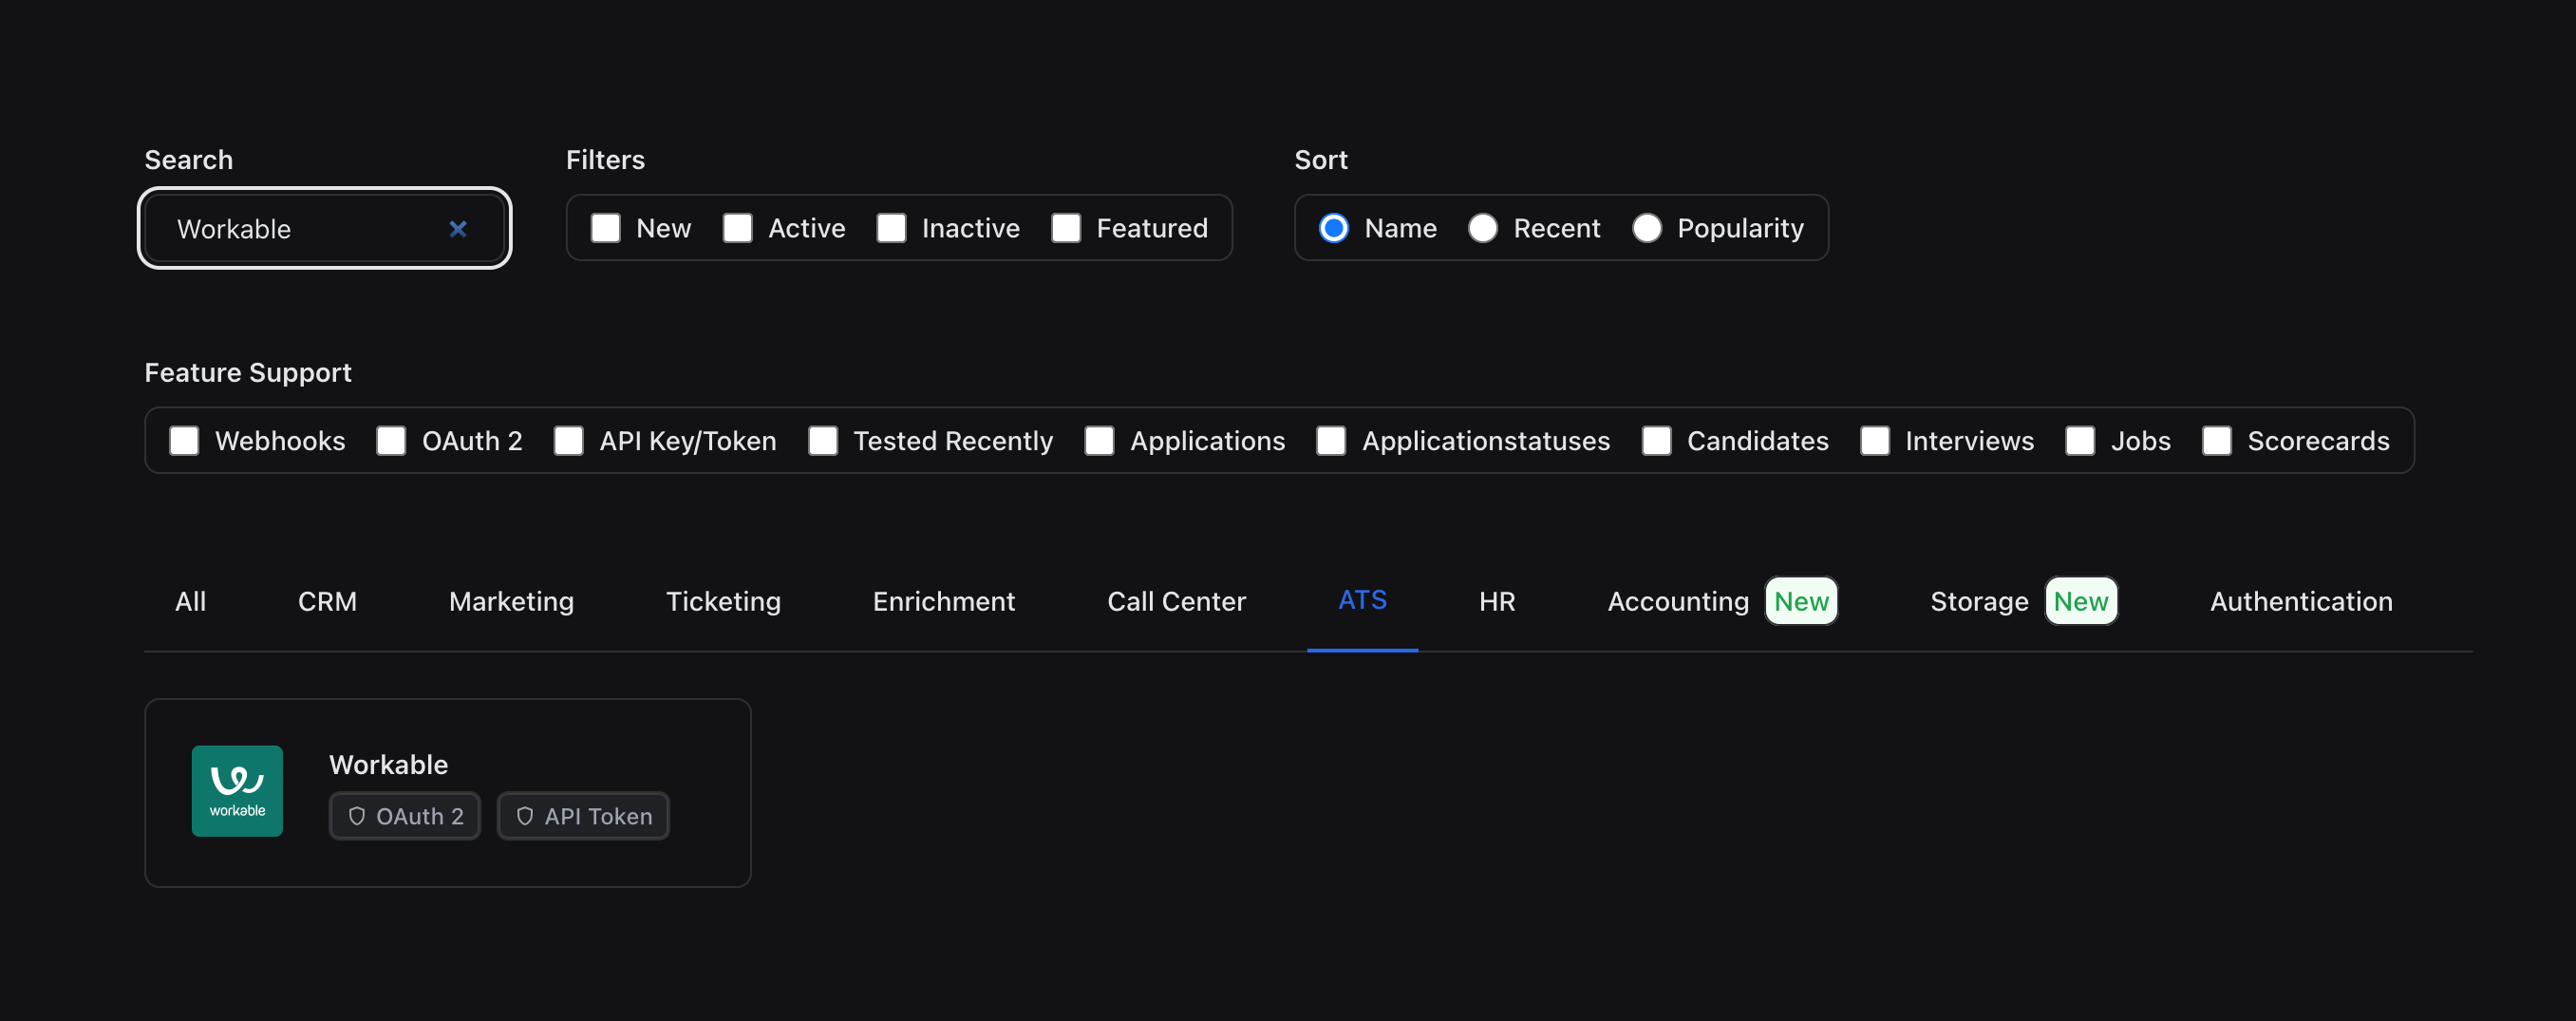
Select **Workable**. On the authorization page, choose the categories (ATS, HR & Directory) and the authorization methods your customers can use: API token, OAuth 2 or both. For OAuth 2, enter your Workable client ID and client secret. Then select **Activate**.
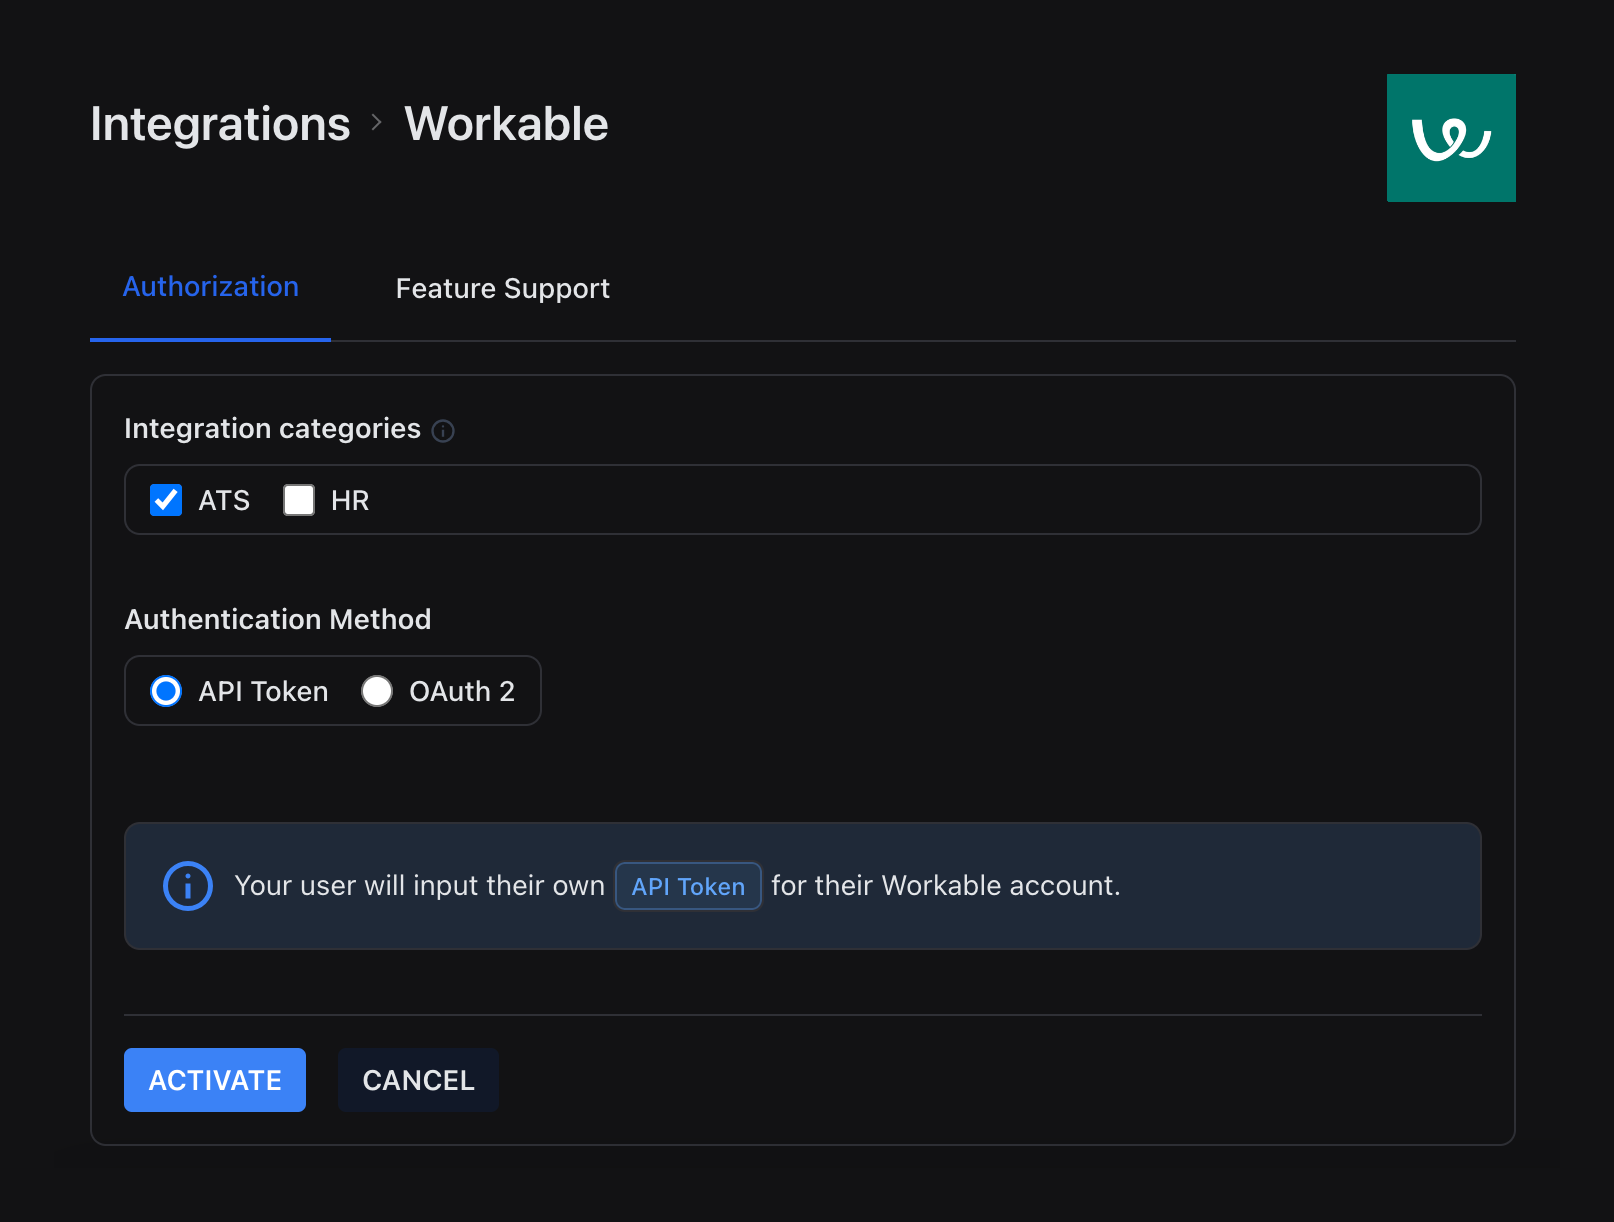
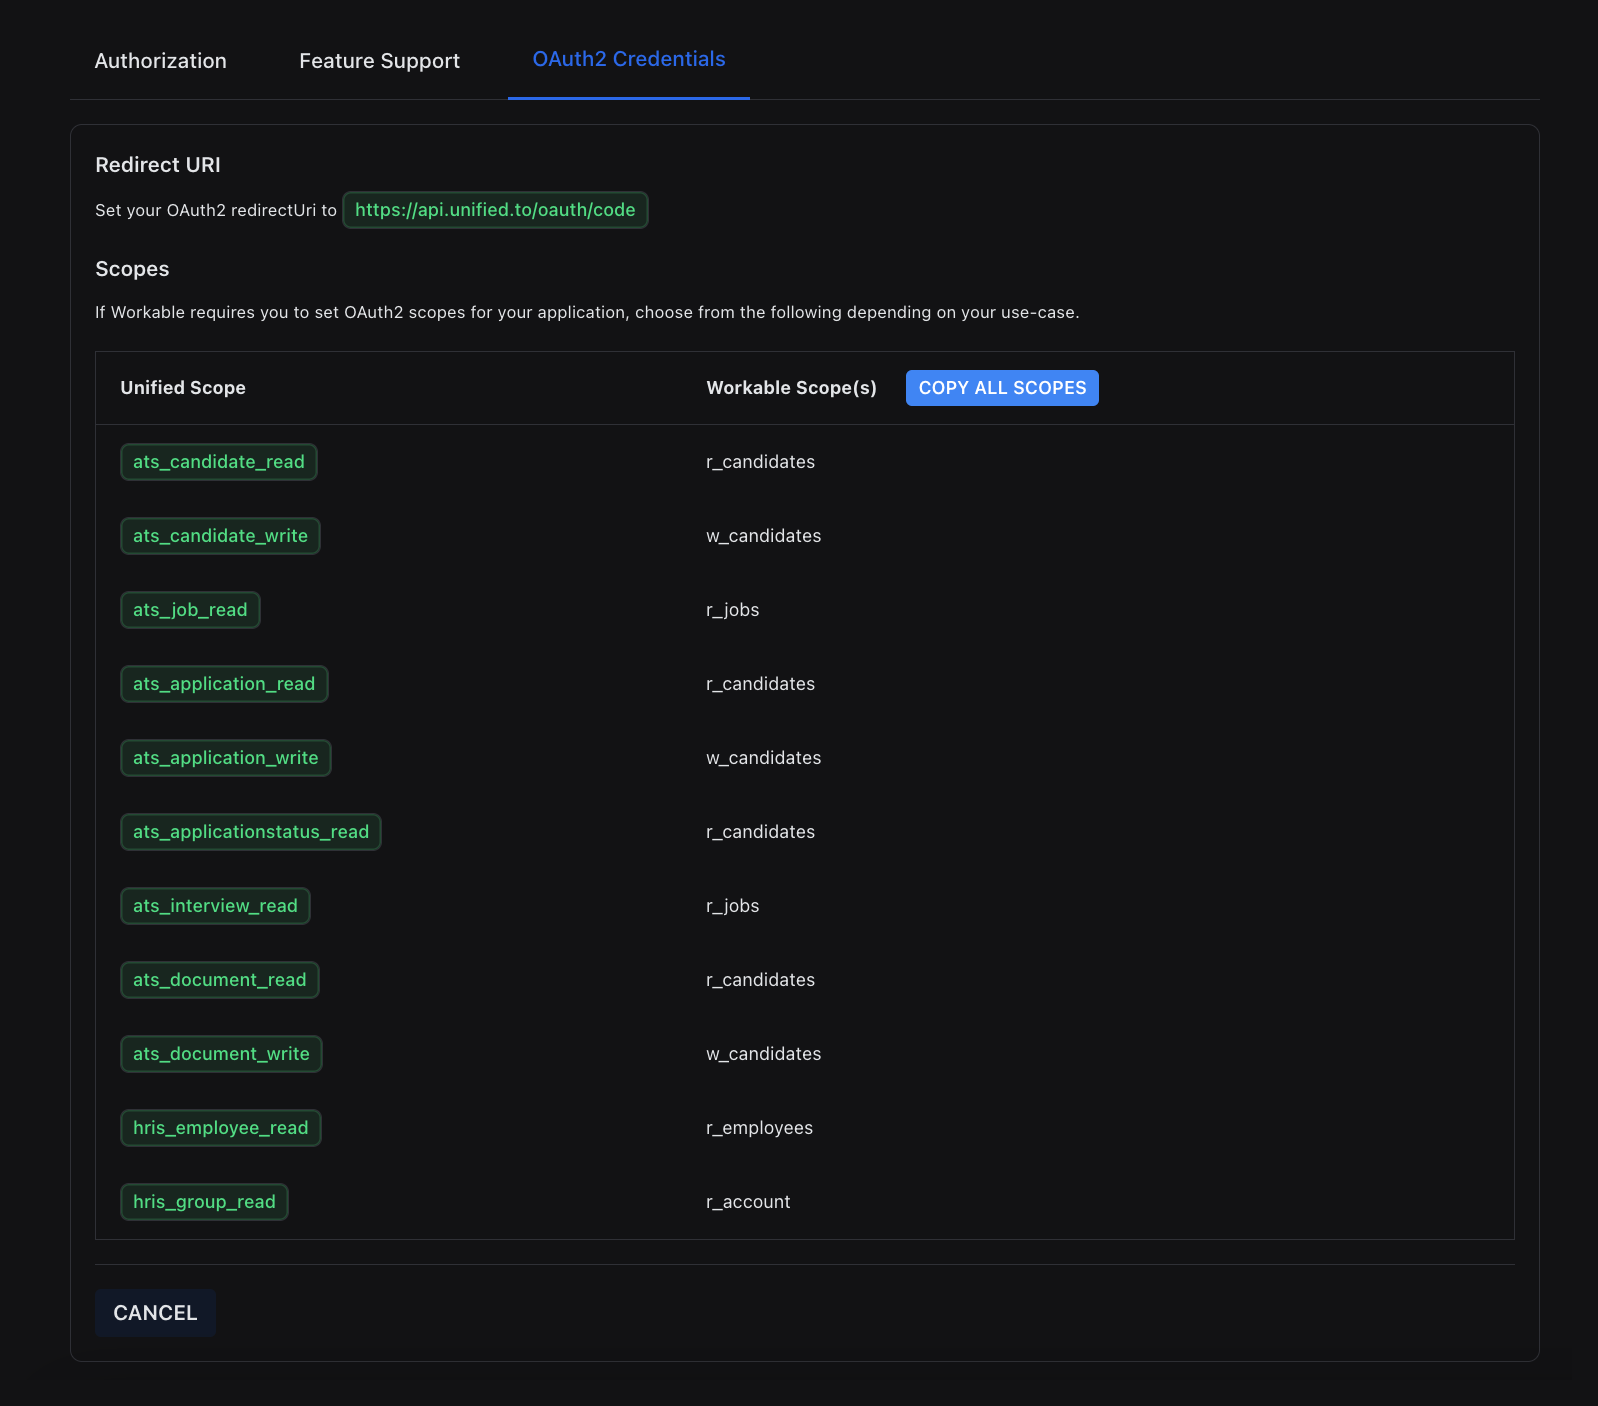
Activation applies to the environment selected in [app.unified.to](https://app.unified.to/). Activate Workable in each environment you use, such as Sandbox and Production, with that environment's credentials. As of 19 October 2026, activated integrations can't be copied between environments.
The **Feature Support** tab shows the objects and fields [Unified.to](https://unified.to/)'s Workable integration supports. The same objects, methods and fields are listed publicly on the [Workable integration page](https://docs.unified.to/integrations/workable).
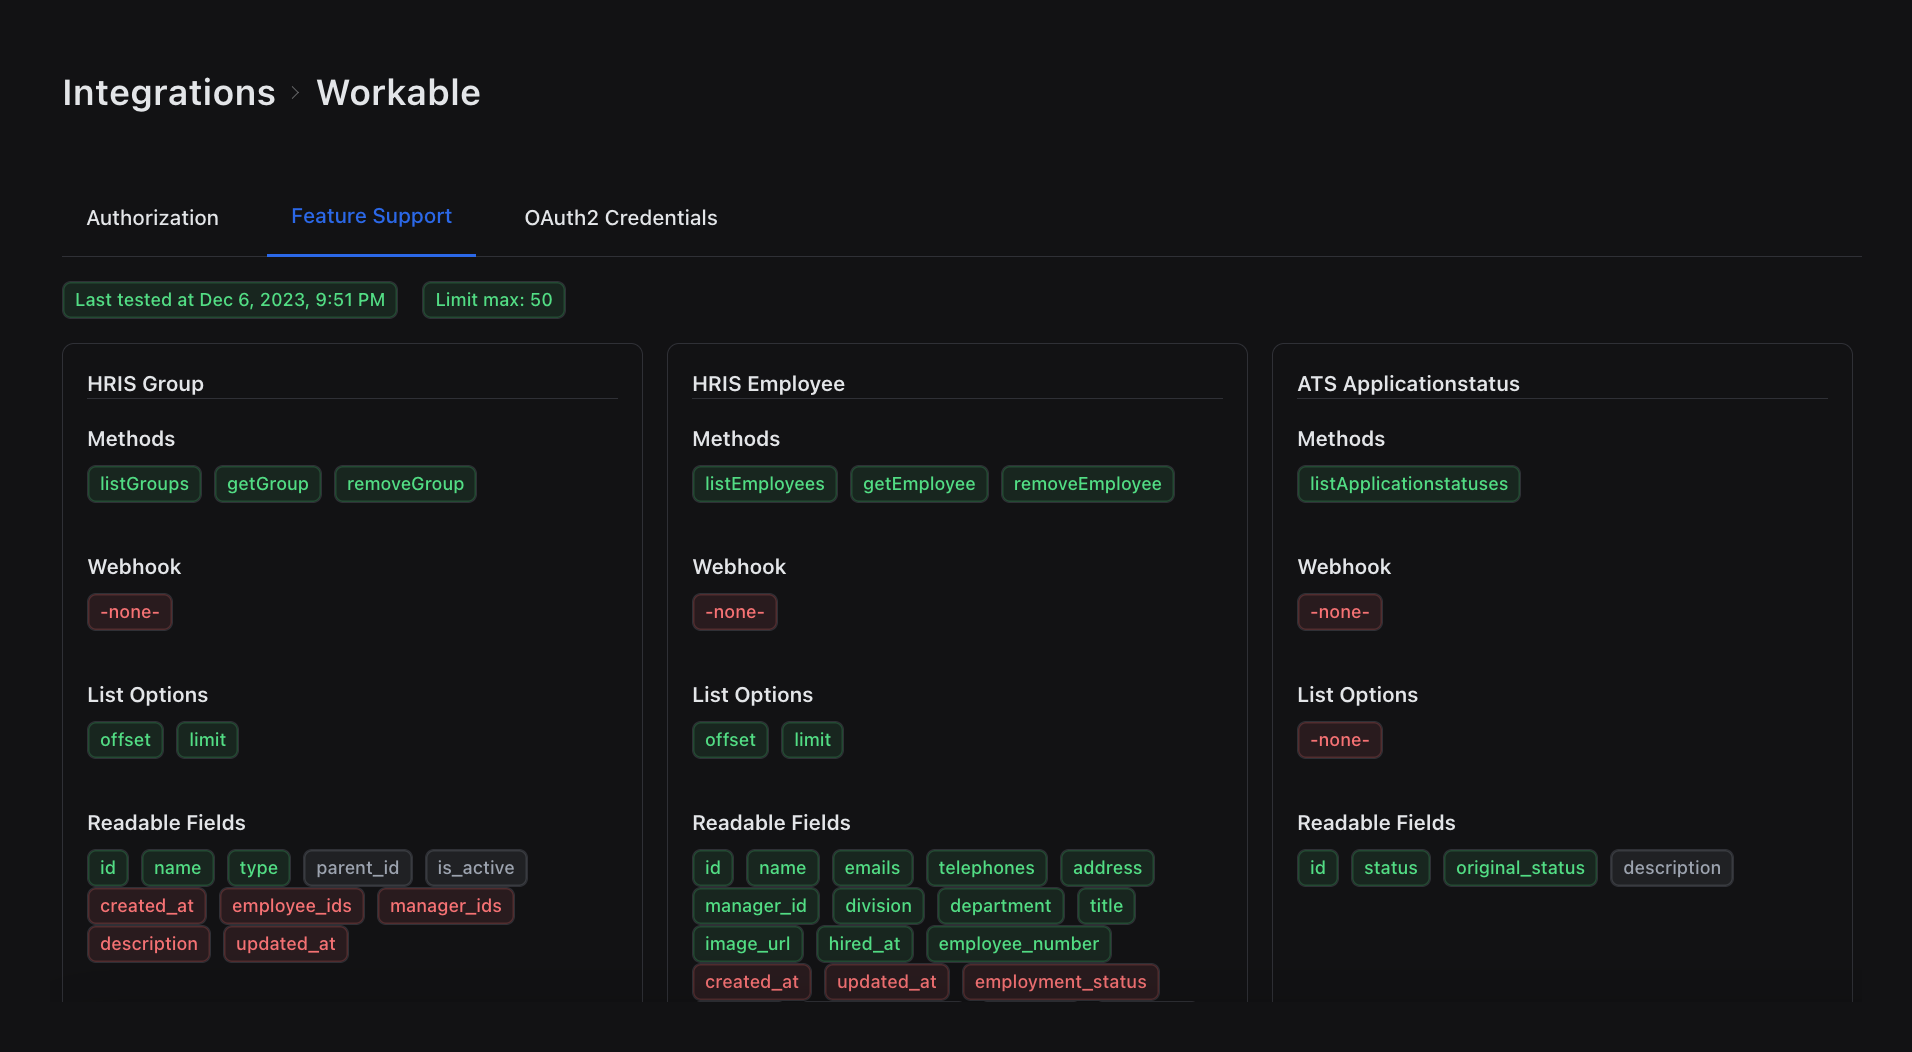
## What can you read and write with a Workable connection?
As of 19 October 2026, [Unified.to](https://unified.to/)'s Workable integration reads candidates, applications, jobs, documents, activities, interviews, scorecards, stages and companies in ATS, and employees and departments in HR & Directory. It writes candidates, applications, documents and activities.
| [Unified.to](https://unified.to/) object | Read | Write | Change events |
| --------------------------------------- | -------------------------- | ---------------------------- | ---------------------------------------------- |
| Candidate | List, Get | Create (needs a job), Update | Native and virtual webhooks (created, updated) |
| Application | List, Get | Create, Update | Virtual webhooks |
| Job | List, Get | None (read-only) | Virtual webhooks |
| Document | List (by application), Get | Create, Update, Remove | None |
| Activity | List (by candidate) | Create | None |
| Interview | List, Get | None | None |
| Scorecard | List (by candidate) | None | Virtual webhooks |
| Application status (stages) | List | None | None |
| Company | List | None | None |
| HR & Directory employee | List, Get | None | Native webhooks |
| HR & Directory group (departments) | List, Get | None | None |
For Workable endpoints outside these objects, use the Passthrough API (GET, POST, PUT, DELETE).
In Workable, a candidate is created on a job, and putting the same person on another job means creating the candidate again on that job, under a new Workable ID. See [Workable: creating candidates and attaching them to jobs](https://docs.unified.to/guides/workable_creating_candidates_and_attaching_them_to_jobs) before you write candidates.
Assessment vendors use a separate integration, Workable Assessment (launched 6 February 2026). It is authorized with a Workable partner API key and handles assessment packages and orders.
## How do Workable change events reach your app?
Candidate and employee changes can arrive as native webhooks, which [Unified.to](https://unified.to/) forwards as Workable sends them. Applications, jobs and scorecards use virtual webhooks, which check for changes at an interval you set, as often as every minute on paid plans; a check that finds nothing isn't billed. Candidates support both types. As of 20 October 2026, [Unified.to](https://unified.to/) lists created and updated events for Workable objects, not deleted events.
Workable's `candidate_created` event feeds [Unified.to](https://unified.to/)'s native candidate created event, and only `candidate_moved` (a stage change) feeds native candidate updated; other candidate changes reach you through virtual webhooks.
Create webhooks in [app.unified.to](https://app.unified.to/) or with the [webhooks API](https://docs.unified.to/reference/webhooks). See [virtual webhooks](https://docs.unified.to/concepts/virtual_webhooks) for how checks and retries work. Native Workable webhooks need no setup in the customer's Workable account: [Unified.to](https://unified.to/) subscribes when you create the webhook. The connection must include `r_candidates` for candidate events or `r_employees` for employee events. Without them, webhook creation fails with "Failed to subscribe".
## How do you add Workable to your app?
Add the Authorization component to your app, or build your own list of integrations with the API.
**Workspace and environments.** When you create a [Unified.to](https://unified.to/) account, [Unified.to](https://unified.to/) creates a workspace for you. A workspace holds environments, such as Sandbox, staging and production, and each environment has its own active integrations and credentials. You can add environments under **Workspace Settings** on any plan ([set environments](https://docs.unified.to/guides/set_environments_for_your_unified_workspace)).
**Workspace ID.** The Authorization component needs your workspace ID. Find it under **Settings > API Keys**.
**Authorization component.** Open [app.unified.to/embed](https://app.unified.to/embed?tab=Authorization), configure the Authorization component and copy its snippet into your app with your workspace ID. Components are available for React, Angular, Vue, Svelte and plain JavaScript. Select the permission scopes your product needs; if you leave them blank, [Unified.to](https://unified.to/) requests every scope the integration supports. The preview shows the Workable authorization page your customers see.
**Your own front end.** To build your own list, call `GET /unified/integration/workspace/{workspace_id}`, which returns all activated integrations in a workspace. Then send customers to the authorization URL from `GET /unified/integration/auth/{workspace_id}/{integration_type}`.
## What happens after a customer connects Workable?
After a customer authorizes Workable, [Unified.to](https://unified.to/) redirects them to your success URL. The URL carries `id` (the connection ID), `state`, `nonce`, `type` and `sig`. Before you store anything, check `sig` against your workspace secret ([embedded components](https://docs.unified.to/concepts/embedded-components)).
**Important:** pass your own user or account ID in `state`. It comes back on the success URL with the connection ID, so you can store the two together.
From then on, call the API with that connection ID, for example `GET /ats/{connection_id}/candidate`. A connection is one customer's authorization of one integration.
## How do you test without a Workable account?
Use the Sandbox (synthetic data) environment. Switch the environment in [app.unified.to](https://app.unified.to/) to **Sandbox (synthetic data)**, activate Workable with any credentials, and create a test connection under **Connections > Create test connection**. Calls on that connection return synthetic data and don't reach Workable ([sandbox environment](https://docs.unified.to/concepts/sandbox)).
To get mock data on a single request, send the header `X-Mock: 1` with an empty `Authorization` header ([mock server](https://docs.unified.to/reference/mock)).
## Which SDKs can you use?
SDKs are available for TypeScript, Python, PHP, Java, Go, C# and Ruby. [Learn more](https://docs.unified.to/reference/sdks).
## Where to go next
- [Workable: creating candidates and attaching them to jobs](https://docs.unified.to/guides/workable_creating_candidates_and_attaching_them_to_jobs)
- [Build a candidate sourcing or job board app](https://docs.unified.to/guides/how_to_build_a_candidate_sourcing_or_job_board_app_with_unified)
- [Build a candidate assessment product](https://docs.unified.to/guides/how_to_build_a_candidate_assessment_product_with_unified)
- [Workable integration page](https://docs.unified.to/integrations/workable)
Have a question? Complete [this form](https://unified.to/contact) or chat with us on [Discord](https://discord.gg/85z7HF7JbD).
## Handling Delegated vs. Application Scopes in Microsoft Integrations
URL: https://docs.unified.to/guides/handling_delegated_vs_application_scopes_in_microsoft_integrations
# Handling Delegated vs. Application Scopes in Microsoft Integrations
------
_December 9, 2025_
Microsoft Graph offers two fundamentally different permission models — **Delegated** and **Application** scopes. Understanding how these scopes behave is important when connecting Microsoft integrations through Unified.
Some Microsoft APIs only support delegated permissions, while others require strictly application-level permissions. Mixing them in a single OAuth flow will cause failures.
In Unified, you can create separate Microsoft connections so you can cleanly target the scopes required for the endpoints you plan to use.
This guide explains the difference between the permission types, why certain Unified endpoints require one or the other, and how to configure your Unified connections correctly.
## **1. Delegated vs. Application Permissions**
### **Delegated Permissions**
Delegated permissions are used when a **signed-in Microsoft user** is present in the OAuth flow.
Use delegated permissions when:
- The API needs to act **on behalf of a user**
- You want to access data the user normally has permission to view
- The Microsoft Graph endpoint explicitly supports delegated scopes
### **Application Permissions**
Application permissions are used when **no user is logged in**, and the app accesses Microsoft Graph directly as itself.
Use application permissions when:
- A Microsoft endpoint **does not support delegated scopes**
- The API involves system-level or tenant-wide data
- The OAuth token must come from the **client_credentials** flow
Examples of Unified endpoints that only support application scopes:
- **`uc_call`** (MS Teams call records API)
- Microsoft Graph requires `CallRecords.Read.All` as an **application permission**, not delegated.
---
## **2. Why You Cannot Mix Delegated and Application Scopes**
Microsoft Graph enforces strict separation between permission types:
- Delegated scopes must be requested during a **user login** OAuth flow
- Application scopes must be requested using **client credentials**
- A single OAuth authorization cannot request both delegated and application permissions
If you request an application-only permission in a user sign-in flow, the request fails. For example, `OnlineMeetings.Read.All` has no delegated form, so in a user sign-in Microsoft treats it as a scope that doesn't exist and returns `AADSTS650053`, which Microsoft's error reference describes as: "The application '{name}' asked for scope '{scope}' that doesn't exist on the resource '{resource}'." No token is issued, and the Unified connection fails to authenticate.
Because of this, selecting both scope types for the same Unified connection will not work.
---
## **3. How to configure a Microsoft Teams connection**
Microsoft Teams uses delegated permissions for Messaging, HRIS and Calendar, and application permissions for call records (`uc_call`). Before your end users can authorize a Microsoft Teams connection, register an app in Microsoft Azure and add the permissions for the objects you plan to use.
1. **Register the app.** Register an application in Azure and get its Client ID and Client Secret ([registration guide](https://docs.unified.to/guides/how_to_get_your_oauth_2_credentials_for_microsoft_dynamics_365)).
2. **Add delegated permissions.** In the app, open **API Permissions**, click **Add a permission**, select **Microsoft Graph**, then **Delegated permissions**, and add the permissions for the Messaging, HRIS and Calendar objects you need.
3. **Add application permissions for call records.** Repeat the steps with **Application permissions** and add `CallRecords.Read.All`, `OnlineMeetingRecording.Read.All`, `OnlineMeetingTranscript.Read.All`, `CallRecordings.Read.All` and `CallTranscripts.Read.All`. Application permissions need admin consent in the customer's tenant.
4. **Create the connection.** In Unified, enter the Client ID and Client Secret and click **Activate**.
**Call records use a separate connection.** Messaging, HRIS and Calendar run on a connection your end user authorizes by signing in. For call records, Unified's Microsoft Teams integration also supports an app-only (organization-level) connection created with your app's Client ID, Client Secret and the customer's Tenant ID (as of 8 October 2026), after a tenant admin grants consent for the application permissions above.
**Use your own Azure app in production.** Unified's own credentials are for testing; in production, the consent screen your customers see should be your app's.
The full steps, with screenshots, are in [How to create a Connection in Microsoft Teams](https://docs.unified.to/guides/how_to_create_a_connection_in_microsoft_teams).
**Bot-based messaging.** Microsoft Teams (bot) is a separate Unified integration for channels, messages and message events. It uses delegated permissions only, and the bot has to be packaged and installed in the right team, channel or chat before API calls work; see [How to Set Up a Microsoft Teams Bot with Unified](https://docs.unified.to/guides/how_to_set_up_a_microsoft_teams_bot_with_unified).
## HiBob & Unified: connection and time off guide
URL: https://docs.unified.to/guides/hibob_and_unified_connection_and_time_off_guide
# HiBob & Unified: connection and time off guide
------
_April 22, 2026_
This guide explains how to connect **HiBob** to **Unified** for HRIS use cases, which credentials to use, and how **time off**works in our implementation, including:
- `hris_employee` time off fields
- the `hris_timeoff` object
**Official HiBob API reference:** [https://apidocs.hibob.com/docs](https://apidocs.hibob.com/docs)
---
## Creating credentials in HiBob
1. In HiBob, go to **Settings → Integrations → Automation → Service Users**
2. Create or select a **service user** intended for API access
3. Copy the **Service User ID**
4. Generate or copy the **Service User Token**
5. Paste:
- the **ID** into the first credential field in Unified
- the **Token** into the second credential field in Unified
**Note:** Store the token securely and rotate it if exposed.
---
## hris_timeoff – Required Permissions
Before accessing time off data, ensure the **service user has the correct permissions**.
### Visibility Rules
Time off policies can be:
- Public
- Public with custom name
- Private
- Private requests are only visible if permission is granted
- Responses include a `visibility` field:
- `Public`
- `Private`
- `Custom name`
### Required Permissions
### Get Requests
- **People's Data → Time off → See who's out today → See who's out**
### Private Requests
- **People's Data → Time off → See who's out today → See who's out because of a private policy or policies with a custom name**
- Some endpoints require:
- `includePrivate: true`
### Pending Requests
- **People's Data → Time off → Requests → Create, edit all fields, and cancel people's requests that haven't been approved yet**
- Some endpoints require:
- `includePending: true`
### Get Request by ID
- **People's Data → Time off → Requests → Create, edit, and cancel people's requests that haven't been approved yet**
### Request Attachments
- **People's Data → Time off → Requests → Upload, edit and view attachments in people's requests**
### Policies & Policy Types
- **Features → Time off → Settings → Manage company's time off settings**
### Create Request
Requires BOTH:
- **Features → Time off → Settings → Manage company's time off settings**
- **People's Data → Time off → Requests → Create, edit, and cancel people's requests that haven't been approved yet**
### Time Off Balance
- **People's Data → Time off → Balance → See selected people's time off and sick leave balances**
- **People's Data → Time off → Balance → Adjust selected people's time off balances and bank their overtime**
---
## hris_employee – Required Permissions
To access time off balances and policies:
### Time Off Balance
- **People's Data → Time off → Balance → See selected people's time off and sick leave balances**
- **People's Data → Time off → Balance → Adjust selected people's time off balances and bank their overtime**
### Policies & Policy Types
- **Features → Time off → Settings → Manage company's time off settings**
## How long are logs retained
URL: https://docs.unified.to/guides/how_long_are_logs_retained
# How long are logs retained
------
_April 2, 2024_
[Unified.to](https://unified.to/) keeps two types of logs.
**API call logs** record every API request, including the IP address, timestamp, HTTP method, path, connection ID and any errors. They never include customer data or payloads.
**Operating logs** record system events and are retained for 15 days.
API call log retention depends on your plan:
| Plan | API call log retention |
| ---------- | ---------------------- |
| Test | 30 days |
| Grow | 60 days |
| Pro | 60 days |
| Scale | 365 days |
| Enterprise | Custom |
### Sending logs to your own tools
On the Test, Pro and Scale plans, you can send API call logs to Datadog, Grafana or ClickHouse for custom retention. Configure this in the [Unified.to](https://unified.to/) dashboard under **Settings > Workspace > External Logging**. See:
- [Pushing API logs to your Datadog instance](https://docs.unified.to/guides/extended_observability_pushing_api_logs_to_your_datadog_instance)
- [Pushing API logs to Grafana Loki](https://docs.unified.to/guides/extended_observability_pushing_api_logs_to_grafana_loki)
### Backing up your API call logs
To retain a record of all of your API calls, we suggest that you make a backup copy of your API call log on a regular basis. You can do this by using our [Unified.to Admin API](https://docs.unified.to/unified/apicall/Returns_API_Calls).
For example, if you use our Node SDK, you could perform a backup using the `listUnifiedApicalls()` method:
```typescript
import { UnifiedTo } from '@unified-api/typescript-sdk';
const sdk = new UnifiedTo({
security: {
jwt: '',
},
});
const results = await sdk.unified.listUnifiedApicalls({ });
```
## How to access employees and users
URL: https://docs.unified.to/guides/how_to_access_employees_and_users
# How to access employees and users
------
_June 25, 2024_
How do you get information on a customer account's users and employees?
[Unified.to](https://unified.to/) returns a customer account's users and employees through the HR & Directory API's Employee endpoints, on HR integrations and on many CRM, ticketing, accounting and collaboration integrations that list employees, such as HubSpot, Zendesk, QuickBooks and Microsoft Teams. This is achieved using the HR [Get Employee](https://docs.unified.to/hris/employee/Retrieve_an_employee) and [List Employees](https://docs.unified.to/hris/employee/List_all_employees) API endpoints.
```javascript
GET /hris/{connection_id}/employee
GET /hris/{connection_id}/employee/{id}
```
The Employee endpoints are available on most of [Unified.to](https://unified.to/)'s 698 [HR & Directory integrations](https://docs.unified.to/hris/integrations).
### Employee/User IDs in all unified data models
Here is a list of different objects across all our unified API categories that link back to an HR Employee via their IDs. Note: We use the terms 'employee' and 'user' interchangeably.
| Category | Data Model | Field | Description |
| ----------- | ---------------------------------------------------------- | --------------------------- | --------------------------------------------------------------- |
| ATS | [Activity](https://docs.unified.to/ats/activity/model) | user_ids | The recruiters associated with this activity |
| ATS | [Candidate](https://docs.unified.to/ats/candidate/model) | user_id | The recruiter or hiring manager associated with this candidate |
| ATS | [Document](https://docs.unified.to/ats/document/model) | user_id | The user who created this document |
| ATS | [Interview](https://docs.unified.to/ats/interview/model) | user_ids | The employees that were in this interview |
| ATS | [Job](https://docs.unified.to/ats/job/model) | recruiter_ids | |
| ATS | [Job](https://docs.unified.to/ats/job/model) | hiring_manager_ids | |
| ATS | [Job](https://docs.unified.to/ats/job/model) | user_id | The job owner |
| ATS | [Scorecard](https://docs.unified.to/ats/scorecard/model) | interviewer_id | |
| ATS | [Company](https://docs.unified.to/ats/company/model) | recruiter_ids | |
| Call Center | [Call](https://docs.unified.to/uc/call/model) | user_id | The agent |
| CRM | [Company](https://docs.unified.to/crm/company/model) | user_id | The salesperson that is responsible for this company/account |
| CRM | [Contact](https://docs.unified.to/crm/contact/model) | user_id | The salesperson that is responsible for this contact |
| CRM | [Deal](https://docs.unified.to/crm/deal/model) | user_id | The salesperson that is responsible for this deal/opportunity |
| CRM | [Event](https://docs.unified.to/crm/event/model) | user_id | |
| CRM | [Lead](https://docs.unified.to/crm/lead/model) | user_id | The salesperson that is responsible for this lead |
| CRM | [Lead](https://docs.unified.to/crm/lead/model) | creator_user_id | The user that created this lead |
| HR | [Employee](https://docs.unified.to/hris/employee/model) | manager_id | This user's reporting manager |
| HR | [Group](https://docs.unified.to/hris/group/model) | user_ids | The group's members |
| HR | [Group](https://docs.unified.to/hris/group/model) | manager_ids | The group's managers |
| HR | [Payslip](https://docs.unified.to/hris/payslip/model) | user_id | The employee that this pay slip pertains to |
| HR | [Timeoff](https://docs.unified.to/hris/timeoff/model) | user_id | The employee that this time off request pertains to |
| HR | [Timeoff](https://docs.unified.to/hris/timeoff/model) | approver_user_id | The employee that approved this time off request |
| KMS | [Space](https://docs.unified.to/kms/space/model) | user_id | The creator of this space |
| KMS | [Page](https://docs.unified.to/kms/page/model) | user_id | The creator of this page |
| Messaging | [Message](https://docs.unified.to/messaging/message/model) | author_member.user_id | |
| Messaging | [Message](https://docs.unified.to/messaging/message/model) | destination_members.user_id | |
| Messaging | [Message](https://docs.unified.to/messaging/message/model) | hidden_members.user_id | |
| Messaging | [Message](https://docs.unified.to/messaging/message/model) | mentioned_members.user_id | |
| Storage | [File](https://docs.unified.to/storage/file/model) | user_id | The owner of this file/folder |
| Tasks | [Project](https://docs.unified.to/task/project/model) | user_ids | The users that belong to this project |
| Tasks | [Task](https://docs.unified.to/task/task/model) | assigned_user_ids | |
| Tasks | [Task](https://docs.unified.to/task/task/model) | creator_user_id | |
| Tasks | [Task](https://docs.unified.to/task/task/model) | follower_user_ids | |
| Ticketing | [Note](https://docs.unified.to/ticketing/note/model) | user_id | The user who created this note |
| Ticketing | [Ticket](https://docs.unified.to/ticketing/ticket/model) | user_id | The user who created this ticket |
Some uses of the Employee endpoints outside HR:
**Onboarding:** read new employees from the HR system and add them to your task-management or training product, so new hires have access from their first day.
**Assigning Leads and Deals:** Assign newly created leads and/or deals to a specific sales-rep using their user ID
**Notify Hiring Managers:** When adding a new candidate and their job application, notify the hiring manager by retrieving their information and emailing them
By integrating employee data across multiple SaaS platforms, organizations can improve operational efficiency, enhance data accuracy, and provide a better employee experience.
## Resources
-
- [Overview of our unified HR API documentation ](https://docs.unified.to/hris/overview)
- [Full list of supported HR integrations ](https://unified.to/hris)
## How to add API support for the Create Activity in Crelate
URL: https://docs.unified.to/guides/how_to_add_api_support_for_the_create_activity_in_crelate
# How to add API support for the Create Activity in Crelate
------
_September 25, 2025_
To create activities in Crelate through [Unified.to](https://unified.to/)'s ATS Activity endpoint, each Crelate activity type you write must be available on the records you attach it to. A Crelate administrator sets this in each activity type's Available On setting.
To set it:
1. Select Settings, then Activities under Basic Setup.
2. Select the specific Activity Type you want to configure
3. In Available On, choose where the activity type can be used: Contacts, Companies or Opportunities (as of 21 October 2026). Candidates are Crelate contacts.
The settings shown in the image above will enable the maximum number of API features.
Only Crelate administrators can change activity types.
To connect Crelate, you need a Crelate API key: see [How to get your Crelate API key](https://docs.unified.to/guides/how_to_get_your_crelate_api_key_step_by_step_guide). For the activity fields [Unified.to](https://unified.to/) writes, see the [Crelate integration page](https://docs.unified.to/integrations/crelate).
## How to Associate a Connection ID with Your End-User
URL: https://docs.unified.to/guides/how_to_associate_a_connection_id_with_your_end_user
# How to Associate a Connection ID with Your End-User
------
_April 4, 2024_
This guide explains how to associate connections you create through Unified.to with end-users in your own application.
When your end-users authorize access to third-party applications through Unified.to, you need a way to keep track of which connections belong to which users in your application. This guide covers two ways to accomplish this, with recommendations on when to use each approach.
If you prefer to learn through video, check out our guide on YouTube:
## Before you begin
This guide assumes you have:
- A basic understanding of [end-users, integrations, and connections](https://unified.to/blog/end_users_integrations_and_connections)
- Familiarity with OAuth 2.0 authorization flows
## Method 1: Use the state parameter (recommended)
The state parameter provides a secure way to maintain context throughout the OAuth flow by passing data between your authorization request and the callback. The state parameter _does not_ change during authorization. Whatever value you put into the state parameter in the authorization URL is the same value that will be extracted from the success URL.
1. Create a state object with your user's ID, passing in additional security measures like a hashing signature. For example:
```javascript
const stateObject = {
user_id: "xyz789",
nonce: generateRandomString(), // Add randomness for security
timestamp: Date.now(), // Optional: Add timestamp for expiry checking
sig: generateSignature() // Optional: Add signature for verification
};
```
2. Encode the state object as a base64-string:
```javascript
const encodedState = Buffer.from(JSON.stringify(stateObject)).toString('base64');
```
3. Add the encoded state to your authorization URL
```javascript
const authUrl = `https://api.unified.to/unified/integration/auth/${workspace_id}/${integration}?state=${encodedState}`;
```
4. Handle the callback after successful authorization. The connection ID is included in the URL as `id`. For example:
```javascript
// In your callback handler
function handleCallback(req, res) {
// Get connection ID from the callback URL
const connectionId = req.query.id;
// Decode and verify the state
const decodedState = JSON.parse(Buffer.from(req.query.state, 'base64').toString());
// Verify the state is valid (check signature, nonce, timestamp if used)
if (verifyState(decodedState)) {
// Associate the connection ID with the user ID in your database
await saveUserConnection(decodedState.user_id, connectionId);
}
}
```
## Method 2: Use the external ID parameter
This method uses the connection's built-in **External ID** field (`external_xref`) to store your user association on the connection itself.
1. Add the `external_xref` parameter to your authorization URL
```javascript
const authUrl = `https://api.unified.to/unified/integration/auth/${workspace_id}/${integration}?external_xref=${user_id}`;
```
2. Once a connection is created, that external ID is stored on the connection as `external_xref`. You can now query connections using the external ID:
```javascript
const options = {
method: 'GET',
url: 'https://api.unified.to/unified/connection',
headers: {
'authorization': `Bearer ${unified_api_key}`
},
params: {
external_xref: user_id
}
};
```
## Keeping the association when a connection is re-authorized
If a connection becomes unhealthy (for example, the end-user revoked access or their credentials expired), [re-authorize the existing connection](https://docs.unified.to/concepts/embedded-components#re-authorize-an-existing-connection) instead of creating a new one. Re-authorizing keeps the same connection ID, so the association you saved with either method stays valid:
- The success URL returns the **same** `id`, and your `state` value is returned as usual.
- The connection's `external_xref` is kept. If you include `external_xref` on the re-authorization URL, it replaces the stored value, so leave it off unless you intend to change it.
## Best practices for implementation
1. **Always validate the state parameter**
- Check signatures if used
- Verify nonces haven't been reused
2. **Securely store connection associations**
- Use a database to map user IDs to connection IDs
- Consider encrypting sensitive data
3. **Handle error cases**
- Missing parameters
- Failed authorization attempts
4. **Re-authorize instead of recreating**
- Re-authorizing an unhealthy connection keeps its ID, so you don't need to update your stored association
## How to build a Candidate Assessment product with
URL: https://docs.unified.to/guides/how_to_build_a_candidate_assessment_product_with
# How to build a Candidate Assessment product with
------
_October 23, 2023_
There are two ways to build a candidate assessment product on your customers' ATS. In the first, your product reads applications through [Unified.to](https://unified.to/)'s ATS API, starts an assessment when an application reaches a status you choose, and writes the result back to the candidate record. It needs no ATS partnership and works on any ATS integration that returns applications. In the second, your packages are listed inside the ATS's own assessment module and recruiters order them there; [Unified.to](https://unified.to/)'s Assessment API handles that route on ATSes with an assessment module (see [How to Offer Assessment Packages and Receive Orders](https://unified.to/blog/how_to_offer_assessment_packages_and_receive_orders_with_unified_assessment_api)). This guide covers the first route.
The same data can feed AI screening or semantic resume matching; see the RAG section at the end.
## Who is this guide for?
It's for teams with a candidate assessment product (skills tests, background checks, structured interviews) who need to read new applications from their customers' ATS and return results to it.
- Read new applications from your customers' ATS (applicant tracking system) so your product can assess those candidates.
- Retrieve resumes and job descriptions to power RAG-based candidate ranking and semantic matching.
[Unified.to](https://unified.to/)'s ATS API covers 164 ATS integrations, including [Greenhouse](https://unified.to/integrations/greenhouse), [Lever](https://unified.to/integrations/lever), [SmartRecruiters](https://unified.to/integrations/smartrecruiters) and [SAP SuccessFactors](https://unified.to/integrations/successfactors) ([full list](https://unified.to/ats)).
## How to add ATS integrations to your product
Before we start, be sure to first read:
[Getting Started with Unified.to](https://unified.to/blog/start_here_getting_started_with_unified)
1. **Get an initial list of applications**
1. When the customer authorizes an ATS connection, [read the initial set of applications for a job](https://docs.unified.to/ats/application/List_all_applications) (filtering by `job_id` and `updated_gte` where the integration supports them)
```typescript
import { UnifiedTo } from '@unified-api/typescript-sdk';
import { AtsApplication, AtsApplicationStatus } from '@unified-api/typescript-sdk/sdk/models/shared';
const sdk = new UnifiedTo({
security: {
jwt: process.env.UNIFIED_API_KEY!,
},
});
export async function getApplications(connectionId: string, trigger_status: AtsApplicationStatus, jobId: string, updatedGte?: string) {
const applications: AtsApplication[] = [];
const limit = 100;
let offset = 0;
while (true) {
// listAtsApplications returns the array of applications directly
const apps = await sdk.ats.listAtsApplications({
updatedGte, // ISO-8601 string, e.g. '2026-10-01T00:00:00Z'
jobId,
offset,
limit,
connectionId,
});
applications.push(...apps.filter((application) => application.jobId === jobId && application.status === trigger_status)); // job_id is honoured server-side on some integrations only
if (apps.length === limit) {
offset += limit;
} else {
break;
}
}
return applications;
}
```
2. **Set up to get updated applications**
1. To receive new and updated applications, [create a webhook](https://docs.unified.to/unified/webhook/Create_webhook_subscription) for that `connection_id`. Application webhooks are native or virtual depending on the integration; virtual webhooks check at an interval you set, as often as every minute on paid plans, and a check that finds nothing isn't billed. Check the integration page for which applies.
```typescript
import { createHmac, timingSafeEqual } from 'crypto';
import { UnifiedTo } from '@unified-api/typescript-sdk';
import { AtsApplicationStatus, Webhook, WebhookEvent, WebhookObjectType, WebhookType } from '@unified-api/typescript-sdk/sdk/models/shared';
const sdk = new UnifiedTo({
security: {
jwt: process.env.UNIFIED_API_KEY!,
},
});
// The payload arrives as JSON with snake_case field names
interface IncomingWebhook {
id: string;
created_at: string;
updated_at: string;
workspace_id: string;
connection_id: string;
hook_url: string;
object_type: string;
interval: number;
checked_at: string;
integration_type: string;
environment: string;
event: 'created' | 'updated' | 'deleted';
runs: string[];
fields: string;
webhook_type: WebhookType;
is_healthy: boolean;
page_max_limit: number;
}
interface IncomingApplication {
id: string;
candidate_id?: string;
job_id?: string;
status?: AtsApplicationStatus;
original_status?: string;
updated_at?: string;
}
interface IWebhookData {
data: T[]; // The data array contains objects of the webhook's object type (eg. ATS applications)
webhook: IncomingWebhook; // The webhook object
nonce: string; // random string
sig256: string; // base64(HMAC-SHA256(workspace.secret, JSON.stringify(data) + nonce))
external_xref?: string; // the external_xref you set on the connection
type: 'INITIAL-PARTIAL' | 'INITIAL-COMPLETE' | 'VIRTUAL' | 'NATIVE';
}
export async function createApplicationsWebhook(connectionId: string, myWebhookUrl: string): Promise {
// createUnifiedWebhook returns the Webhook object directly
return await sdk.unified.createUnifiedWebhook({
webhook: {
hookUrl: myWebhookUrl,
objectType: WebhookObjectType.AtsApplication,
event: WebhookEvent.Updated,
connectionId,
},
});
}
export async function handleUnifiedWebhook(incoming: IWebhookData, trigger_status: AtsApplicationStatus) {
if (incoming.webhook.object_type !== 'ats_application') {
return; // not for us
}
const secret = process.env.WORKSPACE_SECRET;
if (!secret) {
throw new Error('WORKSPACE_SECRET is not set');
}
const computed = Buffer.from(
createHmac('sha256', secret)
.update(JSON.stringify(incoming.data)) // must match the order and encoding received
.update(String(incoming.nonce))
.digest('base64'),
'utf8',
);
const provided = Buffer.from(incoming.sig256 ?? '', 'utf8');
if (computed.length !== provided.length || !timingSafeEqual(computed, provided)) {
return; // signature mismatch: reject the payload
}
return incoming.data?.filter((application) => application.status === trigger_status);
}
```
2. Alternatively, create a polling schedule to [get new/updated applications](https://docs.unified.to/ats/application/List_all_applications), which would be similar to the code in 1a)
3. **Filter applications on a specific status**
1. The [application](https://docs.unified.to/ats/application/model) carries a standard `status` (with the vendor's own label in `original_status`), so choose the status that should start the assessment.
2. Application.Status options are `NEW` `REVIEWING` `SCREENING` `SUBMITTED` `FIRST_INTERVIEW` `SECOND_INTERVIEW` `THIRD_INTERVIEW` `BACKGROUND_CHECK` `OFFERED` `ACCEPTED` `HIRED` `REJECTED` `DECLINED` `WITHDRAWN`. Of these, `REVIEWING`, `SCREENING`, `FIRST_INTERVIEW`, `SECOND_INTERVIEW`, or `BACKGROUND_CHECK` should be considered.
4. **Email the candidate with the assessment based on the job**
1. [Read the candidate](https://docs.unified.to/ats/candidate/Retrieve_a_candidate) from the `Application.candidate_id` field
```typescript
import { UnifiedTo } from '@unified-api/typescript-sdk';
const sdk = new UnifiedTo({
security: {
jwt: process.env.UNIFIED_API_KEY!,
},
});
export async function readCandidate(connectionId: string, candidateId: string) {
return await sdk.ats.getAtsCandidate({
id: candidateId,
connectionId,
});
}
```
2. Optional: [read the job](https://docs.unified.to/ats/job/Retrieve_a_job) from the `Application.job_id` field
```typescript
import { UnifiedTo } from '@unified-api/typescript-sdk';
const sdk = new UnifiedTo({
security: {
jwt: process.env.UNIFIED_API_KEY!,
},
});
export async function readJob(connectionId: string, jobId: string) {
return await sdk.ats.getAtsJob({
id: jobId,
connectionId,
});
}
```
3. Determine which test to send to the candidate based on the `Job.id`, `Job.description` or `Job.name` fields
5. **Once the candidate has completed the assessment/test, notify the hiring manager and/or recruiter**
1. [Read the employee](https://docs.unified.to/hris/employee/Retrieve_an_employee) from the `Job.hiring_manager_ids` or `Job.recruiter_ids` fields, on integrations that support the HR employee object on the same connection (Greenhouse and Lever do), and email them from `Employee.emails`
```typescript
import { UnifiedTo } from '@unified-api/typescript-sdk';
const sdk = new UnifiedTo({
security: {
jwt: process.env.UNIFIED_API_KEY!,
},
});
export async function readEmployee(connectionId: string, employeeId: string) {
return await sdk.hris.getHrisEmployee({
id: employeeId,
connectionId,
});
}
```
2. Optional: [write a PDF report](https://docs.unified.to/ats/document/Create_a_document) to the application or candidate in the customer's ATS, on integrations that support document creation (Greenhouse and Workable attach to the application; Lever to the candidate)
```typescript
import { UnifiedTo } from '@unified-api/typescript-sdk';
import { AtsDocumentType } from '@unified-api/typescript-sdk/sdk/models/shared';
const sdk = new UnifiedTo({
security: {
jwt: process.env.UNIFIED_API_KEY!,
},
});
// Greenhouse and Workable attach documents by applicationId; Lever, Ashby and SmartRecruiters by candidateId
export async function createDocument(connectionId: string, target: { applicationId?: string; candidateId?: string }, documentUrl: string, filename: string, type: AtsDocumentType) {
return await sdk.ats.createAtsDocument({
atsDocument: {
...target,
type,
documentUrl,
filename,
},
connectionId,
});
}
```
3. Optional: [create an activity](https://docs.unified.to/ats/activity/Create_an_activity) (a note on the candidate or application) on integrations that support it, such as Greenhouse, Lever, Workable and Ashby. Where the integration accepts scorecard creation (SmartRecruiters, Ashby, Workday and SAP SuccessFactors among them; not Greenhouse or Lever, as of 19 October 2026), you can create a scorecard instead.
4. Optional: [update the candidate](https://docs.unified.to/ats/candidate/Update_a_candidate)'s `tags` on integrations where tags are writable (Greenhouse and Lever are two). Read the candidate's current `tags`, add yours, and send the full list, so no existing tags are lost.
```typescript
import { UnifiedTo } from '@unified-api/typescript-sdk';
const sdk = new UnifiedTo({
security: {
jwt: process.env.UNIFIED_API_KEY!,
},
});
export async function updateCandidateTags(connectionId: string, candidateId: string, newTags: string[]) {
// read the current tags and send the merged list, so no existing tags are lost
const candidate = await sdk.ats.getAtsCandidate({
id: candidateId,
connectionId,
});
return await sdk.ats.updateAtsCandidate({
atsCandidate: {
tags: [...new Set([...(candidate.tags ?? []), ...newTags])],
},
id: candidateId,
connectionId,
});
}
```
Write-back targets vary by ATS (as of 19 October 2026): activities (notes, created on 55 integrations) and documents (48) are the widest options, application status is writable on 33 of 125 application integrations, and scorecards can be created on the fewest (12, not Greenhouse or Lever). Check the integration page before you design around one.
### Advanced: Adding RAG-Based Resume Matching
Beyond triggering assessments, you can use the same data for retrieval-augmented generation (RAG):
1. Subscribe to application created and updated webhooks so new resumes are embedded as they arrive.
2. Retrieve the candidate's resume (an `ats_document` with `type` `RESUME`) and the job's `description`.
3. Chunk and embed both documents.
4. Store embeddings in your vector database with identifiers like `connection_id`, `candidate_id`, `job_id` and `updated_at`.
5. Retrieve the most relevant resume segments against the job description before generating screening insights or ranking scores.
[Unified.to](https://unified.to/) reads the ATS data at request time and returns it in one schema across ATS integrations, with no customer records at rest; embeddings and retrieval stay in your infrastructure.
## Keep learning
- [How to add a test connection](https://unified.to/blog/start_here_how_to_add_a_test_connection)
- [How your customers add integrations from your application](https://docs.unified.to/quick-start)
- [How to generate OAuth 2 credentials](https://unified.to/blog/start_here_how_to_generate_oauth2_credentials)
## How do you start?
Connect a test ATS, list its applications and register an application webhook; the steps above are the whole integration. [Start a 30-day free trial](https://app.unified.to/login) or [book a demo](https://calendly.com/d/cph9-g8n-jzg/connect-with-unified).
## How to build a candidate sourcing or job board app with Unified.to
URL: https://docs.unified.to/guides/how_to_build_a_candidate_sourcing_or_job_board_app_with_unified
# How to build a candidate sourcing or job board app with Unified.to
------
_January 4, 2024_
To build a candidate sourcing or job board app with [Unified.to](https://unified.to/)'s ATS API, read your customer's open jobs, then send candidates to the job's public page or create the candidate and application in the ATS, and attach their resume.
## Why build with a unified API?
API integrations are necessary for any modern SaaS app, especially for recruitment solutions like candidate sourcing and job boards that require a high volume of integrations to improve product value and support a broader user base.
Instead of building each ATS integration separately, developers can use a unified API to launch many at once. Unified APIs simplify integration efforts by offering consistent endpoints and data formats that reduce the complexity of managing numerous APIs.
Unified APIs accelerate development cycles, enabling quicker deployment of new features and product updates for your recruitment software. We built Unified.to to make integration development as easy as possible for SaaS developers.
## Prerequisites
Before starting, be sure to review our [Getting Started with Unified](https://unified.to/blog/start_here_getting_started_with_unified) article. It will walk you through registering for a free account and our onboarding. Once you have completed the onboarding steps, go ahead and as you like.
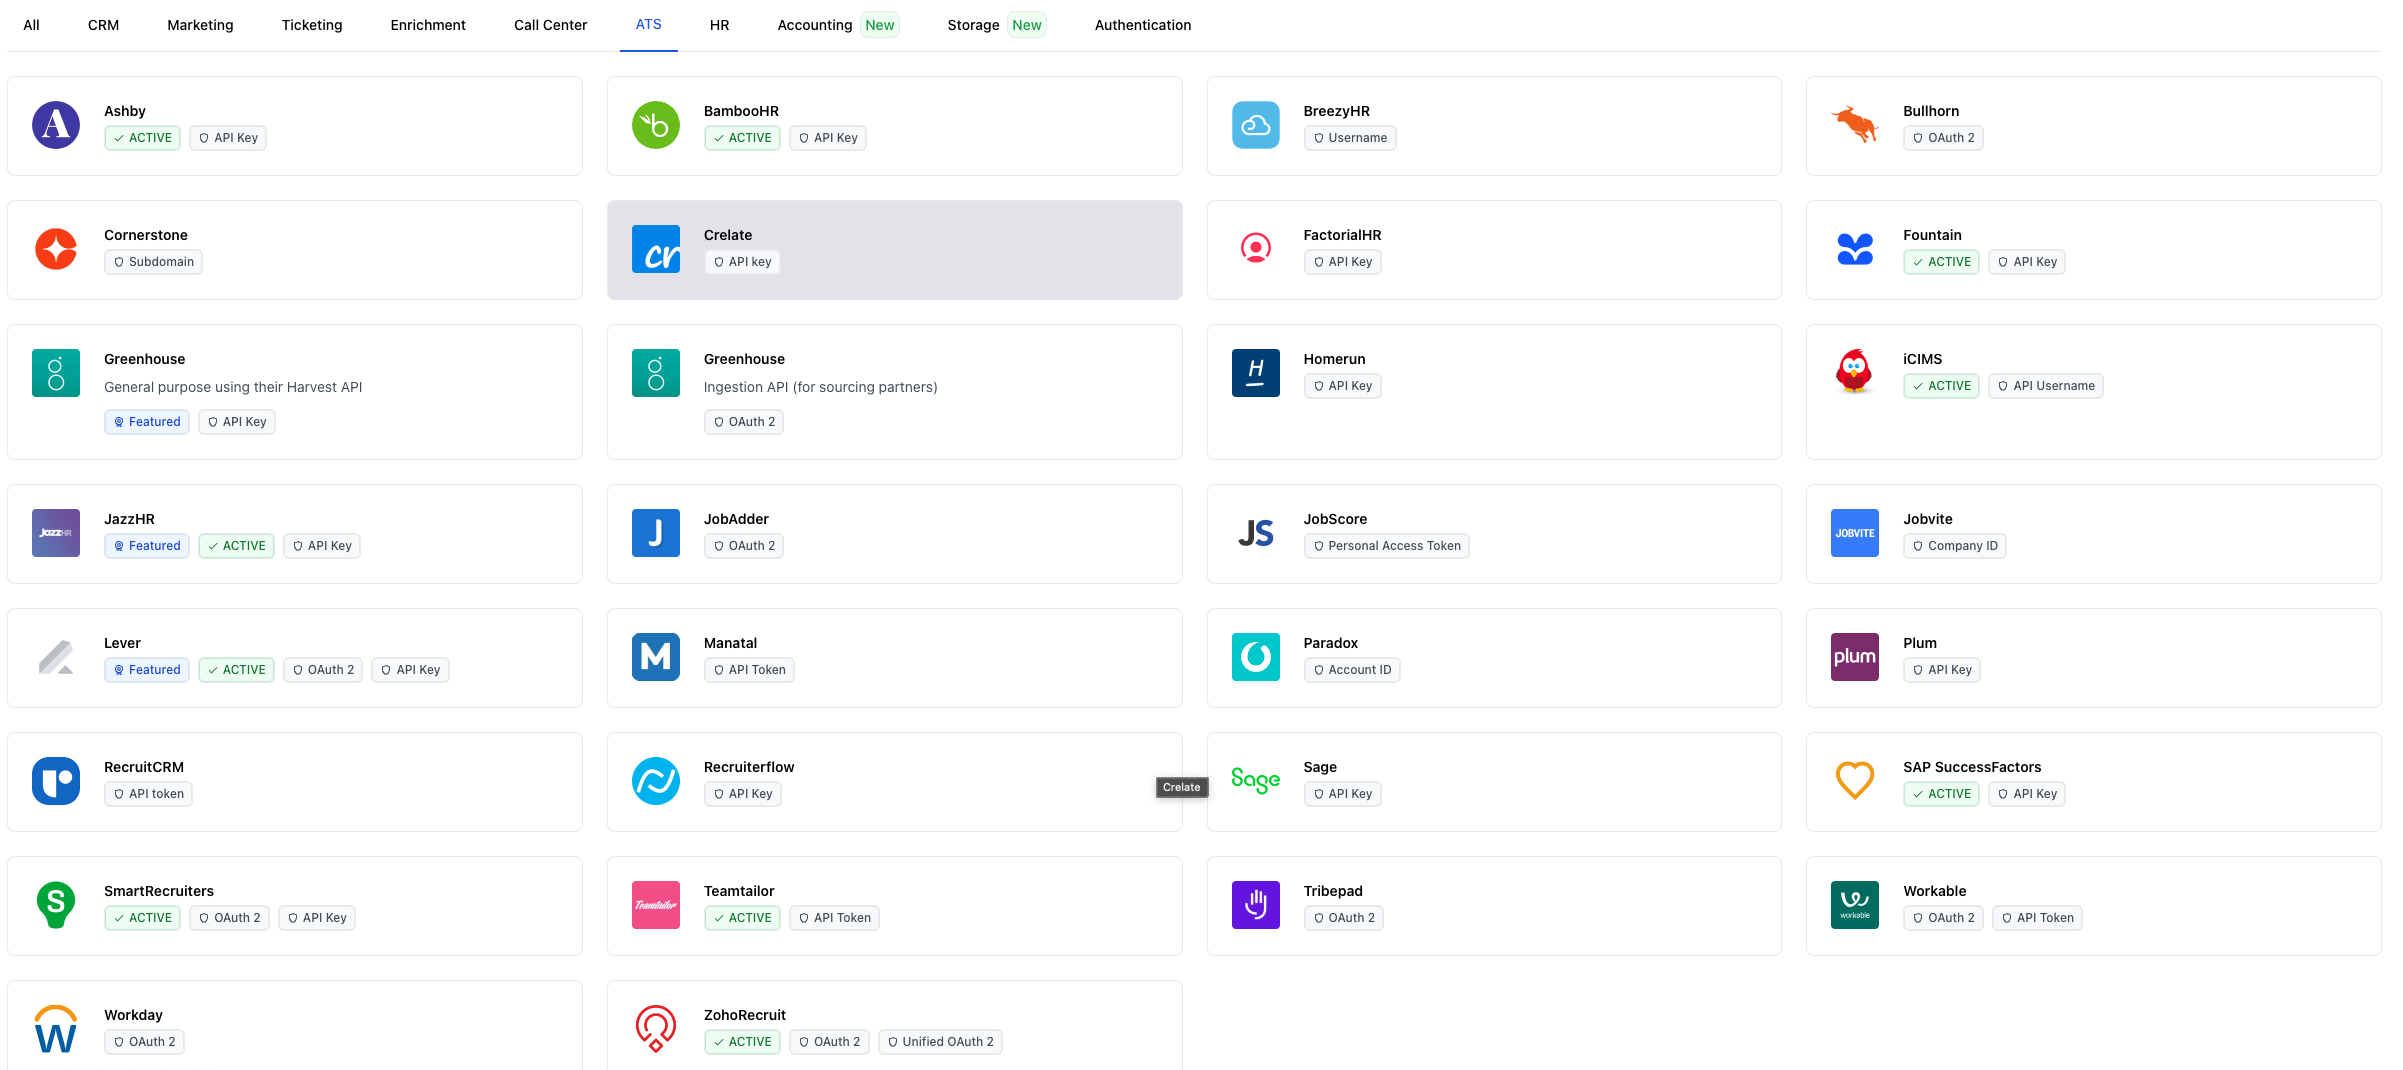
Next, deploy the [Unified.to](https://unified.to/) Embedded Authorization widget in your product's user-interface. Check out our to learn more.
## Overview
These are main steps that you will need to support to build your candidate sourcing or job board app:
1. read active jobs to search relevant candidates for
2. apply a candidate to a job
Let's go into more detail for each.
## Step 1: Read Jobs
Before searching or finding relevant candidates, you'll need to know which jobs your customer wants you to search for.
[Unified.to](https://unified.to/) reads jobs from your customer's ATS.
To get a list of existing jobs from your end user's ATS, call the List all jobs [API endpoint](https://docs.unified.to/ats/job/List_all_jobs) (`listAtsJobs` in the TypeScript SDK).
```typescript
import { UnifiedTo } from '@unified-api/typescript-sdk';
const sdk = new UnifiedTo({
security: {
jwt: "",
},
});
export async function getJobs(connectionId: string) {
return await sdk.ats.listAtsJobs({
connectionId,
});
}
```
The connection_id comes in from your end user's authorization of their ATS and is stored on your end. You can watch our for more detail.
A `Job` has fields such as `name`, `description`, `compensation`, `addresses` and `remote` that will be relevant to your software. Reference our [API docs](https://docs.unified.to/ats/job/model) for more information.
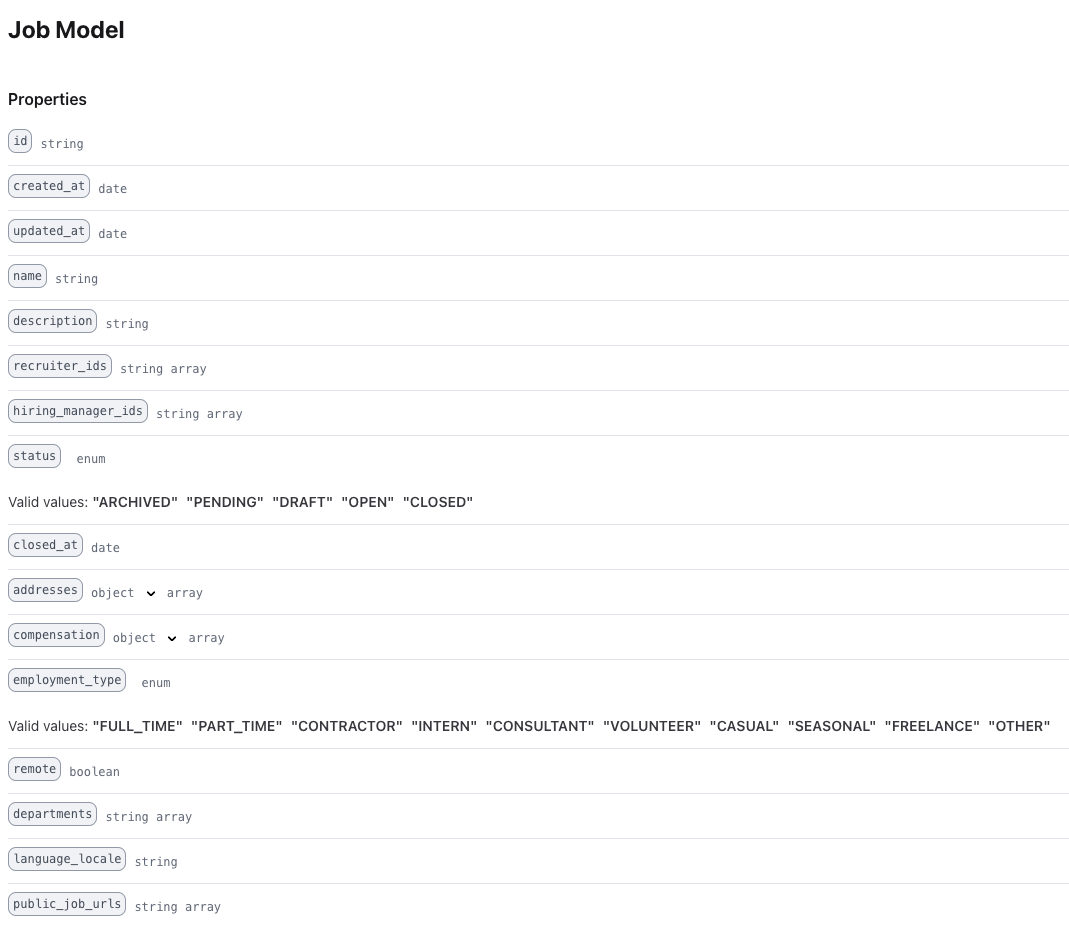
Once you have the list of jobs, ask your customer to identify which jobs your app should identify candidates for.
## Step 2: Create an application
Once you have a candidate, there are two ways to create a job application.
1. Send the interested candidate to the job's public web page to apply directly. Many integrations return `public_job_urls`, a list of the job's public pages (on Greenhouse it's a slow field: request it with `fields`). The downside to this method is that you lose control of the candidate's experience and not all ATS providers supply the public website. The upside of this method is that it is very easy to implement.
2. Create an application and candidate in the ATS directly using our Unified ATS API. This is easily accomplished by using the `createCandidate` [API endpoint](https://docs.unified.to/ats/candidate/Create_a_candidate) and `createApplication` [API endpoint](https://docs.unified.to/ats/application/Create_an_application).
```typescript
import { UnifiedTo } from '@unified-api/typescript-sdk';
import { AtsCandidate } from '@unified-api/typescript-sdk/dist/sdk/models/shared';
const sdk = new UnifiedTo({
security: {
jwt: '',
},
});
export async function createCandidate(connectionId: string, atsCandidate: AtsCandidate) {
const result = await sdk.ats.createAtsCandidate({
atsCandidate,
connectionId,
});
return result.atsCandidate?.id;
}
export async function createApplication(connectionId: string, candidateId: string, jobId: string) {
const result = await sdk.ats.createAtsApplication({
atsApplication: {
candidateId,
jobId,
},
connectionId,
});
return result.atsApplication?.id;
}
```
## Step 3: uploading a resume/CV/cover letter (optional)
You can also upload the candidate's documents. Set the `Document` [object](https://docs.unified.to/ats/document/model) fields your customer's ATS requires: usually `filename`, `type` (such as RESUME), the file as `document_url` or base64 `document_data`, and the record it attaches to. Greenhouse and Workable attach to an `application_id` and take a URL only; Lever attaches to a `candidate_id` and also accepts base64.
Some ATS providers may require additional fields to be present. Be sure to check their [feature support page](https://app.unified.to/integrations/greenhouse?tab=support) for more information.
## Step 4: Review the application status (optional)
If you need to be informed on the status of the candidate's job application, use the Retrieve an application [API endpoint](https://docs.unified.to/ats/application/Retrieve_an_application), or subscribe to application updated events on integrations that support them (native or virtual webhooks).
## Where to go next
Use [Unified.to](https://unified.to/)'s [ATS API](https://unified.to/ats) to support 164 ATS integrations in your sourcing or job-board app with one integration.
## Additional resources
- [Unified ATS API](https://unified.to/ats)
- [API Documentation for the Unified ATS API](https://docs.unified.to/ats/overview)
- [SDKs for Unified.to](https://docs.unified.to/overview/sdks)
-
-
## How to build a Discord support bot with Unified.to and Langbase
URL: https://docs.unified.to/guides/how_to_build_a_discord_support_bot_with_unified_and_langbase
# How to build a Discord support bot with Unified.to and Langbase
------
_December 12, 2024_
Want to build an AI-powered support bot that can answer questions with information from an knowledge base?
In this guide, we'll show you how to combine Unified.to's data ingestion capabilities with Langbase's AI agent framework to create a powerful support bot. We'll pull content from your customers' knowledge management system (like Notion) through Unified.to, process it with Langbase's Memory Agents, and make it available to a Discord bot, powered by Unified.to's Messaging API, so it can answer support questions.
We'll be using React and Typescript in these examples, which you can adapt to fit your framework of choice.
## Overview
This guide walks you through how to:
- Pull knowledge base content using Unified.to's KMS API
- Process and prepare this content using Langbase's Memory Agents
- Create an AI agent using Langbase Pipes
- Send responses through Discord using Unified.to's Messaging API
By combining Unified.to's unified APIs with Langbase's AI capabilities, we get the best of both worlds: easy access to your data sources and powerful AI features without the complexity of building everything from scratch.
## Before you begin
Make sure you have:
- A [Unified.to](https://app.unified.to/) account
- A [Langbase](https://langbase.com/) account
- Access to a knowledge management system (e.g., Notion) containing your support content
- Unified.to allows you to easily access your customers' data and that's normally what you would use in production, but for the purposes of this guide you can follow along with your own Notion account
- A Discord server where you want to deploy your bot
> If you don't want to use real data from Notion or Discord, you can also take advantage of Unified.to's [sandbox environment](https://docs.unified.to/concepts/sandbox) and work with synthetic data instead.
The following steps assume you already have your Unified.to account with your workspace ID and API key available. If you're new, check out our [Quick Start guide](https://docs.unified.to/quick-start) to get familiar with the platform.
## Set up your connections
The first thing you'll do is activate your preferred KMS platform to be the source of data for your bot. We'll use Notion in this guide, but our [KMS API](https://unified.to/kms) supports 33 platforms today and more are being added on a regular basis.
**Note:** If you're using the sandbox environment, for the steps below that ask you to enter your OAuth 2 credentials, just enter any random value e.g., `test123`.
### Activate Notion and Discord integrations
1. On app.unified.to, go to the [Integrations page](https://app.unified.to/integrations)
2. Search for and select Notion
3. Choose OAuth 2, enter your credentials (which can be anything if you're using the sandbox environment), and then click **Activate**
Repeat steps 1-3 but for Discord. If you want to use real data from Notion and Discord, check out our how-to guides on setting up with them:
- [How to set up and configure Notion](https://docs.unified.to/guides/how_to_set_up_and_configure_notion)
- [How to get your Discord OAuth 2 credentials and bot token](https://docs.unified.to/guides/how_to_get_your_discord_oauth_2_credentials_and_bot_token)
### (Sandbox environment) Create a test connection from the web app
If you're using the sandbox environment, then you can create test connections easily from the web app.
1. On app.unified.to, go to the [Connections](https://app.unified.to/connections) page
2. Click on **Create test connection** at the top right corner of the page (note: this will only show up if your current environment is the sandbox environment)
3. Click on the **Notion** and **Discord** integrations
4. Click **Done**
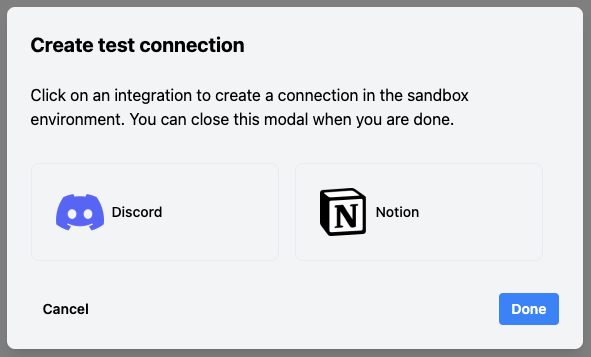
Skip ahead to the 'Pull content from your knowledge base' step below.
### (Production environments) Add the Authorization component to your app
To ask for your customers' permission to access their Notion and Discord accounts, you can add Unified.to's Authorization component to your front-end:
1. Add the following React component to your app. Make sure to replace `WORKSPACE_ID` with your actual workspace ID.
```javascript
// TODO: Make sure to run 'npm install @unified-api/react-directory'
import UnifiedDirectory from '@unified-api/react-directory';
```
We also offer pre-built embedded components in Angular, Vue, and Svelte. See other ways to display the Authorization component in your app [here](https://app.unified.to/embed?tab=Authorization).
- If your customers' mainly interact with you through message-based platforms, you could even send them the Authorization URL through an AI chat agent instead of a web front-end!
The Authorization component displays a list of your integrations. When your user clicks on one of these integrations, the authorization flow will open up in a new tab. Your users will follow the steps to grant you access to their accounts. When that is done, they will be redirected back to your app (the default success URL location).
1. Handle the callback after a user authorizes an integration. The connection ID will be sent back in the success URL - we need to save this to make API calls later on. In this example, we'll save the connection ID to local storage:
```javascript
function handleAuthCallback() {
const urlParams = new URLSearchParams(window.location.search);
const connectionId = urlParams.get('id');
if (connectionId) {
console.log('New connection created:', connectionId);
// Store this connection ID securely - you'll need it for API calls
localStorage.setItem('unifiedConnectionId', connectionId);
}
}
window.addEventListener('load', handleAuthCallback);
```
For this guide, you can be your own test user:
1. Click on the Notion integration in the Authorization component
2. Grant access to your Notion workspace
3. Repeat for Discord
4. Save both connection IDs - you'll need them for the next steps
Note: In production, you should associate these connection IDs with your user's account in your database. For more information, see our guide on [How to associate connection IDs with your users](https://docs.unified.to/guides/how_to_associate_a_connection_id_with_your_end_user).
## Pull content from your knowledge base
Now that you've got a connection ID, we can start making calls to the Unified API!
First, let's write some functions to recursively fetch all content from your KMS:
```javascript
async function fetchContent(connectionId: string, apiKey: string) {
const spaces = await fetchAllSpaces(connectionId, apiKey);
const allContent = [];
for (const space of spaces) {
const pages = await fetchPagesInSpace(connectionId, apiKey, space.id);
allContent.push(...pages);
}
return allContent;
}
async function fetchAllSpaces(connectionId: string, apiKey: string) {
const response = await fetch(
`https://api.unified.to/kms/${connectionId}/space?limit=100`,
{
headers: {
Authorization: `Bearer ${apiKey}`,
}
}
);
if (!response.ok) {
throw new Error(`Failed to fetch spaces: ${response.statusText}`);
}
return response.json();
}
async function fetchPagesInSpace(connectionId: string, apiKey: string, spaceId: string) {
const response = await fetch(
`https://api.unified.to/kms/${connectionId}/page?limit=100&space_id=${spaceId}`,
{
headers: {
Authorization: `Bearer ${apiKey}`,
}
}
);
if (!response.ok) {
throw new Error(`Failed to fetch pages: ${response.statusText}`);
}
return response.json();
}
// Usage
const content = await fetchContent(CONNECTION_ID, API_KEY);
```
**API reference**: [KMS](https://docs.unified.to/kms/overview)
Call `fetchContent` in your app to see the results. You should see a collection of [Pages](https://docs.unified.to/kms/page/model).
## Process the content with Langbase Memory Agents
Now that we have our knowledge base content, we need to prepare it for AI consumption. Instead of building a complex RAG pipeline ourselves, we'll use Langbase's [Memory Agents](https://langbase.com/docs/memory) to handle all the heavy lifting - from text processing to embedding generation and storage.
First, let's install the Langbase SDK:
```shell
npm install langbase
```
Now we can create memory to store our knowledge base:
```typescript
import { Langbase } from 'langbase';
const langbase = new Langbase({
apiKey: process.env.LANGBASE_API_KEY!,
});
async function createKnowledgeBase() {
// Create a new memory
const memory = await langbase.memory.create({
name: 'support-bot-knowledge',
description: 'Knowledge base for our support bot',
embedding_model: 'openai:text-embedding-3-large'// Using OpenAI's latest model
});
return memory;
}
```
**API reference:** [Create memory](https://langbase.com/docs/sdk/memory/create)
Now let's process our Unified.to content and upload it to Langbase:
```typescript
async function uploadContentToMemory(pages, memoryName: string) {
for (const page of pages) {
// Download the page content from Unified.to's download_url
const content = await fetch(page.download_url).then(res => res.text());
// Create a buffer from the content
const documentBuffer = Buffer.from(content);
// Upload to Langbase with metadata
await langbase.memory.documents.upload({
memoryName,
documentName: page.title,
document: documentBuffer,
contentType: 'text/markdown', // Adjust based on your content type
meta: {
source: 'unified_kms',
created_at: page.created_at,
updated_at: page.updated_at,
space_id: page.space_id
}
});
}
}
```
**API reference:** [Upload document](https://langbase.com/docs/sdk/memory/document-upload)
Langbase's Memory Agents will automatically:
1. Process the text (Unified.to's data models have already cleaned the data for you!)
2. Split content into optimal chunks
3. Generate embeddings using state-of-the-art models
4. Store and index everything for fast retrieval
Once your content is uploaded, you can create a Pipe to handle natural language interactions. Pipes are custom AI agents that can be exposed as APIs, making them perfect for our Discord bot:
```typescript
async function createSupportBotPipe(memoryName: string) {
const pipe = await langbase.pipe.create({
name: 'Support Bot',
type: 'chat',
memory: memoryName,
description: 'Support bot powered by our knowledge base'
});
return pipe;
}
```
**API reference**: [Create pipe](https://langbase.com/docs/sdk/pipe/create)
This gives you a fully-functional RAG system with just a few API calls. No need to manage embeddings, vector stores, or complex AI infrastructure - Langbase handles all of that for you.
## Set up real-time message monitoring
To make your support bot responsive, you'll need to set up webhooks to receive notifications when users send messages in Discord channels.
1. Create a webhook to monitor Discord messages:
```javascript
async function createDiscordWebhook(connectionId: string, apiKey: string, hookUrl: string) {
const response = await fetch(
'https://api.unified.to/unified/webhook',
{
method: 'POST',
headers: {
'Authorization': `Bearer ${apiKey}`,
'Content-Type': 'application/json'
},
body: JSON.stringify({
connection_id: connectionId,
hook_url: hookUrl,
object_type: 'messaging_message',
event: 'created'
})
}
);
if (!response.ok) {
throw new Error(`Failed to create webhook: ${response.statusText}`);
}
return response.json();
}
createDiscordWebhook(CONNECTION_ID, API_KEY, 'https://localhost:8000/webhook')
```
**API reference**: [Create a webhook](https://docs.unified.to/unified/webhook/Create_webhook_subscription)
1. Set up an endpoint on your server to handle incoming webhook events. For example:
```javascript
app.post('/webhook', async (req, res) => {
// Verify webhook signature
const { data, webhook, nonce, sig } = req.body;
// Handle new messages
for (const message of data) {
// Ignore messages from the bot itself
if (message.author_member.id === BOT_USER_ID) continue;
// Process the message and generate a response
const response = await generateBotResponse(message.message);
// Send the response back to the channel
await sendDiscordResponse(
DISCORD_CONNECTION_ID,
API_KEY,
message.channel_id,
response
);
}
res.sendStatus(200);
});
```
1. Validate incoming webhooks (recommended):
```javascript
const crypto = require('crypto');
function verifyWebhookSignature(data, nonce, signature, workspaceSecret) {
const hmac = crypto.createHmac('sha1', workspaceSecret);
const calculatedSignature = hmac
.update(JSON.stringify(data) + nonce)
.digest('base64');
return calculatedSignature === signature;
}
```
With this setup, your bot can:
1. Receive notifications whenever a new message is sent in the monitored channels
2. Process those messages through your AI pipeline
3. Send responses back to the appropriate channel
For more details on webhooks at Unified.to, see our [guide to webhooks](https://docs.unified.to/reference/webhooks).
## Send responses through Discord
When you're ready to respond to a user's question, use our Messaging API to send the message back to Discord. Here's an example implementation with error handling and message formatting:
```javascript
async function sendDiscordResponse(connectionId: string, apiKey: string, channelId: string, response: string) {
const formattedResponse = formatDiscordMessage(response);
const apiResponse = await fetch(
`https://api.unified.to/messaging/${connectionId}/message`,
{
method: 'POST',
headers: {
'Authorization': `Bearer ${apiKey}`,
'Content-Type': 'application/json'
},
body: JSON.stringify({
channel_id: channelId,
message: formattedResponse,
message_html: formattedResponse, // Optional: Use for formatted text
})
}
);
if (!apiResponse.ok) {
if (apiResponse.status === 401) {
throw new Error('Authentication failed - check your API key');
} else if (apiResponse.status === 404) {
throw new Error('Channel not found - verify channel ID');
}
throw new Error(`Failed to send message: ${apiResponse.statusText}`);
}
return apiResponse.json();
}
function formatDiscordMessage(response) {
// Example formatting for Discord markdown
return `**Bot Response:**\n${response}`;
}
// Example usage with different message types
async function sendBotResponses(connectionId, apiKey, channelId) {
// Simple text response
await sendDiscordResponse(
connectionId,
apiKey,
channelId,
'Here is the answer to your question...'
);
// Response with code block
await sendDiscordResponse(
connectionId,
apiKey,
channelId,
'```javascript\nconst example = "code block";\n```'
);
// Response with rich formatting
await sendDiscordResponse(
connectionId,
apiKey,
channelId,
'**Bold text** and *italic text* with a [link](https://example.com)'
);
}
```
**API reference**: [Messaging](https://docs.unified.to/messaging/overview)
## Putting it all together
Here's a high-level overview of how to combine all the components into a working support bot:
```typescript
import { Langbase } from 'langbase';
async function initializeSupportBot() {
// Initialize APIs
const langbase = new Langbase({
apiKey: process.env.LANGBASE_API_KEY!
});
// Get connection IDs - implement these based on how you manage your users
const KMS_CONNECTION_ID = await getKMSConnection(user_id);
const DISCORD_CONNECTION_ID = await getDiscordConnection(user_id);
const UNIFIED_API_KEY = process.env.UNIFIED_API_KEY;
// Step 1: Fetch content from KMS
const kmsContent = await fetchContent(KMS_CONNECTION_ID, UNIFIED_API_KEY);
// Step 2: Set up Langbase Memory and upload content
const memory = await langbase.memory.create({
name: `support-kb-${user_id}`,
description: 'Knowledge base for support bot'
});
await uploadContentToMemory(kmsContent, memory.name);
// Step 3: Create an AI agent using Langbase Pipe
const pipe = await langbase.pipe.create({
name: `discord-support-bot`,
type: 'chat',
memory: memory.name,
description: 'Support bot powered by our knowledge base'
});
// Step 4: Set up Discord webhook for real-time messages
const webhook = await createDiscordWebhook(
DISCORD_CONNECTION_ID,
UNIFIED_API_KEY,
'https://your-server.com/webhook'
);
// Step 5: Handle incoming questions
async function handleQuestion(channelId: string, question: string) {
try {
// Use the Pipe to generate a response
const response = await langbase.pipe.chat({
pipe: pipe.name,
messages: [{ role: 'user', content: question }]
});
// Send the response back to Discord
await sendDiscordResponse(
DISCORD_CONNECTION_ID,
UNIFIED_API_KEY,
channelId,
response.message
);
} catch (error) {
console.error('Error handling question:', error);
}
}
return {
memory,
pipe,
webhook,
handleQuestion
};
}
// Usage example
async function startBot() {
const bot = await initializeSupportBot();
// Your webhook endpoint would call this when receiving messages
app.post('/webhook', async (req, res) => {
const { data, webhook, nonce, sig } = req.body;
// Handle new messages
for (const message of data) {
// Ignore messages from the bot itself
if (message.author_member.id === BOT_USER_ID) continue;
await bot.handleQuestion(message.channel_id, message.message);
}
res.sendStatus(200);
});
}
```
This implementation:
1. Initializes both Unified.to and Langbase clients
2. Creates a Memory AGent to store your knowledge base content
3. Sets up a Pipe to handle natural language interactions
4. Configures Discord webhooks for real-time messaging
The bot will now:
- Automatically receive messages from Discord through webhooks
- Process questions using your knowledge base through Langbase Pipes
- Send responses back to the appropriate Discord channel
All of this happens with minimal infrastructure management on your part - Unified.to handles the integrations while Langbase manages the AI components.
## Conclusion
Congratulations! You've built a powerful support bot by combining Unified.to's integration capabilities with Langbase's AI features. In this guide, you learned how to:
- Pull knowledge base content from any system using Unified.to's KMS API
- Process and embed that content using Langbase Memory Agents
- Create an AI agent using Langbase Pipes
- Handle real-time messages through Discord using Unified.to's Messaging API and webhooks
As an added bonus, this architecture is incredibly flexible. Since you're using Unified.to's APIs, you can easily expand your knowledge sources - want to pull content from Confluence instead of Notion? Or deploy your bot on Slack? It's just a matter of changing the connection - your core logic stays the same.
And with Langbase handling the AI components, you can enhance your bot's capabilities without managing complex infrastructure:
- Experiment with multiple Memory Agents for different types of content
- Customize your Pipe's behaviour through prompt engineering
- Scale your bot without worrying about vector store management
Happy building!
## How to Build a Fintech Application with Unified's Payments API
URL: https://docs.unified.to/guides/how_to_build_a_fintech_application_with_unified_payments_api
# How to Build a Fintech Application with Unified's Payments API
------
_September 9, 2025_
_Last Updated: July 2026_
With Unified, you can build fin-tech products that work with your end customers payment providers. With a single integration you can connect payment processors like Stripe, PayPal, GoCardless and more!
You can do various things such as creating payments, generating payment links, and reading refund and payout records for reconciliation, all without building custom integrations for each payment provider. Refunds and payouts are read-only in the unified model: you retrieve them to reconcile, and issue them through the payment provider itself.
In this guide, we will show you how to create and list payments as well as some related data. For the example we will be using Stripe, but this approach works for any of the payment integrations supported by Unified.
[See the full list of supported payment integrations.](https://docs.unified.to/payment/integrations)
---
## Prerequisites
- Node.js (v18+)
- Unified account with a payment integration enabled (e.g., Stripe)
- Unified API key
- Your customer's payment processor connection ID
---
## Step 1: Setting up your project
Set up your dependencies
```bash
mkdir payments-demo
cd payments-demo
npm init -y
npm install @unified-api/typescript-sdk dotenv
```
Add your credentials to `.env`:
```plain text
UNIFIED_API_KEY=your_unified_api_key
CONNECTION_STRIPE=your_customer_stripe_connection_id
```
---
## Step 2: Initialize the SDK
```typescript
import 'dotenv/config';
import { UnifiedTo } from '@unified-api/typescript-sdk';
const { UNIFIED_API_KEY, CONNECTION_STRIPE } = process.env;
const sdk = new UnifiedTo({
security: { jwt: UNIFIED_API_KEY! },
});
```
---
## Step 3: How to Get Your Customer's Connection ID
Before you can list payments, your customer must authorize your app to access their payment provider via Unified's embedded auth flow.
Once authorized, you'll receive a connection ID for each integrations.
## Step 4: Listing Payments
```typescript
export async function listPayments(connectionId: string) {
const payments = await sdk.payment.listPaymentPayments({
connectionId,
limit: 10,
});
return payments; // PaymentPayment[]
}
```
---
## Step 5: Creating a Payment Link
```typescript
export async function createPaymentLink(connectionId: string, amount: number, currency: string) {
const link = await sdk.link.createPaymentLink({
connectionId,
paymentLink: {
amount,
currency,
isActive: true,
successUrl: "",
// Stripe typically requires line items on links
lineitems: [
{
itemName: "Order #123",
unitAmount: amount,
unitQuantity: 1,
itemSku: "SKU-123",
},
],
},
});
return link; // PaymentLink
}
```
---
## Step 6: Listing Refunds
```typescript
export async function listRefunds(connectionId: string) {
const refunds = await sdk.refund.listPaymentRefunds({
connectionId,
limit: 10,
});
return refunds; // PaymentRefund[]
}
```
---
## Step 7: Listing Payouts
```typescript
export async function listPayouts(connectionId: string) {
const payouts = await sdk.payout.listPaymentPayouts({
connectionId,
limit: 10,
});
return payouts; // PaymentPayout[]
}
```
---
## Step 8: Listing Subscriptions
```typescript
export async function listSubscriptions(connectionId: string) {
const subs = await sdk.subscription.listPaymentSubscriptions({
connectionId,
limit: 10,
});
return subs; // PaymentSubscription[]
}
```
---
## Step 9: Example Usage
Here's how you might use these functions in your payment workflow:
```typescript
async function main() {
// 1. Create a payment
const payment = await createPayment(CONNECTION_STRIPE!, 1000, "USD");
// 2. List payments
const payments = await listPayments(CONNECTION_STRIPE!);
// 3. Create a payment link
const link = await createPaymentLink(CONNECTION_STRIPE!, 1000, "USD");
// 4. List links
const links = await sdk.link.listPaymentLinks({ connectionId: CONNECTION_STRIPE!, limit: 10 });
// 5. List refunds
const refunds = await listRefunds(CONNECTION_STRIPE!);
// 6. List payouts
const payouts = await listPayouts(CONNECTION_STRIPE!);
// 7. List subscriptions (creation may not be implemented for some providers)
const subscriptions = await listSubscriptions(CONNECTION_STRIPE!);
console.log("Payment:", payment);
console.log("Payments count:", payments.length);
console.log("Payment Link URL:", link.url);
console.log("Links count:", links.length);
console.log("Refunds count:", refunds.length);
console.log("Payouts count:", payouts.length);
console.log("Subscriptions count:", subscriptions.length);
}
main();
```
---
Happy building! 🎉
## How to Build an E-Commerce Product Integration with Unified
URL: https://docs.unified.to/guides/how_to_build_an_e_commerce_product_integration_with_unified
# How to Build an E-Commerce Product Integration with Unified
------
_September 8, 2025_
Unified makes it possible for developers to build ecom products that work with your end customers preferred ecom platforms!
With our Unified Commerce API, you can connect to dozens of ecom systems (like Shopify, BigCommerce, WooCommerce and more).
This article will give you knowledge on how to create and list products, and to even create product images from the product description using Unified's GenAI integration.
## Requirements
- Node.js (v1
- Unified account with ecom integration
- Unified API key
- Your end customer's e-commerce connection ID
- Unified GenAI connection ID
## Step 1: Setting up your project
```bash
mkdir ecommerce-demo
cd ecommerce-demo
npm init -y
npm install @unified-api/typescript-sdk dotenv
```
Add your credentials to `.env`:
```shell
UNIFIED_API_KEY=your_unified_api_key
CONNECTION_SHOPIFY=your_customer_shopify_connection_id
CONNECTION_GENAI=your_genai_connection_id
```
---
## Step 2: Initialize the SDK
```typescript
import 'dotenv/config';
import { UnifiedTo } from '@unified-api/typescript-sdk';
const {
UNIFIED_API_KEY,
CONNECTION_SHOPIFY,
CONNECTION_GENAI
} = process.env;
const sdk = new UnifiedTo({
security: { jwt: UNIFIED_API_KEY! },
});
```
---
## Step 3: How to Get Your Customer's Connection ID
Before you can create or list products, your customer must authorize your app to access their e-commerce store via Unified's authentication flow.
Once authorized, you'll receive a **connection ID** for that customer's integration (e.g., Shopify).
Store this connection ID securely as shown above and use it in all API calls for that customer.
See the [full list of supported integrations](https://unified.to/commerce).
---
## Step 4: Generate a Product Image from Description (with GenAI)
You can use Unified GenAI to generate a product image based on the product description.
```typescript
export async function generateProductImage(description: string) {
const prompt = `Generate a high-quality product image for the following product description: ${description}`;
const result = await sdk.genai.createGenaiPrompt({
connectionId: CONNECTION_GENAI!,
prompt: {
messages: [{ role: "USER", content: prompt }],
maxTokens: 1024,
temperature: 0.7,
responseFormat: "image_url", // or whatever the GenAI API expects for image output
},
});
return result.choices?.[0]?.message?.content || "";
}
```
_Explanation:_
- This function sends the product description to Unified GenAI and gets back an image URL.
- You can use this image URL when creating the product in Shopify (or any other e-commerce platform).
---
## Step 5: Create a Product (with AI-generated Image)
Here's how to create a product in Shopify, using the generated image.
```typescript
export async function createProduct(connectionId: string, name: string, description: string, price: number) {
// 1. Generate product image
const imageUrl = await generateProductImage(description);
// 2. Create the product
const createProductResult = await sdk.commerce.createCommerceItem({
connectionId,
commerceItem: {
name,
description,
price,
media: imageUrl ? [{ url: imageUrl }] : [],
isActive: true,
// Add any other fields as needed (e.g., tags, variants, metadata)
},
});
return createProductResult; // commerceItem
}
```
_Explanation:_
- Generates an image from the description.
- Creates a product in Shopify (or any Unified-supported e-commerce platform) with the image and other details.
---
## Step 6: List Products
You can list all products for a customer's e-commerce connection:
```typescript
export async function listProducts(connectionId: string) {
const productsResult = await sdk.commerce.listCommerceItems({
connectionId,
limit: 10,
});
return productsResult; // commerceItem[]
}
```
_Explanation:_
- Fetches the first 10 products for the customer's store.
- You can filter, paginate, or sort as needed.
---
## Step 7: Example Usage
Here's how you might use these functions in your product workflow:
```typescript
async function main() {
const name = "AI-Generated T-Shirt";
const description = "A stylish t-shirt with a unique, AI-generated design.";
const price = 29.99;
// 1. Create the product with an AI-generated image
const product = await createProduct(CONNECTION_SHOPIFY!, name, description, price);
// 2. List products
const products = await listProducts(CONNECTION_SHOPIFY!);
console.log("Created product:", product);
console.log("All products:", products);
}
main();
```
---
## How to build an invoicing system with Unified.to
URL: https://docs.unified.to/guides/how_to_build_an_invoicing_system_with_unified
# How to build an invoicing system with Unified.to
------
_January 3, 2024_
When building a SaaS app for invoicing, you'll need to exchange data within your customers' accounting app of choice. In this guide, we'll cover the basics of how to access the data you need for your invoicing app with the help of [Unified.to](https://unified.to/)'s unified accounting API.
## Prerequisites
Before starting, be sure to review our [Getting Started with Unified](https://unified.to/blog/start_here_getting_started_with_unified) article. It will walk you through registering for a free account and onboarding. Once you have completed the onboarding steps, go ahead and as you like.
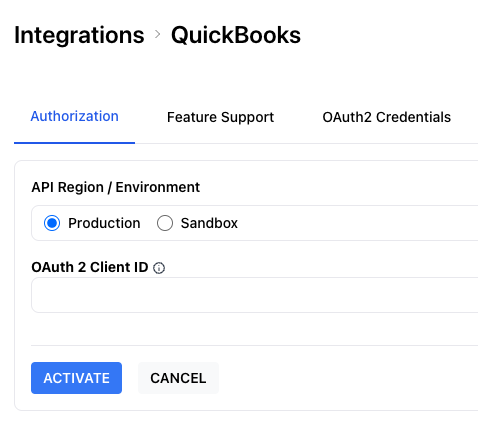
The next step is to deploy the [Unified.to](https://unified.to/) Embedded Authorization widget in your product's user interface (UI). Check out our to learn more.
## Overview
Here are the steps that you will need to support to build your invoicing app:
1. create an invoice
2. pay an invoice or cancel an invoice
Let's go into more detail for each.
## Step 1: Create an invoice
To generate an invoice, gather specific details from your end user, including essential information like the amount, line items/products, due date, and customer details.
[Unified.to](https://unified.to/) can help with two of those values: customer and product.
**Customers**
To get a list of existing customers from your end user's accounting system, simply call the `listCustomers` [API endpoint](https://docs.unified.to/accounting/customer/List_all_customers).
```typescript
import { UnifiedTo } from '@unified-api/typescript-sdk';
const sdk = new UnifiedTo({
security: {
jwt: '',
},
});
export async function getCustomers(connectionId: string) {
return await sdk.accounting.listAccountingContacts({
connectionId,
});
}
```
The connection_id comes in from your end user's authorization of their accounting app and is stored on your end. You can watch our to learn more.
If you need to create a new customer, use our `createCustomer` [API endpoint](https://docs.unified.to/accounting/customer/Create_a_customer).
A `Customer` will have specific fields such as `name` , `emails`, `billing_address`, and tax information that will be relevant to your software. See our [API Documentation page](https://docs.unified.to/accounting/customer/model) for more information.
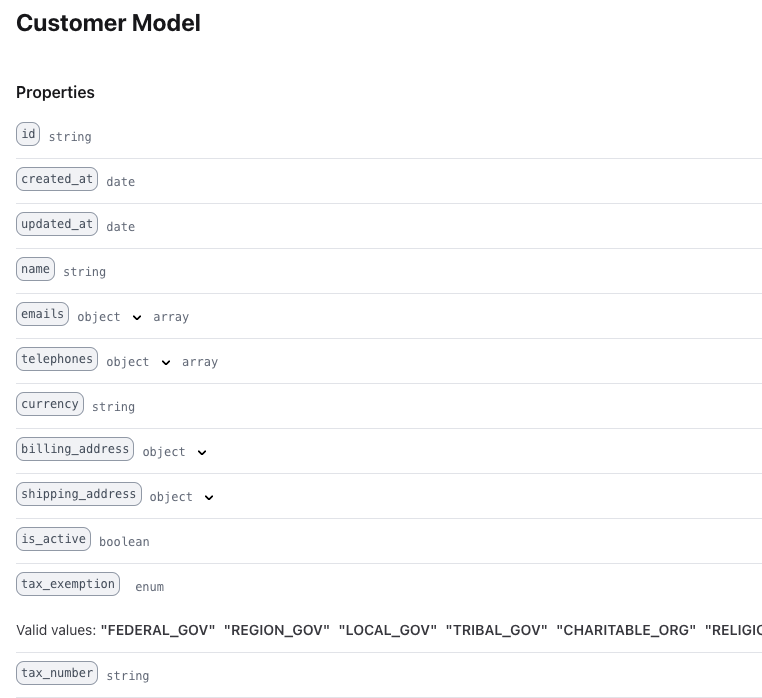
**Products**
Much like getting a list of existing customers, it is easy to get a list of existing products in your end user's accounting app using the `listItems` API endpoint. We call a product, an `Item`, and you can find the full data-model on our [API Documentation page](https://docs.unified.to/accounting/item/model).
```typescript
import { UnifiedTo } from '@unified-api/typescript-sdk';
const sdk = new UnifiedTo({
security: {
jwt: '',
},
});
export async function getItems(connectionId: string) {
return await sdk.commerce.listCommerceItems({
connectionId,
});
}
```
**Chart of accounts & tax rates**
Each line item in an invoice will be associated with a customer, item, account and tax rate in your end user's accounting application.
You can get a list of accounts by calling our `listAccounts` [API endpoint](https://docs.unified.to/accounting/account/List_all_accounts) which returns a list from their 'Chart of Accounts'.
You can also get a list of tax rates by calling our `listTaxrates` [API endpoint](https://docs.unified.to/accounting/taxrate/List_all_taxrates).
**Invoices**
Once the end user has created an invoice, you will want to send that invoice into their accounting system as well.
This is easily accomplished by using the `createInvoice` [API endpoint](https://docs.unified.to/accounting/invoice/Create_a_invoice).
```typescript
import { UnifiedTo } from '@unified-api/typescript-sdk';
import { AccountingInvoice } from '@unified-api/typescript-sdk/dist/sdk/models/shared';
const sdk = new UnifiedTo({
security: {
jwt: '',
},
});
export async function createInvoice(connectionId: string, invoice: AccountingInvoice) {
const result = await sdk.accounting.createAccountingInvoice({
accountingInvoice: invoice,
connectionId,
});
return result.accountingInvoice?.id;
}
```
## Step 2: Paying invoices
Once that invoice is paid, you will need to communicate this to the accounting application. This is accomplished by using the `createPayment` [API endpoint](https://docs.unified.to/accounting/payment/Create_a_payment) which associates a payment with an invoice.
At a minimum, a `Payment` will need an `invoice_id` , a `customer_id` and an `amount`. Some integrations may require additional values to be present, so check that [integration's feature support page](https://app.unified.to/integrations/quickbooks?tab=support). For example, Quickbooks also requires a `currency` field.
## Conclusion
It's easy to support multiple accounting applications in your invoicing app and allow your end user to seamlessly move data between the two. By using Unitied.to's [Unified Accounting API](https://unified.to/accounting) you can add accounting integrations to your product and support your invoicing use case within days.
## Additional Resources
- [Unified Accounting API](https://unified.to/accounting)
- [API Documentation for the Unified Accounting API](https://docs.unified.to/accounting/overview)
- [SDKs for Unified.to](https://docs.unified.to/overview/sdks)
-
-
## How to build Enterprise Search using RAG
URL: https://docs.unified.to/guides/how_to_build_enterprise_search_using_rag
# How to build Enterprise Search using RAG
------
_November 19, 2025_
In this article, we will be going into detail on how to build an enterprise search application as well as a Q&A bot using a RAG pipeline with [Unified.to](https://unified.to/)'s integrations and OpenAI embedding models.
[RAG](https://developer.nvidia.com/blog/rag-101-demystifying-retrieval-augmented-generation-pipelines/) or Retrieval-Augmented-Generation is an approach for indexing a large amount of information so it can be searched quickly. This design pattern is very beneficial for enterprise search, Q&A bots, or any agent. A Q&A bot can be used to answer questions across a company's knowledge base, while an enterprise search application can be used to search corporate information from any internal data source.
We will be using a few of Unified.to's integrations to access internal company knowledge in [file storage](https://unified.to/storage) (eg. Google Drive) and [knowledge management systems](https://unified.to/kms) (eg. Notion), embed their content using [OpenAI's models](https://unified.to/genai), and then store them in a vector DB and used to answer questions.
## **Prerequisites**
- Node.js 19+
- Unified account with integrations enabled for Google Drive and Notion
- Unified.to API key and GenAI Connection ID
- OpenAI API key (As we are using OpenAI for embedding)
- A vector DB (eg. Pinecone, or Chroma. For the demo we are using a in memory vector store)
## **Step 1: Setting your project up**
```typescript
mkdir rag-bot
cd rag-bot
npm init -y
npm install dotenv @unified-api/typescript-sdk
```
Add your credentials and keys to the `.env`:
```plain text
UNIFIED_API_KEY=your_unified_api_key
CONNECTION_GOOGLEDRIVE=your_gdrive_connection_id
CONNECTION_NOTION=your_notion_connection_id
CONNECTION_GENAI=your_genai_connection_id
```
## **Step 2: Initialize the SDK**
```typescript
import 'dotenv/config';
import { UnifiedTo } from '@unified-api/typescript-sdk';
const { UNIFIED_API_KEY, CONNECTION_GOOGLEDRIVE, CONNECTION_NOTION, CONNECTION_GENAI } = process.env;
const sdk = new UnifiedTo({
security: { jwt: UNIFIED_API_KEY! },
});
```
## **Step 3: Fetch all the files from Google Drive**
We will now use Unified's storage API to retrieve files from a Google Drive.
```typescript
async function getAllGoogleDriveFiles(connectionId: string) {
const files: any[] = [];
let offset = 0;
const limit = 100;
let hasMore = true;
while (hasMore) {
const response = await sdk.storage.listStorageFiles({
connectionId,
offset,
limit,
});
pages.push(...(response.files || []));
hasMore = (response.files?.length || 0) === limit;
offset += limit;
}
return files;
}
const file = await sdk.storage.getStorageFile({ connectionId, id: fileId });
const downloadUrl = file.download_url;
const content = await fetch(downloadUrl).then(res => res.text());
return content;
}
```
## **Step 4: Fetch Notion Pages**
Now that we have the data from Google Drive, we will use Unified's connection to Notion to fetch data from Notion as well.
```typescript
async function getAllNotionPages(connectionId: string) {
const pages: any[] = [];
let offset = 0;
const limit = 100;
let hasMore = true;
while (hasMore) {
const response = await sdk.storage.listStorageFiles({
connectionId,
offset,
limit,
});
files.push(...(response.files || []));
hasMore = (response.files?.length || 0) === limit;
offset += limit;
}
return pages;
}
async function getNotionPageContent(connectionId: string, pageId: string) {
const page = await sdk.kms.getKmsPage({
connectionId,
id: pageId,
});
const content = await fetch(page.download_url).then(r => r.text());
return content;
}
```
## **Step 5: Building the vector DB**
For the purpose of the demo, we will be creating a simple in memory vector store. But for production, you would use a cloud-based vector database like Pinecone, Chroma or Weaviate.
```typescript
type Document = { id: string; source: string; content: string; embedding?: number[] };
const vectorDB: Document[] = [];
```
## **Step 6: Embedding the documents**
For the purpose of the example, we will be using OpenAI as the embedding provider in this step. [Unified.to](https://unified.to/)'s Generative AI API supports embeddings on [several integrations](https://unified.to/genai), such as OpenAI, Cohere and Google Gemini, but you can also use one provider's SDK. Please remember to chunk the content properly and not embed the entire content at once.
### Chunking strategies:
Chunking large documents effectively is important to maintain context and relevance. Here are a few best practices for chunking:
1. **Semantic Chunking**: Instead of splitting by fixed lengths, break the document into chunks based on natural language boundaries, like paragraphs or sections, ensuring each chunk is coherent and meaningful.
2. **Overlap Between Chunks**: Include a slight overlap between adjacent chunks. This helps maintain continuity and context, especially for complex ideas that span multiple chunks.
3. **Fixed-Length Chunking**: If you use fixed-length chunking, aim for a length that balances between too small (losing context) and too large (losing efficiency). Typically, a few hundred tokens per chunk works well.
4. **Using Document Structure**: If your document has headings, subheadings, or other structural elements, use those to guide the chunking. This ensures that each chunk is logically complete.
5. **Contextual Embeddings**: Sometimes, you can embed the entire document first and then create embeddings for chunks that are derived from the document's embedding, ensuring that each chunk stays contextually relevant.
6. **Pre-processing and Cleaning**: Before chunking, clean up the text by removing unnecessary whitespace, special characters, or any irrelevant information to improve the quality of the embeddings.
By following these strategies, you'll maintain the semantic integrity of the document and ensure that the vector database can retrieve meaningful context.
There are several popular libraries that help with chunking and embedding with less custom code. A few notable ones include:
1. **LangChain**: This is a popular framework that integrates various language models and vector databases. It provides built-in utilities for chunking, embedding, and storing data in vector stores.
2. **Haystack**: Developed by deepset, Haystack is another framework for building search pipelines. It supports intelligent chunking, document retrieval, and integration with vector databases like FAISS, Milvus, and Pinecone.
3. **Transformers and Datasets from Hugging Face**: Hugging Face offers tools that can help with both embedding and chunking. You can use their Transformers library for embedding and their Datasets library to preprocess and chunk documents.
4. **SentenceTransformers**: This library is great for generating embeddings and can be combined with custom chunking logic to break documents into meaningful pieces before embedding.
5. **LlamaIndex (formerly GPT Index)**: This library is designed to help build large language model applications and provides utilities for chunking, indexing, and querying documents effectively.
These libraries often provide a lot of built-in functionality, making it easier to handle complex documents and ensure that your embeddings and vector storage are efficient and meaningful.
```typescript
import { Configuration, OpenAIApi } from "openai";
const openai = new OpenAIApi(new Configuration({ apiKey: process.env.OPENAI_API_KEY }));
async function embedText(text: string): Promise {
const response = await openai.createEmbedding({
model: "text-embedding-3-large", //You can choose to use text-embedding-3-small too
input: text,
});
return response.data.data[0].embedding;
}
```
## **Step 7: Indexing Everything**
Now that we have all the data collected, it is time to index all of it!
When you store vectors in a vector database like Pinecone or Weaviate, you can attach `metadata` to each vector. This metadata can include things like a unique ID, the original text, source information, or any other relevant attributes.
When you perform a similarity search and get the top matching vectors, the database returns the metadata along with the vectors. That way, you can easily link back to the original content.
For instance, when you index a piece of text, you'd store the vector along with metadata like a document ID, the title, or even the source URL. When you retrieve the nearest neighbors, the metadata is returned, and you can use it to identify or fetch the original content from your database or any external source.
```typescript
async function indexAllContent() {
// Google Drive
const gdriveFiles = await getAllGoogleDriveFiles(CONNECTION_GOOGLEDRIVE!);
for (const file of gdriveFiles) {
const content = await getFileContent(CONNECTION_GOOGLEDRIVE!, file.id);
const embedding = await embedText(content);
vectorDB.push({
id: file.id,
source: "gdrive",
content,
embedding,
filename: file.name,
date_created: file.created_at,
owner_id: file.user_id,
});
}
// Notion
const notionPages = await getAllNotionPages(CONNECTION_NOTION!);
for (const page of notionPages) {
const content = await getNotionPageContent(CONNECTION_NOTION!, page.id);
const embedding = await embedText(content);
vectorDB.push({ id: page.id, source: "notion", content, embedding });
}
}
```
## **Step 8: Finding Answers**
Now that we have the data ready, it is time to implement the Bot or enterprise search that will use this data to answer questions from a user.
The basic flow would be:
1. Embed the question asked
2. Find similar docs in the Vector DB
3. Send the top `n` amount of docs as context paired with the question to Unified's GenAI endpoint.
4. Return the answer to the user.
For the purpose of the example, we will be sending the top 3 most similar docs.
```typescript
function cosineSimilarity(a: number[], b: number[]) {
const dot = a.reduce((sum, ai, i) => sum + ai * b[i], 0);
const normA = Math.sqrt(a.reduce((sum, ai) => sum + ai * ai, 0));
const normB = Math.sqrt(b.reduce((sum, bi) => sum + bi * bi, 0));
return dot / (normA * normB);
}
async function answerQuestion(question: string) {
const questionEmbedding = await embedText(question);
// For the purpose of the example we will be sending the top 3 docs
const scored = vectorDB.map(doc => ({
...doc,
score: cosineSimilarity(questionEmbedding, doc.embedding!)
}));
const topDocs = scored.sort((a, b) => b.score - a.score).slice(0, 3);
const context = topDocs.map(doc => doc.content).join('\n---\n');
const prompt = `
You are a helpful company knowledge bot. Use the following context to answer the question.
Context:
${context}Question:
${question}Answer in a concise and accurate way.
`;
const result = await sdk.genai.createGenaiPrompt({
connectionId: CONNECTION_GENAI!,
prompt: {
messages: [{ role: "USER", content: prompt }],
maxTokens: 256,
temperature: 0.2
}
});
return result.choices?.[0]?.message?.content || "No answer generated.";
}
```
## **Step 9: Usage**
```typescript
(async () => {
await indexAllContent();
const answer = await answerQuestion("How do I request vacation days?");
console.log("Bot answer:", answer);
})();
```
The same flow works across industries: [Unified.to](https://unified.to/) supports 36 categories and 1682 integrations to read end-customer data from.
## How to configure Bullhorn Redirect URI for creating a connection
URL: https://docs.unified.to/guides/how_to_configure_bullhorn_redirect_uri_for_creating_a_connection
# How to configure Bullhorn Redirect URI for creating a connection
------
_April 8, 2026_
To connect Bullhorn to [Unified.to](https://unified.to/), each of your customers needs Bullhorn REST API credentials (OAuth client ID, client secret, API username and API password) whose redirect URI is set to [Unified.to](https://unified.to/)'s OAuth callback. Bullhorn Support sets this up; it's a one-time request per Bullhorn account.
## Why does Bullhorn need a support request?
Bullhorn's REST API credentials aren't self-service. Bullhorn Support creates the OAuth client ID and client secret and registers the redirect URIs they accept (Bullhorn documentation, as of 21 October 2026). A customer can't change the redirect URI in the Bullhorn web interface.
## Steps your customer must complete
### 1. Ask Bullhorn Support for REST API credentials
The customer opens a ticket with Bullhorn Support (Bullhorn Resource Center) asking for REST API OAuth credentials for the application, with the redirect URI in step 2. Bullhorn Support returns:
- OAuth client ID
- OAuth client secret
- API username (the customer sets its password)
[Unified.to](https://unified.to/)'s Bullhorn connection form asks for all four: OAuth2 Client ID, OAuth2 Client Secret, API Username and API Password.
### 2. Include the redirect URI in the request
In the same ticket (or a follow-up, if the credentials already exist), the customer asks Bullhorn Support to set the redirect URI for those credentials and gives:
- the API username or application name
- the [Unified.to](https://unified.to/) redirect URI for your region (below)
Example request: "Please set the redirect URI for our Bullhorn API user to `https://api.unified.to/oauth/code`."
Use the redirect URI for the region your [Unified.to](https://unified.to/) workspace is in:
| Region | Redirect URI |
| ------ | -------------------------------------- |
| US | `https://api.unified.to/oauth/code` |
| EU | `https://api-eu.unified.to/oauth/code` |
| AU | `https://api-au.unified.to/oauth/code` |
If your workspace uses a [custom API domain (CNAME)](https://docs.unified.to/guides/how_to_set_up_a_custom_api_url_with_a_cname), available on Pro and Scale in the US and EU regions, use `https://YOUR_CUSTOM_DOMAIN/oauth/code` instead.
### 3. Wait for Bullhorn Support to confirm
The connection fails until Bullhorn Support confirms the credentials and the redirect URI are in place.
### 4. Create the connection in [Unified.to](https://unified.to/)
Your customer then connects Bullhorn through your [Unified.to](https://unified.to/) authorization flow, entering the OAuth2 Client ID, OAuth2 Client Secret, API Username and API Password.
## What else should you know?
- Every customer must request the redirect URI change individually for their own Bullhorn account.
- [Unified.to](https://unified.to/) can't set the redirect URI for your customer; only Bullhorn Support can.
- This is a one-time setup for each of your customers using Bullhorn.
- If the customer creates a new API user in the future, they will need to go through this process again.
Once connected, see the [Bullhorn integration page](https://docs.unified.to/integrations/bullhorn) for the ATS, CRM and HR & Directory objects and fields Bullhorn supports.
## How to configure webhooks in HubSpot
URL: https://docs.unified.to/guides/how_to_configure_webhooks_in_hubspot
# How to configure webhooks in HubSpot
------
_February 23, 2024_
This guide walks you through how to configure webhooks in HubSpot to work with Unified.to. These webhooks allow you to get notifications about new events and changes from HubSpot e.g. new leads, updated deals, or deleted contacts.
## Before you begin
- Make sure you have a HubSpot developer account.
- Get your client ID, client secret, and developer API key.
- Point the **Redirect URL** in your HubSpot app to `api.unified.to/oauth/code`
- If you're using the EU data region, use instead`api-eu.unified.to/oauth/code`
- Follow our [HubSpot developer guide](https://docs.unified.to/guides/how_to_register_a_hubspot_developer_app_and_get_your_oauth_2_credentials#how-to-register-a-hubspot-developer-app-and-get-your-oauth-2-credentials) to see how to do all of the above.
## Setting up Webhooks in Hubspot Legacy Apps
### Select the appropriate Legacy App to setup the webhook
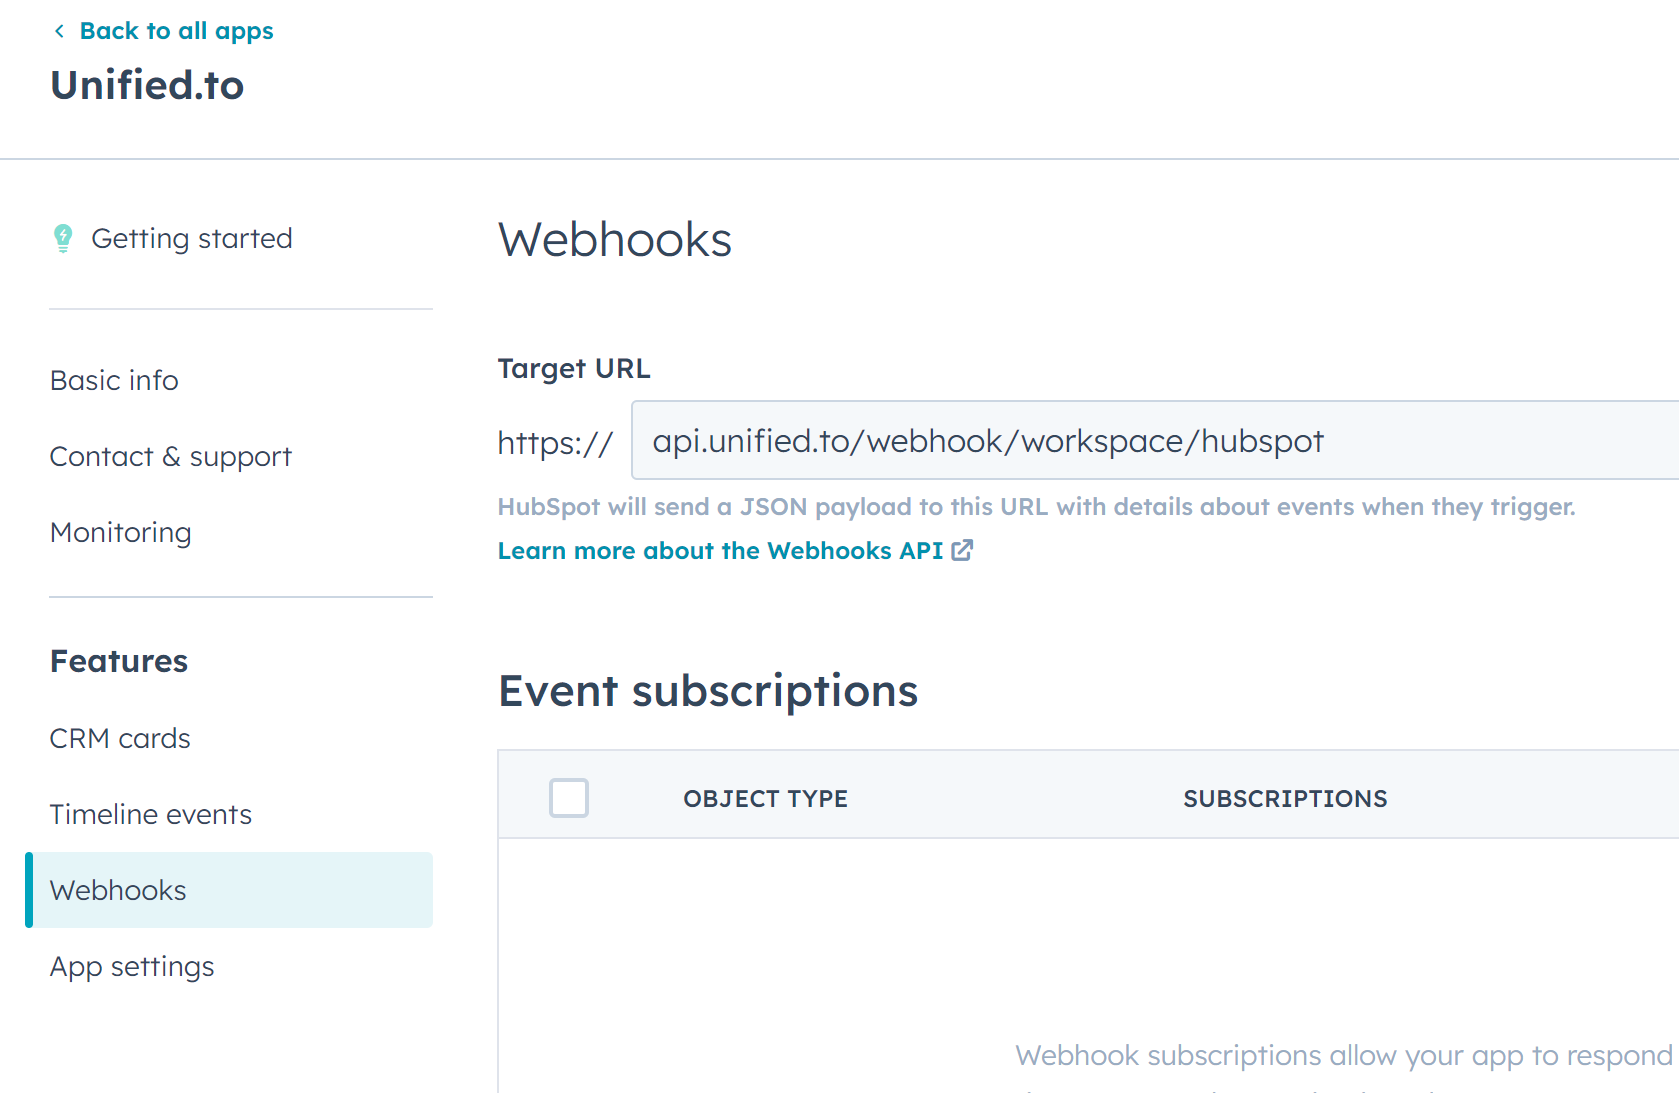
### Set the target URL for the webhook
HubSpot uses a single webhook URL per app, which means you need to configure your app to send any events to the Unified.to servers.
1. Navigate to your [HubSpot developer account](https://app.hubspot.com/).
2. Click **Apps.**
3. Select the app you wish to use to access your customers' data.
4. Click **Webhooks.**
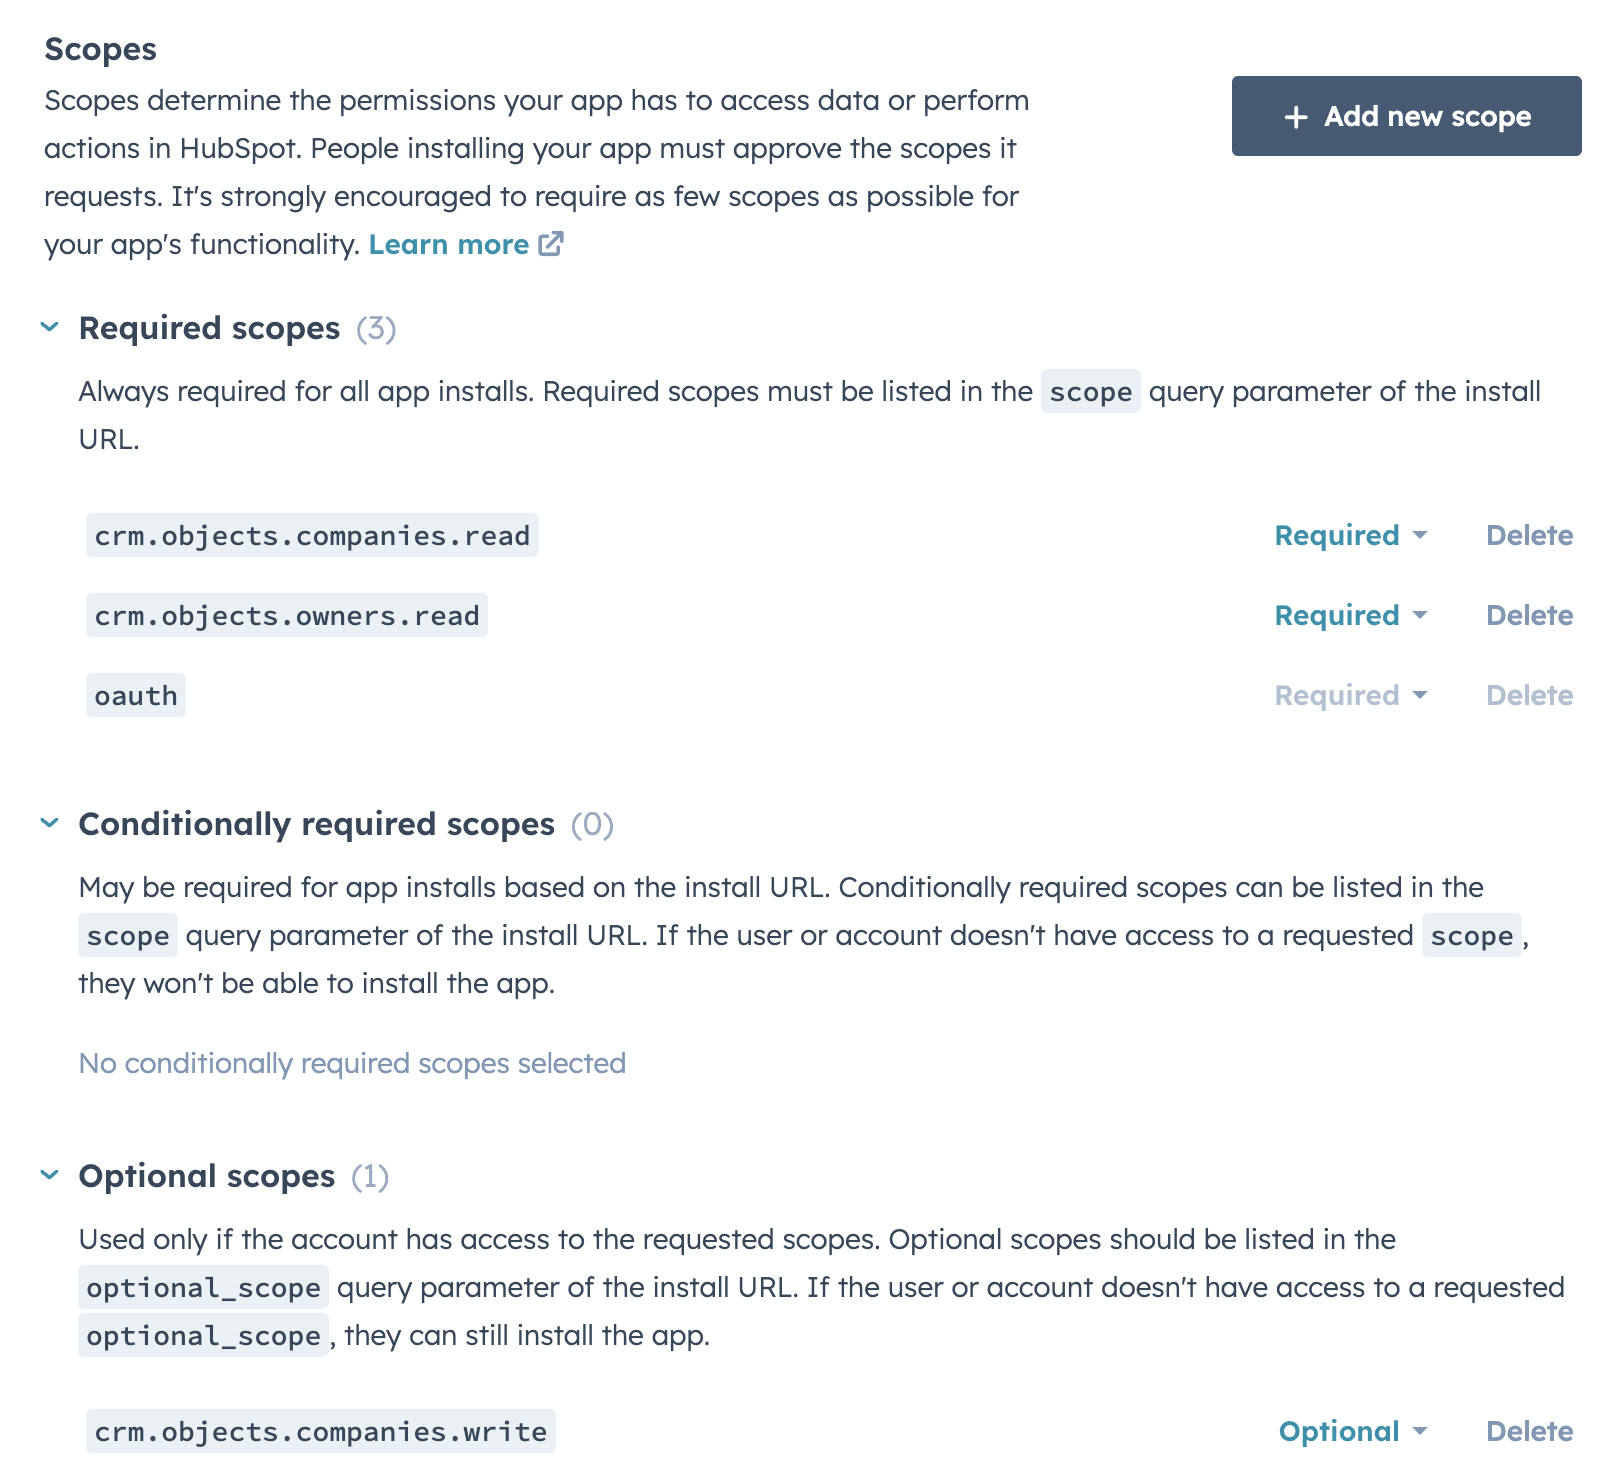
5. Under **Target URL**:
1. If you are using the US data region, copy and paste in: `api.unified.to/webhook/workspace/hubspot`
2. If you using the EU data region, copy and paste in: `api-eu.unified.to/webhook/workspace/hubspot`
If your URL is greyed out and you have subscriptions under **Event subscriptions**, then you'll need to unsubscribe from all of them. _WARNING: If these subscriptions and the target URL are used by other applications, this action will break them. In that case, you may want to consider creating a new developer app to use with Unified.to._
6. You do **not** have to create any subscriptions manually. Unified.to will do that on your behalf.
### Add scopes for your webhooks
In order for Unified.to to receive webhook data from HubSpot, you need to add scopes for the events you are interested in as well as a few others.
1. With your app page still open, click **Basic Info** and then click **Auth.**
2. Scroll down to **Scopes**:
1. Add `crm.objects.owners.read`as **Required**.
2. For any events where you want to read data, add them as **Required.**
1. Note: This applies to events that you'll be subscribed to as well as those that you will only call via the API. For example, if you want to create a Contacts webhook and also fetch Companies via the API, you'll need to add both `crm.objects.contacts.read` and `crm.objects.companies.read` as **Required** because Unified.to will pass all of these as required scopes in each auth flow.
3. For any events where you want to write data, add them as **Optional**.
4. For example, if you want to receive notifications about updates to HubSpot companies, you'll need to add `crm.objects.companies.read` as **Required**. If you want to write data to companies, add `crm.objects.companies.write` as **Optional**.
5. To see the full list of HubSpot scopes that Unified.to supports, see: [https://app.unified.to/integrations/hubspot?tab=oauth2](https://app.unified.to/integrations/hubspot?tab=oauth2).
3. The `oauth` scope is also required for all HubSpot integrations. This will be added by default if your app was created after April 2024.

### Select permission scopes on Unified.to
When prompting your customers to authorize access to their third-party accounts, you will need to select the corresponding scopes in [Unified.to](https://unified.to/) as well. The following steps show you how to do that when using our Embedded Authorization component.
1. On app.unified.to, click on **Settings** and then [**Embedded Authorization**](https://app.unified.to/settings/embed?tab=Authorization)**.**
2. You will see a preview of the Embedded Authorization component on the left and a list of configuration options on the right. Click on **Options**.
3. Scroll down to **Permission scopes** and select **webhook** as well as any other permission scopes that you need e.g. the same scopes you added in HubSpot. You do not need to select `oauth` or `crm.objects.owners.read` on [Unified.to](https://unified.to/) as well; Unified maps these automatically.
1. For example, using the examples from above for reading Contacts and Companies, the scopes in Unified.to would be `crm_contact_read` and `crm_company_read`
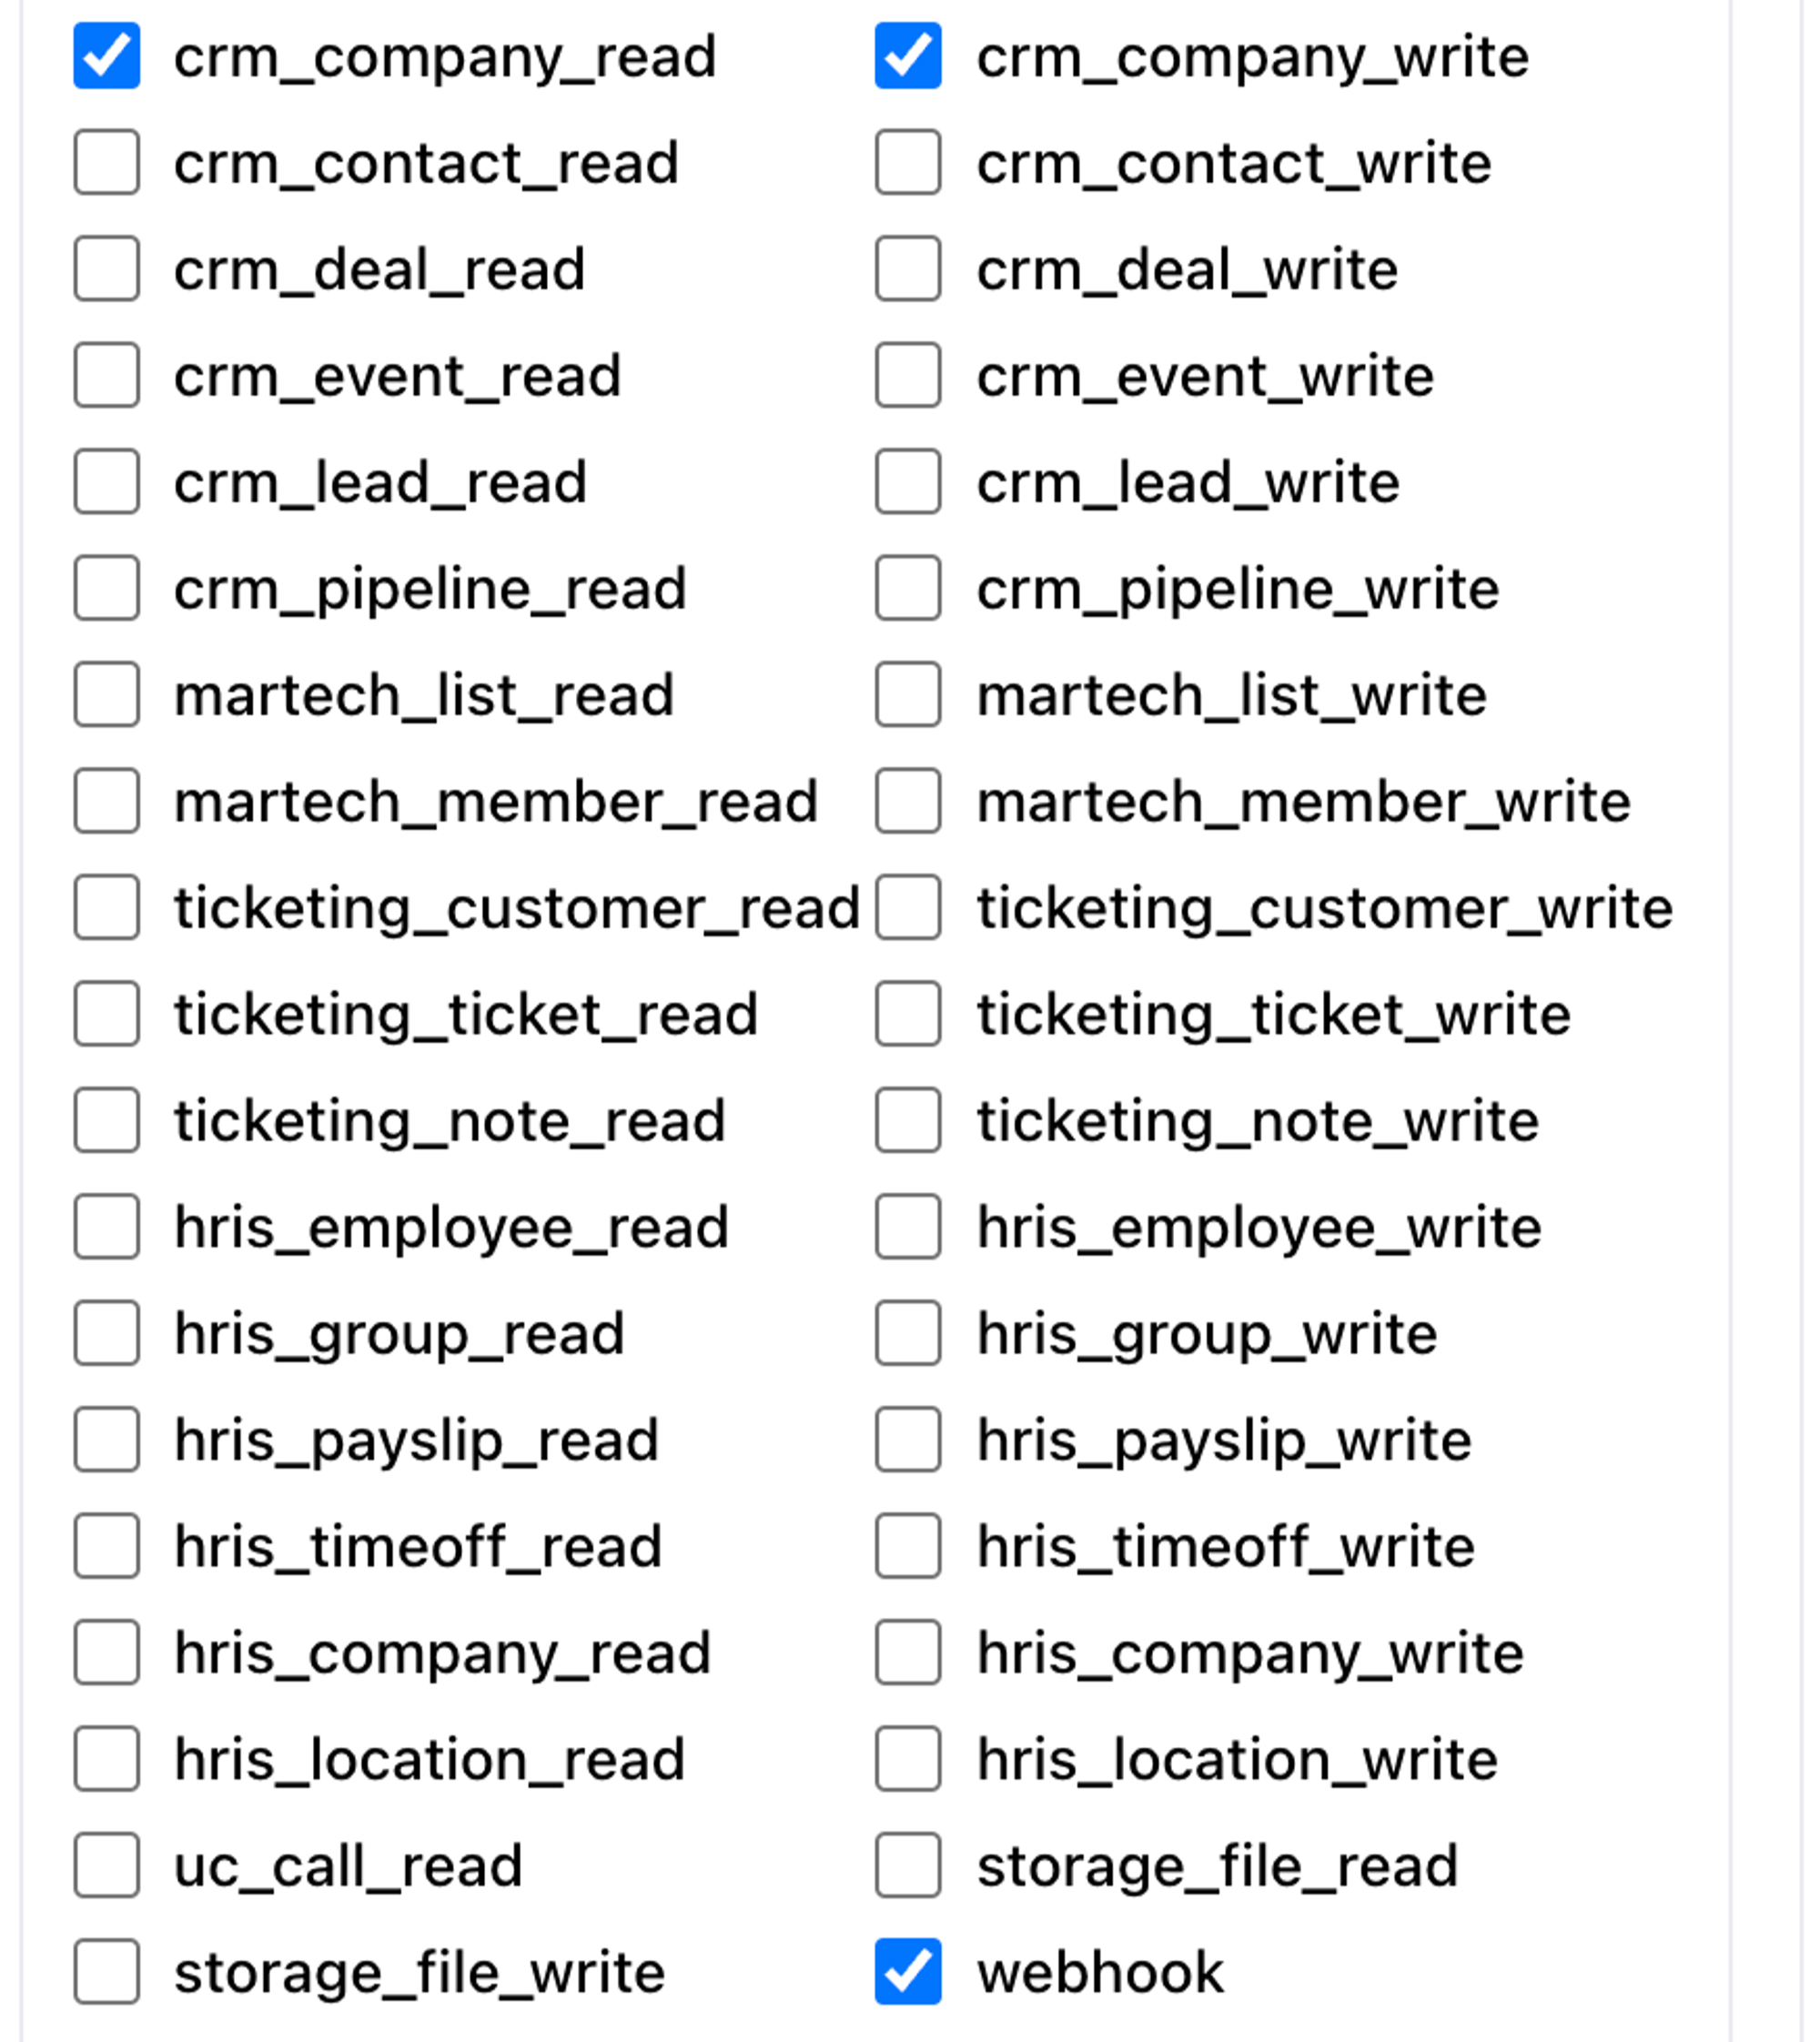
2. A mapping of Unified scopes to their HubSpot counterparts can be found [here](https://app.unified.to/integrations/hubspot?tab=oauth2).
3. Tip: Under **Integration categories,** select **CRM** to only see scopes related to CRM data objects.
## Setting up Webhooks in Hubspot Development Platform
### Create Webhook configuration file
In your hubspot project folder, create a new folder `webhook` and inside add in the `webhook-hsmeta.json` file.
```javascript
project-folder/
└── src/
└── app/
├── app-hsmeta.json
└── webhooks/
└── webhook-hsmeta.json
```
### **Setup Webhook configuration**
Now that you have the webhook config file ready, let's setup the configuration as follows:
```javascript
{
"uid": "webhooks",
"type": "webhooks",
"config": {
"settings": {
"targetUrl": "https://api.unified.to/webhook/workspace/hubspot",
"maxConcurrentRequests": 10
},
"subscriptions": {
"legacyCrmObjects": [
{
"subscriptionType": "deals.propertyChange",
"propertyName": "dealstage",
"active": true
},
{
"subscriptionType": "deals.associationChange",
"active": true
}
]
}
}
}
```
For the `targetUrl` :
1. If you are using the US data region, copy and paste in: `api.unified.to/webhook/workspace/hubspot`
2. If you using the EU data region, copy and paste in: `api-eu.unified.to/webhook/workspace/hubspot`
For the `subscriptions` we need to use the `legacyCrmObjects` to define which object we want to get events for.
### Deploy Hubspot Project
Once you've setup your webhook configuration, you can now upload the project via:
```javascript
hs project upload
```
Once uploaded, your configuration should now show up in your app's webhook list:
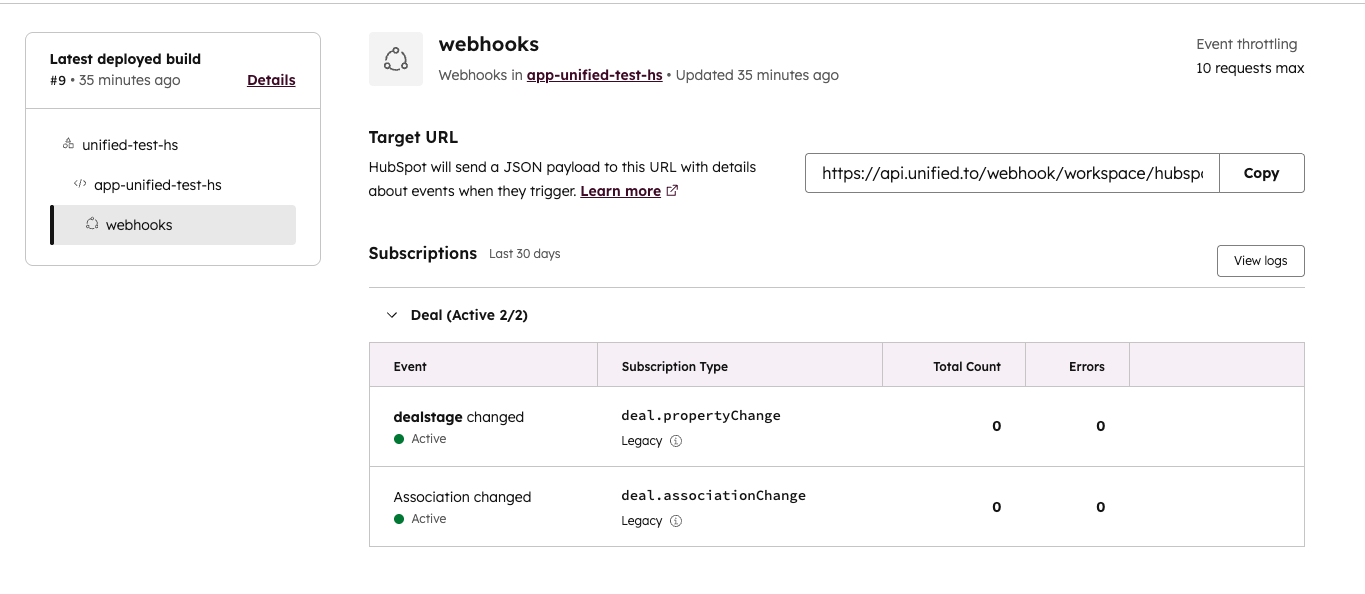
For creating the webhook in Unified, see [How to create and configure webhooks](https://docs.unified.to/guides/how_to_create_and_configure_webhooks).
## See also
- [Introduction to webhooks](https://docs.unified.to/concepts/webhooks#introduction-to-webhooks)
- [Create a webhook subscription](https://docs.unified.to/unified/webhook/Create_webhook_subscription)
- [How to set up your scopes in HubSpot](https://docs.unified.to/guides/how_to_set_up_your_scopes_in_hubspot)
## How to configure webhooks in Thrive Learning
URL: https://docs.unified.to/guides/how_to_configure_webhooks_in_thrive_learning
# How to configure webhooks in Thrive Learning
------
_August 26, 2026_
Instructions on how to configure native webhooks in Thrive Learning:
1. Create Unified webhooks for the objects you want (lms_content, lms_course, lms_student, hris_employee, lms_activity).
2. Thrive webhooks must be configured in the Thrive application.
3. Ask your customer to contact their Thrive admin or implementation team to set up the relevant subscriptions:
1. user_subscription (for students/employees)
2. content_subscription (for content/courses)
3. completion_subscription (for activity)
4. Point each subscription URL at the Unified workspace webhook URL: [https://api.unified.to/webhook/workspace/thrive?workspace_id=YOUR_WORKSPACE_ID&connection_id=YOUR_CONNECTION_ID](https://api.unified.to/webhook/workspace/thrive?workspace_id=YOUR_WORKSPACE_ID&connection_id=YOUR_CONNECTION_ID). Change the Unified API host for other regions (`api-eu.unified.to` for EU, `api-au.unified.to` for Australia).
For creating the webhook in Unified, see [How to create and configure webhooks](https://docs.unified.to/guides/how_to_create_and_configure_webhooks).
## How to configure webhooks in Toast for Unified
URL: https://docs.unified.to/guides/how_to_configure_webhooks_in_toast_for_unified
# How to configure webhooks in Toast for Unified
------
_August 12, 2026_
Toast pushes restaurant events to a partner webhook URL. Toast does **not** offer a
programmatic subscribe API for these subscriptions; they are created in the Toast
Developer Portal and/or with the Toast Integrations team. Point that URL at Unified so
your Unified webhooks receive native events.
Official Toast docs:
- [Webhook basics](https://doc.toasttab.com/doc/devguide/apiWebhookBasics.html)
- [Subscriptions](https://doc.toasttab.com/doc/devguide/apiSubscriptions.html)
- [Message signing](https://doc.toasttab.com/doc/devguide/apiMessageSigning.html)
- [Webhooks reference](https://doc.toasttab.com/doc/devguide/apiWebhooksReference.html)
## Prerequisites
1. A Toast partner / developer account with access to the Toast Developer Portal.
2. At least one Unified **Toast** connection for the restaurant (auth must include the
restaurant GUID in `other_auth_info[3]` / `Toast-Restaurant-External-ID`).
3. One or more Unified **native** webhooks on that connection for the object types you care
about (created in the Unified dashboard or via the Unified webhooks API). Creating the
Unified webhook stores a `toast-{restaurantGuid}` subscription marker so inbound Toast
deliveries can be matched.
## 1. Get your Unified workspace webhook URL
Unified receives Toast deliveries on the **workspace** webhook endpoint for the `toast`
integration:
```plain text
https://{api-host}/webhook/workspace/toast?workspace_id={your_workspace_id}
```
Replace:
- `{api-host}`: your Unified API host for the region (US / EU / AU), e.g. `api.unified.to`
- `{your_workspace_id}`: the Unified workspace that owns the Toast connection(s)
Use the same URL for every Toast event category you subscribe to. Unified fans out each
delivery to the matching native webhooks for that restaurant.
## 2. Create Toast webhook subscriptions
In the **Toast Developer Portal → Webhooks**:
1. Open **Add webhook** (or ask Toast Integrations to create the subscription if portal
create is not enabled for your partner account).
2. Set **Webhook URL** to the Unified URL from step 1.
3. Choose an **Event category** (one subscription per category; each category gets its own
secret key).
4. Save the subscription and copy the **secret key** shown on the subscription details page.
Repeat for each category you need (see mapping below). Toast environments (sandbox vs
production) have separate subscriptions and secrets.
To remove a subscription later, contact Toast Integrations or delete it in the Developer
Portal. Unified `unsubscribe` only clears local matching cache; it cannot delete Toast-side
subscriptions.
## 3. (Recommended) Store signing secrets on the connection
Toast signs each POST with HMAC-SHA256 and sends `Toast-Signature` (Base64). The secret is
**per event category**.
If you store secrets on the Toast connection auth metadata, Unified verifies the signature
before dispatching:
```json
{
"toast_webhook_secrets": {
"stock": "",
"menus": "",
"partner": "",
"order_updated": "",
"channel_order_updated": "",
"restaurant_availability": ""
}
}
```
Put this object under the connection's `auth.meta` (or merge into existing `auth.meta`).
If a category has no secret configured, Unified accepts the delivery without signature
checks (Toast treats signing as recommended, not required).
## 4. Event category → Unified object mapping
| Toast event category | Toast event types | Unified object(s) | Unified webhook event |
| --------------------------------------------------------------------- | ---------------------------------------------------------------------- | -------------------------------------------------------------- | -------------------------------------------- |
| Orders (`eventCategory` = `order_updated` or `channel_order_updated`) | `order_updated`, `channel_order_updated` | `accounting_order`, `accounting_salesorder`, `payment_payment` | `updated` |
| `stock` | `in_stock`, `out_of_stock`, `low_quantity` | `commerce_inventory` | `updated` |
| `menus` | `menus_updated` | `commerce_item`, `commerce_collection` | `updated` (publish signal — re-list catalog) |
| `restaurant_availability` / `restaurant_availability_toggle` | `availability_online`, `availability_offline`, `toggle_availability_*` | `commerce_availability` | `updated` |
| `partner` | `partner_added`, `partner_updated`, `partner_removed` | `commerce_location`, `hris_location` | `created` / `updated` / `deleted` |
## 5. Create matching Unified native webhooks
For each row you care about in the table above:
1. Create a Unified webhook with `webhook_type: native`, the Toast `connection_id`, the
object type, and the event (`created` / `updated` / `deleted`).
2. Point the webhook's delivery URL at **your** application (Unified will POST converted
unified objects there when Toast fires).
3. Ensure the Toast connection's restaurant GUID matches the location that will emit events.
## Troubleshooting
| Symptom | What to check |
| --------------------------------- | ------------------------------------------------------------------------------------------------------------------------------------------------------------ |
| Toast shows failures to the URL | Workspace ID query param; HTTPS; region host |
| Toast 2xx but no Unified delivery | Native webhook exists for that object/event; connection restaurant GUID matches `details.restaurantGuid`; subscription marker `toast-{guid}` on webhook meta |
| Signature failures | Secret for that **exact** `eventCategory`; secrets differ per category and environment |
| Empty menu payloads | Expected — treat as 're-list catalog' |
| Partner events never match | Connection must already exist for that `restaurantGuid` |
For creating the webhook in Unified, see [How to create and configure webhooks](https://docs.unified.to/guides/how_to_create_and_configure_webhooks).
## How to Connect Anthropic to Real-Time SaaS Data with Unified.to MCP Server
URL: https://docs.unified.to/guides/how_to_connect_anthropic_to_real_time_saas_data_with_unified_mcp_server
# How to Connect Anthropic to Real-Time SaaS Data with Unified.to MCP Server
------
_August 28, 2025_
Anthropic's Claude models can power sophisticated workflows — but most products still need access to live customer data from CRMs, ATSs, HRIS, or accounting systems. That usually means writing brittle glue code, normalizing APIs, and maintaining webhook jobs.
With [Unified.to](https://unified.to/)'s MCP server, you can skip that complexity. [Unified.to](https://unified.to/) exposes 1682 SaaS integrations as real-time, callable tools that Claude can use directly — no custom integration logic required.
In this guide, we'll walk through how to connect Anthropic to Unified.to MCP so your application can give Claude real-time access to customer SaaS data and actions.
## Authentication
Every request to the [Unified.to](https://unified.to/) MCP server must include a token. Send it as a bearer token in the `Authorization: Bearer {token}` header. Passing the token as a URL parameter is deprecated.
There are two authentication flows:
- **Private (workspace key + connection)**
Use your Unified.to workspace API key and add a `connection` parameter. This should never be exposed publicly.
- **Public (connection-scoped)**
Generate a connection-scoped URL with the Core MCP tool `get_unified_connection_mcp_url` and `mode=user`; it returns a signed token scoped to one connection that never exposes your workspace API key. `mode=api` embeds your workspace API key and must not be shared.
## Integrating with Anthropic API
Model names change often; use a current model from your provider's model list.
**Manual Tool Orchestration:**
1. Call Unified's `/tools` endpoint and pass the tool list to Claude:
```python
import os
import anthropic
import requests
UNIFIED_API_KEY = os.environ["UNIFIED_API_KEY"]
CONNECTION_ID = os.environ["CONNECTION_ID"]
# Regional host without a path: US https://mcp-api.unified.to, EU https://mcp-api-eu.unified.to, AU https://api-au.unified.to
UNIFIED_MCP_URL = os.environ.get("UNIFIED_MCP_URL", "https://mcp-api.unified.to")
tools = requests.get(
f"{UNIFIED_MCP_URL}/tools",
headers={"Authorization": f"Bearer {UNIFIED_API_KEY}"},
params={"type": "anthropic", "connection": CONNECTION_ID},
).json()
client = anthropic.Anthropic() # reads ANTHROPIC_API_KEY
messages = [{"role": "user", "content": "List the candidates and then analyse the resumes from their applications."}]
while True:
resp = client.messages.create(
model="claude-sonnet-5-5",
max_tokens=4096,
tools=tools,
messages=messages,
)
if resp.stop_reason != "tool_use":
break
messages.append({"role": "assistant", "content": resp.content})
results = []
for block in resp.content:
if block.type == "tool_use":
result = requests.post(
f"{UNIFIED_MCP_URL}/tools/{block.name}/call",
headers={
"Authorization": f"Bearer {UNIFIED_API_KEY}",
"Content-Type": "application/json",
},
params={"connection": CONNECTION_ID},
json=block.input,
)
results.append({"type": "tool_result", "tool_use_id": block.id, "content": result.text})
messages.append({"role": "user", "content": results})
print("".join(b.text for b in resp.content if b.type == "text"))
```
2. Claude will return a `tool_use` block:
```json
[
{
"type": "tool_use",
"id": "toolu_...",
"name": "list_candidates",
"input": { "limit": "100" }
}
]
```
3. Call Unified's `/tools/{id}/call` endpoint with the arguments.
4. Append Claude's response as an assistant message, then return the result as a `tool_result` block at the start of the next user message:
```json
[
{
"type": "tool_result",
"tool_use_id": "toolu_...",
"content": "..."
}
]
```
## Controlling Tool Access
Unified.to MCP gives you granular control over how tools are exposed to Anthropic:
- `permissions` → restrict available scopes.
- `tools` → allowlist specific tool IDs.
- `aliases` → adds extra descriptions to improve tool matching.
- `hide_sensitive=true` → strips names, emails and phone numbers from results.
- `include_external_tools=true` → expose all vendor API endpoints, not just Unified.to's normalized models.
These options help you keep Anthropic outputs predictable and secure in production-grade workflows.
### Sample Snippet
```javascript
import Anthropic from '@anthropic-ai/sdk';
// Claude model
const model = 'claude-sonnet-5-5';
// Unified connection ID that the MCP server should use
const connection = process.env.CONNECTION_ID;
// Regional host without a path: US https://mcp-api.unified.to, EU https://mcp-api-eu.unified.to, AU https://api-au.unified.to
const UNIFIED_MCP_URL = process.env.UNIFIED_MCP_URL || 'https://mcp-api.unified.to';
// Set to true to expose the vendor's own API endpoints as tools
const includeExternal = false;
const message = 'List the candidates and then analyse the resumes from their applications.';
// Optional: list of specific tools that you want to use
const toolIds = ['get_messaging_message','list_messaging_message']
const params = new URLSearchParams({
connection,
include_external_tools: includeExternal ? 'true' : 'false',
});
if (toolIds.length > 0) {
params.append('tools', toolIds.join(','));
}
const anthropic = new Anthropic({
apiKey: process.env.ANTHROPIC_API_KEY,
});
const serverUrl = `${UNIFIED_MCP_URL}/mcp?${params.toString()}`;
const completion = await anthropic.beta.messages.create({
model,
max_tokens: 1024,
messages: [
{
role: 'user',
content: message,
},
],
stream: false,
mcp_servers: [
{
type: 'url',
url: serverUrl,
name: 'unifiedMCP',
// Anthropic calls the MCP server, so send a connection-scoped signed token
// (one connection only); the workspace API key stays on your server
authorization_token: process.env.UNIFIED_MCP_TOKEN,
},
],
tools: [{ type: 'mcp_toolset', mcp_server_name: 'unifiedMCP' }],
betas: ['mcp-client-2025-11-20'],
});
console.log('response', JSON.stringify(completion, null, 2));
```
## Coverage and Infrastructure
Unified.to MCP is built for real-world AI use cases:
- **22,566 real-time tools** (growing weekly)
- **1682 integrations across 36 categories** (ATS, CRM, HRIS, Accounting, Messaging, File Storage, and more)
- **No stored customer records**: [Unified.to](https://unified.to/) stores no customer records; logs hold operational metadata only
- **Scoped security controls** — permissions, aliases, and PII redaction
- **Multi-region deployment** — US, EU, and AU data centers for compliance
[Unified.to](https://unified.to/) MCP works with major LLM providers, including **OpenAI, Anthropic, Google Gemini and Cohere.** That means you can build once and connect to any agent client.
[Explore the MCP docs](https://docs.unified.to/mcp?utm_source=chatgpt.com) or [book a demo](https://calendly.com/d/cph9-g8n-jzg/connect-with-unified?utm_source=chatgpt.com)
## How to Connect Cohere to Real-Time SaaS Data with Unified.to MCP Server
URL: https://docs.unified.to/guides/how_to_connect_cohere_to_real_time_saas_data_with_unified_mcp_server
# How to Connect Cohere to Real-Time SaaS Data with Unified.to MCP Server
------
_August 28, 2025_
Cohere's LLMs can power rich workflows — but most products still need access to live customer data from CRMs, ATSs, HRIS, or accounting systems. That usually means writing brittle glue code, normalizing APIs, and maintaining webhook jobs.
With [Unified.to](https://unified.to/)'s MCP server, you can skip that complexity. [Unified.to](https://unified.to/) exposes 1682 SaaS integrations as real-time, callable tools that Cohere can use directly — no custom integration logic required.
In this guide, we'll walk through how to connect Cohere to Unified.to MCP so your application can give Cohere real-time access to customer SaaS data and actions.
## Authentication
Every request to the [Unified.to](https://unified.to/) MCP server must include a token. Send it as a bearer token in the `Authorization: Bearer {token}` header. Passing the token as a URL parameter is deprecated.
There are two authentication flows:
- **Private (workspace key + connection)**
Use your Unified.to workspace API key and add a `connection` parameter. This should never be exposed publicly.
- **Public (connection-scoped)**
Generate a connection-scoped URL with the Core MCP tool `get_unified_connection_mcp_url` and `mode=user`; it returns a signed token scoped to one connection that never exposes your workspace API key. `mode=api` embeds your workspace API key and must not be shared.
## Integrating [Unified.to](https://unified.to/) MCP Server with Cohere
Cohere's chat API can directly consume tools defined by [Unified.to](https://unified.to/) MCP. Model names change often; use a current model from your provider's model list.
**Manual Tool Orchestration:**
1. Call Unified's `/tools?type=cohere` endpoint and pass the tool list to Cohere:
```python
import os
import cohere
import requests
UNIFIED_API_KEY = os.environ["UNIFIED_API_KEY"]
CONNECTION_ID = os.environ["CONNECTION_ID"]
# Regional host without a path: US https://mcp-api.unified.to, EU https://mcp-api-eu.unified.to, AU https://api-au.unified.to
UNIFIED_MCP_URL = os.environ.get("UNIFIED_MCP_URL", "https://mcp-api.unified.to")
MODEL = "command-a-plus-05-2026"
tools = requests.get(
f"{UNIFIED_MCP_URL}/tools",
headers={"Authorization": f"Bearer {UNIFIED_API_KEY}"},
params={"type": "cohere", "connection": CONNECTION_ID},
).json()
co = cohere.ClientV2(api_key=os.environ["COHERE_API_KEY"])
messages = [{"role": "user", "content": "Score this candidate for the Software Engineer job."}]
response = co.chat(model=MODEL, messages=messages, tools=tools)
while response.message.tool_calls:
messages.append(response.message)
for tc in response.message.tool_calls:
result = requests.post(
f"{UNIFIED_MCP_URL}/tools/{tc.function.name}/call",
headers={
"Authorization": f"Bearer {UNIFIED_API_KEY}",
"Content-Type": "application/json",
},
params={"connection": CONNECTION_ID},
data=tc.function.arguments or "{}",
)
messages.append({
"role": "tool",
"tool_call_id": tc.id,
"content": [{"type": "document", "document": {"data": result.text}}],
})
response = co.chat(model=MODEL, messages=messages, tools=tools)
print(response.message.content[0].text)
```
2. When Cohere requests a tool call, call Unified's `/tools/{id}/call` endpoint.
3. Append the assistant message and a `tool` message with the `tool_call_id` and the result, then call `co.chat` again until Cohere stops requesting tools.
### Example Prompt and Response
**Prompt:**
```plain text
"Score this candidate for the Software Engineer job."
```
**What happens:**
- Your app passes Cohere the tools Unified MCP exposes for the connection.
- Cohere requests the tools that fetch the candidate and the job, and your app runs each call through `/tools/{id}/call`.
- Cohere scores the candidate from the returned data.
- Cohere returns a response like:
**Response:**
```plain text
Candidate Jane Doe scored 92/100 for the Software Engineer job. Strengths: Python, distributed systems. Recommended for interview.
```
## Advanced MCP Options
Unified.to MCP gives you granular control over how tools are exposed to Cohere:
- `permissions` → restrict available scopes.
- `tools` → allowlist specific tool IDs.
- `aliases` → adds extra descriptions to improve tool matching.
- `hide_sensitive=true` → strips names, emails and phone numbers from results.
- `include_external_tools=true` → expose all vendor API endpoints, not just Unified.to's normalized models.
These options help you keep Cohere outputs predictable and secure in production-grade workflows.
### Sample Snippet
```javascript
import { CohereClientV2 } from 'cohere-ai';
// Unified connection ID that the tools should use
const connection = process.env.CONNECTION_ID;
// Regional host without a path: US https://mcp-api.unified.to, EU https://mcp-api-eu.unified.to, AU https://api-au.unified.to
const UNIFIED_MCP_URL = process.env.UNIFIED_MCP_URL || 'https://mcp-api.unified.to';
// Set to true to expose the vendor's own API endpoints as tools
const includeExternal = false;
const message = 'Score this candidate for the Software Engineer job.';
// Optional: list of specific tools that you want to use
const toolIds = ['get_messaging_message','list_messaging_message']
const cohereClient = new CohereClientV2({
token: process.env.COHERE_API_KEY || '',
});
const params = new URLSearchParams({
connection,
include_external_tools: includeExternal ? 'true' : 'false',
});
if (toolIds.length > 0) {
params.append('tools', toolIds.join(','));
}
// type selects the tool-list format and applies to GET /tools only
const toolsParams = new URLSearchParams(params);
toolsParams.set('type', 'cohere');
const tools = await fetch(`${UNIFIED_MCP_URL}/tools?${toolsParams.toString()}`, {
headers: { Authorization: `Bearer ${process.env.UNIFIED_API_KEY}` },
});
const toolsJson = await tools.json();
const completion = await cohereClient.chat({
model: 'command-a-plus-05-2026',
messages: [
{
role: 'user',
content: message,
},
],
tools: toolsJson,
});
for (const toolCall of completion?.message?.toolCalls || []) {
// call mcp server with toolCallId
const toolCallResponse = await fetch(`${UNIFIED_MCP_URL}/tools/${toolCall.function?.name}/call?${params.toString()}`, {
method: 'POST',
headers: {
Authorization: `Bearer ${process.env.UNIFIED_API_KEY}`,
'Content-Type': 'application/json',
},
body: toolCall.function?.arguments || '{}',
});
const toolCallResponseJson = await toolCallResponse.json();
console.log(JSON.stringify(toolCallResponseJson, null, 2));
}
```
## Coverage and Infrastructure
[Unified.to](https://unified.to/) MCP runs as part of the Unified API:
- **22,566 real-time tools** (growing weekly)
- **1682 integrations across 36 categories** (ATS, CRM, HRIS, Accounting, Messaging, File Storage, and more)
- **No stored customer records**: [Unified.to](https://unified.to/) stores no customer records; logs hold operational metadata only
- **Scoped security controls** — permissions, aliases, and PII redaction
- **Multi-region deployment** — US, EU, and AU data centers for compliance
This ensures your Cohere workflows aren't just demos — they're secure, scalable, and designed for production-grade use cases.
## Next Steps
[Unified.to](https://unified.to/) MCP works with major LLM providers, including **OpenAI, Anthropic, Google Gemini and Cohere.** That means you can build once and connect to any agent client.
[Explore the MCP docs](https://docs.unified.to/mcp?utm_source=chatgpt.com) or [book a demo](https://calendly.com/d/cph9-g8n-jzg/connect-with-unified?utm_source=chatgpt.com) to see it live in action.
## How to Connect Google Gemini to Real-Time SaaS Data with Unified.to MCP Server
URL: https://docs.unified.to/guides/how_to_connect_google_gemini_to_real_time_saas_data_with_unified_mcp_server
# How to Connect Google Gemini to Real-Time SaaS Data with Unified.to MCP Server
------
_August 28, 2025_
Google Gemini can power powerful workflows — but most products still need access to **live customer data** from CRMs, ATSs, HRIS, or accounting systems. That usually means writing brittle glue code, normalizing APIs, and maintaining webhook jobs.
With [**Unified.to**](https://unified.to/)**'s MCP server**, you can skip that complexity. [Unified.to](https://unified.to/) exposes 1682 SaaS integrations as **real-time, callable tools** that Gemini can use directly — no custom integration logic required.
In this guide, we'll walk through how to connect Gemini to Unified.to MCP so your application can give Gemini real-time access to customer SaaS data and actions.
## Authentication
Every request to the [Unified.to](https://unified.to/) MCP server must include a token. Send it as a bearer token in the `Authorization: Bearer {token}` header. Passing the token as a URL parameter is deprecated.
There are two authentication flows:
- **Private (workspace key + connection)**
Use your Unified.to workspace API key and add a `connection` parameter. This should never be exposed publicly.
- **Public (connection-scoped)**
Generate a connection-scoped URL with the Core MCP tool `get_unified_connection_mcp_url` and `mode=user`; it returns a signed token scoped to one connection that never exposes your workspace API key. `mode=api` embeds your workspace API key and must not be shared.
## Integrating with Google Gemini API
Model names change often; use a current model from your provider's model list.
**Manual Tool Orchestration:**
1. Call Unified's `/tools?type=gemini` endpoint and pass the tool list as `function_declarations` to Gemini.
2. Gemini will return a function call request:
```plain text
{
"functionCall": {
"id": "...",
"name": "list_candidates",
"args": { "limit": "100" }
}
}
```
3. Call Unified's `/tools/{id}/call` endpoint.
4. Respond to Gemini with the tool result as a `functionResponse` in your next message:
```json
{
"role": "user",
"parts": [
{
"functionResponse": {
"id": "...",
"name": "list_candidates",
"response": { ... }
}
}
]
}
```
## Controlling Tool Access
Unified.to MCP gives you granular control over how tools are exposed to Gemini:
- `permissions` → restrict available scopes.
- `tools` → allowlist specific tool IDs.
- `aliases` → adds extra descriptions to improve tool matching.
- `hide_sensitive=true` → strips names, emails and phone numbers from results.
- `include_external_tools=true` → expose all vendor API endpoints, not just Unified.to's normalized models.
These options help you keep Gemini outputs predictable and secure in production-grade workflows.
### Sample Snippet:
```javascript
import { GoogleGenAI, mcpToTool } from '@google/genai';
import { Client } from '@modelcontextprotocol/sdk/client/index.js';
import { StreamableHTTPClientTransport } from '@modelcontextprotocol/sdk/client/streamableHttp.js';
// Construct a new GEMINI client via GoogleGenAI
// Gemini model
const model = 'gemini-3.8-flash';
// Unified connection ID that the MCP server should use
const connection = process.env.CONNECTION_ID;
// Regional host without a path: US https://mcp-api.unified.to, EU https://mcp-api-eu.unified.to, AU https://api-au.unified.to
const UNIFIED_MCP_URL = process.env.UNIFIED_MCP_URL || 'https://mcp-api.unified.to';
const message = 'Score this candidate for the Software Engineer job.';
// Optional: list of specific tools that you want to use
const toolIds = ['get_messaging_message','list_messaging_message']
const gemini = new GoogleGenAI({
apiKey: process.env.GEMINI_API_KEY || '',
});
// Construct the required params
const params = new URLSearchParams({
connection,
include_external_tools: 'true', // set to 'false' to hide the vendor's own API endpoints
});
if (toolIds.length > 0) {
params.append('tools', toolIds.join(','));
}
const serverUrl = `${UNIFIED_MCP_URL}/mcp?${params.toString()}`;
const transport = new StreamableHTTPClientTransport(new URL(serverUrl), {
requestInit: {
headers: { Authorization: `Bearer ${process.env.UNIFIED_API_KEY}` },
},
});
const client = new Client({
name: 'unified-mcp',
version: '1.0.0',
});
await client.connect(transport);
const completion = await gemini.models.generateContent({
model,
contents: message,
config: {
tools: [mcpToTool(client)],
},
});
console.log(completion.text);
await client.close();
```
## Coverage and Infrastructure
Unified.to MCP is built for real-world AI use cases:
- **22,566 real-time tools** (growing weekly)
- **1682 integrations across 36 categories** (ATS, CRM, HRIS, Accounting, Messaging, File Storage, and more)
- **No stored customer records**: [Unified.to](https://unified.to/) stores no customer records; logs hold operational metadata only
- **Scoped security controls** — permissions, aliases, and PII redaction
- **Multi-region deployment** — US, EU, and AU data centers for compliance
[Unified.to](https://unified.to/) MCP works with major LLM providers, including **OpenAI, Anthropic, Google Gemini and Cohere.** That means you can build once and connect to any agent client.
- [Explore the MCP docs](https://docs.unified.to/mcp?utm_source=chatgpt.com)
- [Book a demo](https://calendly.com/d/cph9-g8n-jzg/connect-with-unified?utm_source=chatgpt.com)
## How to Connect LLMs to Real-Time SaaS Data with Unified.to MCP Server
URL: https://docs.unified.to/guides/how_to_connect_llms_to_real_time_saas_data_with_unified_mcp_server
# How to Connect LLMs to Real-Time SaaS Data with Unified.to MCP Server
------
_August 25, 2025_
[Unified's MCP](https://docs.unified.to/mcp) server allows your application to give an LLM API real-time access to your customers' SaaS data and perform actions on that data, without you having to write custom business-logic code for every integration, which can often make things messy.
For example, imagine you're building a [candidate assessment workflow](https://docs.unified.to/guides/how_to_build_a_candidate_assessment_product_with_unified), we'd usually call the API to fetch the data, and feed it into the LLM for it to analyze that data. With the Unified MCP server, we can enable OpenAI (or another LLM API) to directly access the data and perform actions making the workflow much simpler and cleaner.
## The Flow
Here's how an LLM API connects to Unified's MCP server:
- Your app connects to the MCP server using the HTTP endpoint.
- You authenticate with a token in the `Authorization: Bearer` header: your workspace API key plus a customer's `connection` ID from your own server, or a connection-scoped signed token when an LLM provider or agent calls the server.
- The LLM can then discover and call tools (like 'fetch candidate', 'score candidate', 'update job status') in real time.
## Authentication
Send the token in the Authorization header (`Authorization: Bearer {token}`). Don't put it in the URL. Use the Streamable HTTP host for your workspace's region (US `https://mcp-api.unified.to/mcp`, EU `https://mcp-api-eu.unified.to/mcp`, AU `https://api-au.unified.to/mcp`); a credential works only on its own region's host.
**LLM providers, agents and third-party clients:**
Use a connection-scoped signed token, generated with `get_unified_connection_mcp_url` (mode=user). It works for one connection only, so your workspace API key stays on your server.
**Private (Direct LLM API):**
From your own server, use your [Unified.to](https://unified.to/) workspace API key as the token, and include a `connection` parameter for the customer's connection ID.
_Example:_
```plain text
https://mcp-api.unified.to/mcp?connection=
Authorization: Bearer
```
_Note: Keep the workspace API key on your server. Never put it in a URL or a client config._
## Building the application with an LLM API and MCP
If your application is using an LLM API that supports MCP (like OpenAI), you can use the [`mcp-use`](https://github.com/mcp-use/mcp-use) Python package to connect to Unified MCP and access your customer's data and actions.
### Dependencies
The full list of dependencies and setup you need to do to get things running.
```bash
mkdir unified-mcp-client
cd unified-mcp-client
python -m venv .venv
source .venv/bin/activate
pip install mcp-use python-dotenv requests openai
touch client.py
```
### Setting up your secrets
Add your Unified API key, your customer's connection ID, and your workspace secret to a `.env` file:
```bash
echo "UNIFIED_API_KEY=" >> .env
echo "CONNECTION_ID=" >> .env
echo "UNIFIED_MCP_TOKEN=" >> .env
echo ".env" >> .gitignore
```
# The MCP Client Class
Here's an example using the `mcp-use` package:
```python
# client.py
import os
import asyncio
from dotenv import load_dotenv
from mcp_use import MCPClient
load_dotenv()
CONNECTION_ID = os.getenv("CONNECTION_ID")
UNIFIED_API_KEY = os.getenv("UNIFIED_API_KEY") # stays on your server
# Use your region's host: US mcp-api.unified.to, EU mcp-api-eu.unified.to, AU api-au.unified.to
MCP_URL = f"https://mcp-api.unified.to/mcp?connection={CONNECTION_ID}"
client = MCPClient.from_dict({
"mcpServers": {
"unified": {
"url": MCP_URL,
"headers": {"Authorization": f"Bearer {UNIFIED_API_KEY}"},
}
}
})
async def main():
await client.create_all_sessions()
session = client.get_session("unified")
# List available tools
tools = await session.list_tools()
print("Available tools:", [tool.name for tool in tools])
asyncio.run(main())
```
## Integrating with OpenAI (LLM API)
Once your MCP client is set up, you can connect it to OpenAI's API, which natively supports remote MCP servers.
### Configure OpenAI to Use Unified MCP
When you send a Responses API request, specify the MCP server as a tool source and pass a connection-scoped token in the `authorization` field.
Here's a **candidate assessment example**:
```python
from openai import OpenAI
openai_client = OpenAI() # reads OPENAI_API_KEY
response = openai_client.responses.create(
model="gpt-4o",
tools=[{
"type": "mcp",
"server_label": "unified",
"server_url": MCP_URL, # no token in the URL
# Connection-scoped signed token: works for one connection only
"authorization": os.getenv("UNIFIED_MCP_TOKEN"),
"require_approval": "never",
}],
input="Score this candidate for the Software Engineer job.",
)
print(response.output_text)
```
**No backend glue code required: OpenAI orchestrates the tool calls via Unified MCP.**
## Integrating with Anthropic API
**Manual Tool Orchestration:**
1. Call Unified's `/tools` endpoint and pass the tool list to Claude:
```python
resp = client.messages.create(
model="claude-3-5-sonnet-20241022",
tools=tools,
input="list the candidates and then analyse the resumes from their applications",
)
```
2. Claude will return a `tool_use` block:
```json
[
{
"type": "tool_use",
"id": "toolu_...",
"name": "list_candidates",
"input": { "limit": "100" }
}
]
```
3. Call Unified's `/tools/{id}/call` endpoint with the arguments.
4. Return the result to Claude as a `tool_result` block in your next message:
```json
[
{
"type": "tool_result",
"tool_use_id": "toolu_...",
"content": "..."
}
]
```
## Integrating with Google Gemini API
**Manual Tool Orchestration:**
1. Call Unified's `/tools` endpoint and pass the tool list as `function_declarations` to Gemini.
2. Gemini will return a function call request:
```plain text
function_call {
name: "list_candidates"
args { fields { key: "limit" value { string_value: "100" } } }
}
```
3. Call Unified's `/tools/{id}/call` endpoint.
4. Respond to Gemini with the tool result as a `functionResponse` in your next message:
```json
{
"role": "user",
"parts": [
{
"functionResponse": {
"name": "list_candidates",
"response": { ... }
}
}
]
}
```
## Integrating with Cohere
**Manual Tool Orchestration:**
1. Call Unified's `/tools?type=cohere` endpoint and pass the tool list to Cohere:
```python
response = co.chat(
model="command-a-03-2025", messages=messages, tools=tools
)
```
2. When Cohere requests a tool call, call Unified's `/tools/{id}/call` endpoint.
3. Pass the tool result back to Cohere in your next message
### Example Prompt and Response
**Prompt:**
```plain text
"Score this candidate for the Software Engineer job."
```
**What happens:**
- Your chosen LLM discovers the available tools from Unified MCP (e.g., `fetch-candidate`, `fetch-job`, `score-candidate`).
- The LLM calls `fetch-candidate` and `fetch-job` tools to get the data.
- The LLM calls `score-candidate` with the data.
- The LLM returns a response like:
**Response:**
```plain text
Candidate Jane Doe scored 92/100 for the Software Engineer job. Strengths: Python, distributed systems. Recommended for interview.
```
## How to Connect OpenAI to Real-Time SaaS Data with Unified.to MCP Server
URL: https://docs.unified.to/guides/how_to_connect_openai_to_real_time_saas_data_with_unified_mcp_server
# How to Connect OpenAI to Real-Time SaaS Data with Unified.to MCP Server
------
_August 28, 2025_
OpenAI's LLMs can power rich workflows — but most products still need access to **live customer data** from CRMs, ATSs, HRIS, or accounting systems. That usually means writing brittle glue code, normalizing APIs, and maintaining webhook jobs.
With [Unified.to](https://unified.to/)'s MCP server, you can skip that complexity. [Unified.to](https://unified.to/) exposes 1682 SaaS integrations as real-time, callable tools that OpenAI can use directly — no custom integration logic required.
In this guide, we'll walk through how to connect OpenAI to Unified.to MCP so your application can give OpenAI real-time access to customer SaaS data and actions.
## Authentication
Every request to the [Unified.to](https://unified.to/) MCP server must include a token. Send it as a bearer token in the `Authorization: Bearer {token}` header. Passing the token as a URL parameter is deprecated.
There are two authentication flows:
- **Private (workspace key + connection)**
Use your Unified.to workspace API key and add a `connection` parameter. This should never be exposed publicly.
- **Public (connection-scoped)**
Generate a connection-scoped URL with the Core MCP tool `get_unified_connection_mcp_url` and `mode=user`; it returns a signed token scoped to one connection that never exposes your workspace API key. `mode=api` embeds your workspace API key and must not be shared.
## Integrating with OpenAI (LLM API)
Once your MCP client is set up, you can connect it to OpenAI's API, which natively supports remote MCP servers.
### Configure OpenAI to Use Unified MCP
Model names change often; use a current model from your provider's model list.
When you send a Responses API request, add Unified MCP as a remote MCP tool (`"type": "mcp"`). OpenAI calls the MCP server on your behalf, so pass a connection-scoped signed token (works for one connection only) in the `authorization` field and keep your workspace API key on your server.
Here's a **candidate assessment example**:
```python
import os
from openai import OpenAI
# Connection-scoped signed token from get_unified_connection_mcp_url (mode=user)
UNIFIED_MCP_TOKEN = os.environ["UNIFIED_MCP_TOKEN"]
CONNECTION_ID = os.environ["CONNECTION_ID"]
# Regional host without a path: US https://mcp-api.unified.to, EU https://mcp-api-eu.unified.to, AU https://api-au.unified.to
UNIFIED_MCP_URL = os.environ.get("UNIFIED_MCP_URL", "https://mcp-api.unified.to")
client = OpenAI() # reads OPENAI_API_KEY
response = client.responses.create(
model="gpt-6-astra",
tools=[{
"type": "mcp",
"server_label": "unified",
"server_url": f"{UNIFIED_MCP_URL}/mcp?connection={CONNECTION_ID}",
"authorization": UNIFIED_MCP_TOKEN,
"require_approval": "never",
}],
input="Score this candidate for the Software Engineer job.",
)
print(response.output_text)
```
OpenAI lists and calls the Unified MCP tools itself, so no backend glue code is required.
## Advanced MCP Options
Unified.to MCP gives you granular control over how tools are exposed to OpenAI:
- `permissions` → restrict available scopes.
- `tools` → allowlist specific tool IDs.
- `aliases` → adds extra descriptions to improve tool matching.
- `hide_sensitive=true` → strips names, emails and phone numbers from results.
- `include_external_tools=true` → expose all vendor API endpoints, not just Unified.to's normalized models.
These options help you keep OpenAI outputs predictable and secure in production-grade workflows.
### Sample Snippet
```javascript
import OpenAI from 'openai';
// OpenAI model
const model = 'gpt-6-astra';
// Unified connection ID that the MCP server should use
const connection = process.env.CONNECTION_ID;
// Regional host without a path: US https://mcp-api.unified.to, EU https://mcp-api-eu.unified.to, AU https://api-au.unified.to
const UNIFIED_MCP_URL = process.env.UNIFIED_MCP_URL || 'https://mcp-api.unified.to';
// Set to true to expose the vendor's own API endpoints as tools
const includeExternal = false;
const message = 'Score this candidate for the Software Engineer job.';
// Optional: list of specific tools that you want to use
const toolIds = ['get_messaging_message','list_messaging_message']
const openai = new OpenAI({
apiKey: process.env.OPENAI_API_KEY || '',
});
const params = new URLSearchParams({
connection,
include_external_tools: includeExternal ? 'true' : 'false',
});
if (toolIds.length > 0) {
params.append('tools', toolIds.join(','));
}
const serverUrl = `${UNIFIED_MCP_URL}/mcp?${params.toString()}`;
const completion = await openai.responses.create({
model,
tools: [
{
type: 'mcp',
server_label: 'unifiedMCP',
server_url: serverUrl, // change url as needed
// Connection-scoped signed token (one connection only)
authorization: process.env.UNIFIED_MCP_TOKEN,
require_approval: 'never',
},
],
instructions: `You are a helpful assistant`,
input: message,
});
console.log(completion.output_text);
```
## Coverage and Infrastructure
[Unified.to](https://unified.to/) MCP runs as part of the Unified API:
- **22,566 real-time tools** (growing weekly)
- **1682 integrations across 36 categories** (ATS, CRM, HRIS, Accounting, Messaging, File Storage, and more)
- **No stored customer records**: [Unified.to](https://unified.to/) stores no customer records; logs hold operational metadata only
- **Scoped security controls** — permissions, aliases, and PII redaction
- **Multi-region deployment** — US, EU, and AU data centers for compliance
This ensures your OpenAI workflows aren't just demos — they're secure, scalable, and designed for production-grade use cases.
[Unified.to](https://unified.to/) MCP works with major LLM providers, including **OpenAI, Anthropic, Google Gemini and Cohere.** That means you can build once and connect to any agent client.
- [Explore the MCP docs](https://docs.unified.to/mcp?utm_source=chatgpt.com)
- [Book a demo](https://calendly.com/d/cph9-g8n-jzg/connect-with-unified?utm_source=chatgpt.com)
## How to Connect Zoom and Zoom Phone
URL: https://docs.unified.to/guides/how_to_connect_zoom_and_zoom_phone
# How to Connect Zoom and Zoom Phone
------
_July 2, 2026_
This guide walks you through creating a Zoom OAuth app, configuring the right permissions, and connecting your Zoom account. You will need a Zoom account with admin access for some features (user directory, call logs, and recordings).
---
## **What you need**
- A [**Zoom Marketplace**](https://marketplace.zoom.us/) developer account
- Zoom account admin access (required for directory, group, and Zoom Phone admin scopes)
- A Zoom Phone license if you plan to use the Zoom Phone integration
- Your Unified workspace (to store credentials and start the connection)
> **Note:** Zoom and Zoom Phone are separate integrations in Unified. You can use one OAuth app for both, as long as that app includes the scopes for every feature you need.
---
## **Step 1: Create a Zoom OAuth app**
1. Sign in to the [**Zoom App Marketplace**](https://marketplace.zoom.us/).
2. Go to **Develop** → **Build App**.
3. Choose **General App** and click **Create**.
4. Enter an app name and basic details.
On the **Basic Information** page:
1. Open **App Credentials** and note your **Development** Client ID and Client Secret.
- Use development credentials while the app is still in testing.
- After the app is published, switch to **Production** credentials.
2. Under **OAuth Information**, configure:
- **OAuth Redirect URL** — use the exact URL for your Unified region (see below).
- **OAuth Allow List** — add the same URL (or the base domain if Zoom accepts it).
3. If **Strict Mode URL** is enabled, the redirect URL must match character-for-character.
### **OAuth redirect URL by region**
Add the redirect URL that matches where your Unified workspace is hosted:
| **Region** | **Redirect URL** |
| ---------- | -------------------------------------- |
| US | `https://api.unified.to/oauth/code` |
| EU | `https://api-eu.unified.to/oauth/code` |
| AU | `https://api-au.unified.to/oauth/code` |
> **Important:** Copy the URL exactly. A trailing slash, wrong subdomain, or `http` instead of `https` will cause the connection to fail.
---
## **Step 2: Add the required scopes (permissions)**
In your Zoom app, open the **Scopes** page and add the permissions below. Only add scopes for the features you actually use.
For each scope, Zoom may ask you to describe why your app needs it. Keep the explanation tied to your use case (e.g. 'Read call history for CRM logging' or 'List meetings for calendar sync').
### **Required for sign-in (Zoom and Zoom Phone)**
Add these for any connection:
- `user_profile`
- `user_info:read`
- `user:read`
### **Zoom — users and groups**
If you sync users or groups:
| **Feature** | **Scopes to add** |
| ------------ | ---------------------------------------------------- |
| Read users | `user:read:user:admin`, `user:read:list_users:admin` |
| Write users | `user:write:admin` |
| Read groups | `group:read:admin`, `group:read:list_groups:admin` |
| Write groups | `group:write:admin` |
### **Zoom — meetings and webinars**
If you work with meetings or webinars:
| **Feature** | **Scopes to add** |
| --------------------------------- | ------------------------------------------------------------------------------------------------------------------------------------------------------------------------------------------------------------------------------------------------- |
| Read meetings | `meeting:read:list_meetings` |
| Create / update / delete meetings | `meeting:write:meeting`, `meeting:update:meeting`, `meeting:delete:meeting` |
| Read webinars | `webinar:read:list_webinars` |
| Manage webinars | `webinar:write:webinar`, `webinar:update:webinar`, `webinar:delete:webinar`, `webinar:write:registrant`, `webinar:update:registrant`, `webinar:delete:registrant`, `webinar:write:panelist`, `webinar:update:panelist`, `webinar:delete:panelist` |
### **Zoom Phone — calls, recordings, and users**
If you use the Zoom Phone integration:
| **Feature** | **Scopes to add** |
| --------------------- | ---------------------------- |
| Read Zoom Phone users | `phone:read:user:admin` |
| Read call history | `phone:read:call_log:admin` |
| Read call recordings | `phone:read:recording:admin` |
> **Note:** Zoom Phone scopes require a Zoom Phone license on the account you connect.
---
## **Step 3: Add credentials in Unified**
1. In the Unified dashboard, open **Integrations**.
2. Enable **Zoom** and/or **Zoom Phone**.
3. Enter the **Client ID** and **Client Secret** from your Zoom app (development credentials while testing; production credentials after publish).
4. Save the integration.
The Client ID and Client Secret in Unified must match the values shown in the Zoom Marketplace for the same app and environment (Development vs Production).
---
## **Step 4: Connect a Zoom account**
1. Start a new connection for Zoom or Zoom Phone (from the dashboard or your app's auth flow).
2. You will be redirected to Zoom to sign in and approve the requested permissions.
3. After approval, you are redirected back and the connection is created.
> **Tip:** The Zoom user who authorizes the connection should be an account admin if you use admin-level scopes (users, groups, call logs, recordings).
---
## **Testing vs published apps**
Zoom apps start in **development / testing** mode. This affects who can connect.
### **While the app is in testing**
- Only Zoom accounts added as **authorized testers** (or users on the same Zoom account as the app owner) can complete OAuth.
- Use the **Development** Client ID and Client Secret in Unified.
- For each customer Zoom account that needs to connect **before** the app is published, that account must be added as a tester in the Zoom Marketplace:
1. Open your app in the [**Zoom Marketplace Developer portal**](https://marketplace.zoom.us/develop/applications).
2. Find **Add app for testing** / **Local Test** / **Authorized testers** (wording may vary).
3. Add the customer's Zoom email or account.
If a customer sees an error that the app is not authorized, they are usually not on the tester list yet.
### **When the app is published**
- Any Zoom customer can connect without being added as a tester.
- Switch Unified to the **Production** Client ID and Client Secret from the Zoom app.
- Existing connections may need to be **re-authorized** after you switch credentials or publish.
> **Note:** Publishing goes through Zoom's review process. Zoom may require security review for certain scopes and can take several business days. Plan ahead if you need many customers to connect on a fixed timeline.
---
## **Checklist before connecting**
Use this quick checklist if a connection fails:
- [ ] Client ID and Client Secret in Unified match the Zoom app (same environment: Development or Production).
- [ ] OAuth Redirect URL in Zoom is exactly `https://api.unified.to/oauth/code` (or the EU/AU URL for your region).
- [ ] The same URL is on the OAuth Allow List.
- [ ] All scopes your product needs are added in the Zoom app.
- [ ] If the app is still in testing, the connecting user's Zoom account is an authorized tester.
- [ ] The authorizing user has admin rights when using admin scopes.
- [ ] For Zoom Phone: the account has Zoom Phone enabled.
---
## **Troubleshooting**
### **'Invalid redirect URI' or redirect errors**
The redirect URL in Zoom does not match what Unified sends. Confirm the exact URL for your region and that Strict Mode is not blocking a valid redirect.
### **'App not authorized' or customer cannot sign in**
The app is likely still in testing and the customer's Zoom account is not an authorized tester. Add them in the Zoom Marketplace, or publish the app.
### **Connection works but data is missing**
Usually a missing scope. Compare the scopes in your Zoom app with the tables in Step 2 and add any that apply to the features you use.
### **Zoom Phone returns no calls or recordings**
- Confirm `phone:read:call_log:admin` and/or `phone:read:recording:admin` are added.
- Confirm the connected account has Zoom Phone and admin access to phone data.
### **After publishing, connections stopped working**
Update Unified with the **Production** Client ID and Client Secret, then ask affected users to connect again.
---
## **Related Zoom products**
Unified also supports **Zoom Calendar** as a separate integration with its own calendar-specific scopes. If you only need Zoom meetings, webinars, users, and Zoom Phone, follow this guide. If you need Zoom's native calendar product, enable the Zoom Calendar integration and add its scopes in the same (or a separate) Zoom OAuth app.
For Zoom developer documentation, see [**developers.zoom.us**](https://developers.zoom.us/).
## How to create a Connection In Microsoft Teams
URL: https://docs.unified.to/guides/how_to_create_a_connection_in_microsoft_teams
# How to create a Connection In Microsoft Teams
------
_June 5, 2026_
Most Microsoft products follow the same standard process for creating a connection, but Microsoft Teams is slightly different.
To access Unified Communications (UC) objects such as call records, Microsoft requires **application-level permissions** in addition to delegated permissions. This is necessary because Microsoft does not allow access to certain Teams resources using delegated permissions alone.
Before your end-users can authorize a MS Teams connection, you must first register an application in Microsoft Azure and configure the required permissions.
## Step 1: Register Your Microsoft Application
Follow the guide below to register your application and obtain your **Client ID** and **Client Secret**:
[https://docs.unified.to/guides/how_to_get_your_oauth_2_credentials_for_microsoft_dynamics_365#how-to-get-your-oauth-2-credentials-for-microsoft-dynamics-365](https://docs.unified.to/guides/how_to_get_your_oauth_2_credentials_for_microsoft_dynamics_365#how-to-get-your-oauth-2-credentials-for-microsoft-dynamics-365)
Once you have completed the application registration, continue with the permission setup steps below.
## Microsoft Teams Permission Types
Microsoft Teams uses two types of permissions:
1. **Delegated Permissions**
2. **Application Permissions**
### Resources That Require Delegated Permissions
The following categories only require delegated permissions:
- Messaging
- HRIS
- Calendar
### Resources That Require Application Permissions
The following category requires application permissions:
- Call Records
---
## Step 2: Configure Delegated Permissions
1. Open your registered application in Azure Portal.
2. Navigate to **API Permissions**.
3. Click **Add a permission**.
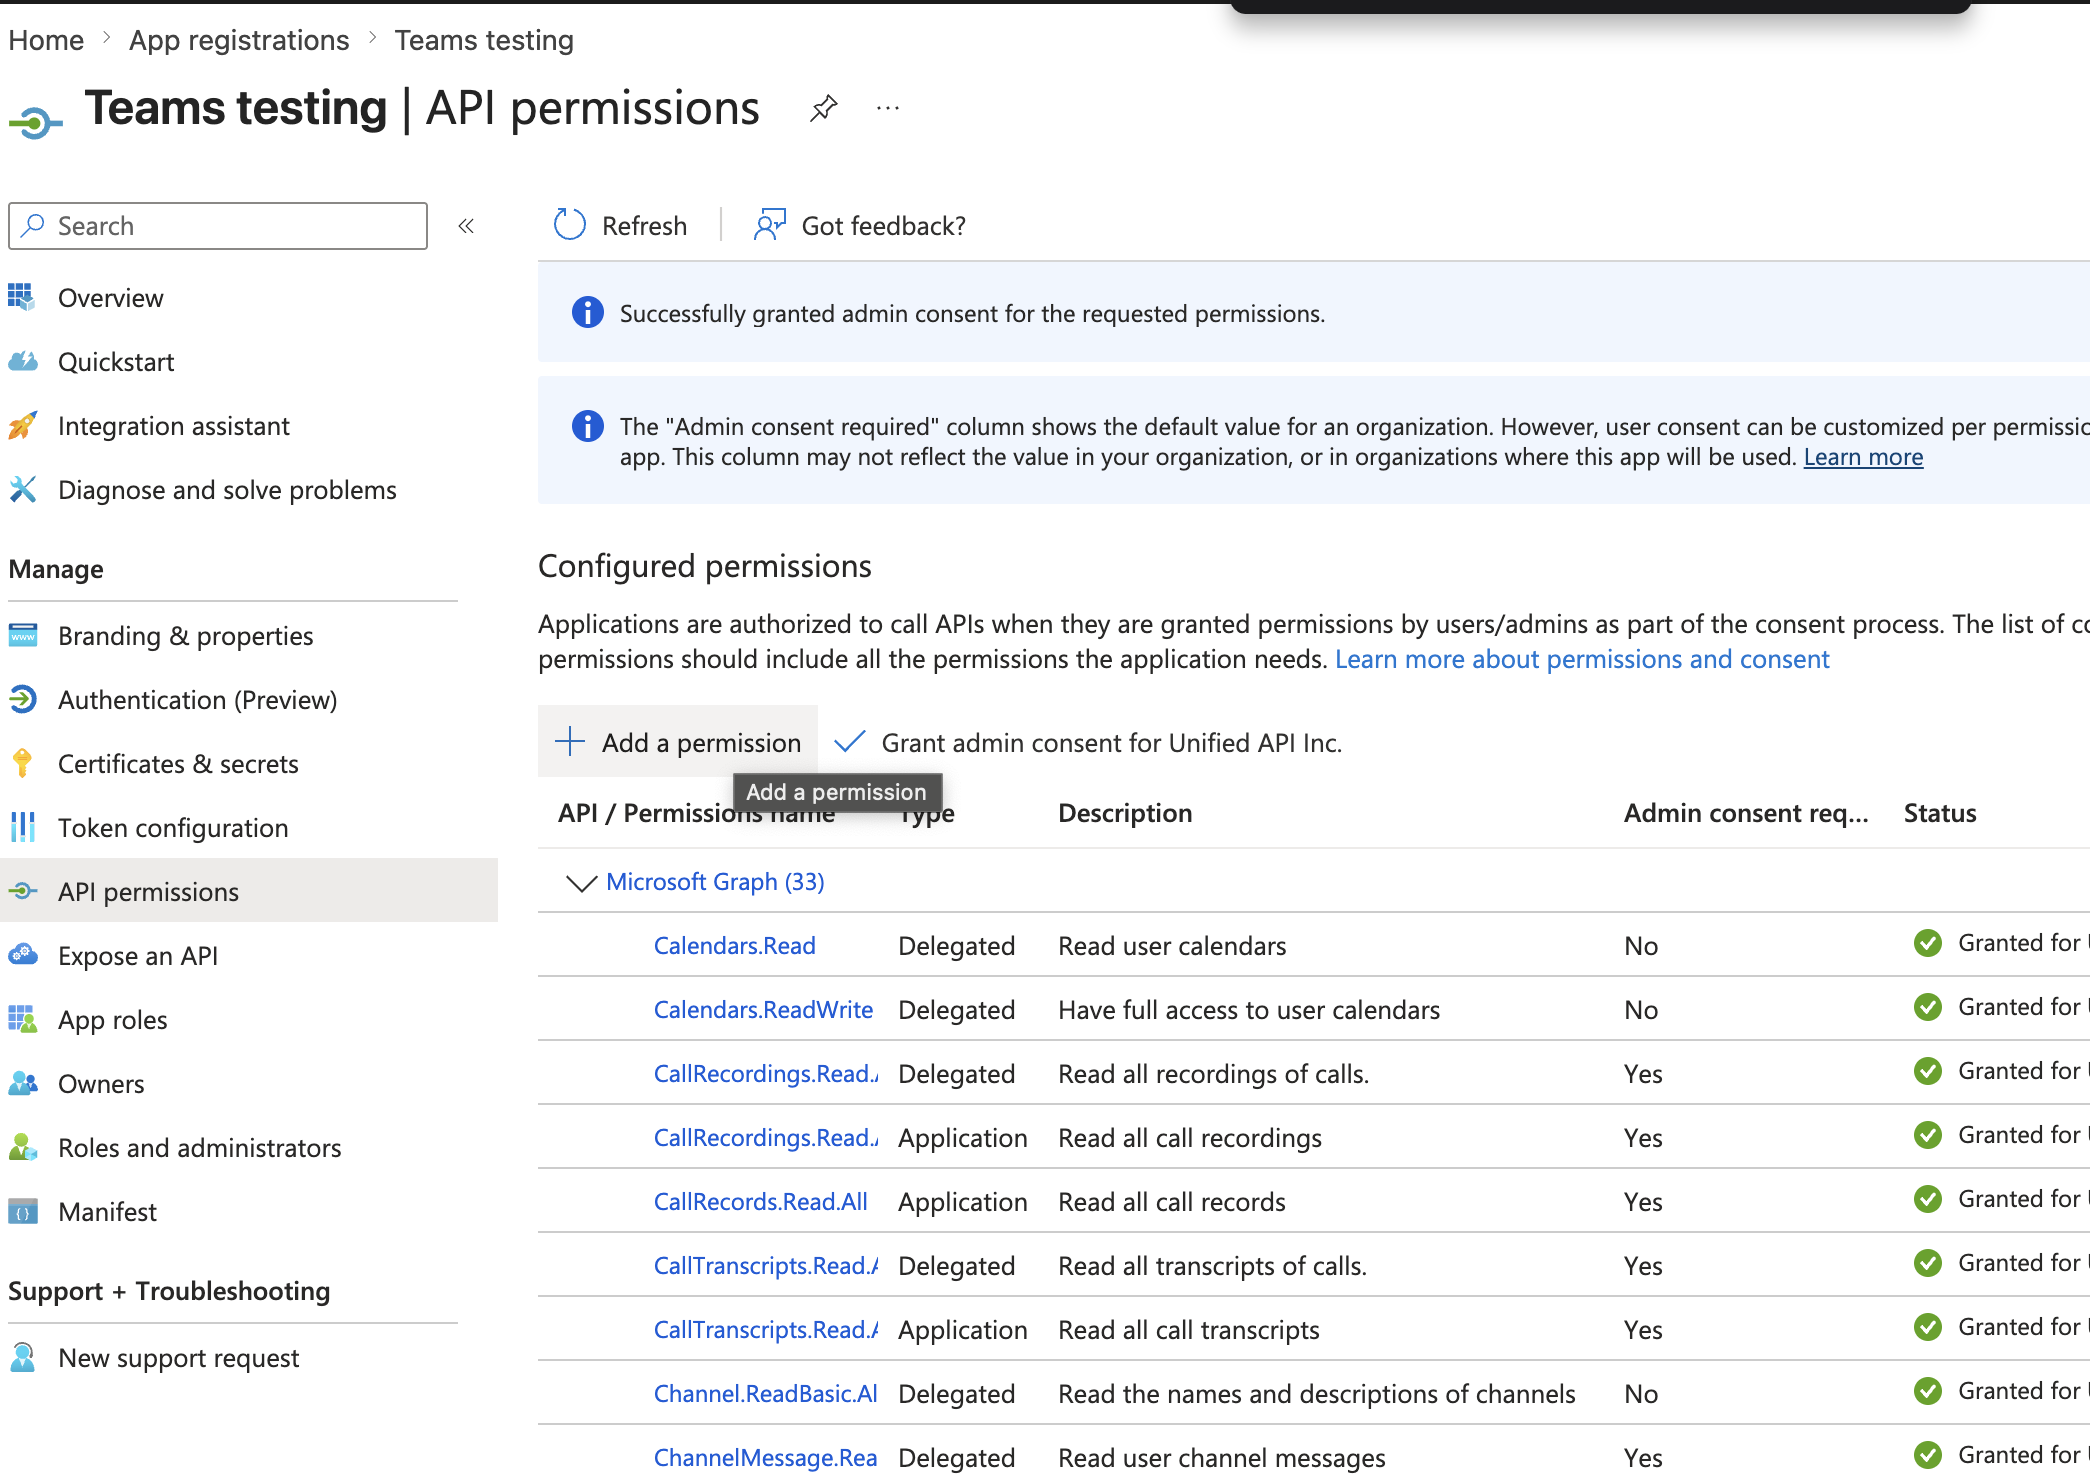
4. Select **Microsoft Graph**.
5. Select **Delegated permissions**.
6. Search for and select the required delegated permissions.
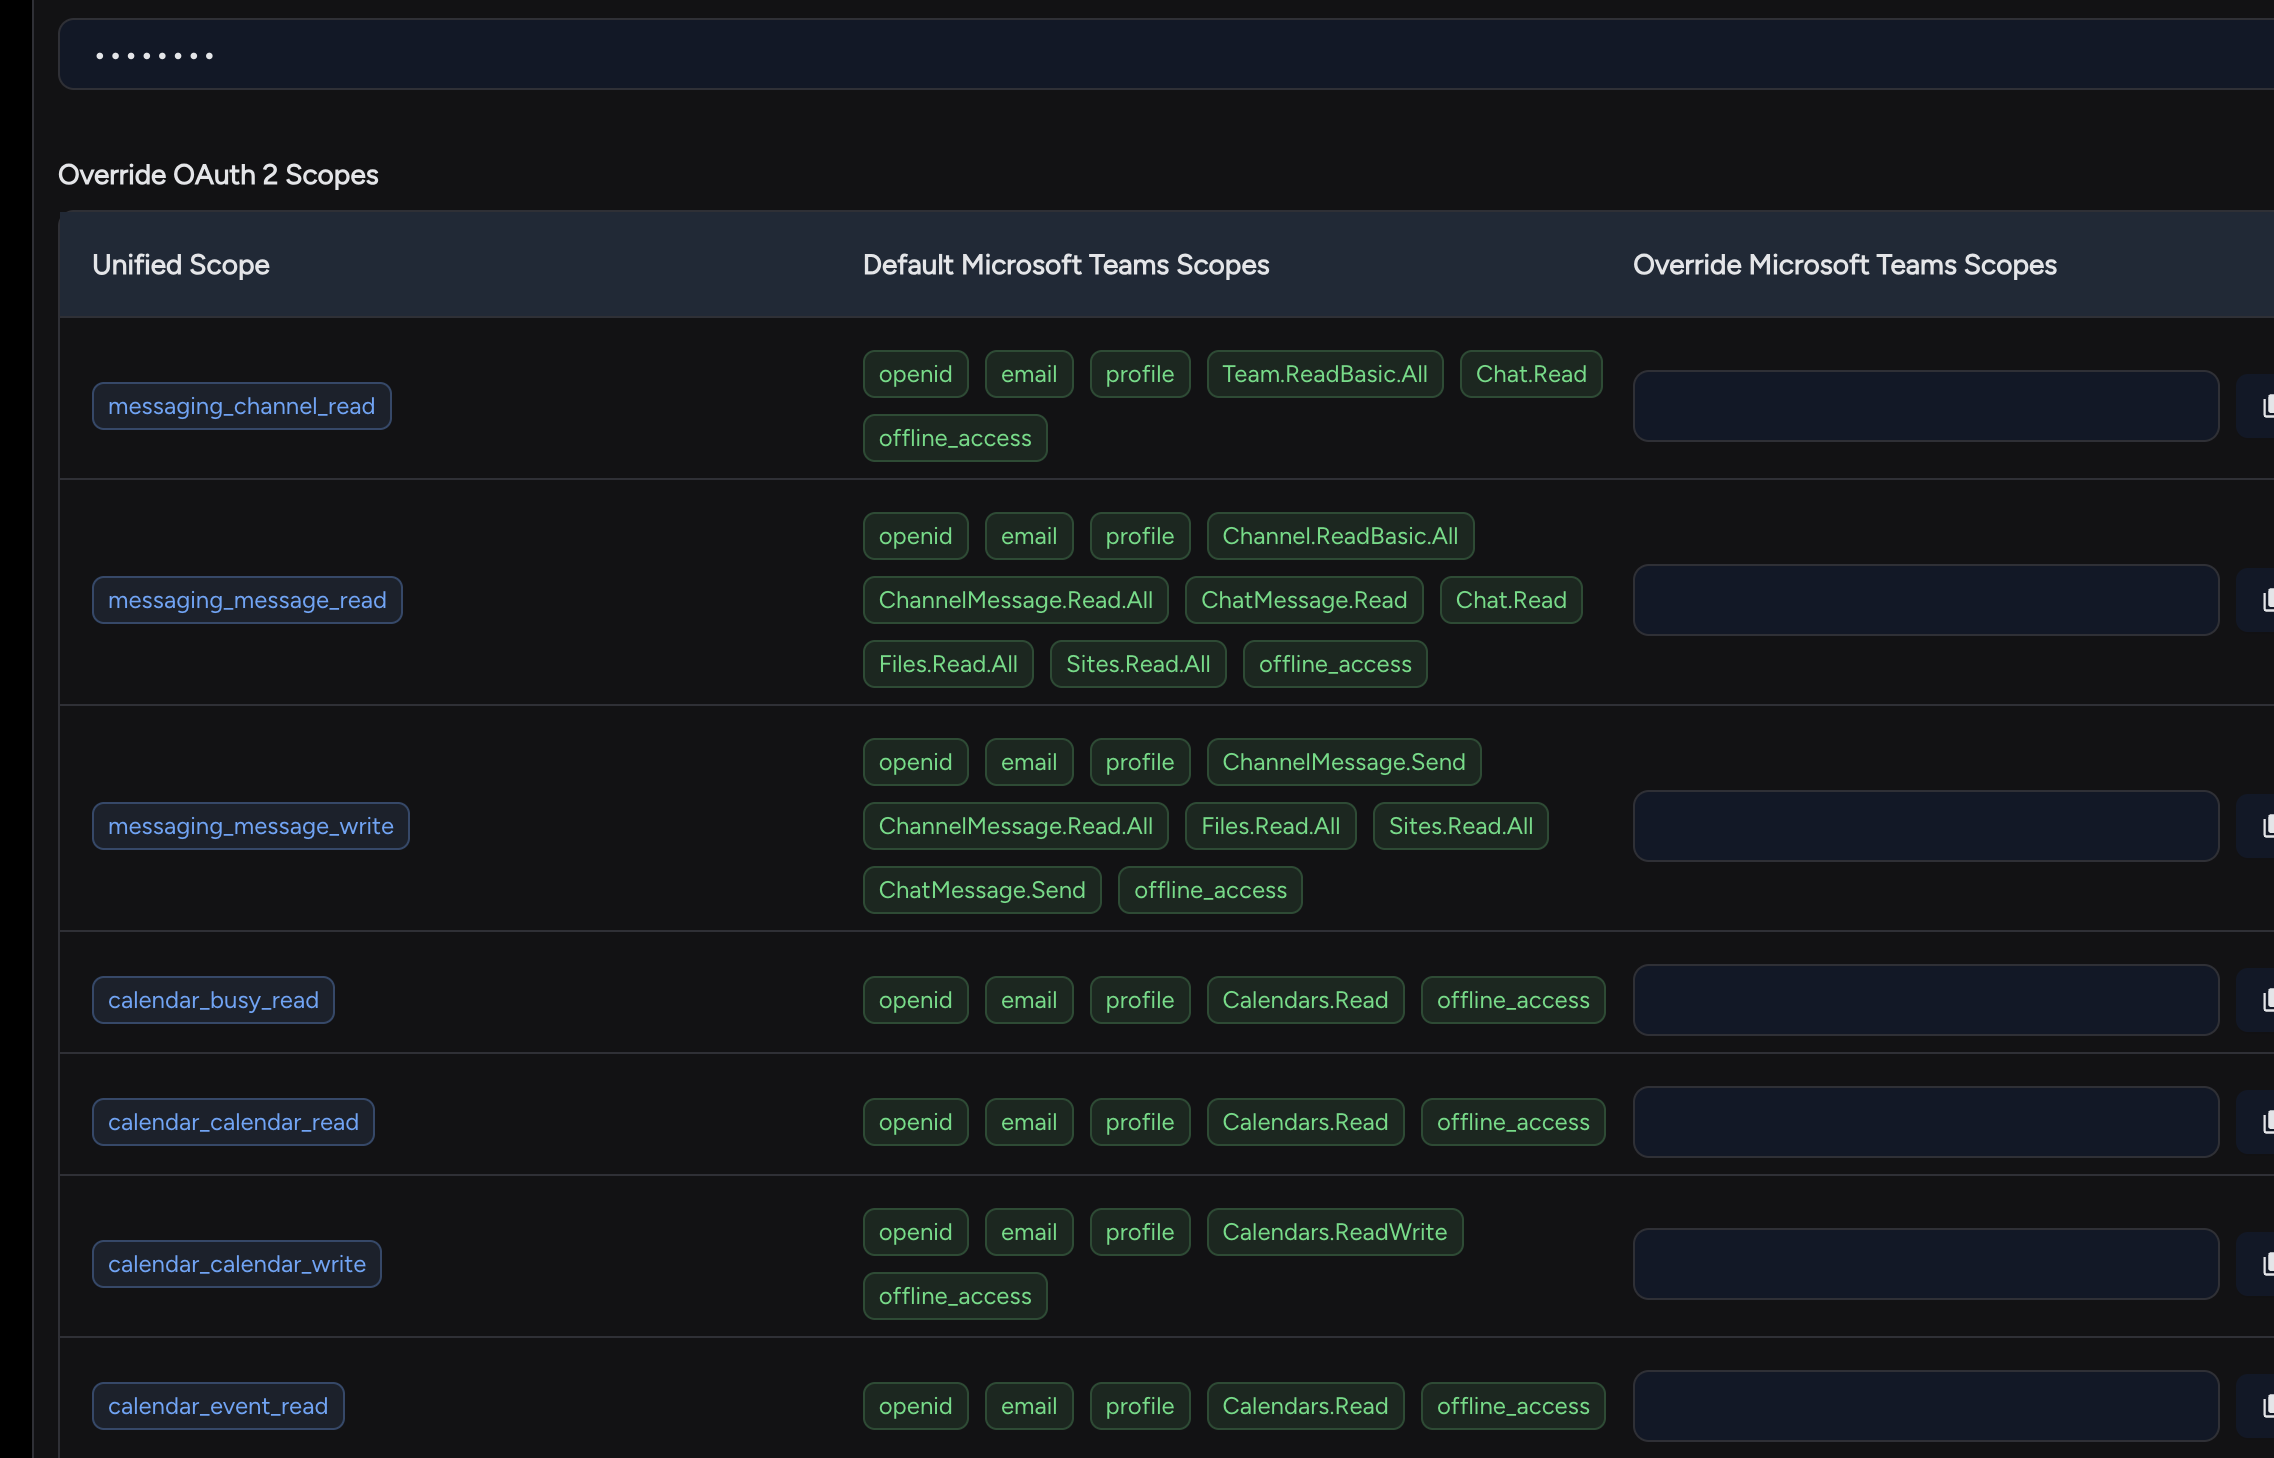
7. Click **Add permissions**.
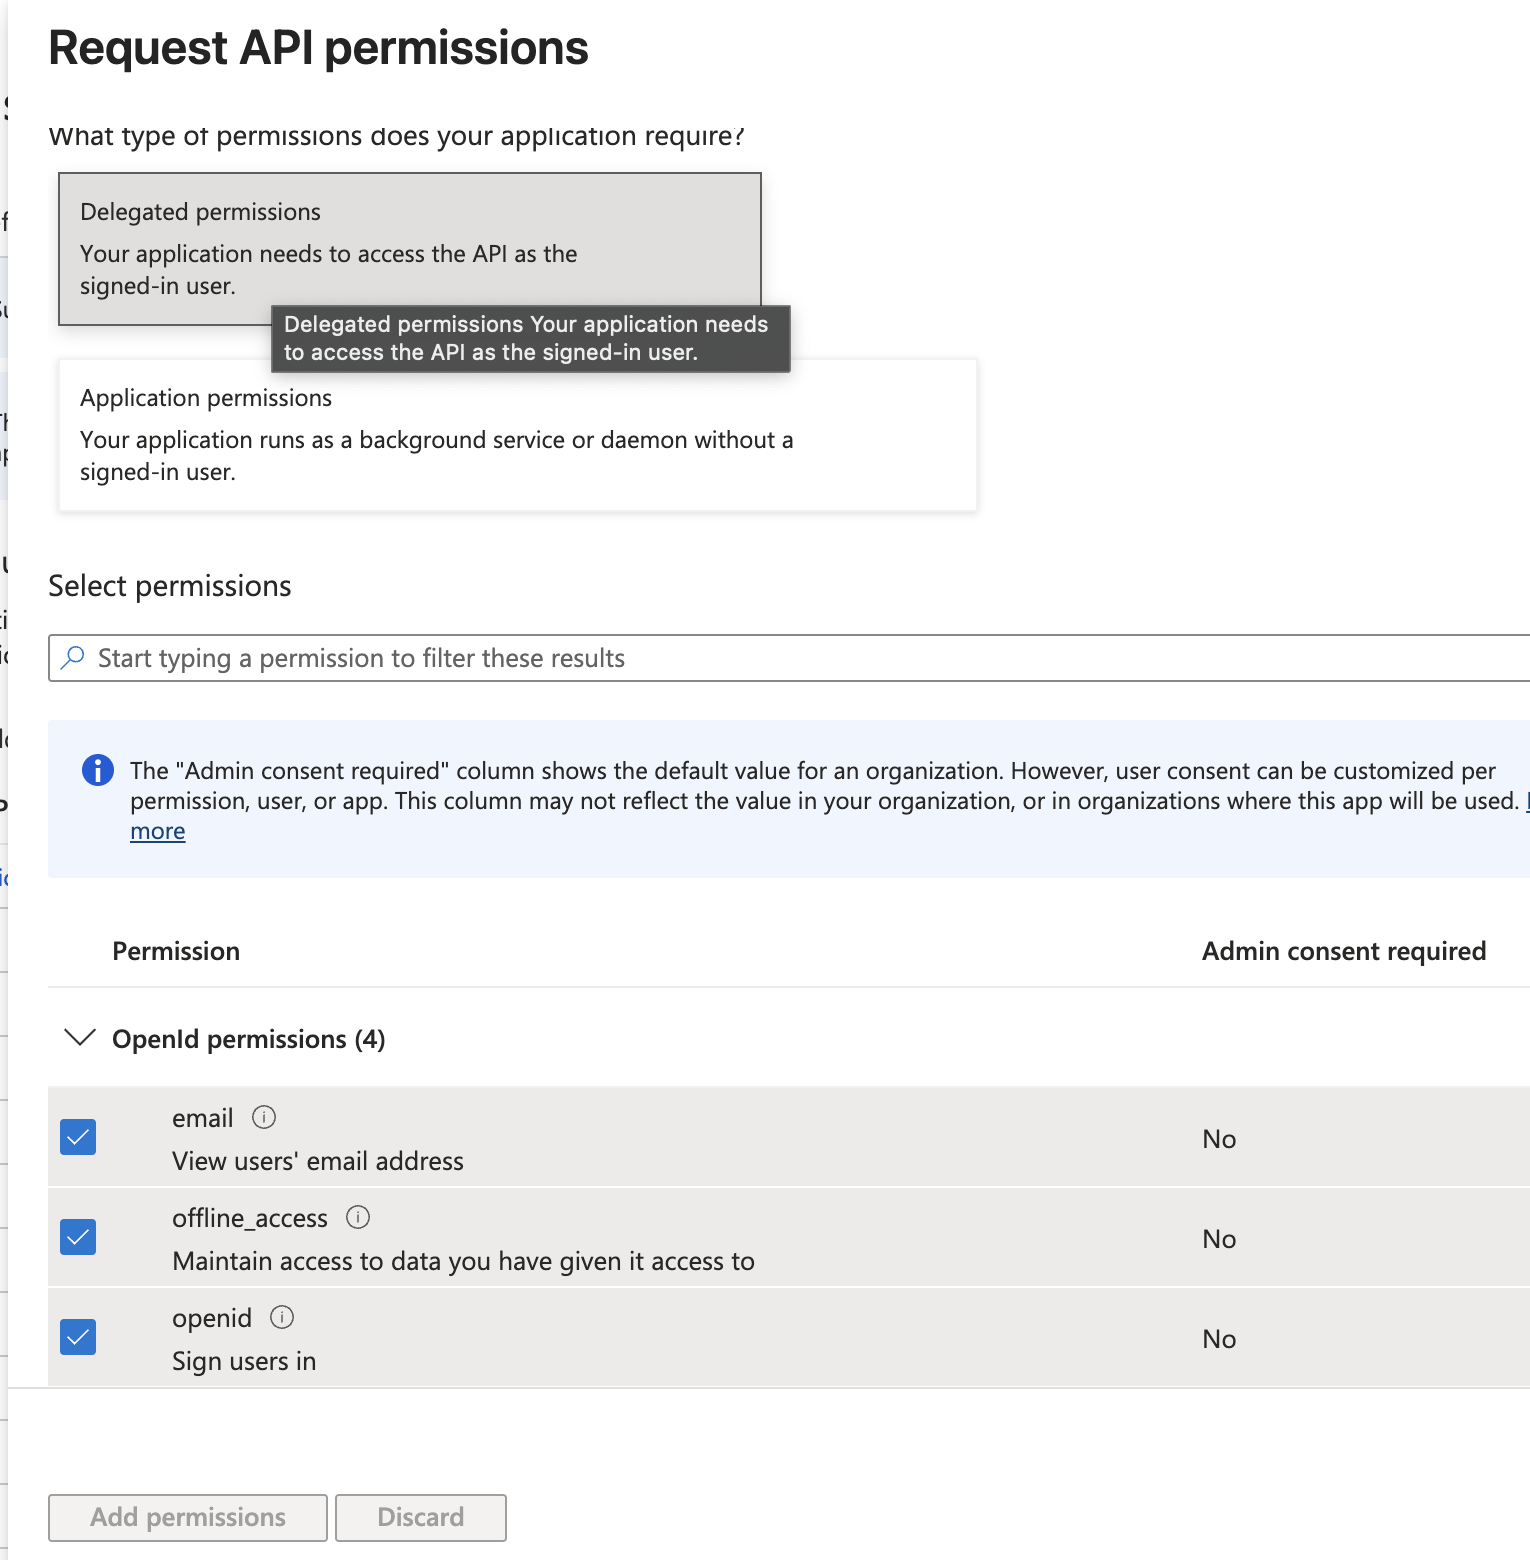
---
## Step 3: Configure Application Permissions (Required for Call Records)
If you need access to Call Records, repeat the steps above but select **Application permissions** instead of Delegated permissions.
Search for and add the following permissions:
```plain text
CallRecords.Read.All
OnlineMeetingRecording.Read.All
OnlineMeetingTranscript.Read.All
CallRecordings.Read.All
CallTranscripts.Read.All
```
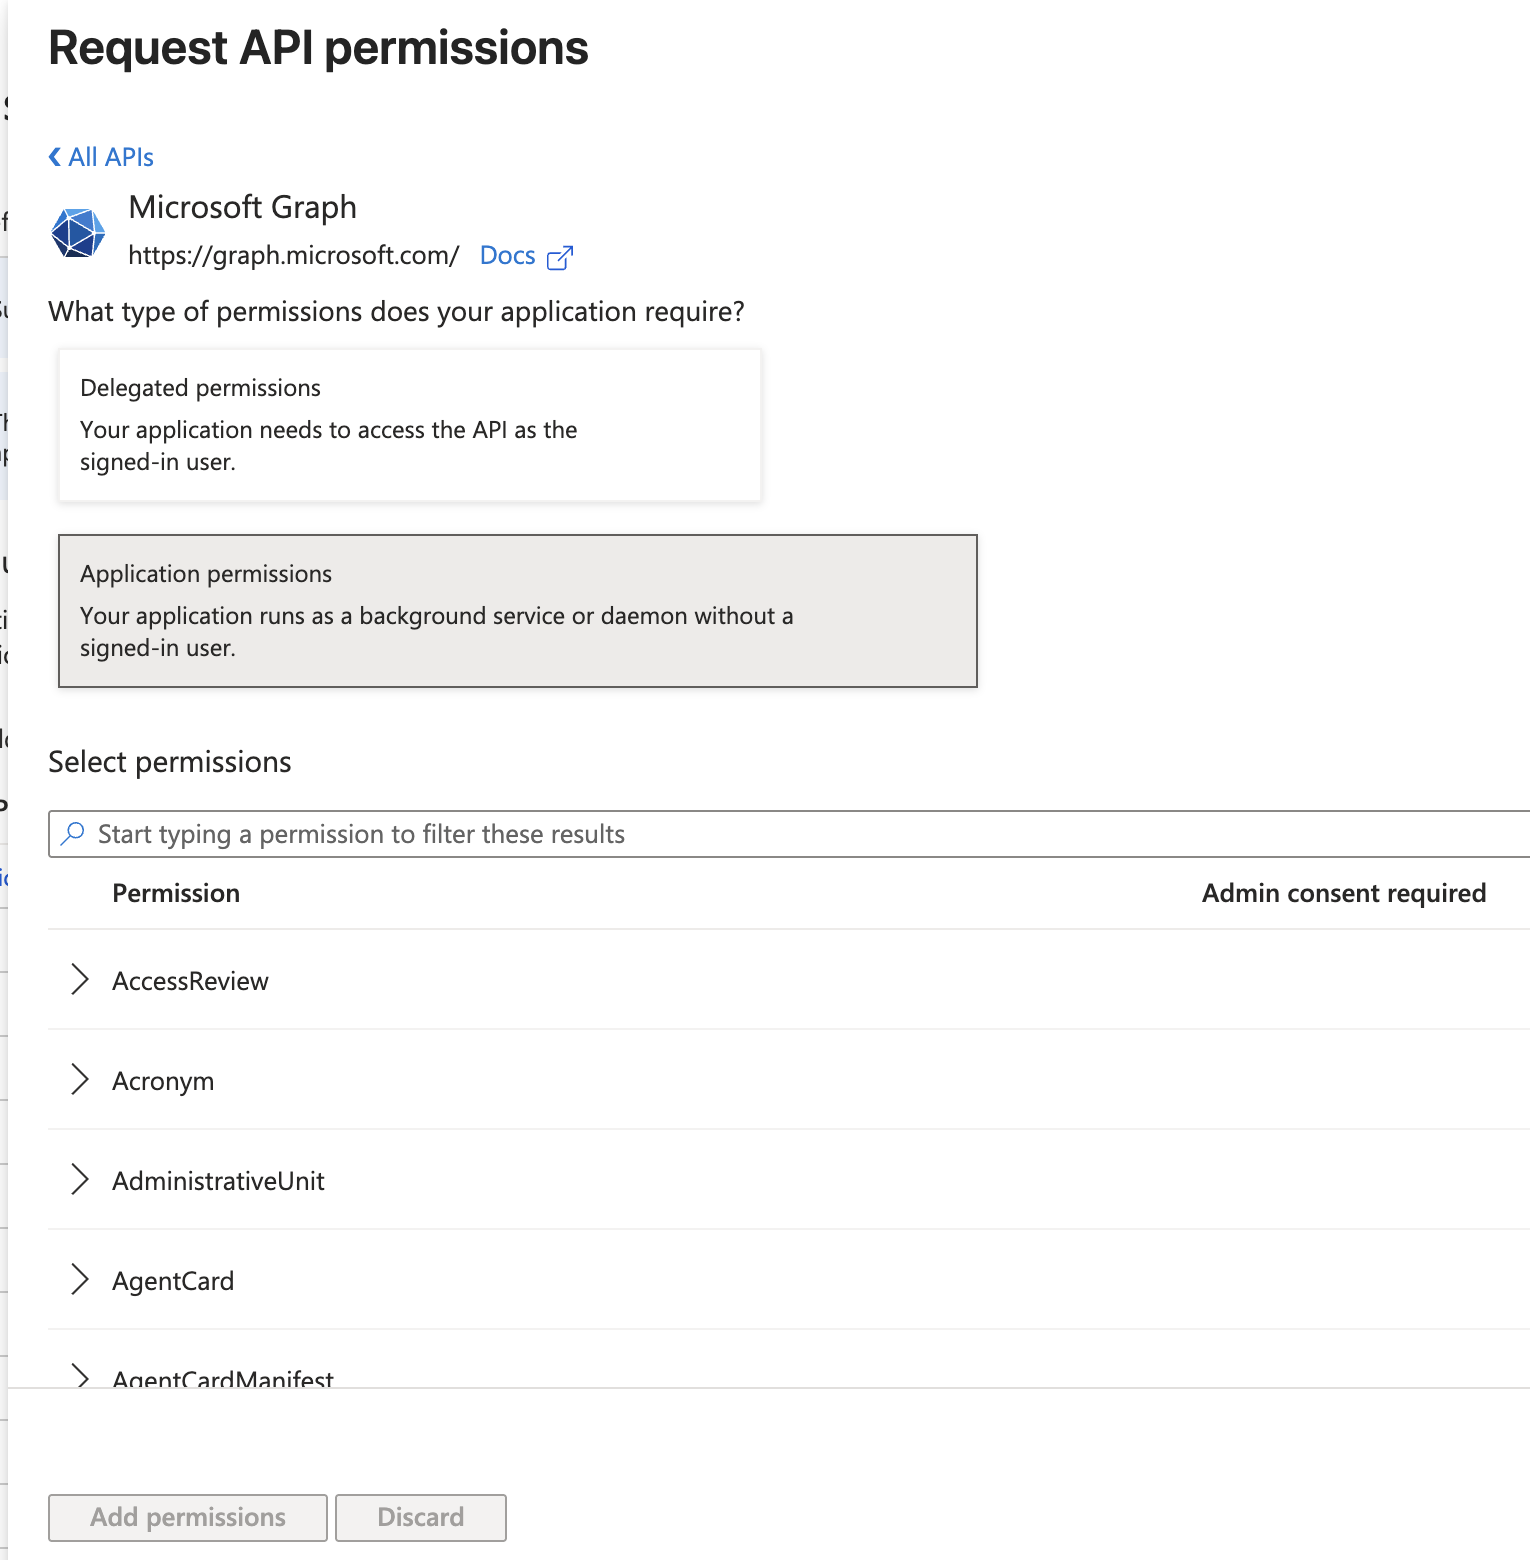
After selecting all required permissions, click **Add permissions**.
## Step 4: Create the Connection
After configuring permissions, create your Microsoft Teams connection.
If you have not yet obtained your Client ID and Client Secret, follow this guide:
[https://docs.unified.to/guides/how_to_get_your_oauth_2_credentials_for_microsoft_dynamics_365#how-to-get-your-oauth-2-credentials-for-microsoft-dynamics-365](https://docs.unified.to/guides/how_to_get_your_oauth_2_credentials_for_microsoft_dynamics_365#how-to-get-your-oauth-2-credentials-for-microsoft-dynamics-365)
Enter the following credentials:
- Client ID
- Client Secret
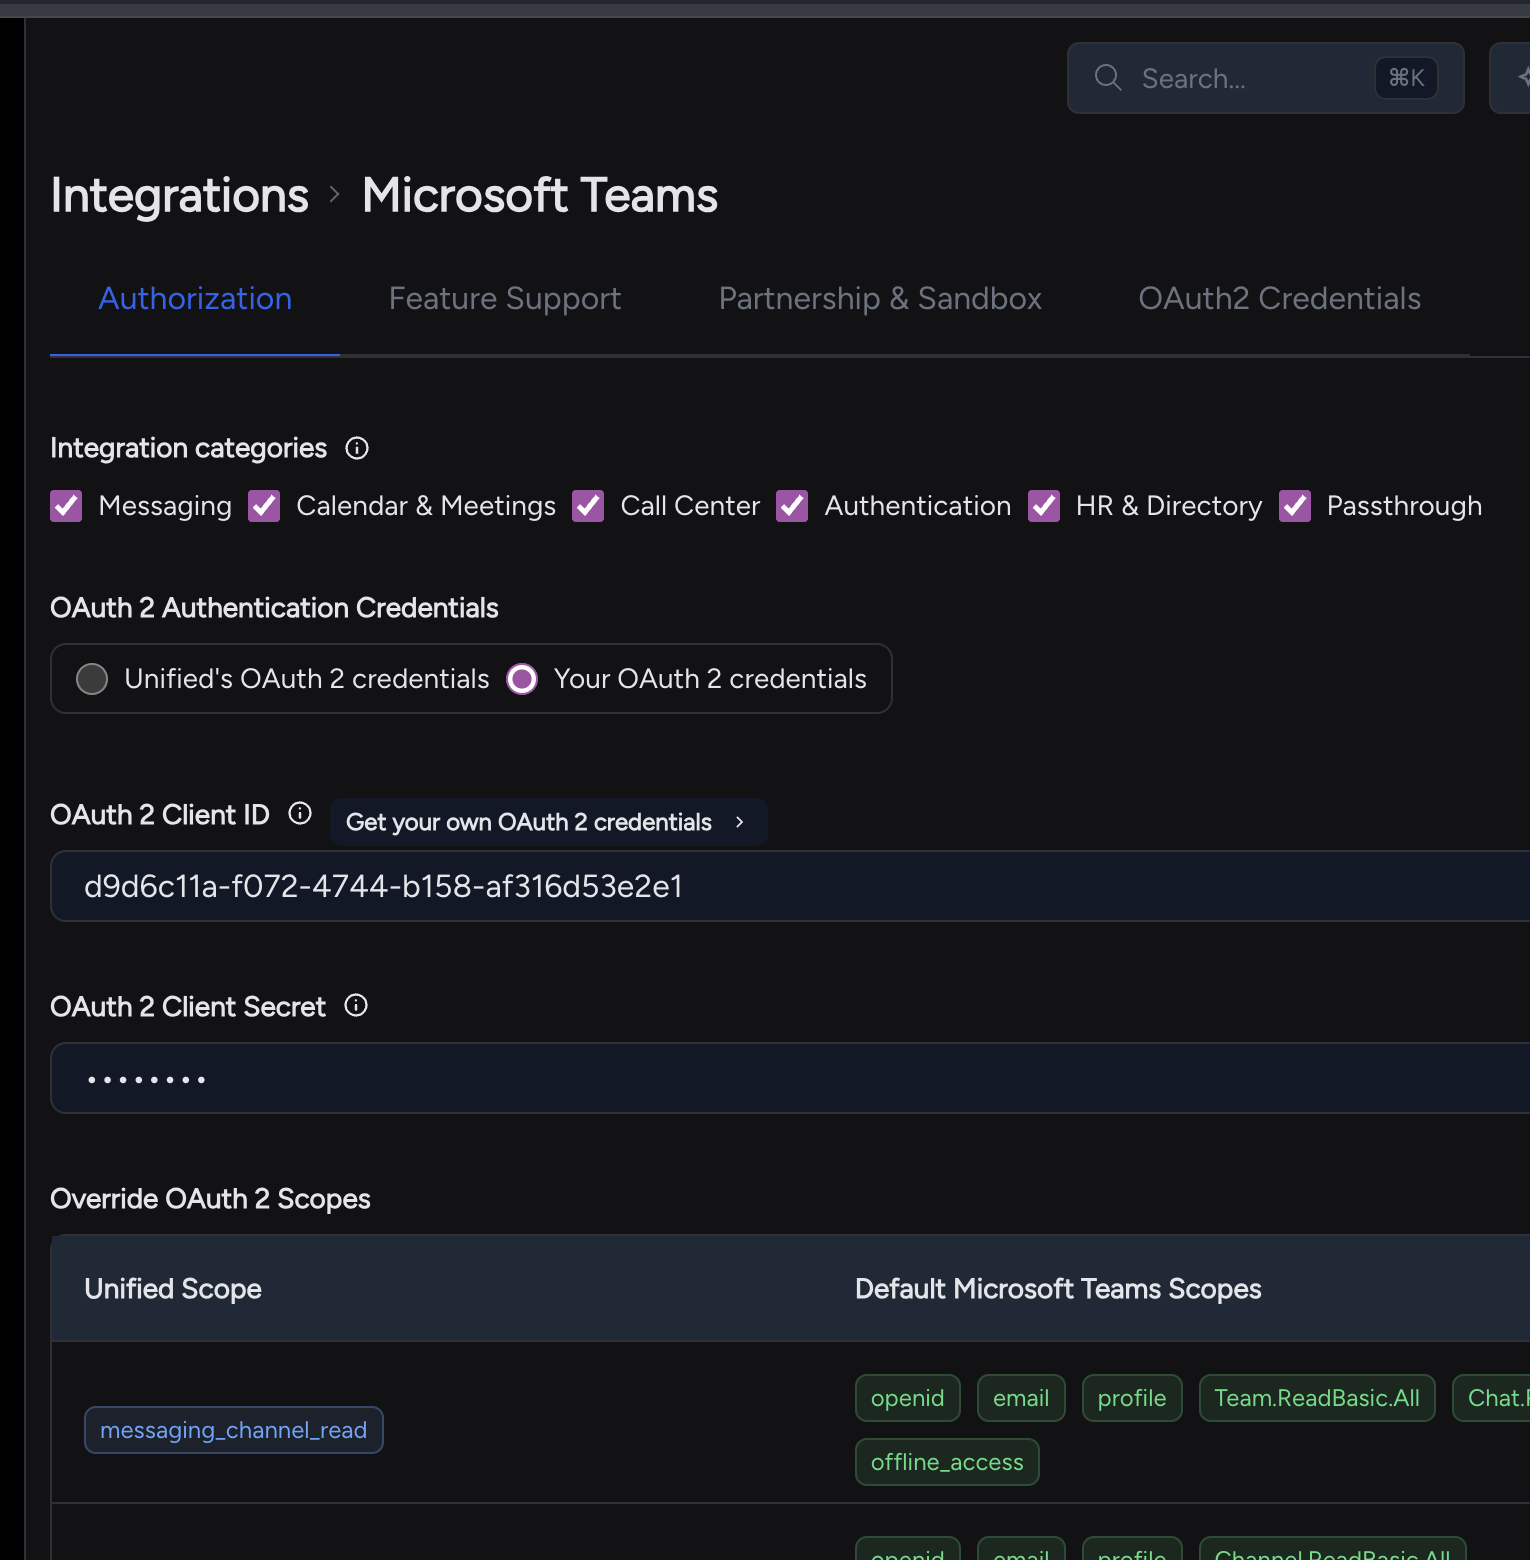
Click **Activate**.
---
## You're Ready to Go
Your Microsoft Teams integration is now configured and ready to use.
If you have any questions or encounter any issues during setup, please contact our support team.
## How to create a token-based connection in Highlevel
URL: https://docs.unified.to/guides/how_to_create_a_token_based_connection_in_highlevel
# How to create a token-based connection in Highlevel
------
_April 23, 2026_
This guide walks you through creating a **HighLevel token-based connection** using a **sub-account (location) API key** in Unified.
---
## ⚠️ Important Context
HighLevel operates on two levels:
- **Agency level (company)**
- **Sub-account level (location)** ✅ _(token-based authentication works only here)_
To access **CRM** and **HRIS** data, you must use a **sub-account (location)** API key.
> **Note:** HighLevel offers multiple ways to create connections. To avoid issues, follow every step in this guide carefully.
---
## ✅ Prerequisites
- You must have **Admin** or **Owner** access to the sub-account.
## 🔧 Step-by-Step Setup
1. Navigate to Your Sub-Account
Go to your **HighLevel sub-account (location)**.
2. Open Private Integrations
Go to **Settings → Private Integrations** _(inside the sub-account)_
3. Create a New Integration
Click **Create Integration**
4. Name Your Integration
Provide a clear name for your token (e.g., `Unified Integration`)
5. Select Required Scopes
Choose scopes based on your use case:
| Permission | Resource | HighLevel Scopes |
| ---------- | ------------- | ------------------------------------------------ |
| Read | CRM Contact | `contacts.readonly` |
| Write | CRM Contact | `contacts.write` |
| Read | CRM Company | `businesses.readonly`, `locations/tags.readonly` |
| Write | CRM Company | `businesses.write`, `locations/tags.write` |
| Read | CRM Deal | `opportunities.readonly` |
| Write | CRM Deal | `opportunities.write` |
| Read | HRIS Employee | `users.readonly` |
| Write | HRIS Employee | `users.write` |
| Read | CRM Lead | `contacts.readonly` |
| Write | CRM Lead | `contacts.write` |
| Read | CRM Pipeline | `opportunities.readonly` |
| Read | CRM Event | `forms.readonly`, `contacts.readonly` |
| Write | CRM Event | `contacts.write` |
**Reference:** [https://marketplace.gohighlevel.com/docs/Authorization/Scopes](https://marketplace.gohighlevel.com/docs/Authorization/Scopes)
6. Create and Confirm
Click **Create, t**hen click **Confirm**
7. Copy API Token
You will receive an **API Token**
Store it securely (you won't be able to retrieve it later)
8. Get Location ID
To find your **Location ID**:
Look at the URL of your sub-account
Example:
```plain text
https://app.gohighlevel.com/v2/location/tG38xt5twyoGISw4o92p/settings/private-integrations/...
```
The value after `/location/` is your **Location ID**
→ `tG38xt5twyoGISw4o92p`
9. Connect in Unified
- Go to: [https://app.unified.to/integrations/highlevel](https://app.unified.to/integrations/highlevel)
- Select **API TOKEN**
- Click **Activate**
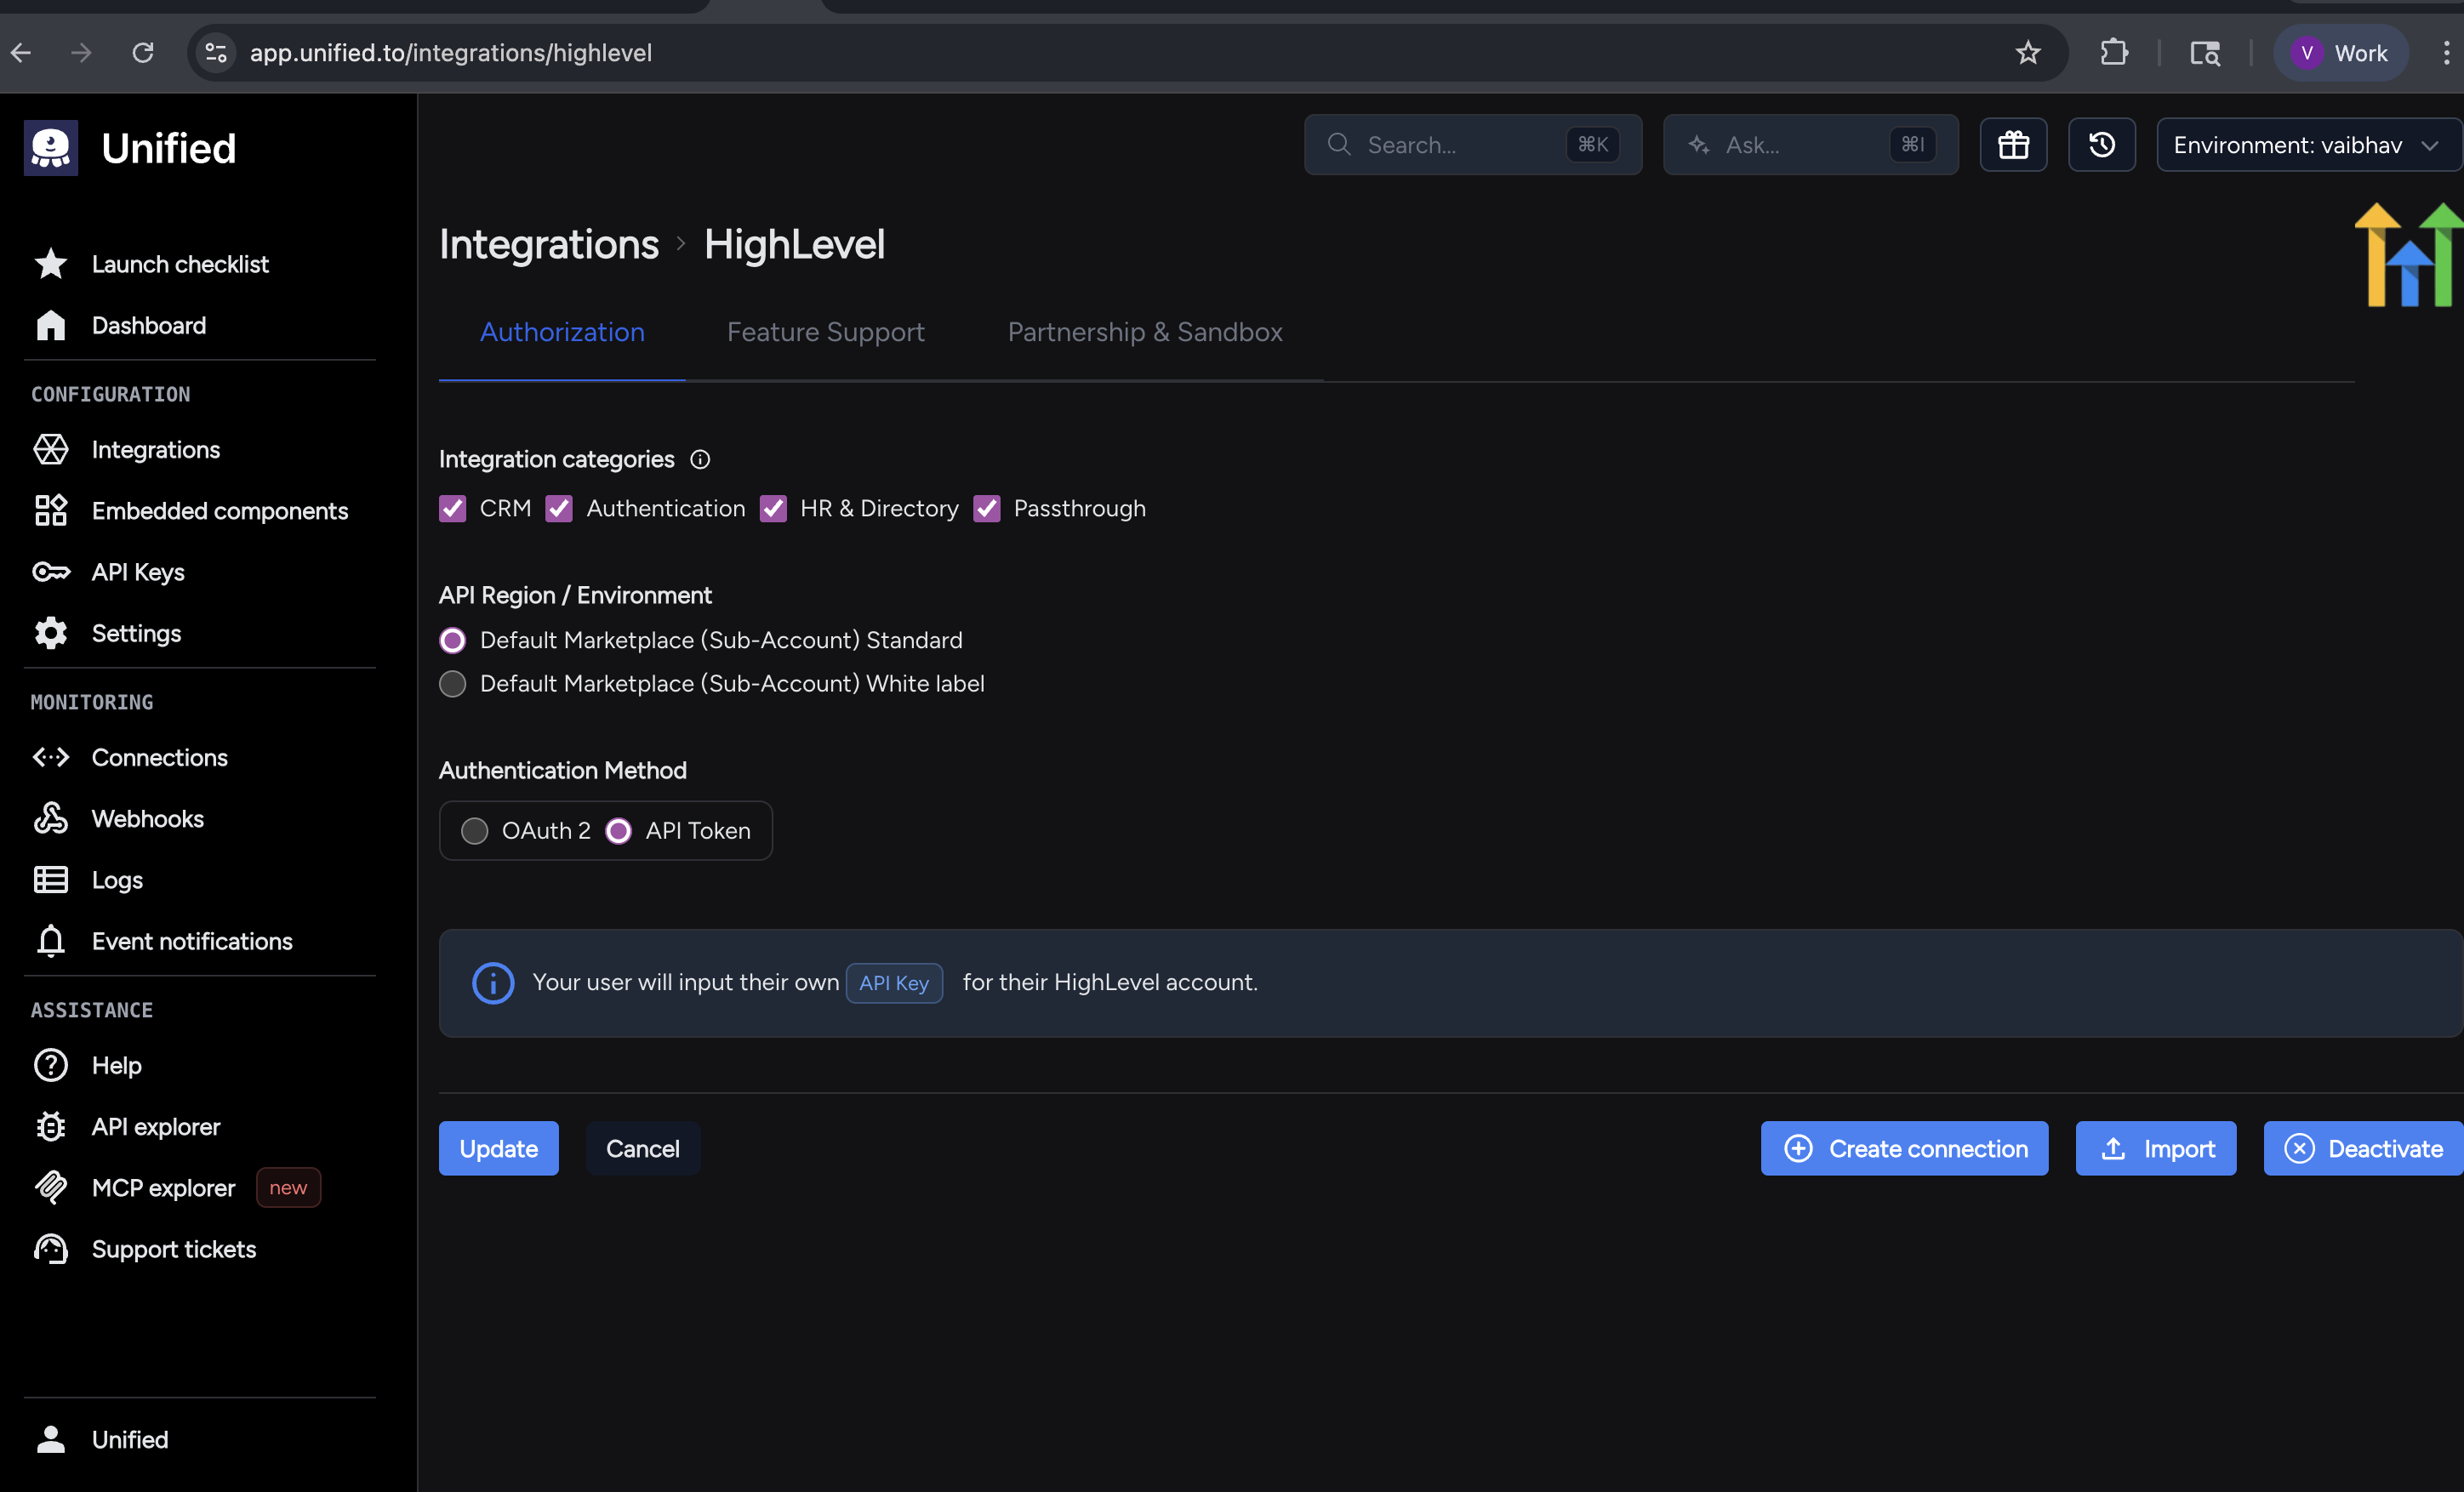
10. Create Connection
Paste **API Token and Location ID, then c**lick **Create Connection**
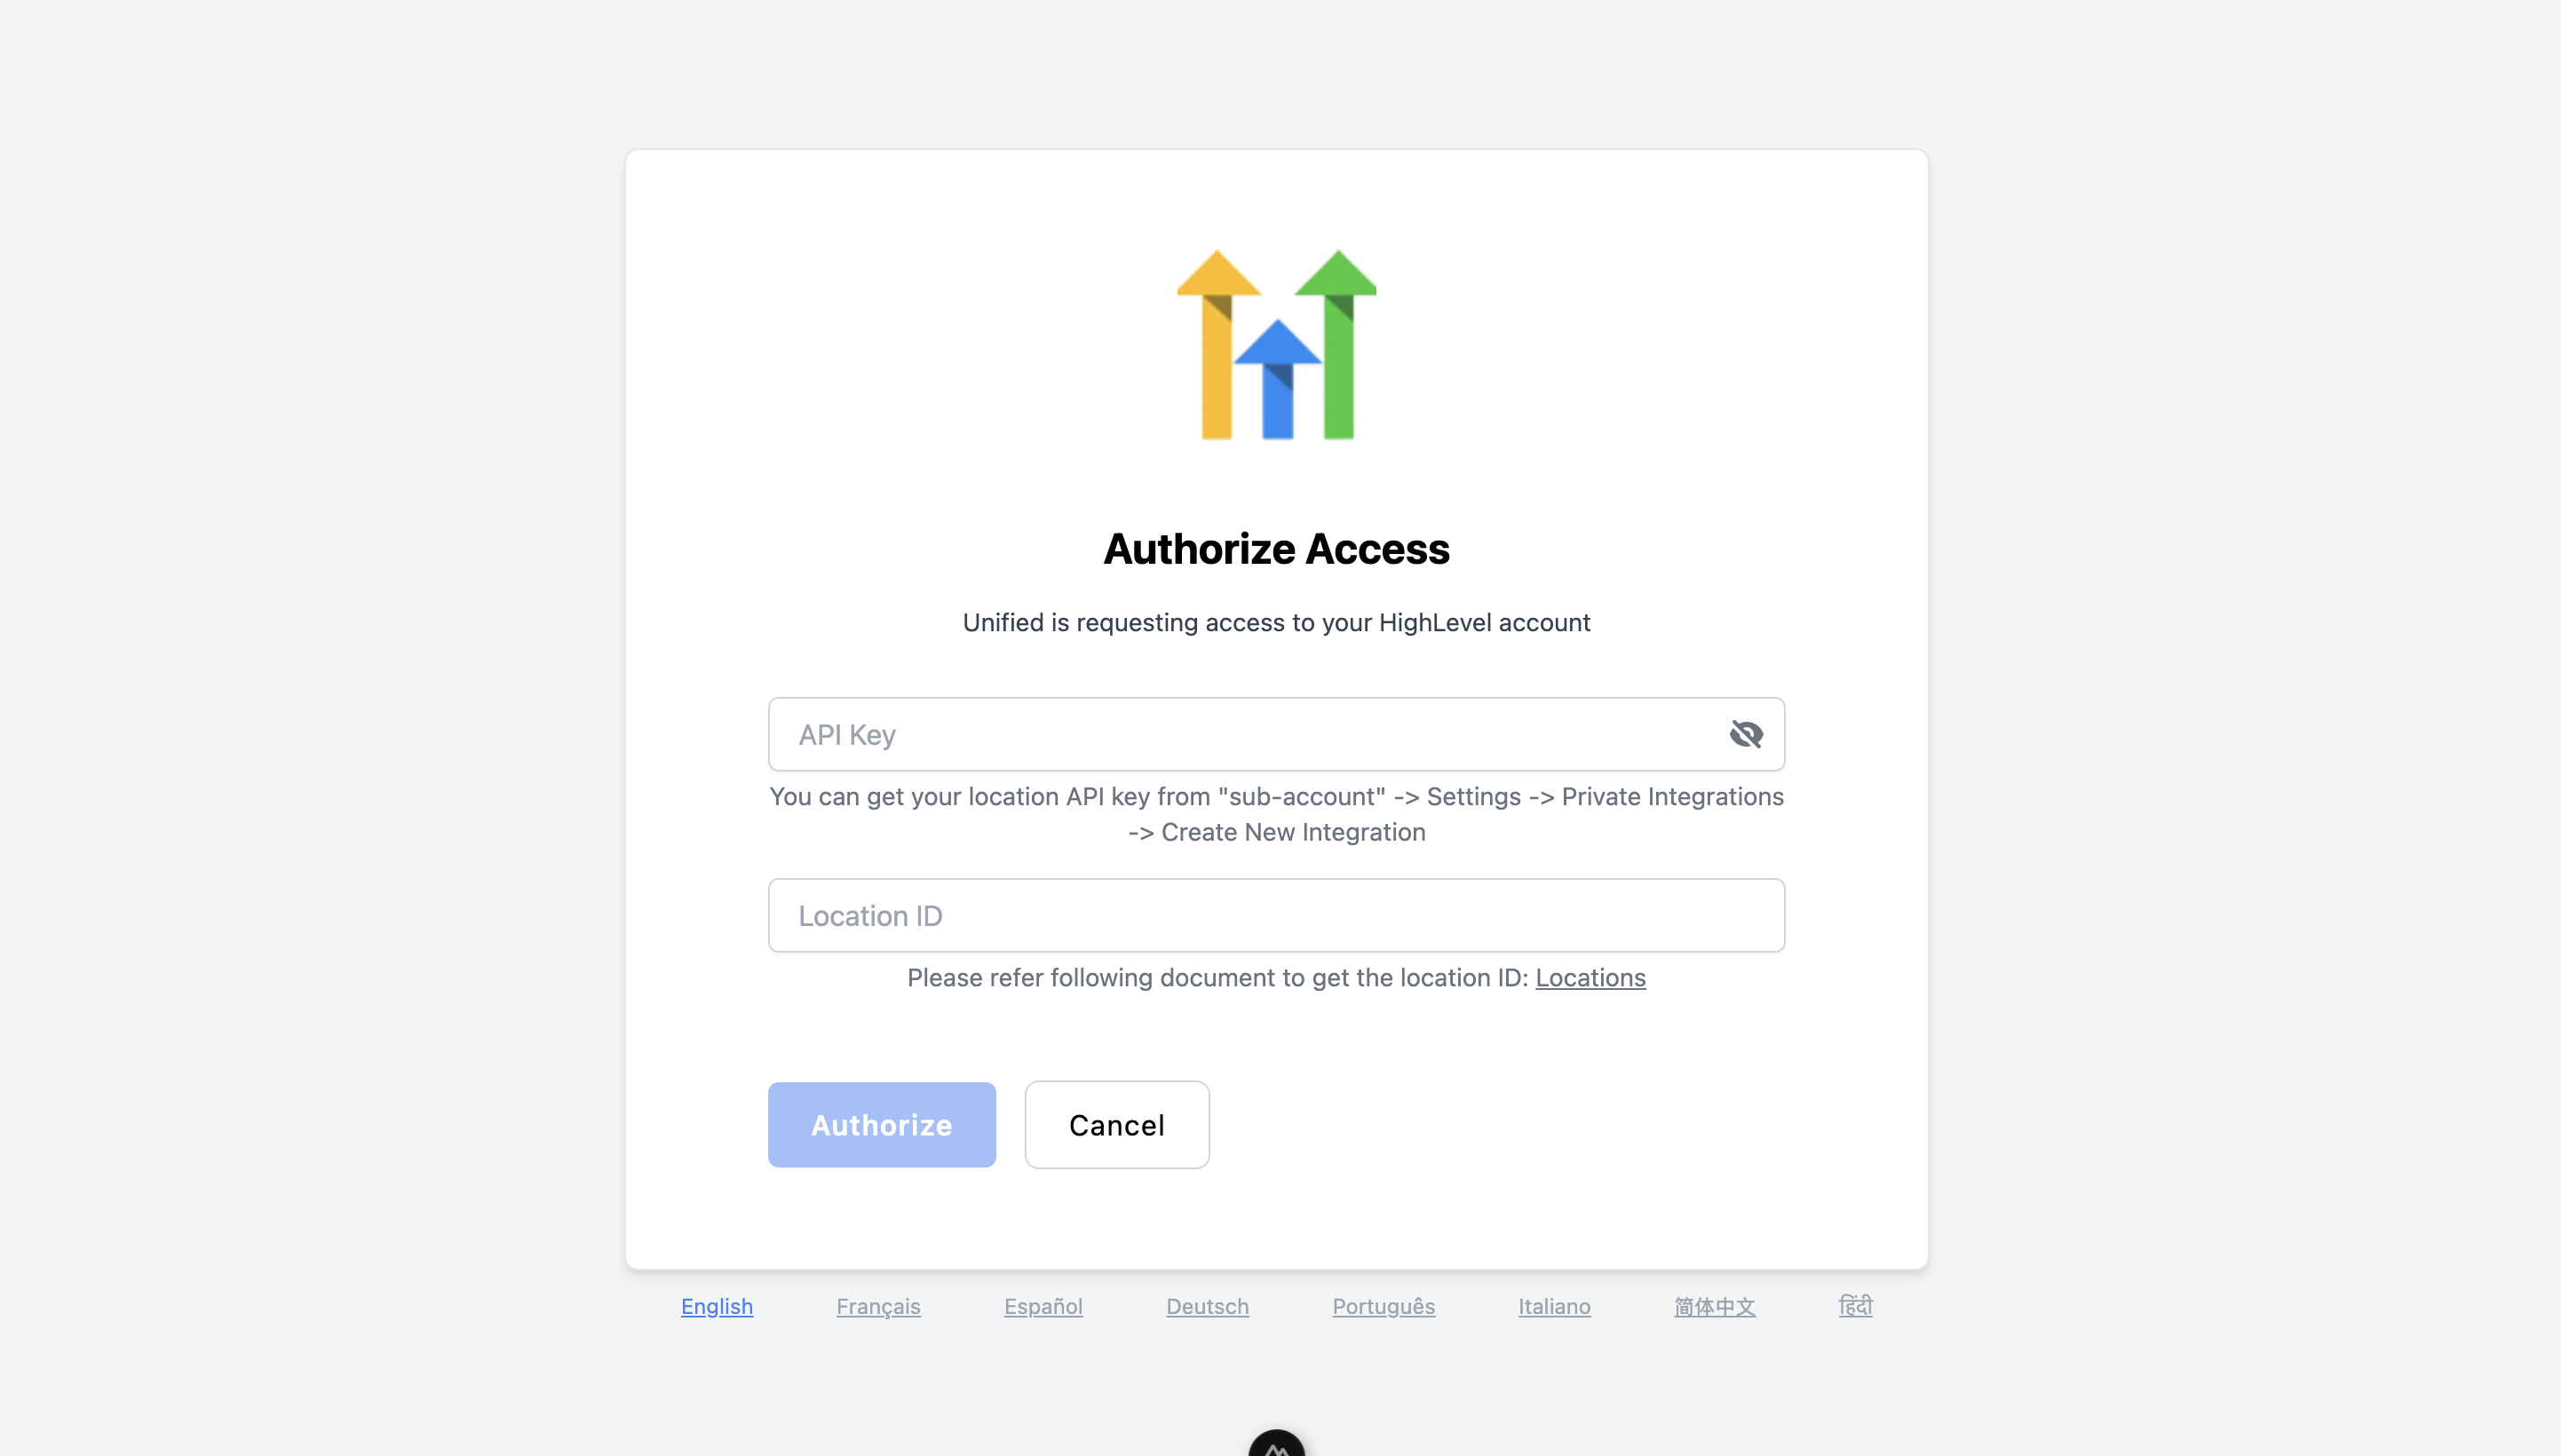
---
## ✅ Done
Your HighLevel token-based connection should now be successfully set up in Unified.
---
If it doesn't work, double-check:
- You created the token at the **sub-account level**
- The correct **scopes** are selected
- The **Location ID** matches the sub-account
If you have any more doubts or issues, please contact the [Unified.to](https://unified.to/) team for support.
## How to Create a Unified.to Connection to HighLevel
URL: https://docs.unified.to/guides/how_to_create_a_unified_connection_to_highlevel
# How to Create a Unified.to Connection to HighLevel
------
_March 19, 2026_
This guide explains how to connect an existing HighLevel account to [Unified.to](https://unified.to/). It assumes:
- You already have a Unified.to account
- You already have a HighLevel account
- You have access to a HighLevel Developer (Agency) account
---
## Overview
To create a connection between Unified.to and HighLevel, you will:
1. Create or configure a HighLevel OAuth app
2. Collect required credentials (Client ID, Client Secret, etc.)
3. Use Unified.to to create a connection
4. Authorize the connection via OAuth
---
## Step 1: Create a HighLevel OAuth App
1. Log in to your HighLevel Developer (Agency) account [link](https://marketplace.gohighlevel.com/apps)
2. Navigate to the **App Dashboard**.
1. Click **Create App**
2. Fill in the required details:
- **App Name**: Any name (e.g., Unified Integration)
- **Redirect URL**: In **Advanced settings → Auth**, set the redirect URL to the value shown on the integration's **OAuth2 Credentials** page in [Unified.to](https://unified.to/).
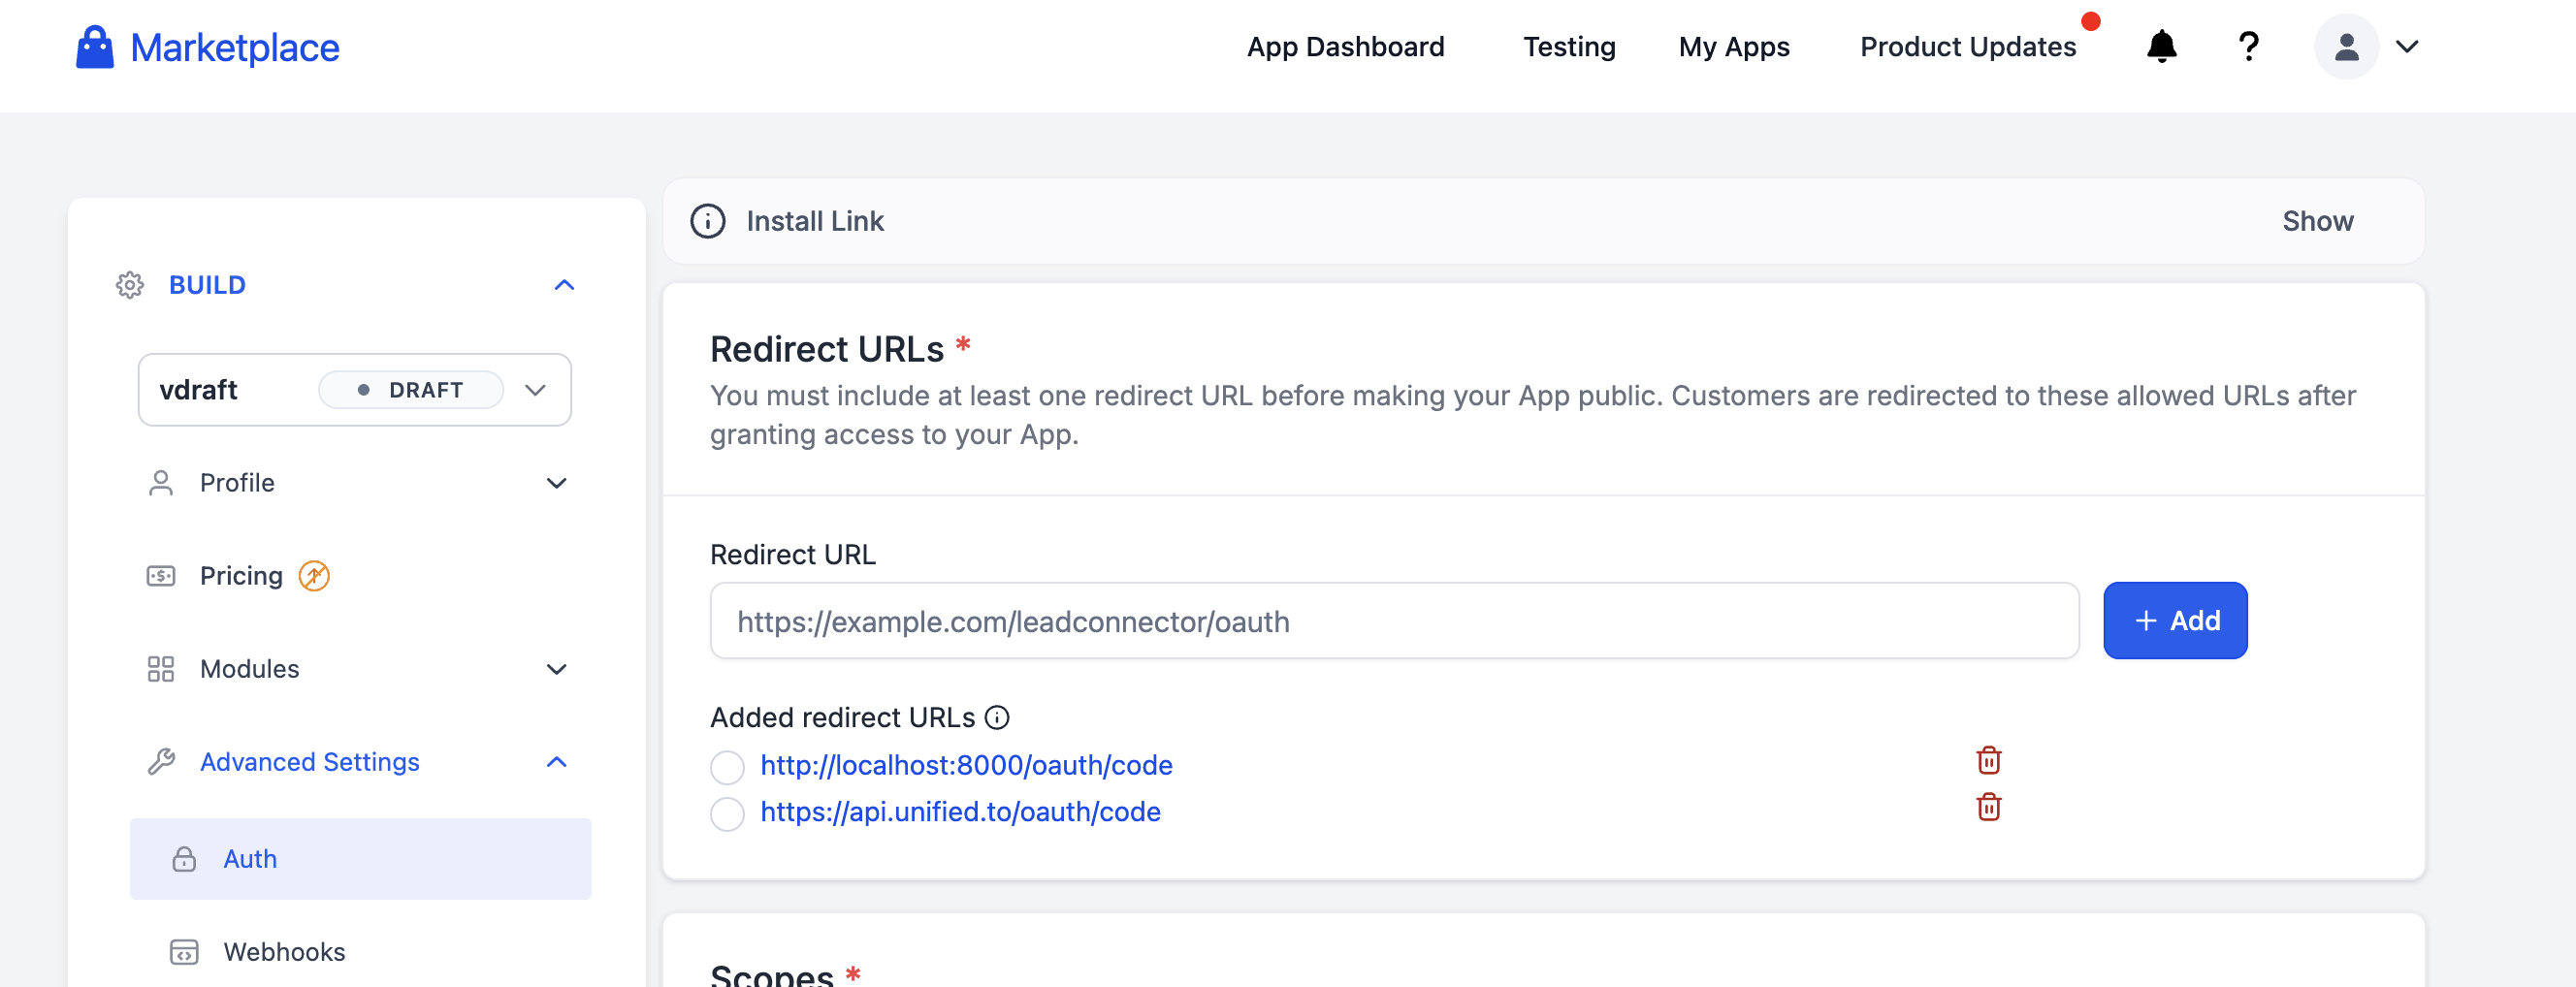
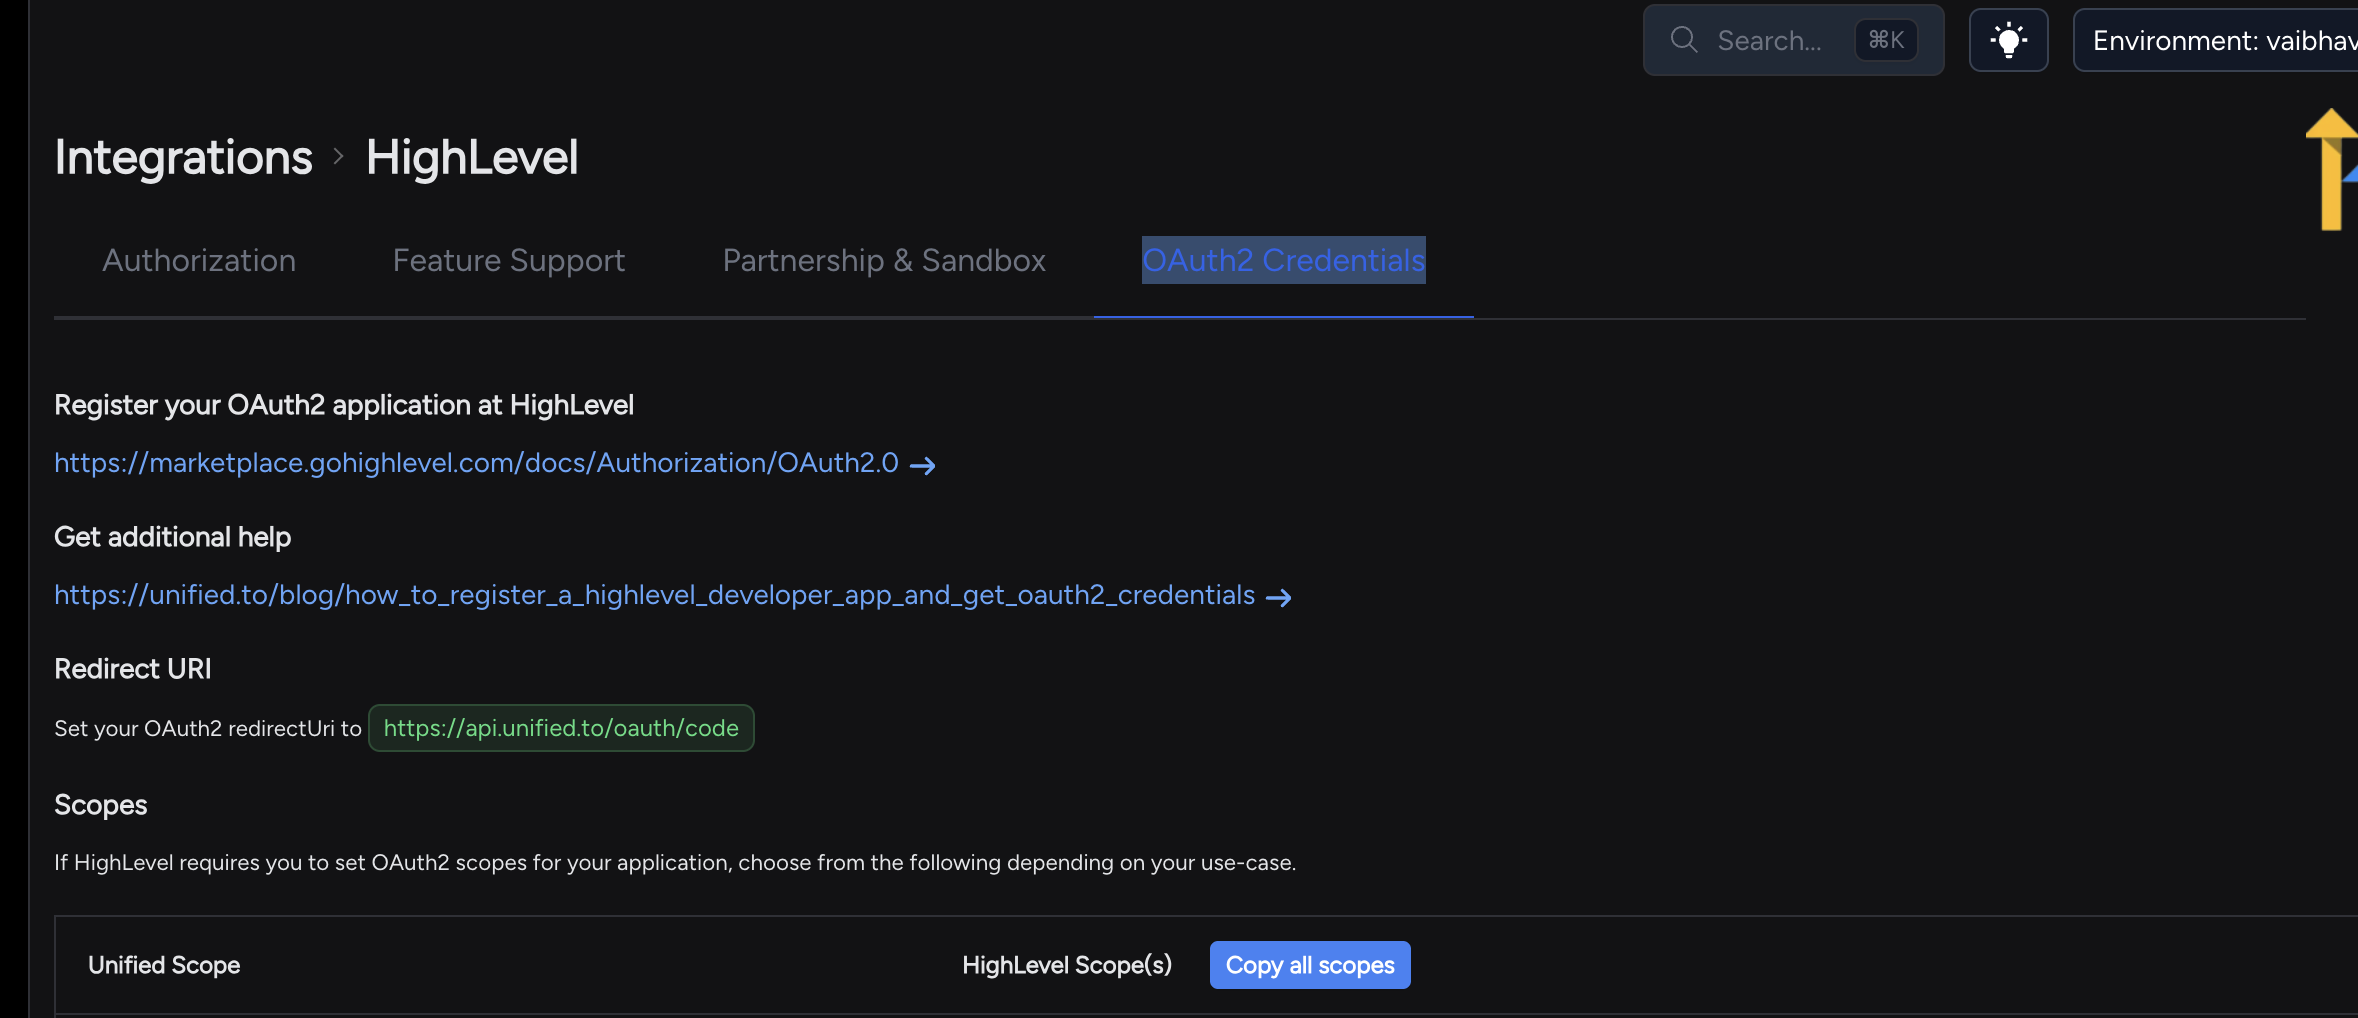
- **Scopes**: Use the scopes listed on the HighLevel app setup page.
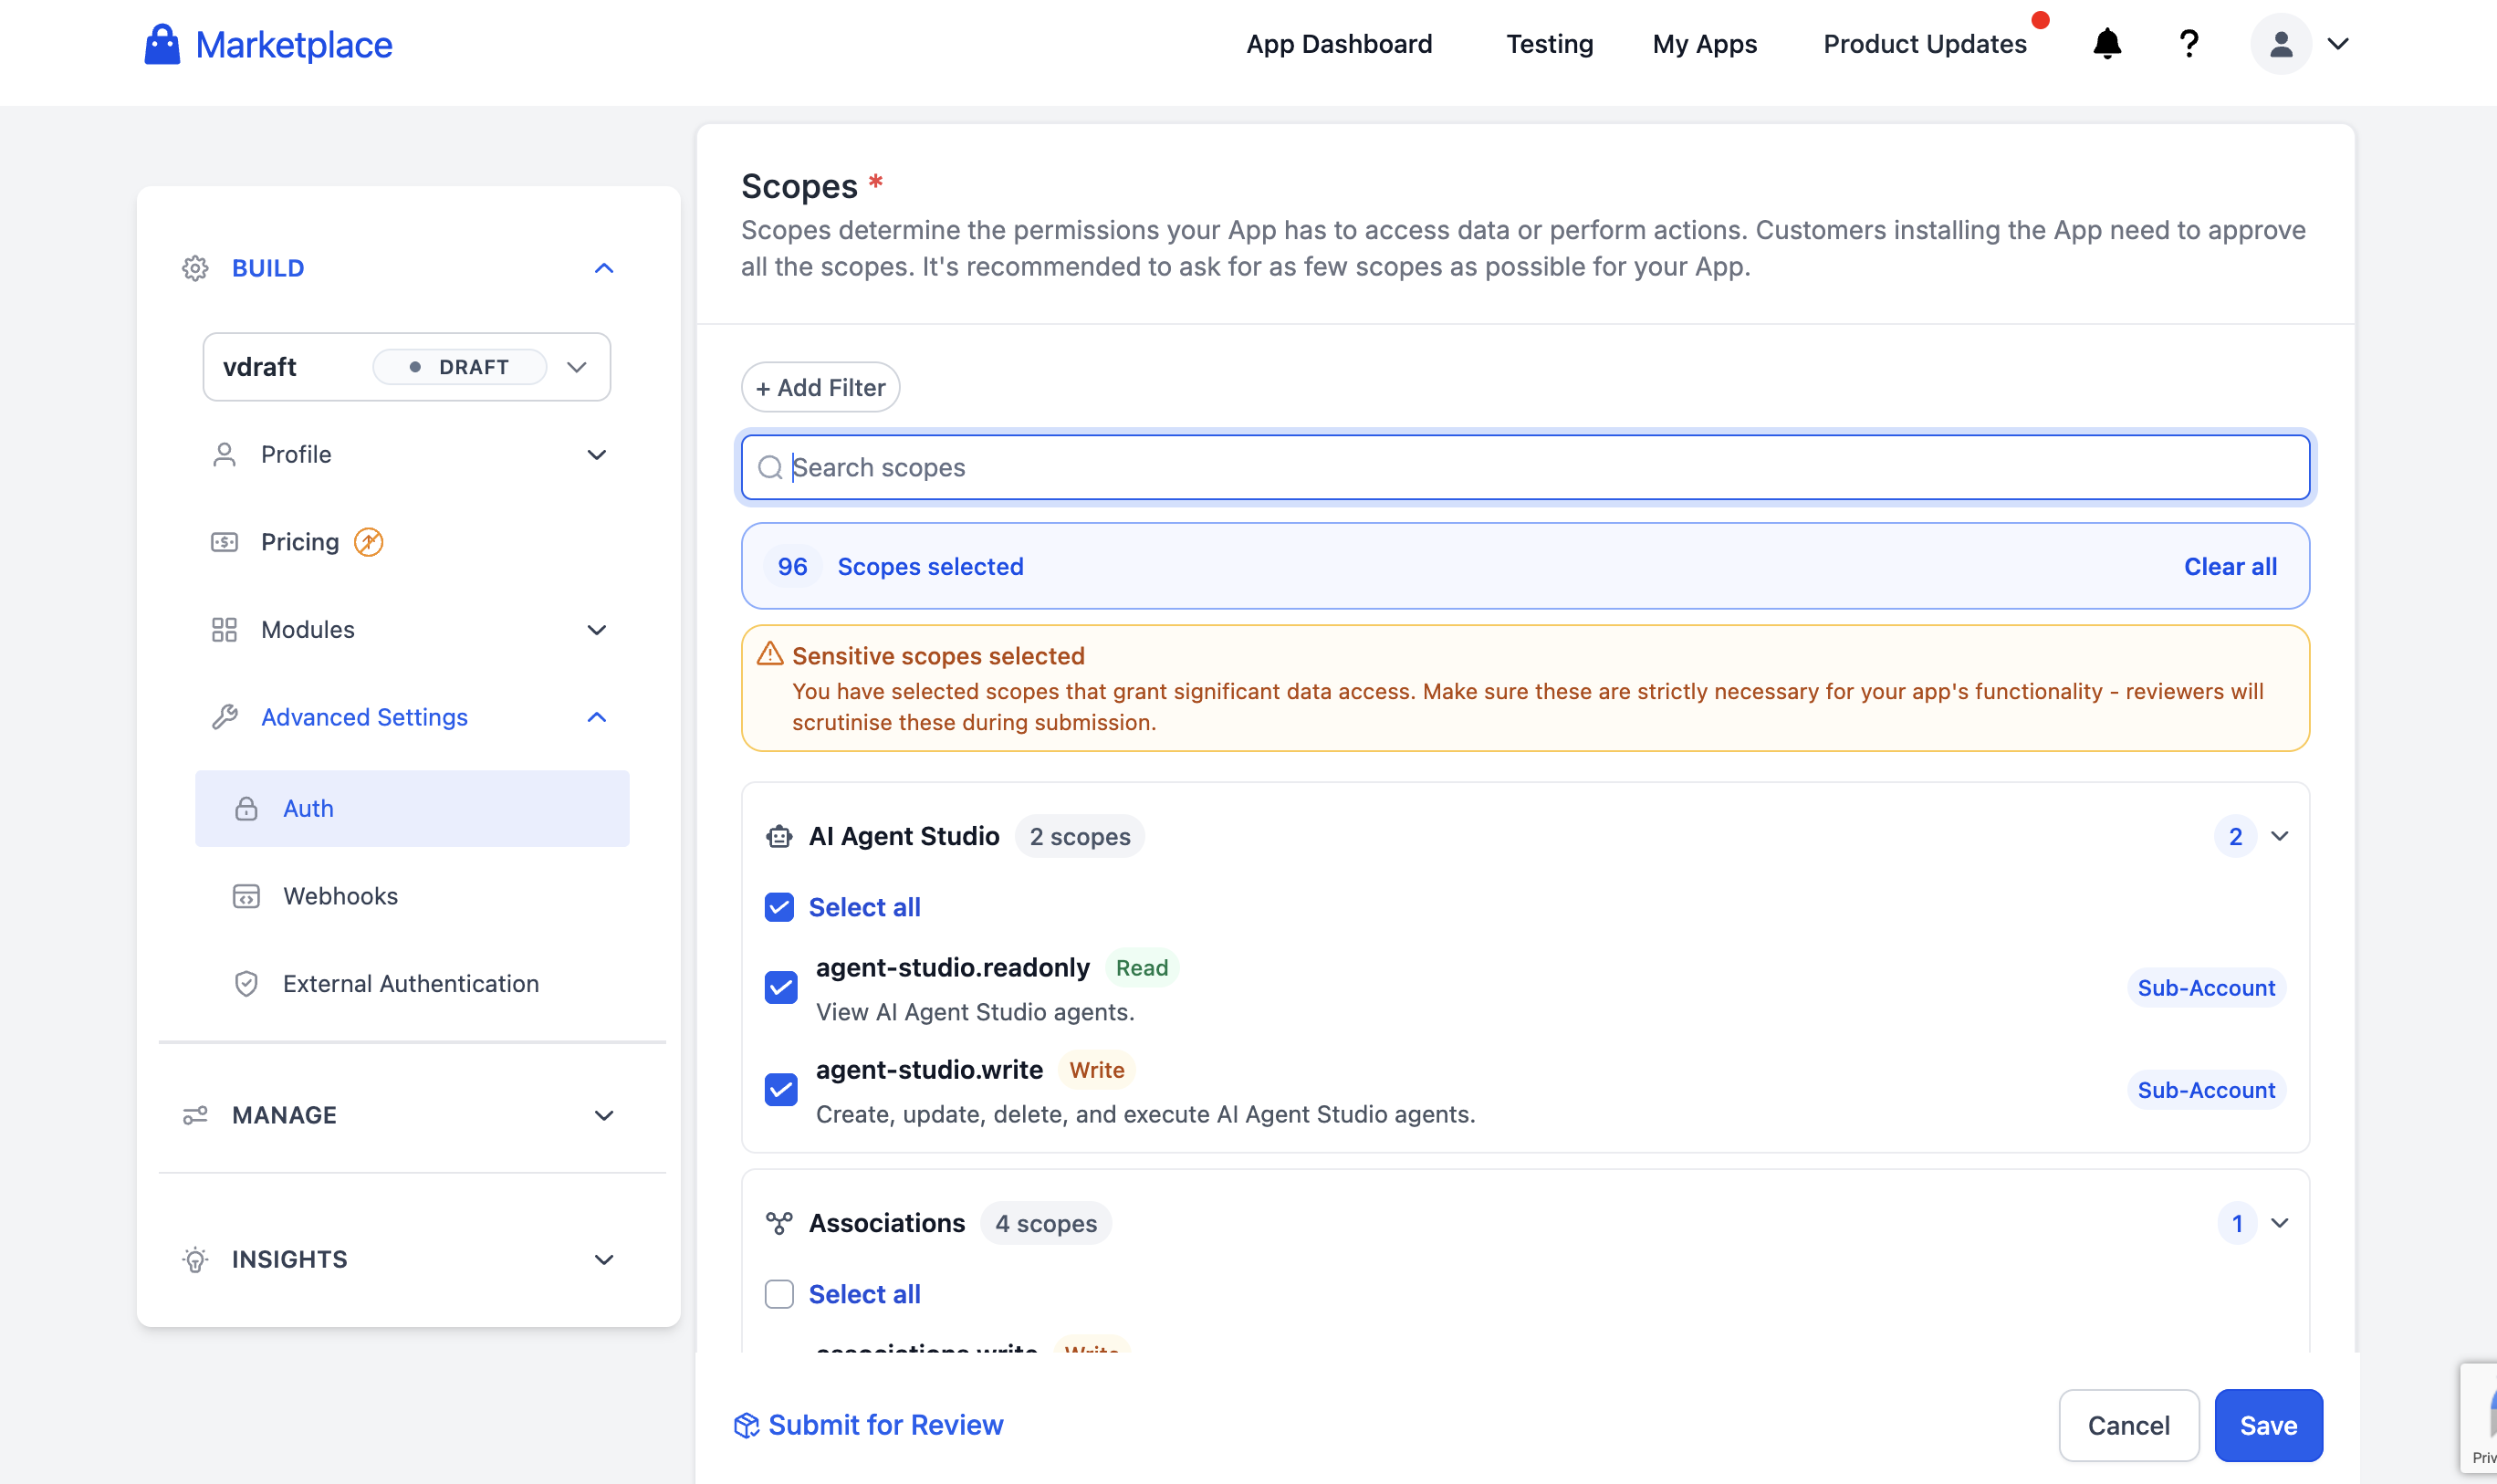
In [Unified.to](https://unified.to/), you can also find the required scopes listed below the integration page.
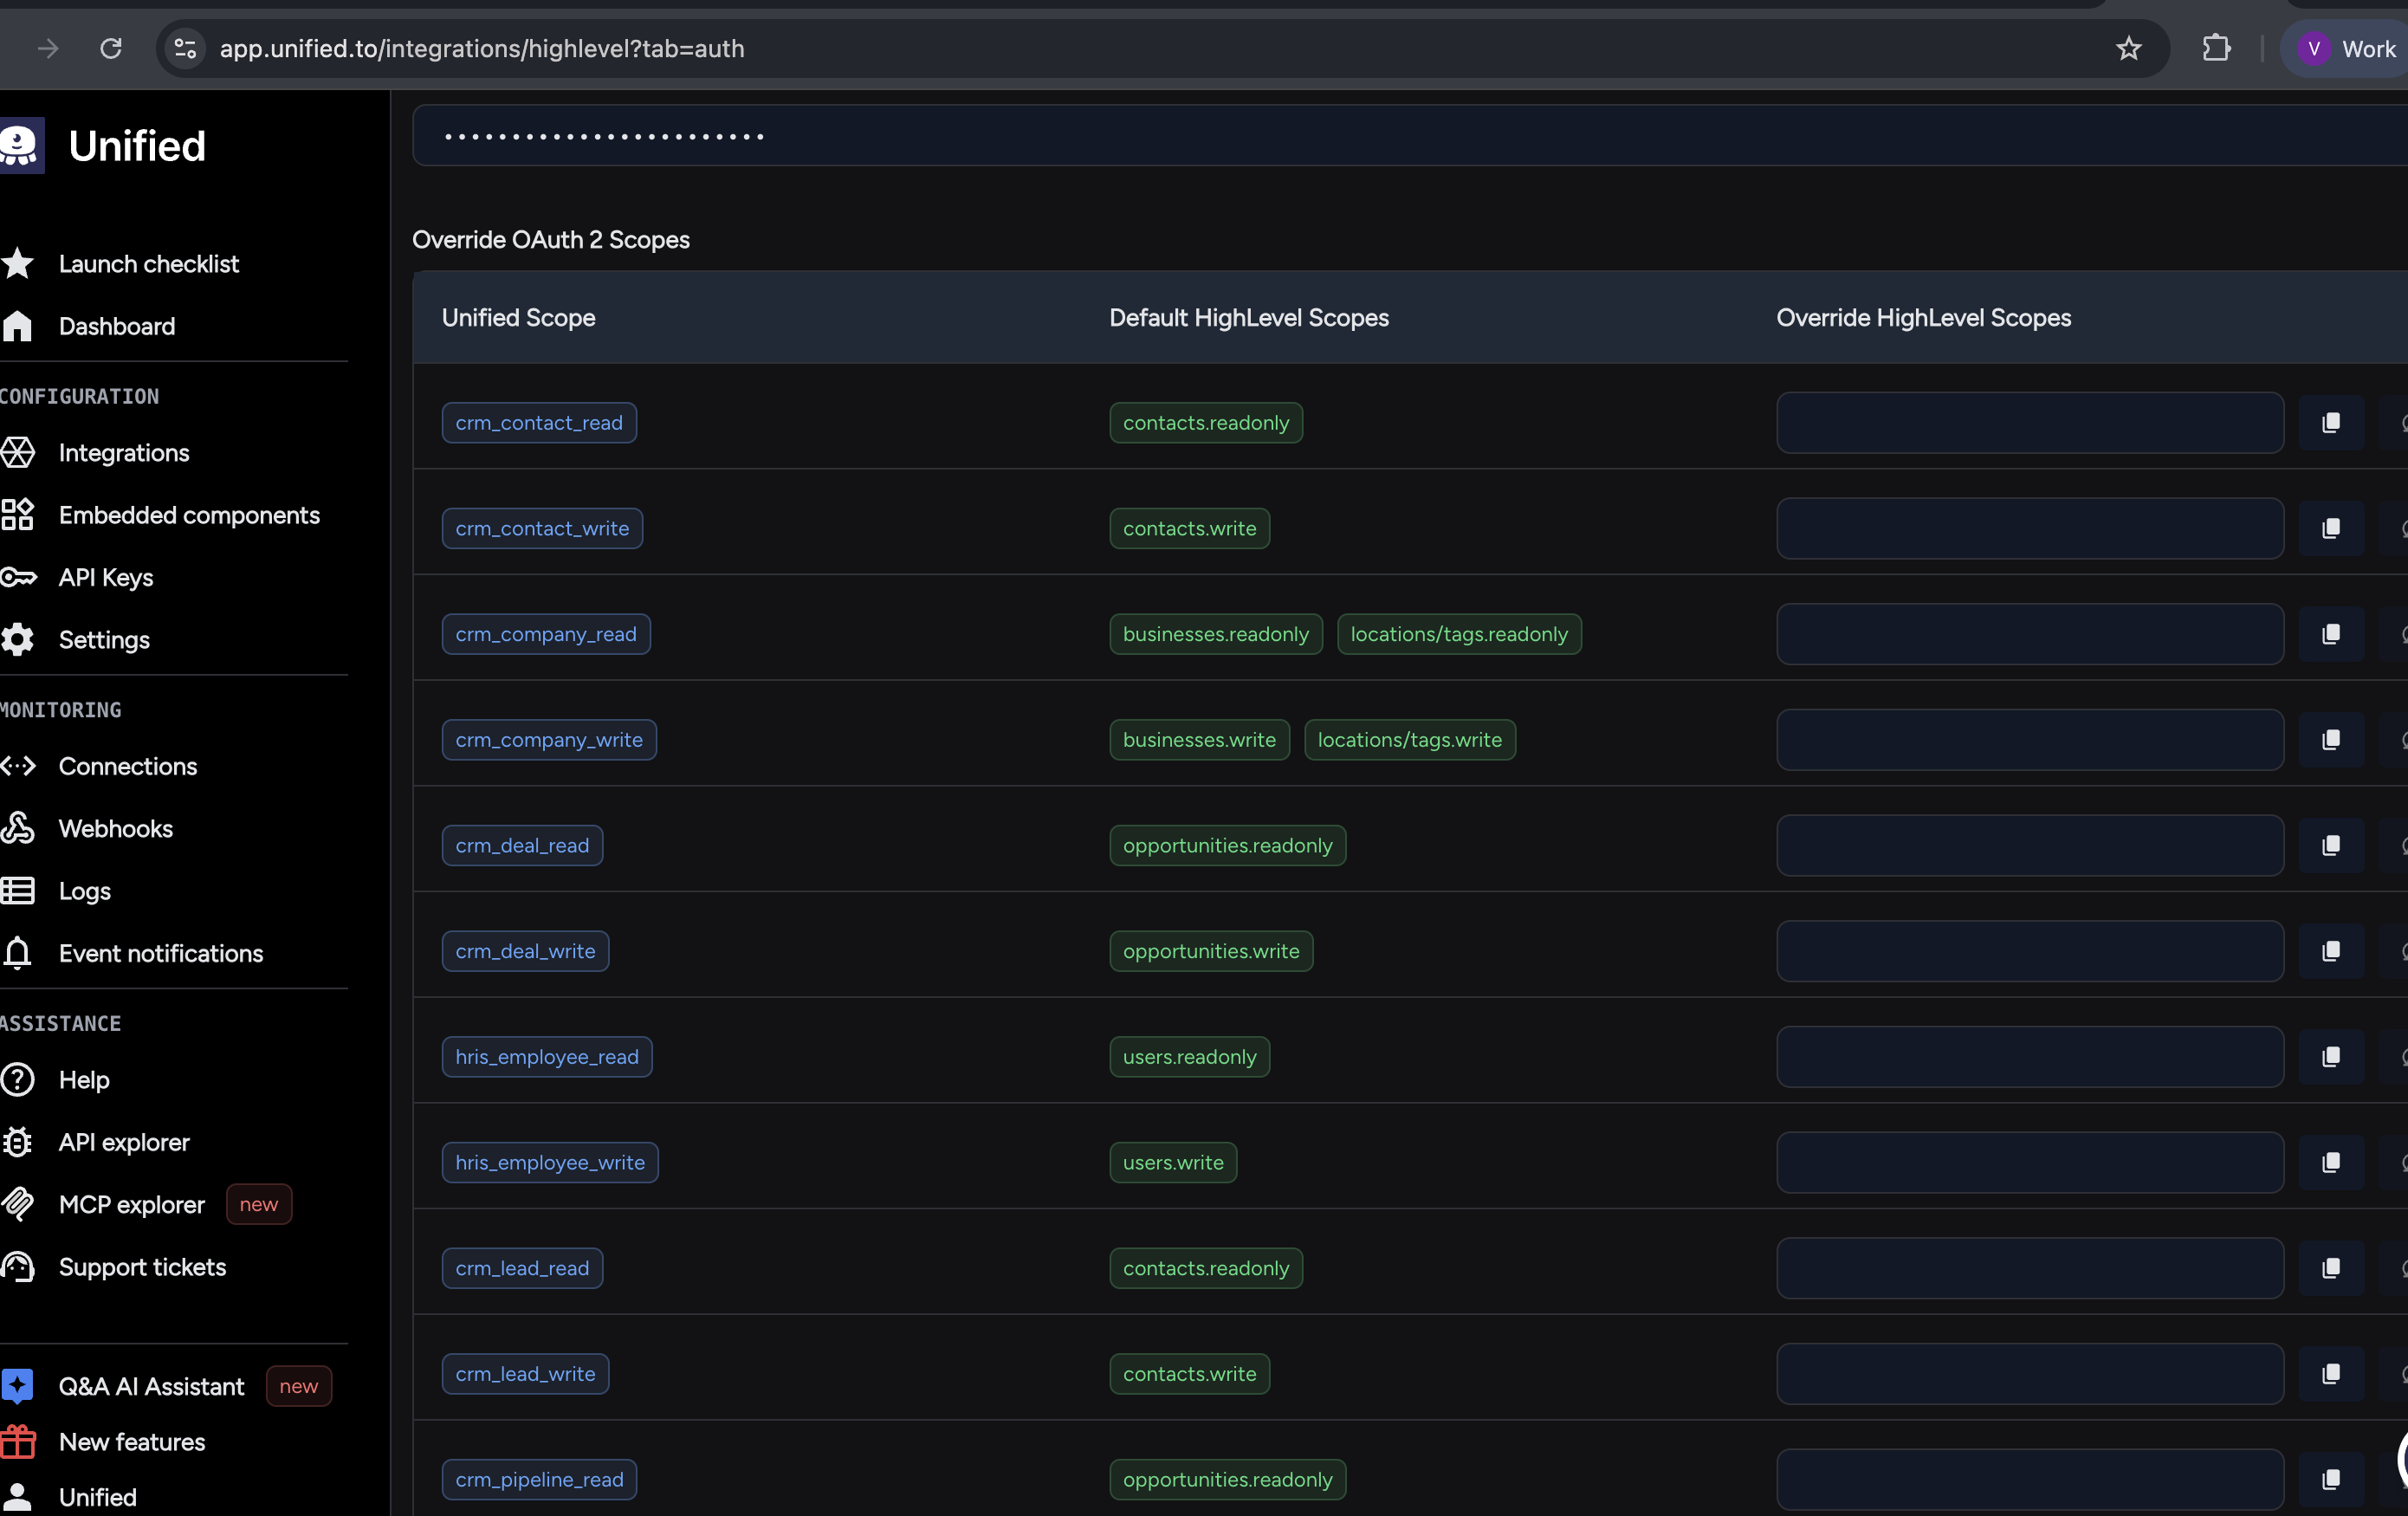
3. Save the app in HighLevel.
---
## Step 2: Get Credentials
After creating the app, go to **Manage → Secrets** and add:
- **Client ID**
- **Client Secret**
To find the **Version ID**, open the install link and copy the Version ID from the resulting page.
Keep these secure. You will need them in Unified.to.
---
## Step 3: Create Connection in Unified.to
1. Log in to your Unified.to dashboard
2. Navigate to **Integrations**.
3. Select **HighLevel** as the integration
4. Enter the following details:
- **Client ID** (from HighLevel)
- **Client Secret** (from HighLevel)
- **Version ID** (from HighLevel)
5. Click Activate
6. Go to **Embedded Components**.
7. Click **HighLevel**.
---
## Step 4: Authorize the Connection
1. You will be redirected to HighLevel
2. Log in (if not already logged in)
3. Select the account/location you want to connect
4. Approve the requested permissions
Once approved, you will be redirected back to Unified.to
---
## Common Issues & Troubleshooting
### 1. Invalid Redirect URI
- Ensure the redirect URL in HighLevel exactly matches the one used by Unified.to
### 2. Unauthorized / 401 Errors
- Double-check Client ID and Client Secret
- Ensure the OAuth app is active
### 3. Missing Data
- Ensure correct scopes are selected in HighLevel
- Some data may depend on the selected location/account
---
## Notes
- HighLevel uses location-based access. Make sure you select the correct location during authorization
- You can create multiple connections for different locations if needed
---
If you run into issues, reach out to the Unified.to support team with:
- Connection ID
- Error logs
- Steps to reproduce
## How to Create a Xero Connection in Unified.to
URL: https://docs.unified.to/guides/how_to_create_a_xero_connection_in_unified
# How to Create a Xero Connection in Unified.to
------
_April 2, 2026_
Follow the steps below to create a Xero application and connect it to Unified.to.
## 1. Sign in to the Xero Developer Portal
Go to the Xero Developer portal:
[https://developer.xero.com/app/manage/](https://developer.xero.com/app/manage/)
Sign in with your Xero account.
## 2. Create a New App
From the dashboard, click **Create New App**.
Choose the appropriate app type and fill in the required details:
- App name
- Company or organization name
- Privacy policy URL
- Terms and conditions URL (if required)
## 3. Add the Redirect URI
While creating the app, add the OAuth 2.0 Redirect URI provided by Unified.to.
You can find the correct redirect URI here:
[https://app.unified.to/integrations/xero?tab=oauth2](https://app.unified.to/integrations/xero?tab=oauth2)
> Important: The redirect URI may differ depending on your Unified.to region. Make sure you copy the exact value shown in your Unified.to dashboard.
Examples:
- US region
- EU region
- AU region
If the redirect URI does not match exactly, Xero authentication will fail.
After adding the redirect URI, click **Create App**.
---
##
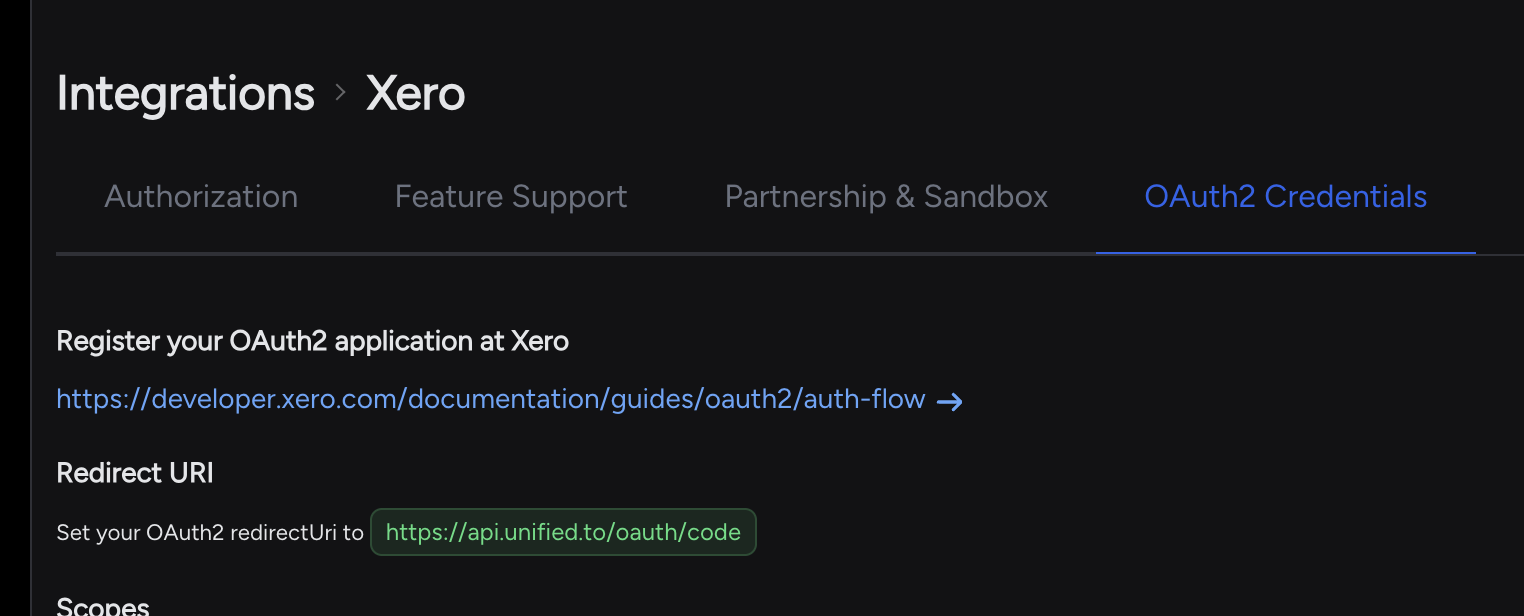
## 4. Copy the Client ID and Client Secret
After the app is created, open the app and go to the **Configuration** tab.
There you will find:
- Client ID
- Client Secret
> Keep the Client Secret secure. Do not share it publicly or commit it to source control.
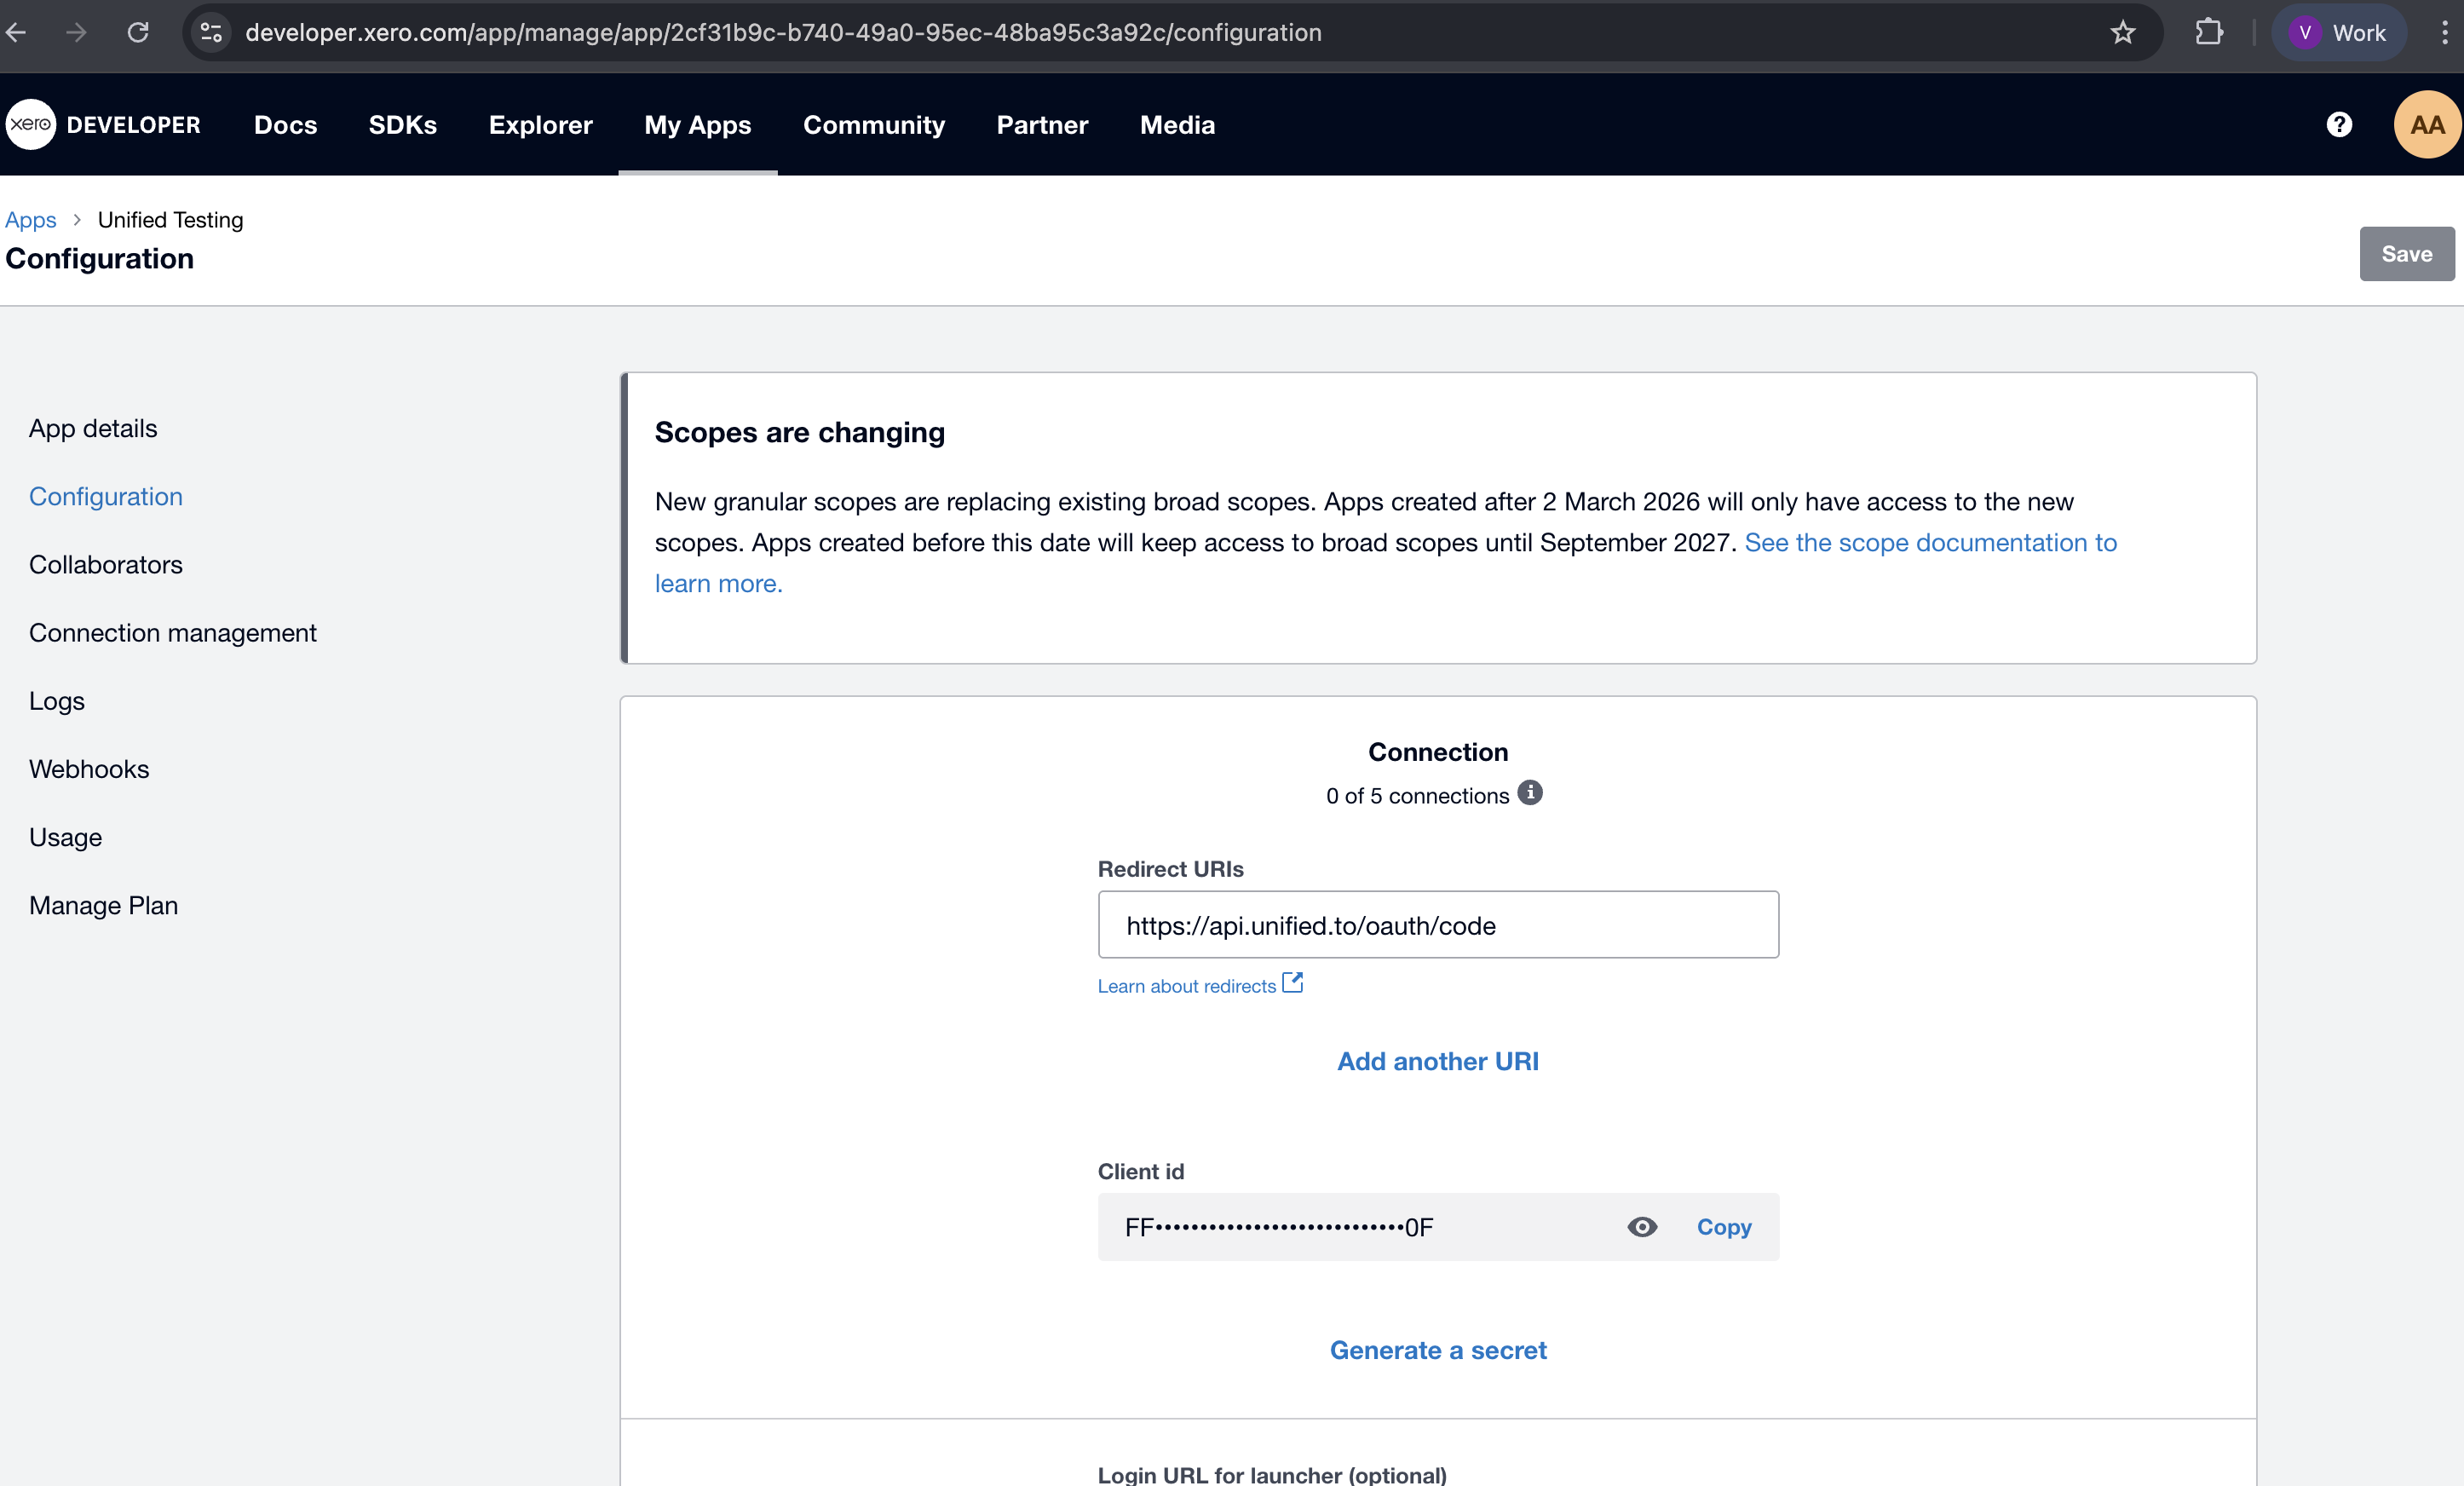
## 5. Add Credentials to Unified.to
Open the Xero integration settings page in Unified.to:
https://app.unified.to/integrations/xero?tab=auth
Paste the following values:
- Client ID
- Client Secret
Click **Activate**.
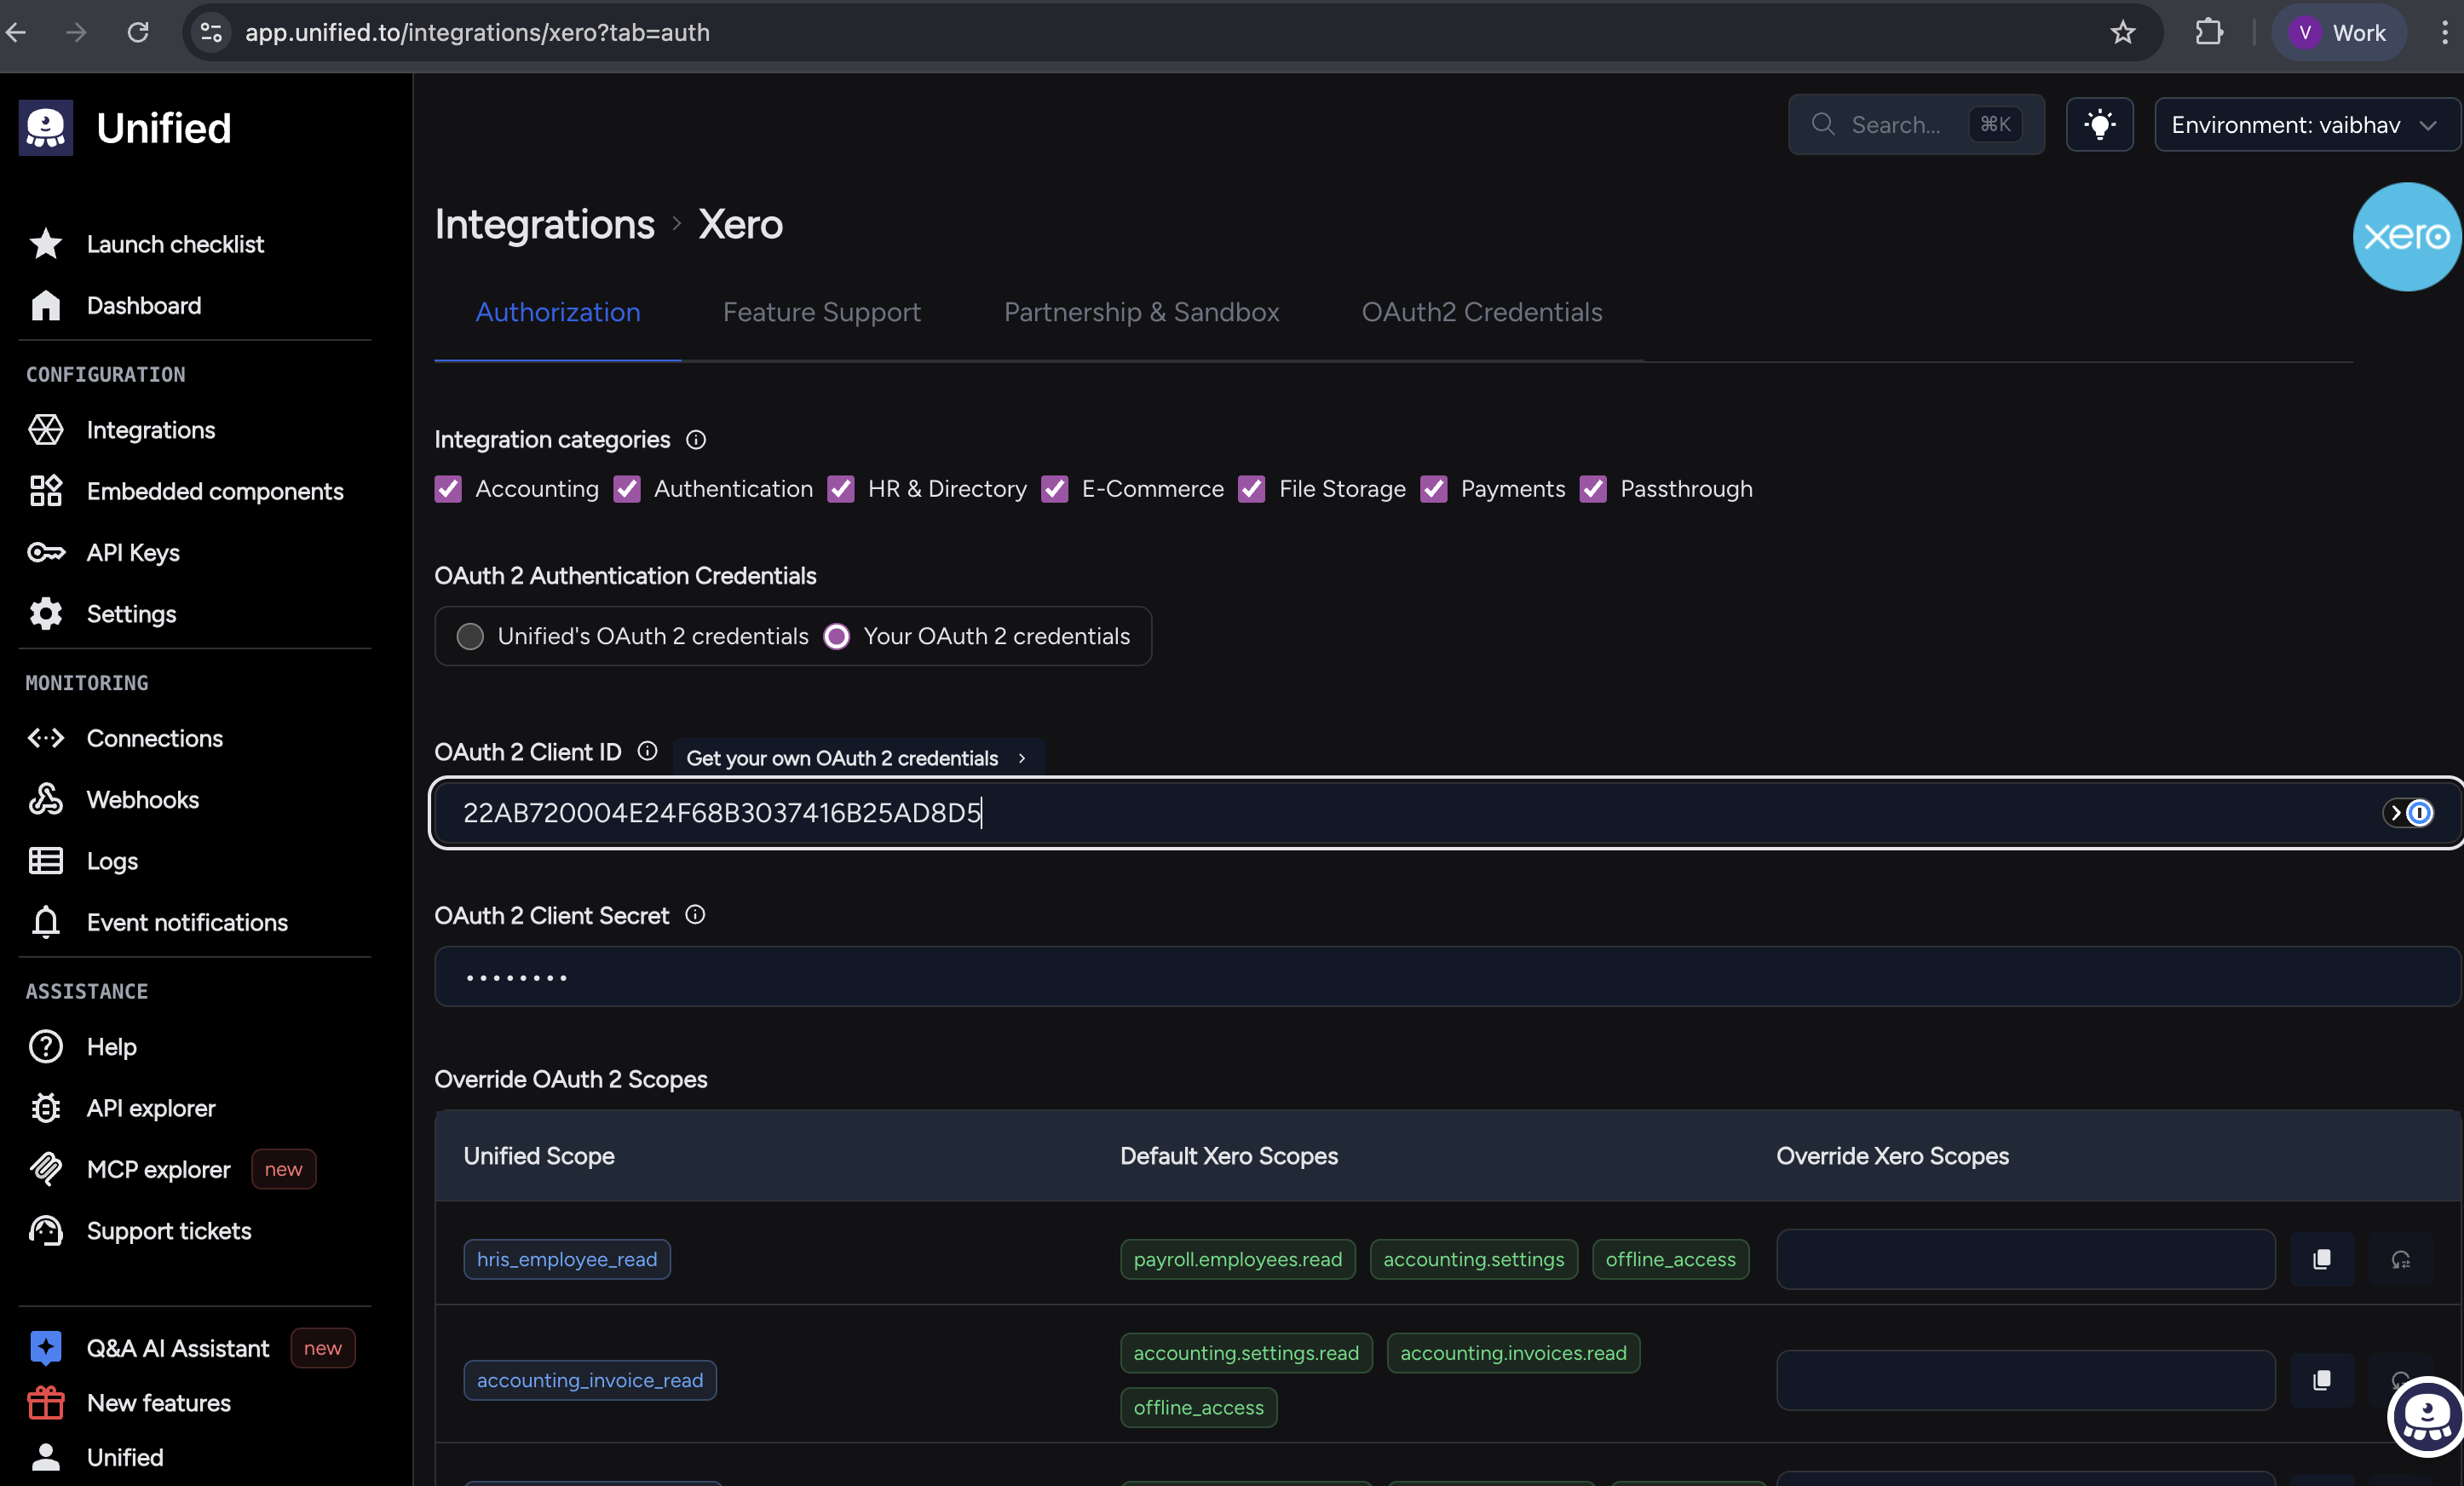
## 6. Create a Connection Using Embedded Components
To create a customer-facing connection flow:
1. Go to **Embedded Components** in Unified.to.
2. Select the **Xero** integration.
3. Launch the embedded authorization flow.
4. Complete the authorization process.
This allows your end users to connect their Xero account directly from your application.
## Notes
### Journals Endpoint Availability
The `Journals` endpoint is a premium Xero feature.
According to Xero's documentation, the Journals API is only available starting with the **Advanced** pricing tier. Customers using lower Xero plans may receive authorization or access errors when calling this endpoint.
### Common Issues
- Ensure the redirect URI in Xero exactly matches the one shown in Unified.to.
- Make sure you are using the correct region-specific Unified.to redirect URI.
- If you regenerate the Client Secret in Xero, you must update it in Unified.to.
- Only users with sufficient permissions in Xero can authorize an organization.
- If you have previously selected an organization for the same Xero app, Xero may automatically reuse that organization during future authorizations.
### Troubleshooting
If authentication fails:
- Verify the Client ID and Client Secret are correct.
- Double-check the redirect URI.
- Re-authorize the connection after saving any changes.
- Remove the existing connection and create a new one if necessary.
## How to create and configure webhooks
URL: https://docs.unified.to/guides/how_to_create_and_configure_webhooks
# How to create and configure webhooks
------
_September 4, 2024_
This guide goes over how to create and configure webhooks with [Unified.to](https://unified.to/). Webhooks deliver events to your server when records change in your customers' accounts (see [webhook vs API](https://unified.to/blog/webhook_vs_api_when_to_use_each_and_how_they_actually_work_together) for the basics).
Looking for help with troubleshooting webhook issues? See: [How to troubleshoot unhealthy webhooks](https://docs.unified.to/guides/how_to_troubleshoot_unhealthy_webhooks).
## Before you begin
This guide assumes you have a basic understanding of [webhooks](https://docs.unified.to/reference/webhooks).
## Create a webhook
Webhooks and connections are closely related; webhooks can only be created from existing connections and you can create multiple webhooks off a single connection. Webhook support is per integration and per object. If an object doesn't support webhooks on an integration, create returns an error saying so. Check the integration's Feature Support tab in the dashboard before building on a webhook. If you delete a connection, any webhooks that are associated with it will also be deleted.
There are two ways to create a webhook:
### Method 1: Use the Unified API
Send a POST request to `/unified/webhook`(see below for configuration options). For example:
```javascript
POST /unified/webhook?include_all=true
{
"hook_url": "YOUR_WEBHOOK_URL",
"connection_id": "YOUR_CONNECTION_ID",
"object_type": "ats_candidate",
"event": "updated"
}
```
**API reference:** [Create a webhook](https://docs.unified.to/unified/webhook/Create_webhook_subscription)
By including the optional parameter `include_all` in the query, the webhook will receive all historical data for the connection (see:[ Get all initial data for a connection](https://docs.unified.to/guides/how_to_create_and_configure_webhooks#get-all-initial-data-for-a-connection)).
For the payload your server receives, including the `sig256` signature, `external_xref` and `type` values, see [Webhook payload](https://docs.unified.to/reference/webhooks#webhook-payload).
The objects in `data` use the same format as the corresponding API endpoint. The `fields` option, including `raw`, `raw.*` and custom fields, works the same way on webhooks as on API calls, for native and virtual webhooks.
### Method 2: Use the Unified.to app
If you prefer to create webhooks through the UI, you can do so at [app.unified.to](https://app.unified.to/).
1. Navigate to **Integrations** > [**Webhooks**](https://app.unified.to/webhooks).
2. Click **New Webhook**.
3. Click on the input and a list of your connections will appear. Select the connection from which you want to create a webhook.
4. Choose how to configure your webhook (see below).
5. Click **Save**.
Information about the other fields can be found under their respective tooltips in the UI.
### Webhook configuration options
Whether you use the API or our web UI, these are the configuration options you can specify when creating a webhook:
1. **Object:** The data you are interested in e.g. Deal, Company, Application, etc.
2. **Event:** The events you want to subscribe to. Note: The _updated_ event will also be sent when the data object is first _created_. Native webhooks forward deleted events where the vendor sends them. On virtual webhooks, deleted events are reliable only on BambooHR, Dropbox, Google Drive, Gmail, JobAdder, OneDrive, SharePoint, RingCentral, Egnyte and Box.
3. **Type:** Virtual webhooks cover integrations whose APIs don't offer webhooks, or whose webhooks are limited. Where an integration supports both, choose native for immediate updates and virtual to set how often changes are checked and control cost. The type can't be changed after creation (including with PUT); delete and recreate the webhook to switch. For more details, see: [Understanding virtual webhooks](https://docs.unified.to/concepts/virtual_webhooks).
4. **Filter (optional):** Specify any properties you want to filter incoming events by. See: [Use filters to refine webhook events](https://docs.unified.to/guides/how_to_create_and_configure_webhooks#use-filters-to-refine-webhook-events)
5. **Fields (optional):** Comma-separated list of fields to include in the webhook payload. Leave blank to include all fields. The 'raw' field is NOT included by default. If you want to include all fields as well raw, just enter 'raw'. To read more about raw fields, see: [Raw and custom fields](https://docs.unified.to/reference/fields).
6. **Interval (virtual webhooks only):** Specify how often [Unified.to](https://unified.to/) checks the integration for changes. The minimum is 1 minute on paid plans and 60 minutes on the trial. The interval is ignored on native webhooks and doesn't affect the initial sync.
## List your webhooks
To view your webhooks, make a GET request to `/unified/webhook` or visit [app.unified.to](https://app.unified.to/) and navigate to Integrations > [**Webhooks**](https://app.unified.to/webhooks).
**API reference:** [Get all webhooks](https://docs.unified.to/unified/webhook/Returns_all_registered_webhooks)
## Get all initial data for a connection
When you create a webhook, you can choose to fetch all existing data immediately.
1. If you are using the API, add the `include_all` query parameter when creating the webhook.
2. If you are using the UI, check off **Initially sync all data** in the configuration options.
Once the initial sync is complete, you will receive a final payload with `type: INITIAL-COMPLETE` and the requested webhook will continue to work as normal. Initial sync works the same way for native and virtual webhooks, wherever the integration supports it. Once it completes, a native webhook receives events as the integration sends them; a virtual webhook checks for changes on its interval.
**API reference:** [Create a webhook subscription](https://docs.unified.to/unified/webhook/Create_webhook_subscription)
## A note on retrieving webhook data
Our system will POST initial data to your webhook in chunk sizes up to the limit supported by the integration. The limit is shown on the integration's **Feature Support** tab in the dashboard.
When performing the initial retrieval, depending on the amount of data being sent, the integration's API's rate-limiting rules, and your server's performance, it could take a very long time. If you do not want to get all of the existing data (for example, you already have it or don't need it), then do not include the `include_all` parameter in the request.
After the initial retrieval is completed, whenever updated data is available, your webhook will be called with a list of data objects, up to the max limit. If there are more entries than the limit, then your webhook URL will be POSTed to multiple times.
For details about the webhook payload that is sent to your server, [click here](https://docs.unified.to/reference/webhooks#webhook-payload).
## Specify which fields to receive from a webhook
If you only want a subset of fields when receiving updated data, you can define them with the `fields` parameter in both the API and the UI. This is useful if you don't want the entire payload being sent to your servers. For more details, see: [Fields](https://docs.unified.to/reference/fields).
**API reference:** [Create a webhook subscription](https://docs.unified.to/unified/webhook/Create_webhook_subscription)
## Use filters to refine webhook events
_Note: Filters are supported on virtual webhooks and on native webhooks for some integrations. Check the integration's Feature Support tab for which filters apply. For more information, see:_ [_Understanding virtual webhooks_](https://docs.unified.to/concepts/virtual_webhooks)
Some webhooks support filters, allowing you to filter the events you receive. For instance, if you're subscribed to Deal events from a CRM, you could filter by `company_id` to only receive events from that specific company.
Filter availability varies by integration type and data model. To check which filters are supported for a particular webhook, open the integration's **Feature Support** tab in the dashboard and check the List Options and Virtual Webhook Options sections. Parameters that end in `_id` or `type` can be used as filter options when creating a webhook, helping you tailor your subscriptions to your specific needs. For worked examples in the dashboard and the API, see [How to filter webhook events](https://docs.unified.to/guides/how_to_filter_webhook_events).
## Trigger webhooks manually
If you don't want to wait for the next scheduled check while testing a virtual webhook, you can trigger it right away. Manual triggering applies to virtual webhooks only; the API returns 400 for native webhooks.
1. In the web app, navigate to [Webhooks](https://app.unified.to/webhooks).
2. Click the **Trigger** icon next to your webhook:

This can also be accomplished with the API.
**API reference:** [Trigger a webhook](https://docs.unified.to/unified/webhook/Trigger_webhook)
**Note:** When you trigger a webhook, we will schedule the next dispatch event to go out right away. This is treated like a regular webhook event. Therefore, if your webhook is listening for update events and no new updates have occurred since the last run, then no new events will be sent to your server.
## Frequently asked questions
**Is there a page_max_limit for webhooks?**
An integration's `page_max_limit` typically comes directly from the API provider. You can see that limit on the integration's **Feature Support** tab in the dashboard. You don't have to set limits for webhooks; they will use the integration's max limit.
**Does changing the interval for virtual webhooks affect the initial retrieval?**
Increasing frequency of virtual webhooks has no effect on the initial retrieval of historical data. Each page read is scheduled to be read one after another as soon as possible.
**How do I distinguish between an updated event and a created event?**
When a new data object is created, it triggers both created and updated events. If you want to track both of these events but also tell them apart, we recommend subscribing to the updated event and then compare `created_at` and `updated_at` for incoming data. If they are the same, that means the data object was newly created.
**What happens if the webhook dispatch fails? Is there a retry mechanism in place?**
If your endpoint doesn't respond, a native webhook is retried 3 times immediately, then marked unhealthy; the event isn't redelivered unless the integration sends it again. A virtual webhook makes up to 3 immediate attempts 1 second apart, then backs off progressively for up to about two weeks, re-reading the same page from the integration rather than resending a stored payload. Its cursor advances only after a successful delivery. When retries are exhausted, the webhook is marked unhealthy and scheduling stops. There's no way to re-enable an unhealthy webhook: fix your endpoint, then recreate the webhook. Failed delivery attempts aren't billed. Read more about it [here](https://docs.unified.to/guides/how_to_troubleshoot_unhealthy_webhooks#a-note-on-our-webhook-retry-mechanism).
**Why do I receive duplicate webhook events and how should I handle them?**
Duplicate webhook events can occur for several reasons:
- Some integrations (like HubSpot) trigger separate events for each property change on an object
- Rapid changes to objects can trigger multiple events that may arrive out of order due to network conditions
To handle duplicates effectively:
1. Always use the object's latest state when updating your database
2. Implement atomic writes to avoid race conditions. Only update records if the incoming data is newer:
```javascript
-- Pseudo-code example
IF incoming_object.updated_at >= stored_object.updated_at THEN
UPDATE record
ELSE
-- Skip update as we already have newer data
END IF
```
## Vendor-specific native webhook setup
Some integrations need native webhooks registered in the vendor's own app first. These guides cover the vendor-side steps:
- [Facebook Messenger: webhook setup](https://docs.unified.to/guides/facebook_messenger_webhook_setup)
- [Greenhouse: native candidate webhooks](https://docs.unified.to/guides/configure_greenhouse_native_candidate_webhooks)
- [HubSpot: configure webhooks](https://docs.unified.to/guides/how_to_configure_webhooks_in_hubspot)
- [LinkedIn: set up webhooks](https://docs.unified.to/guides/how_to_set_up_linkedin_webhooks_with_unified)
- [QuickBooks Online: native webhooks](https://docs.unified.to/guides/how_to_set_up_native_webhooks_for_quickbooks_online_with_unified)
- [Slack: event subscriptions](https://docs.unified.to/guides/how_to_set_up_slack_webhooks_using_event_subscriptions)
- [Thrive Learning: configure webhooks](https://docs.unified.to/guides/how_to_configure_webhooks_in_thrive_learning)
- [Toast: configure webhooks](https://docs.unified.to/guides/how_to_configure_webhooks_in_toast_for_unified)
## See also
- [How to troubleshoot unhealthy webhooks](https://docs.unified.to/guides/how_to_troubleshoot_unhealthy_webhooks)
- [Understanding virtual webhooks](https://docs.unified.to/concepts/virtual_webhooks)
- [How to filter webhook events](https://docs.unified.to/guides/how_to_filter_webhook_events)
## How to create Connection with Hubspot
URL: https://docs.unified.to/guides/how_to_create_connection_with_hubspot
# How to create Connection with Hubspot
------
_December 17, 2025_
Hubspot provides Free Developer Sandbox Account. You can create that from following [link](https://offers.hubspot.com/free-cms-developer-sandbox) .
1. Create an account.
1. Provide name of the account
After account is created it will redirect you to following page:-
1. Goto Development page from the size menu
1. Create a project in IDE and install and install using following command
```javascript
npm install -g @hubspot/cli && hs init
```
1. Create your Personal Access Key.
It will be inside the keys menu
1. Paste that key in your terminal when your hubspot application ask for it.
1. Now we will create a project.
run following command in that same project.
```javascript
hs get-started
```
1. Write Y to upload that project in the hubspot application.
1. Again select Y for following
1. It will redirect to hubspot page.
goto to following page:-
Connected Apps→ Manage Location → click the check box → Save.
1. In your project(code) you will see following folder structure.
GOTO→ yourproject (account-testing) → app-hsmeta.json
1. Following will be the scopes and redirect URL. You can remove which you want. However, do remember those removed scopes before creating a connection in unified. Also remember to add redirect URL as follows.
```javascript
{
"uid": "get_started_app",
"type": "app",
"config": {
"description": "A Unified.to token app for testing",
"name": "My Get Started app",
"distribution": "private",
"auth": {
"type": "oauth",
"redirectUrls": [
"https://api.unified.to/oauth/code",
],
"requiredScopes": [
"oauth",
"crm.objects.companies.read",
"crm.objects.contacts.read",
"crm.objects.deals.read",
"crm.objects.owners.read",
"crm.pipelines.orders.read",
"crm.objects.contacts.write",
"crm.pipelines.orders.read",
"crm.pipelines.orders.write",
"crm.objects.deals.write",
"sales-email-read",
"content",
"tickets",
"crm.lists.read",
"settings.users.teams.read"
],
"optionalScopes": [],
"conditionallyRequiredScopes": []
},
"permittedUrls": {
"fetch": ["https://api.hubapi.com"],
"iframe": [],
"img": []
},
"support": {
"supportEmail": "support@example.com",
"documentationUrl": "https://example.com/docs",
"supportUrl": "https://example.com/support",
"supportPhone": "+18005555555"
}
}
}
```
1. You can update those changes using following command in terminal.
```javascript
hs project upload
```
1. When the code is uploaded successfully you can check that by going to following Development→ Project → Select your project.
1. To check your scopes click on the project Component. It will show your app-hsmeta.json
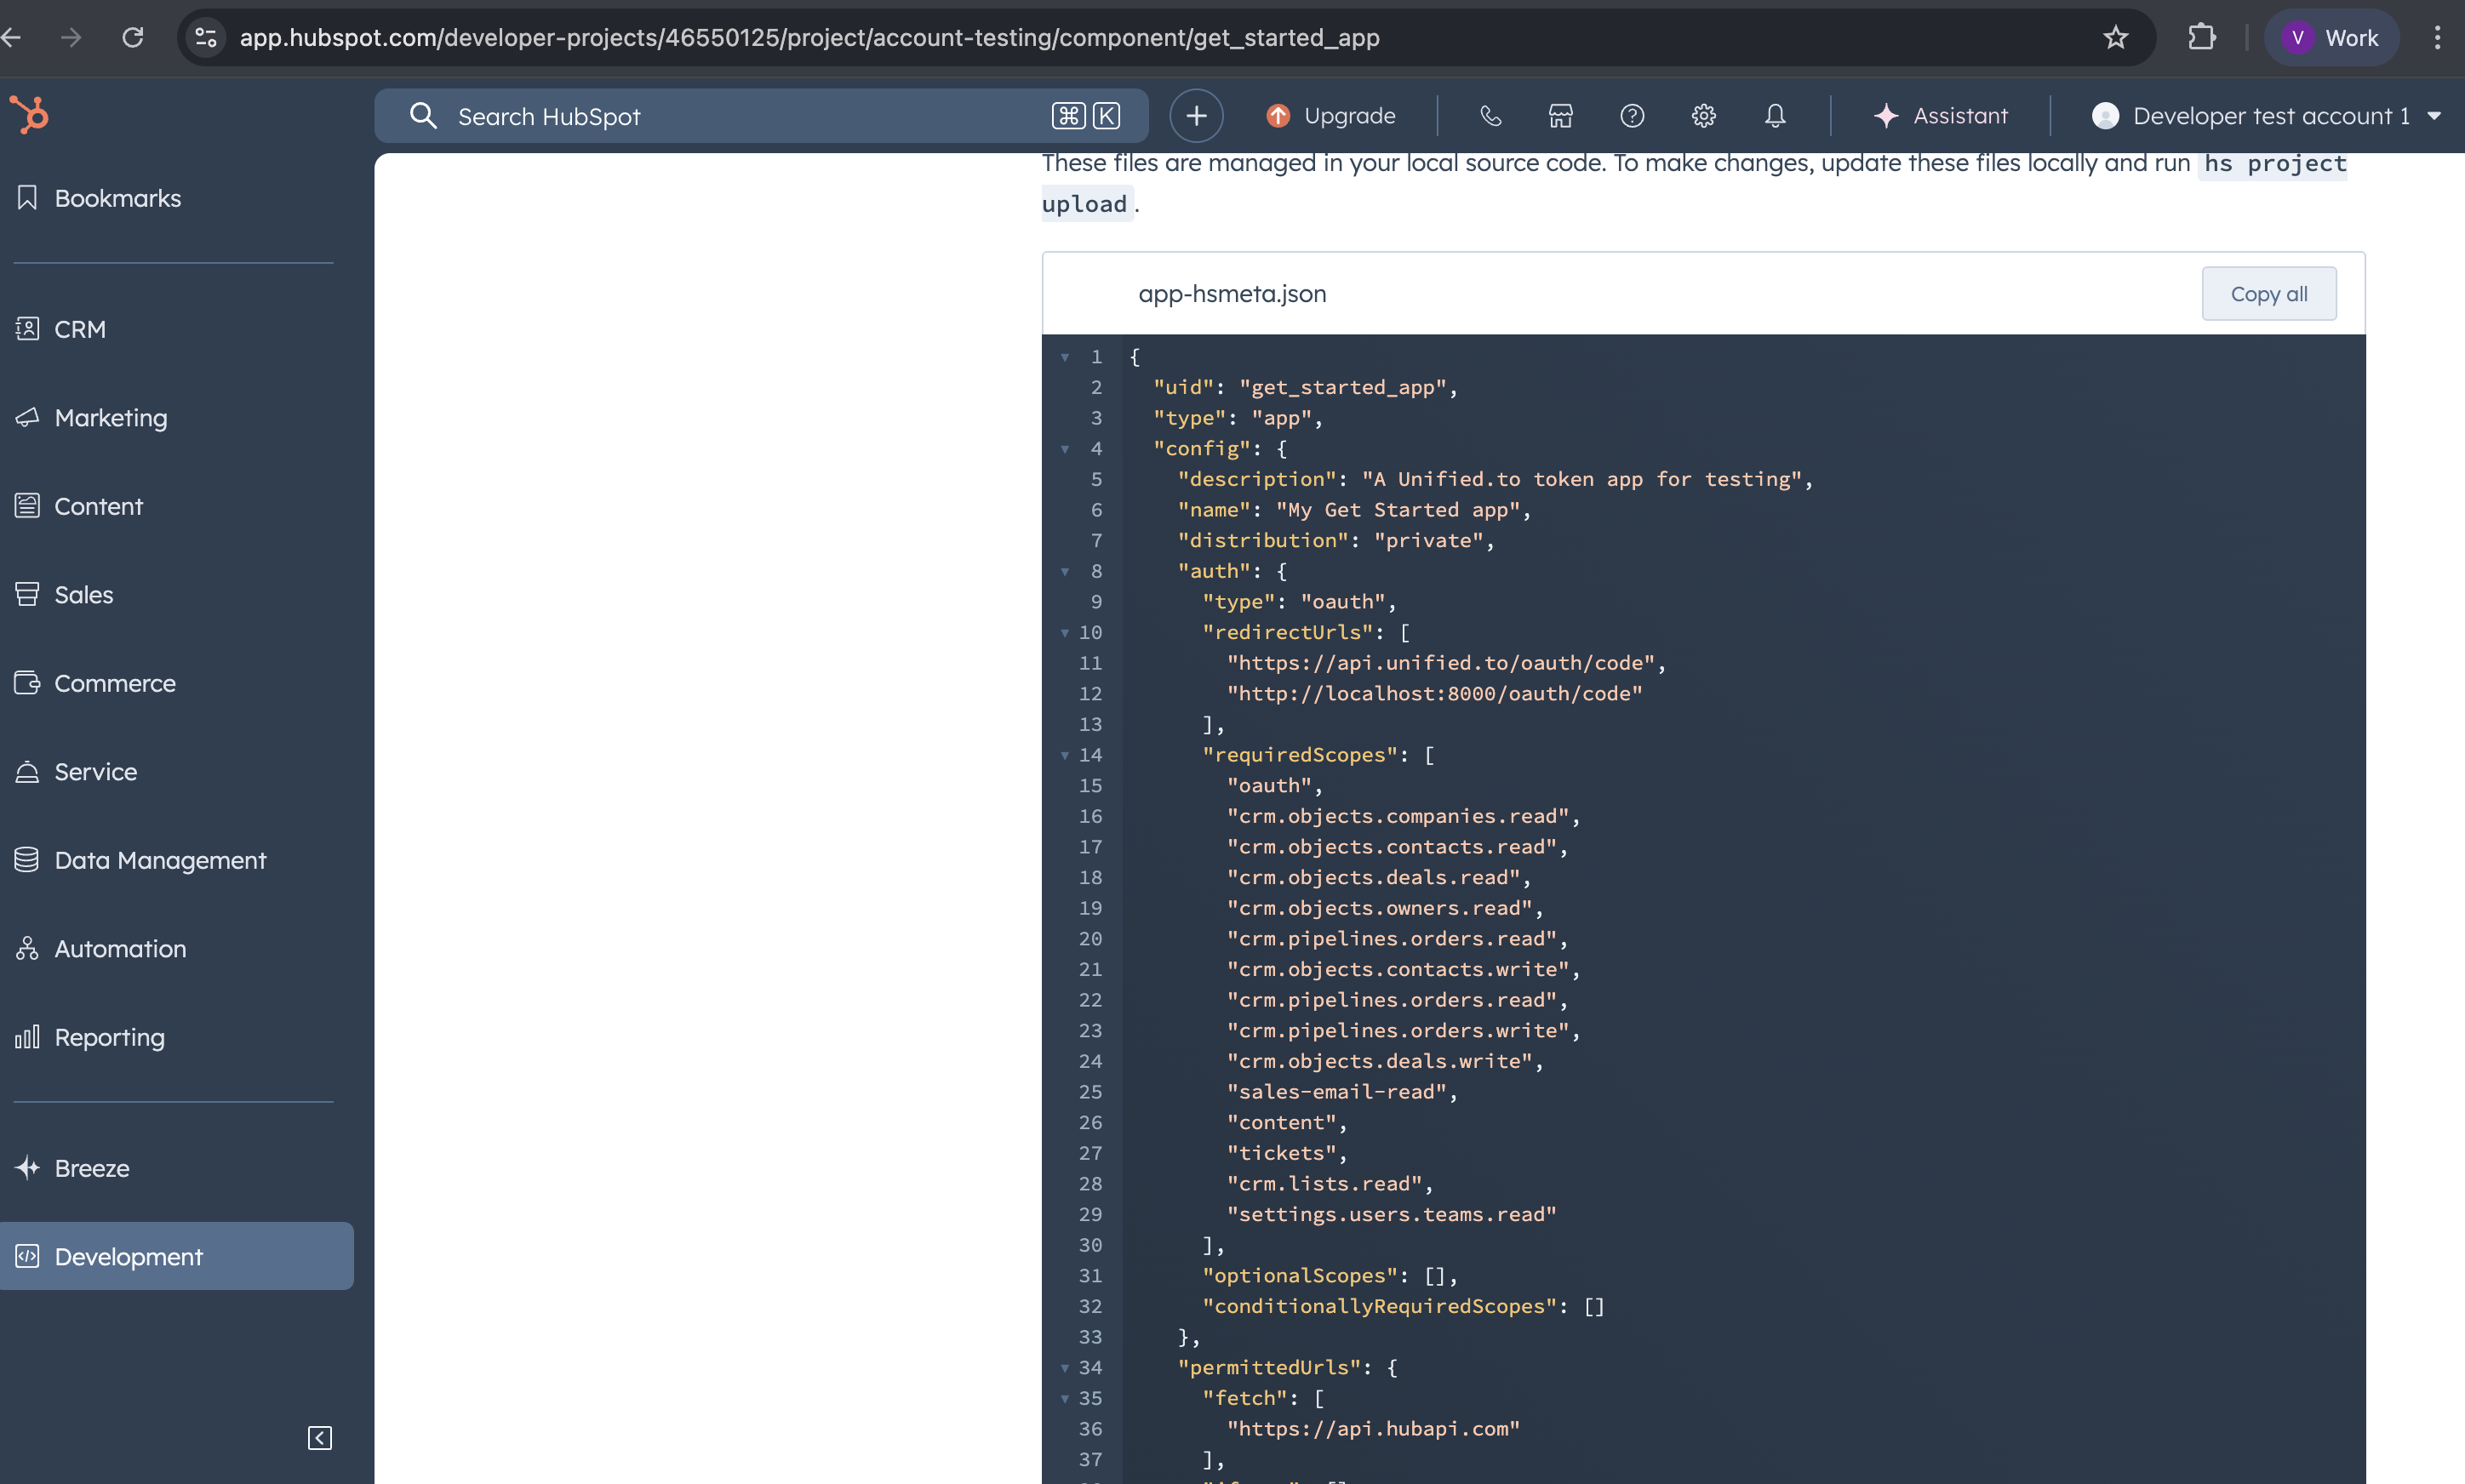
1. To get the client ID and Client Secret click on the Auth button in your project component.
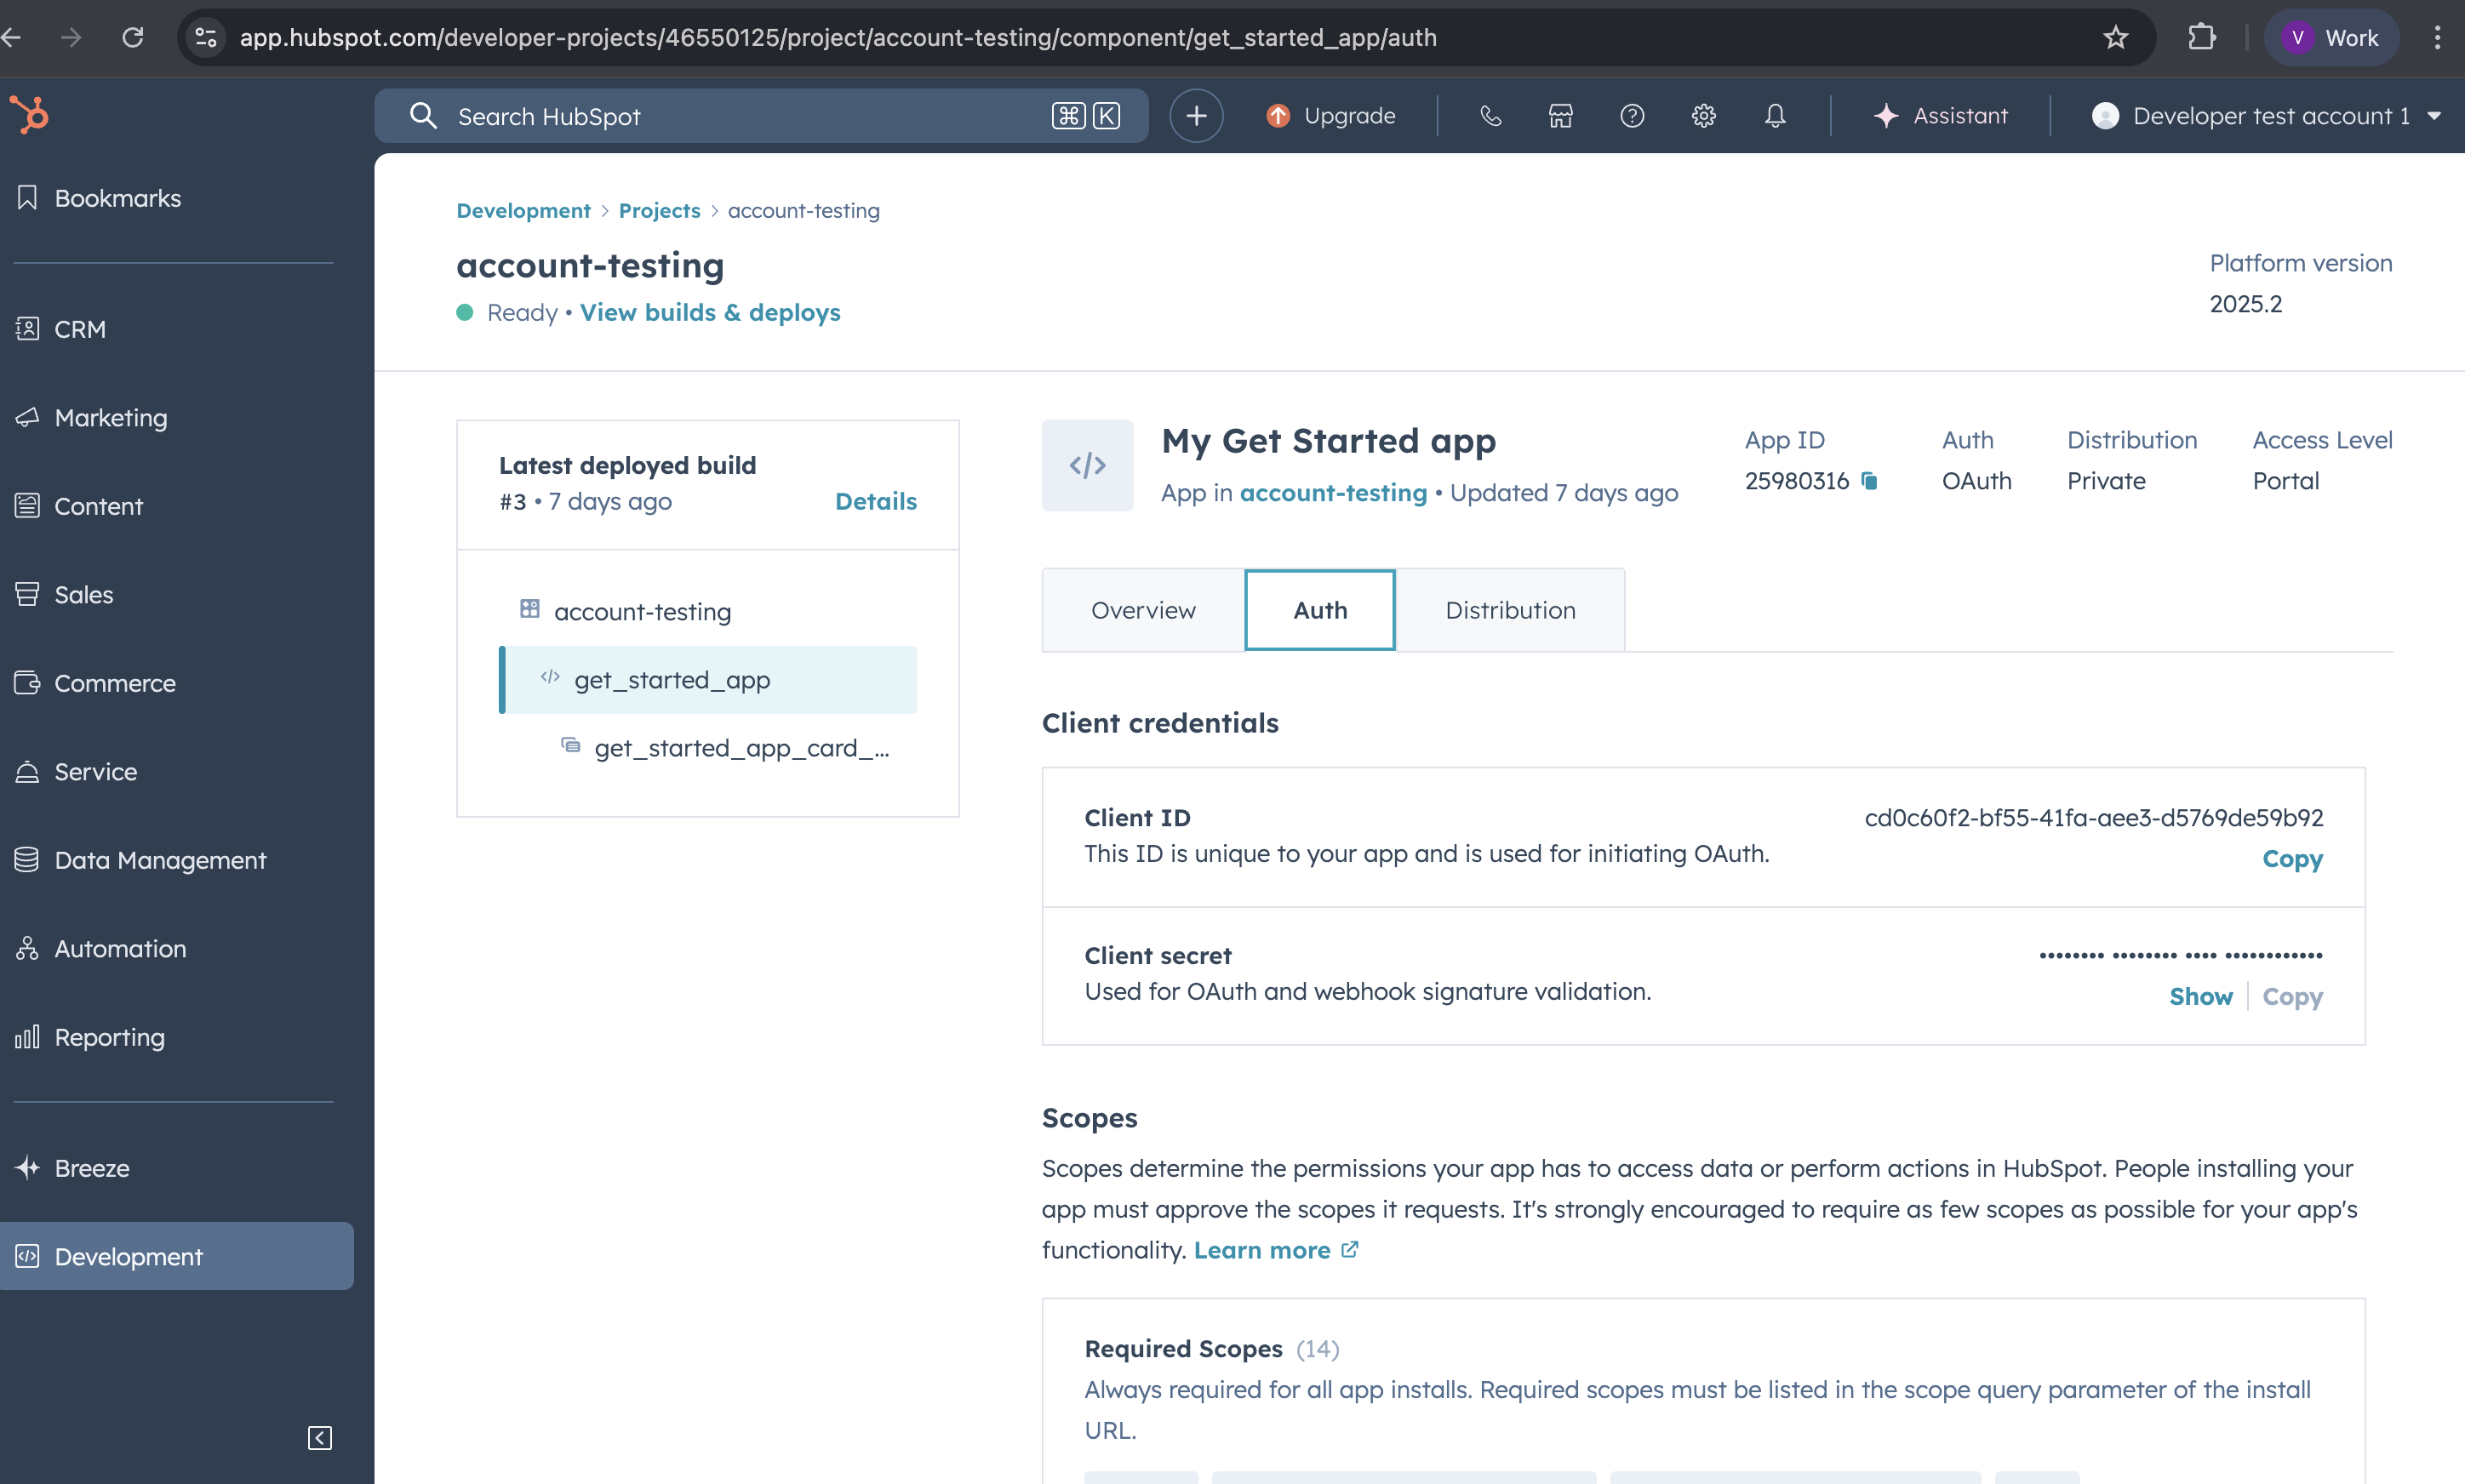
1. Paste the Client ID and Client Secret in the app.unified.to
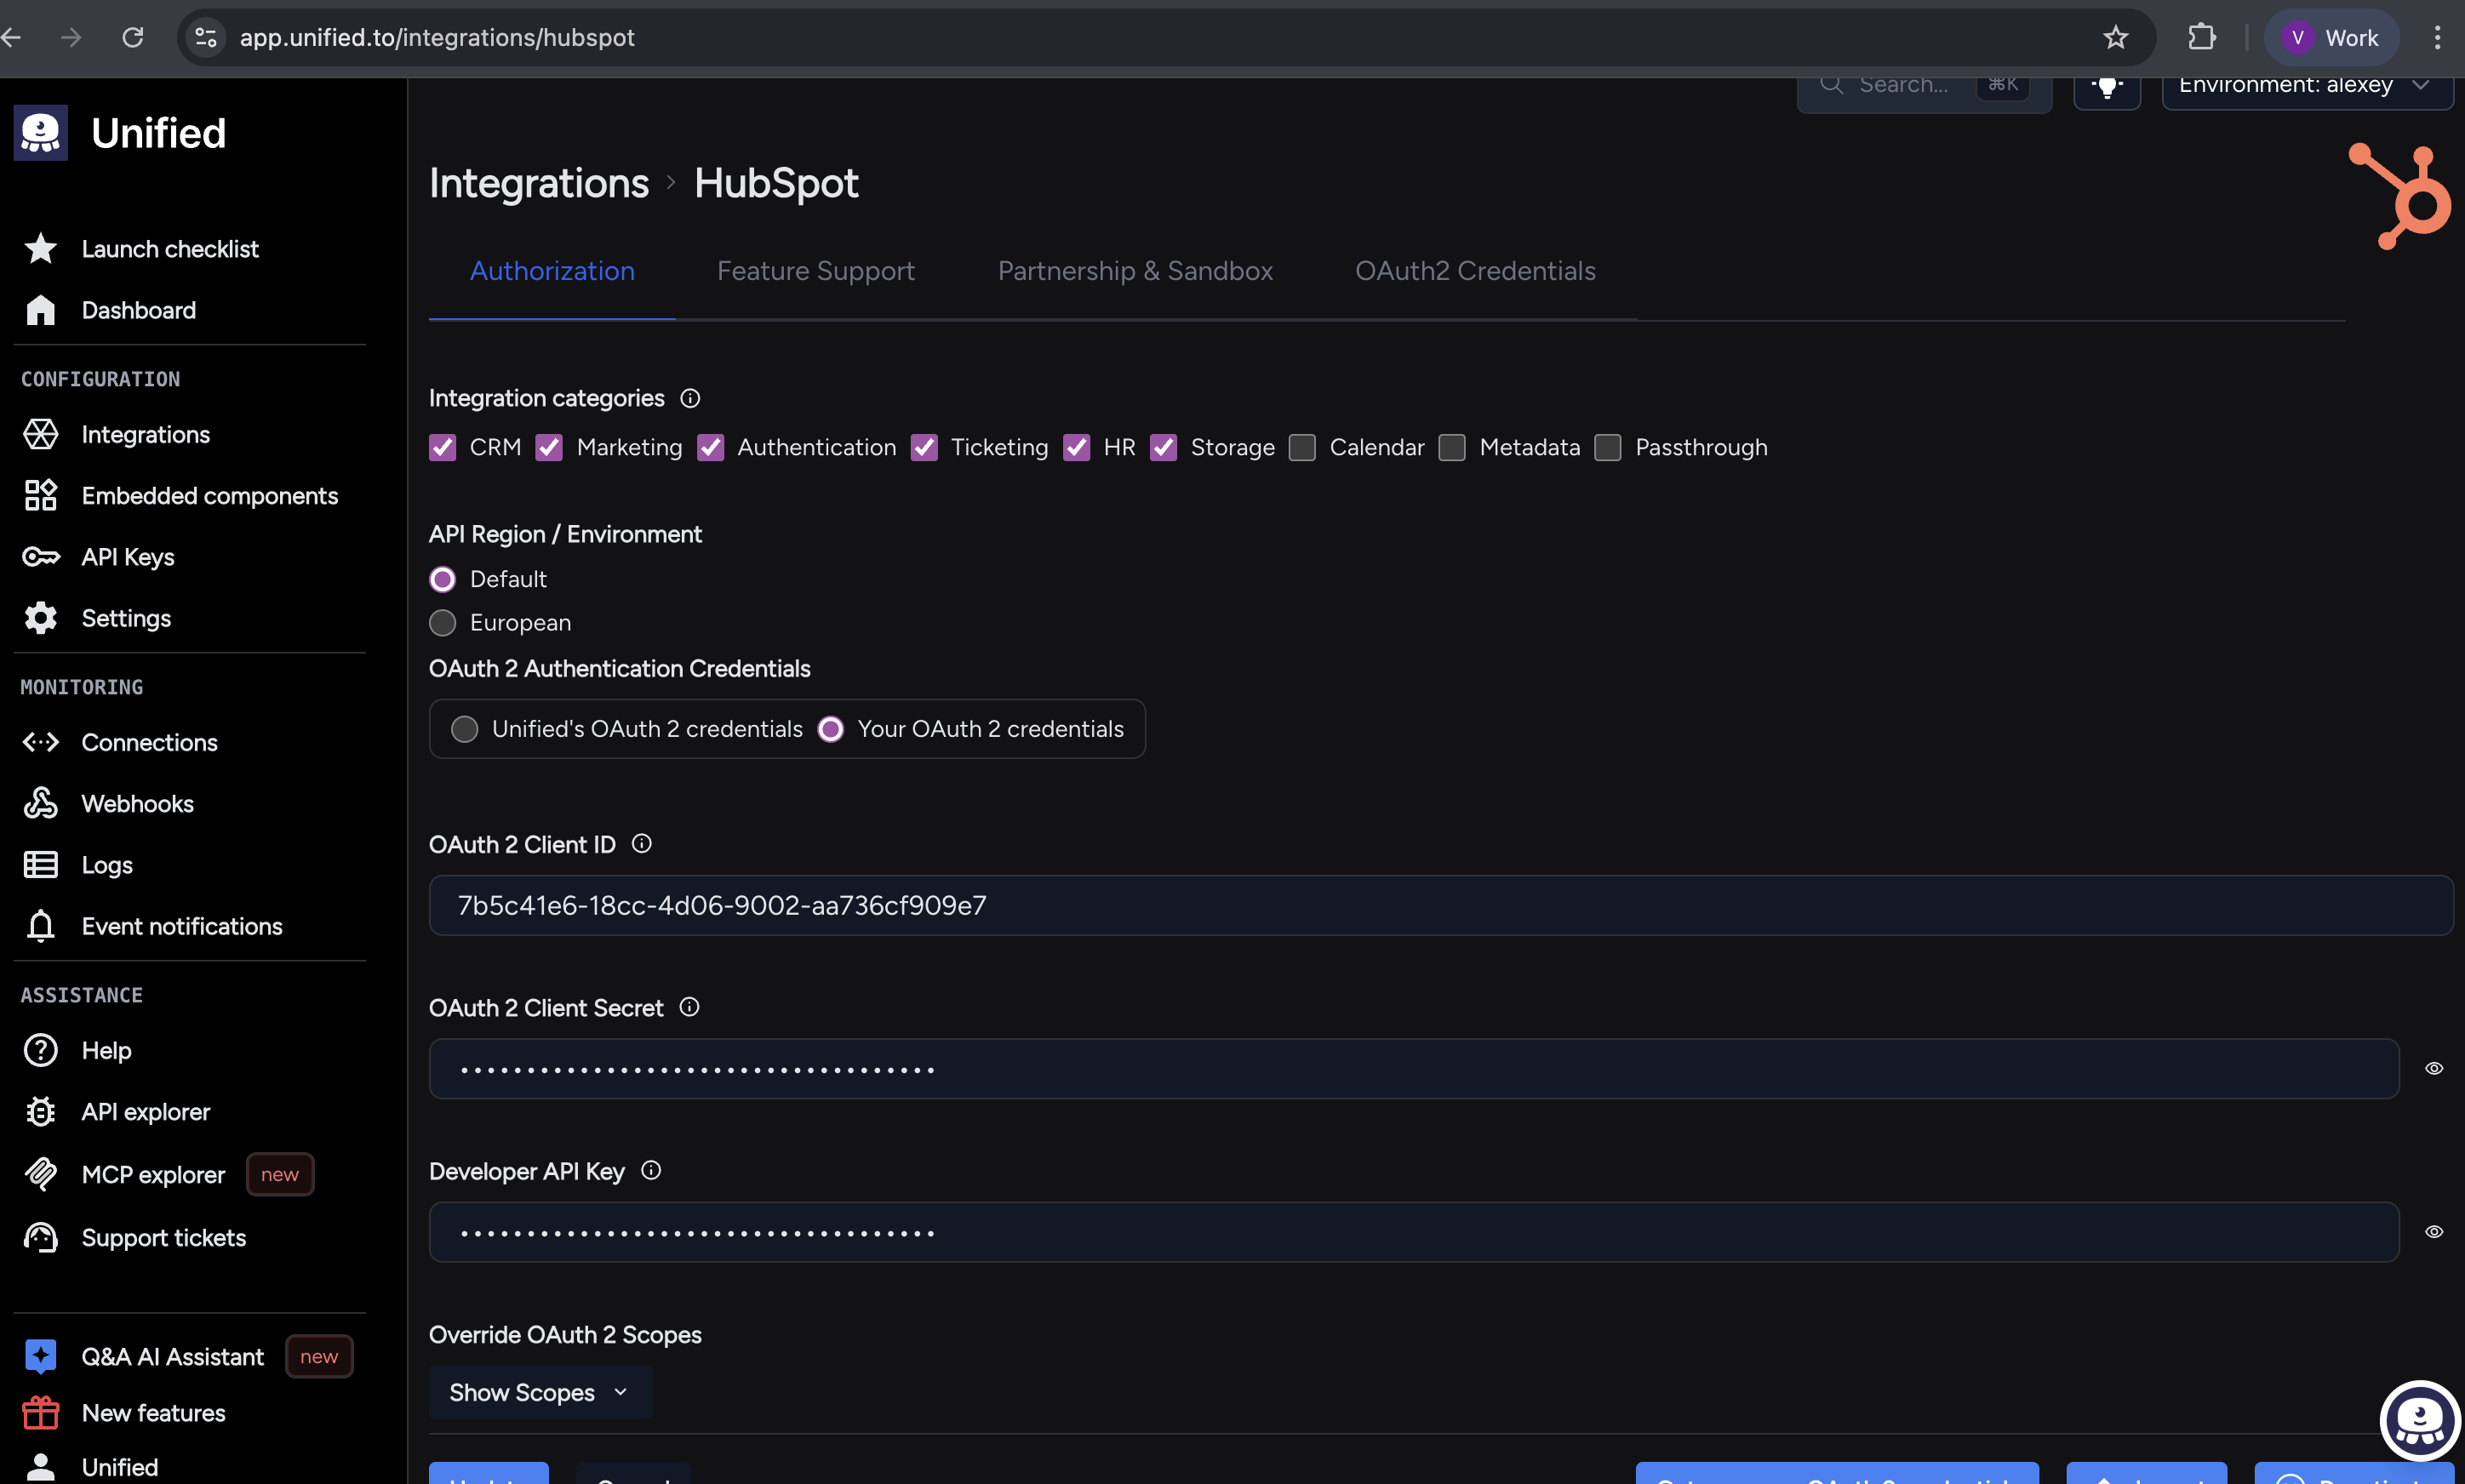
1. To get developer key goto Development→ keys → developer API key. If no keys are present than generate developer api key.
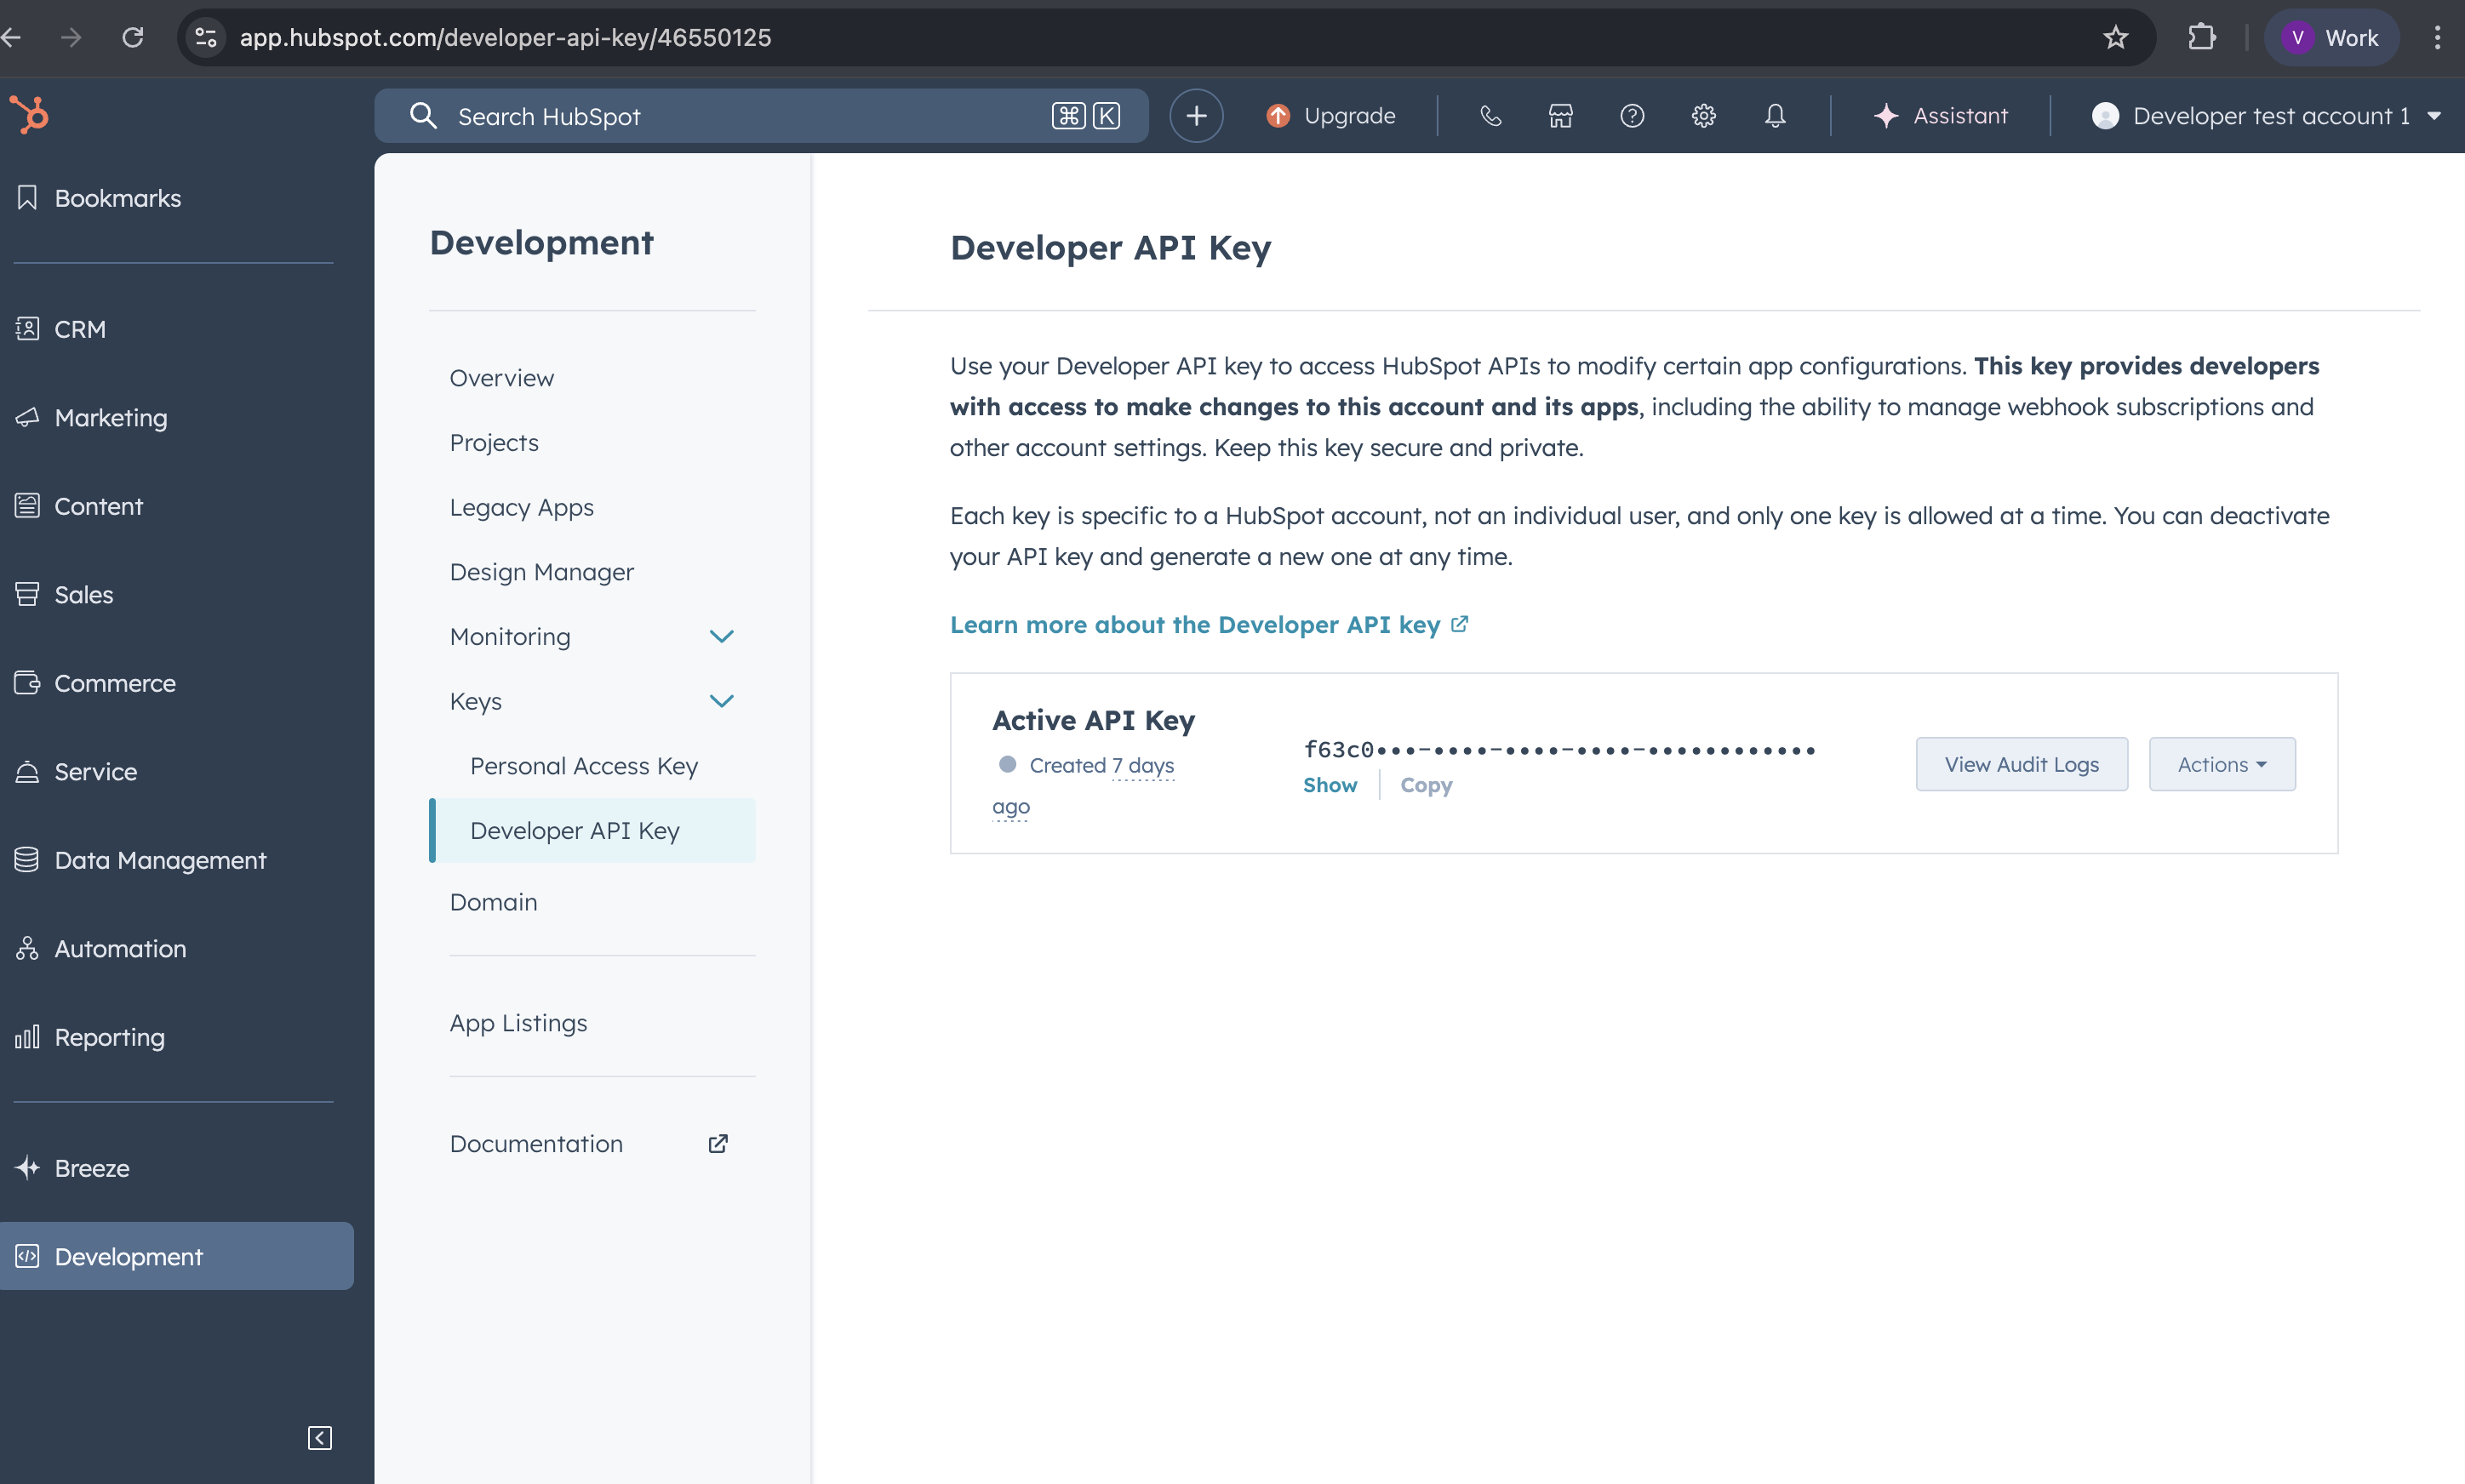
1. Paste that key in the [app.unified.to](https://app.unified.to/) and click activate.
2. Goto Embedded components→ click on hubspot→ select your project→ click on approve.
Your Hubspot application is created.
## How to customize portal URLs for Stripe and GoCardless
URL: https://docs.unified.to/guides/how_to_customize_portal_urls_for_stripe_and_gocardless
# How to customize portal URLs for Stripe and GoCardless
------
_November 13, 2024_
This guide explains how to customize the portal URLs for Stripe and GoCardless contacts to control payment method flows and redirects. Portal URLs allow your customers to manage their payment methods and perform other operations through a dedicated UI.
## Before you begin
This guide assumes you have:
- A basic understanding of the Unified API
- An active integration with either Stripe or GoCardless
## Understanding portal URLs
When working with the `accounting_contact` object for Stripe and GoCardless integrations, each contact includes a `portal_url` field. This URL provides access to the contact's portal UI where they can perform various operations, such as managing payment methods.
For example, a typical response might look like:
```javascript
{
"id": 77558,
"portal_url": ""
}
```
## Customize the portal URL
You can customize the portal URL's behaviour by appending specific query parameters to your API calls. The following parameters are available:
1. `success_url` (optional): Specifies where users should be redirected after completing their action
2. `type` (optional): Specifies the type of action the link is intended for. Available values:
- `portal`: Generates a standard portal UI link (default)
- `add_payment_method`: Generates a portal UI URL specifically for adding a new payment method
### Add a payment method with custom redirect
To create a URL that allows customers to add a payment method and redirects them upon completion:
1. Start with the original portal URL from the contact object:
```javascript
https://api.unified.to/accounting/{connection_id}/contact/{contact_id}/portal
```
2. Append the `success_url` and `type` parameters:
```javascript
https://api.unified.to/accounting/{connection_id}/contact/{contact_id}/portal?success_url=YOUR_REDIRECT_URL&type=add_payment_method
```
Note: Both `success_url` and `type` parameters are optional. If `type` is not specified, the system defaults to `type=portal`.
## See also
- [Accounting contact object reference](https://docs.unified.to/accounting/contact/model)
## How to filter webhook events
URL: https://docs.unified.to/guides/how_to_filter_webhook_events
# How to filter webhook events
------
_July 24, 2024_
Webhook filters allow you to only receive data about the events you care about. For instance, if you're subscribed to CRM Deal events from ActiveCampaign, you could filter by `company_id` to receive data only about deals for a specific company.
Filters are supported on virtual webhooks and on native webhooks for some integrations. Check the integration's Feature Support tab for which filters apply. Read more about the differences between native and virtual webhooks here: [Understanding virtual webhooks](https://docs.unified.to/concepts/virtual_webhooks)
Filter availability varies by integration type and data model. To see which filters are supported for a webhook, open the integration's Feature Support tab in the dashboard. Filter parameters are listed under List Options; the Virtual Webhook Options section shows the options a virtual webhook uses. Parameters that end in `_id` or `type` can be used as filter options when creating a webhook, helping you tailor your subscriptions to your specific needs.
Filters an integration doesn't support are accepted and stored, but have no effect on which events you receive. A few integrations require a filter; if one is missing, create returns an error naming the integration and the filter.
For example, this is the Feature Support list for CRM Deals by ActiveCampaign:
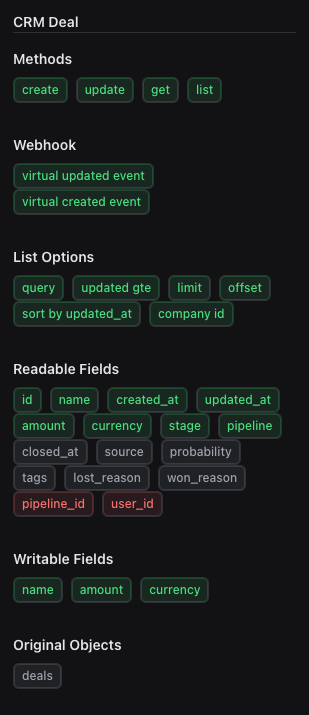
Notice that this data model supports virtual webhooks as specified under ‘Webhook.' Under ‘List Options', the parameter `company_id` is shown, indicating that it is possible to use this as a filter.
When creating webhooks via the [Unified.to](https://unified.to/) web app, you can specify your filter parameters in the webhook creation form:
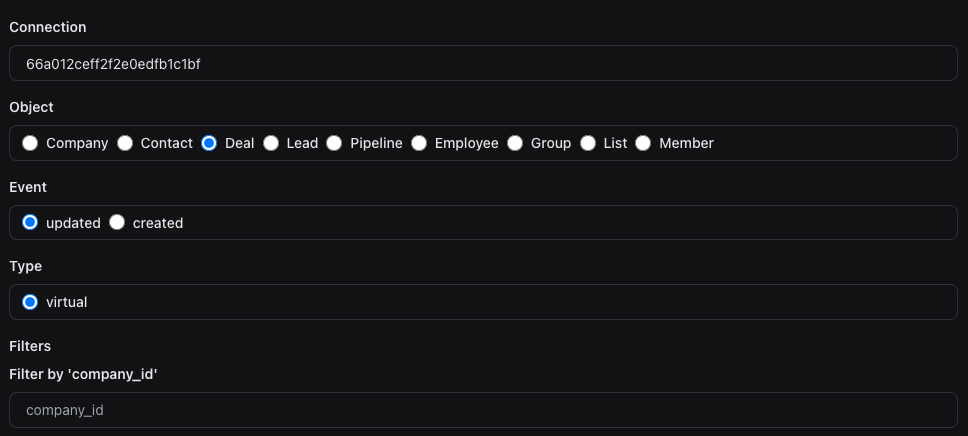
When creating a webhook programmatically via our API, you can include `filters` in the payload with a string dictionary of values to filter by. For example, in JavaScript:
```javascript
const options = {
method: 'POST',
url: 'https://api.unified.to/unified/webhook',
headers: {
authorization: 'bearer YOUR_ACCESS_TOKEN'
},
data: {
filters: {
company_id: '12345',
},
// other payload data if needed
},
};
const results = await axios.request(options);
```
Review our complete guide on the webhook API here: [Create webhook subscriptions](https://docs.unified.to/unified/webhook/Create_webhook_subscription).
For setting up webhooks end to end, see [How to create and configure webhooks](https://docs.unified.to/guides/how_to_create_and_configure_webhooks). If a webhook stops delivering, see [How to troubleshoot unhealthy webhooks](https://docs.unified.to/guides/how_to_troubleshoot_unhealthy_webhooks).
## How-to Get a Private Support Channel for Your Unified Integration
URL: https://docs.unified.to/guides/how_to_get_a_private_support_channel_for_your_unified_integration
# How-to Get a Private Support Channel for Your Unified Integration
------
_May 1, 2026_
[Unified.to](https://unified.to/) offers customers 3 platforms for support:
- Slack
- Discord
- Microsoft Teams
# Slack
We use Slack Connect to invite our customers into private support channels that we create in our Slack account. Just reach out to your account manager, and they will create a channel for you and invite your product team.
This is our preferred method of working with your team to get them to success faster.
# Discord
Our [Discord server](https://discord.gg/85z7HF7JbD) offers both public and private channels for support. The public channels are used for anyone who is just trying out [Unified.to](https://unified.to/). Once you dedicate your product team's time to integrate Unified.to into your application, please let us know and we will create a private channel for you.
# Microsoft Teams
For enterprise customers, Unified also offers shared private channels in Microsoft Teams. Please let us know if you cannot use Slack nor Discord (as per your IT policy), and we will be happy yo setup Teams access and a private channel.
But, you will need your IT to also setup Teams access to the Unified MS Teams account for your team, by following this guide:
This guide is for your **Microsoft Entra (Azure AD) administrator**. It walks through the configuration needed on your tenant so we can collaborate with you in a Microsoft Teams shared channel.
## Background
Unified.to wants to invite a user from your organization into a Microsoft Teams **shared channel** (sometimes referred to as a "private cross-org channel"). Unlike standard Teams channels, which require external users to be added as guests in your tenant, shared channels use **Microsoft Entra B2B direct connect**. This lets your user access the channel from inside their own Microsoft Teams client, without switching tenants and without being added to our directory.
For B2B direct connect to work, **both tenants must trust each other**. We have already configured our side. This document covers the symmetric configuration required on yours.
## What you'll be enabling
You're enabling B2B direct connect with a single specific external tenant — Unified.to. Nothing else changes:
- We are not added as guests in your directory.
- Your users are not added as guests in ours.
- Your existing default cross-tenant access policy is unaffected for every other organization.
- The settings can be reverted at any time by removing the entry.
## Prerequisites
- A user account in your Entra tenant with one of the following roles:
- Global Administrator, **or**
- Security Administrator, **or**
- Conditional Access Administrator (with Cross-tenant access settings permission)
- Your tenant must have Microsoft Entra ID (any edition — Free is sufficient for the basic configuration described here)
- A modern browser signed in to your Microsoft 365 admin account
## Our tenant details
You'll need these values during the setup:
| Field | Value |
| ------------------------- | -------------------------------------- |
| Organization name | Unified.to |
| Primary domain | `unified.to` |
| Microsoft Entra tenant ID | `4b8acf48-e5c8-4484-896b-95b1b824ddda` |
## Step-by-step setup
The full process takes about five minutes.
1. Open the Microsoft Entra admin center
Go to https://entra.microsoft.com and sign in with your admin account.
2. Navigate to Cross-tenant access settings
In the left navigation, expand **Entra ID** → **External Identities** → **Cross-tenant access settings**.
(If you don't see External Identities directly, click "Show more" or use the search bar at the top: search for "Cross-tenant access settings".)
3. Add Unified.to as an organization
4. Make sure you're on the **Organizational settings** tab (not "Default settings").
5. Click **+ Add organization**.
6. In the side panel, paste either of the following into the "Tenant ID or domain name" field:
- Tenant ID: `4b8acf48-e5c8-4484-896b-95b1b824ddda`
- Domain: `unified.to`
7. Microsoft will resolve the entry and display **Unified.to** with our tenant ID.
8. Click **Add**. You should see a confirmation toast: "Successfully added Unified.to tenant to organizational settings."
Unified.to now appears in the list with both Inbound access and Outbound access showing **"Inherited from default"**. We'll override that next.
### 4. Configure Inbound access
This controls whether Unified.to users can access resources in your tenant via B2B direct connect (such as joining a shared channel that we host).
1. In the 'Unified.to row', click the **Inbound access** link ("Inherited from default").
2. In the panel that opens, click the **B2B direct connect** tab.
3. Select the **Customize settings** radio.
4. On the **External users and groups** sub-tab:
- Access status: **Allow access**
- Applies to: **All Unified.to users and groups**
5. Switch to the **Applications** sub-tab:
- Access status: **Allow access**
- Applies to: **All applications**
6. Click **Save**. The Save button greys out when the save completes.
7. Close the panel (X in the top-right) to return to the Organizational settings list. The Inbound access column for Unified.to should now read **"Configured"**.
### 5. Configure Outbound access
This controls whether your users can access resources hosted by Unified.to (such as the shared channel we'll invite them into).
1. In the 'Unified.to row', click the **Outbound access** link ("Inherited from default").
2. In the panel that opens, click the **B2B direct connect** tab.
3. Select the **Customize settings** radio.
4. On the **Users and groups** sub-tab:
- Access status: **Allow access**
- Applies to: **All [your organization name] users**
5. Switch to the **External applications** sub-tab:
- Access status: **Allow access**
- Applies to: **All external applications**
6. Click **Save**.
7. Microsoft will display a consent dialog titled **"Are you sure?"**, explaining that enabling outbound B2B direct connect lets external organizations access limited contact data about your users for the purpose of sending connection requests. Click **Yes** to confirm.
8. Close the panel. The Outbound access column for Unified.to should now read **"Configured"**.
### 6. Verify
The Unified.to row in your Organizational settings should now show:
| Inbound access | Outbound access |
| -------------- | --------------- |
| Configured | Configured |
Both fields should be hyperlinked. If either still says "Inherited from default", reopen that link and re-save.
## What about Microsoft Teams settings?
In most tenants, the Teams admin center already permits shared channel collaboration with external orgs by default. If a user from your side reports they cannot accept our shared-channel invite, your Teams admin should verify:
- Microsoft Teams admin center → **Teams** → **External access** → "Allow Teams accounts not managed by an organization" or per-domain allow list (if your org uses an allow list, add `unified.to`).
- Microsoft Teams admin center → **Teams** → **Teams policies** → the policy assigned to the affected user has **"Create shared channels"** and **"Invite external users to shared channels"** enabled (or at minimum, **"Join external shared channels"**).
These Teams-level settings are usually permissive by default. The Entra cross-tenant configuration above is the part that's typically missing.
## Replication delay
Cross-tenant configuration can take up to 15 minutes to propagate across Microsoft's services. If we attempt to invite your user into the shared channel right after you finish, and it fails, please ask us to wait ten minutes and retry before troubleshooting further.
## Letting us know you're done
Once Inbound and Outbound both read "Configured" for Unified.to on your side, please let us know. We'll then send the shared-channel invite to the user(s) you specify, and they'll see the invitation appear in their own Microsoft Teams client.
## Reverting later
To remove the trust relationship at any time:
1. Microsoft Entra admin center → External Identities → Cross-tenant access settings → Organizational settings.
2. Find the Unified.to row, click the trash icon at the right, and confirm.
This restores your default policy for our tenant. Any active shared channels become inaccessible to your users at that point.
## Reference
Microsoft's official documentation:
- B2B direct connect overview: [https://learn.microsoft.com/entra/external-id/b2b-direct-connect-overview](https://learn.microsoft.com/entra/external-id/b2b-direct-connect-overview)
- Configure cross-tenant access settings: [https://learn.microsoft.com/entra/external-id/cross-tenant-access-settings-b2b-direct-connect](https://learn.microsoft.com/entra/external-id/cross-tenant-access-settings-b2b-direct-connect)
- Shared channels in Microsoft Teams: [https://learn.microsoft.com/microsoftteams/shared-channels](https://learn.microsoft.com/microsoftteams/shared-channels)
## How to get your 8x8 Connect API Key and Account ID: Step-by-step guide
URL: https://docs.unified.to/guides/how_to_get_your_8x8_connect_api_key_and_account_id_step_by_step_guide
# How to get your 8x8 Connect API Key and Account ID: Step-by-step guide
------
_July 17, 2025_
8x8 Connect supports authentication with API Key and Account ID. To connect, you'll need to generate secure API Key and Account ID from your account settings.
This short guide shows you how to generate one, whether you're testing in your sandbox or helping customers connect their 8x8 Connect account.
## **API Keys**
**Step 1:** View the API Keys Section of the Connect Dashboard. This may be accessed [here](https://connect.8x8.com/messaging/api-keys).
**Step 2:** Click the "Create API Key" button.
**Step 3:** Name the API Key in the Pop Up, this can be any value. We recommend using a memorable name related to the API key's intended purpose such as "HealthCareApp_Production". Once the value is entered in, click **save**.
**Step 4:** The new API key should now be located in the list, you can perform a partial search at the top for the name. Only the last 6 characters will be shown, click the document button highlighted in red to reveal the entire API key. You can return to this page to retrieve the API key's value at any time.
## Account ID and SubAccount ID
The **accountId** and **subAccountId** can be found in your 8x8 Connect via **API keys** page.
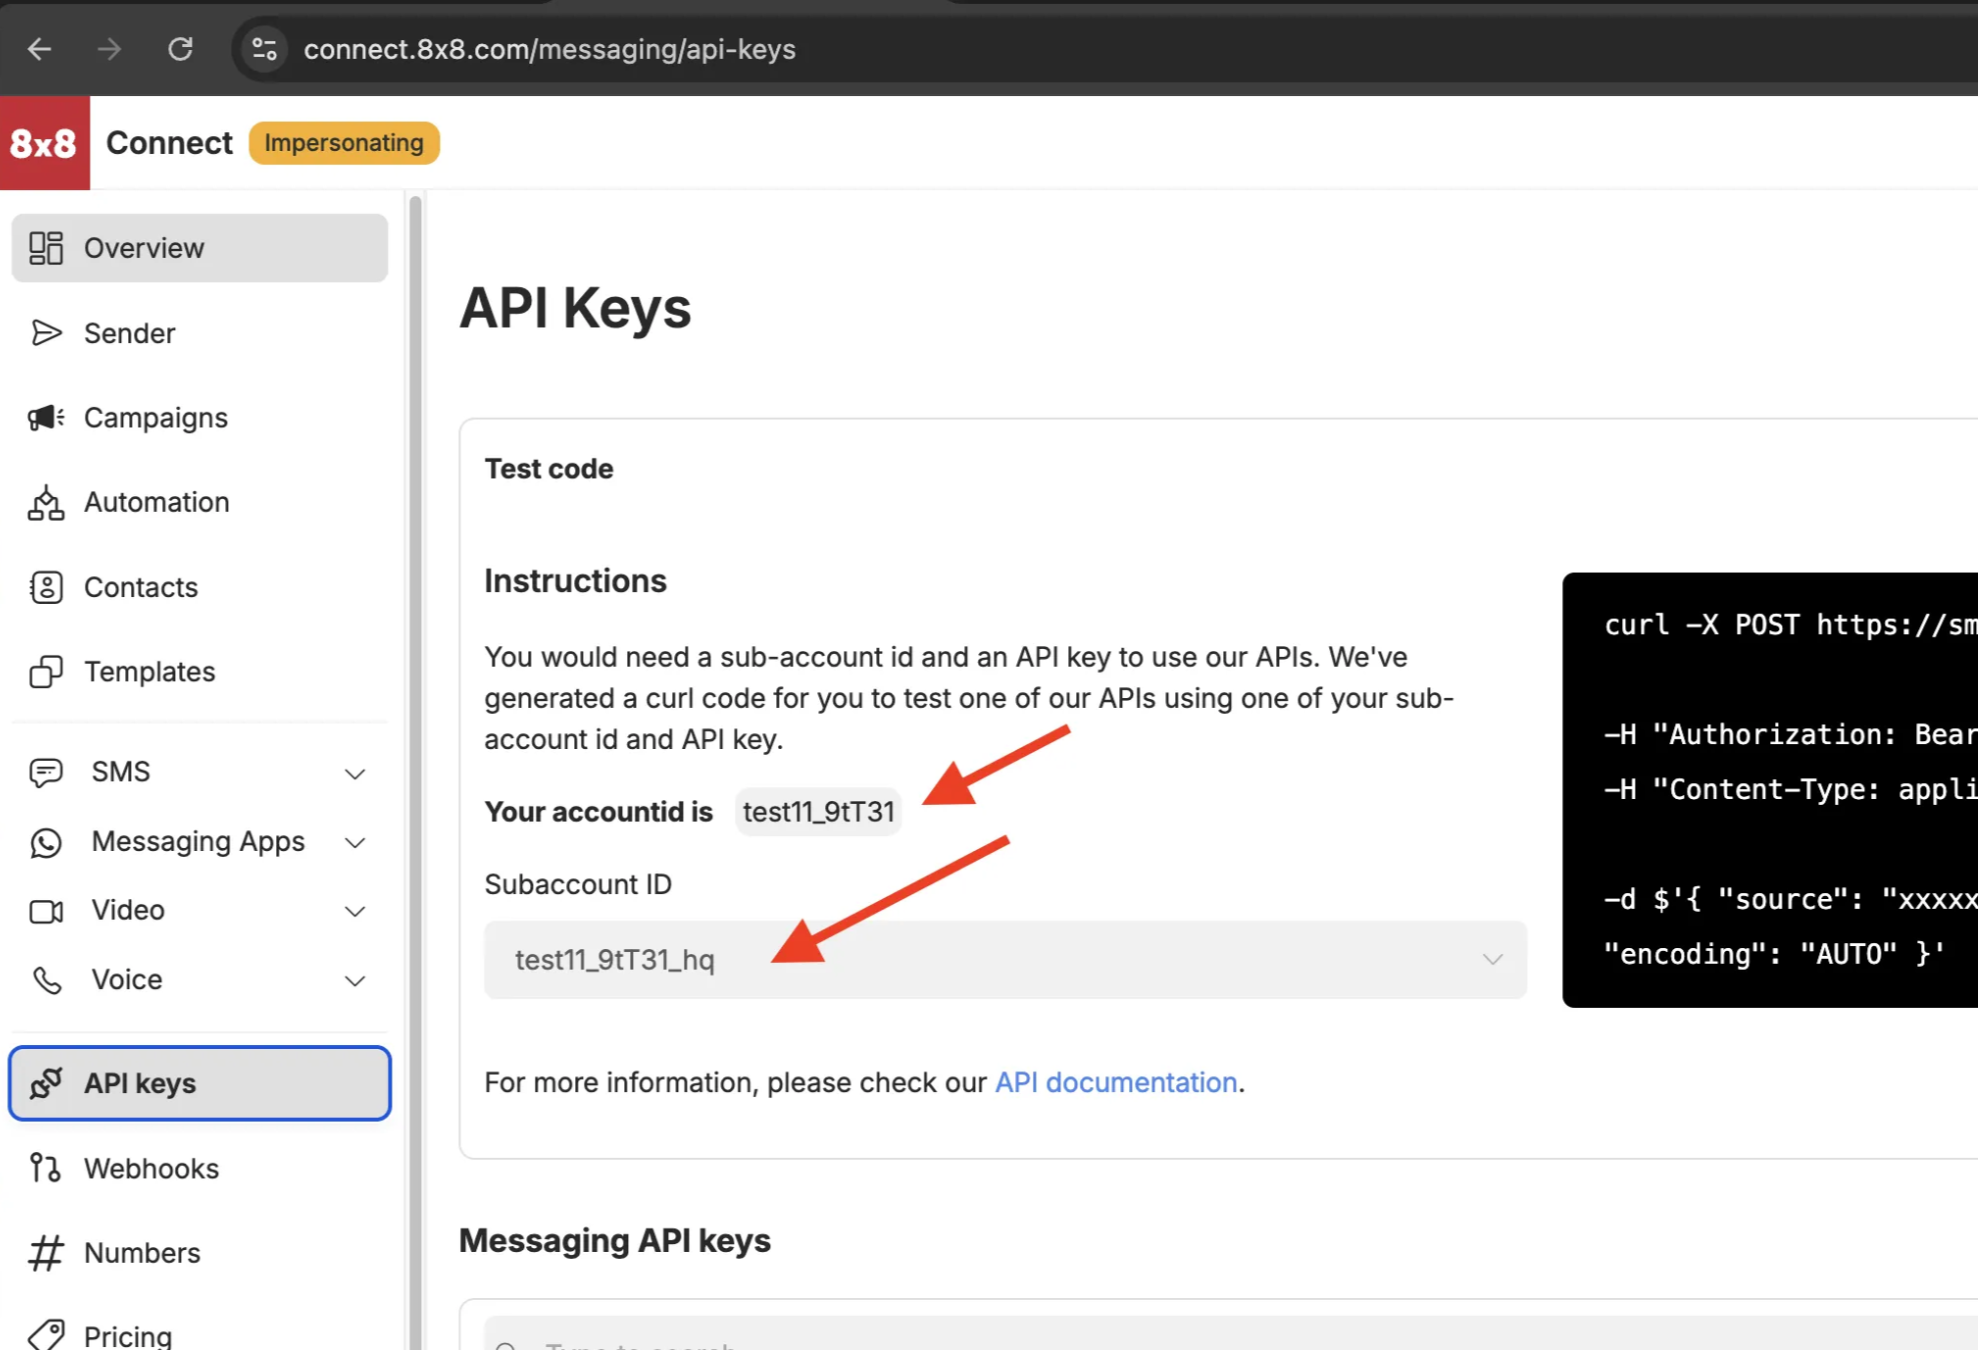
Above we can see the Accountid is : **test11_9tT31** with SubaccountId : **test11_9tT31_hq.** Your account may have multiple subaccounts which can be seen if you click the drop down in **Subaccount ID.**
You've now created your 8x8 Connect API Key and Account ID - just one of many if you support multiple vendors. Each one adds new auth flows, schema differences, and ongoing maintenance.
Unified.to removes that overhead with unified objects that work across 660 APIs. Map once, launch everywhere. Your team ships features instead of debugging vendor-specific edge cases.
[Book a demo](https://calendly.com/d/cph9-g8n-jzg/connect-with-unified) to see how much faster you can launch customer integrations with Unified.to.
## How to get your ADP Workforce Now Oauth2 client ID, Oauth2 client secret, Oauth2 PEM certificate and Oauth2 private key: Step-by-step guide
URL: https://docs.unified.to/guides/how_to_get_your_adp_workforce_now_oauth2_client_id_oauth2_client_secret_oauth2_pem_certificate_and_oauth2_private_key_step_by_step_guide
# How to get your ADP Workforce Now Oauth2 client ID, Oauth2 client secret, Oauth2 PEM certificate and Oauth2 private key: Step-by-step guide
------
_April 24, 2023_
When connecting ADP Workforce Now to other platforms, authentication requires a Oauth2 client ID, Oauth2 client secret, Oauth2 PEM certificate and Oauth2 private key.
Follow these step-by-step instructions to generate one from your ADP Workforce Now account, or provide them to your customers if they need to connect their account.
1. Log into your ADP account and access the ADP API Central portal. You will need the paid `ADP API Central` [application](https://apps.adp.com/en-US/apps/410612).
2. Select a project or create a new project
3. Enter the project details.
4. Select domain
5. Inside the Production integration Page, select the most suitable option for you.
6. After creating a new Project, select Development Credentials

7. This page will Provide the Client ID, Secret Key and Certificates
8. Select Manage Certificate to generate Certificate
9. Fill out the form, which will provide the PEM Key required to create a connection.
10. The processing time for the certificate is few minutes. Generated Certificate will be required to create a connection.
11. If asked, select `api` permission.
For Unified, you need to have access to the following APIS for your App:
- Job Applications API
- Job Applicants API
- Job Requisitions API
- Client Data - Validation Tables API
- Worker Leaves API
- Worker API
To add the API to your application scope, contact your ADP representative. Make sure you provide the following:
- Organization name
- Application name
- List of APIs to be added
Generating a ADP Workforce Now Oauth2 client ID, Oauth2 client secret, Oauth2 PEM certificate and Oauth2 private key is the first step. The harder part is building pipelines that stay reliable as customers add more systems.
Unified.to gives you options: deliver data via API, streaming webhooks, database sync, or even as MCP tools for AI agents. One integration layer that adapts to your architecture instead of forcing tradeoffs.
[Book a demo](https://calendly.com/d/cph9-g8n-jzg/connect-with-unified) to see how we simplify integration delivery across 1567 integrations and 37 categories.
## How to get your Amazon S3 AWS Region, AWS S3 Key and AWS S3 Secret: Step-by-step guide
URL: https://docs.unified.to/guides/how_to_get_your_amazon_s3_aws_region_aws_s3_key_and_aws_s3_secret_step_by_step_guide
# How to get your Amazon S3 AWS Region, AWS S3 Key and AWS S3 Secret: Step-by-step guide
------
_December 22, 2023_
Developers connecting to Amazon S3 will need an AWS Region, AWS S3 Key and AWS S3 Secret for authentication.
Here's how to generate, configure, and copy your Amazon S3 AWS Region, AWS S3 Key and AWS S3 Secret so you can use it in your integration or share steps with your customers.
# **Generating AWS Access Key ID and Secret Access Key**
You can easily access your AWS S3 account using a Access key and Secret Access key of your AWS account.
1. If you don't have one already then go to your account and click on **My Security Credentials**
2. Then select **Access keys (access key ID and secret access key)** section.
There is an important notification on the section, which recommends you to create an IAM Role instead of creating root access keys.
3. Click on **Create New Access Key**
4. Download the Key pairs to your system for future use.
5. Click on _**Show Access key**_ and you will get your _**Access Key ID**_ and _**Secret Access Key.**_
6. You need to use this _**Access Key ID**_ and _**Secret Access Key**_ to connect to your AWS connect and access the S3 bucket.
With your Amazon S3 AWS Region, AWS S3 Key and AWS S3 Secret in hand, you're ready to connect. But managing keys, tokens, and refresh flows across every vendor quickly becomes a security risk.
Unified.to abstracts all of that behind a single, secure layer. We never store customer data, credentials are always under your control, and our permissioning model removes the risk of misconfigured scopes.
[Book a demo](https://calendly.com/d/cph9-g8n-jzg/connect-with-unified) to see how Unified keeps integrations real-time, compliant, and safe at scale.
## How to get your Ashby API Key: Step-by-step guide
URL: https://docs.unified.to/guides/how_to_get_your_ashby_api_key_step_by_step_guide
# How to get your Ashby API Key: Step-by-step guide
------
_April 24, 2023_
Ashby supports authentication with an API Key. To connect, you'll need to generate an secure API Key from your account settings.
This short guide shows you how to generate one, whether you're testing in your sandbox or helping customers connect their Ashby account.
1. Sign in to Ashby and click "Admin" in the top navigation bar
2. Navigate to Integrations > API Keys
3. Click + New in the upper right corner
4. Add a name for the new API Key, click Create API Key
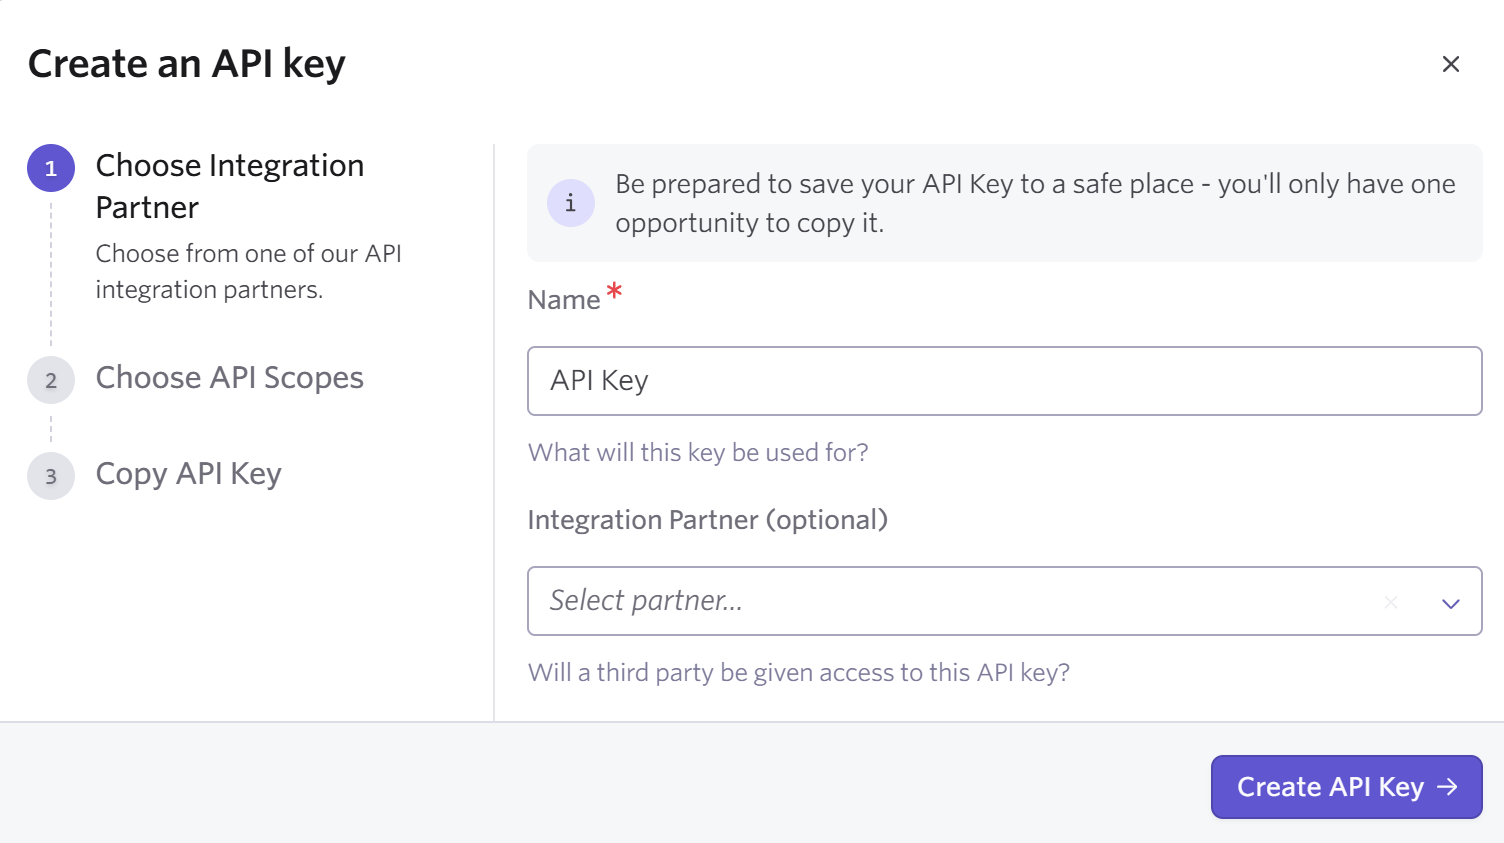
5. Set necessary API Scopes, e.g.
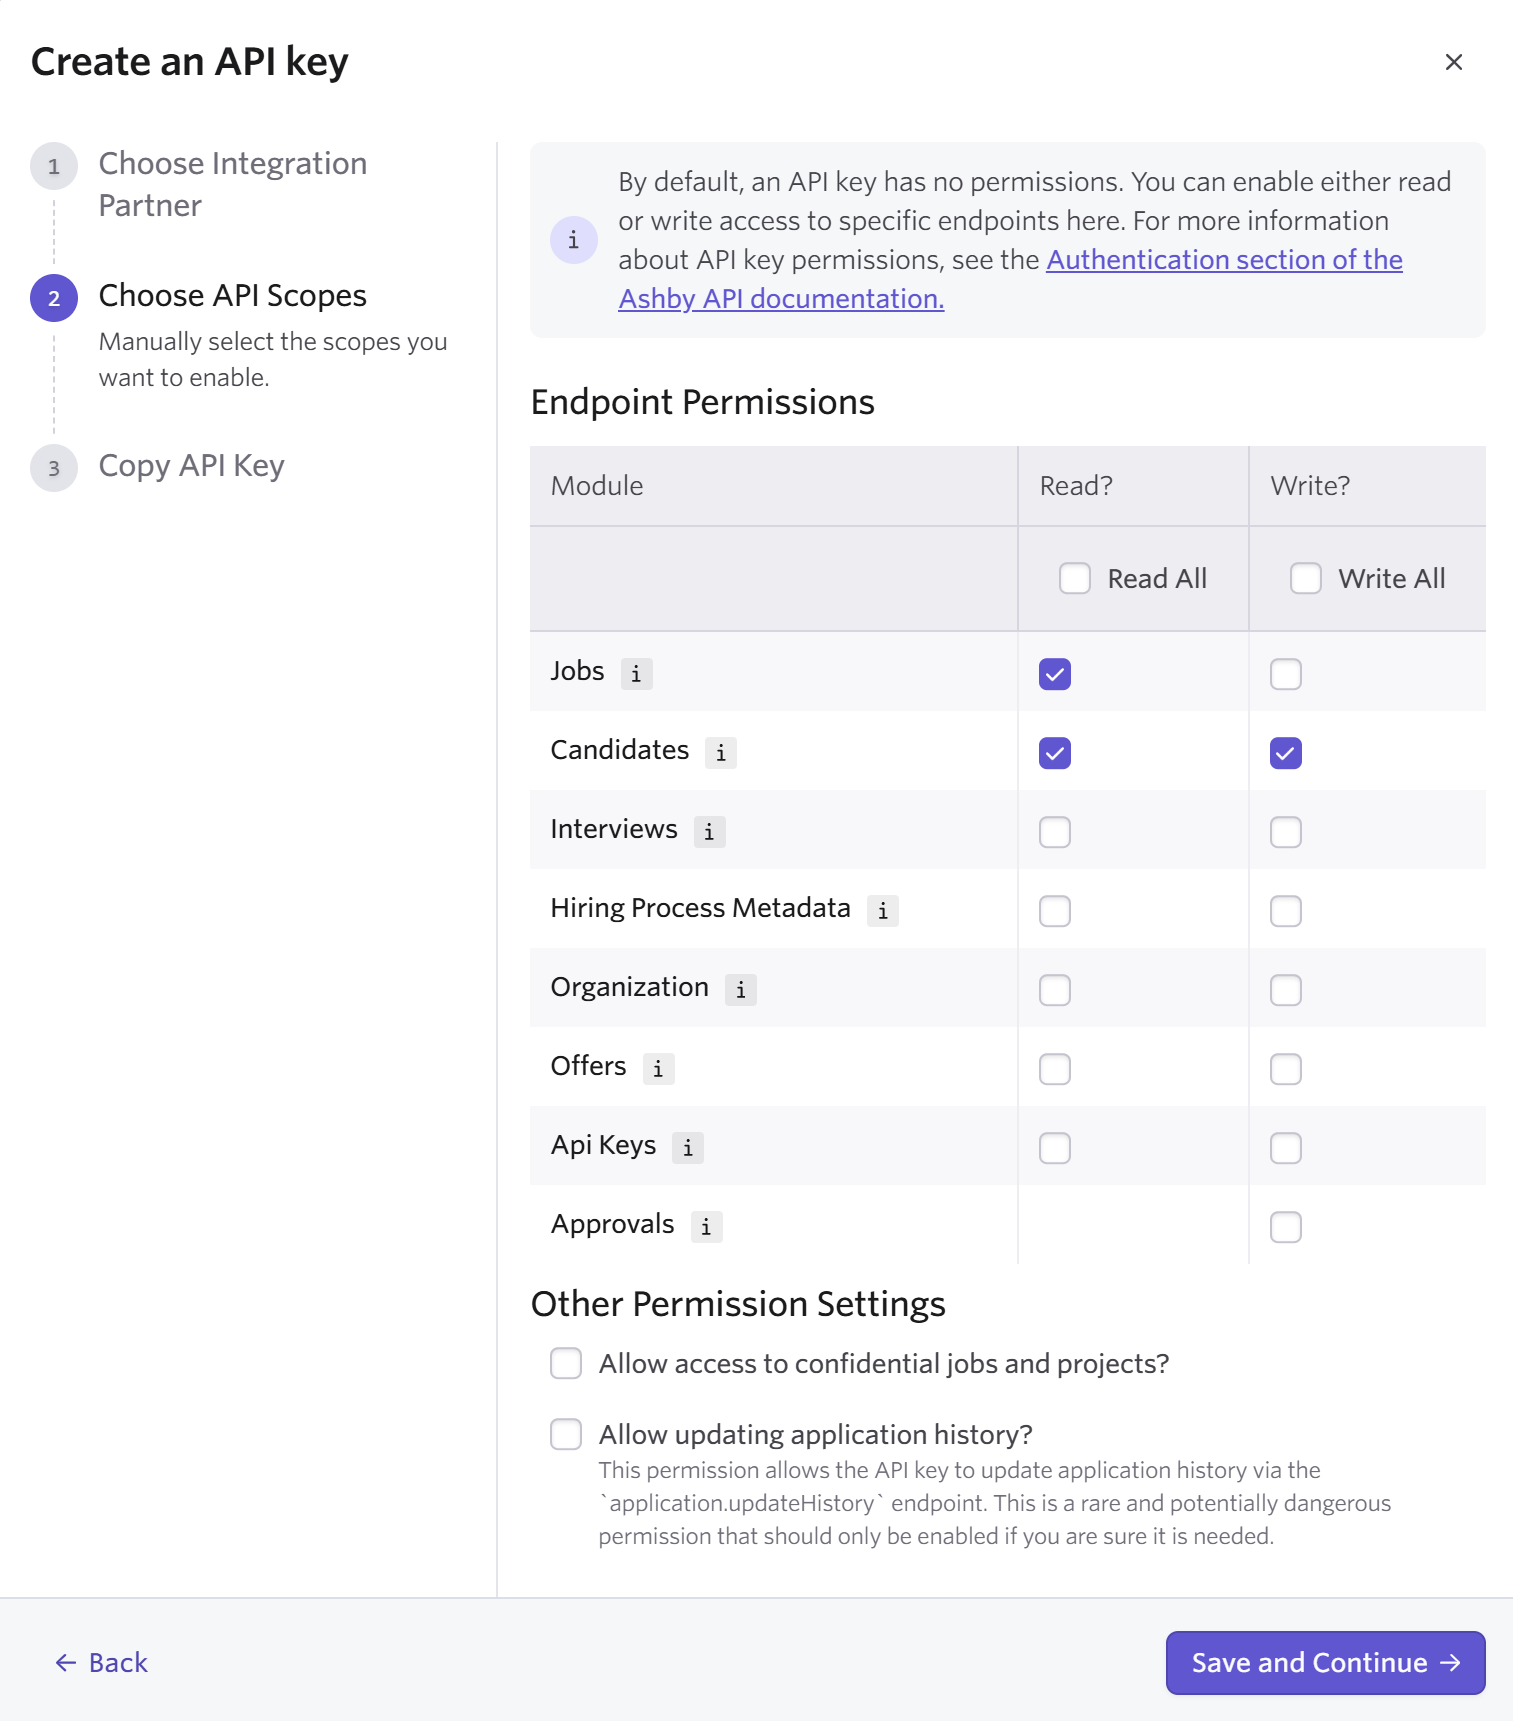
To read Applications, you will also need the "Offers" READ permission.
To use Webhooks, you will also need the "API Keys" WRITE permission.
6. Click "Save and Continue"
7. Copy the API Key
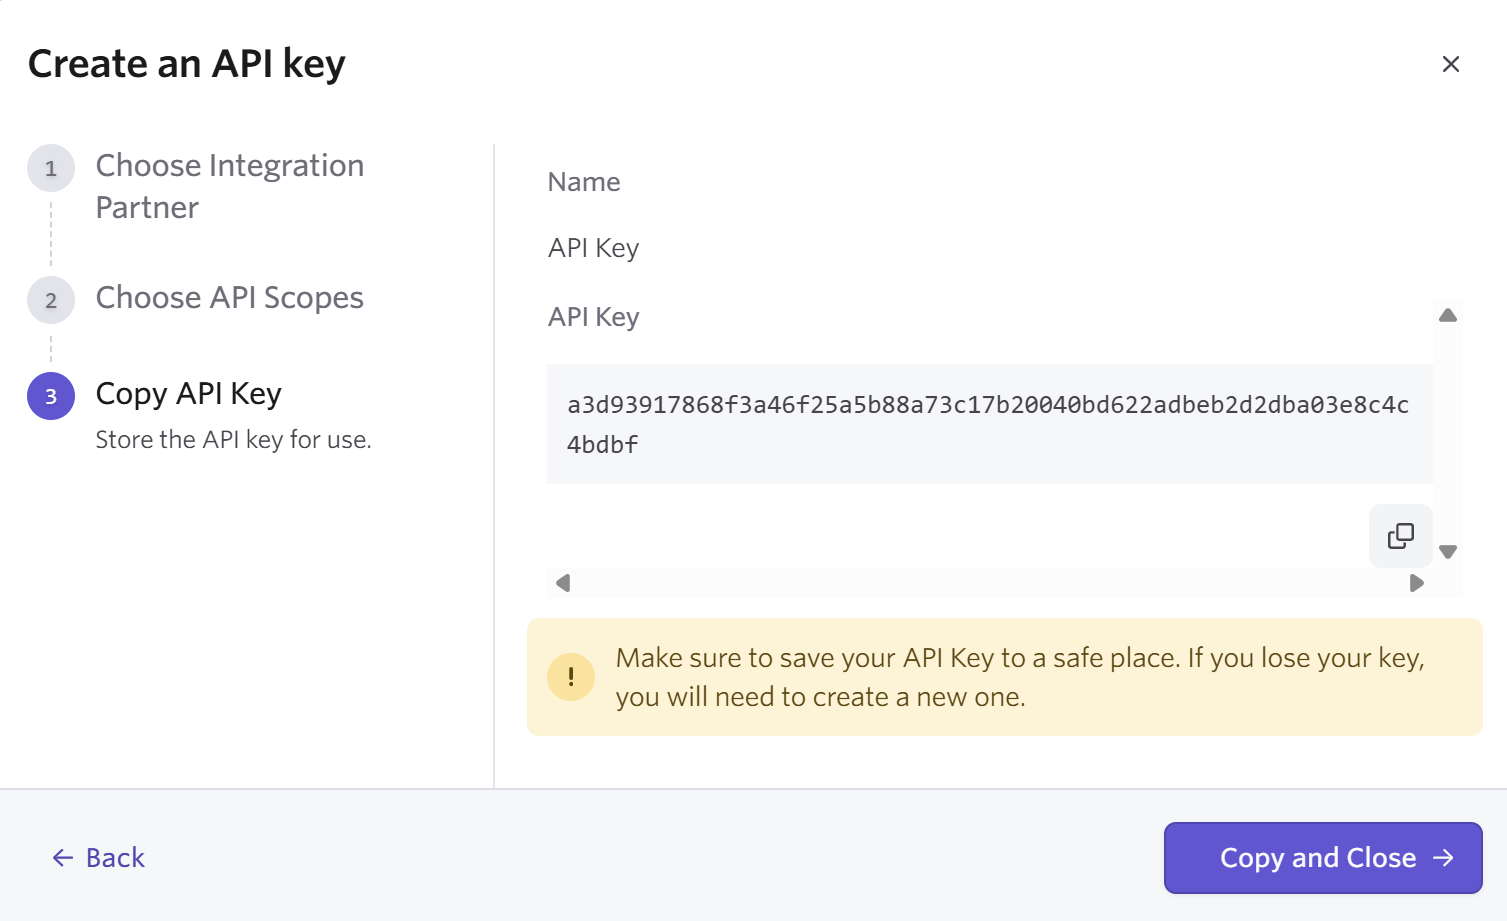
Generating a Ashby API Key is the first step. The harder part is building pipelines that stay reliable as customers add more systems.
Unified.to gives you options: deliver data via API, streaming webhooks, database sync, or even as MCP tools for AI agents. One integration layer that adapts to your architecture instead of forcing tradeoffs.
[Book a demo](https://calendly.com/d/cph9-g8n-jzg/connect-with-unified) to see how we simplify integration delivery across 1602 integrations and 37 categories.
## How to get your Brex API token: Step-by-step guide
URL: https://docs.unified.to/guides/how_to_get_your_brex_api_token_step_by_step_guide
# How to get your Brex API token: Step-by-step guide
------
_March 21, 2025_
If you're building an integration with Brex, you'll need an API token from your customer's Brex account to authenticate requests.
This guide shows you (or your customers) how to generate one from Brex's account settings.
### **Generate a user token**
1. Sign in to [dashboard.brex.com](https://dashboard.brex.com/) as an [account admin or card admin](https://developer.brex.com/docs/roles_permissions_scopes) .
2. Go to [_Developer > Settings_](https://dashboard.brex.com/settings/developer) .
3. Click _Create Token_ .
4. Create a name for your token that will help you identify it. Choose what level of data access you need for your application; these are the [scopes](https://developer.brex.com/docs/roles_permissions_scopes) your token will have.
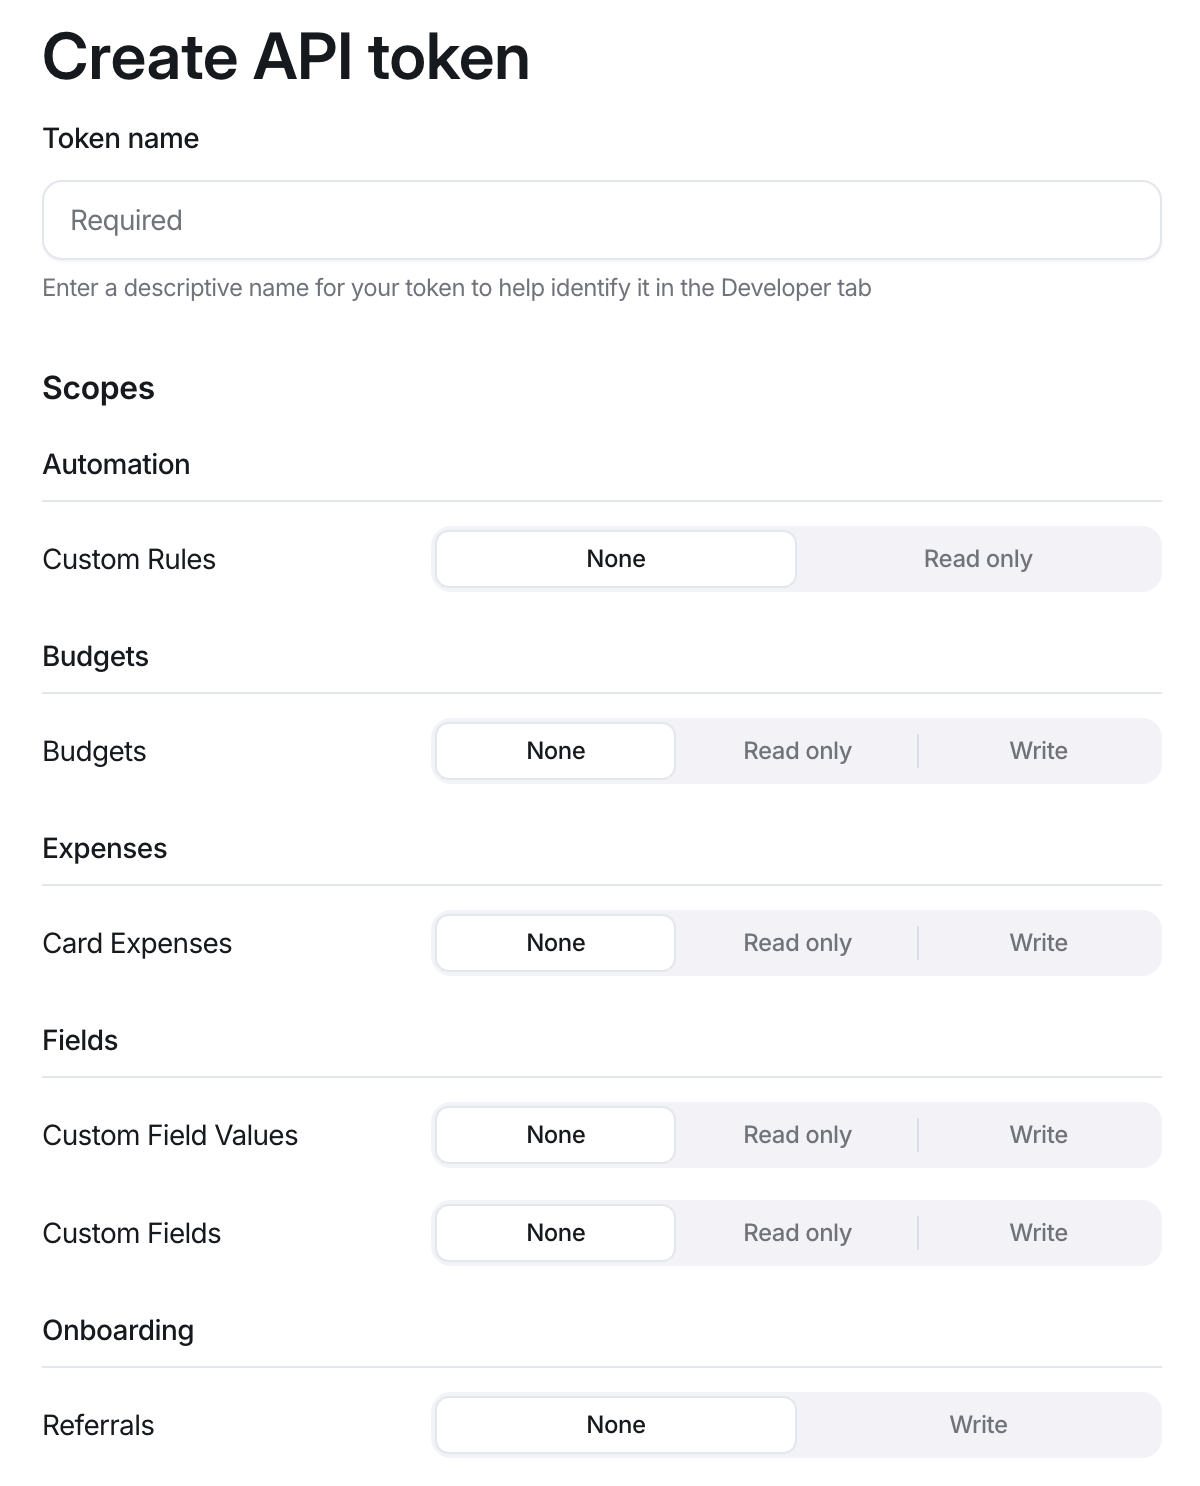
5. The next screen will confirm your previous selections. Make sure it looks good, then select _Allow Access_ .
6. Your token is now created. Copy and store the token securely. You won't be able to see it again.
7. Back on the developer page of your Brex dashboard, you should see your token listed now. As a security measure, part of the string is obfuscated. If you lose it, create a new one and replace the token.
**Caution**: Your user token is private and should not be shared. Never check it into version control or save it somewhere publicly accessible. If your user token is compromised or leaked, make sure to revoke it.
### **Token revocation and expiration**
User tokens will expire if they are not used to make an API call for 90 days.
If your token is compromised, or you no longer need it, revoke the user token from the developer page in your Brex dashboard. Once revoked, any calls made with this token will immediately begin to fail.
You've now created your Brex API token - just one of many if you support multiple vendors. Each one adds new auth flows, schema differences, and ongoing maintenance.
Unified.to removes that overhead with unified objects that work across 475 APIs. Map once, launch everywhere. Your team ships features instead of debugging vendor-specific edge cases.
[Book a demo](https://calendly.com/d/cph9-g8n-jzg/connect-with-unified) to see how much faster you can launch customer integrations with Unified.to.
## How to get your Bullhorn OAuth2 Client ID, OAuth2 Client Secret, API Username and API Password: Step-by-step guide
URL: https://docs.unified.to/guides/how_to_get_your_bullhorn_oauth2_client_id_oauth2_client_secret_api_username_and_api_password_step_by_step_guide
# How to get your Bullhorn OAuth2 Client ID, OAuth2 Client Secret, API Username and API Password: Step-by-step guide
------
_April 24, 2023_
If you're building an integration with Bullhorn, you'll need an OAuth2 Client ID, OAuth2 Client Secret, API Username and API Password from your customer's Bullhorn account to authenticate requests.
This guide shows you (or your customers) how to generate one from Bullhorn's account settings.
## Why this is required?
Bullhorn requires every connected application to use its own API user, client ID, client secret, and approved redirect URI. The redirect URI cannot be updated through the Bullhorn web interface, so Bullhorn Support must be contacted to approve and configure the redirect URI.
## Steps your customer must complete
### 1. Create an API User in Bullhorn
The customer must create a dedicated API user for the application they want to connect.
During this process, Bullhorn will provide:
- Client ID
- Client Secret
These credentials will later be used when creating the connection in Unified.
**Note**: A new API user is required each time a new application is connected to Bullhorn.
### 2. Contact Bullhorn Support
After creating the API user, the customer must contact Bullhorn Support and request that the redirect URI for the API user be updated.
The customer should provide:
- The API user or application they created
- The Unified redirect URI
Example request:
Please update the redirect URI for our Bullhorn API user to the following Unified redirect URI: **`https://api.unified.to/oauth/code`**
### 3. Wait for Bullhorn to approve and apply the Redirect URI change
Bullhorn does not currently allow redirect URIs to be configured through the Bullhorn web UI.
Because of this, the redirect URI change must be completed by Bullhorn Support before the connection can work.
## Important Notes
- Every customer must request the redirect URI change individually for their own Bullhorn account.
- This is a Bullhorn limitation and cannot be configured directly in the Bullhorn UI or programmatically via Unified.
- This is a one-time setup
- If you create a new API user in the future, you will need to go through this process again
Generating a Bullhorn OAuth2 Client ID, OAuth2 Client Secret, API Username and API Password is the first step. The harder part is building pipelines that stay reliable as customers add more systems.
Unified.to gives you options: deliver data via API, streaming webhooks, database sync, or even as MCP tools for AI agents. One integration layer that adapts to your architecture instead of forcing tradeoffs.
[Book a demo](https://calendly.com/d/cph9-g8n-jzg/connect-with-unified) to see how we simplify integration delivery across 1561 integrations and 37 categories.
## How to get your Ceridian Dayforce Username, Password and Client Namespace: Step-by-step guide
URL: https://docs.unified.to/guides/how_to_get_your_ceridian_dayforce_username_password_and_client_namespace_step_by_step_guide
# How to get your Ceridian Dayforce Username, Password and Client Namespace: Step-by-step guide
------
_April 24, 2023_
Developers connecting to Ceridian Dayforce will need an Username, Password and Client Namespace for authentication.
Here's how to generate, configure, and copy your Ceridian Dayforce Username, Password and Client Namespace so you can use it in your integration or share steps with your customers.
To get the Dayforce client namespace, follow these steps:
1. Log in to Dayforce.
2. Navigate to the "Company" tab.
3. Click on "Settings".
4. Under the "General" section, you should find the "Client Namespace" field. The value in this field is the Dayforce client namespace.
Getting your Ceridian Dayforce Username, Password and Client Namespace is the first step. The bigger challenge is supporting dozens of vendors - each with unique auth flows, schemas, and maintenance requirements.
Unified.to is a real-time integration platform built to replace that work. Instead of building and maintaining 1567 custom connectors, you get one secure, normalized API layer across 37 SaaS tools.
On top of that, our usage-based pricing scales cleanly with your product. No per-connection fees, no setup charges, and no lock-in, just infrastructure economics that grow with you.
[Book a demo](https://calendly.com/d/cph9-g8n-jzg/connect-with-unified) to discover how predictable integration costs should be.
## How to get your Crelate API key: Step-by-step guide
URL: https://docs.unified.to/guides/how_to_get_your_crelate_api_key_step_by_step_guide
# How to get your Crelate API key: Step-by-step guide
------
_August 18, 2023_
To access Crelate data or automate workflows through an integration, an API key is required.
This guide walks you through where to find it and how to set it up for development or end-customer use.
**Where Is My API Key?**
Your API Key can be found in your Settings Tab under "My Settings & Preferences". You will have to enable your API Key. Once Your API is enabled, you will be presented with your API Key.
If you ever need to regenerate a new API Key, you can do so by clicking "Regenerate New Key". However, please note: **Any Change in API KEY (for instance generating a new key or turning API Access off) will result in any exsisting links with the old API key to fail.**
**Managing API**
If you would like to manage your API, you can do so by going into your settings and clicking API Management under (Advanced Settings). You will presented with a screen that will allow you to manage users who have turned on API Access. If you click on a user who has enabled their API, administrators will have the option of turning off API Access for that user. Administrators can do this by clicking "Clear API Key". **Clearing the API key will cause any references to that API Key to fail and will turn off that users API access to that specific API key**. If that user would like API access again, they will have to regenerate another API key.
To start, select your navigation menu and select "**Your Profile & Preferences**"
Next, navigate to **API Access**
You've now created your Crelate API key - just one of many if you support multiple vendors. Each one adds new auth flows, schema differences, and ongoing maintenance.
Unified.to removes that overhead with unified objects that work across 514 APIs. Map once, launch everywhere. Your team ships features instead of debugging vendor-specific edge cases.
[Book a demo](https://calendly.com/d/cph9-g8n-jzg/connect-with-unified) to see how much faster you can launch customer integrations with Unified.to.
## How to get your Dashlane API Key: Step-by-step guide
URL: https://docs.unified.to/guides/how_to_get_your_dashlane_api_key_step_by_step_guide
# How to get your Dashlane API Key: Step-by-step guide
------
_March 26, 2025_
When connecting Dashlane to other platforms, authentication requires an API Key.
Follow these step-by-step instructions to generate one from your Dashlane account, or provide them to your customers if they need to connect their account.
## Generate a Dashlane API key
To access the Dashlane API endpoints, you'll need an API key. This key can be generated in two ways: directly through the **Admin Console** or the **Dashlane CLI**.
### **Generate an API key using Dashlane Admin Console**
1. Open the Admin Console and navigate to the **Integrations** section.
2. Select **Public API** and then **Create key**.
3. Enter a name for the key and select **Generate key**.
4. Copy or download the bearer token. The bearer token will be used to authenticate and access the endpoints.
**Important**: Save your bearer token securely in a Secret on your vault, as it will only be displayed once.
[Add and manage secrets in Dashlane](https://support.dashlane.com/hc/articles/17020356625682)
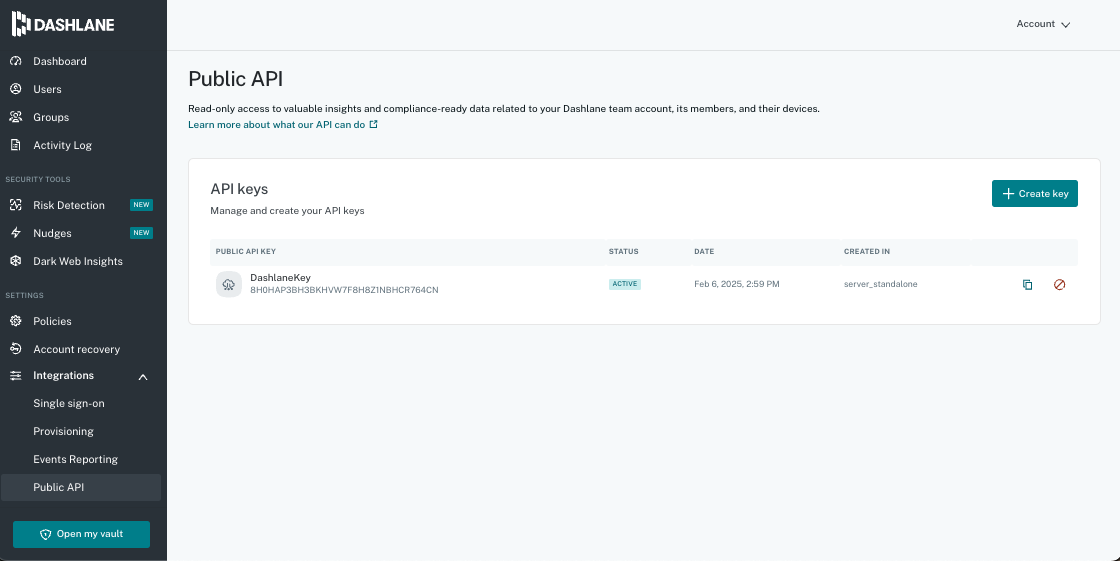
You've now retrieved your Dashlane API Key. That's one system covered, but scaling integrations one by one means repeating this process hundreds of times.
Unified.to handles this for you: 475 integrations out of the box, all with normalized schemas, real-time delivery, and Virtual Webhooks. No polling scripts, no retry logic, no maintenance backlog.
[Book a demo](https://calendly.com/d/cph9-g8n-jzg/connect-with-unified) to see how Unified cuts integration work from quarters to days.
## How to get your Deel Access Token: Step-by-step guide
URL: https://docs.unified.to/guides/how_to_get_your_deel_access_token_step_by_step_guide
# How to get your Deel Access Token: Step-by-step guide
------
_August 26, 2023_
When connecting Deel to other platforms, authentication requires an Access Token.
Follow these step-by-step instructions to generate one from your Deel account, or provide them to your customers if they need to connect their account.
**Generating Access Tokens**
1. Navigate to **Apps & Integrations > Developer Center**.
2. Select the type of Token, whether Organization or Personal. The former ties the keys to the whole organization while the latter ties the keys to an individual - token will expire once this person leaves the company.
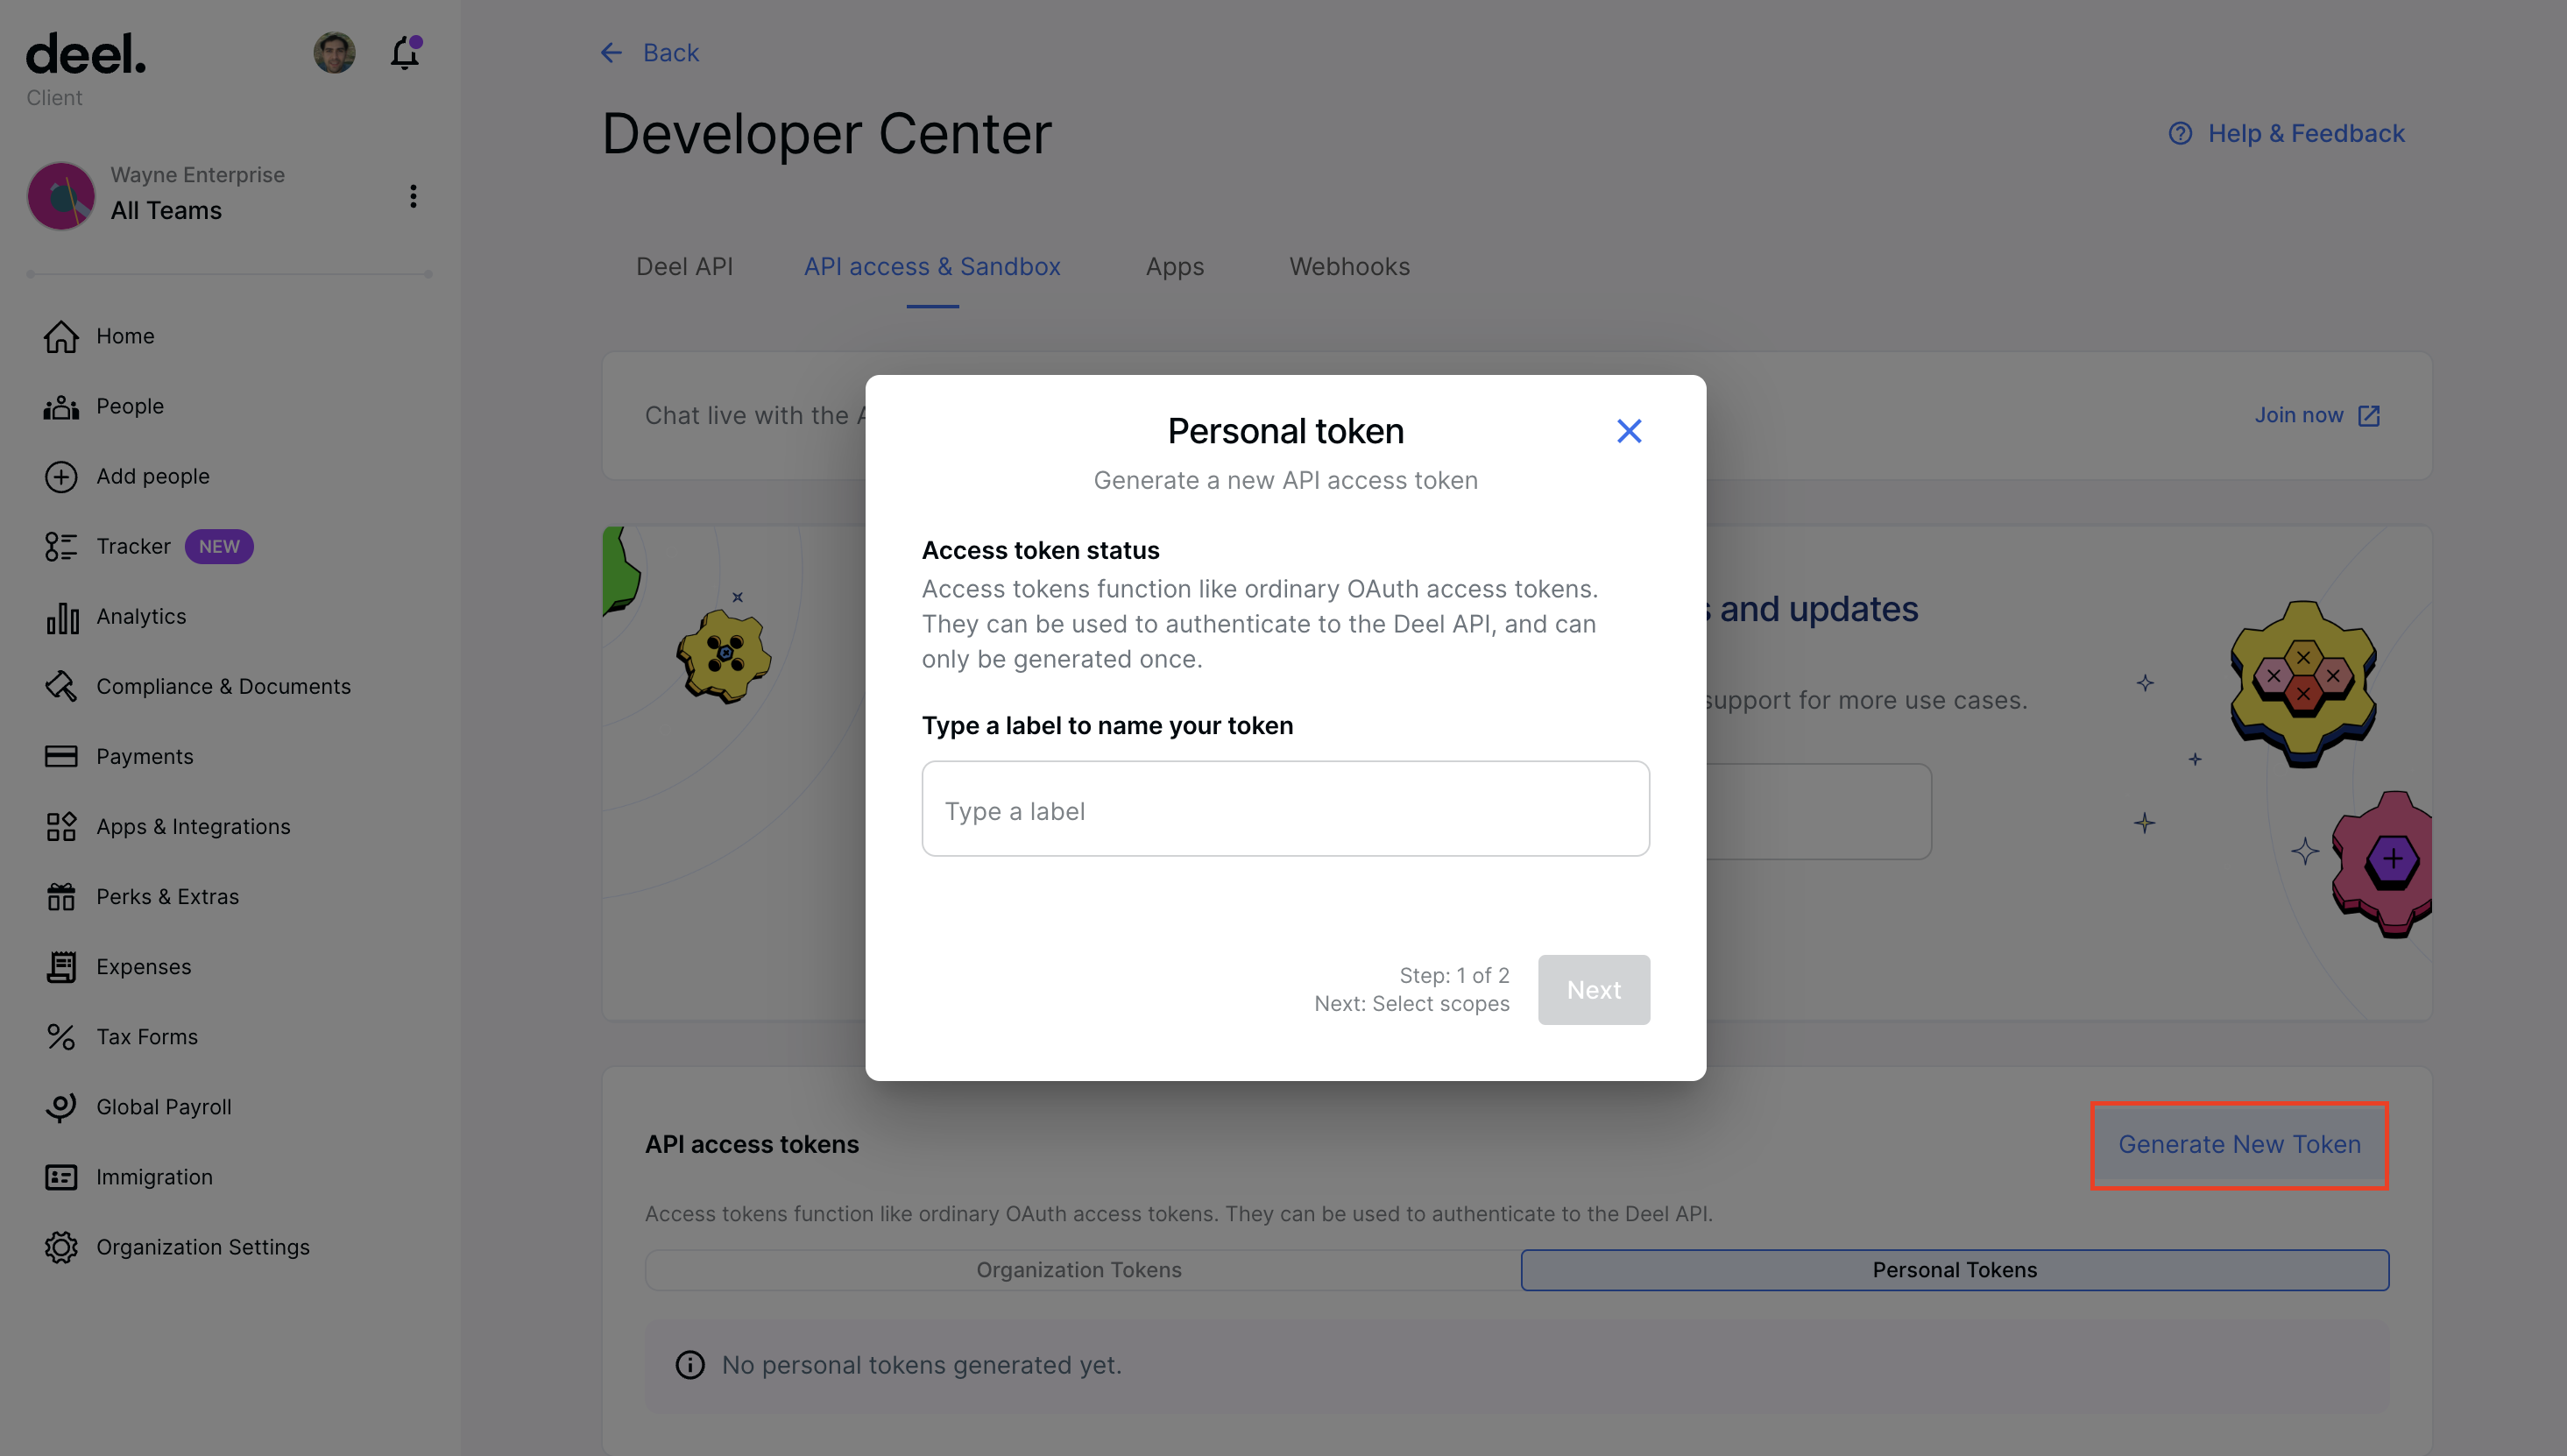
1. Add a token name and click on the **Next** button.
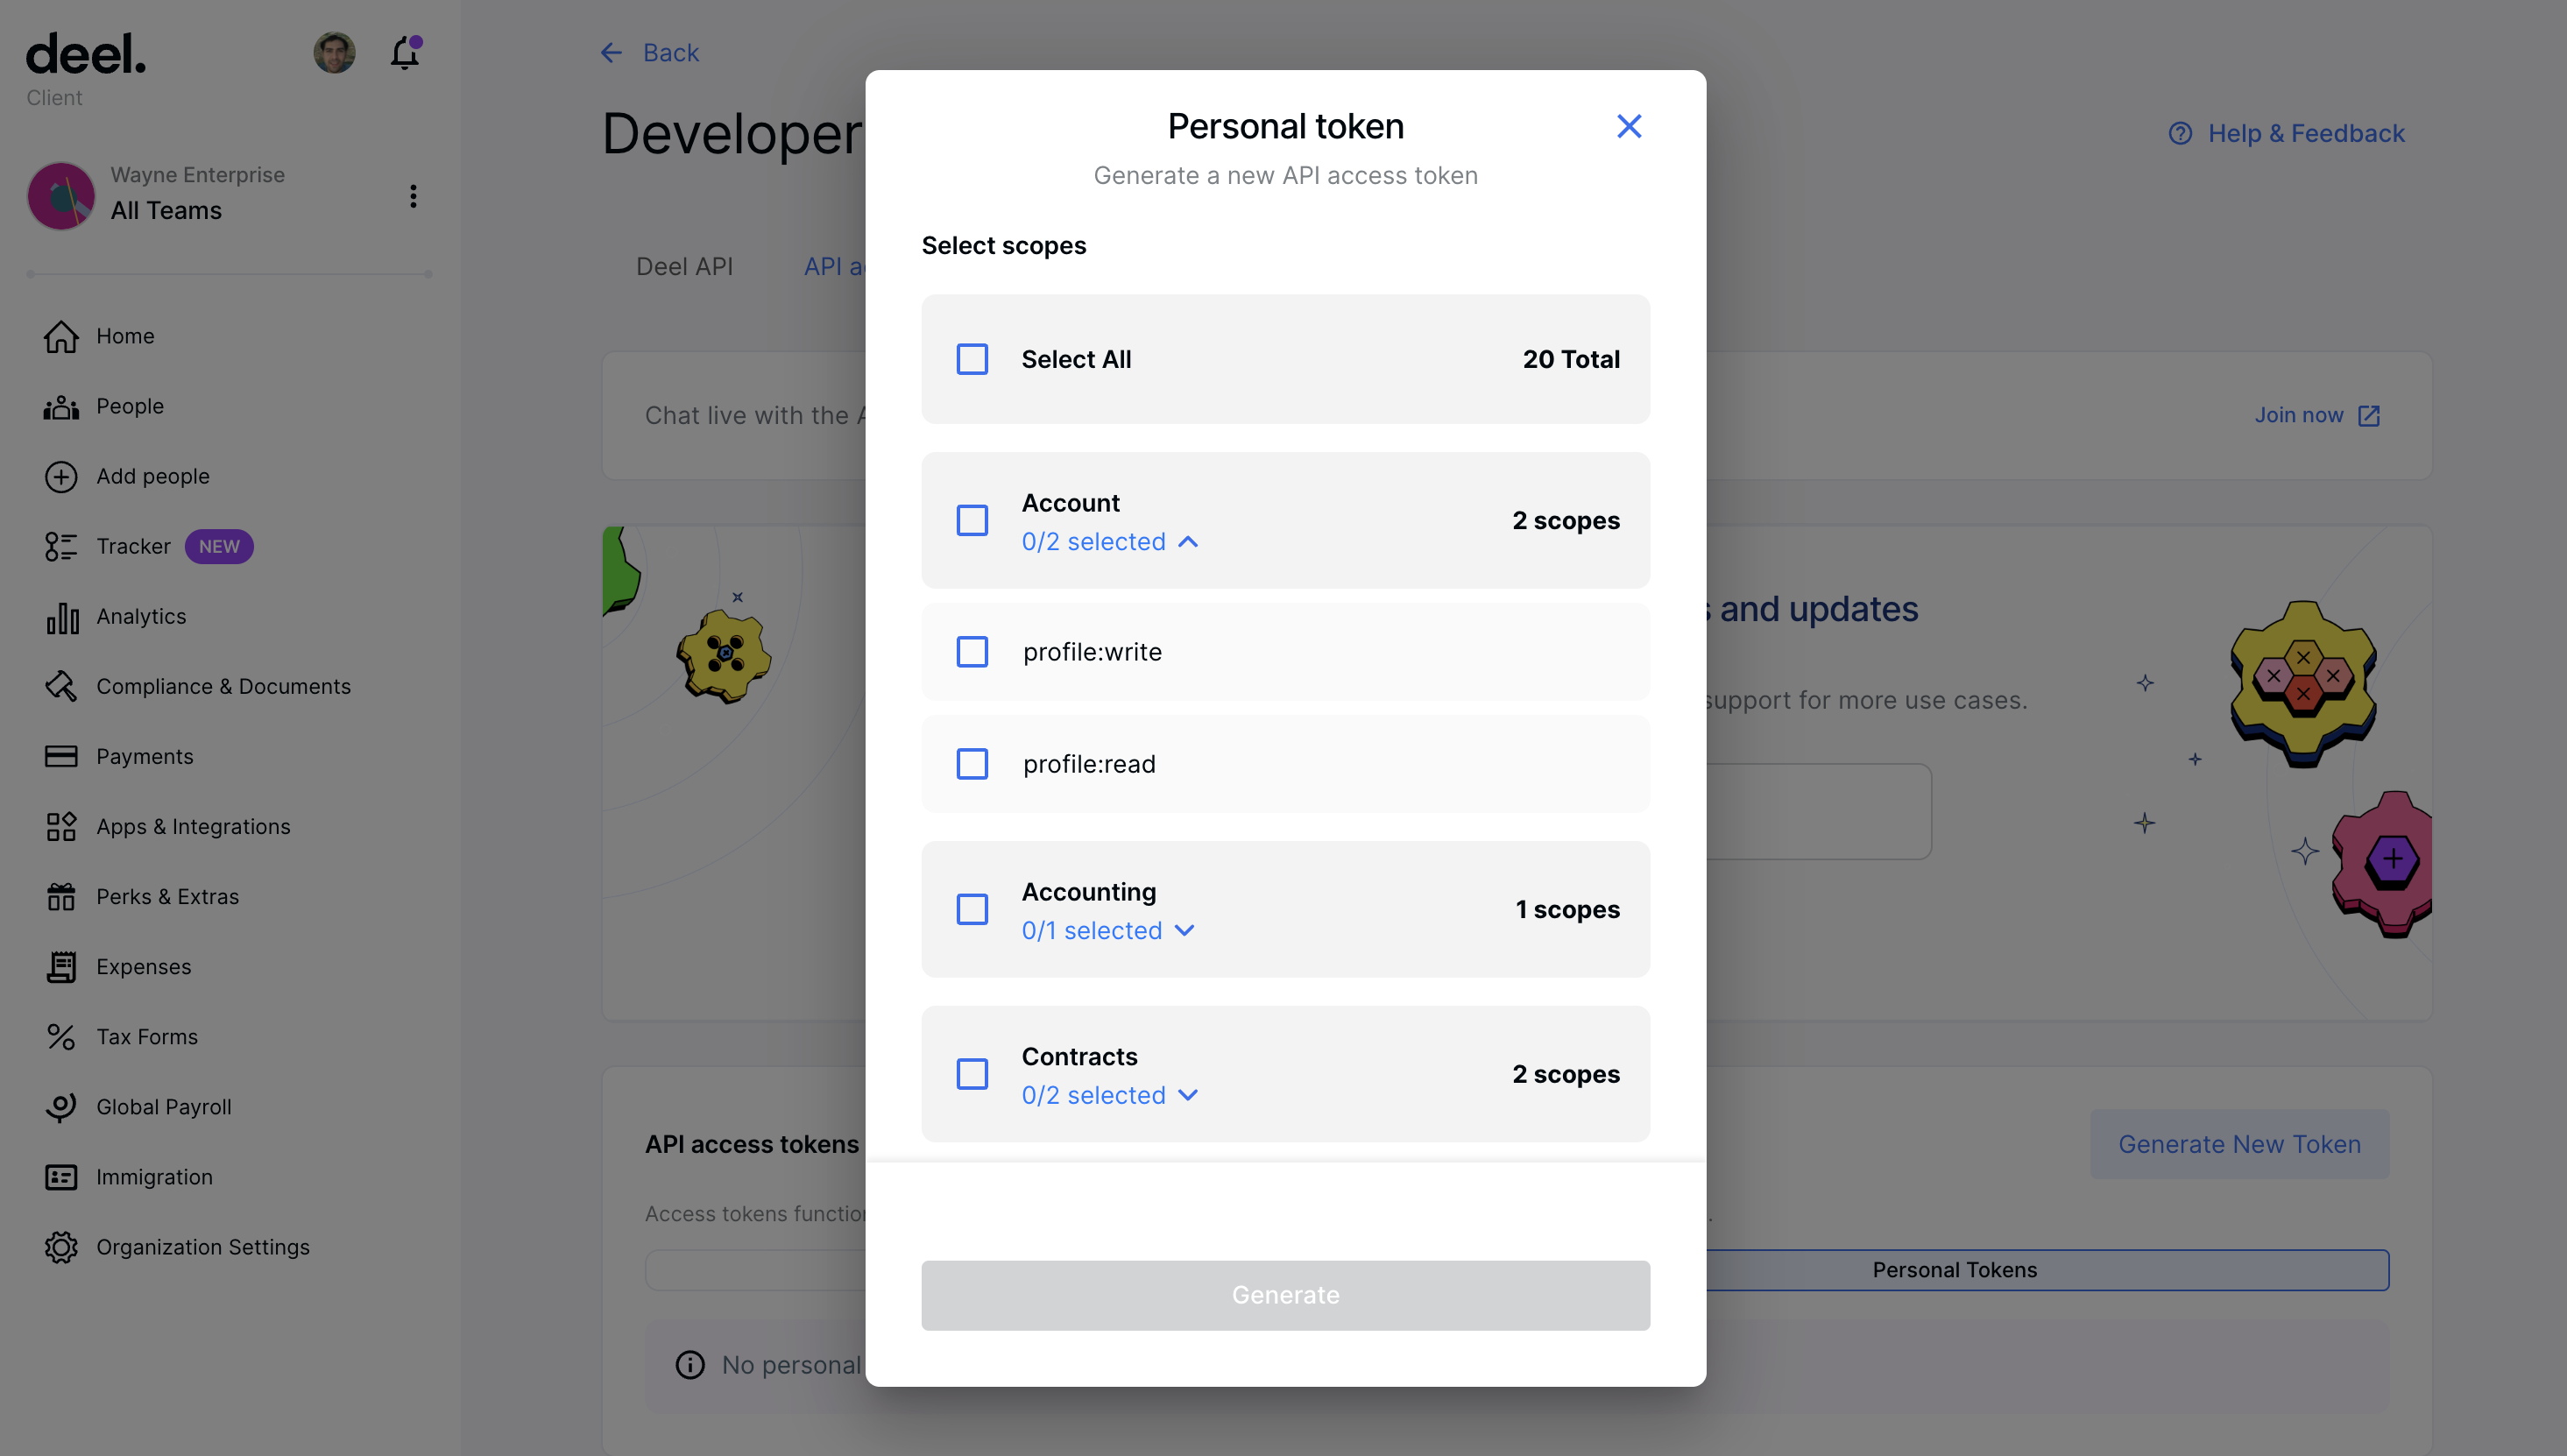
1. In the popup, select the scopes for the access token and click **Generate**.
`people:read` , `organizations:read`, `payslips:read`, `time-off:read`
2. Make sure to copy and save your newly generated token because you won't be able to see it again!
Generating a Deel Access Token is the first step. The harder part is building pipelines that stay reliable as customers add more systems.
Unified.to gives you options: deliver data via API, streaming webhooks, database sync, or even as MCP tools for AI agents. One integration layer that adapts to your architecture instead of forcing tradeoffs.
[Book a demo](https://calendly.com/d/cph9-g8n-jzg/connect-with-unified) to see how we simplify integration delivery across 721 integrations and 33 categories.
## How to get your Dialpad API Key: Step-by-step guide
URL: https://docs.unified.to/guides/how_to_get_your_dialpad_api_key_step_by_step_guide
# How to get your Dialpad API Key: Step-by-step guide
------
_April 24, 2023_
Dialpad supports authentication with an API Key. To connect, you'll need to generate an secure API Key from your account settings.
This short guide shows you how to generate one, whether you're testing in your sandbox or helping customers connect their Dialpad account.
To create and access your API key, you need to follow the below steps. Note that only Company Admins can create API keys on Dialpad.
1. Navigate to Admin Settings > My Company > Authentication > API Keys
2. Select **Add Key**
3. Name your key and set the expiration terms
4. Select desired **Additional Scopes**
5. Select **Save**
[video](https://use.vg/wWKws7)
Note: API keys can only be created by Dialpad customers on the Pro and Enterprise plans, and you must be a Company Admin to create and access an API key.
You've now retrieved your Dialpad API Key. That's one system covered, but scaling integrations one by one means repeating this process hundreds of times.
Unified.to handles this for you: 1258 integrations out of the box, all with normalized schemas, real-time delivery, and Virtual Webhooks. No polling scripts, no retry logic, no maintenance backlog.
[Book a demo](https://calendly.com/d/cph9-g8n-jzg/connect-with-unified) to see how Unified cuts integration work from quarters to days.
## How to get your Discord OAuth 2 credentials and bot token
URL: https://docs.unified.to/guides/how_to_get_your_discord_oauth_2_credentials_and_bot_token
# How to get your Discord OAuth 2 credentials and bot token
------
_May 21, 2024_
_Last updated: May 2026_
This guide explains how to register your application with Discord and obtain your OAuth 2 credentials and bot token. You'll need these credentials to activate the Discord integration and access Discord via Unified.to's unified API.
## Register your application in Discord
1. Sign into Discord and navigate to the [Developer Portal](https://discord.com/developers/applications).
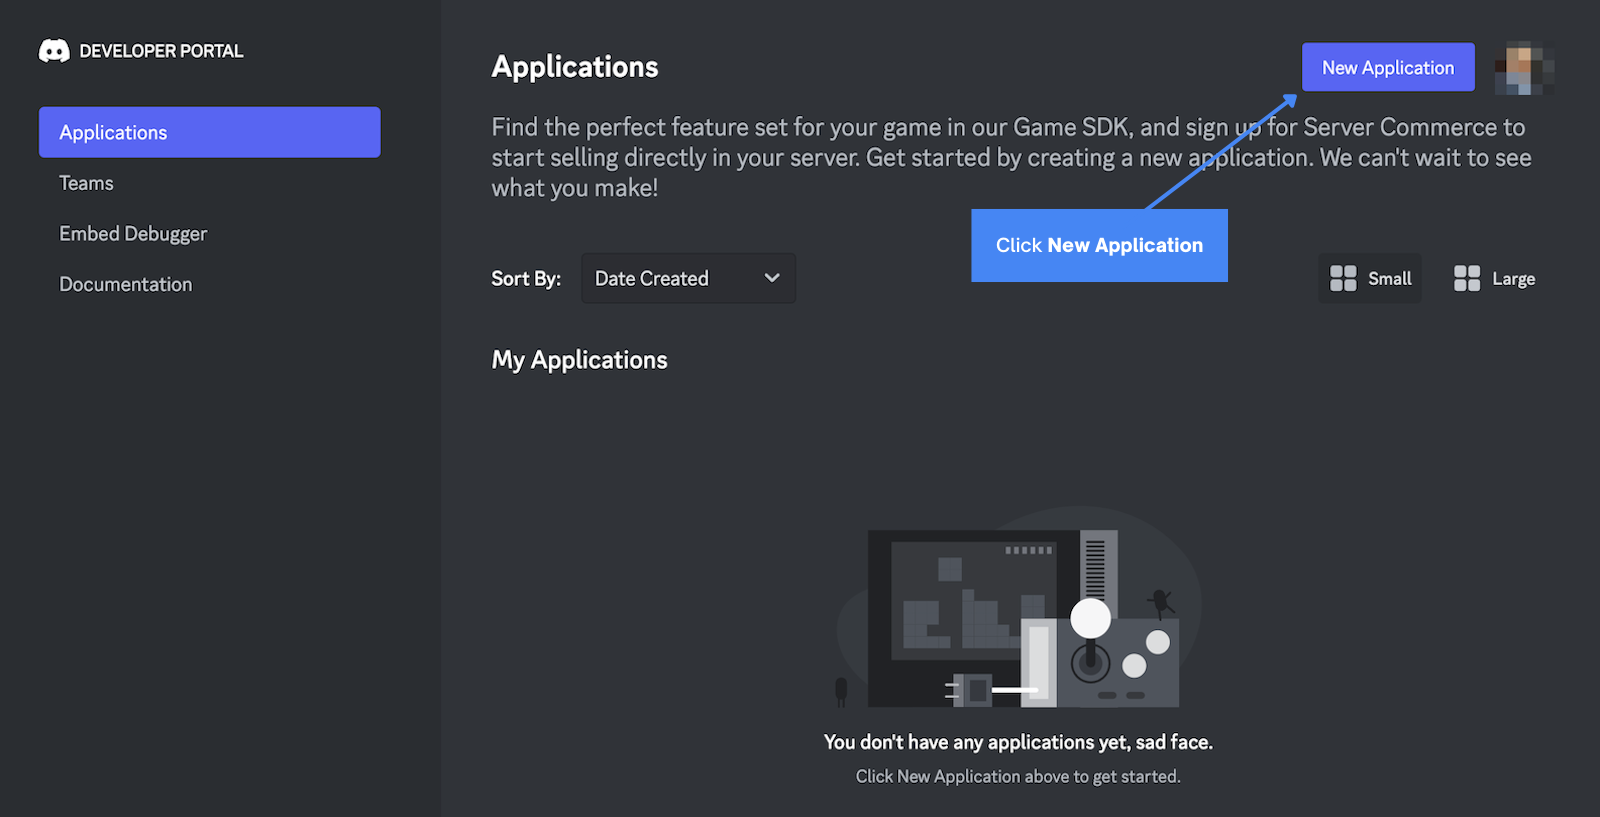
2. Click **New Application** at the top right of the page.
3. In the **Create an application** window:
- Enter a name for your application
- Check the box to agree to Discord's terms of service and developer policy
- Click **Create**
Discord will create a new application and take you to the **General Information** tab for your application's page. Think of this application as the container for both your OAuth 2 credentials and your bot user.
## Get your Discord OAuth 2 credentials
Once your application is registered, you can obtain its OAuth 2 credentials. These authenticate your app and let it access the Discord API through Unified.to.
1. On your application's page, select the **OAuth2** tab from the left sidebar.
2. Under **Client Information**, make note of your **Client ID** and **Client Secret** — you'll need these later.
3. Under **Redirects**, click **Add Redirect**.
4. Enter `https://api.unified.to/oauth/code` as the redirect URL. (If your workspace is hosted in the EU or AU region, use the corresponding regional redirect URL.)
5. Click **Save Changes** at the bottom of the page.
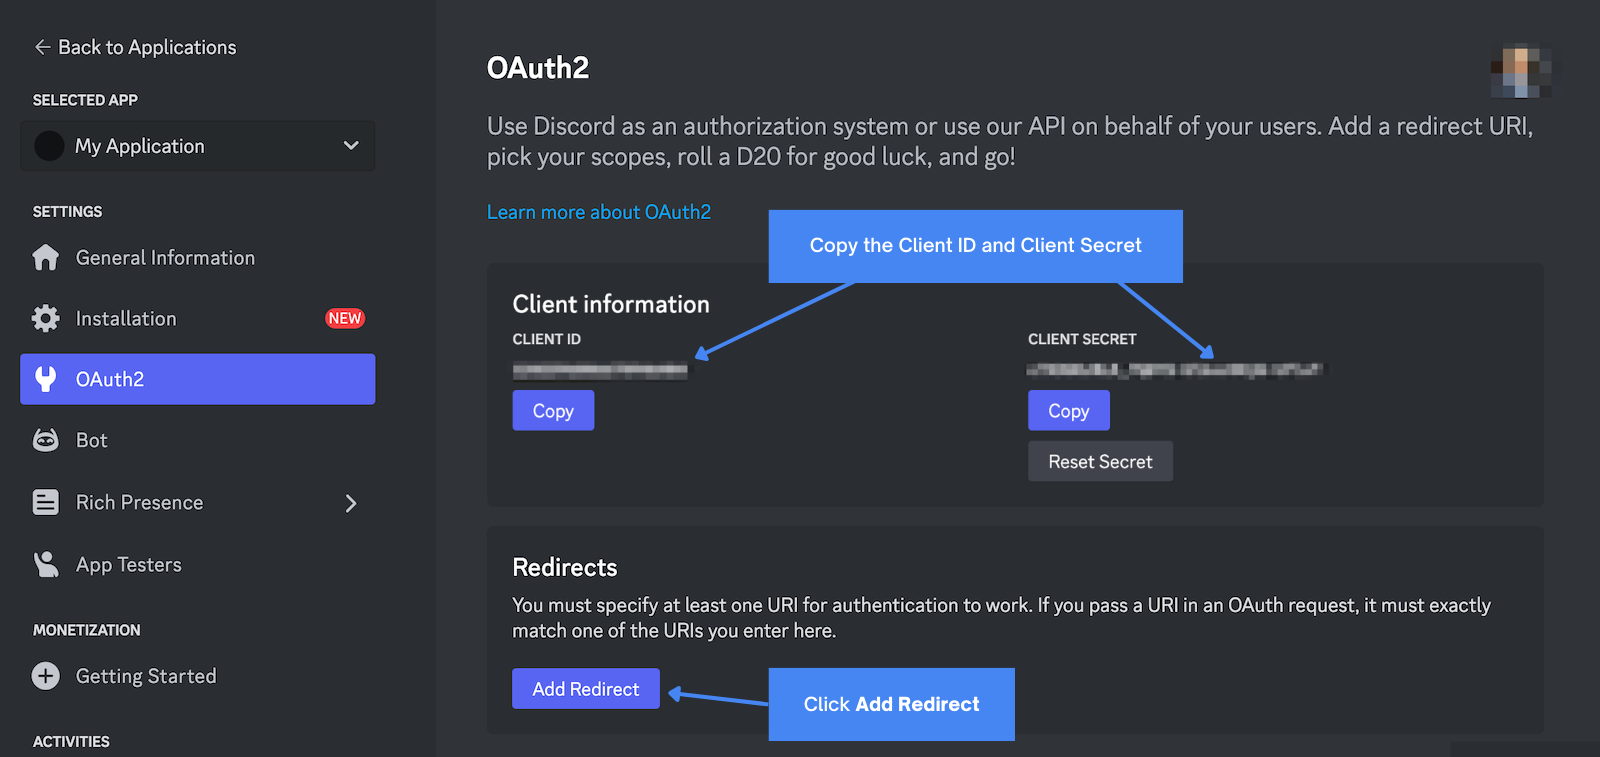
> **Keep these private.** Never commit your Client Secret or Bot Token to source control, share them in screenshots, or include them in client-side code. Store them in environment variables or a secrets manager.
## Retrieve your Discord bot token
The Discord integration also requires a **Bot Token** to access the Discord API.
1. Select **Bot** from the left sidebar.
2. Under **Build-A-Bot > Token**, copy the **Bot Token**.
3. If no token is shown (for a new bot), click **Reset Token** to generate one, confirm in the dialog, and copy the new token that appears.
> **Note:** Resetting the token invalidates the previous one. If a bot is already running in production with the existing token, resetting will break those connections until you update them. You also won't be able to view a token again after it's generated, so store it securely right away.

## Configure bot permissions and intents
Enable the permissions and privileged gateway intents that match the data your integration accesses. Enable only what you need — Unified.to maps each capability to the minimum required access. The Discord integration supports messages and channels (via the Messaging API) and members (via the HRIS API):
- **To list channels** (Messaging Channel `list`/`get`): no privileged intent is required. The bot needs the standard **View Channels** permission in the server.
- **To read or write messages** (Messaging Message `list`/`create`/`update`/`get`/`remove`): enable **Message Content Intent** under **Privileged Gateway Intents**. Note that Message Content Intent is gated by Discord and may require verification once your bot is in a larger number of servers.

- **To read members** (HRIS Employee `list`/`get`, which maps Discord guild members to the unified employee object — a Unified.to abstraction, not a Discord-native concept): enable **Server Members Intent** under **Privileged Gateway Intents**. (Discord's documentation refers to this as the Guild Members Intent; the developer portal UI labels it "Server Members Intent.")
After enabling the intents you need, click **Save Changes** at the bottom of the page. Granting intents or permissions you don't use increases risk and can complicate Discord's review process once your bot reaches a larger number of servers.
## Activate Discord in Unified.to
1. Navigate to [Integrations](https://app.unified.to/integrations) in Unified.to.
2. Find and click on the **Discord** integration card.
3. On the integration details page, select **Your OAuth 2 credentials**, then enter your:
- Discord **Client ID**
- Discord **Client Secret**
- Discord **Bot Token**
4. Click **Activate** to save your changes and enable the Discord integration.

You can now use the Unified API to build new experiences with Discord.
→ [Start your 30-day free trial](https://app.unified.to/login)
→ [Book a demo](https://calendly.com/d/cph9-g8n-jzg/connect-with-unified)
## How to get your ELMO client ID and client secret: Step-by-step guide
URL: https://docs.unified.to/guides/how_to_get_your_elmo_client_id_and_client_secret_step_by_step_guide
# How to get your ELMO client ID and client secret: Step-by-step guide
------
_December 11, 2023_
ELMO supports authentication with client ID and client secret. To connect, you'll need to generate secure client ID and client secret from your account settings.
This short guide shows you how to generate one, whether you're testing in your sandbox or helping customers connect their ELMO account.
**Authentication Methods**
ELMO uses three main credentials for API authentication:
- **Client ID:** A unique identifier for your application.
- **Client Secret:** A secure key used in conjunction with the Client ID.
**Step-by-Step Setup**
1. **Request Access:** Contact your **ELMO Account Manager** to confirm your organization has API access enabled.
2. **Assign Permissions:**
- Log in to the **ELMO Administration portal**.
- Navigate to **Security Profiles** and add a profile with the **API Access Manager**role.
- Assign this profile to the specific user who will manage the integration.
3. **Generate Credentials:**
- Have a Company Admin access the **API Management console**.
- Generate and securely record the **Client ID** and **Client Secret**.
You've now created your ELMO client ID and client secret - just one of many if you support multiple vendors. Each one adds new auth flows, schema differences, and ongoing maintenance.
Unified.to removes that overhead with unified objects that work across 475 APIs. Map once, launch everywhere. Your team ships features instead of debugging vendor-specific edge cases.
[Book a demo](https://calendly.com/d/cph9-g8n-jzg/connect-with-unified) to see how much faster you can launch customer integrations with Unified.to.
## How to get your Gainsight Client ID, Client Secret and Gainsight API Domain: Step-by-step guide
URL: https://docs.unified.to/guides/how_to_get_your_gainsight_client_id_client_secret_and_gainsight_api_domain_step_by_step_guide
# How to get your Gainsight Client ID, Client Secret and Gainsight API Domain: Step-by-step guide
------
_November 15, 2025_
Gainsight supports authentication with Client ID, Client Secret and Gainsight API Domain. To connect, you'll need to generate secure Client ID, Client Secret and Gainsight API Domain from your account settings.
This short guide shows you how to generate one, whether you're testing in your sandbox or helping customers connect their Gainsight account.
To generate the M2M OAuth key:
1. Navigate to **Administration > Connectors 2.0**.
2. Click **Create Connection**. The Create Connection dialog appears.
3. From the **Connector** dropdown list, select **Gainsight API**.
4. In the **Name of the connection** field, enter the name of the connection.
5. In the **Authentication Type**, select the OAuth.
6. Click **Generate OAuth Credentials**.
New OAuth API Key and OAuth API Secret keys are generated, which you can copy and use for authentication in all of the REST API requests to Gainsight.
**Note**:
- M2M OAuth can be created and managed only by super admins.
- M2M OAuth cannot be used for Event APIs.
- Two different M2M connections cannot have the same name for a single connection.
Generating a Gainsight Client ID, Client Secret and Gainsight API Domain is the first step. The harder part is building pipelines that stay reliable as customers add more systems.
Unified.to gives you options: deliver data via API, streaming webhooks, database sync, or even as MCP tools for AI agents. One integration layer that adapts to your architecture instead of forcing tradeoffs.
[Book a demo](https://calendly.com/d/cph9-g8n-jzg/connect-with-unified) to see how we simplify integration delivery across 475 integrations and 29 categories.
## How to get your Greenhouse API Key and Job board token: Step-by-step guide
URL: https://docs.unified.to/guides/how_to_get_your_greenhouse_api_key_and_job_board_token_step_by_step_guide
# How to get your Greenhouse API Key and Job board token: Step-by-step guide
------
_April 24, 2023_
Developers connecting to Greenhouse will need an API Key and Job board token for authentication.
Here's how to generate, configure, and copy your Greenhouse API Key and Job board token so you can use it in your integration or share steps with your customers.
1. To create a Greenhouse "Harvest" API key, click the Configure icon on your Greenhouse navigation bar and select "_Dev Center_" on the left.
1. Click "_API Credential Management_".
1. Click "_Create New API Key_", and select "_Harvest_" for the API Type.
1. Click "_Manage Permissions_".
2. Copy your Harvest API key to a secure location then click _"I have stored the API key"_.
3. Set Jobs, Job Posts, and Candidates, Applications, Scorecards permissions.
4. Click Save
5. Optionally, you can specify the job board token for your organization. Go to the "_Configure Job Boards_" page. (Configure gear icon > Job Boards & Posts)
6. Find and edit the job board. (Ellipsis icon > Edit Board Settings)
1. On the _Edit Your Job Board_ page, find the _URL_ section. Copy this value as this is the token.

Getting your Greenhouse API Key and Job board token is the first step. The bigger challenge is supporting dozens of vendors - each with unique auth flows, schemas, and maintenance requirements.
Unified.to is a real-time integration platform built to replace that work. Instead of building and maintaining 1435 custom connectors, you get one secure, normalized API layer across 37 SaaS tools.
On top of that, our usage-based pricing scales cleanly with your product. No per-connection fees, no setup charges, and no lock-in, just infrastructure economics that grow with you.
[Book a demo](https://calendly.com/d/cph9-g8n-jzg/connect-with-unified) to discover how predictable integration costs should be.
## How to get your Helpscout API Key: Step-by-step guide
URL: https://docs.unified.to/guides/how_to_get_your_helpscout_api_key_step_by_step_guide
# How to get your Helpscout API Key: Step-by-step guide
------
_June 8, 2024_
Developers connecting to Helpscout will need an API Key for authentication.
Here's how to generate, configure, and copy your Helpscout API Key so you can use it in your integration or share steps with your customers.
To generate, view, or regenerate the API key, click the "person" icon on the top right of your account, next to the search, then click **Your Profile**.
Next, click the **Authentication** link in the menu on the left and select **API Keys** tab
**Note:** If you don't see an API key in your profile, that's because you haven't been granted the "Docs: Create new, edit settings & Collections" permission by the Account Owner or an Administrator.
Generating a Helpscout API Key is the first step. The harder part is building pipelines that stay reliable as customers add more systems.
Unified.to gives you options: deliver data via API, streaming webhooks, database sync, or even as MCP tools for AI agents. One integration layer that adapts to your architecture instead of forcing tradeoffs.
[Book a demo](https://calendly.com/d/cph9-g8n-jzg/connect-with-unified) to see how we simplify integration delivery across 475 integrations and 29 categories.
## How to get your HiBob Service User ID and Service User Token: Step-by-step guide
URL: https://docs.unified.to/guides/how_to_get_your_hibob_service_user_id_and_service_user_token_step_by_step_guide
# How to get your HiBob Service User ID and Service User Token: Step-by-step guide
------
_April 24, 2023_
If you're building an integration with HiBob, you'll need an Service User ID and Service User Token from your customer's HiBob account to authenticate requests.
This guide shows you (or your customers) how to generate one from HiBob's account settings.
## **Step 1: Create a service user**
Service Users are created and managed in the Service Users section in Bob.
1. **If you have direct access to Bob:** Go to the Service Users configuration page to create a new user and copy the ID and token. See [Manage service users](https://help.hibob.com/hc/en-us/articles/27875098648465-Manage-service-users).
2. **If you don't have direct access to Bob**: Ask a Bob Admin to generate the credentials for you.
You'll need this ID and token to authenticate your API requests.
## **Step 2: Creating a permission group**
By default, service users have no access permissions.
To assign them access:
1. Create a dedicated Permission Group.
2. Add the Service User to this group.
This group should include only the permissions required for the API operations the service user will perform.
- **If you have access to Bob:** [Create a service user permission group](https://help.hibob.com/hc/en-us/articles/29550415706897).
- **If not**: Ask a Bob Admin to create one and assign the user to it.
## **Step 3: Set permissions**
A new permission group does not have any permissions enabled by default.
**Notes:**
- **Ask Bob Admin** to help determine which permissions are required for this service user. To learn more, see [Manage service users](https://help.hibob.com/hc/en-us/articles/27875098648465).
- **Default employee data permissions**: To read basic employee data via the People search API, assign the Default Employee Fields permissions. This includes access to the "root," "about," "employment," and "work" categories. To learn more, see [Permissions for Default Employee Fields in People Search API](https://help.hibob.com/hc/en-us/articles/27875098648465#h_01JB9DYK9SZEJ7MF4DA7RHJE03).
Permissions are grouped into:
### **3.1 Features**
Grant access to Bob features you need to access via the API you plan to use with this service user. For example, if you want to access reports, you may need to activate some options in **Features > Reports**.
1. From the top right, click **Edit**.
2. Select the area of Bob you'd like to manage.
3. Check or uncheck the permissions this group should have.
### **3.2 People's data**
Grant access to people's data in each area of Bob for the API you plan to use with this service user.
1. From the top right, click **Edit**.
2. Select the area of Bob you'd like to manage.
3. Mark the checkbox(es) to enable or disable the permissions you'd like to give the service users in this group.
**'View', 'edit' and 'view history'**
To access Employee data via the API you need to grant basic view access to each category:
- **View all employees' [Category name] sections**
If you want to access history data (such as all the entries in the Lifecycle or Work table), you also need to grant the history access:
- **View all employees' [Category name] section histories**.
If you want to update data or access sensitive data that requires an extra layer of permissions, you need to grant the edit permission:
- **Edit all employees' [Category name] sections**
### **3.3 Access rights**
Grant access to the people whose data you want to access via the API you plan to use with this service user.
1. From the **People's data** tab, click **Access data for**.
2. Select whose data these permissions apply to (by default, the access rights are set to all employees using the **Lifecycle status equals Any** condition). Options are:
- **Everyone**: all employees marked as Employed in the system.
> **Note**: By default, the service user's permission group grants access to all **active** employees. To access inactive employees you need to use **select by condition** and remove the condition: **Lifecycle status equals Employed** from the permission group's **Access data for** settings.
- **Select people by condition**: click **Edit**, select conditions from the dropdown menu, then click **Apply**.
- **Select people by name**: click **Edit**, select specific employees, then click **Apply**.
To learn more, see [Create a service user permission group](https://help.hibob.com/hc/en-us/articles/29550415706897).
You've now created your HiBob Service User ID and Service User Token - just one of many if you support multiple vendors. Each one adds new auth flows, schema differences, and ongoing maintenance.
Unified.to removes that overhead with unified objects that work across 1412 APIs. Map once, launch everywhere. Your team ships features instead of debugging vendor-specific edge cases.
[Book a demo](https://calendly.com/d/cph9-g8n-jzg/connect-with-unified) to see how much faster you can launch customer integrations with Unified.to.
## How to get your HighLevel API Key and Location ID: Step-by-step guide
URL: https://docs.unified.to/guides/how_to_get_your_highlevel_api_key_and_location_id_step_by_step_guide
# How to get your HighLevel API Key and Location ID: Step-by-step guide
------
_April 24, 2023_
HighLevel supports authentication with API Key and Location ID. To connect, you'll need to generate secure API Key and Location ID from your account settings.
This short guide shows you how to generate one, whether you're testing in your sandbox or helping customers connect their HighLevel account.
This guide walks you through creating a **HighLevel token-based connection** using a **sub-account (location) API key** in Unified.
---
## ⚠️ Important Context
HighLevel operates on two levels:
- **Agency level (company)**
- **Sub-account level (location)** ✅ _(token-based authentication works only here)_
To access **CRM** and **HRIS** data, you must use a **sub-account (location)** API key.
> **Note:** HighLevel offers multiple ways to create connections. To avoid issues, follow every step in this guide carefully.
---
## ✅ Prerequisites
- You must have **Admin** or **Owner** access to the sub-account.
## 🔧 Step-by-Step Setup
### 1. Navigate to Your Sub-Account
Go to your **HighLevel sub-account (location)**.
### 2. Open Private Integrations
- Go to **Settings → Private Integrations** _(inside the sub-account)_
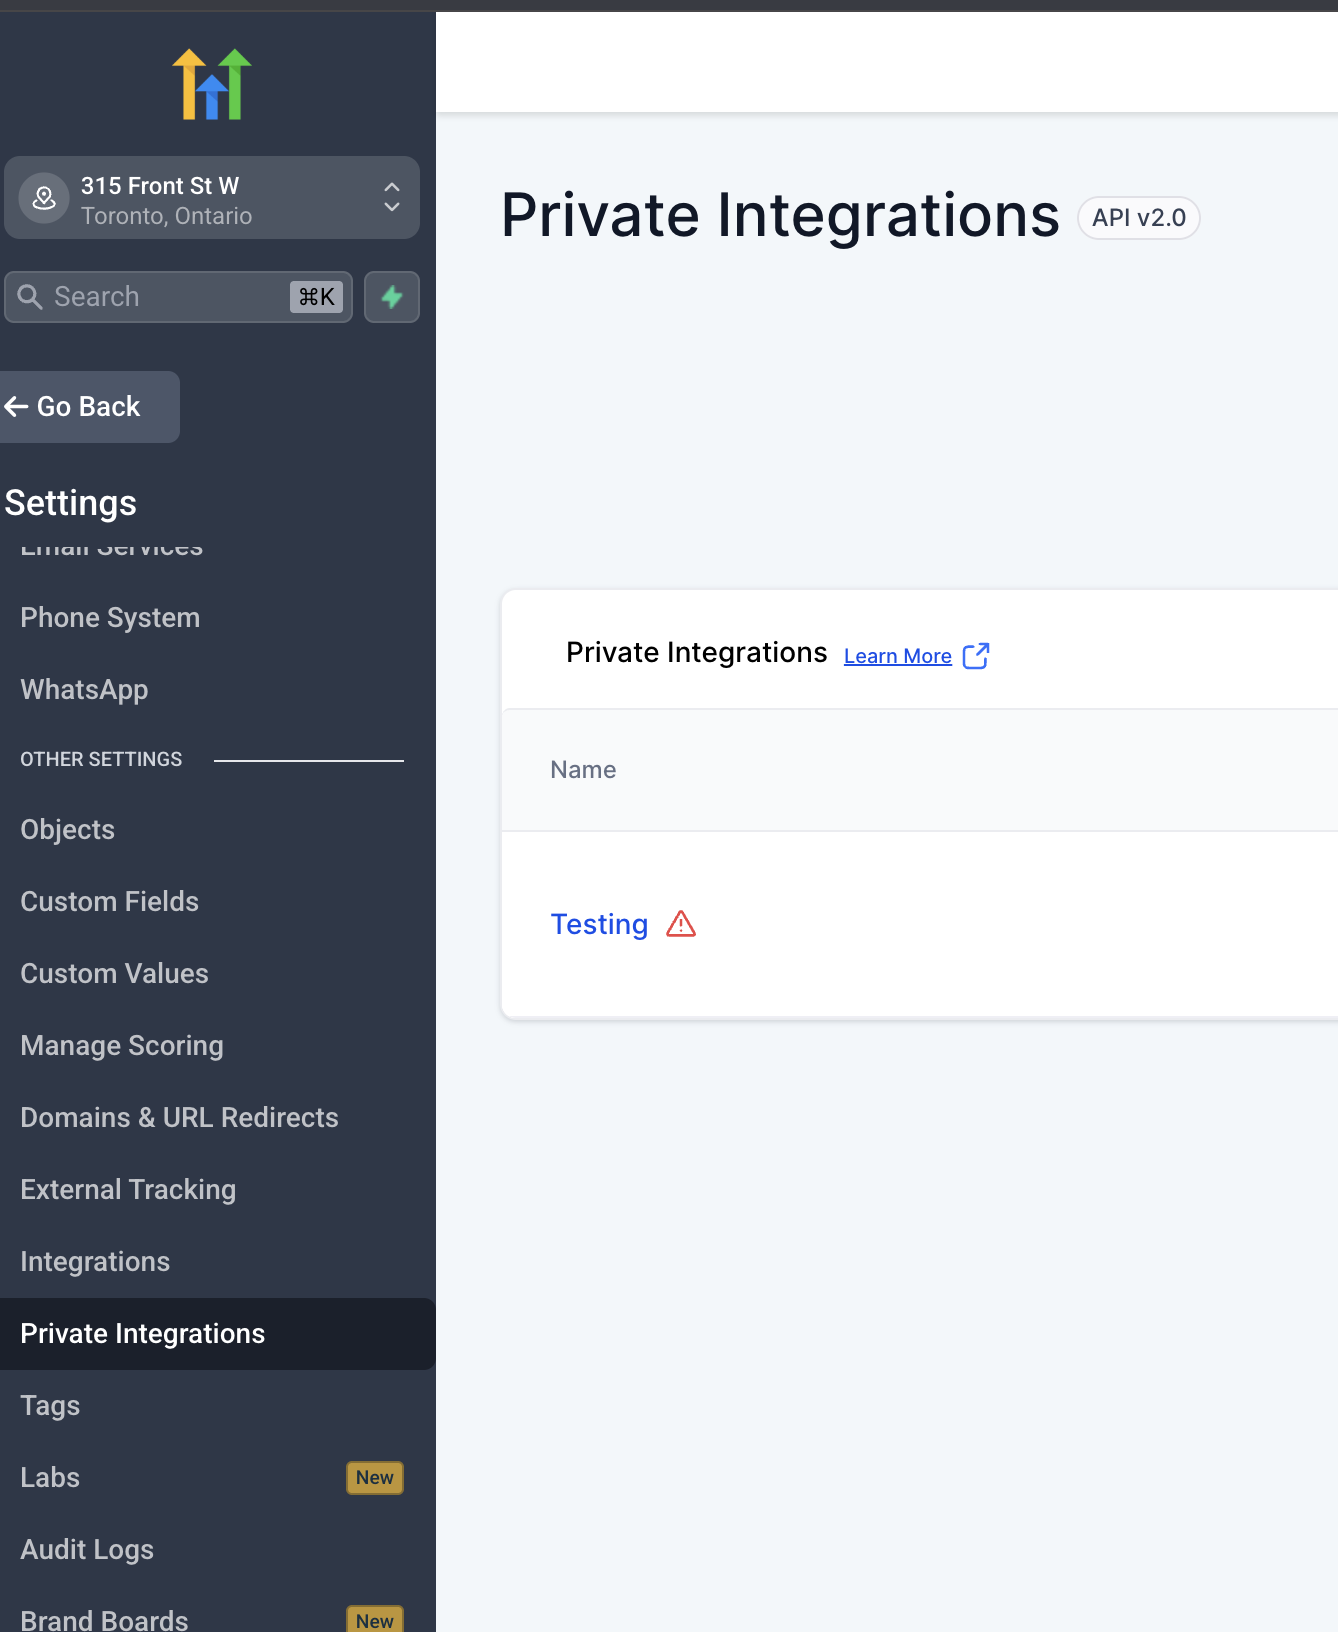
### 3. Create a New Integration
- Click **Create Integration**
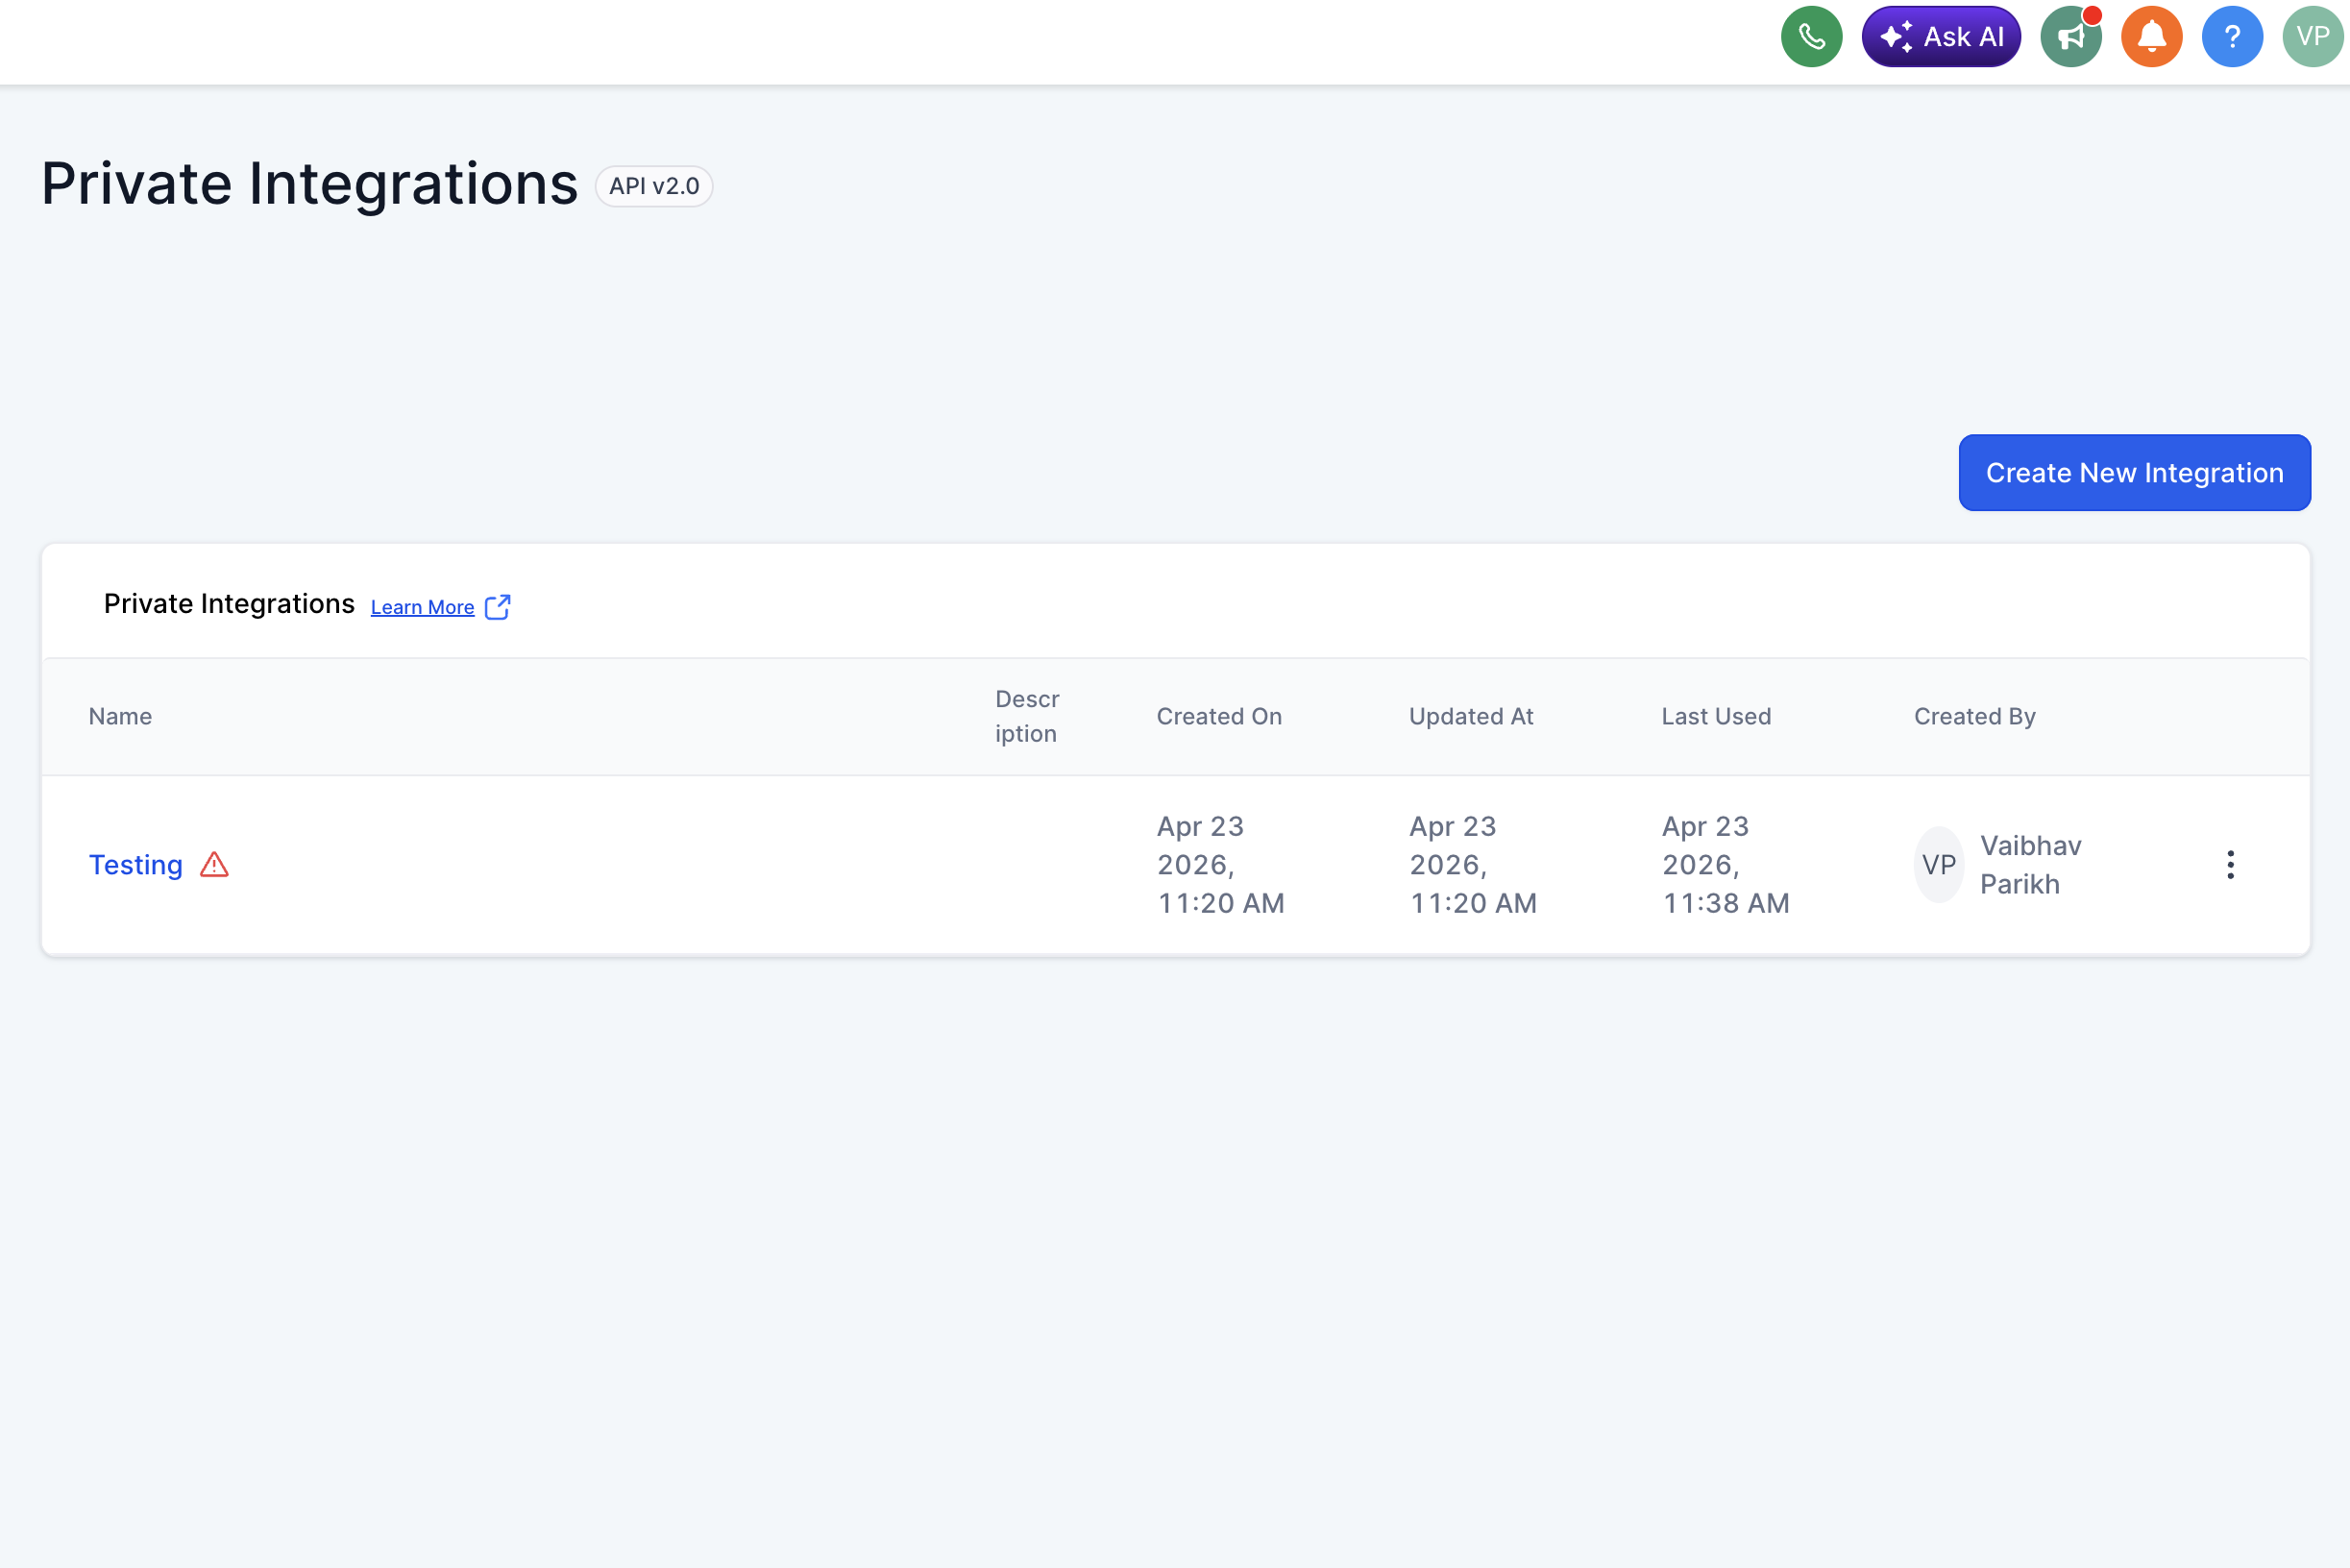
### 4. Name Your Integration
- Provide a clear name for your token (e.g., `Unified Integration`)
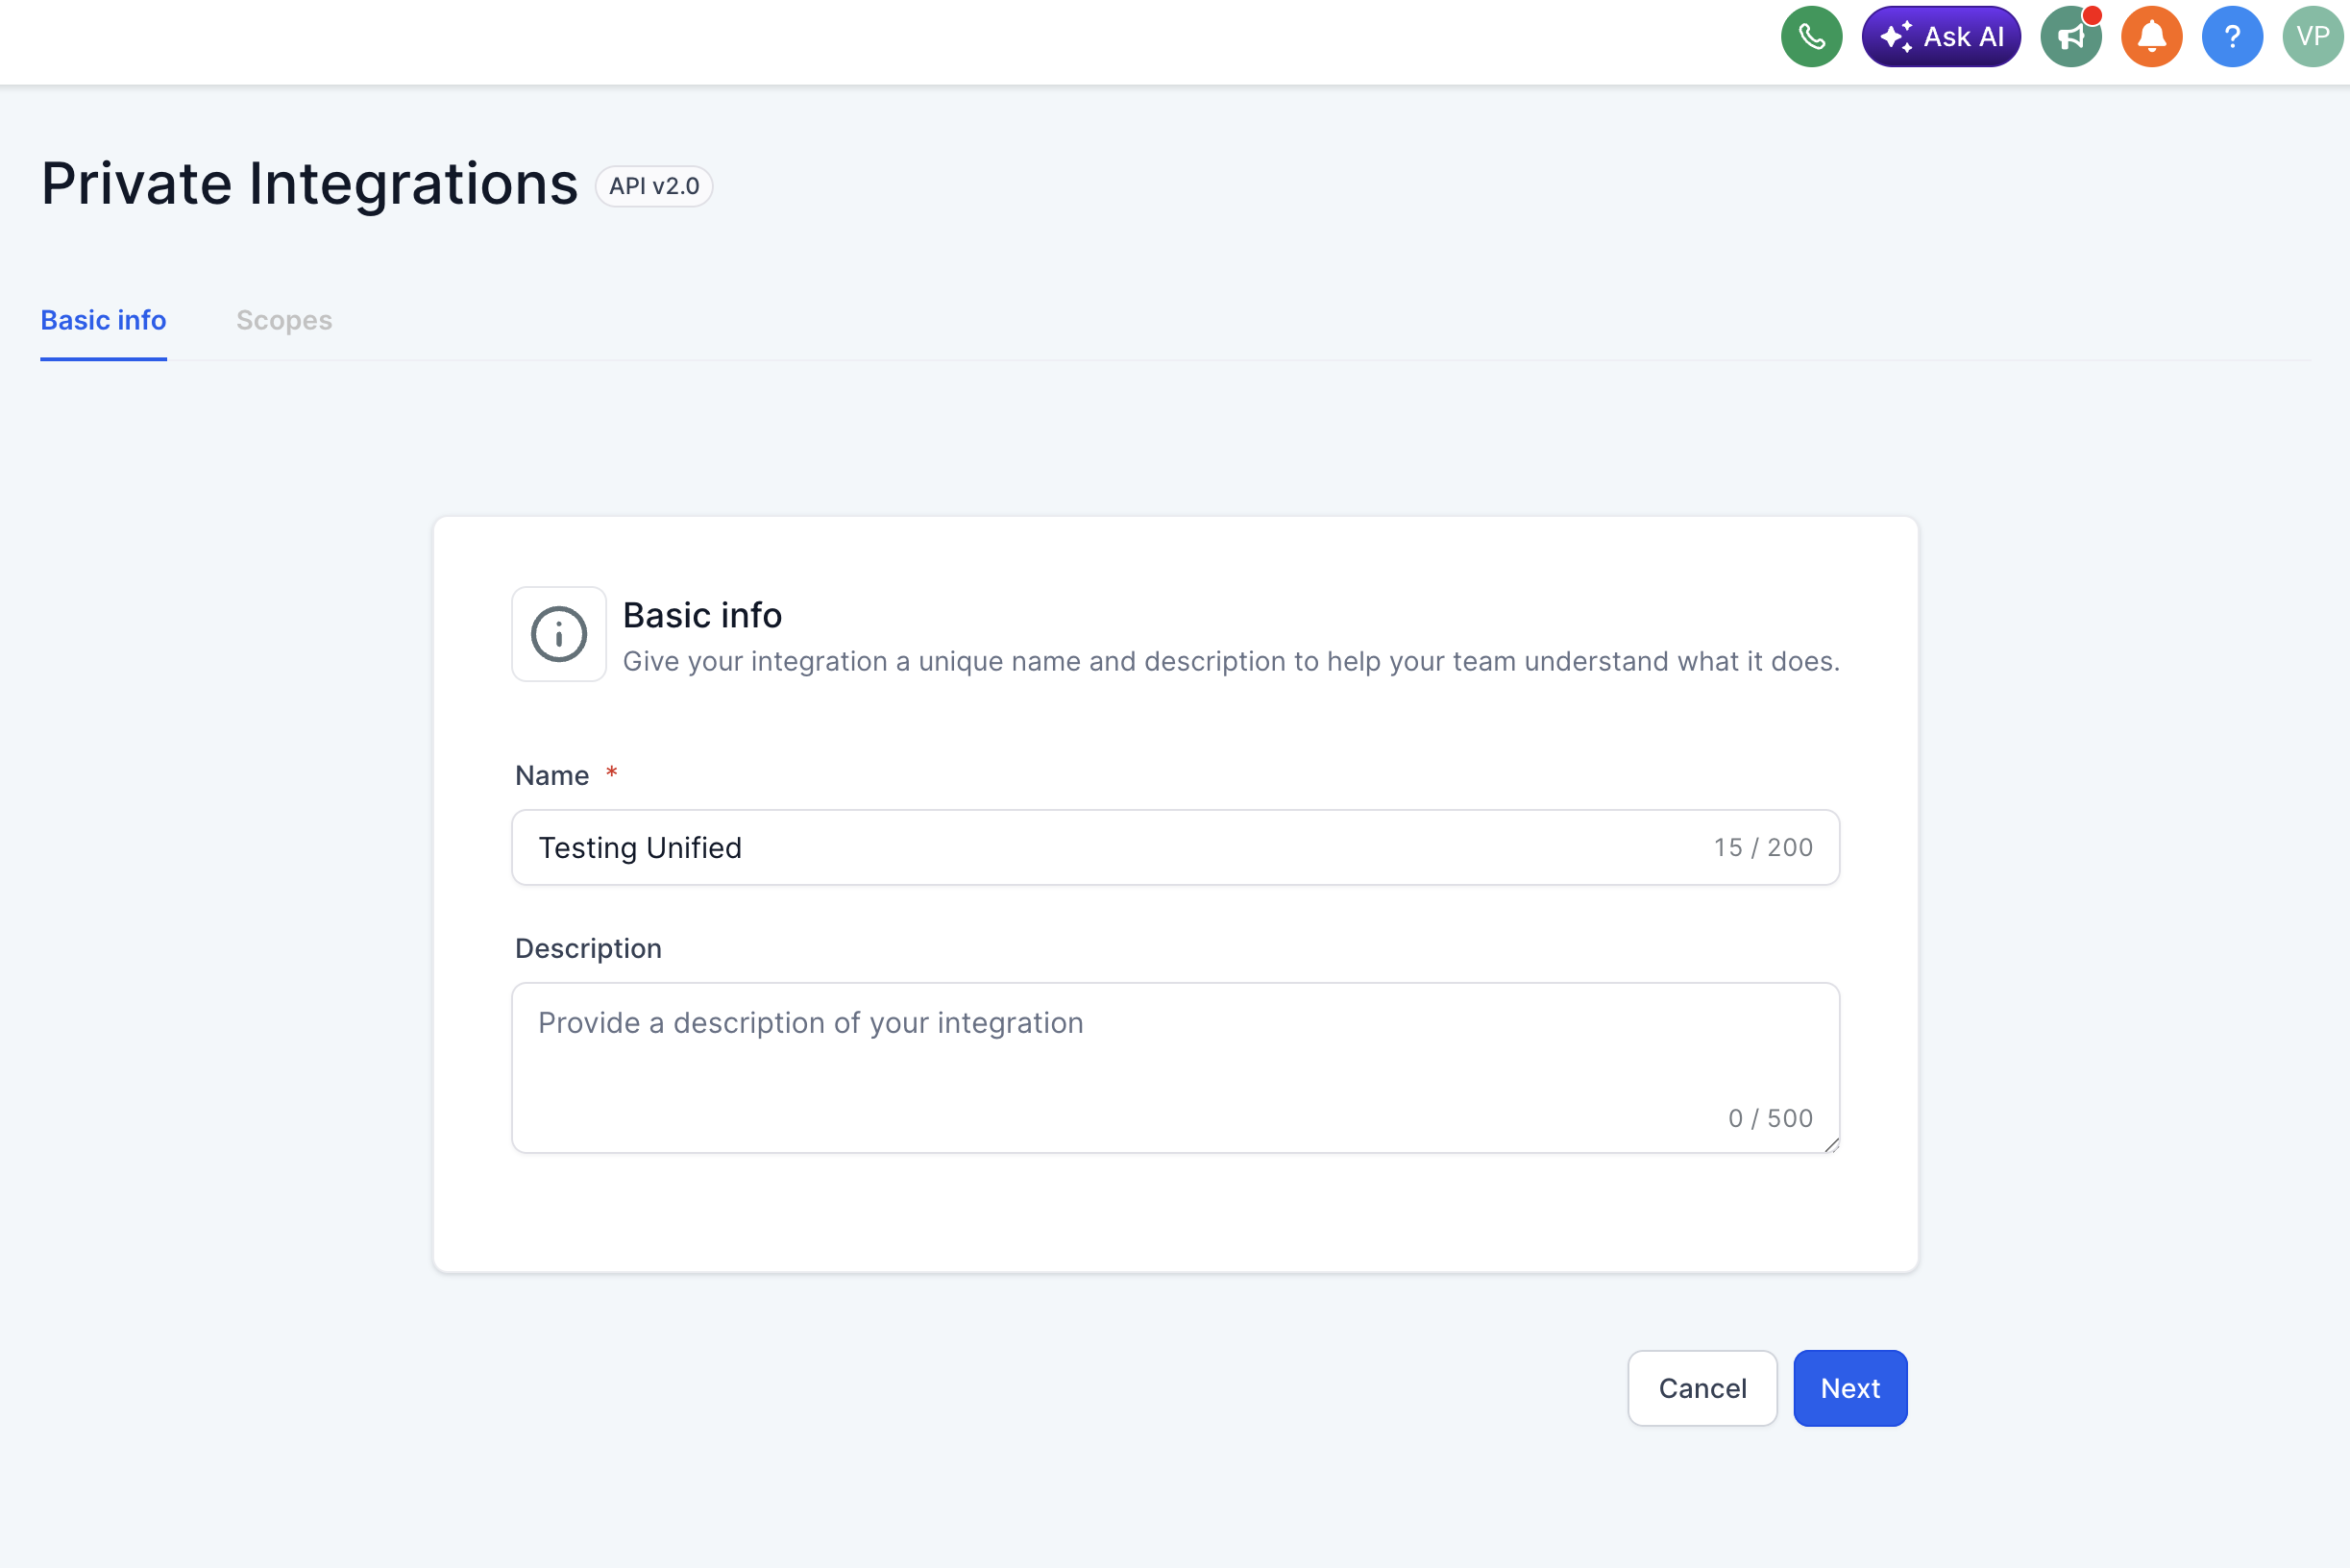
### 5. Select Required Scopes
Choose scopes based on your use case:
| Permission | Resource | HighLevel Scopes |
| ---------- | ------------- | ------------------------------------------------ |
| Read | CRM Contact | `contacts.readonly` |
| Write | CRM Contact | `contacts.write` |
| Read | CRM Company | `businesses.readonly`, `locations/tags.readonly` |
| Write | CRM Company | `businesses.write`, `locations/tags.write` |
| Read | CRM Deal | `opportunities.readonly` |
| Write | CRM Deal | `opportunities.write` |
| Read | HRIS Employee | `users.readonly` |
| Write | HRIS Employee | `users.write` |
| Read | CRM Lead | `contacts.readonly` |
| Write | CRM Lead | `contacts.write` |
| Read | CRM Pipeline | `opportunities.readonly` |
| Read | CRM Event | `forms.readonly`, `contacts.readonly` |
| Write | CRM Event | `contacts.write` |
**Reference:** [https://marketplace.gohighlevel.com/docs/Authorization/Scopes](https://marketplace.gohighlevel.com/docs/Authorization/Scopes)
### 6. Create and Confirm
- Click **Create**
- Then click **Confirm**
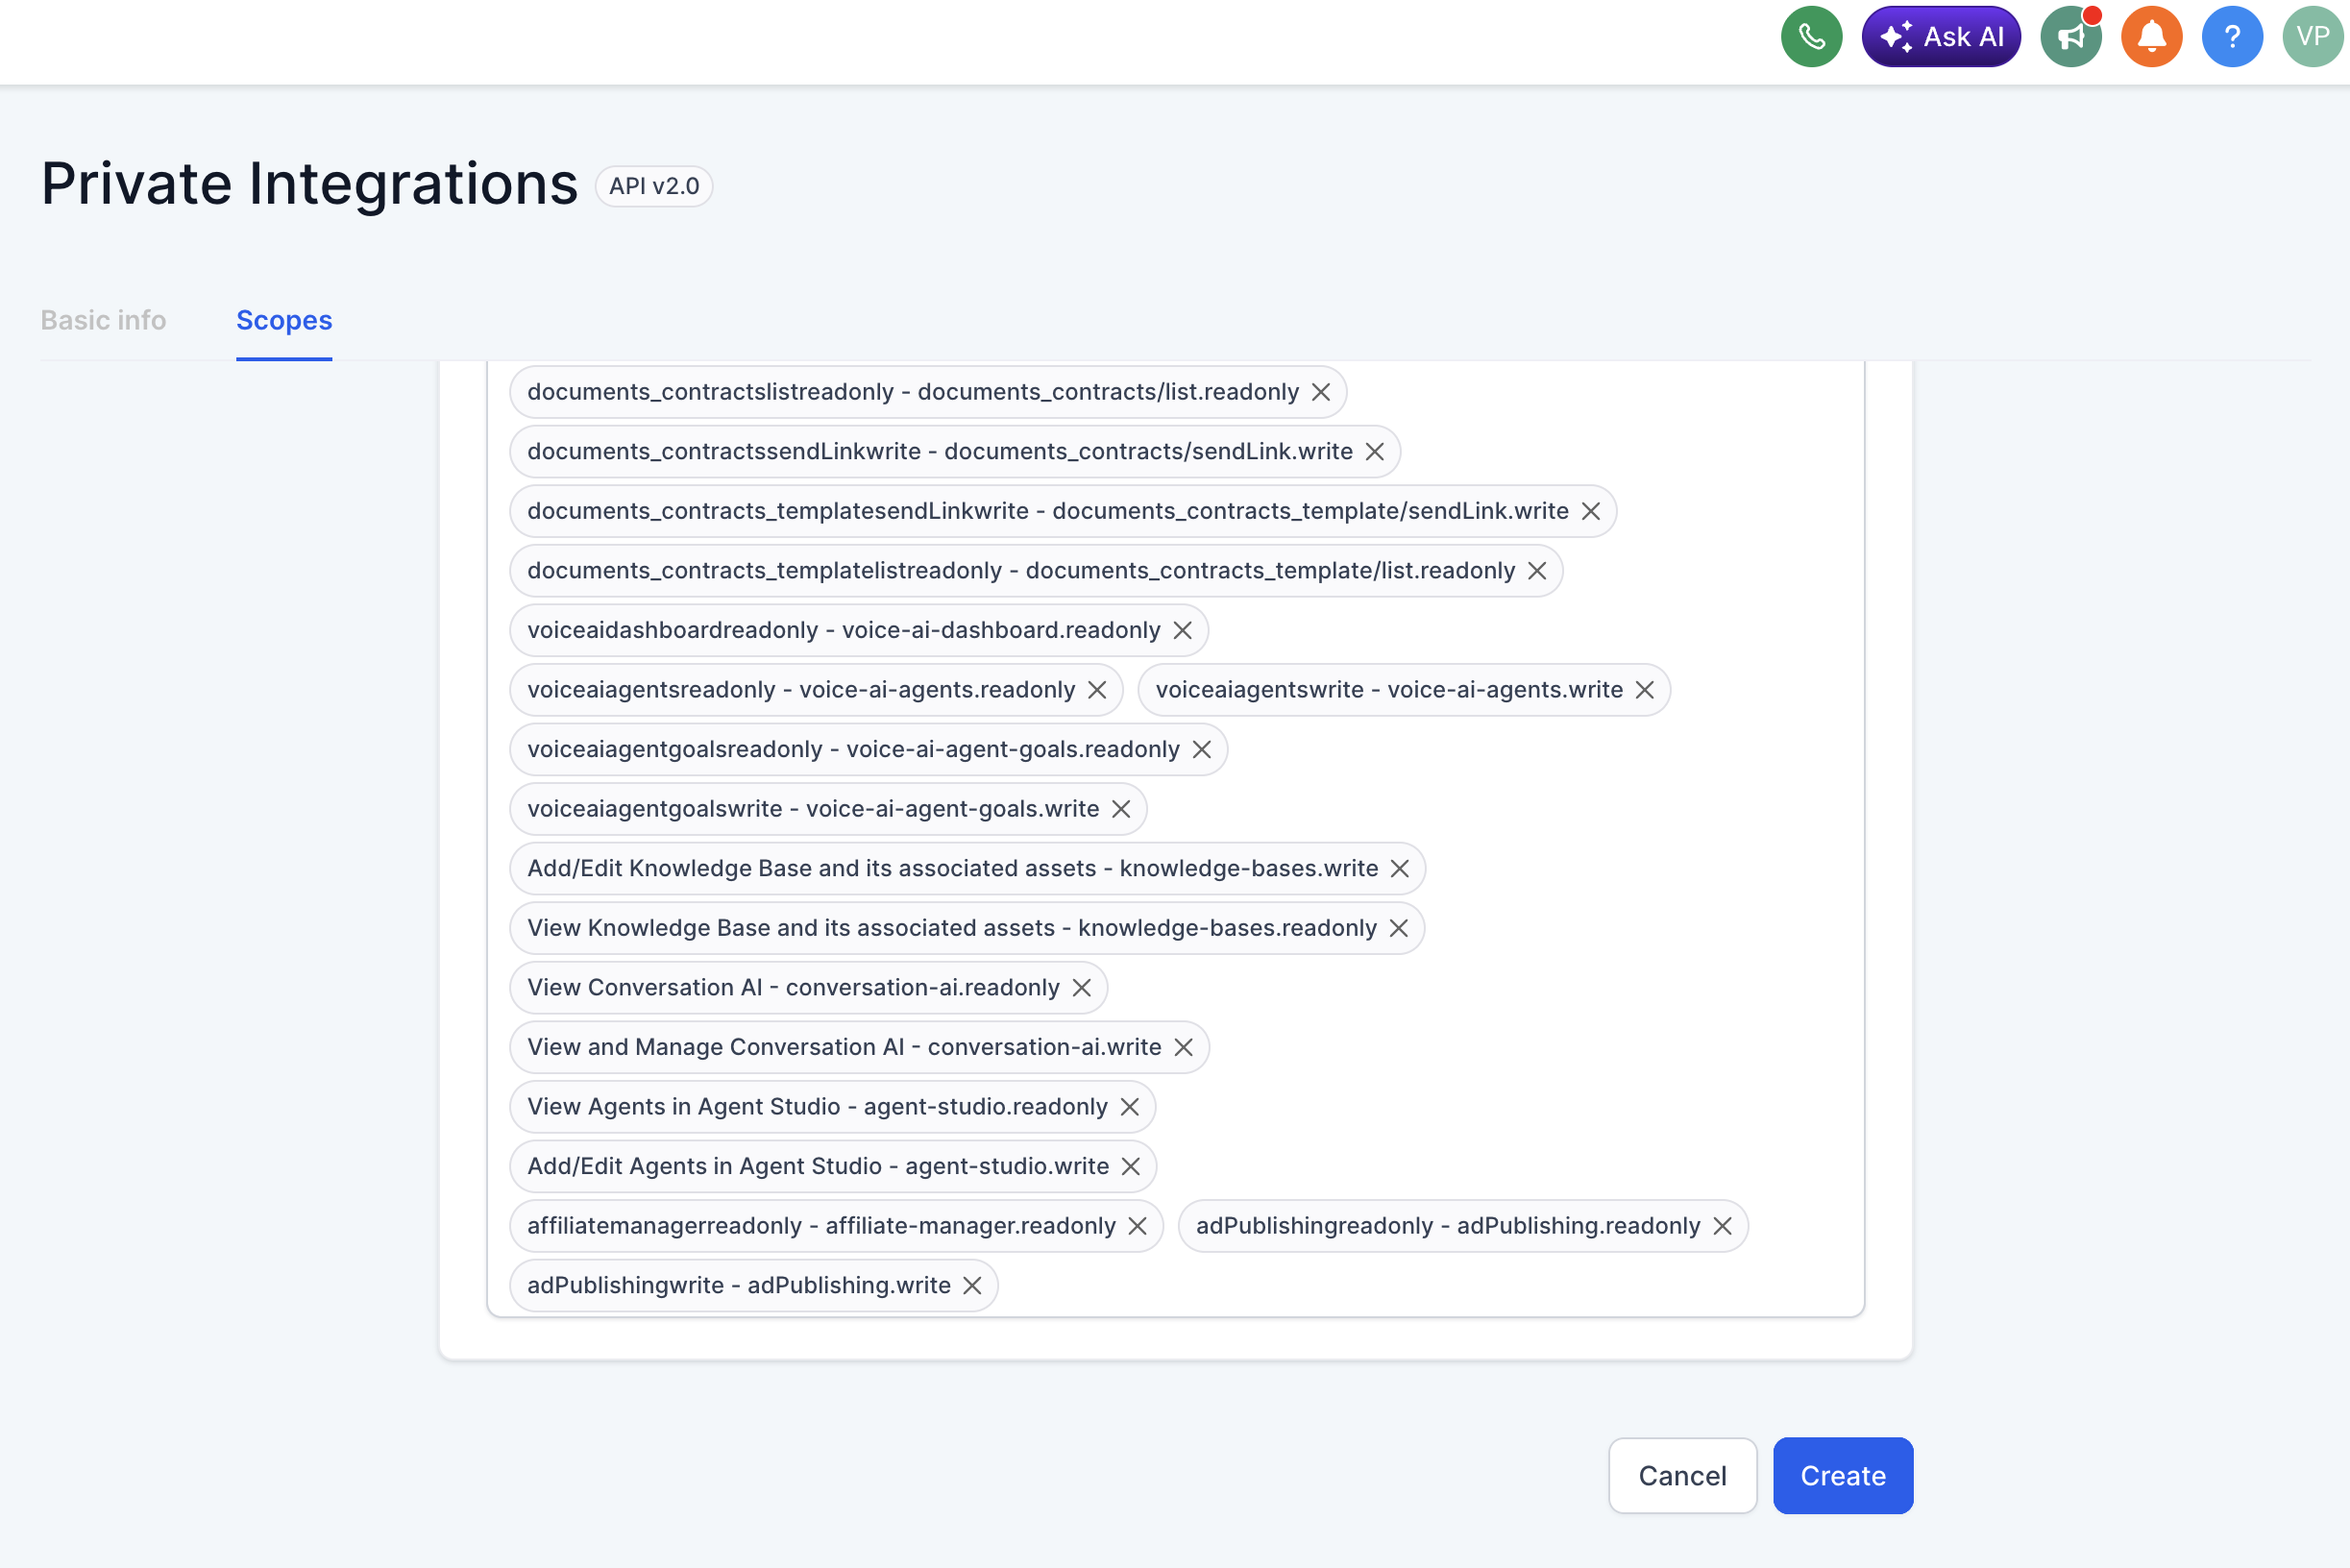
### 7. Copy API Token
- You will receive an **API Token**
- Store it securely (you won't be able to retrieve it later)
### 8. Get Location ID
To find your **Location ID**:
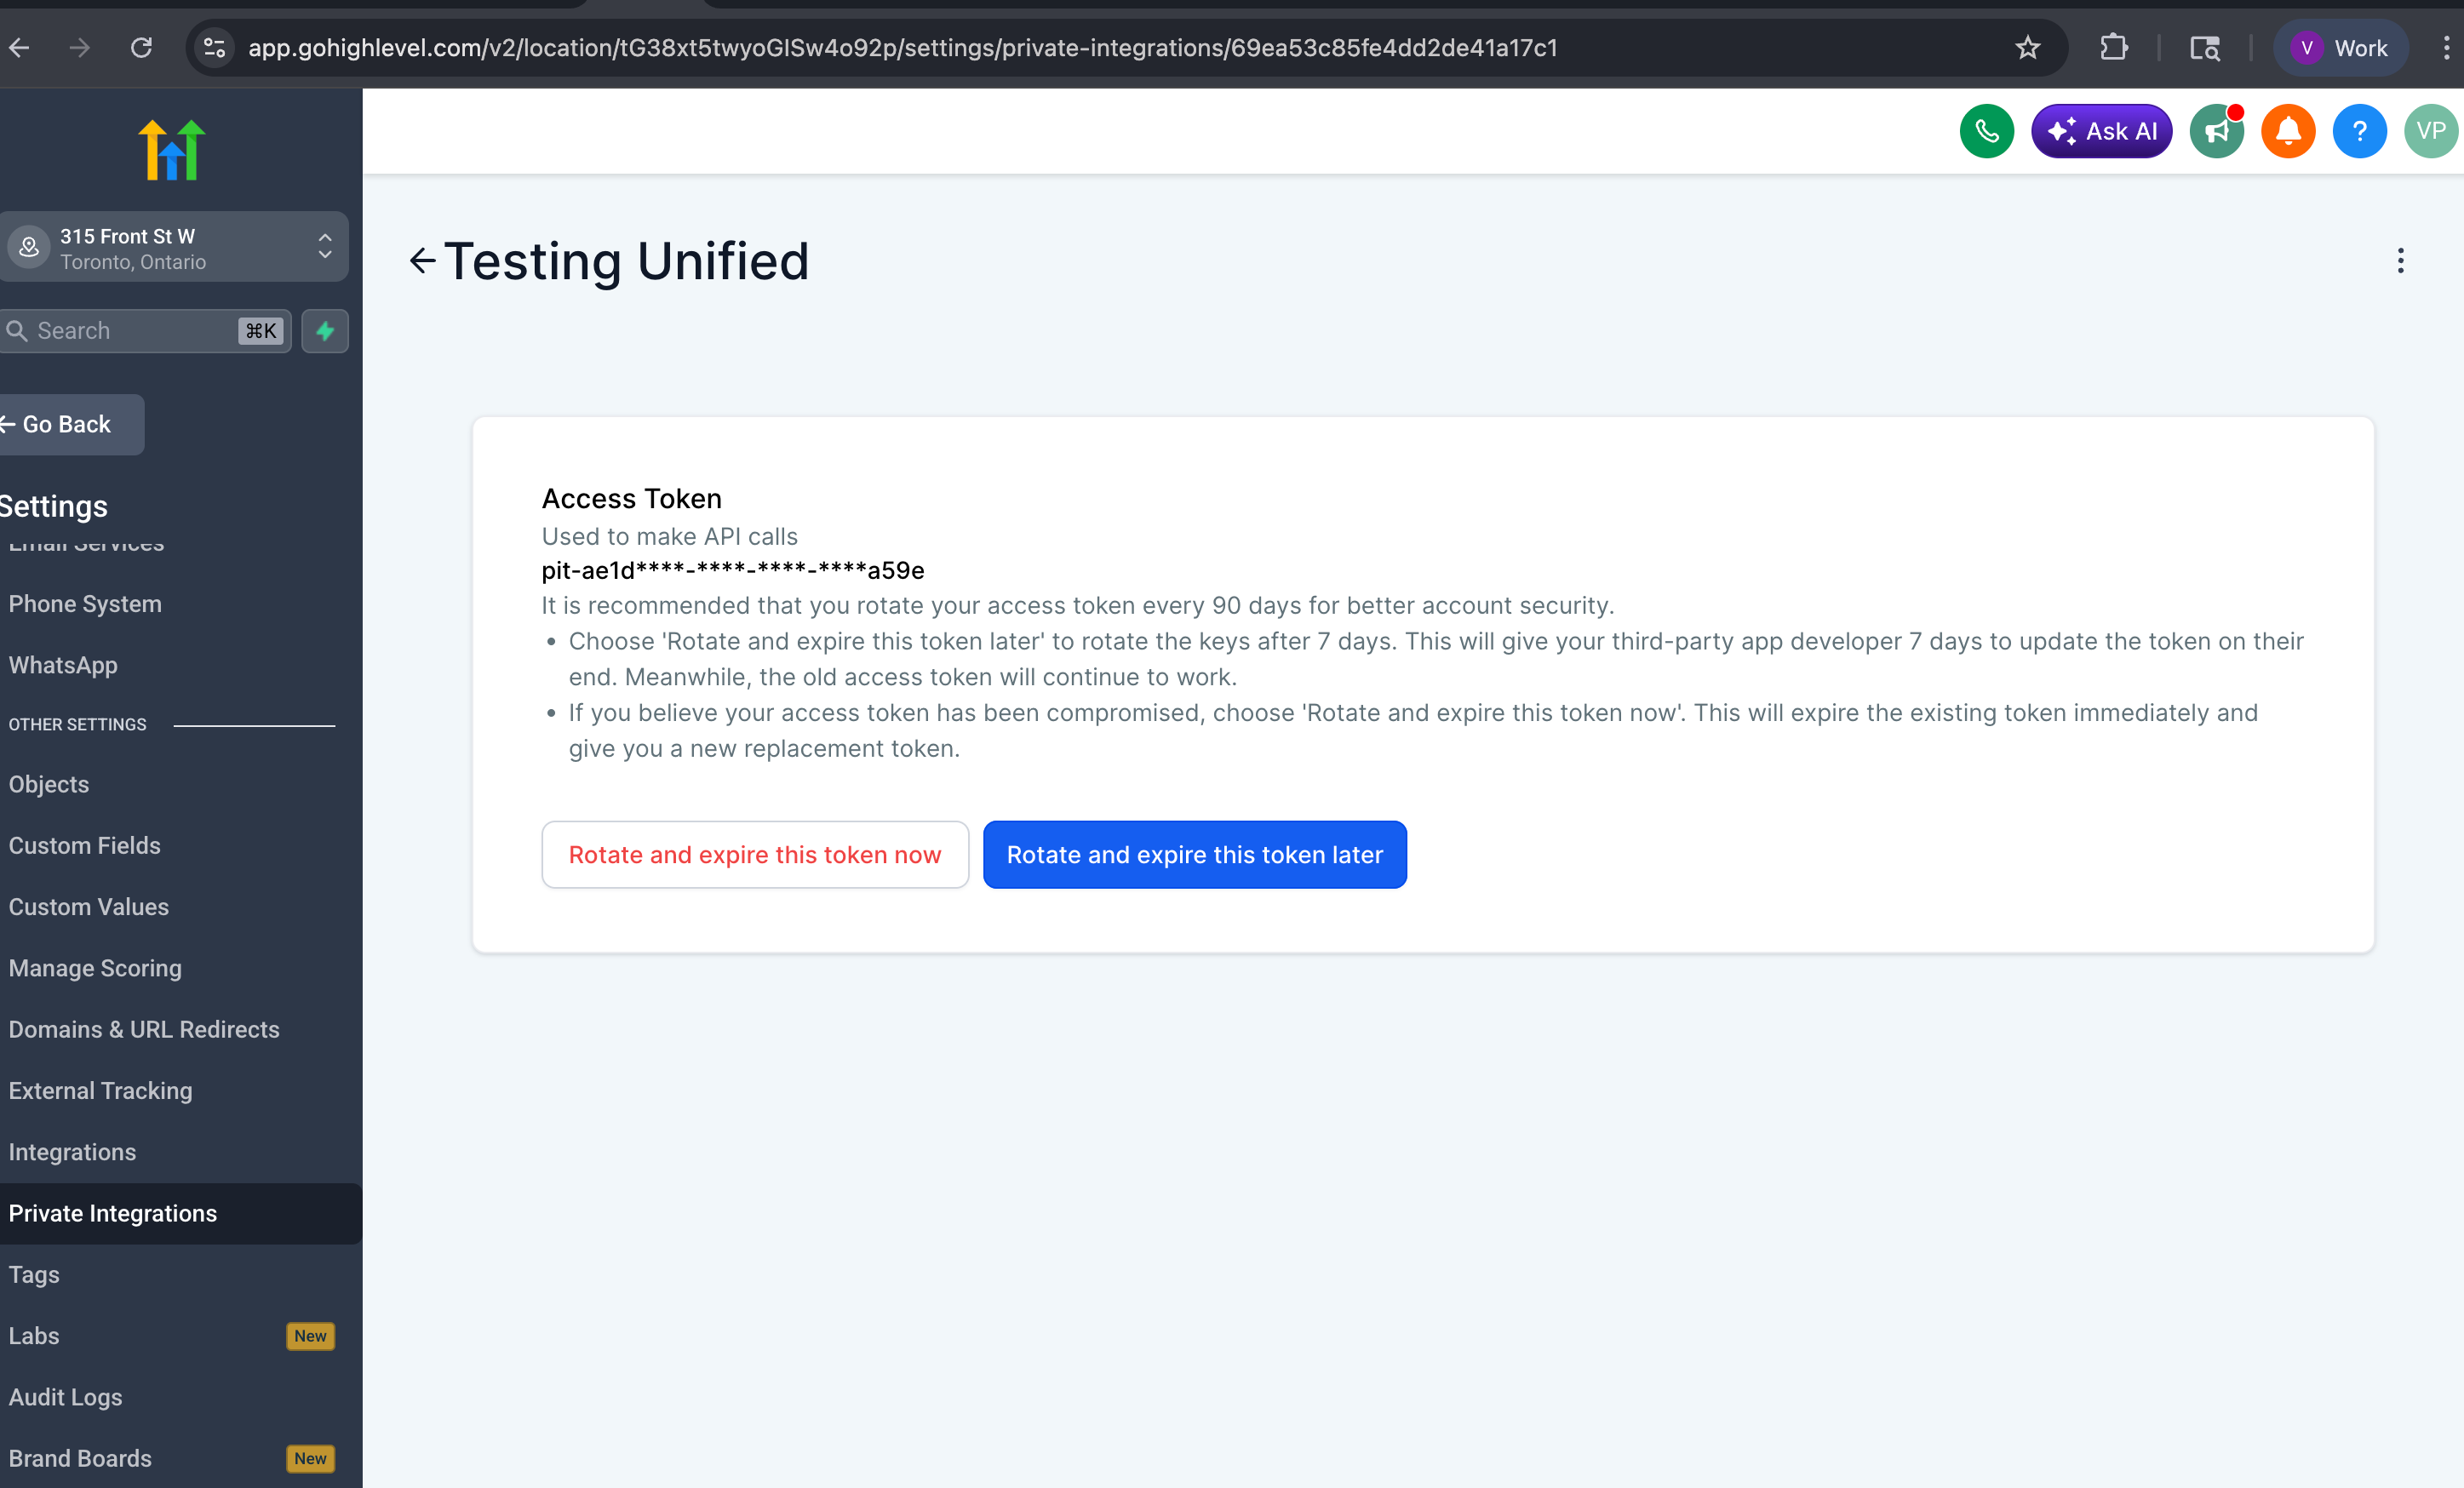
- Look at the URL of your sub-account
Example:
```plain text
https://app.gohighlevel.com/v2/location/tG38xt5twyoGISw4o92p/settings/private-integrations/...
```
- The value after `/location/` is your **Location ID**
→ `tG38xt5twyoGISw4o92p`
### 9. Connect in Unified
- Go to: [https://app.unified.to/integrations/highlevel](https://app.unified.to/integrations/highlevel)
- Select **API TOKEN**
- Click **Activate**
---
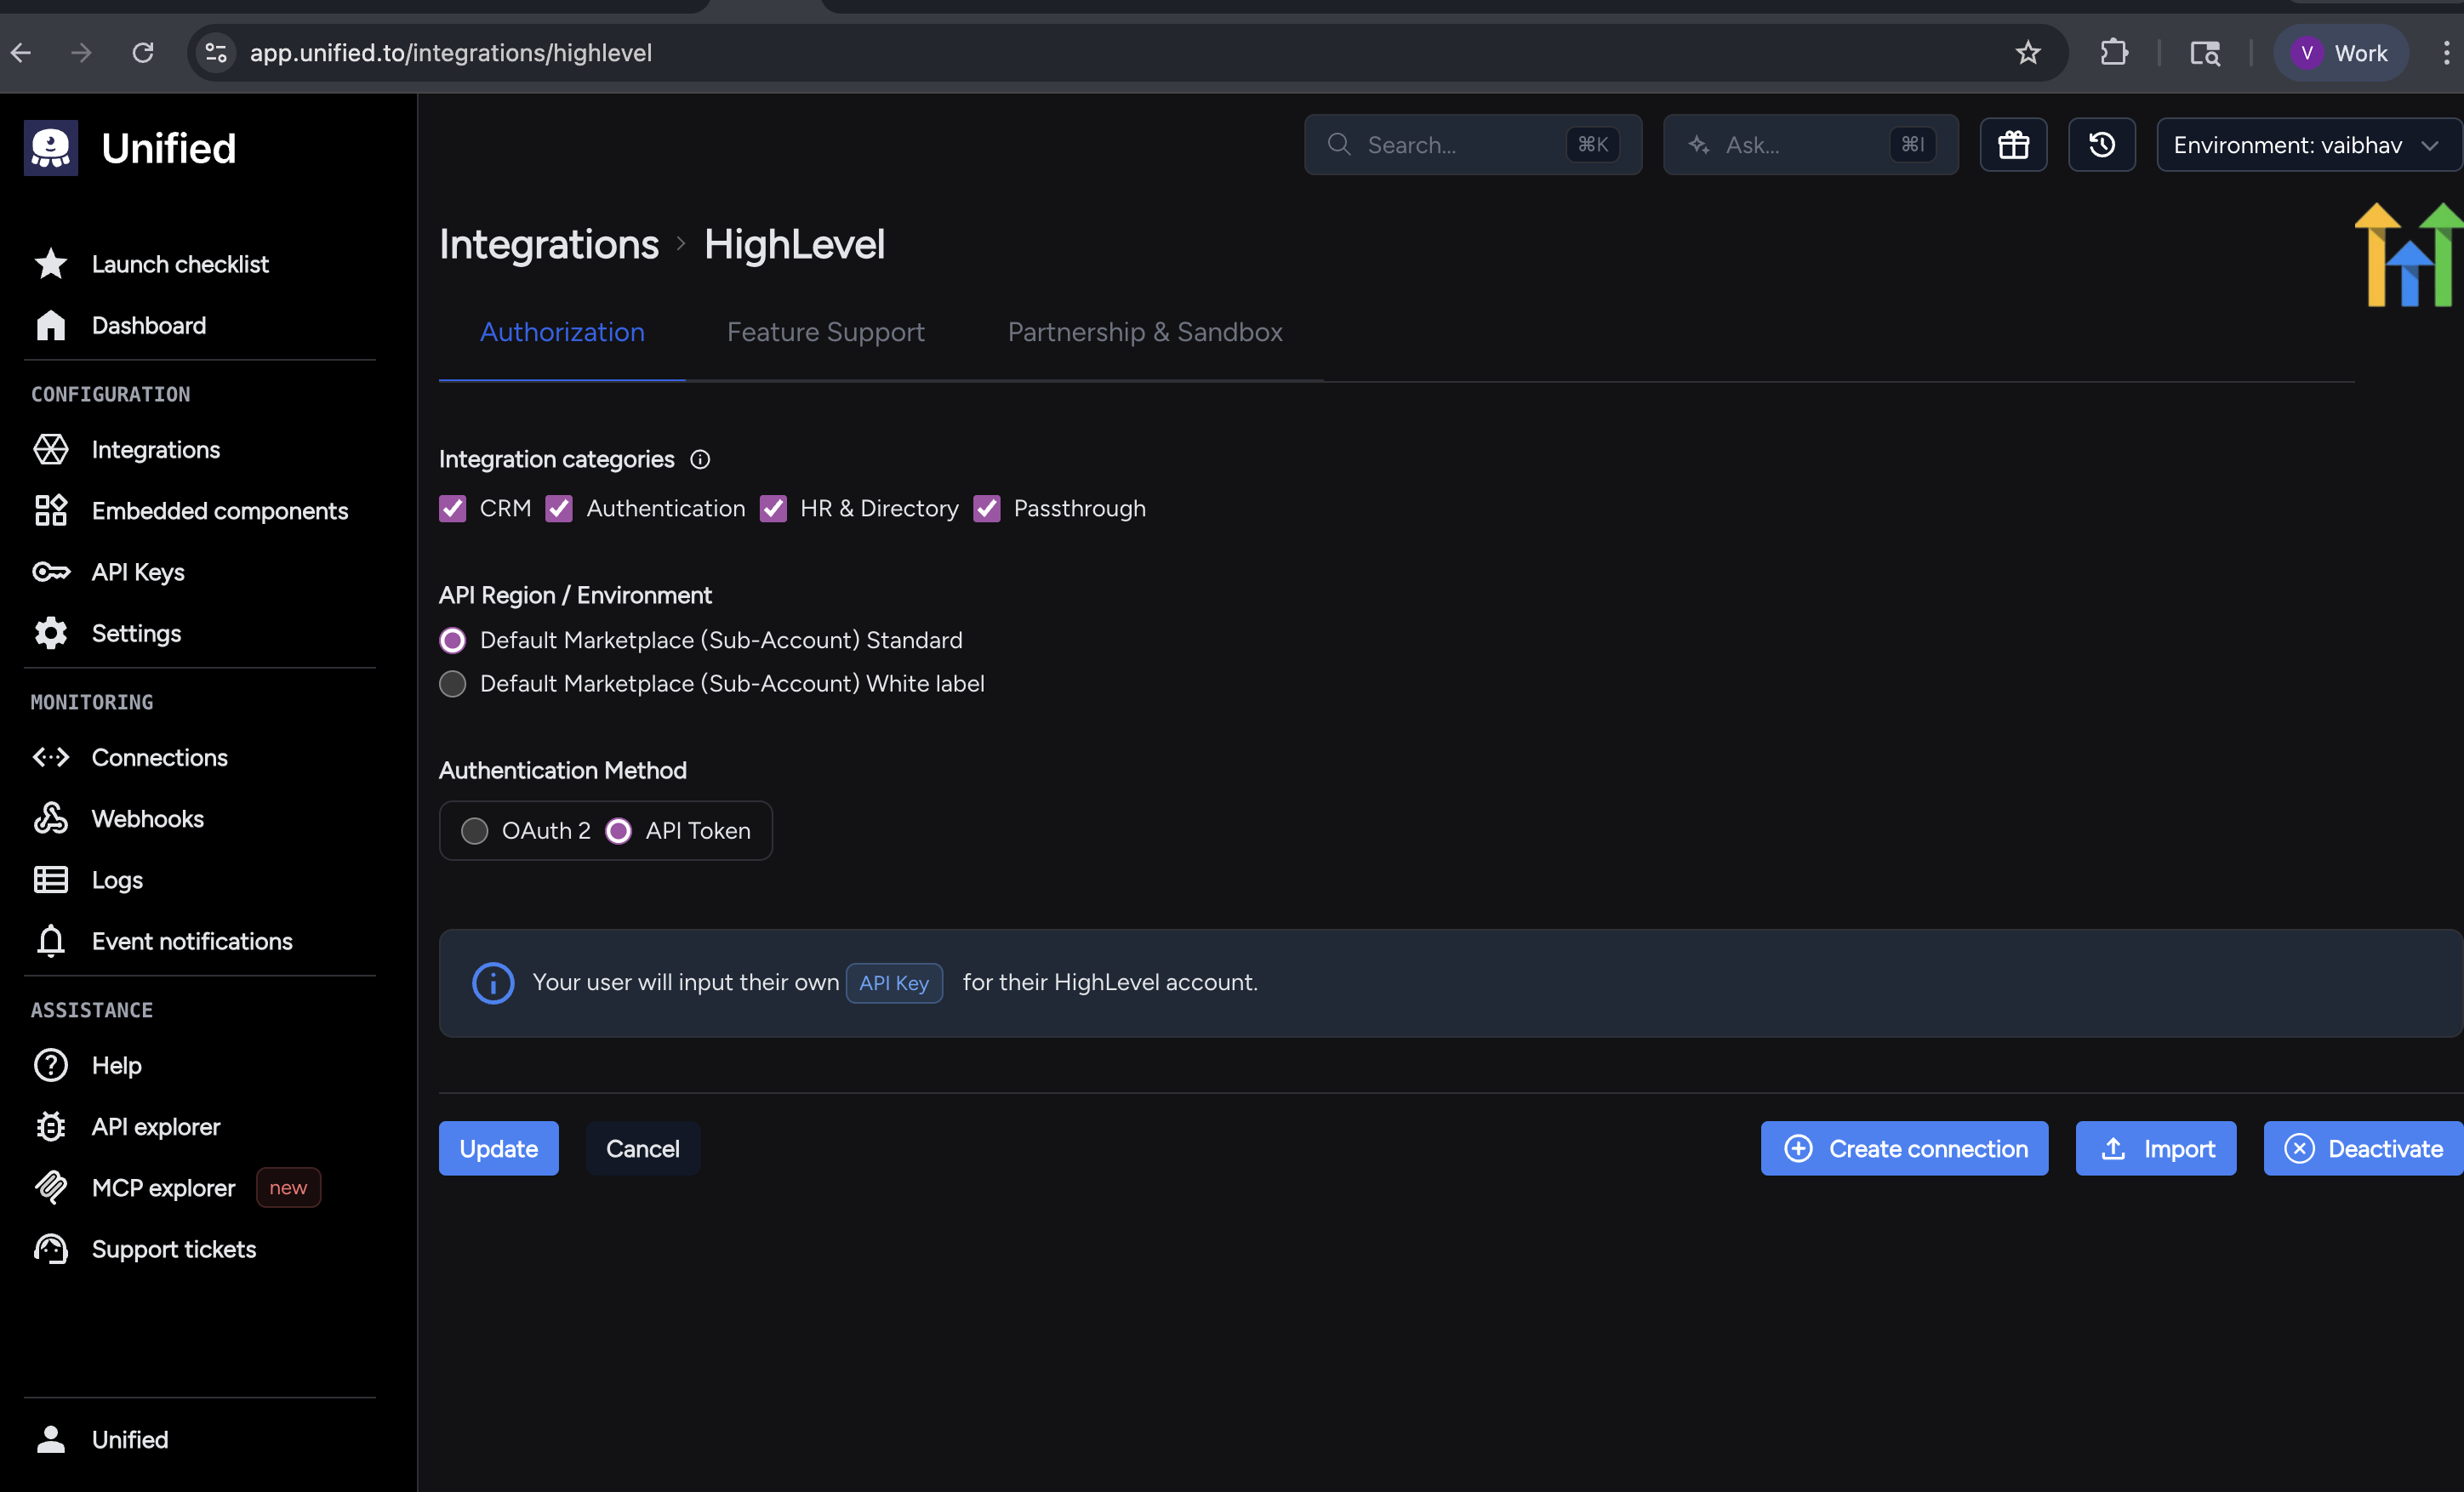
### 10. Create Connection
- Paste:
- **API Token**
- **Location ID**
- Click **Create Connection**
## ✅ Done
Your HighLevel token-based connection should now be successfully set up in Unified.
---
If it doesn't work, double-check:
- You created the token at the **sub-account level**
- The correct **scopes** are selected
- The **Location ID** matches the sub-account
If you have any more doubts or issues, please contact the [Unified.to](https://unified.to/) team for support.
You've now created your HighLevel API Key and Location ID - just one of many if you support multiple vendors. Each one adds new auth flows, schema differences, and ongoing maintenance.
Unified.to removes that overhead with unified objects that work across 1323 APIs. Map once, launch everywhere. Your team ships features instead of debugging vendor-specific edge cases.
[Book a demo](https://calendly.com/d/cph9-g8n-jzg/connect-with-unified) to see how much faster you can launch customer integrations with Unified.to.
## How to get your HubSpot developer key and OAuth 2 credentials (Legacy Apps)
URL: https://docs.unified.to/guides/how_to_get_your_hubspot_developer_key_and_oauth_2_credentials_legacy_apps
# How to get your HubSpot developer key and OAuth 2 credentials (Legacy Apps)
------
_February 12, 2023_
This guide will show you how to retrieve your OAuth 2 credentials and developer API key in HubSpot.
**Note**: HubSpot allows you to create different types of apps - public and private. This guide is about public apps.
## Register a HubSpot Developer Account
First, you'll need to register for a free account on HubSpot if you haven't already.
1. Navigate to the [HubSpot Developers portal](https://developers.hubspot.com/get-started).
2. Click **Create App Developer Account.**
3. Follow the onboarding to complete your account setup.
## Get your HubSpot Developer API key
Developer account API keys are separate from standard API keys - they can be used to manage subscriptions for webhooks and other HubSpot features.
1. Inside the HubSpot developer dashboard, open the sidebar and click [Apps](https://app.hubspot.com/developer/47094559/applications).
2. Click **Get HubSpot API key**.
3. Follow the instructions to create a Developer API key.
4. Click **Show key** to reveal your key. You will need this for the final step.
## Create a HubSpot app
A HubSpot app is a container for your integration settings and is where you'll create and find your OAuth 2 credentials.
1. On the Development page → Legacy Apps→ click **Create Legacy App →** Select **Public App.**
1. Give your app a name and description.
2. Click on the **Auth** tab.
3. Under **Redirect URLs,** enter: **`https://api.unified.to/oauth/code`**
4. Under **Scopes,** click **Add new scopes** and select the permissions that your application will require. For example, if your application reads Deals, then select `crm.deal.read`
5. Click **Create app** to finish setting up your app.
## (optional) Add the `oauth` scope to your app
For apps created before April 2024, the `oauth` scope may be missing from your app's auth settings. Apps created after this date have it on by default. This scope is required for the HubSpot integration to work.
1. Under **Scopes**, click **Add new scope.**
2. Search for **oauth** and select it.
3. Click **Update**.
## Get your OAuth 2 credentials
1. After creating your app, you will be redirected to the App Info tab. Click again on the **Auth** tab.
2. Your unique **Client ID and Client secret** will be displayed. You will need these for the next step.
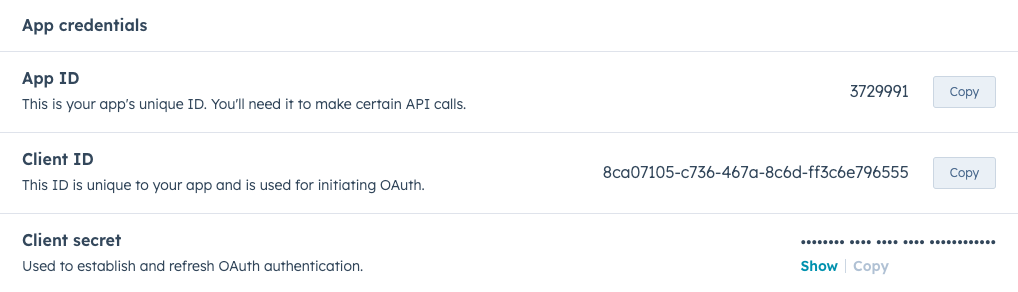
## Activate the HubSpot integration in Unified.to with your client ID and secret
1. Open a new tab and navigate to [the HubSpot integration in Unified.to](https://app.unified.to/integrations/hubspot)
2. You will need the following three pieces of information from the earlier steps:
1. **Client ID**
2. **Client secret**
3. **Developer API key** from the developer dashboard
3. Copy and paste these values into their respective fields on the page. Make sure that **Your OAuth 2 credentials** is selected above.
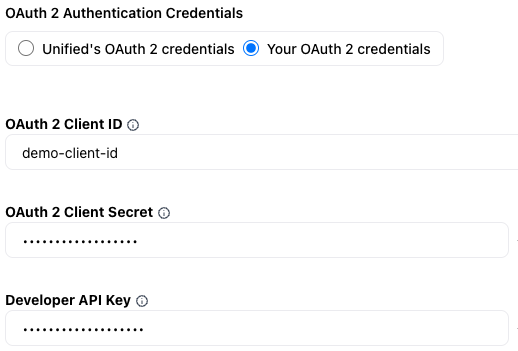
## See also
- [How to set up your scopes in HubSpot](https://docs.unified.to/guides/how_to_set_up_your_scopes_in_hubspot)
- [How to configure webhooks in HubSpot](https://docs.unified.to/guides/how_to_configure_webhooks_in_hubspot)
## How to get your Humaans API Key: Step-by-step guide
URL: https://docs.unified.to/guides/how_to_get_your_humaans_api_key_step_by_step_guide
# How to get your Humaans API Key: Step-by-step guide
------
_November 14, 2023_
When connecting Humaans to other platforms, authentication requires an API Key.
Follow these step-by-step instructions to generate one from your Humaans account, or provide them to your customers if they need to connect their account.
1. Log in to the Humaans Admin Dashboard
2. Go to Settings
3. Open API access tokens
4. Click Create new token
5. Give it a name (e.g. "Unified.to")
6. Copy the generated token
7. Paste it into the API Token field
8. Click Authorize
**Note:** You'll need **Admin access** in Humaans to see "API access tokens."
You've now retrieved your Humaans API Key. That's one system covered, but scaling integrations one by one means repeating this process hundreds of times.
Unified.to handles this for you: 1659 integrations out of the box, all with normalized schemas, real-time delivery, and Virtual Webhooks. No polling scripts, no retry logic, no maintenance backlog.
[Book a demo](https://calendly.com/d/cph9-g8n-jzg/connect-with-unified) to see how Unified cuts integration work from quarters to days.
## How to get your iCIMS API Username, API Password and Customer ID: Step-by-step guide
URL: https://docs.unified.to/guides/how_to_get_your_icims_api_username_api_password_and_customer_id_step_by_step_guide
# How to get your iCIMS API Username, API Password and Customer ID: Step-by-step guide
------
_April 24, 2023_
When connecting iCIMS to other platforms, authentication requires a API Username, API Password and Customer ID.
Follow these step-by-step instructions to generate one from your iCIMS account, or provide them to your customers if they need to connect their account.
# How to get your iCIMS API credentials
This guide explains how to obtain the required credentials for connecting iCIMS. You'll need to work with iCIMS support to get these credentials.
## Required credentials
To connect iCIMS, you'll need:
- Customer ID (your unique platform identifier)
- API Username
- API Password
## Steps to obtain your credentials
### Step 1: Contact iCIMS support
1. Reach out to your iCIMS account representative or support team
2. Request API access for integration purposes
3. Specify that you need:
- Customer ID
- API Username
- API Password
### Step 2: Receive your credentials
iCIMS support will provide you with:
- Your unique Customer ID
- API Username
- API Password
### Step 3: Verify access
1. Once you receive your credentials, keep them in a secure location
2. Enter the credentials in the inputs on this page to create a connection to your iCIMS account
## Important notes
- These credentials must be provided by iCIMS support
- The Customer ID is unique to your organization
Getting your iCIMS API Username, API Password and Customer ID is the first step. The bigger challenge is supporting dozens of vendors - each with unique auth flows, schemas, and maintenance requirements.
Unified.to is a real-time integration platform built to replace that work. Instead of building and maintaining 514 custom connectors, you get one secure, normalized API layer across 30 SaaS tools.
On top of that, our usage-based pricing scales cleanly with your product. No per-connection fees, no setup charges, and no lock-in, just infrastructure economics that grow with you.
[Book a demo](https://calendly.com/d/cph9-g8n-jzg/connect-with-unified) to discover how predictable integration costs should be.
## How to get your JobDiva Client ID, Username/email and Password: Step-by-step guide
URL: https://docs.unified.to/guides/how_to_get_your_jobdiva_client_id_username_email_and_password_step_by_step_guide
# How to get your JobDiva Client ID, Username/email and Password: Step-by-step guide
------
_August 18, 2023_
If you're building an integration with JobDiva, you'll need an Client ID, Username/email and Password from your customer's JobDiva account to authenticate requests.
This guide shows you (or your customers) how to generate one from JobDiva's account settings.
# Obtain a JobDiva Client ID
Contact JobDiva Support to obtain a Client ID to use for your integration.
# Create a JobDiva API User
A JobDiva admin must establish a dedicated API username and password.
In JobDiva:
1. Navigate to Settings > My Team > Add User.
2. Add a new user.
3. Allow to access JobDiva API Calls permission for the user.
With your JobDiva Client ID, Username/email and Password in hand, you're ready to connect. But managing keys, tokens, and refresh flows across every vendor quickly becomes a security risk.
Unified.to abstracts all of that behind a single, secure layer. We never store customer data, credentials are always under your control, and our permissioning model removes the risk of misconfigured scopes.
[Book a demo](https://calendly.com/d/cph9-g8n-jzg/connect-with-unified) to see how Unified keeps integrations real-time, compliant, and safe at scale.
## How to get your Jobvite API Key, API Key Secret and Email: Step-by-step guide
URL: https://docs.unified.to/guides/how_to_get_your_jobvite_api_key_api_key_secret_and_email_step_by_step_guide
# How to get your Jobvite API Key, API Key Secret and Email: Step-by-step guide
------
_August 18, 2023_
To access Jobvite data or automate workflows through an integration, a API Key, API Key Secret and Email are required.
This guide walks you through where to find it and how to set it up for development or end-customer use.
## How do I get my Jobvite API key and secret?
Your API key and secret are both provided by Jobvite's Customer Success team. To request API credentials, file a support ticket at:
[https://www.jobvite.com/support/submit-a-case/](https://www.jobvite.com/support/submit-a-case/)
(Note: you will need to be logged in to submit a case. If you don't see a button titled **Submit a Request**, reach out to your account representative i.e. your Customer Success Manager or Account Manager)
### Submit a ticket
- Select the **issue type** from the dropdown menu
- Add a **Subject**
- Add a detailed **description** of the request:
- **API names** that you want to grant access to
- **Email** of a dedicated Jobvite user to determine that an update was made by the API and not an actual user. This email address needs to accept the Jobvite registration process. Assign the **Administrator** role to this user.
Alternatively, you may start a support chat (see bottom right corner of Help Center) to chat with their support team for guidance on retrieving an API Key.
Please make sure that Jobvite gives you access to:
- New User module
- Enable New Contact Details UI
**NOTE:**
Please note that access to the Contacts API requires that the Jobvite Customer has enabled the Jobvite Engage product on their account. The contacts API is not supported for customers who have not enabled the Jobvite Engage product (additional fee required).
JobVite Contacts are required for access to Candidates.
You've now retrieved your Jobvite API Key, API Key Secret and Email. That's one system covered, but scaling integrations one by one means repeating this process hundreds of times.
Unified.to handles this for you: 805 integrations out of the box, all with normalized schemas, real-time delivery, and Virtual Webhooks. No polling scripts, no retry logic, no maintenance backlog.
[Book a demo](https://calendly.com/d/cph9-g8n-jzg/connect-with-unified) to see how Unified cuts integration work from quarters to days.
## How to get your Lever API Key: Step-by-step guide
URL: https://docs.unified.to/guides/how_to_get_your_lever_api_key_step_by_step_guide
# How to get your Lever API Key: Step-by-step guide
------
_April 24, 2023_
When connecting Lever to other platforms, authentication requires an API Key.
Follow these step-by-step instructions to generate one from your Lever account, or provide them to your customers if they need to connect their account.
1. To generate API credentials, navigate to Settings > Integrations and API > API Credentials.
2. Click the Generate New Key button
3. Input a name for the key that reflects the service or integration that will be using the key
4. Under the 'Permissions' heading, select "Select all"
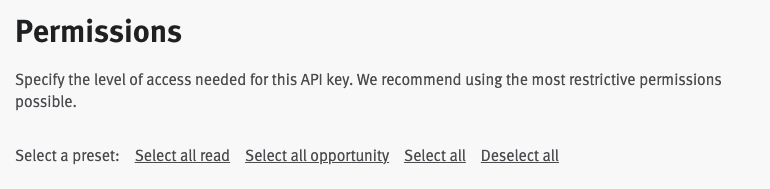
5. Click the Copy Key button next to the API key (which can be found next to the 'Key name' field).
6. Click done
Generating a Lever API Key is the first step. The harder part is building pipelines that stay reliable as customers add more systems.
Unified.to gives you options: deliver data via API, streaming webhooks, database sync, or even as MCP tools for AI agents. One integration layer that adapts to your architecture instead of forcing tradeoffs.
[Book a demo](https://calendly.com/d/cph9-g8n-jzg/connect-with-unified) to see how we simplify integration delivery across 1412 integrations and 37 categories.
## How to get your Loxo Agency slug, API Key and Agency ID: Step-by-step guide
URL: https://docs.unified.to/guides/how_to_get_your_loxo_agency_slug_api_key_and_agency_id_step_by_step_guide
# How to get your Loxo Agency slug, API Key and Agency ID: Step-by-step guide
------
_August 18, 2023_
If you're building an integration with Loxo, you'll need an Agency slug, API Key and Agency ID from your customer's Loxo account to authenticate requests.
This guide shows you (or your customers) how to generate one from Loxo's account settings.
### Where do I find my API Key?
To get your API Key, we'll need to go to Loxo. Once there, click on your profile icon and then Settings.
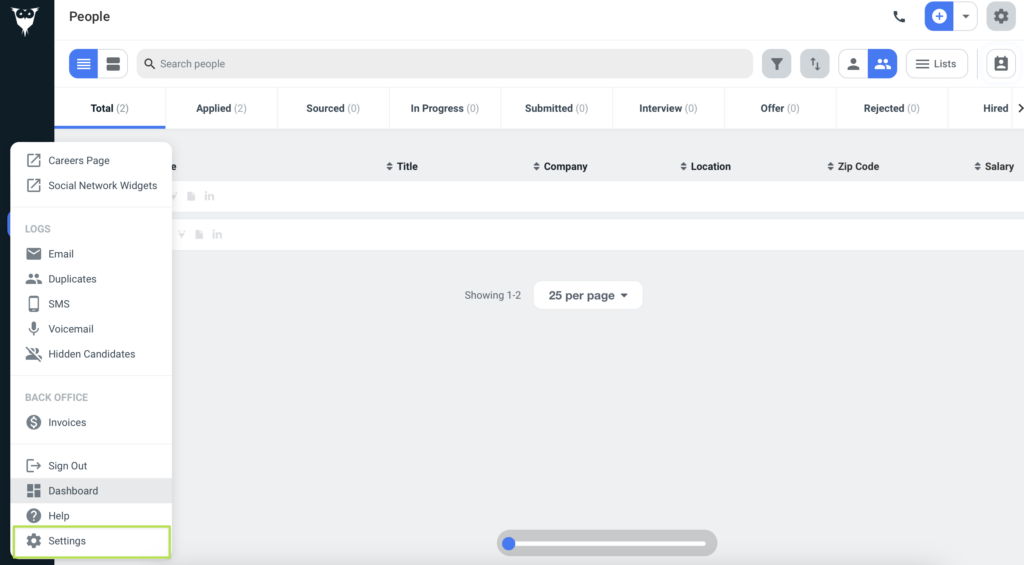
In the Settings view, look for the API Keys card and click on it.
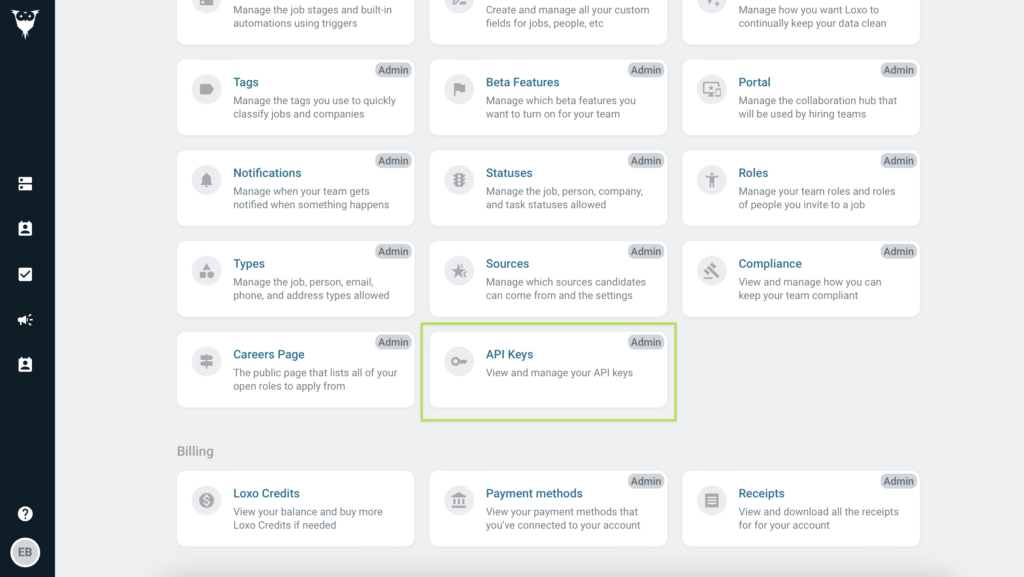
In the API Keys view, click the Add button.
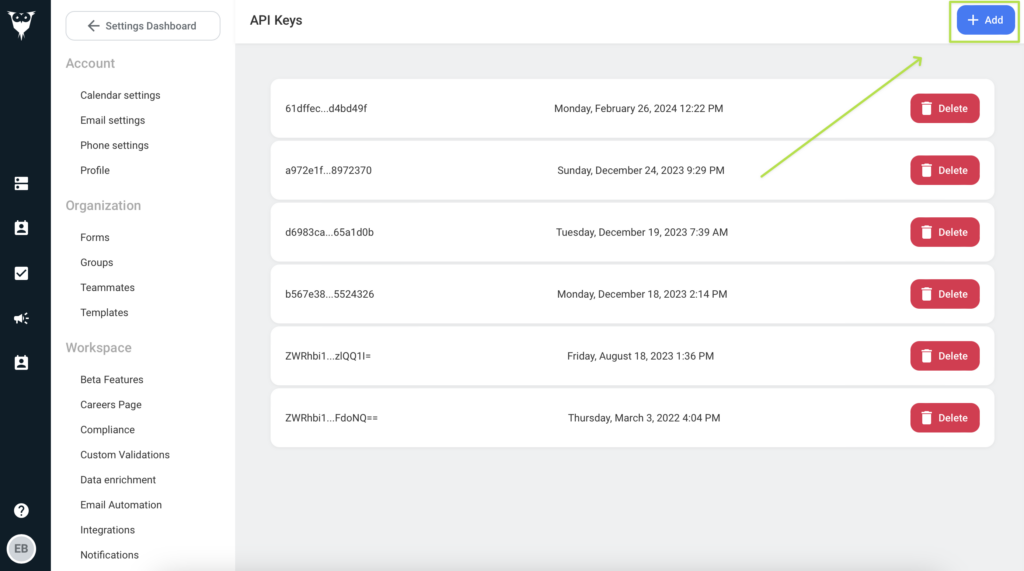
### How can I get my Agency Slug?
To get your agency slug, navigate to your agency's career page. You can find it under your profile's menu.
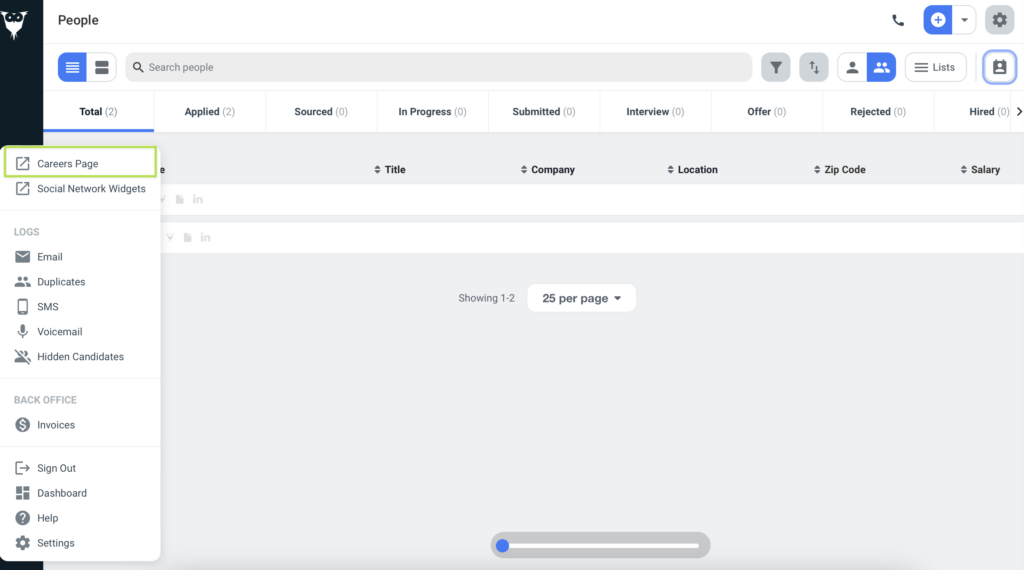
On the Careers page, your agency slug will be the first part of the path, after the domain.
**Example**: `https://app.loxo.co/weblime-consultants` = _weblime-consultants_
You've now retrieved your Loxo Agency slug, API Key and Agency ID. That's one system covered, but scaling integrations one by one means repeating this process hundreds of times.
Unified.to handles this for you: 1319 integrations out of the box, all with normalized schemas, real-time delivery, and Virtual Webhooks. No polling scripts, no retry logic, no maintenance backlog.
[Book a demo](https://calendly.com/d/cph9-g8n-jzg/connect-with-unified) to see how Unified cuts integration work from quarters to days.
## How to get your Microsoft Active Directory / Entra ID Client ID, Client Secret and Tenant ID: Step-by-step guide
URL: https://docs.unified.to/guides/how_to_get_your_microsoft_active_directory_entra_id_client_id_client_secret_and_tenant_id_step_by_step_guide
# How to get your Microsoft Active Directory / Entra ID Client ID, Client Secret and Tenant ID: Step-by-step guide
------
_April 24, 2023_
Developers connecting to Microsoft Active Directory / Entra ID will need an Client ID, Client Secret and Tenant ID for authentication.
Here's how to generate, configure, and copy your Microsoft Active Directory / Entra ID Client ID, Client Secret and Tenant ID so you can use it in your integration or share steps with your customers.
# Microsoft AD/Entra ID Client ID and Secret Authentication
## **Step: 1 Register an application**
Registering your application establishes a trust relationship between the 3rd-party application and the Microsoft identity platform. The trust is unidirectional: the application trusts the Microsoft identity platform, and not the other way around. Once created, the application object can't be moved between different tenants.
1. Sign in to the [Microsoft Entra admin center](https://entra.microsoft.com/).
2. If you have access to multiple tenants, use the **Settings** icon in the top menu to switch to the tenant in which you want to register the application from the **Directories + subscriptions** menu.
3. Browse to **Identity** > **Applications** > **App registrations** and select **New registration**.
4. Enter a display **Name** for the application.
5. Specify who can use the application in the **Supported account types** section
6. Select **Register** to complete the initial app registration.
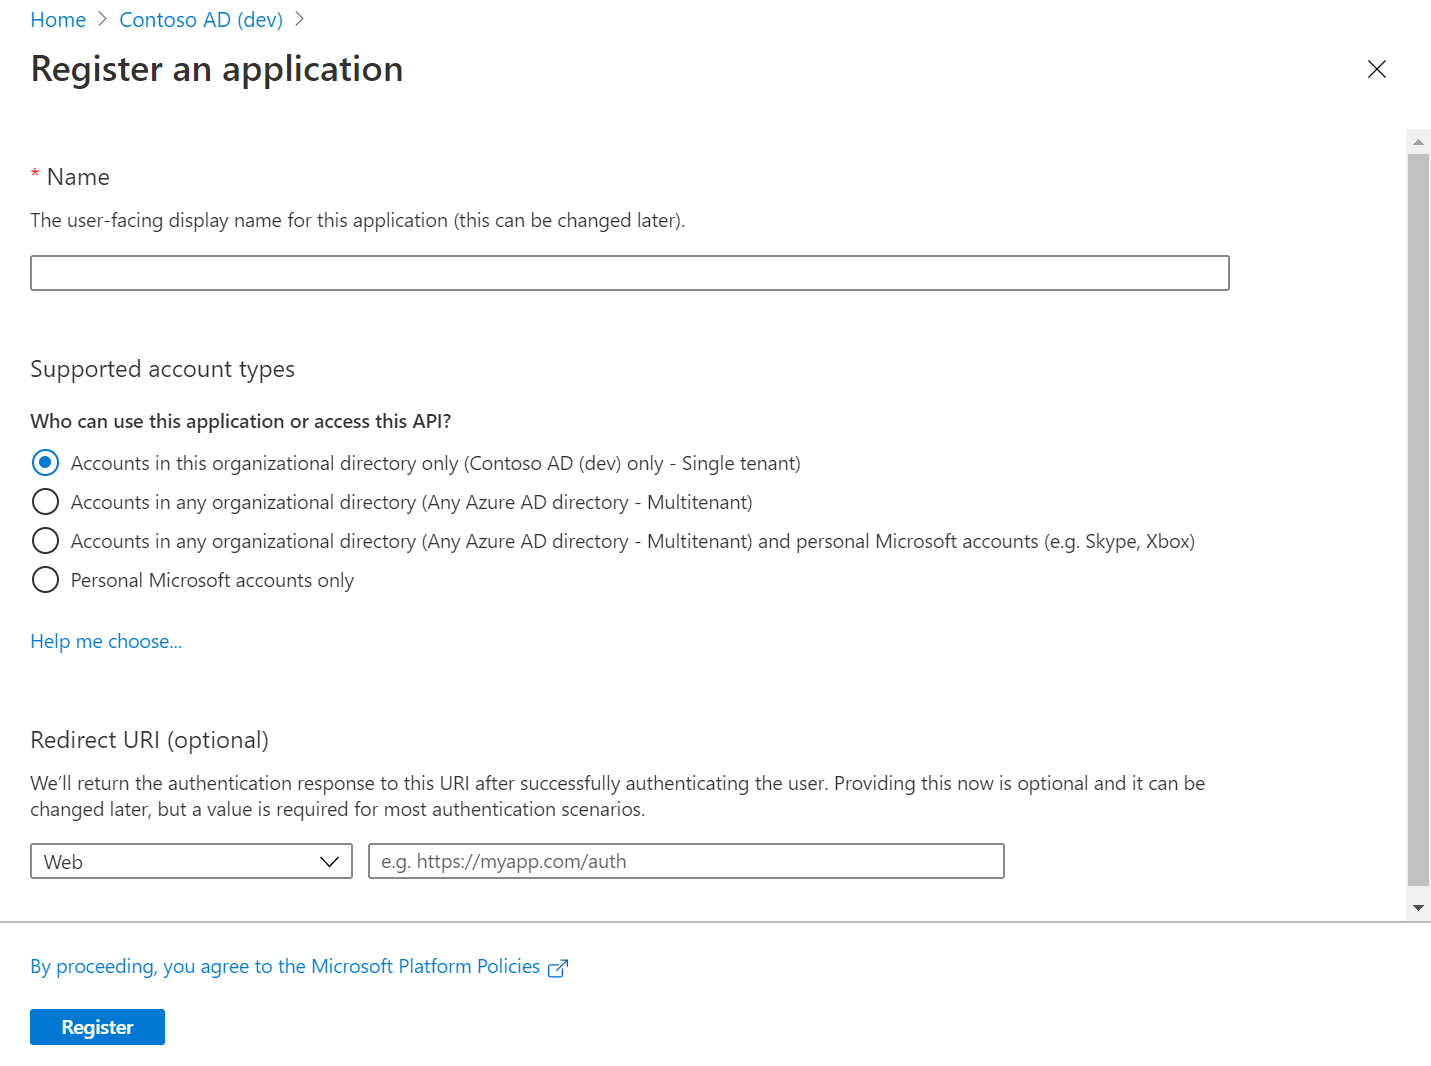
When registration finishes, the Microsoft Entra admin center displays the app registration's **Overview** pane. On this page, the app was assigned values for:
- **Application (client) ID** which uniquely identifies your application in the Microsoft cloud ecosystem, across all tenants.
- **Object ID** which uniquely identifies your application in your tenant.
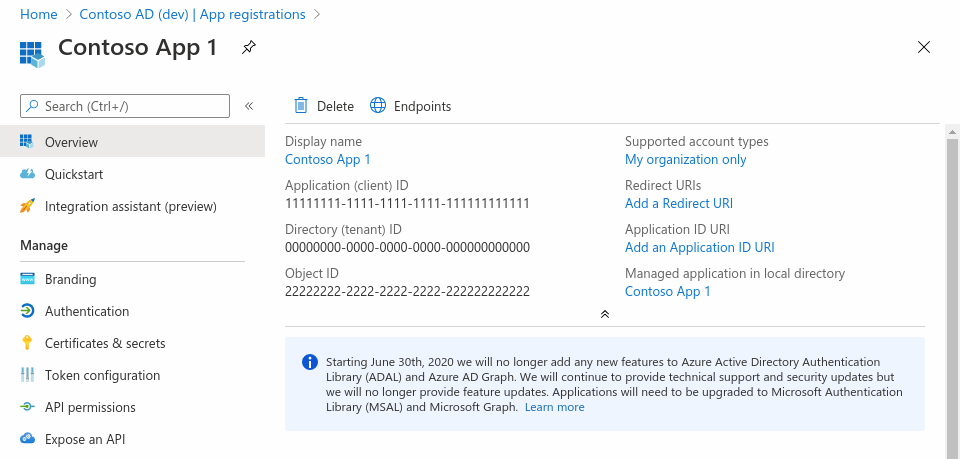
## Step 2: Generate Client Secret
Credentials are used by [confidential client applications](https://learn.microsoft.com/en-us/entra/identity-platform/msal-client-applications) that access a web API. Examples of confidential clients are web apps, other web APIs, or service-type and daemon-type applications. Credentials allow your application to authenticate as itself, requiring no interaction from a user at runtime.
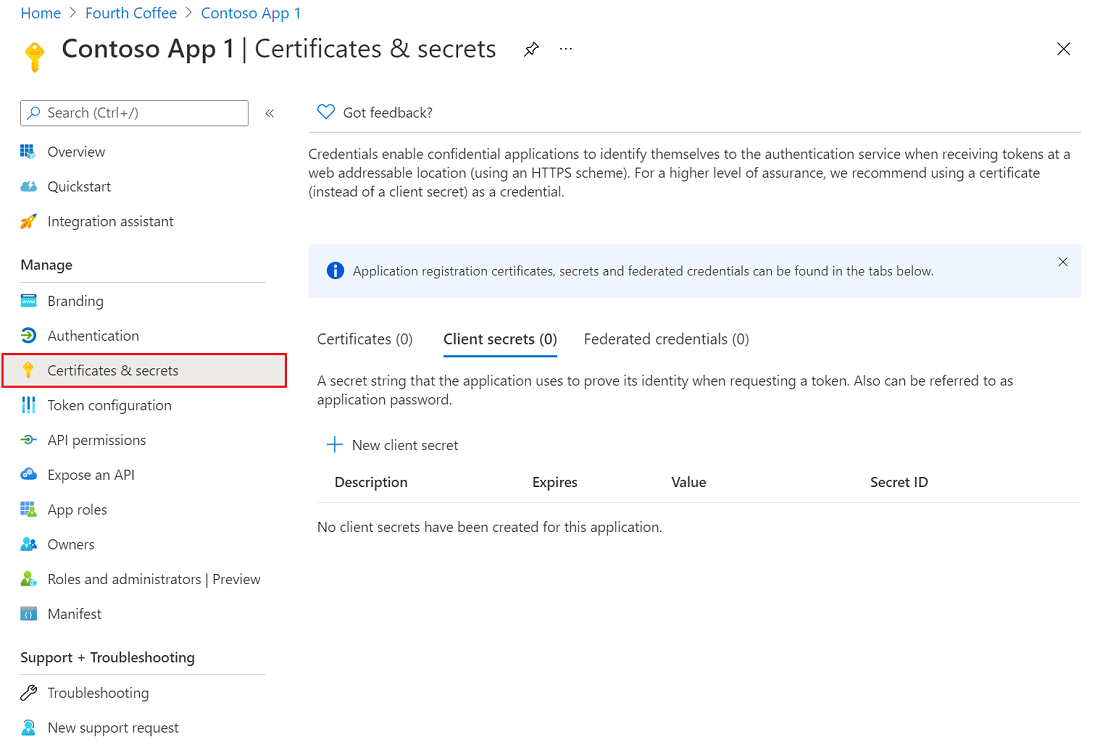
For this case, go to the Client Secrets tab, to generate a new Client Secret. The generated secret's value will be the one that will be used in Unified's authentication process.
## **Step 3: Configure permissions for Microsoft Graph**
Microsoft Graph exposes [application permissions](https://learn.microsoft.com/en-us/graph/permissions-overview#application-permissions) for apps that call Microsoft Graph with their own identity. These permissions always require administrator consent.
Preconfigure the application permissions the app needs when you register the app. An administrator can consent to these permissions either by using the [Microsoft Entra admin center](https://entra.microsoft.com/) when they install the app in their organization, or you can provide a sign-up experience in the app through which administrators can consent to the permissions you configured. Once Microsoft Entra ID records the administrator consent, the app can request tokens without having to request consent again.
To configure application permissions for the app in the app registrations experience on the Microsoft Entra admin center, follow these steps:
- On the application's **API permissions** page, choose **Add a permission**.
- Select **Microsoft Graph** > select **Application permissions**.
- In the **Select Permissions** dialog, choose the permissions to configure to the app.
The following screenshot shows the **Select Permissions** dialog box for Microsoft Graph application permissions.
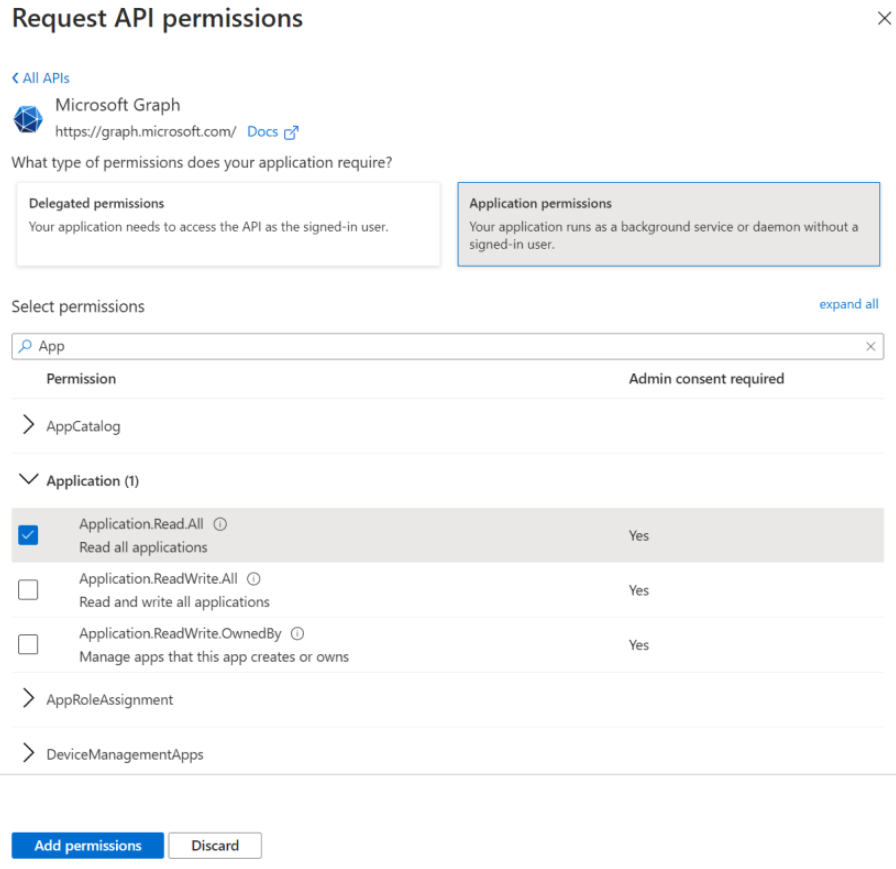
## **Step 4: Grant tenant-wide admin consent in Enterprise apps pane**
You can grant tenant-wide admin consent through the **Enterprise applications** pane if the application is already provisioned in your tenant. For example, an app could be provisioned in your tenant if at least one user consents to the application. For more information, see [How and why applications are added to Microsoft Entra ID](https://learn.microsoft.com/en-us/entra/identity-platform/how-applications-are-added).
To grant tenant-wide admin consent to an app listed in **Enterprise applications** pane:
1. Sign in to the [Microsoft Entra admin center](https://entra.microsoft.com/) as at least a [Cloud Application Administrator](https://learn.microsoft.com/en-us/entra/identity/role-based-access-control/permissions-reference#cloud-application-administrator).
2. Browse to **Entra ID** > **Enterprise apps** > **All applications**.
3. Enter the name of the existing application in the search box, and then select the application from the search results.
4. Select **Permissions** under **Security**.
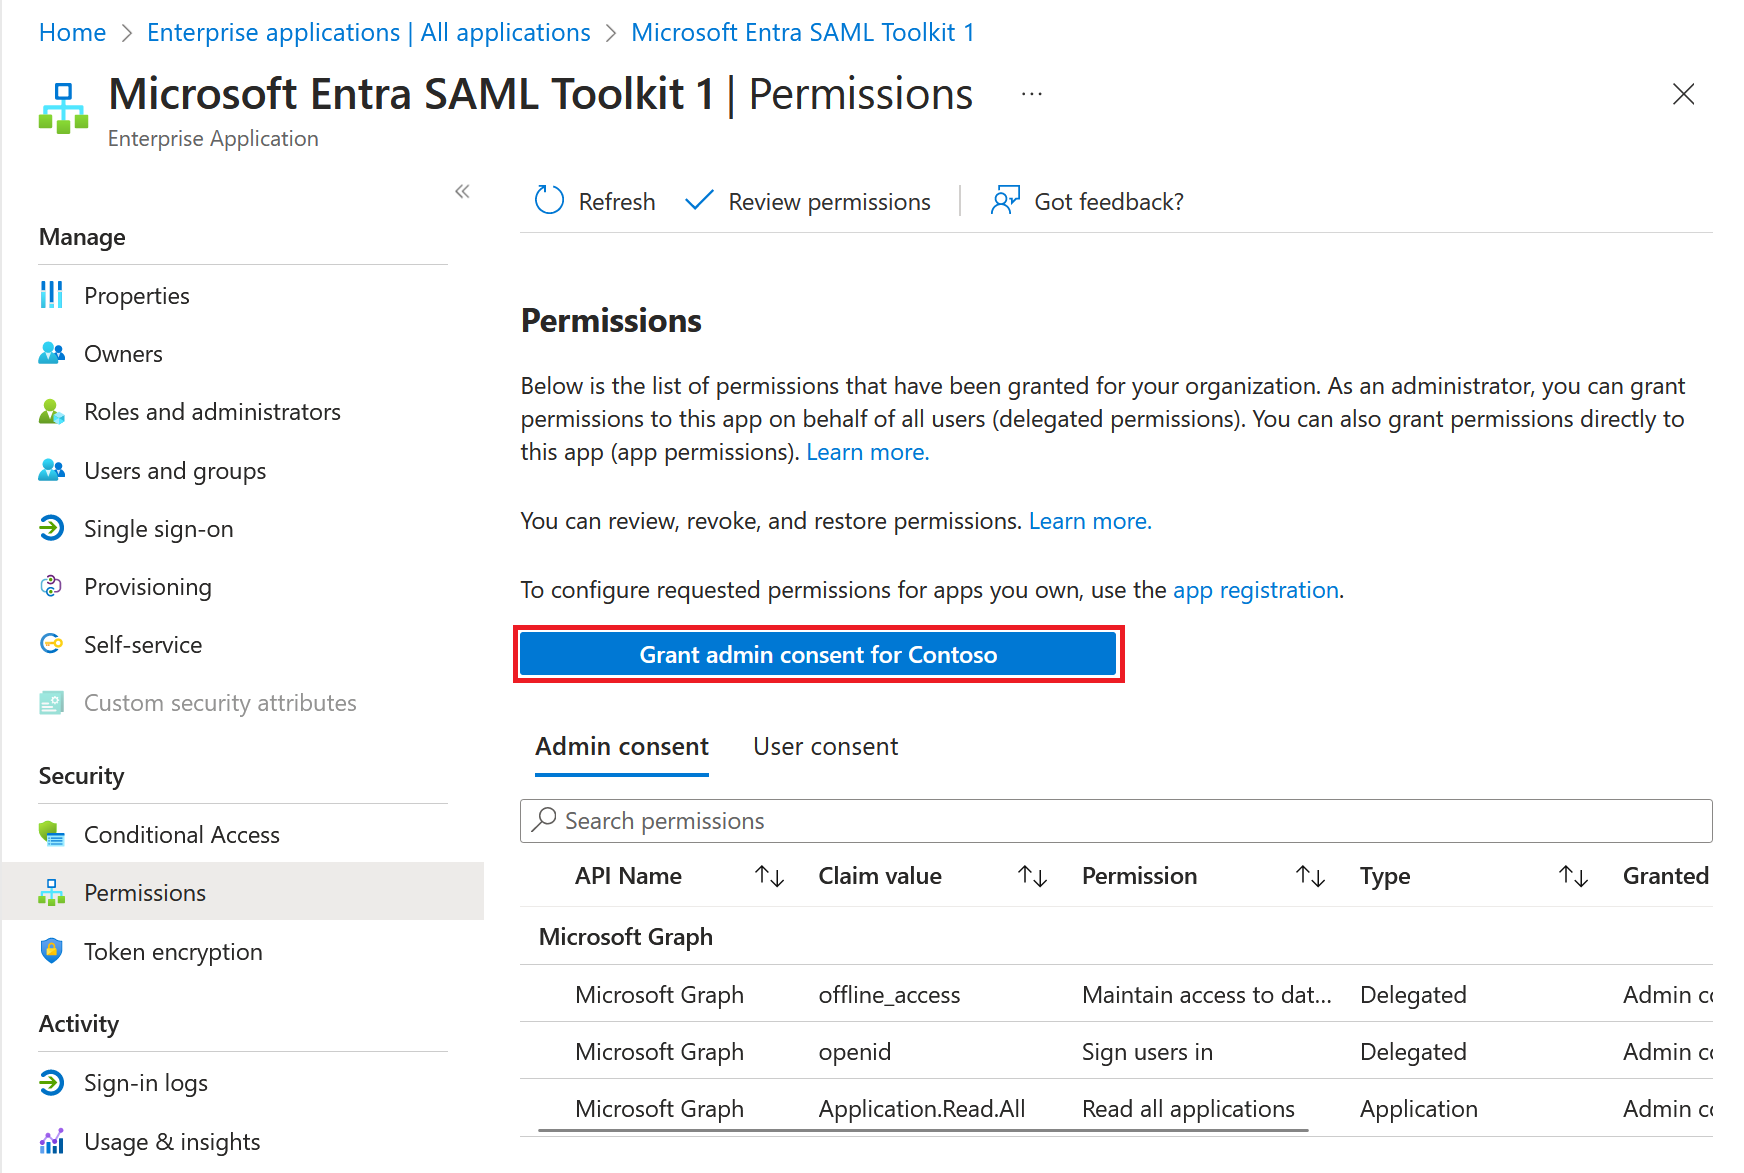
5. Carefully review the permissions that the application requires. If you agree with the permissions the application requires, select **Grant admin consent**.
## Step 5: Setup Authentication in Unified
Setup the Authentication credentials in Unified using the client ID, and generated secret, along with the tenant ID
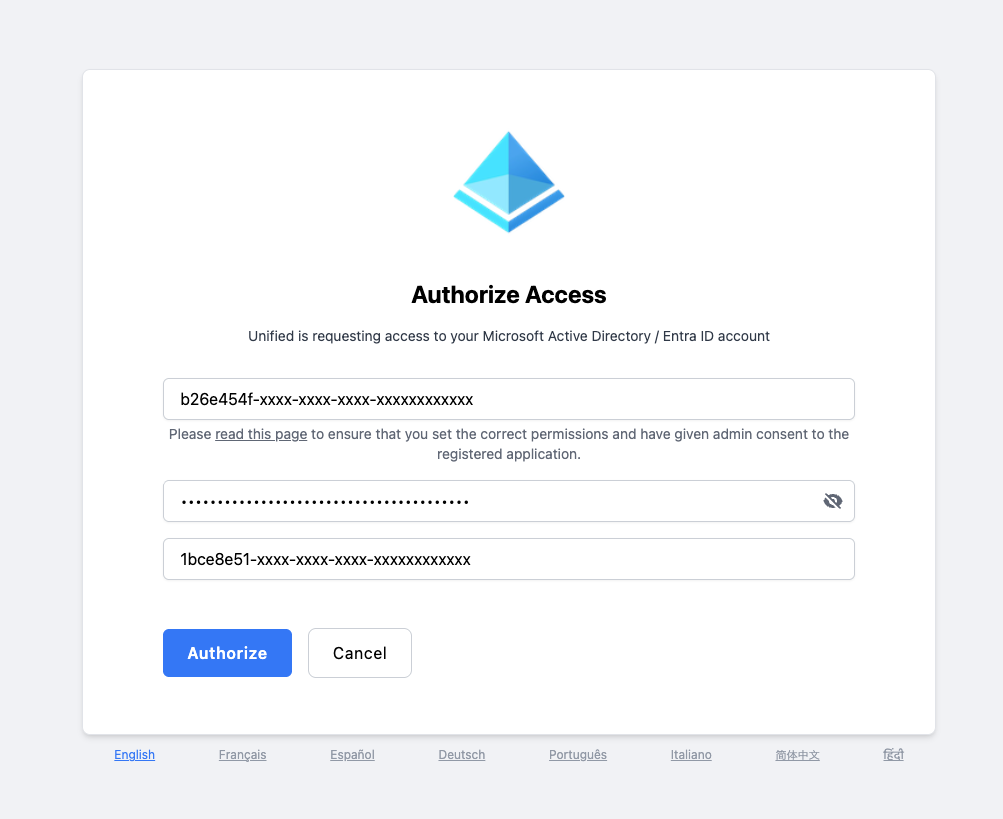
You've now created your Microsoft Active Directory / Entra ID Client ID, Client Secret and Tenant ID - just one of many if you support multiple vendors. Each one adds new auth flows, schema differences, and ongoing maintenance.
Unified.to removes that overhead with unified objects that work across 514 APIs. Map once, launch everywhere. Your team ships features instead of debugging vendor-specific edge cases.
[Book a demo](https://calendly.com/d/cph9-g8n-jzg/connect-with-unified) to see how much faster you can launch customer integrations with Unified.to.
## How to get your Microsoft Azure AD OAuth 2 credentials
URL: https://docs.unified.to/guides/how_to_get_your_microsoft_azure_ad_oauth_2_credentials
# How to get your Microsoft Azure AD OAuth 2 credentials
------
_June 3, 2024_
This guide will show you how to obtain your OAuth 2 credentials for Microsoft Azure Active Directory (Azure AD), which are also needed for other integrations in the Microsoft Azure ecosystem e.g. Outlook, Teams, and Dynamics.
## Register an app in Microsoft Azure Portal
1. Navigate to [Microsoft Azure Portal](https://portal.azure.com/)
2. Search for **Azure Active Directory** and select it.
3. From the sidebar, under Manage, click **App registrations** and then **New registration.**
4. Fill in the following form to register a new app:
1. Enter any name you'd like for your app.
2. Select **Accounts in any organizational directory (Any Azure AD directory - Multitenant) and personal Microsoft accounts (e.g. Skype, Xbox)** to allow anyone to log in.
3. Under **Redirect URI**, enter [`https://api.unified.to/oauth/code`](https://api.unified.to/oauth/code)
4. Click **Register**.
## Get your client ID and client secret
1. After registering your app and on the resulting page, copy the **Client ID** (found next to **Application (client) ID**)
2. Click on **Add a certificate or secret** (found next to **Client credentials)**
3. Under **Client secrets (0)**, click **New client secret**.
4. Click **Add** - do not change anything else in the dialog.
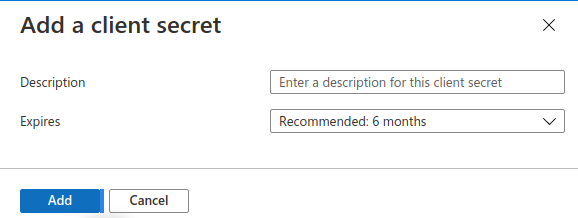
5. On the next page, copy the **Value**
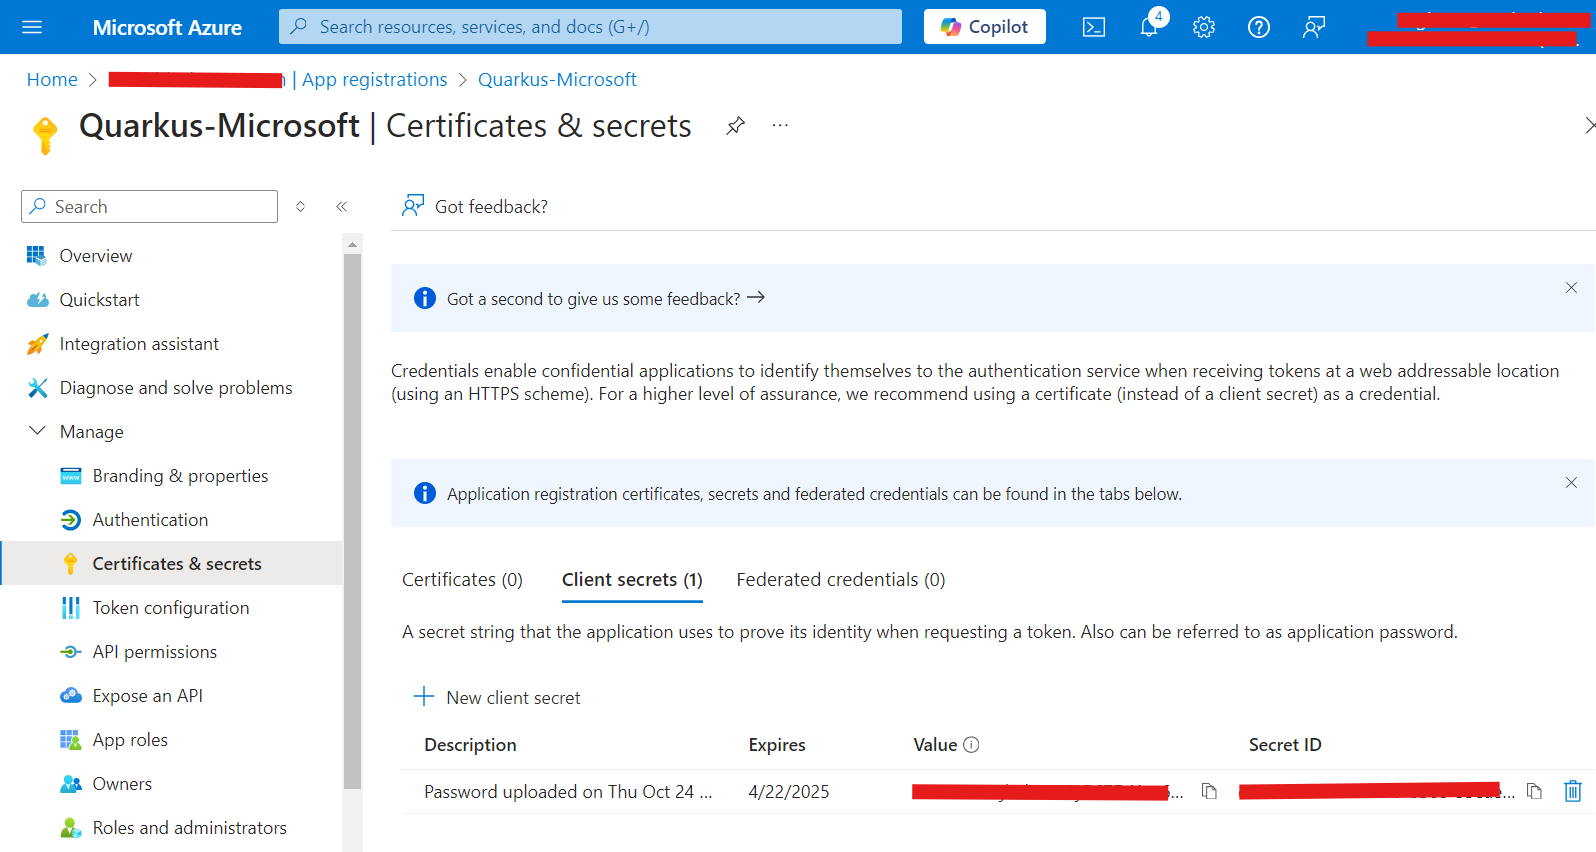
## Enter your OAuth credentials on Unified.to
1. Take note of your Microsoft client ID and client secret from the above steps
2. Navigate to the [app.unified.to](https://app.unified.to/) and find the integration page for the Microsoft integration you are interested in e.g. [https://app.unified.to/integrations/microsoft_ad](https://app.unified.to/integrations/microsoft_ad)
3. Enter your client ID
4. Enter your client secret
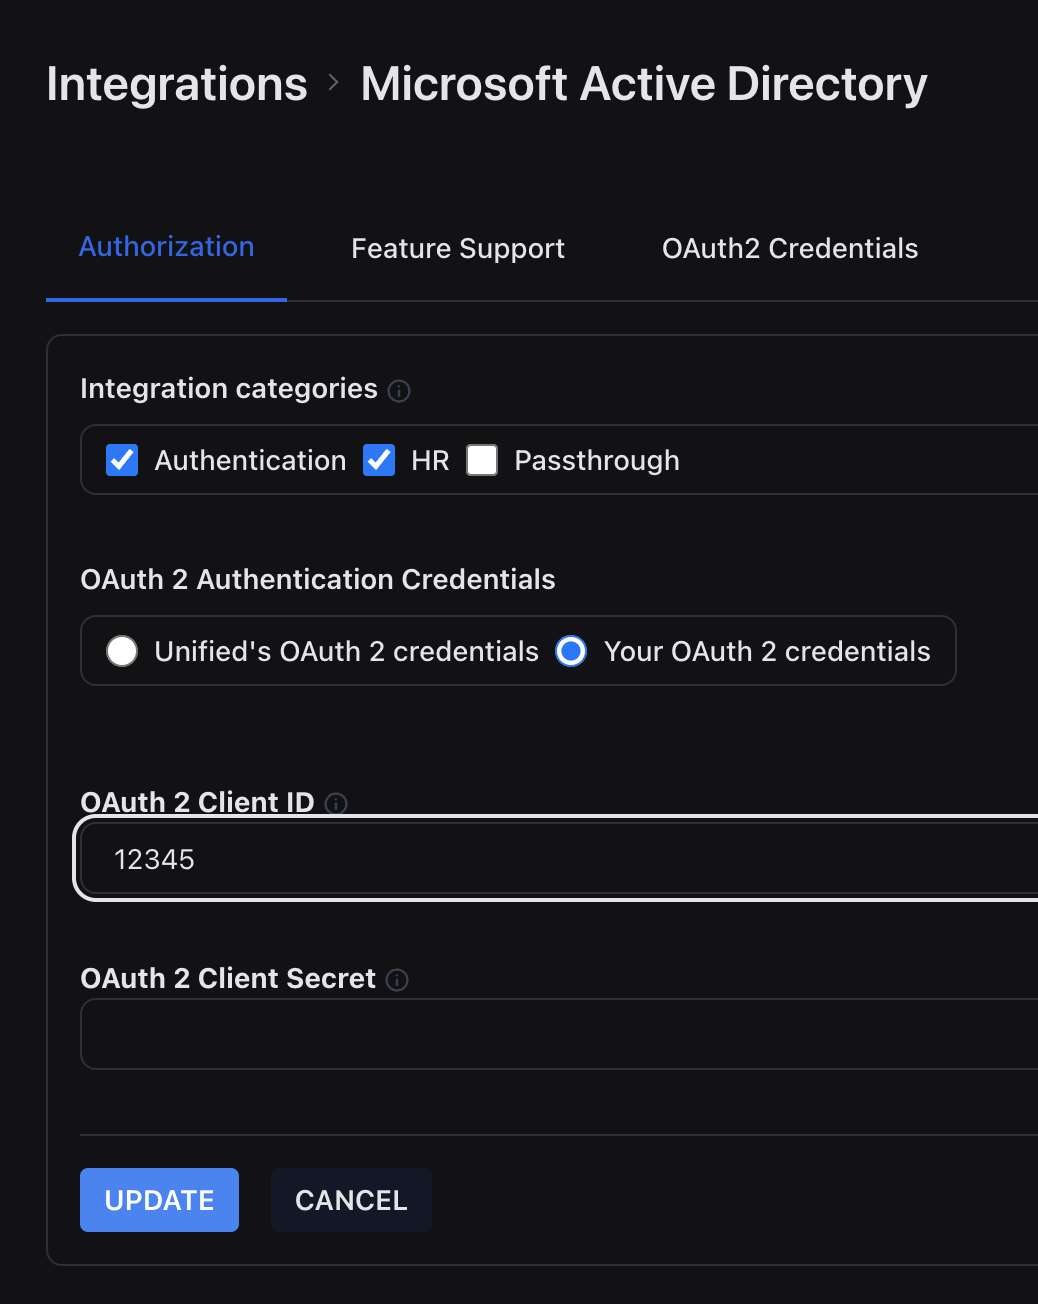
5. Make sure that you enable the correct permission scopes for your application.
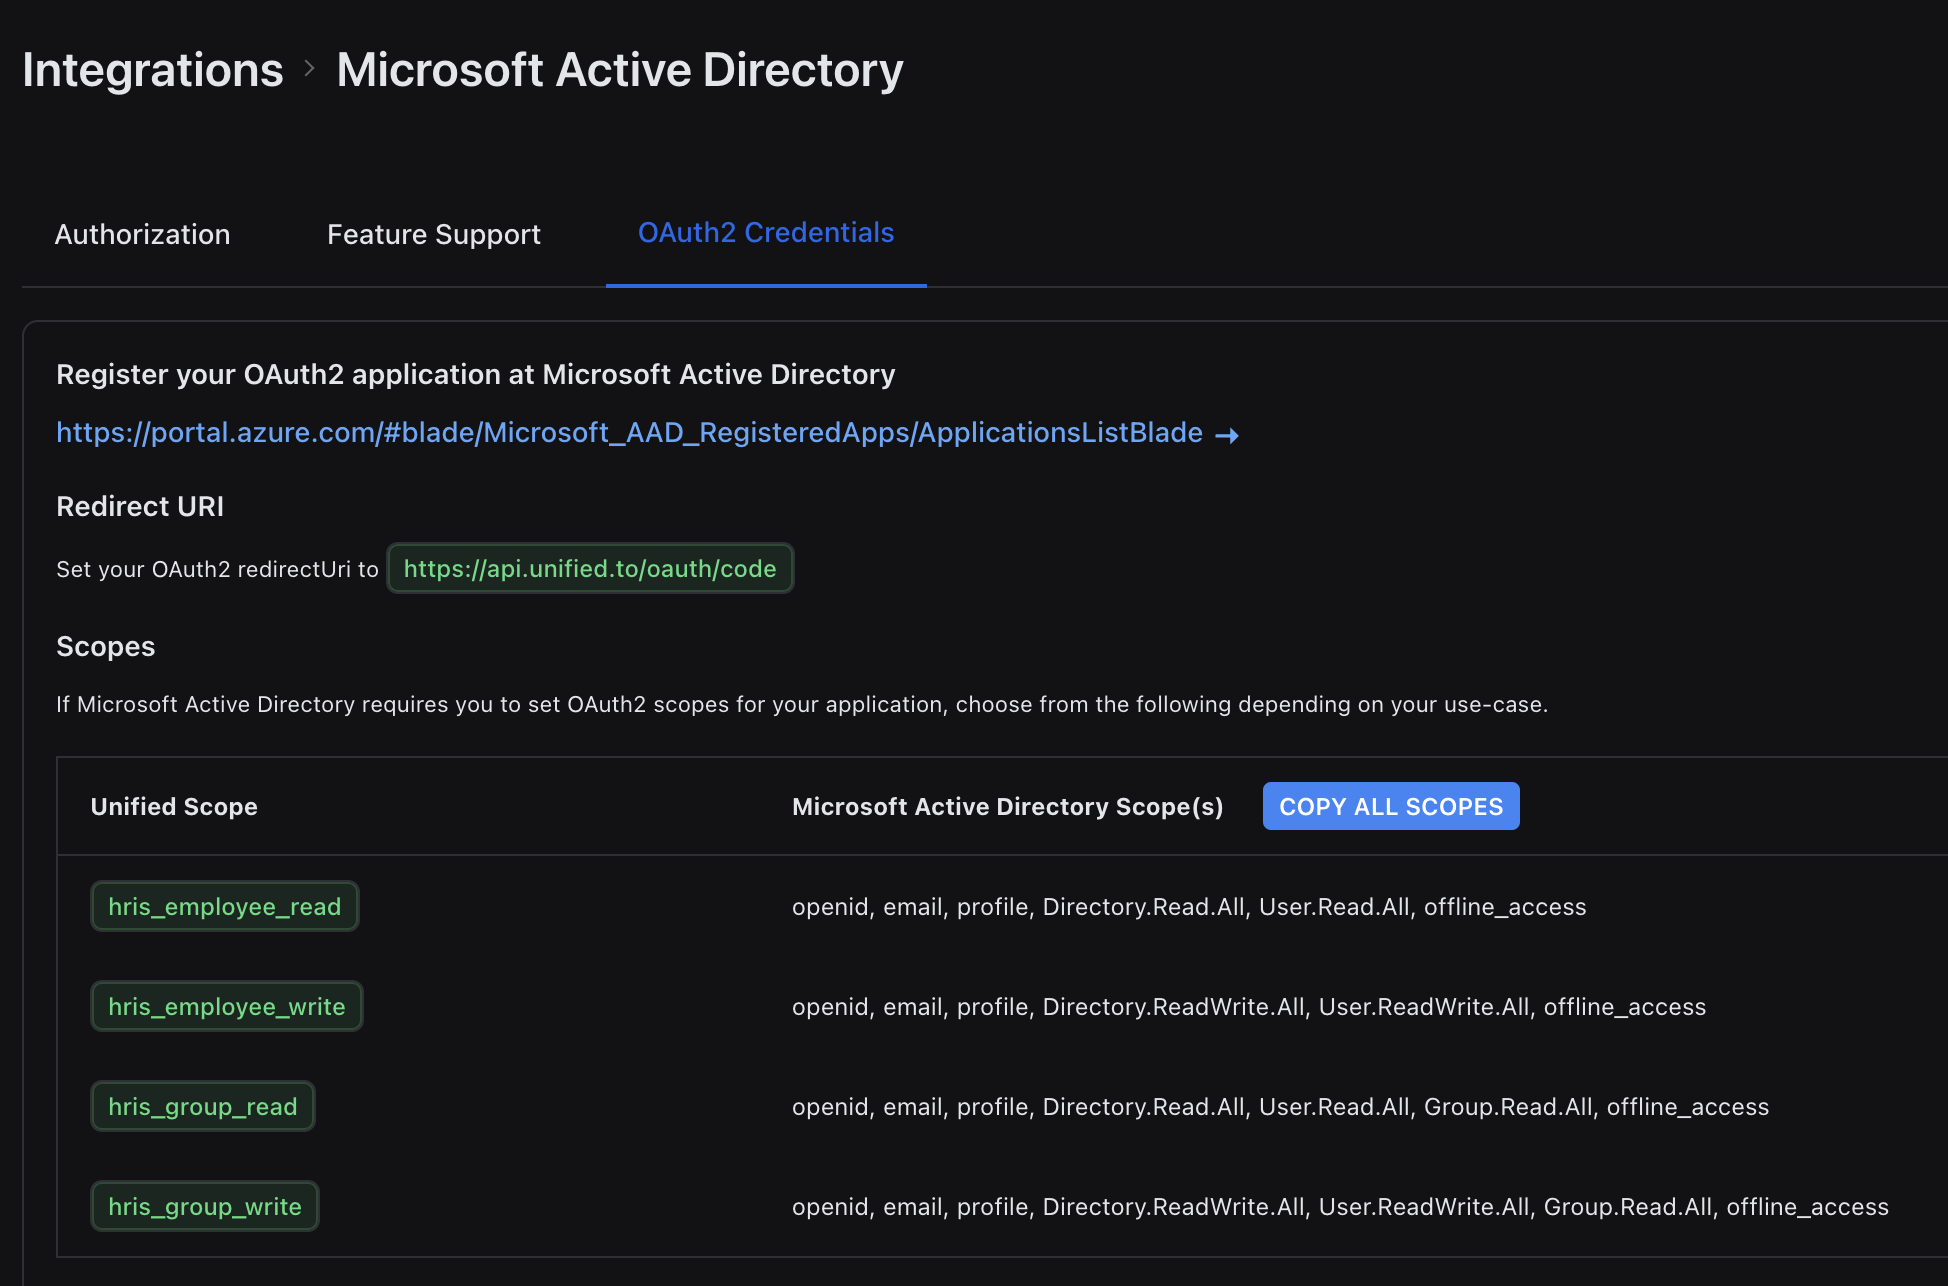
## Troubleshooting
**I'm getting an 'invalid client secret' error**
This error indicates a problem with the client ID and/or secret that you generated. Please ensure you copied the correct values to the integration settings page on Unified.to, or regenerate these credentials in Microsoft Azure Active Directory and then try again.
## How to get your OAuth 2 credentials for Gmail
URL: https://docs.unified.to/guides/how_to_get_your_oauth_2_credentials_for_gmail
# How to get your OAuth 2 credentials for Gmail
------
_June 25, 2024_
_Last updated: May 2026_
To access Google services such as Gmail (also known as Google Mail) through the [Unified API](https://unified.to/technology), you'll generate and retrieve your [OAuth](https://unified.to/embeddedauth) 2 credentials in the Google Cloud Console, then enter them in Unified.to.
## Create or select a project on Google Cloud Console
1. Navigate to the [Google Cloud Console](https://console.cloud.google.com/).
2. From the top nav bar, select an existing project or create a new one.
- If creating a new project, name it whatever you want and click **Create**.
## Enable the Gmail API
1. With your project selected, open the left sidebar and navigate to **APIs & Services > Library** (or search for **Library** from the top nav bar).
2. Search for **Gmail API** and click the matching result.
3. Click **Enable**.
## Configure your OAuth consent screen
Google requires you to configure the OAuth consent screen before it will let you create an OAuth client ID. The consent screen is what users see when they grant your app access to their Gmail.
1. Open the left sidebar and navigate to **APIs & Services > OAuth consent screen**.
2. Choose the user type:
- **Internal** — for Google Workspace organization-internal apps.
- **External** — for consumer Gmail accounts or public apps.
3. Fill in the required fields: app name, user support email, and developer contact information (and, for production, your authorized domains).
4. Complete the consent screen setup.
## Get your OAuth 2 credentials
1. Navigate to **APIs & Services > Credentials** (or search for **Credentials** from the top nav bar).
2. Click **Create Credentials** and select **OAuth client ID**.
3. Select **Web application** as the application type, and name your app whatever you want.
4. Under **Authorized redirect URIs**, enter `https://api.unified.to/oauth/code` (or the corresponding EU/AU regional URL if your workspace is hosted there).
5. Click **Create**.
6. A dialog will appear displaying your new **Client ID** and **Client Secret**. Copy both — you'll need them for the next step.
> Store your Client Secret securely. Never commit it to source control or include it in client-side code; keep it in environment variables or a secrets manager.
## Activate Gmail in Unified.to
1. Navigate to the [Gmail integration page on Unified.to](https://app.unified.to/integrations/googlemail).
2. On the **Authorization** tab, with **OAuth 2** selected as the authentication method, enter your **Client ID** and **Client Secret**.
3. Click **Update** to save your changes and activate the Gmail integration.
## Set your OAuth 2 reauthentication policy
If you're connecting a **Google Workspace** account, make sure your reauthentication policy is set correctly for the integration to keep functioning. This step requires Google Workspace admin access and doesn't apply to consumer Gmail accounts.
1. In the Google Workspace Admin Console, navigate to **Menu > Security > Access and data control > Google Cloud session control**.
2. On the left, select the organizational unit where you want to set the session length. For all users, select the top-level organizational unit. (An organizational unit initially inherits its parent's settings.)
3. Under **Reauthentication policy**, select **Never require reauthentication**.
You can now use the Unified API to build new experiences with Gmail. Happy building!
→ [Start your 30-day free trial](https://app.unified.to/login)
→ [Book a demo](https://calendly.com/d/cph9-g8n-jzg/connect-with-unified)
## How to get your OAuth 2 credentials for Microsoft Dynamics 365
URL: https://docs.unified.to/guides/how_to_get_your_oauth_2_credentials_for_microsoft_dynamics_365
# How to get your OAuth 2 credentials for Microsoft Dynamics 365
------
_October 29, 2024_
_Last updated: May 2026_
This guide explains how to obtain your OAuth 2.0 credentials and configure API permissions for Microsoft Dynamics 365 business applications in Microsoft Entra ID (formerly Azure Active Directory).
## Background
Business applications in Microsoft Dynamics 365 use Microsoft's identity platform, Entra ID, for secure authentication. By registering your application, you establish a trusted connection that allows Unified.to to access Dynamics 365 data through the Dynamics 365 Web API (Dataverse) and, where applicable, Microsoft Graph and other Microsoft APIs. This works through:
- **Delegated access**: Your application acts on behalf of the signed-in user. The user is redirected to Microsoft's sign-in page, authenticates, and grants your application consent, with permissions approved by both the administrator and the user.
- **OAuth 2.0 credentials**: A client ID (which identifies your application) and a client secret (which serves as your application's password).
- **Permissions**: Specific capabilities your application requests, which must be approved by an administrator.
For more information, see [What is the Microsoft identity platform?](https://learn.microsoft.com/en-us/entra/identity-platform/v2-overview)
## Before you begin
Ensure you have:
- Access to the Microsoft Entra admin center ([entra.microsoft.com](https://entra.microsoft.com/))
- Administrator access to Microsoft Entra ID
## Register your application
You'll first register an application in the Microsoft Entra admin center. This provides you with a client ID and client secret.
1. Sign in to the [Microsoft Entra admin center](https://entra.microsoft.com/).
2. In the left sidebar, go to **App registrations**, then click **New registration**.
3. Configure your application:
- Enter a meaningful name (for example, your product name).
- Under **Supported account types**, select **Accounts in any organizational directory (Any Microsoft Entra ID directory - Multitenant)**.
- In the **Redirect URI** section:
- Select **Web** as the platform.
- Enter `https://api.unified.to/oauth/code` as the redirect URI (or the corresponding EU/AU regional URL if your workspace is hosted there).
- Click **Register**.
The redirect URI is where Microsoft sends users and authorization codes after they sign in and grant access, so it must exactly match what Unified.to expects.
## Get your Dynamics 365 client ID and secret
1. **Retrieve your client ID:**
- On your application's overview page, locate the **Application (client) ID**.
- Copy this value — this is your client ID.
2. **Create a client secret:**
- In the left menu, select **Certificates & secrets**.
- Under **Client secrets**, click **New client secret**.
- Provide a description (optional, but helpful for tracking).
- Set the expiration to its maximum value, unless your security policy requires shorter rotation.
- Click **Add**.
- Immediately copy the secret **Value** (not the secret ID). You won't be able to view it again after leaving this page, so store it securely right away — never commit it to source control or share it client-side.
## Configure Dynamics 365 API permissions
1. **Set up Microsoft Graph permissions.** These are used to obtain information about your users.
- In the left menu, click **API permissions**.
- Click **Add a permission**, select **Microsoft Graph**, then choose **Delegated permissions**.
- Search for and add the following permissions:
- `openid`
- `email`
- `offline_access`
- Click **Add permissions**.
2. **Set up permissions for your Dynamics 365 business application.**
- From the **API permissions** screen, click **Add a permission** again.
- Under **More Microsoft APIs**, select the API backing your Dynamics instance:
- If you're using **Dynamics Sales**, select **Dynamics CRM**.
- If you're using **Dynamics Customer Engagement**, select **Customer Insights**.
- Choose **Delegated permissions**.
- Search for and add the following delegated permission on the Dynamics API:
- `user_impersonation` (required for basic access)
- Click **Add permissions**.
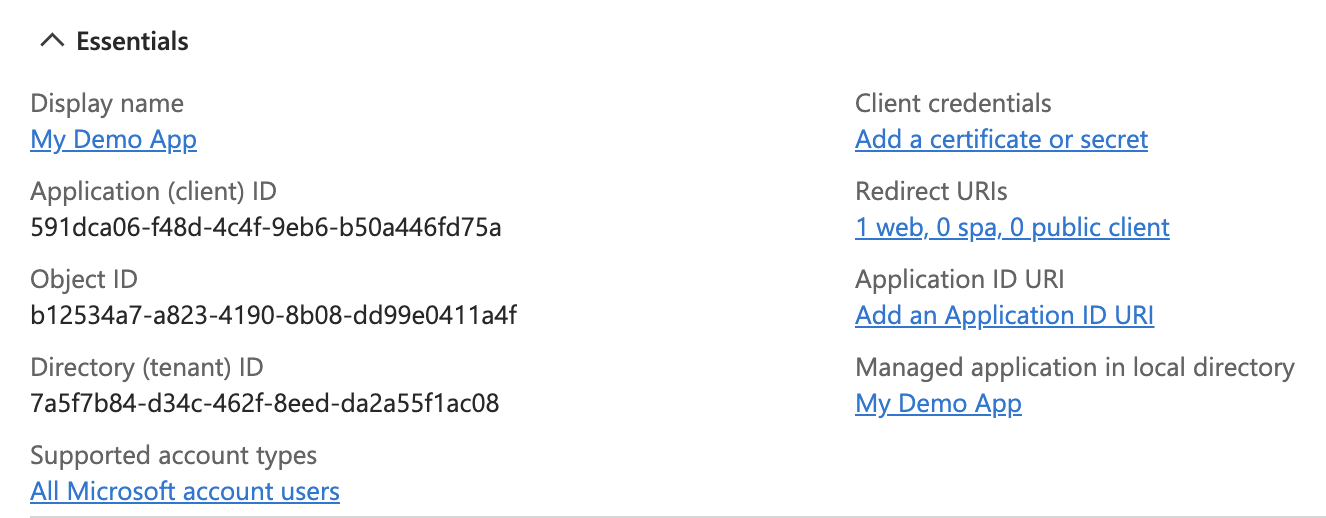
Depending on the specific Dynamics app or environment, you may see slightly different API names (for example, Dataverse or a specific Dynamics module), but you should always choose the API backing your Dynamics instance and add `user_impersonation`. Consent to these permissions is granted when an administrator connects the integration through Unified.to's authorization flow.
## Enter your Dynamics 365 credentials on Unified.to
1. Go to [app.unified.to/integrations](https://app.unified.to/integrations) and search for the Dynamics 365 integration you're using.
2. Enter your client ID and client secret from the steps above.
3. Save your changes.
You can now use the Microsoft Dynamics 365 integration in your application. Happy building!
→ [How to troubleshoot unhealthy connections](https://docs.unified.to/guides/how_to_troubleshoot_unhealthy_connections)
[→ Start your 30-day free trial](https://app.unified.to/login)
[→ Book a demo](https://calendly.com/d/cph9-g8n-jzg/connect-with-unified)
## How to get your OAuth 2 credentials in PipeDrive
URL: https://docs.unified.to/guides/how_to_get_your_oauth_2_credentials_in_pipedrive
# How to get your OAuth 2 credentials in PipeDrive
------
_August 26, 2024_
This guide explains how to create a public developer app in Pipedrive and obtain your OAuth 2 credentials. You'll need these credentials in order to authenticate your app with Unified.to.
_Note: The state parameter is not automatically available in Marketplace Manager. To enable it for your app, please write to marketplace.devs@pipedrive.com._
## Before you begin
Before you create a developer app in Pipedrive, ensure:
- You have a Pipedrive developer sandbox account. If you don't have one, sign up at [Pipedrive's developer portal](https://developers.pipedrive.com/).
## Access the Developer Hub
1. Log in to your Pipedrive account.
2. Click on your profile name in the upper right corner of the top navigation bar.
3. Select **Developer Hub** from the drop-down menu.
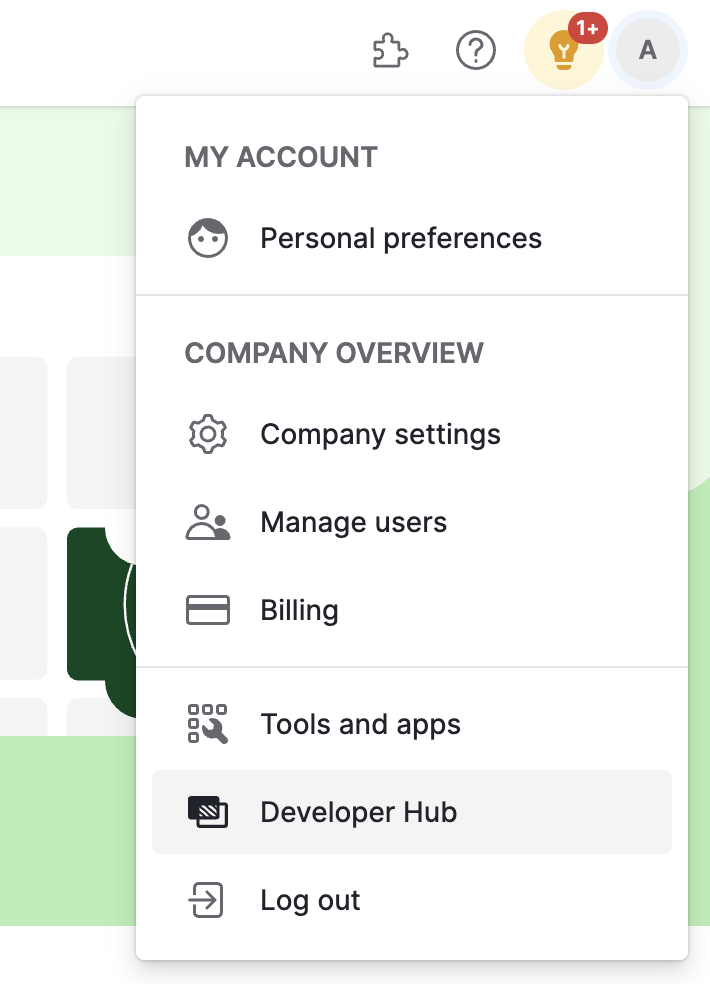
## Create a Pipedrive public app
1. Click **Create an app** (or "+ Create an app" if you have existing apps).
2. Select **Create public app**.
3. Fill in your app details under **Basic info**.
1. In the Callback URL field, choose based on your flow:
- **Unified-hosted OAuth:** `https://api.unified.to/oauth/code`
- **Pipedrive Marketplace (own install + uninstall):** your app callback URL. Marketplace requires one callback that handles OAuth install (GET) and uninstall (DELETE). Unified's callback cannot receive uninstall.
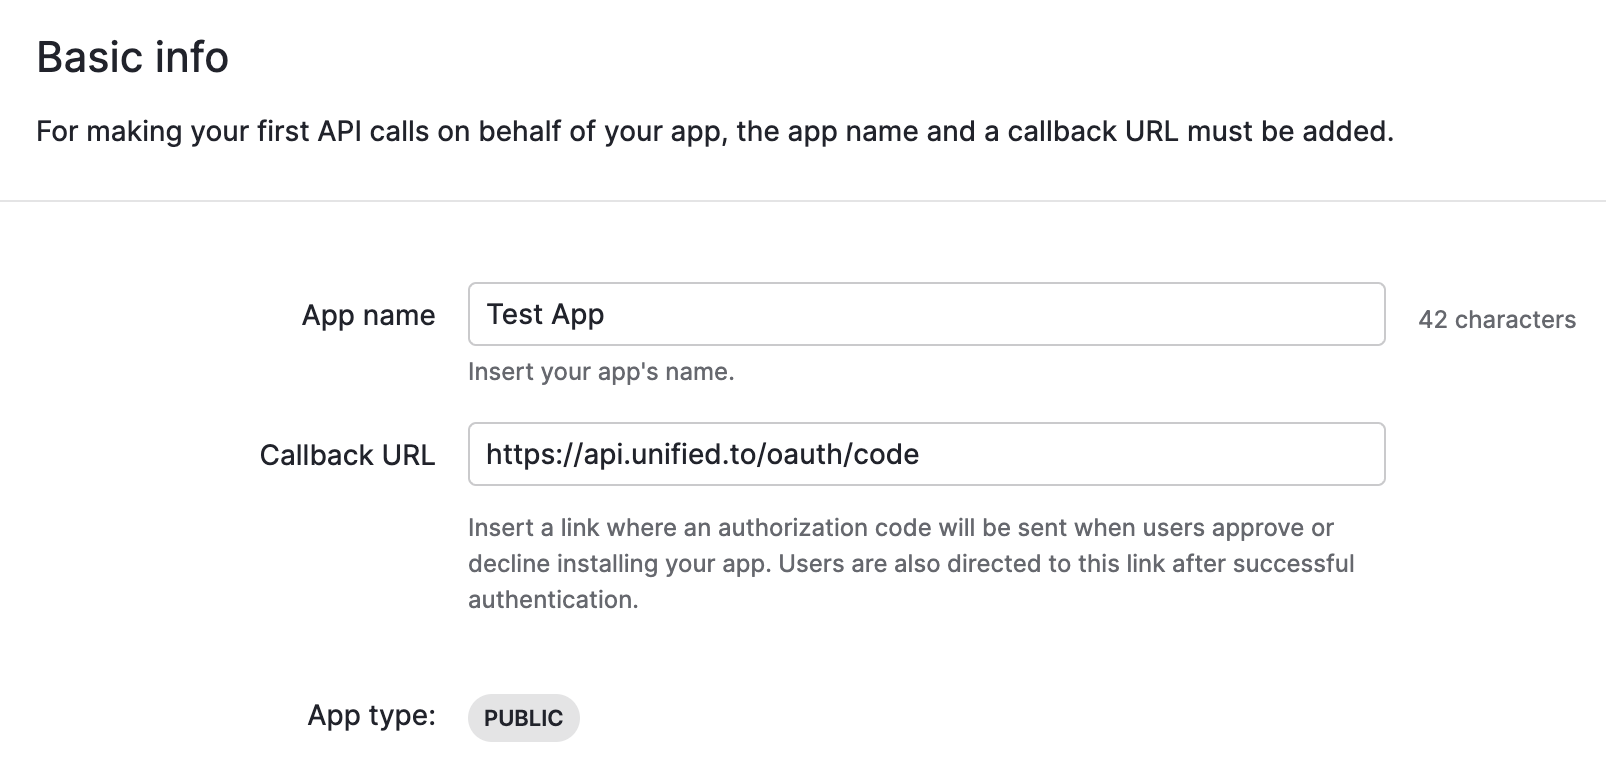
4. Click **Save.** You will be redirected to the **OAuth & access scopes** page after your app is created.
## Configure scopes and get your OAuth 2 credentials
1. Select the scopes your app requires. Only choose scopes that are necessary for your app's functionality.
1. For example, if you want to be notified about new or updated deals from Pipedrive, select **Deals** and choose whether you need read-only access or full (i.e. create, update, read, delete) access.
2. Scroll down to the **Client ID** section.
3. Here you'll find your `client_id` and `client_secret`. Make a note of them as you will need it for the final step.
4. Click **Save**.
## Activate the Pipedrive integration in Unified.to with your client ID and secret
1. Open a new tab and navigate to [the Pipedrive integration in Unified.to](https://app.unified.to/integrations/pipedrive).
2. You will need the following two pieces of information from the earlier steps:
1. **Client ID**
2. **Client secret**
3. Copy and paste these values into their respective fields on the page. Make sure that **OAuth 2** is selected under **Authentication Method**.
4. Click **Activate**.
## Marketplace listing: BYO callback → import into Unified
If you list on the Pipedrive Marketplace and must own the callback URL for install and uninstall:
1. Set Callback URL to your app (not Unified).
2. Activate Pipedrive in Unified with the same `client_id` / `client_secret` from this Marketplace app.
3. On install, exchange the code on your server for `access_token`, `refresh_token`, and `api_domain`.
4. Create the Unified connection with `POST /unified/connection` using the payload below. Set `auth.api_url` to the company host from Pipedrive's `api_domain` token field. Do **not** send `auth.api_domain` (rejected by connection validation) or `other_auth_info` on this OAuth import.
5. On uninstall (Pipedrive sends `DELETE` to your callback), revoke the refresh token at Pipedrive (`POST https://oauth.pipedrive.com/oauth/revoke`), then call `DELETE /unified/connection/{id}` in Unified.
**Full import shape** (adjust `permissions` to match your scopes; set `api_url` to Pipedrive's token-response `api_domain` value — do not send `api_domain` as a connection field):
```json
{
"integration_type": "pipedrive",
"categories": ["crm"],
"permissions": [
"crm_deal_read",
"crm_deal_write",
"crm_contact_read",
"crm_contact_write"
],
"environment": "Production",
"external_xref": "",
"auth": {
"access_token": "",
"refresh_token": "",
"expires_in": 3599,
"api_url": "https://acme.pipedrive.com"
}
}
```
Use the same Marketplace `client_id` / `client_secret` when activating Pipedrive in Unified so token refresh works. General import guidance: [How to migrate or import your integrations into Unified.to](https://docs.unified.to/guides/how_to_migrate_or_import_your_integrations_into_unified).
**Notes:**
- One Marketplace app = one callback URL. You cannot point the same app at both Zig/your domain and `https://api.unified.to/oauth/code`. For Marketplace production, use your callback + import. If you still want Unified-hosted OAuth (e.g. internal testing), use a separate private/sandbox Pipedrive app with Unified's redirect.
- Refresh works on imported connections when Unified's Pipedrive activation uses the same Marketplace `client_id` / `client_secret` that issued the tokens. Include `refresh_token` and `expires_in` on import; do not send `other_auth_info`.
## How to get your OpenAI API Key: Step-by-step guide
URL: https://docs.unified.to/guides/how_to_get_your_openai_api_key_step_by_step_guide
# How to get your OpenAI API Key: Step-by-step guide
------
_February 8, 2024_
To access OpenAI data or automate workflows through an integration, an API Key is required.
This guide walks you through where to find it and how to set it up for development or end-customer use.
## How to get an OpenAI API key (LLM + Ads)
### 1) Create / sign in to your OpenAI account
1. Go to [https://platform.openai.com/](https://platform.openai.com/)
2. Sign in (or create an account).
### 2) Create an API key (for LLM / general API use)
1. In the OpenAI Platform, open **API keys**:
- [https://platform.openai.com/api-keys](https://platform.openai.com/api-keys)
2. Click **Create new secret key**.
3. Give it a recognizable name (e.g., `unified-prod`, `unified-dev`).
4. Copy the key immediately and store it in your password manager / secrets vault.
- You won't be able to see the full key again after you close the dialog.
**Use this key for:**
- LLM requests (Responses API / Chat Completions)
- Embeddings
- Ads API
### 3) Add billing (if required)
If you get "insufficient_quota" or similar errors:
1. Open **Billing** in the OpenAI Platform:
- [https://platform.openai.com/account/billing](https://platform.openai.com/account/billing)
2. Add a payment method and/or purchase credits (depending on your plan).
### OpenAI Ads
---
OpenAI does **not** issue a separate "Ads API key". for the Unified API, you use the **same OpenAI Platform API key** created above.
Getting your OpenAI API Key is the first step. The bigger challenge is supporting dozens of vendors - each with unique auth flows, schemas, and maintenance requirements.
Unified.to is a real-time integration platform built to replace that work. Instead of building and maintaining 1635 custom connectors, you get one secure, normalized API layer across 37 SaaS tools.
On top of that, our usage-based pricing scales cleanly with your product. No per-connection fees, no setup charges, and no lock-in, just infrastructure economics that grow with you.
[Book a demo](https://calendly.com/d/cph9-g8n-jzg/connect-with-unified) to discover how predictable integration costs should be.
## How to get your Paycom SID/Username and Token/Password: Step-by-step guide
URL: https://docs.unified.to/guides/how_to_get_your_paycom_sid_username_and_token_password_step_by_step_guide
# How to get your Paycom SID/Username and Token/Password: Step-by-step guide
------
_August 28, 2023_
To access Paycom data or automate workflows through an integration, a SID/Username and Token/Password are required.
This guide walks you through where to find it and how to set it up for development or end-customer use.
Please request assistance from your Paycom Account Representative for the following items:
1. Enabling the REST API for your Paycom instance
2. Whitelisting your OrgChart server IP address
3. Creating an API Service User
4. Generating valid authentication credentials (SID and Token)
Getting your Paycom SID/Username and Token/Password is the first step. The bigger challenge is supporting dozens of vendors - each with unique auth flows, schemas, and maintenance requirements.
Unified.to is a real-time integration platform built to replace that work. Instead of building and maintaining 884 custom connectors, you get one secure, normalized API layer across 34 SaaS tools.
On top of that, our usage-based pricing scales cleanly with your product. No per-connection fees, no setup charges, and no lock-in, just infrastructure economics that grow with you.
[Book a demo](https://calendly.com/d/cph9-g8n-jzg/connect-with-unified) to discover how predictable integration costs should be.
## How to get your PCRecruiter Username, Password, Database ID, App Key and App ID: Step-by-step guide
URL: https://docs.unified.to/guides/how_to_get_your_pcrecruiter_username_password_database_id_app_key_and_app_id_step_by_step_guide
# How to get your PCRecruiter Username, Password, Database ID, App Key and App ID: Step-by-step guide
------
_August 18, 2023_
Developers connecting to PCRecruiter will need an Username, Password, Database ID, App Key and App ID for authentication.
Here's how to generate, configure, and copy your PCRecruiter Username, Password, Database ID, App Key and App ID so you can use it in your integration or share steps with your customers.
To find your Database ID:
1. Go to **System** in the top navigation bar.
2. Go to **API** in the menu that opens.
3. Go to **Api Settings** under API.
4. This will open a menu that displays the correct **"Api Database Id"**.
Getting your PCRecruiter Username, Password, Database ID, App Key and App ID is the first step. The bigger challenge is supporting dozens of vendors - each with unique auth flows, schemas, and maintenance requirements.
Unified.to is a real-time integration platform built to replace that work. Instead of building and maintaining 878 custom connectors, you get one secure, normalized API layer across 34 SaaS tools.
On top of that, our usage-based pricing scales cleanly with your product. No per-connection fees, no setup charges, and no lock-in, just infrastructure economics that grow with you.
[Book a demo](https://calendly.com/d/cph9-g8n-jzg/connect-with-unified) to discover how predictable integration costs should be.
## How to get your SAP SuccessFactors (OpenID Connect) Username, Password, Client ID, Client Secret, Dependency Name, IAS Host and API URL: Step-by-step guide
URL: https://docs.unified.to/guides/how_to_get_your_sap_successfactors_openid_connect_username_password_client_id_client_secret_dependency_name_ias_host_and_api_url_step_by_step_guide
# How to get your SAP SuccessFactors (OpenID Connect) Username, Password, Client ID, Client Secret, Dependency Name, IAS Host and API URL: Step-by-step guide
------
_August 13, 2025_
To access SAP SuccessFactors (OpenID Connect) data or automate workflows through an integration, a Username, Password, Client ID, Client Secret, Dependency Name, IAS Host and API URL are required.
This guide walks you through where to find it and how to set it up for development or end-customer use.
## **Procedure**
1. Sign into the administration console of your SAP Cloud Identity Services instance.
2. Go to **Applications and Resources** **[Your OIDC Application]** **Application APIs** **Client Authentication** **Secrets**, add a new secret. Once created, copy the client ID and secret for later use. Note that you won't be able to retrieve the secret from the system later. For more information, see [Configure Secrets for API Authentication](https://help.sap.com/docs/cloud-identity-services/aa08922a434a456ba44982c9f4f4d790/dev-configure-secrets-for-api-authentication).
You've now retrieved your SAP SuccessFactors (OpenID Connect) Username, Password, Client ID, Client Secret, Dependency Name, IAS Host and API URL. That's one system covered, but scaling integrations one by one means repeating this process hundreds of times.
Unified.to handles this for you: 475 integrations out of the box, all with normalized schemas, real-time delivery, and Virtual Webhooks. No polling scripts, no retry logic, no maintenance backlog.
[Book a demo](https://calendly.com/d/cph9-g8n-jzg/connect-with-unified) to see how Unified cuts integration work from quarters to days.
## How to get your SAP SuccessFactors Username, Company ID, Password and API URL: Step-by-step guide
URL: https://docs.unified.to/guides/how_to_get_your_sap_successfactors_username_company_id_password_and_api_url_step_by_step_guide
# How to get your SAP SuccessFactors Username, Company ID, Password and API URL: Step-by-step guide
------
_April 24, 2023_
When connecting SAP SuccessFactors to other platforms, authentication requires a Username, Company ID, Password and API URL.
Follow these step-by-step instructions to generate one from your SAP SuccessFactors account, or provide them to your customers if they need to connect their account.
Please follow the following instructions to obtain your SAP SuccessFactors API credentials.
## Step 1: Find your API Server URL
- Go to this [link](https://help.sap.com/docs/SAP_SUCCESSFACTORS_PLATFORM/93f95815070049ebaaff042d8322d518/af2b8d5437494b12be88fe374eba75b6.html#api-servers) and find your data-center (DC). Remember your API Server URL. For example, if your domain was https://salesdemo2.successfactors.com, search for `salesdemo2`
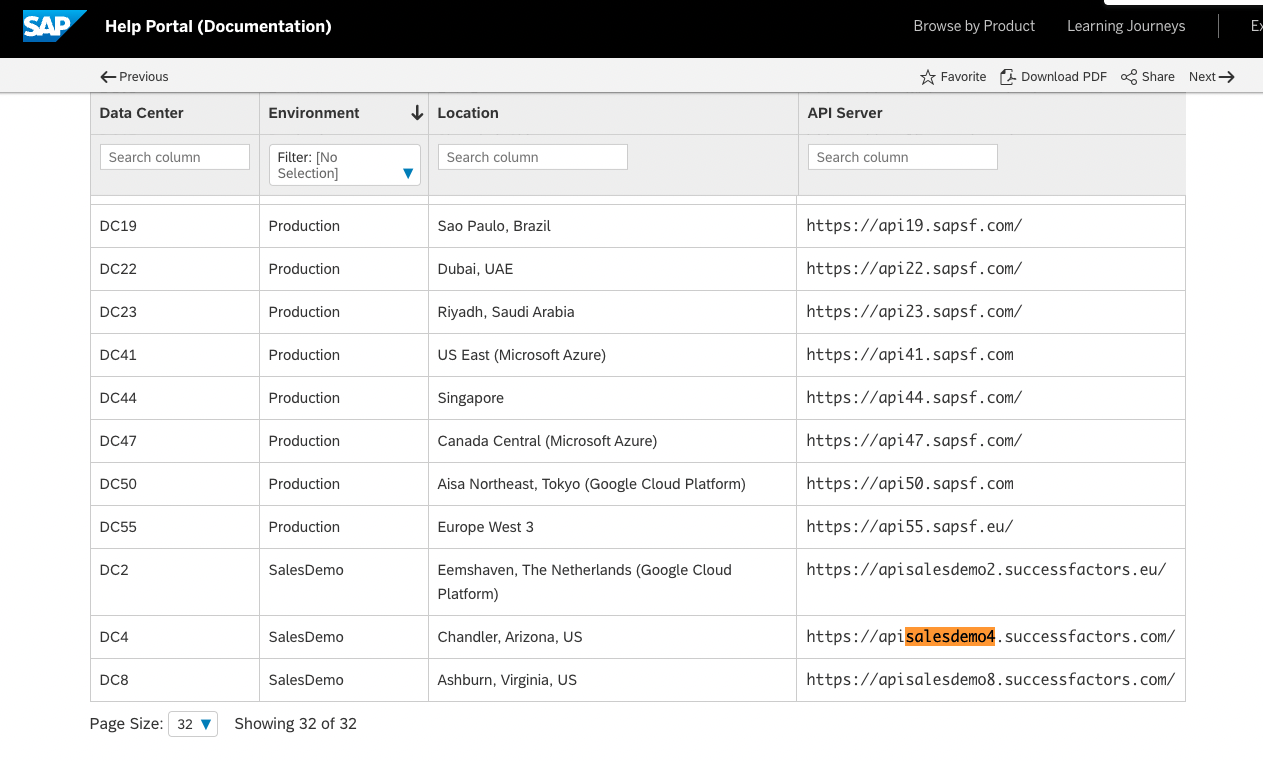
## Step 2: Find your Username and Company ID
- To find your SAP SuccessFactors `username`, log-in to SuccessFactors, then click on your profile image in the upper-right corner to view your username.
- You SHOULD create a new username/password just for API access so that you do not use your own login credentials.
- To find your `Company ID`, you can click on `Show version information` in the top-right menu
- An alternate method to find your `Company ID` under the company settings
## Step 3: Set Security Configuration
- Set the `Allow Admin to Access OData API through Basic Authentication` permission in `Admin Center > OData API Basic Authentication Configuration` page.
- If you require specific IP Addresses to access the SuccessFactors API, then use the following IP addresses: `44.199.69.244` `3.65.142.239` `13.239.151.208`. This is performed in the `Admin Center > OData API Basic Authentication Configuration` or the `API Center > OData IP Allowlisting` pages.
You've now created your SAP SuccessFactors Username, Company ID, Password and API URL - just one of many if you support multiple vendors. Each one adds new auth flows, schema differences, and ongoing maintenance.
Unified.to removes that overhead with unified objects that work across 1647 APIs. Map once, launch everywhere. Your team ships features instead of debugging vendor-specific edge cases.
[Book a demo](https://calendly.com/d/cph9-g8n-jzg/connect-with-unified) to see how much faster you can launch customer integrations with Unified.to.
## How to get your Shopify Admin API access token and Store ID: Step-by-step guide
URL: https://docs.unified.to/guides/how_to_get_your_shopify_admin_api_access_token_and_store_id_step_by_step_guide
# How to get your Shopify Admin API access token and Store ID: Step-by-step guide
------
_November 14, 2023_
If you're building an integration with Shopify, you'll need an Admin API access token and Store ID from your customer's Shopify account to authenticate requests.
This guide shows you (or your customers) how to generate one from Shopify's account settings.
## How do I find my Shopify access token and store ID?
Your access token and store ID can be found under **Settings** _>_ **Apps and sales channels** _>_ **Develop Apps** _>_ **Your_App**_._
If you have not used access tokens in the Shopify admin before, this guide will walk you through how to do that as well as how to retrieve your unique store ID. Note: These instructions are adapted from the [Custom apps](https://help.shopify.com/en/manual/apps/app-types/custom-apps#get-the-api-credentials-for-a-custom-app) guide in Shopify.
### Step 1: Activate custom app development
1. In the Shopify admin dashboard, click **Settings** > [**Apps and sales channels**](https://admin.shopify.com/settings/apps).
2. Click **Develop apps**.
3. Read the disclaimer, and then click **Allow custom app development**.
### Step 2: Create a custom app
1. On the same page, click **Create an app**.
2. In the modal that appears, enter the **App name** and select an **App developer**. This can be the store owner or any collaborator with the **Develop apps** permission.
3. Click **Create app**.
### Step 3: Configure Admin API scopes
1. On the same page, click **Configure Admin API scopes**
2. Select all of the following checkboxes (tip: use the search bar to quickly look these up)
- **Customers:** `read_customers`
- **Inventory:** `read_inventory`, `write_inventory`
- **Locations:** `read_locations`
- **Orders:** `read_orders`, `write_orders`
- **Products:** `read_products`, `write_products`
1. Click **Save**
### Step 4: Install your app and retrieve the access token
1. Navigate to **API credentials** and then click **Install app**
2. In the modal that appears, click **Install**
3. The page will now display a form containing your access token.
4. Click on **Reveal token once**
5. Copy and paste the token to the **Sign in and Authorize page**
### Step 6: Retrieve your Shopify store ID
1. While you are in the Shopify admin dashboard, observe the URL in your address bar - it should look something like this: `https://admin.shopify.com/store/9564e1-49`
2. Your unique Shopify store ID is the part that comes after `/store` e.g. `9564e1-49` in the above example
3. Copy and paste the ID to the **Sign in and Authorize** page
You've now retrieved your Shopify Admin API access token and Store ID. That's one system covered, but scaling integrations one by one means repeating this process hundreds of times.
Unified.to handles this for you: 1242 integrations out of the box, all with normalized schemas, real-time delivery, and Virtual Webhooks. No polling scripts, no retry logic, no maintenance backlog.
[Book a demo](https://calendly.com/d/cph9-g8n-jzg/connect-with-unified) to see how Unified cuts integration work from quarters to days.
## How to get your Wayfair Client ID, Client Secret and Vendor Encrypted Key: Step-by-step guide
URL: https://docs.unified.to/guides/how_to_get_your_wayfair_client_id_client_secret_and_vendor_encrypted_key_step_by_step_guide
# How to get your Wayfair Client ID, Client Secret and Vendor Encrypted Key: Step-by-step guide
------
_November 19, 2024_
If you're building an integration with Wayfair, you'll need an Client ID, Client Secret and Vendor Encrypted Key from your customer's Wayfair account to authenticate requests.
This guide shows you (or your customers) how to generate one from Wayfair's account settings.
Your `Encrypted API Key` can be found in the UI for Supplier management of Vendor apps.
## Steps:
1. Go to the Supplier Integration Status page
2. Select "Vendor Applications" tab
3. Hit "Manage" on the Catalog API row
4. Select your Vendor from the list
5. Grant the needed permissions (see overview of permissions below)
1. Note: Only the permissions that correspond to capabilities that a given Vendor
has adopted will be viewable + grantable.
6. Overview of permissions:
1. **read-product-classes**; Gets the product classes that suppliers can list items for sale
2. **read-product-catalog**; Export the supplier product catalog
3. **write-product-generic-description**; Update the generic descriptions for products
4. **read-product-generic-description-update-status**; Checks the status of generic description updates
5. **read-product-generic-descriptions-by-part**; Get the existing generic descriptions given a supplier part number
6. **read-media-metadata-tags**; Get the metadata tags associated with media;
7. **read-media-uploaded**; Get the list of media that was uploaded for a product
8. **read-media-uploaded-status**; Get the uploaded status for a given media request
9. **write-media-upload-from-url;** Uploads new media and associates it with a product
10. **read-product-create-submit-status;** Check the status of a new product request
11. **read-product-create-questions**; Get the questions required by a product class for listing new items for
sale
12. write-product-create-submit; Submit a new product to be listed on site
13. read-supplier-brand-associations; Get the supplier brands that are authorized for the supplier to sell
7. On the Vendor application page, can copy their encrypted key by pressing the "Copy Encrypted Key" button.
1. This encrypted key is just an encrypted supplier ID + name. This is more secure
than using inputing SuID into the Vendor's system.
Generating a Wayfair Client ID, Client Secret and Vendor Encrypted Key is the first step. The harder part is building pipelines that stay reliable as customers add more systems.
Unified.to gives you options: deliver data via API, streaming webhooks, database sync, or even as MCP tools for AI agents. One integration layer that adapts to your architecture instead of forcing tradeoffs.
[Book a demo](https://calendly.com/d/cph9-g8n-jzg/connect-with-unified) to see how we simplify integration delivery across 1453 integrations and 37 categories.
## How to get your Workable API Token and Subdomain: Step-by-step guide
URL: https://docs.unified.to/guides/how_to_get_your_workable_api_token_and_subdomain_step_by_step_guide
# How to get your Workable API Token and Subdomain: Step-by-step guide
------
_April 24, 2023_
Workable supports authentication with API Token and Subdomain. To connect, you'll need to generate secure API Token and Subdomain from your account settings.
This short guide shows you how to generate one, whether you're testing in your sandbox or helping customers connect their Workable account.
## Generate an API access token
This guide shows how to generate an API access token for your Workable account.
To start, open the drop-down menu on the top right of your screen and select "Integrations" or press [here](https://www.workable.com/backend/account/integrations):
Now click on the "Generate new token" button:
Once you click the generate button, you'll see the new access token being generated:
This token type does not support `r_employees` scope. There are also new scopes like `w_employees` and `r_account` that are not currently supported by access tokens already used for ATS related endpoints. You need to contact support to enable them for your account tokens.
### Subdomain
You will also need the account subdomain which you can find in the company profile settings page:
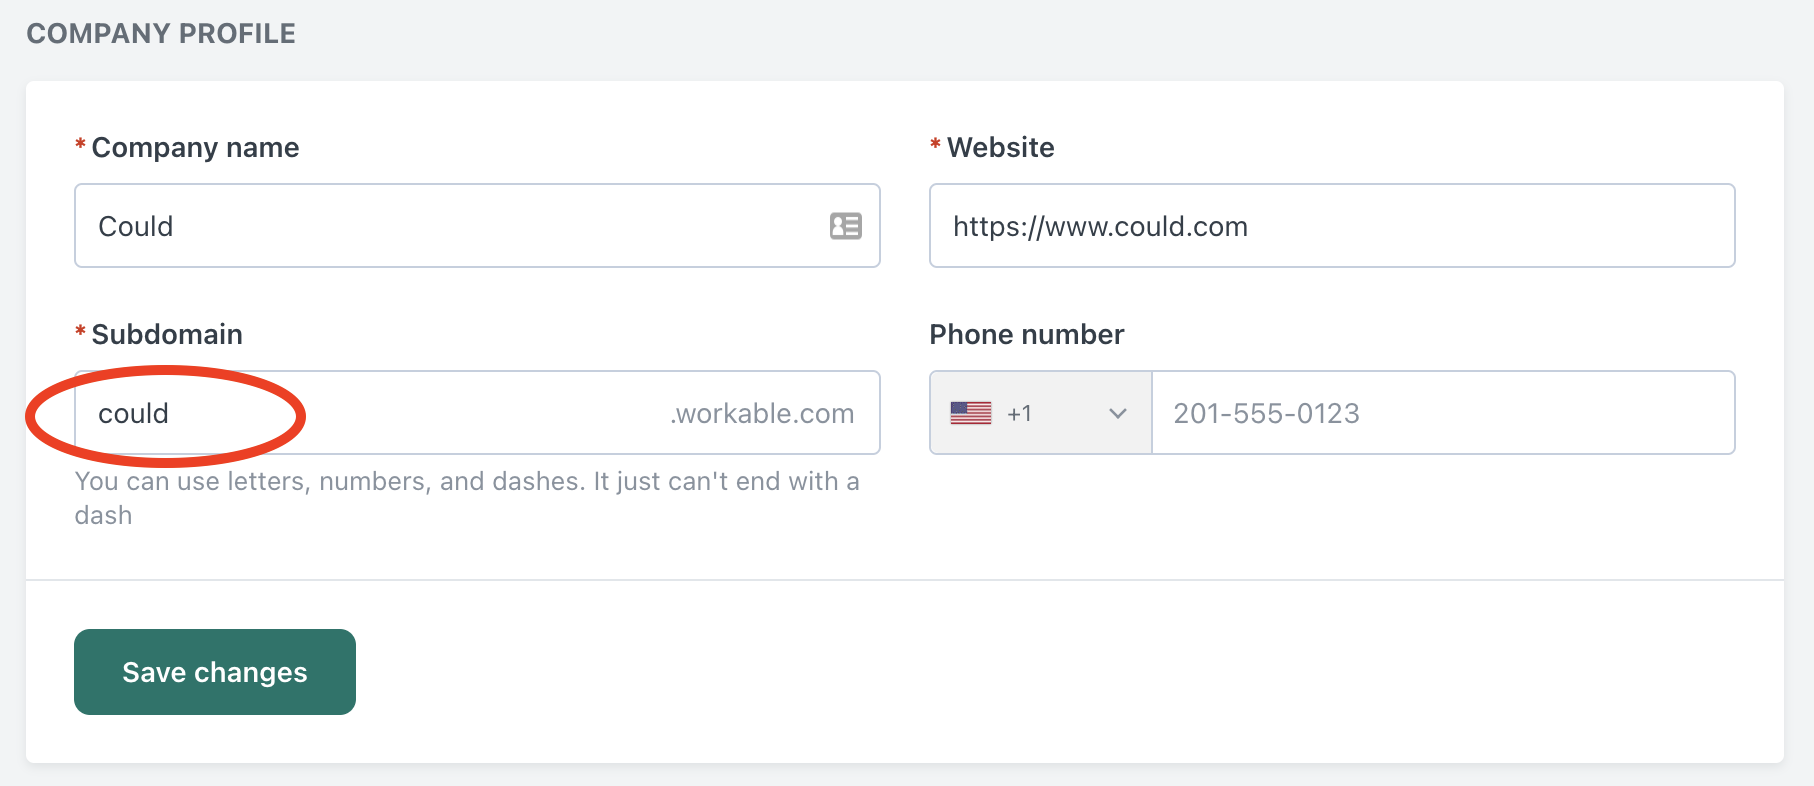
### Revoking The Access Token
Be aware that you can revoke this access token anytime, but if you decide to proceed, every script or application that accesses the Workable API through this token will stop functioning. To keep things running smoothly after revoking your current token, you will have to generate a new access token and update every script or application bound to the previous one.
You've now retrieved your Workable API Token and Subdomain. That's one system covered, but scaling integrations one by one means repeating this process hundreds of times.
Unified.to handles this for you: 944 integrations out of the box, all with normalized schemas, real-time delivery, and Virtual Webhooks. No polling scripts, no retry logic, no maintenance backlog.
[Book a demo](https://calendly.com/d/cph9-g8n-jzg/connect-with-unified) to see how Unified cuts integration work from quarters to days.
## How to get your yotpo APP Key / Store ID and Secret Key: Step-by-step guide
URL: https://docs.unified.to/guides/how_to_get_your_yotpo_app_key_store_id_and_secret_key_step_by_step_guide
# How to get your yotpo APP Key / Store ID and Secret Key: Step-by-step guide
------
_April 4, 2025_
To access yotpo data or automate workflows through an integration, a APP Key / Store ID and Secret Key are required.
This guide walks you through where to find it and how to set it up for development or end-customer use.
# **Retrieving your app key**
**Your app key is sometimes referred to as your Store ID.**
**To retrieve your app key:**
1. **In Yotpo Reviews, click the Profile icon at the top right corner of the screen.**
2. **Select Account Settings >** [**General Settings**](https://settings.yotpo.com/#/general_settings)**. You'll find your App Key at the bottom of the General Settings section.**
**If you need a Secret Key, you'll need to generate it.**
# **Generating your secret key**
**Your secret key is sometimes referred to as your API secret.**
**To generate your secret key:**
1. **Follow the steps above to get to your** [**Account Settings**](https://settings.yotpo.com/#/general_settings)**.**
2. **From your General Settings, click Get secret key. We'll send an email with a verification code to the email address associated with your account.**
**3. Paste the code from the email and click Submit. Your secret key will be revealed on the next screen. Remember, only share your secret key with parties that should have access to your data.**
Generating a yotpo APP Key / Store ID and Secret Key is the first step. The harder part is building pipelines that stay reliable as customers add more systems.
Unified.to gives you options: deliver data via API, streaming webhooks, database sync, or even as MCP tools for AI agents. One integration layer that adapts to your architecture instead of forcing tradeoffs.
[Book a demo](https://calendly.com/d/cph9-g8n-jzg/connect-with-unified) to see how we simplify integration delivery across 506 integrations and 30 categories.
## How to Handle Attachments in Invoice, Bill and Credit Memo
URL: https://docs.unified.to/guides/how_to_handle_attachments_in_invoice_bill_and_credit_memo
# How to Handle Attachments in Invoice, Bill and Credit Memo
------
_August 5, 2025_
Unified.to provides a standardized way to read, upload, and manage attachments (e.g., invoices, receipts, contracts) across various integrations like accounting, CRM, and etc platforms. Here's everything you need to know to get started with attachments via the `Storage File` endpoint.
---
### 🔍 How to Check If an Integration Supports Attachments
To check if a specific integration supports reading or writing attachments:
1. **Go to the Integration Page** in the Unified.to dashboard.
2. Navigate to **Feature Support**.
3. Select the relevant **endpoint** (e.g., `Accounting → Invoice`).
4. Look under **Readable Fields** — if `attachments` is listed, the endpoint supports reading attachments.
🛠️ **Tip:** You can also check support programmatically using the `/storage` endpoint.
---
### 📂 How to List All Attachments
To fetch all available attachments across an integration:
- Use the `GET /storage` (Storage File List) endpoint.
⚠️ **Note:** Most integrations **do not support** listing all attachments globally. Unified.to reflects this limitation. However, some integrations like **Sage** _do_ support it.
---
### 📌 How to Fetch Attachments for a Specific Record (e.g., Invoice)
To get attachments for a specific entity like an invoice, bill, or candidate:
- Use the `GET /storage` endpoint.
- Pass the corresponding `parent_id` (e.g., `invoice_id`) in the query parameters.
Example:
```plain text
http
CopyEdit
GET /storage-file?parent_id=inv_1234
```
---
### 🧾 How to Get Details of a Specific Attachment
To retrieve metadata (name, file type, size, etc.) of a particular attachment:
- Use either:
- `GET /storage/:id` — to get a single attachment
- `GET /storage` — to filter and retrieve multiple files with query params
---
### 📥 How to Download an Attachment
We return a secure `download_url` in the response when you fetch an attachment. You can use this URL to download the file directly.
⚠️ **Note:** The `download_url` is **time-limited** and expires after a few minutes for security reasons. Always use the URL shortly after fetching.
---
### 📤 How to Upload or Create an Attachment
To upload a new attachment:
1. Go to the **Integration Page** and confirm the `storage-file` endpoint is supported under Feature Support.
2. Use the `POST /storage-file` endpoint with required fields.
Key fields:
- `name`
- `data` (base64 encoded) | `download_url`
- `parent_id` (e.g., `invoice_id`, `bill_id`, `employee_id`)
Unified.to will automatically associate the attachment with the parent entity.
Example payload:
```json
json
CopyEdit
{
"file_name": "invoice-august.pdf",
"file_data": "base64-encoded-data",
"parent_id": "inv_1234"
}
```
---
### 🧷 How to Associate an Attachment with an Entity
When uploading a file, simply set the `parent_id` to the ID of the resource (invoice, bill, employee, etc.). Unified.to handles the rest — no extra linking needed.
---
### 💬 Questions or Requests?
- If you're unsure whether an integration supports attachments for a specific resource type, reach out to our support team.
- If a feature isn't currently supported, let us know! We're always looking to expand support where possible.
## How to migrate or import your integrations into Unified.to
URL: https://docs.unified.to/guides/how_to_migrate_or_import_your_integrations_into_unified
# How to migrate or import your integrations into Unified.to
------
_October 25, 2024_
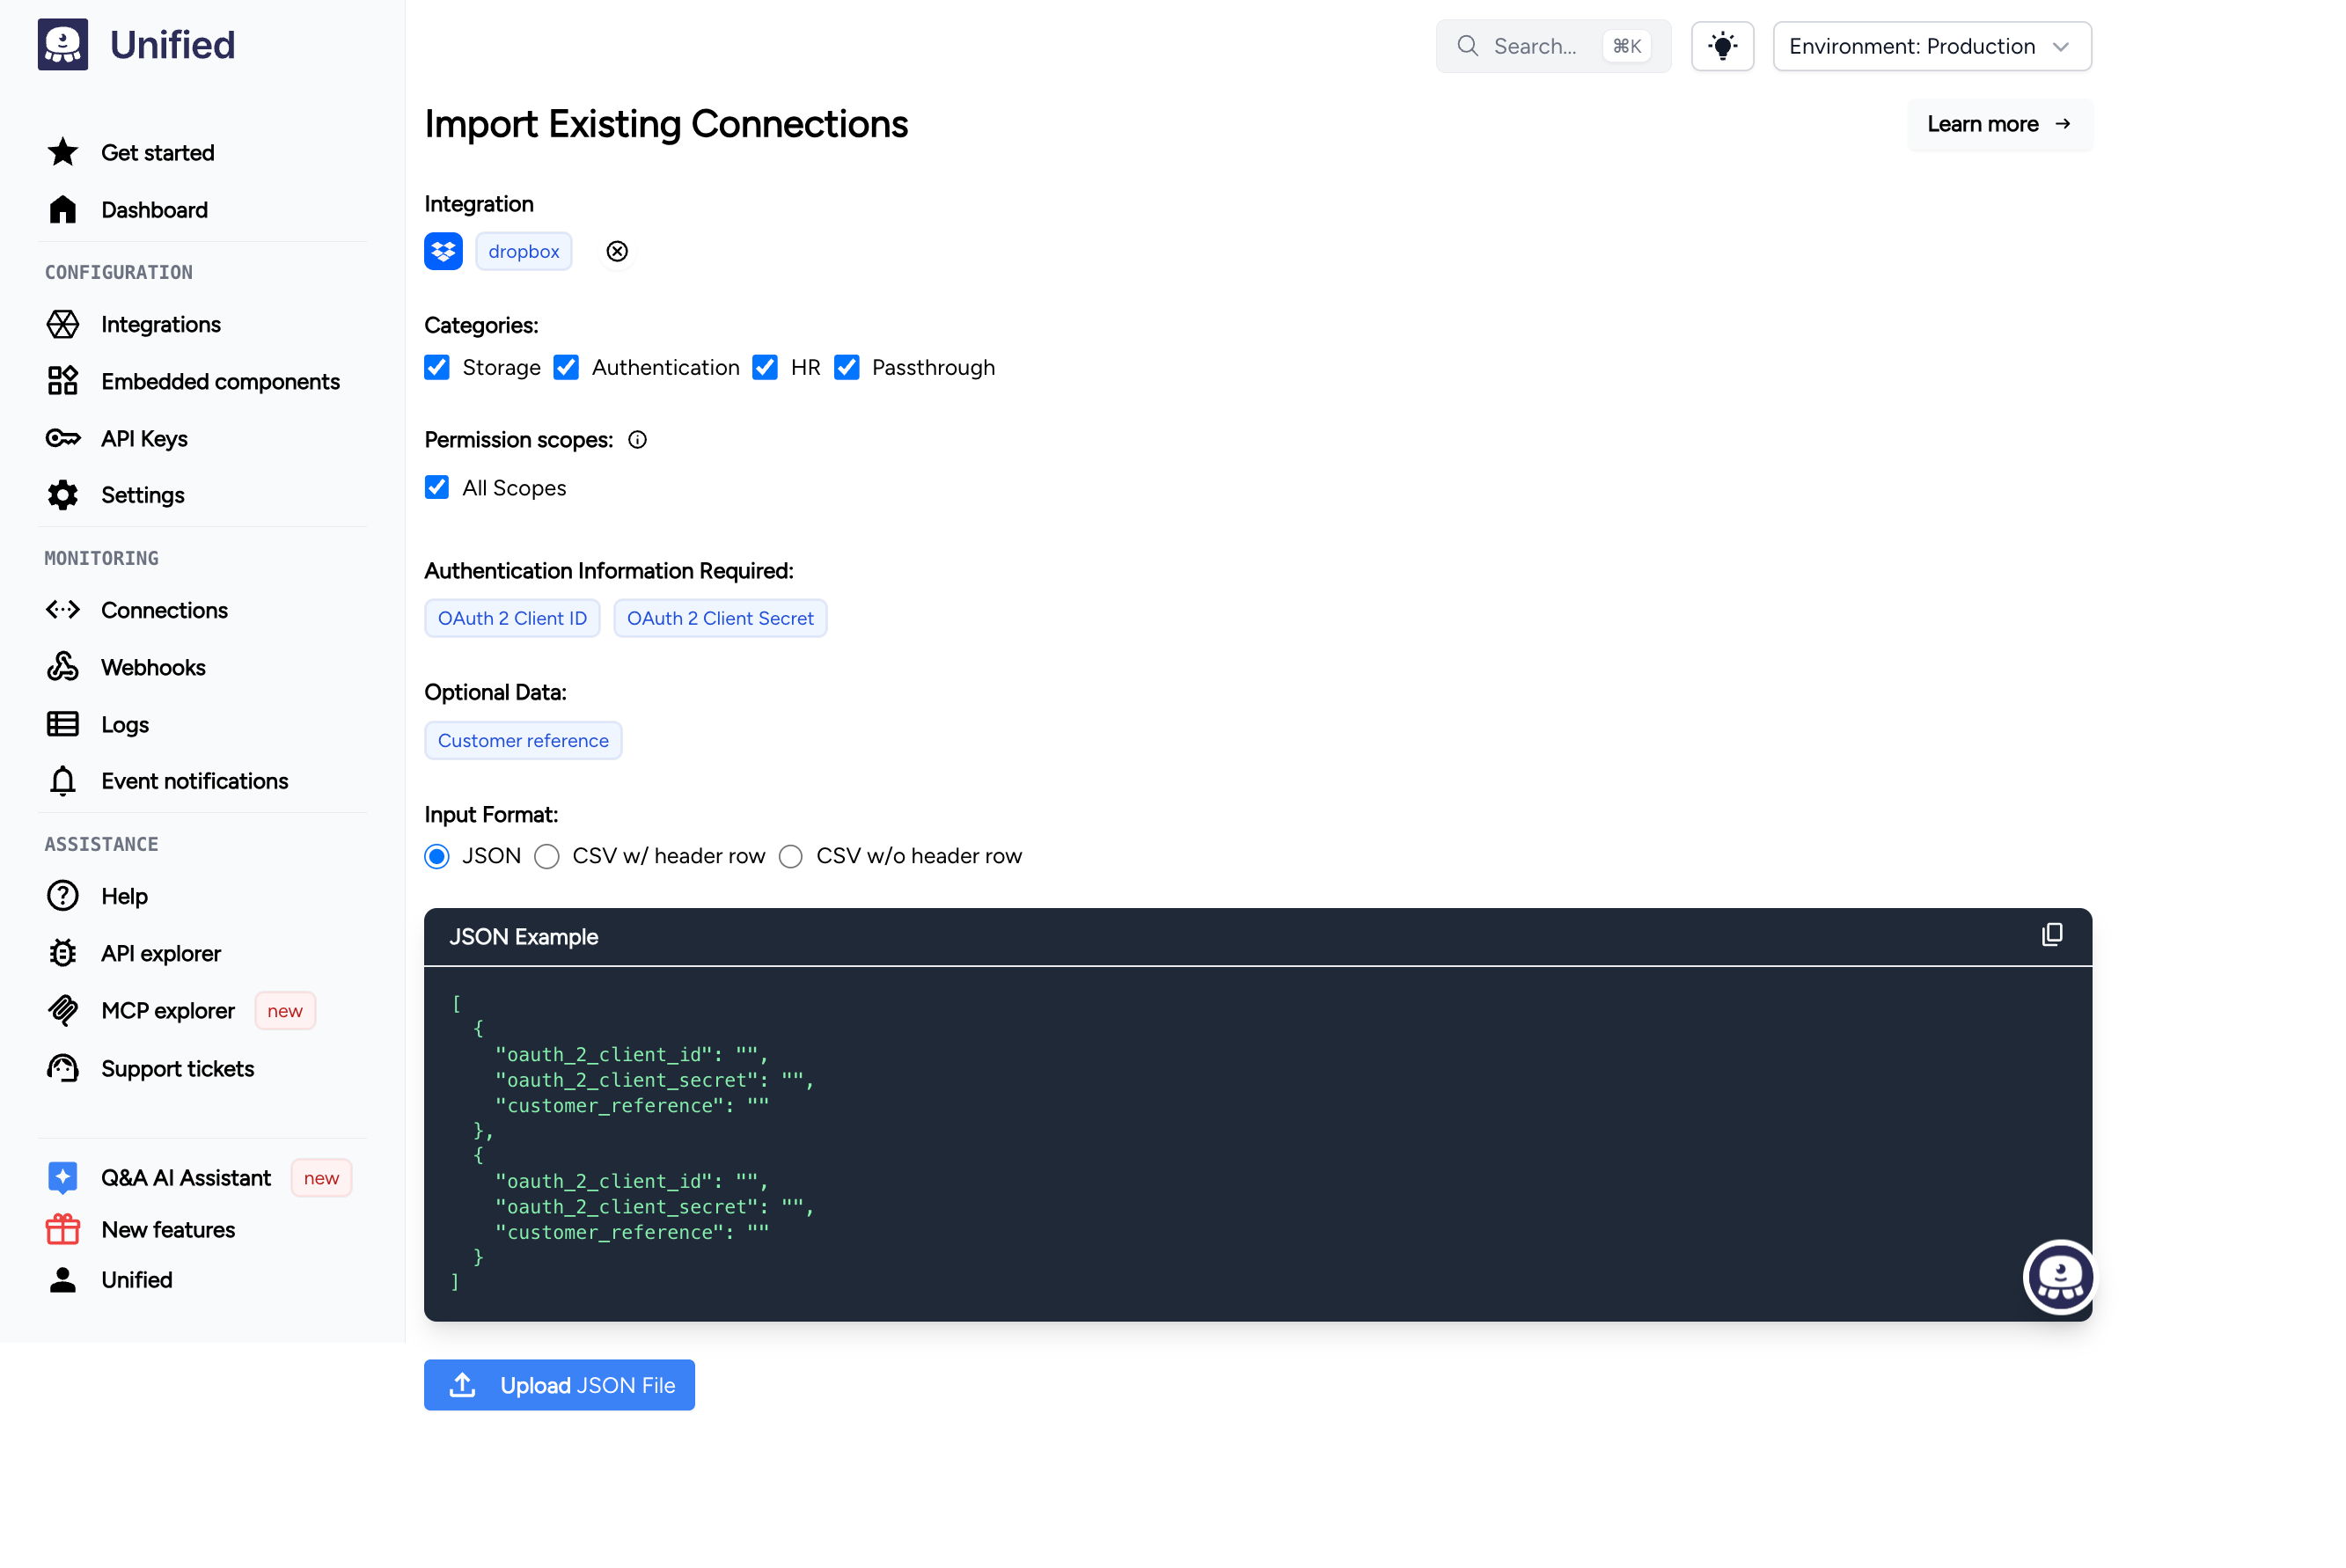
This guide explains how to import your existing integrations into Unified.to, effectively creating new connections using your existing customer credentials. A connection is a secure link between your application and your customer's third-party account.
While connections are typically created through an auth flow where users grant access through the provider's authorization page, you can also create connections by importing existing credentials that your customers have already provided to you.
**Vendor-specific guides.** Moving from another unified API? Each guide maps that vendor's authorization, API calls, pagination, webhooks and passthrough to [Unified.to](https://unified.to/):
- [Merge](https://docs.unified.to/migrate/merge)
- [Apideck](https://docs.unified.to/migrate/apideck)
- [Kombo](https://docs.unified.to/migrate/kombo)
- [Finch](https://docs.unified.to/migrate/finch)
- [Rutter](https://docs.unified.to/migrate/rutter)
- [Migration overview](https://docs.unified.to/migrate/overview), for any other unified API
## When to use import (vs Unified OAuth)
Use `POST /unified/connection` (import) only when you already hold end-user credentials—for example migrating from another platform, or completing OAuth on your own callback (BYO redirect) and then creating the Unified connection.
- **Do not** paste your app `client_id` / `client_secret` into Import Connections. Those are workspace activation credentials (Activate Integration), not per-connection end-user tokens.
- For new end-user connects where Unified can host the OAuth callback, prefer [Authorize new connection](https://docs.unified.to/unified/integration/Authorize_new_connection) or the [embedded auth component](https://docs.unified.to/concepts/embedded-components).
## Before you begin
This guide assumes you have:
- A Unified.to account.
- Existing customer credentials for the integrations you want to import.
- Basic understanding of REST APIs, authentication flows, and [connections](https://docs.unified.to/guides/end_users_integrations_and_connections#end-users-integrations-and-connections).
## Understand the authentication types
Before importing your integrations, you need to determine which authentication type each integration uses. Unified.to supports two main authentication flows:
### API token authentication
- Simple token: Requires a single token or key.
- Multi-field token: Requires multiple credentials (e.g. API key + domain).
### OAuth 2 authentication
- Requires client credentials (client ID and secret).
- Requires access tokens and optional refresh tokens.
- May include additional user information e.g. emails, names.
## Check instructions for the integration you want to import
The Unified.to Core API contains information that will help you determine what you need to successfully import your integrations.
1. Make a GET request to the `/unified/integration` endpoint to get information about the integration you want to import, passing in the categories and/or names of the integrations you are interested in.
2. Check the following fields in the response:
- `token_names`: Lists required credential fields for API token authentication.
- `token_instructions`: Provides guidance on where to find these credentials.
For example:
```javascript
const baseUrl = 'https://api.unified.to/unified/integration';
const params = new URLSearchParams({
categories: ['ats', 'crm'].join(',')
});
const url = `${baseUrl}?${params}`;
// Make the request
fetch(url, {
method: 'GET',
headers: {
'Authorization': `Bearer ${YOUR_API_KEY}`,
'Accept': 'application/json'
}
})
.then(response => {
if (!response.ok) {
throw new Error(`HTTP error! status: ${response.status}`);
}
return response.json();
})
.then(integrations => {
// Loop through each integration and log its auth details
integrations.forEach(integration => {
console.log(`\n=== ${integration.name} ===`);
// Log token information if it exists
if (integration.token_names && integration.token_names.length > 0) {
console.log('Required credentials:', integration.token_names);
console.log('How to find credentials:');
integration.token_instructions?.forEach((instruction, index) => {
console.log(`${index + 1}. ${instruction}`);
});
} else {
console.log('No token credentials required (likely uses OAuth)');
}
});
})
.catch(error => {
console.error('Error fetching integrations:', error);
});
/* Example output:
=== ActiveCampaign ===
Required credentials: ["API Key", "Domain"]
How to find credentials:
1. Your API key can be found in your account on the Settings page under the "Developer" tab...
2. Your API URL can be found in your account on the My Settings page under the "Developer" tab...
=== HubSpot ===
No token credentials required (likely uses OAuth)
*/
```
**API reference:** [Get all integrations](https://docs.unified.to/unified/integration/Returns_all_integrations).
## Import an API token integration
For single-token integrations, construct your connection object:
```json
{
"integration_type": NAME_OF_INTEGRATION,
"permissions": [PERMISSIONS],
"categories": [CATEGORIES],
"environment": "Production", // or any other non-sandbox environment
"auth": {
"token": "your_customer_token"
}
}
```
For multi-field token integrations, use the `other_auth_info` array:
```json
{
"integration_type": NAME_OF_INTEGRATION,
"permissions": [PERMISSIONS],
"categories": [CATEGORIES],
"environment": "Production", // or any other non-sandbox environment
"auth": {
"token": "your_customer_token"
"other_auth_info": [
"first_credential",
"second_credential"
]
}
}
```
**Important**: The order of credentials in `other_auth_info` must match the order of the `token_names` from the integration instructions (see above).
## Import an OAuth 2.0 integration
1. Construct your connection object with the OAuth credentials:
```json
{
"integration_type": "NAME_OF_INTEGRATION",
"permissions": ["PERMISSIONS"],
"categories": ["CATEGORIES"],
"environment": "Production",
"auth": {
"access_token": "customer_access_token",
"refresh_token": "customer_refresh_token",
"expires_in": 3599,
"api_url": "https://company.example.com",
"emails": ["user@example.com"],
"name": "User Name"
}
}
```
1. Choose the redirect / callback model that matches your product:
**Notes**:
- Set `expiry_date` to the token's expiration date (if known) or today's date.
- Include the authenticating user's email and name if available.
- **Unified-hosted OAuth:** set the provider redirect URI to `https://api.unified.to/oauth/code`.
- **BYO / Marketplace callback:** keep your own callback URL when the provider requires your app to own install (and often uninstall) on a single URL. Exchange the code on your server, then import the resulting tokens into Unified. Handle uninstall on your callback and call `DELETE /unified/connection/{id}`.
### Dual-auth integrations and company hosts
Some integrations support both OAuth and API-token auth, and/or return a per-tenant API host in the token response (commonly copied onto `auth.api_url`). For OAuth imports:
- Include `access_token` / `refresh_token` (and `expires_in` when known).
- If the token response includes a company/instance URL, set `auth.api_url` to that value. Only send fields on the Unified connection `auth` schema (e.g. `api_url`) — vendor-only field names may be rejected by validation.
- Activate the integration in Unified with the **same** OAuth app `client_id` / `client_secret` that issued the tokens, so refresh works.
- Omit `other_auth_info` on OAuth imports (see warning below).
> ⚠️ **Dual-auth integrations** (integrations that support both OAuth and API-token auth): do **not** include `other_auth_info` on an OAuth import. If `other_auth_info` is present, Unified uses API-token mode instead of Bearer, which can return 401 even when your OAuth tokens are valid. Use `other_auth_info` only for API-token imports (values in `token_names` order).
## Create the connection
Make a POST request to create the connection. Example using `curl`:
```shell
curl -X POST "" \\
-H "Authorization: Bearer YOUR_API_KEY" \\
-H "Content-Type: application/json" \\
-d '{
"integration_type": "your_integration_type",
"permissions": ["required_permissions"],
"categories": ["integration_category"],
"auth": {
// Your auth object here
}
}'
```
**API reference**: [Create a connection](https://docs.unified.to/unified/connection/Create_connection)
## Test the imported connection
After creating the connection:
1. Note the connection ID from the response.
2. Make a test API call using the new connection ID to verify it works.
3. If the call fails, check the error message and verify your auth credentials.
## Best practices when importing a connection
- Always include relevant `permissions` for the minimum set of data access you require.
- Use a non-sandbox `environment`.
- Store the connection ID securely for future API calls.
- Consider adding `external_xref` to link the connection to your customer's ID.
- Never mix OAuth tokens with `other_auth_info` on the same connection for dual-auth integrations.
- If the provider returns a company/instance URL in the token response, include it as `api_url` on import.
## See also
- [How to associate a connection ID with your end-user](https://docs.unified.to/guides/how_to_associate_a_connection_id_with_your_end_user#how-to-associate-a-connection-id-with-your-end-user)
- [How to troubleshoot unhealthy connections](https://docs.unified.to/guides/how_to_troubleshoot_unhealthy_connections#how-to-troubleshoot-unhealthy-connections)
- [How to create and configure webhooks](https://docs.unified.to/guides/how_to_create_and_configure_webhooks)
## How to obtain your GitHub OAuth2 credentials
URL: https://docs.unified.to/guides/how_to_obtain_your_github_oauth2_credentials
# How to obtain your GitHub OAuth2 credentials
------
_June 3, 2024_
In order to set up OAuth2 for Github, you need to create a new OAuth application in your [GitHub developer settings](https://github.com/settings/applications/new):
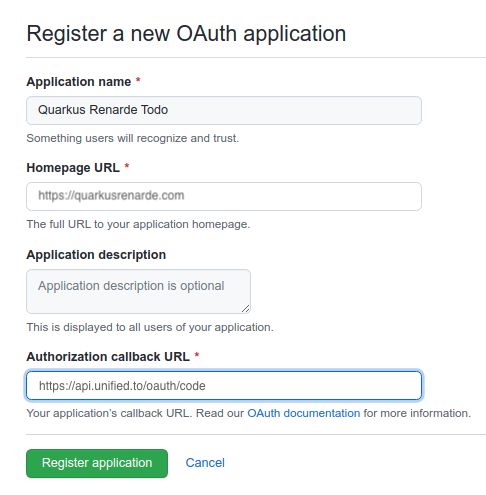
Make sure to fill in the appropriate details, but more importantly the Authorization Callback URL, set to [`https://api.unified.to/oauth/code`](https://localhost:8080/_renarde/security/github-success).
Now click on `Register application` and you'll be shown your application page:
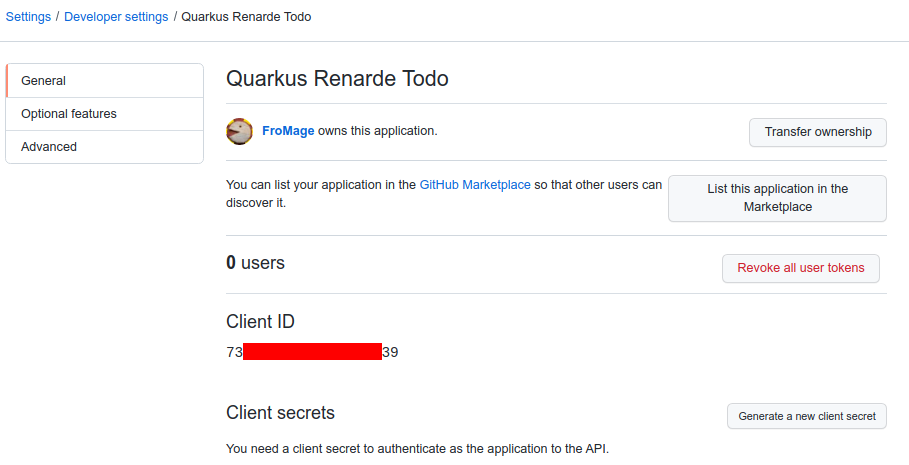
You need to click on `Generate a new client secret`, confirm your credentials, and write down your Client ID and Client secret (especially that one, because you will not be able to see it again later from that page, but you can always recreate one, do don't worry too much):
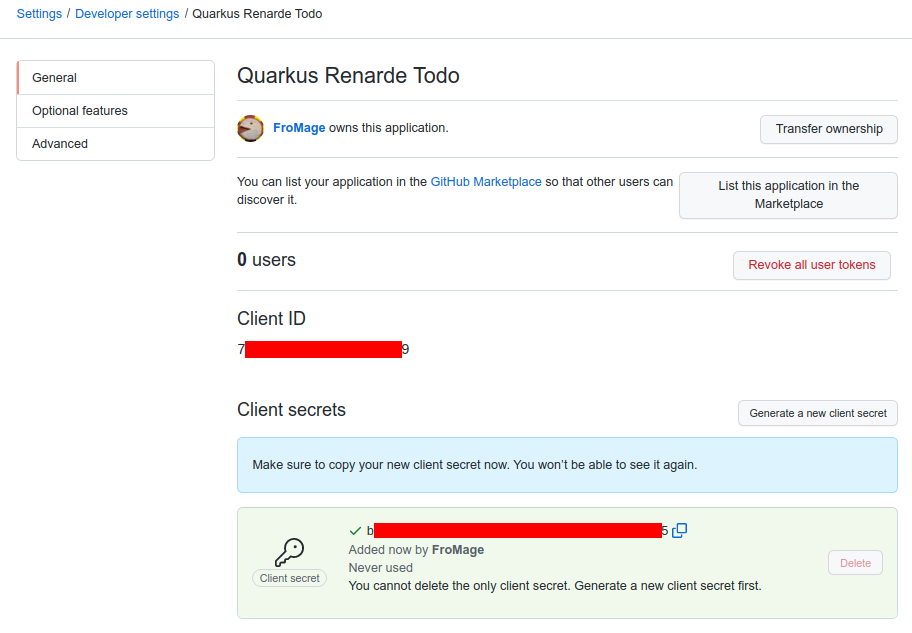
Take your GitHub clientID and clientSecret and add them to the [Unified.to](https://unified.to/) integration settings for Github at [https://app.unified.to/integrations/github](https://app.unified.to/integrations/github)
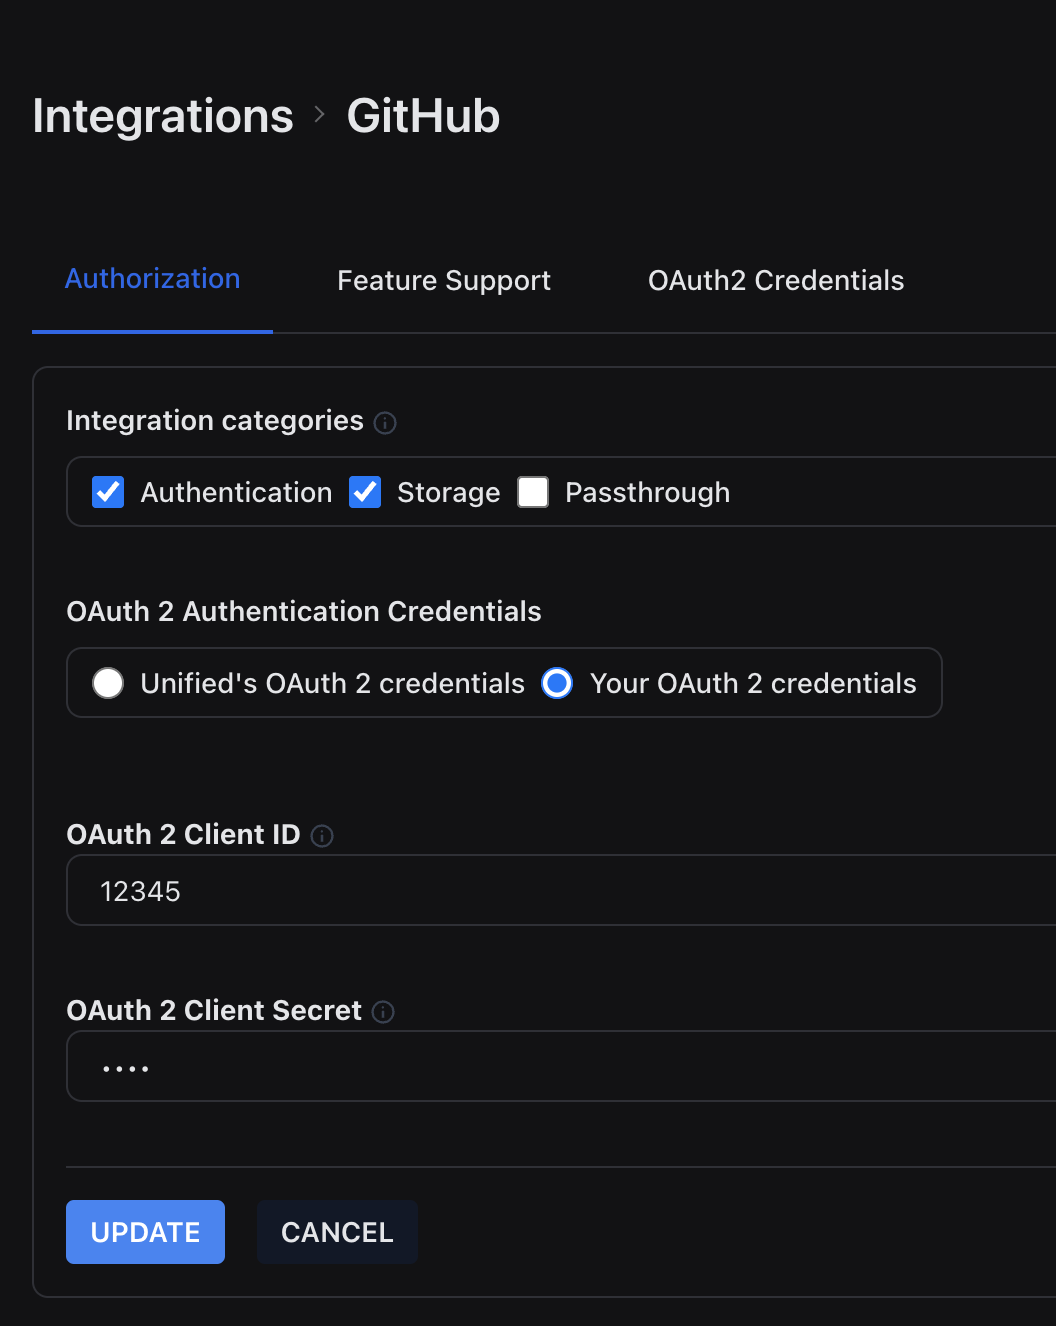
You will now be ready to use GitHub on [Unified.to](https://unified.to/) realtime unified API.
## How to Power Claude with Live Customer Data Using Unified MCP
URL: https://docs.unified.to/guides/how_to_power_claude_with_live_customer_data_using_unified_mcp
# How to Power Claude with Live Customer Data Using Unified MCP
------
_May 28, 2025_
If you're building your software application with Anthropic's LLM API [a](https://claude.ai/)nd want more than a thin agent, your application needs access to real end-customer data — like pulling HubSpot deals, sending a Slack message, or updating a candidate in Greenhouse.
You can wire this up yourself using Unified's API, which will save you a ton of time as it is a single API for multiple SaaS APIs. Or you can point your LLM API at Unified's MCP server and launch even faster.
We'll break down when to use Unified's MCP server, and when to reach for the API instead.
## How Unified's MCP Server Works
Unified's MCP Server exposes real, user-authorized SaaS integrations to any LLM that supports Model Context Protocol.
Anthropic's API, Claude or Cursor can:
- Discover tools based on a given Unified connection
- Call those tools directly through our MCP endpoint
- Use the result in its next generation step
## Two Paths: API vs MCP
Unified supports two integration interfaces:
**1. Unified API (Backend Integration)**
Best for production-grade apps. You fetch and transform data yourself, persist what matters, and optionally embed it in a vector database. Full control, real scalability.
**2. Unified MCP Server (Direct-to-LLM)**
Best for prototyping or agent UXs. You point Anthropic's API, Claude or Cursor at a live MCP endpoint, and it auto-discovers available tools — all backed by your end-user's authorized connections.
## Why Claude + MCP Is the Best Fit
The strongest use case for Unified's MCP Server is direct integration with the Anthropic API. It's already a common pattern among Unified users: AI-native SaaS teams wiring real-time tools into their product experience.
With MCP, you now have two ways to access your customer's data:
1. Use the **Unified API** and call it from your backend
2. Point the **Anthropic API** at Unified's MCP Server and let it fetch tools on its own
This lets your team skip everything between OAuth and LLM — no middleware, no polling, no schema juggling. You stay focused on your product's core logic while Claude handles tool orchestration via Unified.
That's always been the promise of a Unified API: do less glue work and ship faster. MCP just makes that even more direct.
## What to Do if You're Building for Scale
If your product is heading toward scale, especially if it requires logging, observability, or context-aware data access, the better path is:
1. Use the Unified API to fetch and normalize data
2. Store and filter what matters
3. Embed it into a vector database
4. Let your LLM consume it through whatever interface makes sense
MCP is a fast path to working demos. The API is your infrastructure.
## Example Flow
Claude gets this prompt:
> 'Post a message to #sales about the new signed deal.'
It:
1. Identifies a tool call (e.g. `send-slack-message`)
2. Sends the tool and parameters to Unified's MCP Server
3. Unified makes the call to Slack using the user's connection
4. Claude receives the result and continues the conversation
No servers, no APIs, no code in between.
Unified's MCP Server runs in production over Streamable HTTP, with one host per region (US, EU and AU). It supports any authenticated connection, works with Claude or Cursor, and helps you wire up AI features fast without touching infrastructure.
Building the integration itself with a coding agent? [Unified.to](https://unified.to/)'s [Agent Skills](https://docs.unified.to/skills/install) give coding agents such as Claude Code, Codex and Cursor a `SKILL.md` for each [Unified.to](https://unified.to/) API, and the Claude Code plugin adds the Core MCP server in the same install.
[Read the MCP docs](https://docs.unified.to/mcp) or [start your 30-day free trial](https://app.unified.to/login).
## How to register a Google developer app and get OAuth 2 credentials
URL: https://docs.unified.to/guides/how_to_register_a_google_developer_app_and_get_oauth_2_credentials
# How to register a Google developer app and get OAuth 2 credentials
------
_May 29, 2025_
> 💡 **Note** that if you use `Restricted` or `Sensitive` Scopes you need to contact Unified's Support to setup a CNAME for the API URL (US and EU regions) in order to get your App approved by Google
> Check [https://docs.unified.to/guides/how_to_set_up_a_custom_api_url](https://docs.unified.to/guides/how_to_set_up_a_custom_api_url).
1. **Create a Google Cloud Platform project:**
- Go to the Google Cloud Console (https://console.cloud.google.com/) and sign in.
- If you don't have a project, click the "Select a project" dropdown and choose "New Project".
- Give your project a name and click "Create".
2. **Enable the Necessary APIs**
- In the Google Cloud Console, make sure your newly created or existing project is selected.
- Navigate to [**APIs & Services**](https://console.cloud.google.com/apis/library)[ > ](https://console.cloud.google.com/apis/library)[**Library**](https://console.cloud.google.com/apis/library)
- Search for the specific API you want to use (e.g., "Gmail API", "Google Drive API", 'Google Calendar API').
- For Google Directory, make sure that you have the[ Admin SDK API ](https://console.cloud.google.com/apis/library/admin.googleapis.com)enabled.
- Click on the API from the search results.
- Click the "**Enable**" button. Repeat this for all Google APIs your application will need to access
3. **Configure the OAuth Consent Screen**
- In the Google Cloud Console, go to [Google Auth Platform](https://console.cloud.google.com/auth/overview)
- Fill in what is asked and click **Create**
- Click 'Create'
- Go to [Auth Branding](https://console.cloud.google.com/auth/branding) and fill in the required Information
4. **Scopes**: Select the scopes your application needs. Scopes define the permissions your app is requesting (e.g., read emails, access calendar). Be specific and only request the scopes you absolutely need.
- Go to [Auth Data Access](https://console.cloud.google.com/auth/scopes)
- You will at least need `openid`, `userinfo.email`, `userinfo.profile`, `admin.directory.group.readonly` and `admin.directory.user` or `admin.directory.user.readonly`.
- The scopes needed by other Google integrations can be found in the Unified App, for example:
- [Google Contacts](https://app.unified.to/integrations/googlecontacts?tab=oauth2)
- [Google Directory](https://app.unified.to/integrations/googledirectory?tab=oauth2)
- [Gmail](https://app.unified.to/integrations/googlemail?tab=oauth2)
- **Note** that if you use `Restricted` or `Sensitive` Scopes you need to contact Unified's Support to setup a CNAME for the redirect URL (US and EU regions) in order to get your App approved by Google
- Review the information and click "**Save and Continue**" through the steps. If you selected "External" and are just testing, you can often leave your app in "Testing" publishing status. If you intend for it to be publicly available, you'll eventually need to "Publish" it and potentially go through verification.
5. Create OAuth 2.0 Credentials
- Go to [Auth Clients](https://console.cloud.google.com/auth/clients) in the Google Cloud Console.
- Click on "**+ Create Client**" at the top of the page, Follow the steps
- Configure the authorized redirect URIs. Get the correct value from the Integration, for example [Google Drive](https://app.unified.to/integrations/googledrive?tab=oauth2)
- Copy your Client ID and Secret
- Enter these values in your Integrations, for example:
- [Google](https://app.unified.to/integrations/google)
- [Gmail](https://app.unified.to/integrations/googlemail?tab=auth)
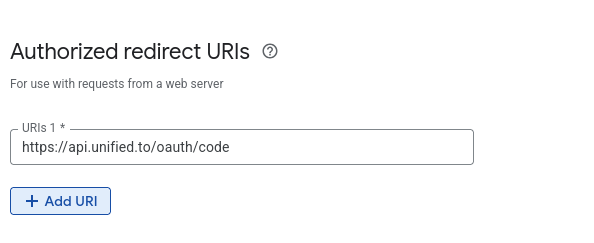
1. Publish your Application
- Go to [Auth Audience](https://console.cloud.google.com/auth/audience)
- Click on Publish app
1. Once your application is approved and verified it will start showing your application name on the authorization consent screen. Until then it will be showing the '[unified.to](https://unified.to/)' name, which is inferred from the redirect URL.
## How to register a Salesforce developer app and get OAuth 2 credentials
URL: https://docs.unified.to/guides/how_to_register_a_salesforce_developer_app_and_get_oauth_2_credentials
# How to register a Salesforce developer app and get OAuth 2 credentials
------
_February 12, 2023_
In this guide, we'll walk you through how to register a Salesforce developer app to get the OAuth 2 credentials you'll need to be a Salesforce integration for your product. Whether you're planning to build a custom-code integration or using a Unified API solution like [Unified.to](https://unified.to/), retrieving your OAuth 2 credentials is the first step in the process of integrating with Salesforce.
We'll also added directional for existing Unified.to users that are leveraging our Unified CRM API for a faster integration development process.
## What is a Salesforce Developer App?
A Salesforce developer app is a container for one or more developer apps. A developer app is an application that can access Salesforce data or functionality through the Salesforce REST, SOAP, or Streaming APIs.
A connected app defines the following information:
- The name and logo of the app
- The OAuth settings for the app, such as the callback URL, the scopes, and the refresh token policy
- The API version and the endpoints for the app
- The user profiles or permission sets that can access the app
By registering a developer app, you can generate a client ID and a client secret, which are the credentials you'll need to authenticate your requests to the Salesforce APIs
## Step 1: Register a Salesforce developer app
To register a Salesforce developer app, you'll need a Salesforce developer account. If you don't have one, sign up for free at [https://developer.salesforce.com/signup](https://developer.salesforce.com/signup).
Once you have a developer account, follow these steps to register a developer app:
1. Log in to your Salesforce developer account and go to **Setup**
2. In the Quick Find box, search for **App Manager** and click on it
3. Click on the **New External Client App** button
4. Fill in the basic information for your app, such as the name, contact email, and logo URL
5. Select `Packaged` in **Distribution State**
6. In the API (Enable OAuth Settings) section, check the **Enable OAuth Settings** checkbox
7. Enter the callback URL for your app (this is the URL that Salesforce will redirect the user to after they authorize your app). For [Unified.to](https://unified.to/) users, the callback URL needs to be `https://api.unified.to/oauth/code`, `https://api-eu.unified.to/oauth/code` or `https://api-au.unified.to/oauth/code`.
8. Select the OAuth scopes for your app (these are the permissions that your app will request from the user). To set up [Unified.to](https://unified.to/) successfully you'll need to add these OAuth Scopes: `Manage user data via APIs (api)` and `Platform requests at any time (refresh_token, offline_access)`. If you are also going to use Salesforce to sign-in your users into your application, then also set the `openid`,`profile`,`email`scopes.
9. Next, enable the following options for you app:
1. Enable Authorization Code and Credentials Flow
2. Require user credentials in the POST body for Authorization Code and Credentials Flow
3. Require Secret for Web Server Flow
4. Require Secret for Refresh Token Flow
10. Do NOT enable CODE CHALLENGE (Require Proof Key for Code Exchange (PKCE) Extension for Supported Authorization Flows)
11. Click **Create**
12. Next click **Edit** under **Policies** tab

13. Set 'Refresh token is valid until revoked' and click **Save**
14. Lastly, go to Settings tab and retrieve you 'Consumer Key' (client ID) and 'Consumer Secret' (client secret).You will need these credentials to activate your Salesforce integration in [Unified.to](https://unified.to/).
## Step 2: Use Unified.to to Simplify Integration Development
Using Salesforce APIs directly can be a complex and time-consuming process, especially if you plan to integrate with other leading CRM platforms like HubSpot, ActiveCampaign, and Copper. Without Unified.to, you'll be tasked with handling authentication, error handling, rate limiting, data mapping, and the synchronization logic for each individual integration.
[Unified.to](https://unified.to/) simplifies this entire process, providing SaaS developers with a unified set of APIs, data models, and webhooks for 220 CRM integrations. Add all the CRM integrations on your roadmap in a matter of hours.
## Step 3: Activate Salesforce in [Unified.to](https://unified.to/) (for [Unified.to](https://unified.to/) users)
1. [Log in](https://app.unified.to/login) and navigate to [**Active Integrations**](https://app.unified.to/integrations)
2. Use the search bar or click the **CRM** tab to select **Salesforce**
3. Click **Activate** on Salesforce
4. Enter the information from the previous step (client ID, client secret)
Once you've activated Salesforce along with other integrations, you'll be able to add integrations to your product using our low-code authorization UI embed.
## One API to integrate them all
You're reading this article on the [**Unified.to**](https://unified.to/) blog. We're a Unified API developer platform for SaaS customer-facing integrations. We're excited to continue to innovate at Unified.to and solve hard, critical integration-related problems for our customers. If you're curious about our integrations-as-a-service solution, consider [**signing up for a free account**](https://app.unified.to/login?utm_source=blog&utm_medium=blog_signup_salesforce&utm_campaign=blog_signup&utm_id=blog_signup) or [**meet with an integrations expert**](https://calendly.com/michelle-unified/discovery-via-blog)**.**
## How to register a Slack developer account and get OAuth 2 credentials
URL: https://docs.unified.to/guides/how_to_register_a_slack_developer_account_and_get_oauth_2_credentials
# How to register a Slack developer account and get OAuth 2 credentials
------
_January 3, 2025_
This guide walks you through how to register a Slack developer account, obtain OAuth 2 credentials, and configure scopes for your application.
## Before you begin
Make sure you have:
- A Slack account
- Admin access to a Slack workspace where you can test your app
## Create a Slack app
1. Go to the [Slack API website](https://api.slack.com/apps) and sign into your Slack account
2. Click **Create New App**
3. Select **From scratch**
4. Enter your app's name
5. Select the workspace where you want to install and test out your app
6. Click **Create App**
After you create your app, you'll be redirected to the app's settings page where you can find your Client Id and Client Secret. Make a note of these as you will need them to activate the Slack integration on Unfiied.to.
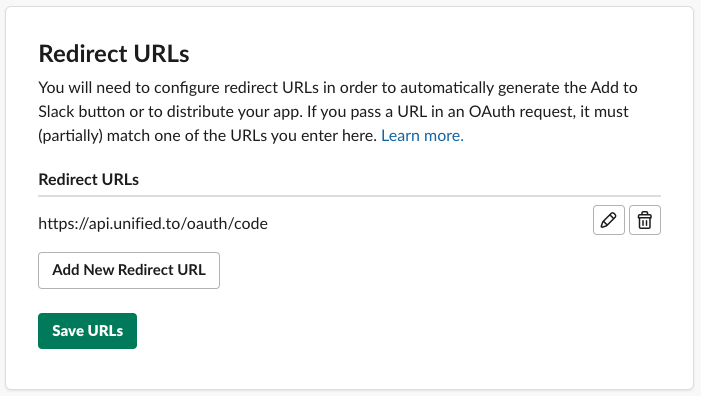
_Note: Store these values securely - never commit them to version control!_
## Configure OAuth 2 settings
In addition to activating the Slack integration, you'll need to configure the redirect URL and enable the correct scopes in order to successfully authorize a connection with Unified.to.
1. From your app's settings page, navigate to **OAuth & Permissions**
2. Under **Redirect URLs,** enter: [`https://api.unified.to/oauth/code`](https://api.unified.to/oauth/code)
3. Click **Save URLs**
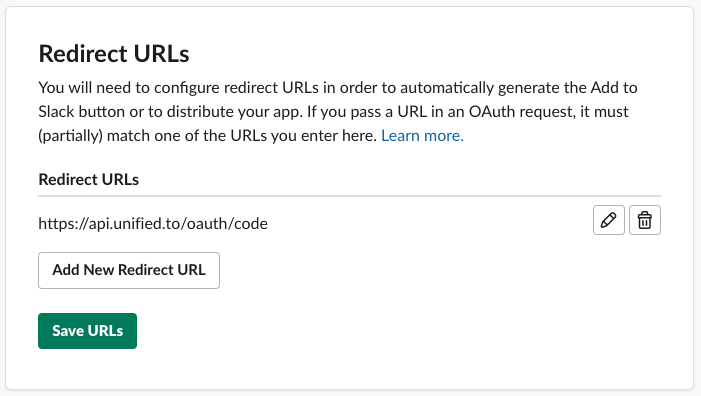
4. If you are using the SlackBot integration, use **Bot Token Scopes.** If not, then use **User Token Scopes.** click **Add an OAuth Scope**
5. Search for and add the scopes you need for your application - refer to [this page ](https://app.unified.to/integrations/slack?tab=oauth2)to see the scopes that are supported by Unified.
1. For example, if you want to read messages, then you should choose the scopes that map to :
1. **messaging_channel_read**: `im:read, mpim:read, channels:read, groups:read`
2. **messaging_message_read**: `im:read, im:history, mpim:read, mpim:history, channels:history, channels:read, groups:read, groups:history`
## Activate the Slack integration with your credentials
1. Go to [https://app.unified.to/integrations/slack?tab=auth](https://app.unified.to/integrations/slack?tab=auth) or [https://app.unified.to/integrations/slackbot?tab=auth](https://app.unified.to/integrations/slack?tab=auth)
2. Enter your Client ID and Client secret from the steps above
3. Save your changes
# For a Slack Bot, follow these additional instructions
1. In the left sidebar, go to **"App Home"**
2. Under **"Your App's Presence in Slack"**, click **"Add"** or **"Edit"**
3. Set a **Display Name** and **Default Username** for your bot
4. Toggle on **"Always Show My Bot as Online"** (optional)
5. Go to **"Event Subscriptions"** in sidebar
6. Toggle **"Enable Events"** to On
7. Enter the Unified webhook URL `https://api.unified.to/webhook/workspace/slackbot?workspace_id={ID}`
8. Subscribe to most bot events like:
- message.channels
- app_mention
- message.im
9. Go to **"Interactivity & Shortcuts" to enable receiving information about button events**
10. Toggle On and enter in `https://api.unified.to/webhook/workspace/slackbot?workspace_id={ID}`
When a user authorizes your `slackbot` integration, their user ID will be stored in `connection.auth.user_id` and the bot ID will be stored in `connection.auth.app_id` .
Congratulations, you're now ready to use the Slack integration in your application.
Happy building!
## How to Register a Workday Developer App and Get OAUTH2 Credentials
URL: https://docs.unified.to/guides/how_to_register_a_workday_developer_app_and_get_oauth2_credentials
# How to Register a Workday Developer App and Get OAUTH2 Credentials
------
_March 13, 2023_
As a developer of an application in the HR space, you absolutely need to have a Workday integration so that you can access your customers' data in the most popular HRIS vendor, Workday.
Before you can use Unified.to's HRIS and ATS unified APIs with Workday, you must get your customer to generate Workday API credentials for your application.
## Register a new API Client in Workday
1. Sign-in to the Workday tenant
2. Search for 'Register API Client for Integration' using the search bar
3. Fill out the requested inputs with the following example details:
1. Client Name;
2. Refresh Token Timeout; 0 days (ie. never)
3. Non-Expiring Refresh Token: Checked
4. Scope: Choose all of the permission scopes for the use-case. Minimum should be 'Staffing' (for employee/worker access), 'Leave of Absence' (for timeoff). Always include 'Tenant Non-Configurable' and 'Integration' as well.
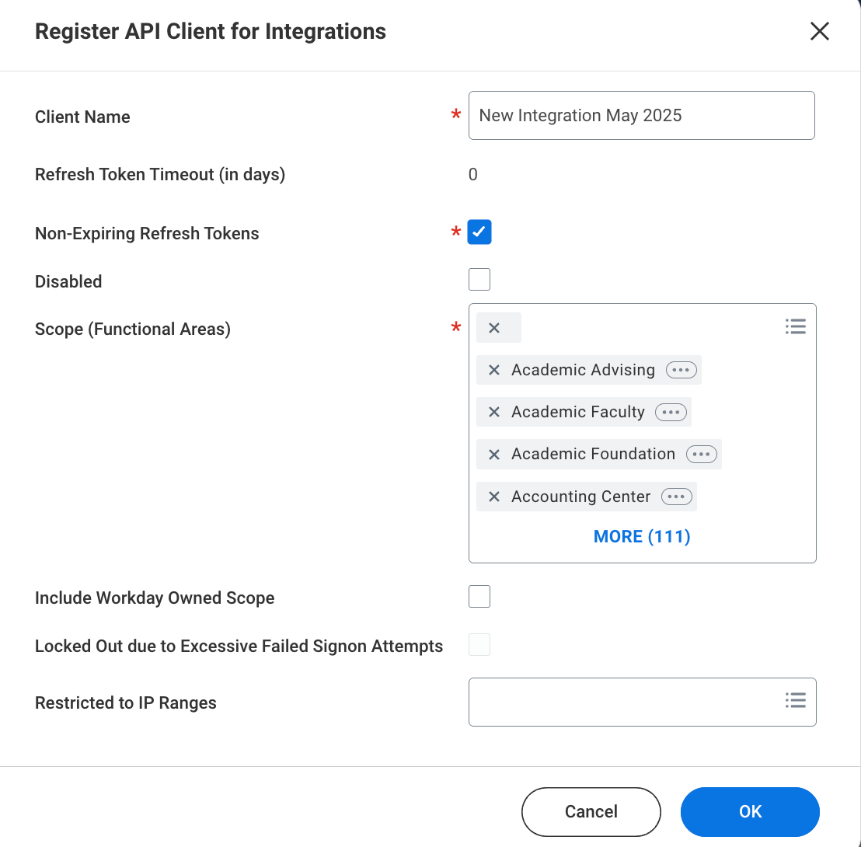
4. Once the API client has been registered, go to 'Related Actions' icon ⇒ 'API Client' ⇒ 'Manage Refresh Tokens for Integrations'
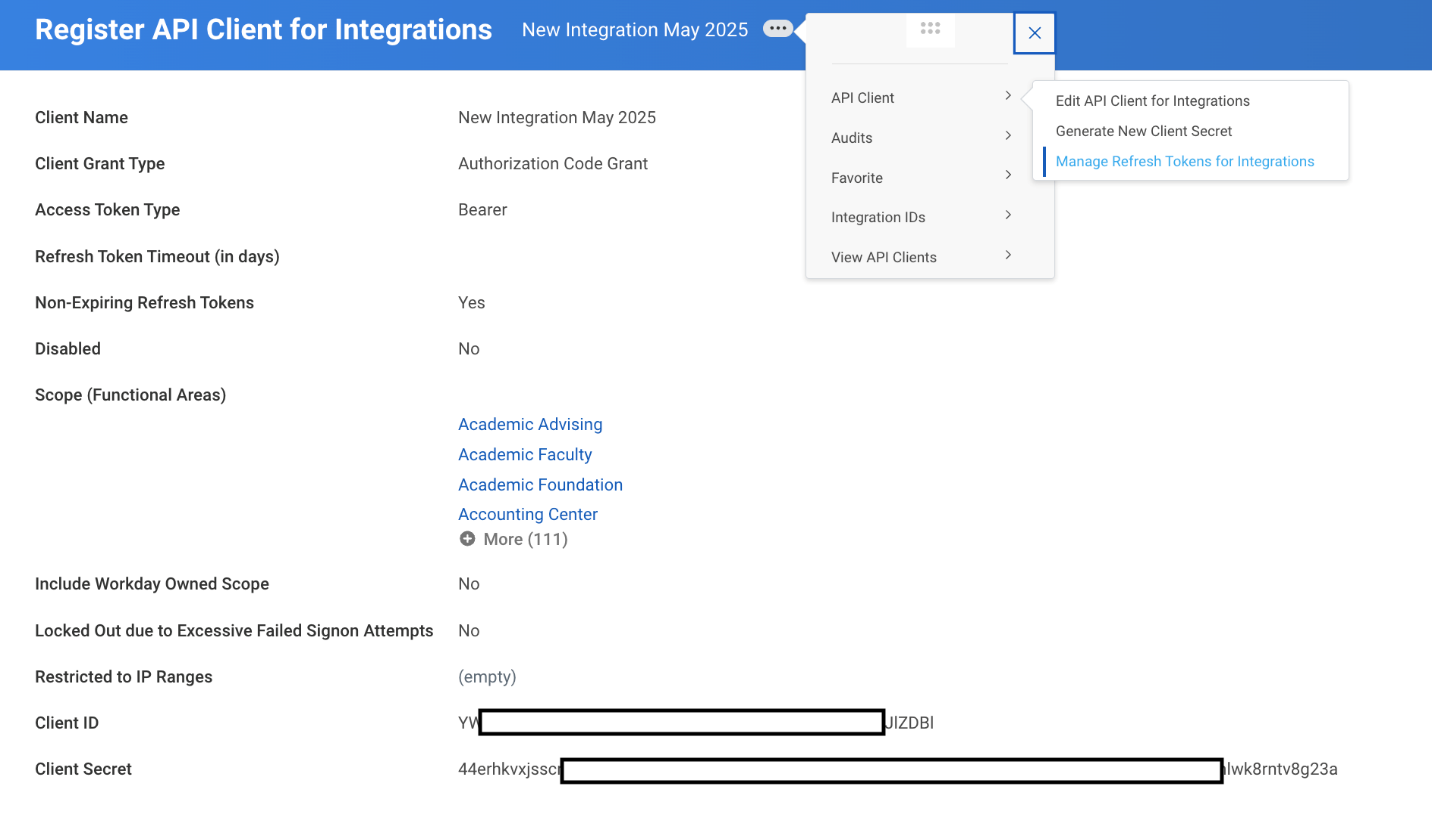
5. Remember the Client ID and Client Secret
6. Enter the 'Integration System User (ISU)' in the Workday Account field. This ISU needs to have access to all of the resources that you need for the API.
7. Check the "Regenerate New Refresh Token" box and click OK.
8. A new refresh token will be generated. Remember that Refresh Token.
## Use [Unified.to](https://unified.to/) to Simplify your Integrations Development
Using Workday APIs directly can be complex and time-consuming, especially if you want to integrate with multiple services or platforms. You will need to handle the authentication, the error handling, the rate limiting, the data mapping, and the synchronization logic for each integration.
A simpler and faster alternative is to use [Unified.to](https://unified.to/) APIs for HRIS and ATS integrations. It provides a unified set of APIs, data-models, and webhooks for most of the HRIS and ATS integrations.
## Activate Workday in Unified.to
1. Navigate to [Active Integrations](https://app.unified.to/integrations)
2. Search for Workday
3. Click on Activate on Workday
4. Enter in the information from the previous step (client ID, secret, endpoints/URLs)
## How to Register a Workday Developer App and Get OAUTH2/ SOAP Credentials
URL: https://docs.unified.to/guides/how_to_register_a_workday_developer_app_and_get_oauth2_soap_credentials
# How to Register a Workday Developer App and Get OAUTH2/ SOAP Credentials
------
_November 10, 2025_
# How to Register and Get OAUTH2 **Credentials for Workday:**
You will need 3 endpoints (URLs):
- REST API Endpoint
- Token Endpoint
- Authorization Endpoint
You will also need:
- Client ID
- Client Secret
### How to setup Client ID
1. **Log in to the Workday application**
2. Register API Client: Navigate to the "Register API Client" section
3. Select the Register API Client form
4. Select the Register API Client form
5. For the grant type, select "Authorization Code Grant'
6. For the access token type, select "Bearer'
7. In the Redirection URI field, enter `https://api.unified.to/oauth/code`
8. In the Scope section, add Staffing and/or Recruiting, depending on your application's needs
9. Select "Non-expiring Refresh Tokens'
10. Select the Include Workday Owned Scope checkbox.
Click OK to save the app.
Once you create your application, Workday will display the information that you entered plus additional information.
### **Retrieve Endpoints**
1. Access "View API Clients"
2. Use the Workday search bar to navigate to "View API clients"
3. Retrieve REST API Endpoint, Token Endpoint, Authorization Endpoint
# How to Register and Get OAUTH2 **Credentials for Workday Legacy**:-
## **Integration System User(ISU)**
### Create User
1. Log in to the Workday tenant
2. search 'Create Integration System User'.
3. Goto 'Create Integration System User'
4. In the "Create Integration System User" page, go to the "Account Information" section.
5. Provide Username & Password
6. Require New Password should remain unchecked
7. Type 0 (zero) for Session Timeout Minutes to prevent session expiration
8. Click "OK" to save.
### Provide permissions to ISU
1. Search field, type "Create Security Group'
2. Select "Integration System Security Group" from the "Type of Tenanted Security Group" drop-down menu.
3. In the "Name" field, enter a name for the security group.
4. Integration System Security Group on Workday select 'Maintain Permissions for Security Group''
5. Configure the Permissions and select "Maintain' Operation
6. "Source Security Group" name matches your created security group.
7. Now add Domain Security Policy Permissions
8. Search 'Activate Pending Security Policy Changes'
### WSDL URL
1. Go to Workday, search 'Public Web Services'.
2. Click **"Public Web Services Report**'
3. Hover over the "Human Resources" section.
4. Click the three dots to open the menu.
5. Select "Web Services" and then click "View WSDL'
6. Goto bottom of the page and get host URL. That looks like following:- [**https://wd5-services1.myworkday.com/ccx**](https://wd5-services1.myworkday.com/ccx)**.**
## How to Register a ZendeskSell Developer App and Get OAUTH2 Credentials
URL: https://docs.unified.to/guides/how_to_register_a_zendesksell_developer_app_and_get_oauth2_credentials
# How to Register a ZendeskSell Developer App and Get OAUTH2 Credentials
------
_February 12, 2023_
If you are a developer who wants to build data integrations for your SaaS software, you might be interested in using the ZendeskSell API. The ZendeskSell API allows you to access and manipulate data from ZendeskSell, a powerful CRM platform that helps you manage your sales pipeline, contacts, deals, and tasks.
However, before you can use the ZendeskSell API, you need to register a developer app and get credentials. In this article, I will show you how to do that in a few simple steps.
## Step 1: Create a ZendeskSell account
If you don't have a ZendeskSell account yet, you need to create one first. You can sign up for a free trial here: [https://www.zendesk.com/register/?source=zendesk_sell](https://www.zendesk.com/register/)
Once you have created your account, you can log in to your ZendeskSell dashboard and access the settings menu.
## Step 2: Register a developer app
To register a developer app, you need to go to the Admin Settings and click on "APIs > Zendesk APIs" and then on 'Oauth Clients'. Then, you need to click on the "Add OAUTH2 Client" button and fill in the required information.
You need to provide a name, a description, a logo URL, and a redirect URI for your app. The redirect URI is the URL where ZendeskSell will send the authorization code after the user grants permission to your app. You can use any URL that you control, but it must match the one you will use in your code later. If you are going to use Unified.to, then this needs to be `https://api.unified.to/oauth/code`
You also need to select the scopes that your app will need to access the ZendeskSell data. The scopes are the permissions that define what your app can do with the ZendeskSell API. You can choose from the following scopes:
- read: Allows your app to read data from ZendeskSell
- write: Allows your app to write data to ZendeskSell
- delete: Allows your app to delete data from ZendeskSell
You can select one or more scopes depending on your app's functionality. However, you should only request the minimum scopes that your app needs to avoid unnecessary access.
After you fill in the information, you can click on the "Register App" button and your app will be created.
## Step 3: Get credentials
Once you have registered your app, you will see a confirmation page with your app's credentials. You will need these credentials to authenticate your app with the ZendeskSell API.
The credentials are:
- Client ID: A unique identifier for your app
- Client Secret: A secret key that you should keep confidential and never share with anyone
You should copy and save these credentials somewhere safe, as you will need them later in your code.
## Step 4: Use [Unified.to](https://unified.to/) to Simplify your Integrations Development
Using ZendeskSell APIs directly can be complex and time-consuming, especially if you want to integrate with multiple services or platforms. You will need to handle the authentication, the error handling, the rate limiting, the data mapping, and the synchronization logic for each integration.
A simpler and faster alternative is to use [Unified.to](https://unified.to/) APIs for CRM integration. It provides a unified set of APIs, data-models, and webhooks for 220 CRM integrations.
## Step 5: Activate Workday in Unified.to
1. Navigate to [Active Integrations](https://app.unified.to/integrations)
2. Search for ZendeskSell
3. Click on Activate on ZendeskSell
4. Enter in the information from the previous step (client ID, secret)
## How to Register a Zoho Developer App and Get OAUTH2 Credentials
URL: https://docs.unified.to/guides/how_to_register_a_zoho_developer_app_and_get_oauth2_credentials
# How to Register a Zoho Developer App and Get OAUTH2 Credentials
------
_August 23, 2024_
Zoho has many applications that we integrate with, including ZohoCRM, ZohoBooks, ZohoPeople, and ZohoRecruit. If you are a developer who wants to build data integrations for your SaaS software with any of the Zoho product suite, you will need to register a developer app and get credentials from Zoho.
In this article, I will show you how to do that in a few simple steps.
## Step 1: Create a Zoho Developer Account
The first step is to create a Zoho Developer account, if you don't have one already. You can sign up for free at [https://developer.zoho.com/signup](https://developer.zoho.com/signup).
Once you have created your account, you will be able to access the Zoho Developer Console, where you can manage your apps and credentials.
## Step 2: Register a Zoho Developer App
The next step is to register a Zoho developer app, which will allow you to access the Zoho API and data. To do that, follow these steps:
- Go to the [Zoho Developer Console](https://api-console.zoho.com/) and click on the "Add App" button.
- Choose "Server-Based" as the Client Type and click on "Create".
- Enter a name and a homepage for your app
- For your Authorized redirect URI, enter in `https://api.unified.to/oauth/code` or `https://api-eu.unified.to/oauth/code`
- Click on "Create".
- You will see a confirmation message and a client ID and a client secret for your app. Copy and save them somewhere safe, as you will need them later.
Congratulations! You have successfully registered a Zoho developer app and got credentials. You can now use them to access the Zoho API and data from your SaaS software.
## Step 3: Activate your Zoho Apps in [Unified.to](https://unified.to/)
1. Navigate to [Active Integrations](https://app.unified.to/integrations)
2. Search for your Zoho app, such as ZohoCRM, ZohoBooks, ZohoPeople, or ZohoRecruit
3. Click on the integration
4. Enter in the information from the previous step (client ID, secret)
5. Click on Activate
## How to Register an ADP Developer App and Get OAUTH2 Credentials
URL: https://docs.unified.to/guides/how_to_register_an_adp_developer_app_and_get_oauth2_credentials
# How to Register an ADP Developer App and Get OAUTH2 Credentials
------
_April 30, 2023_
Developers who are looking to build data integrations for their SaaS software will need to register an ADP Developer application and obtain OAUTH2 credentials. This will allow you to access ADP data and build integrations with ADP services. In this article, we'll go over the steps to register an ADP Developer application and obtain OAUTH2 credentials.
## **Step 1: Create an ADP Developer Account**
To get started, you will need to create an ADP Developer account. If you don't already have one, you can sign up for free on the [ADP Developer Portal](https://developers.adp.com/).
## **Step 2: Register a Developer App**
Once you have an ADP Developer account, you can register a new developer app. Here are the steps to do so:
1. Log in to your ADP Developer account.
2. Navigate to the "Apps" section of the Developer Portal.
3. Click on the "Register App" button.
4. Fill in the required information for your app, such as its name, description, and callback URL.
5. Agree to the ADP Developer Terms of Service and Privacy Policy.
6. Click the "Submit" button to complete the app registration process.
## **Step 3: Get Your App Credentials**
Once your app is registered, you can obtain your app credentials, including the Client ID and Client Secret, which are used to authenticate your app and access the ADP APIs.
1. Navigate to the "Apps" section of the Developer Portal.
2. Click on the name of the app you just registered.
3. Click on the "Credentials" tab to view your app's Client ID and Client Secret.
4. Make sure that your redirect_uri is [`https://api.unified.to/oauth/code`](https://api.unified.to/oauth/code) if you are going to use [Unified.to](https://unified.to/) with these credentials
## Step 4: Using Unified.to
Registering an ADP Developer application and obtaining OAUTH2 credentials is an important step in building data integration for your SaaS software. With these credentials, you'll be able to access ADP data and build integrations with ADP services.
Using ADP APIs directly can be complex and time-consuming, especially if you want to integrate with multiple services or platforms. You will need to handle the authentication, the error handling, the rate limiting, the data mapping, and the synchronization logic for each integration.
It's much easier to use Unified.to APIs for building scalable integrations. With these APIs, you can focus on building your SaaS software and let Unified.to handle the heavy lifting of integrating with ADP. Check out the Unified.to website for more information on how they can help you build better integrations.
## Step 5: Activate ADP in Unified.to
1. Navigate to [Active Integrations](https://app.unified.to/integrations)
2. Search for ADP
3. Click on Activate on ADP
4. Enter in the information from the previous step (client ID, secret)
## How to Register an Atlassian Developer App and Get OAUTH2 Credentials
URL: https://docs.unified.to/guides/how_to_register_an_atlassian_developer_app_and_get_oauth2_credentials
# How to Register an Atlassian Developer App and Get OAUTH2 Credentials
------
_February 12, 2023_
Developers who are looking to build data integrations for their SaaS software with Atlassian services will need to register an Atlassian Developer application and obtain OAUTH2 credentials. This will allow you to access Atlassian data and build integrations with Atlassian services. In this article, we'll go over the steps to register an Atlassian Developer application and obtain OAUTH2 credentials.
## Step 1: **Registering an Atlassian Developer App**
To register an Atlassian Developer app, you need to follow the steps below:
1. Go to the [**Atlassian Developer site**](https://developer.atlassian.com/console/myapps/).
2. Click on "Get started" and create an Atlassian account if you don't have one already.
3. Navigate to the "My Atlassian" page and click on "Create a new app."
4. Fill out the required information for your app, including the app name, description, and contact information.
5. Once you have completed the form, click on "Create app."
6. You will be redirected to the app's overview page, where you can see the app key and client ID.
## Step 2: **Obtaining Credentials**
To obtain the necessary credentials for your salesforce integration, you need to do the following:
1. Go to the app's overview page and click on "Add credentials."
2. Select "OAuth" as the authentication method.
3. Fill out the necessary information, including the callback URL and OAuth scopes. If you are going to use Unified.to, then this needs to be `https://api.unified.to/oauth/code`
4. Once you have completed the form, click on "Create credentials."
5. You will be redirected to the credentials page, where you can see the client secret.
## Step 3: Using Unified.to
Registering an Atlassian Developer application and obtaining OAUTH2 credentials is an important step in building data integration for your SaaS software. With these credentials, you'll be able to access ADP data and build integrations with Atlassian services.
Using Atlassian APIs directly can be complex and time-consuming, especially if you want to integrate with multiple services or platforms. You will need to handle the authentication, the error handling, the rate limiting, the data mapping, and the synchronization logic for each integration.
It's much easier to use Unified.to APIs for building scalable integrations. With these APIs, you can focus on building your SaaS software and let Unified.to handle the heavy lifting of integrating with ADP. Check out the Unified.to website for more information on how they can help you build better integrations.
## Step 4: Activate Atlassian in Unified.to
1. Navigate to [Active Integrations](https://app.unified.to/integrations)
2. Search for Atlassian
3. Click on Activate on Atlassian
4. Enter in the information from the previous step (client ID, secret)
## How to Register your Facebook OAuth2 Application
URL: https://docs.unified.to/guides/how_to_register_your_facebook_oauth2_application
# How to Register your Facebook OAuth2 Application
------
_August 28, 2026_
1. Create a Meta Developer account
- Go to [**https://developers.facebook.com/**](https://developers.facebook.com/)
2. Create an application
- Go to [**https://developers.facebook.com/apps/creation/**](https://developers.facebook.com/apps/creation/)
Enter the following details:
- **App Name**
- **App Contact Email**
1. Add the use case

2. Connect your app to a business portfolio
3. Once you create the app, select it from the [https://developers.facebook.com/apps/](https://developers.facebook.com/apps/) page. From the app dashboard, select 'Customize the Manage everything on your Page use case'
4. Now add the permissions
- pages_show_list
- pages_read_engagement
- pages_read_user_content
- read_insights
- pages_manage_posts
- email
- public_profile
1. **Configure Facebook Login for Business**
- In the left sidebar, open (1, 2): Facebook Login for Business → Settings
- Specify the [**Unified.to**](https://unified.to/) OAuth2 redirect URLs (3)
- Click **Save Changes (4)**
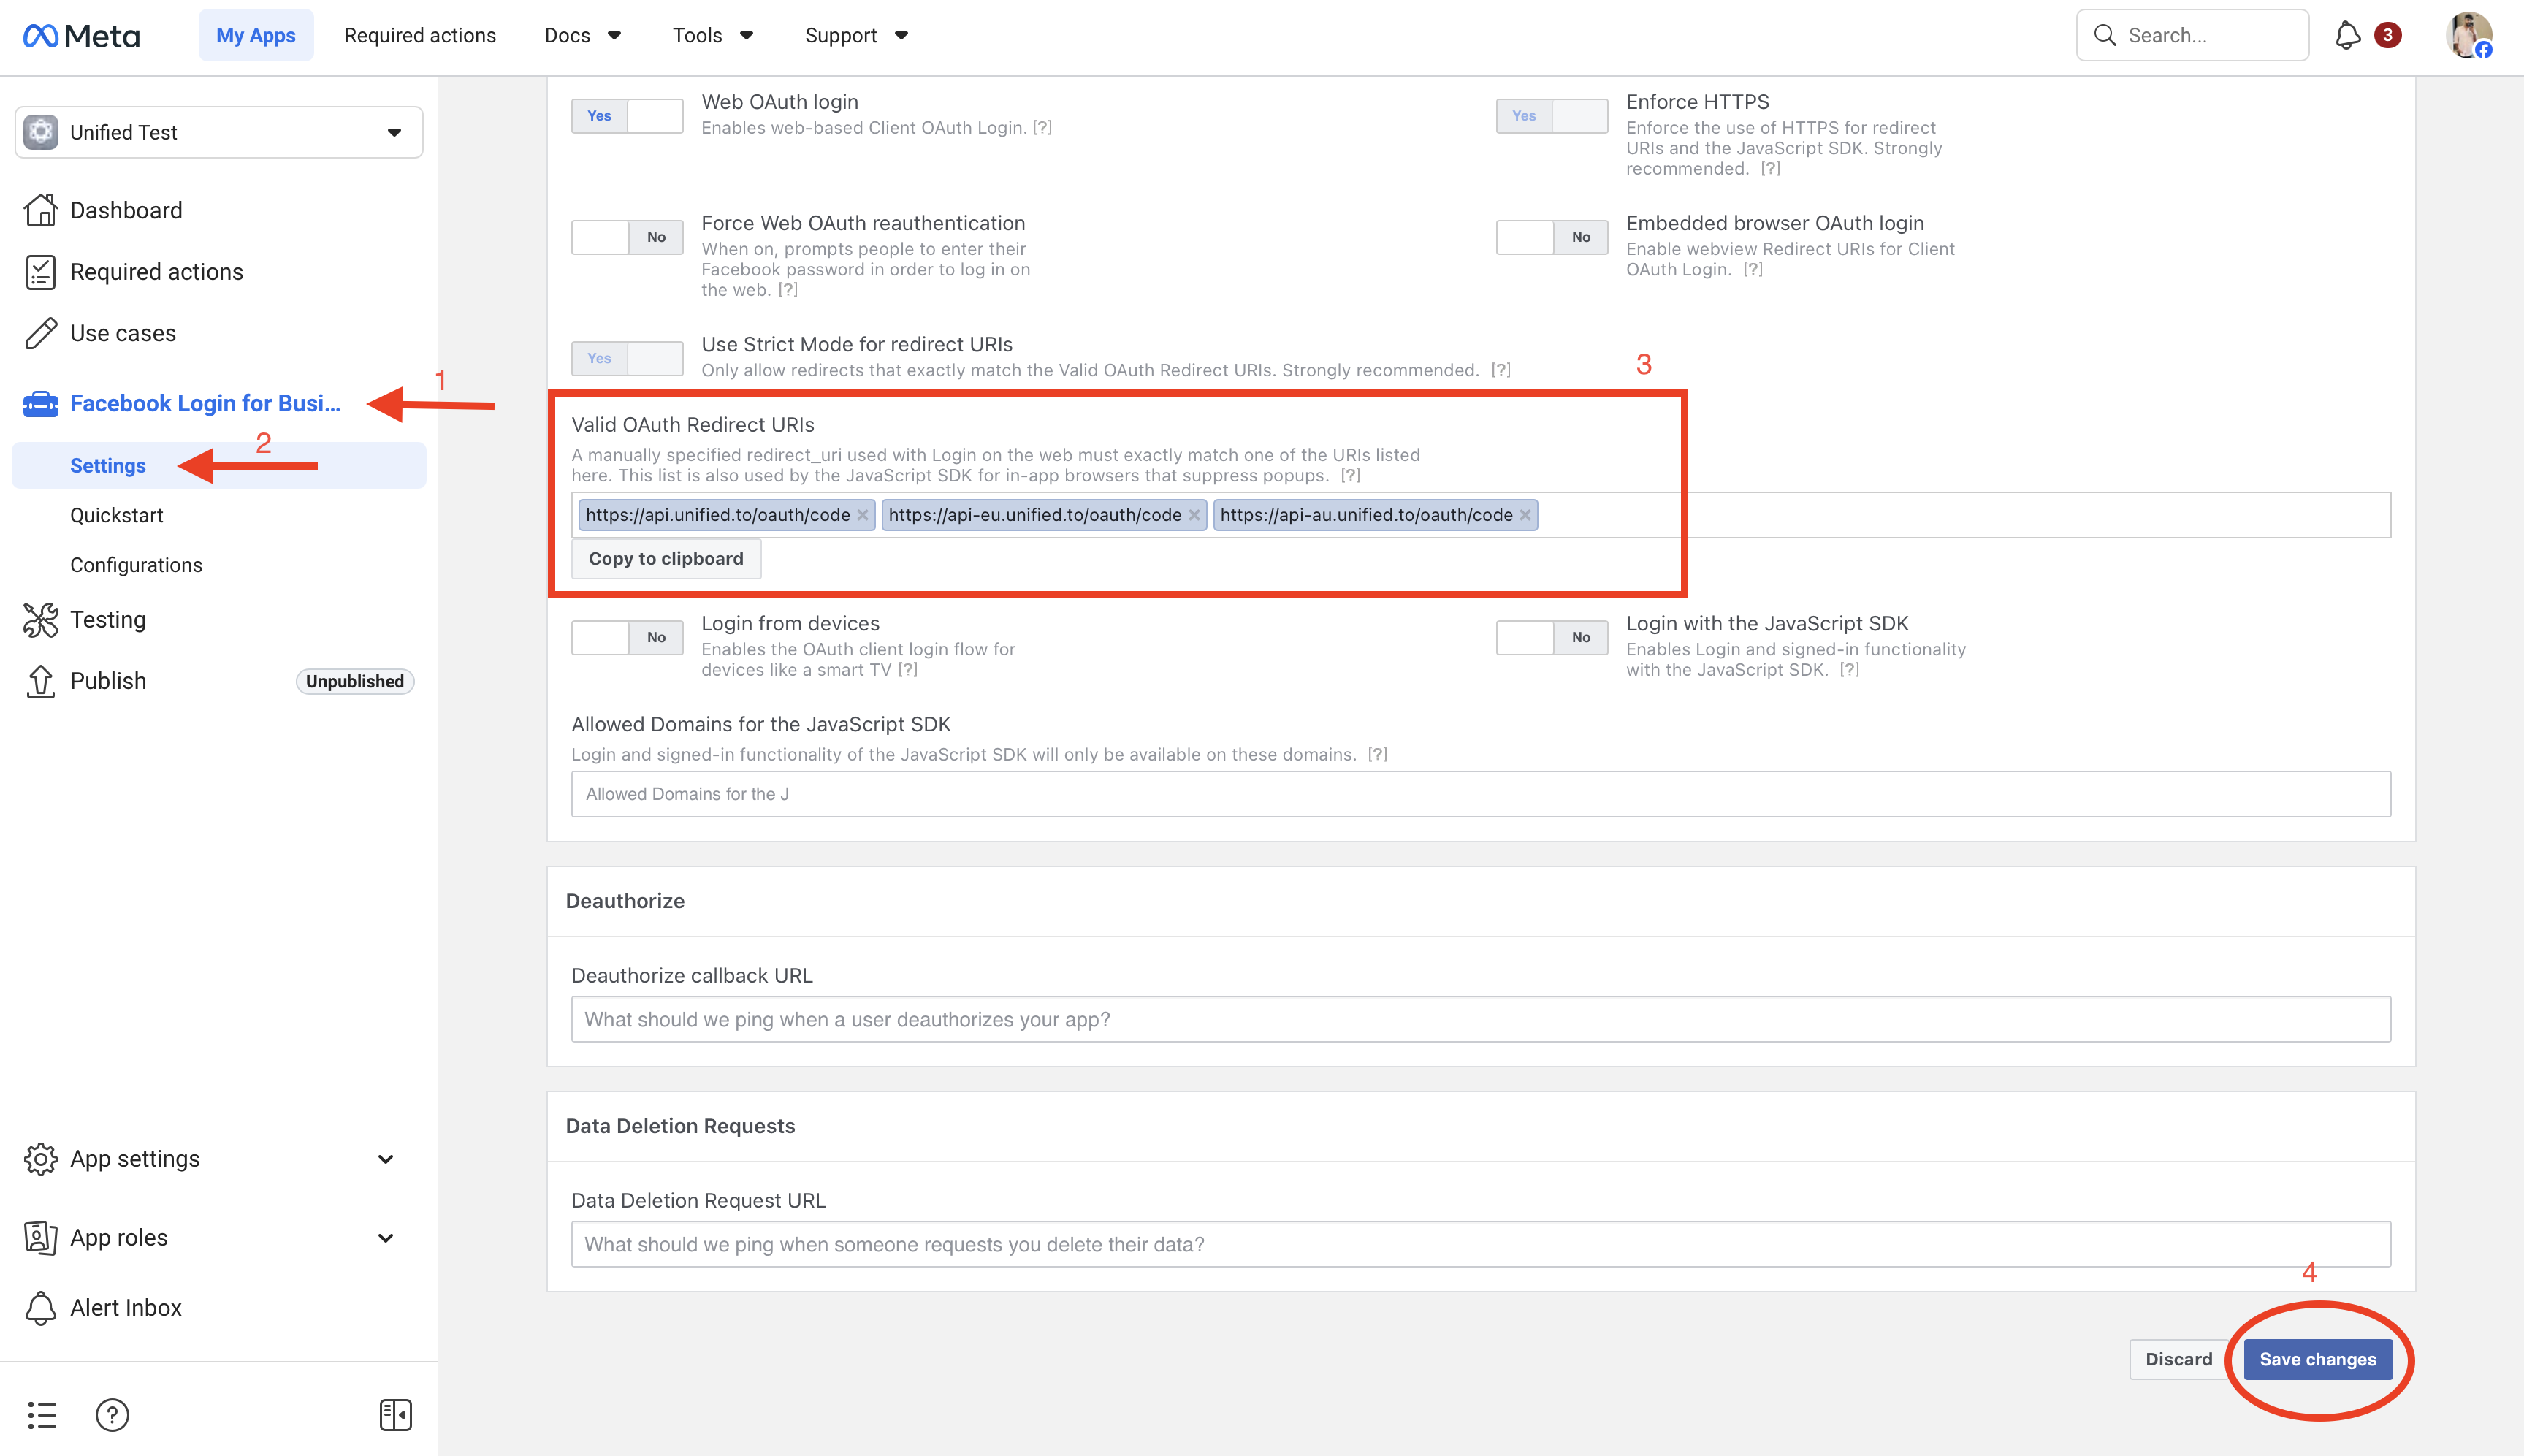

1. **Configure App Domains**
- Go to App Settings → Basic
- Add the following **App Domains**(3): [**unified.to**](https://unified.to/)[**api.unified.to**](https://api.unified.to/)[**app.unified.to**](https://app.unified.to/)[**api-eu.unified.to**](https://api-eu.unified.to/)[**app-eu.unified.to**](https://app-eu.unified.to/)[**api-au.unified.to**](https://api-au.unified.to/)[**app-au.unified.to**](https://app-au.unified.to/)
- Scroll down and save the settings (4)
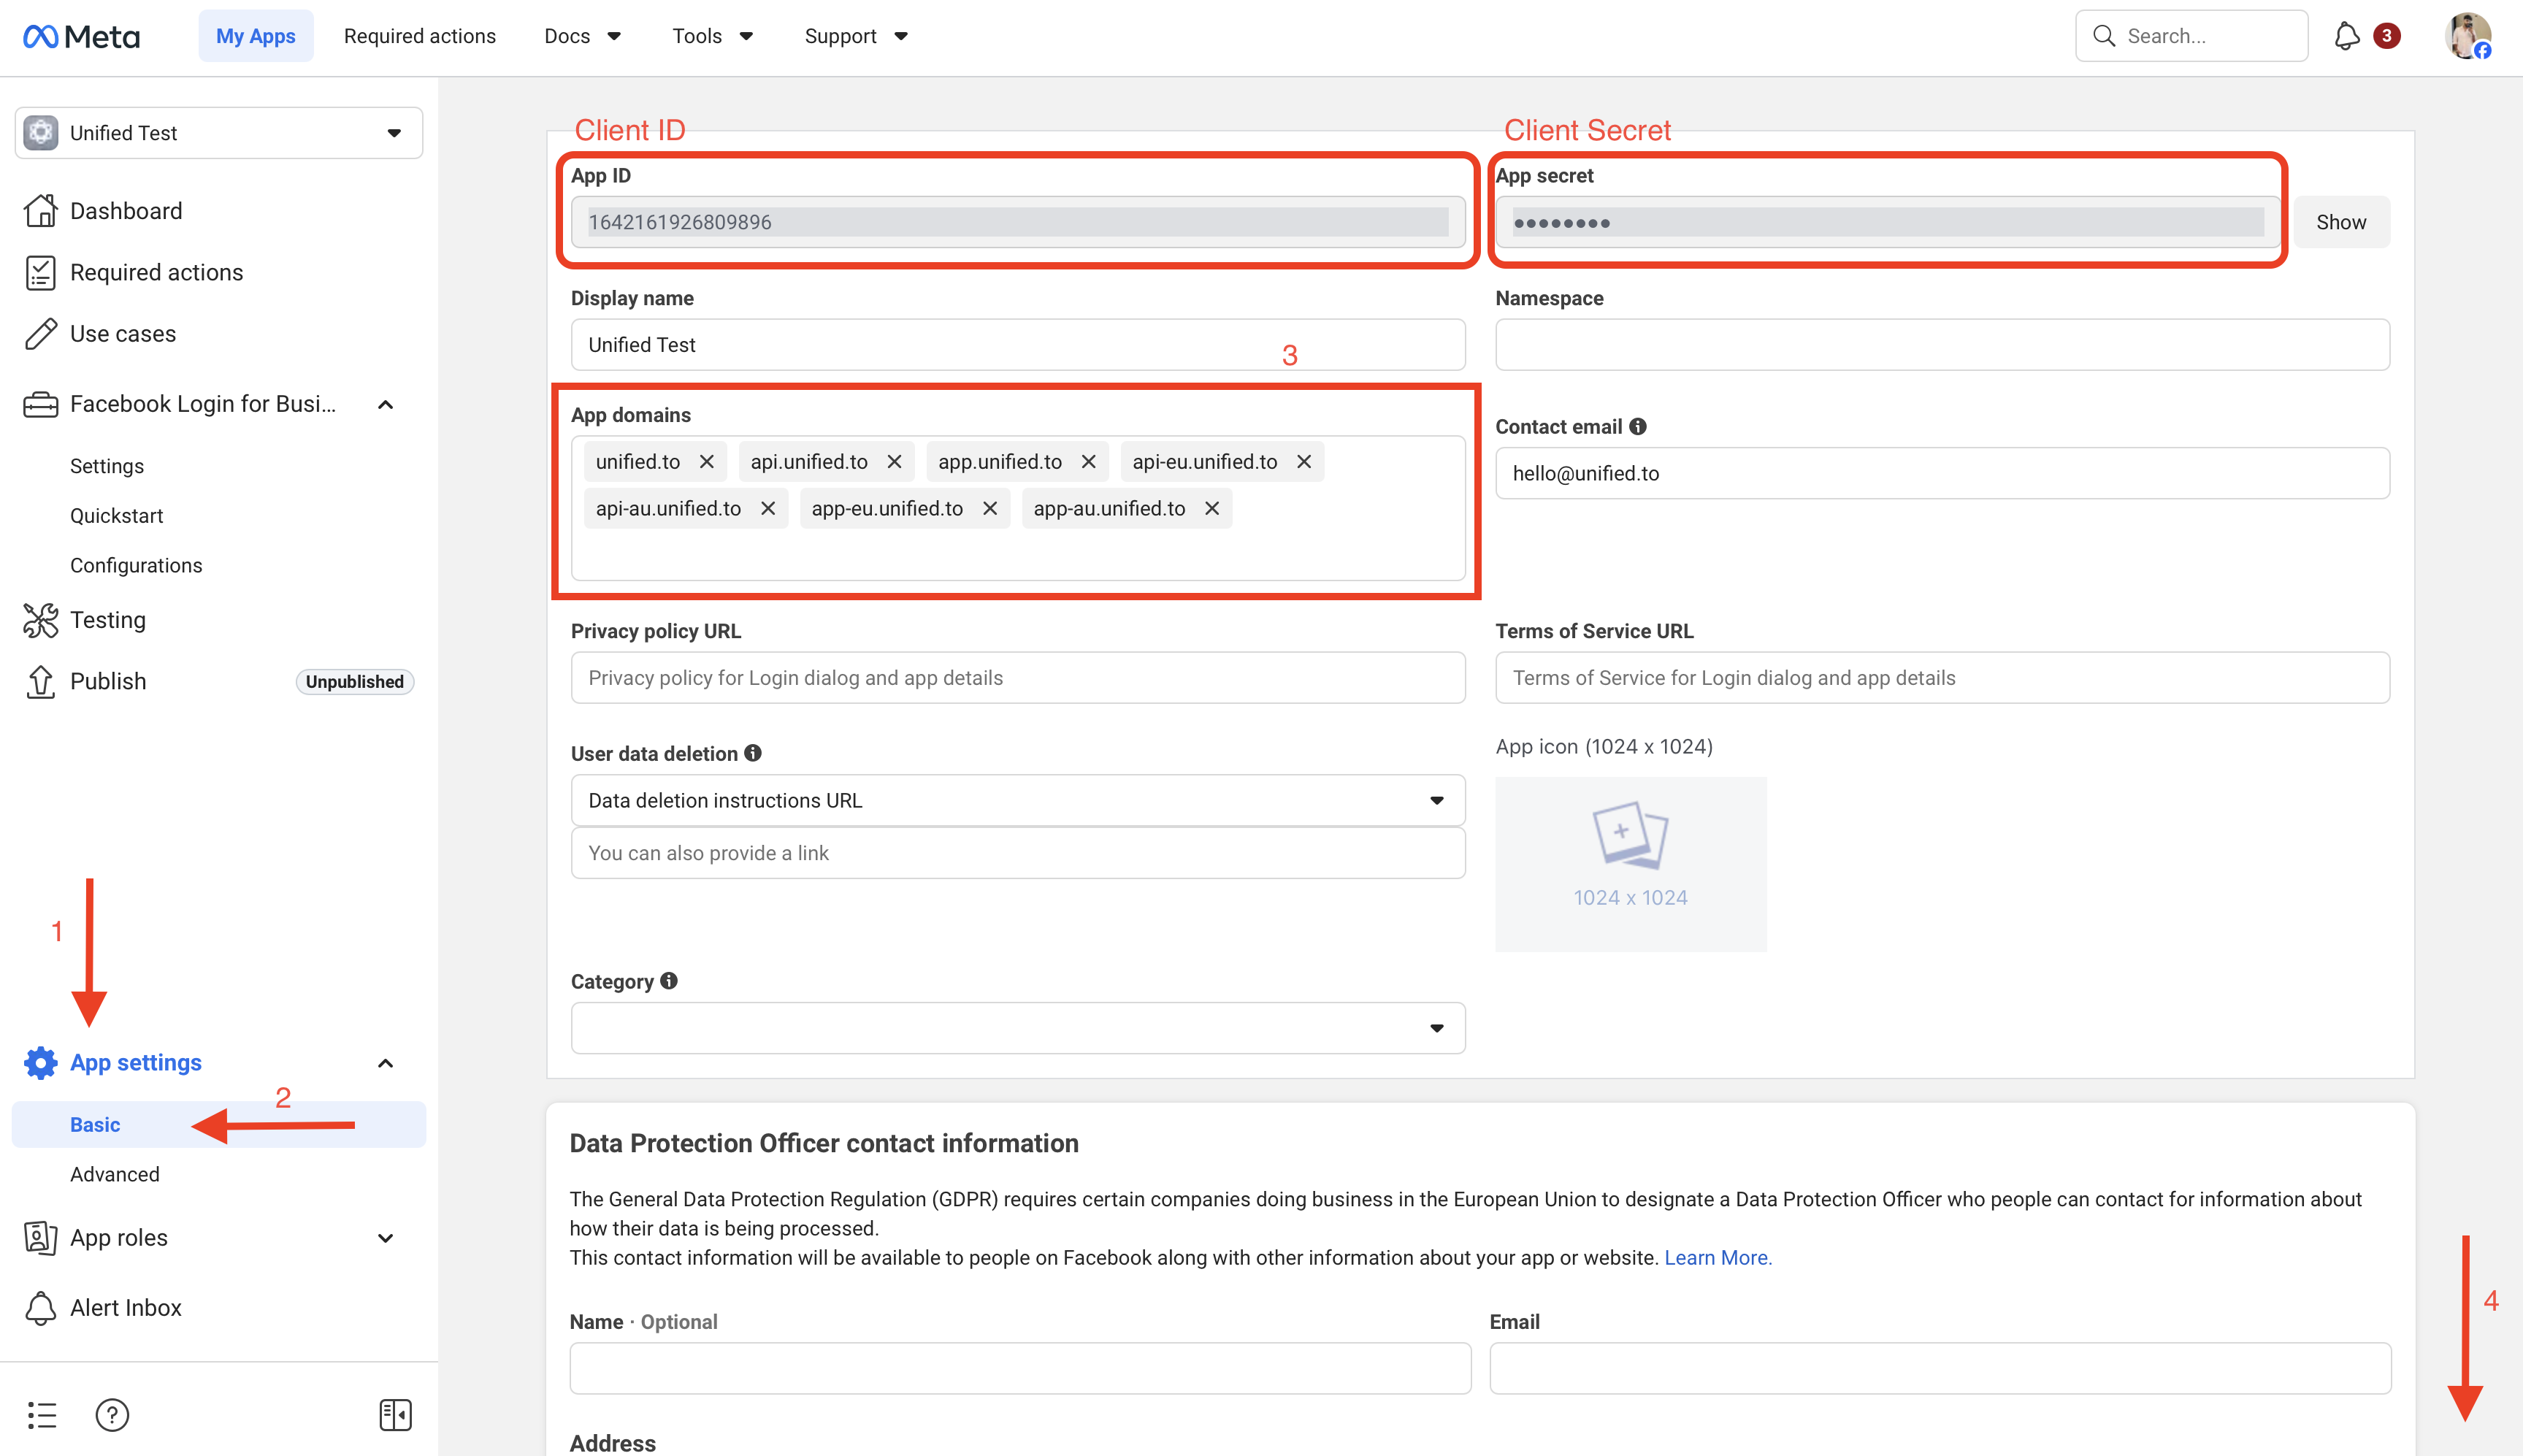
1. In Unified [https://app.unified.to/integrations/facebook](https://app.unified.to/integrations/facebook), add the application's App ID (as the client ID) and the App secret (as the client secret). This information can be found in the App settings > Basic page.
You are now all set to authorize a Facebook connection. Users should see this screen at time of Oauth.
## How to Register your Google Ads OAuth2 Application
URL: https://docs.unified.to/guides/how_to_register_your_google_ads_oauth2_application
# How to Register your Google Ads OAuth2 Application
------
_March 21, 2026_
## **How to Register your Google Ads OAuth2 Application**
1. Create a Google Cloud project
- Go to [**https://console.cloud.google.com/**](https://console.cloud.google.com/)
- Click **Select a project** at the top of the page, then click **New Project**
- Enter the following details:
- Project Name
- Organization (if applicable)
- Click **Create**
2. Enable the Google Ads API
- Go to [**https://console.cloud.google.com/apis/library**](https://console.cloud.google.com/apis/library)
- Search for **Google Ads API**
- Click on **Google Ads API** in the results
- Click **Enable**
3. Configure the OAuth Consent Screen
- Go to [**https://console.cloud.google.com/apis/credentials/consent**](https://console.cloud.google.com/apis/credentials/consent)
- Select **External** as the user type, then click **Create**
- Enter the following details:
- App Name
- User Support Email
- Developer Contact Email
- Click **Save and Continue**
- On the Scopes step, click **Add or Remove Scopes** and add the following scope:
- `https://www.googleapis.com/auth/adwords`
- Click **Save and Continue**
- On the Test Users step, add any Google accounts you want to test with
- Click **Save and Continue**
4. Publish the OAuth Consent Screen
- Go back to [**https://console.cloud.google.com/apis/credentials/consent**](https://console.cloud.google.com/apis/credentials/consent)
- Click **Publish App** to move from Testing to Production status
- This allows any Google user to authorize your application, not just the test users you added
5. Create OAuth2 Credentials
- Go to [**https://console.cloud.google.com/apis/credentials**](https://console.cloud.google.com/apis/credentials)
- Click **Create Credentials** → **OAuth client ID**
- Select **Web application** as the Application Type
- Enter a name for the OAuth client
- Under **Authorized redirect URIs**, add the following **Unified.to** OAuth2 redirect URL:
- [**https://api.unified.to/oauth/code**](https://api.unified.to/oauth/code)
- Click **Create**
- Copy the **Client ID** and **Client Secret** from the dialog that appears
6. Request Basic Access for the Google Ads Developer Token
- Go to [**https://ads.google.com/aw/apicenter**](https://ads.google.com/aw/apicenter)
- Note: You must be logged into a Google Ads Manager account. If you do not have one, create one at [**https://ads.google.com/intl/en/home/tools/manager-accounts/**](https://ads.google.com/intl/en/home/tools/manager-accounts/)
- In the API Center, you will see your **Developer Token**
- Your token will initially have **Test Account** access. To use it with production accounts, click **Apply for Basic Access**
- Fill out the application form with details about how you will use the API
- Google typically reviews and approves Basic Access applications within a few business days
7. Configure Unified.to
- In Unified [**https://app.unified.to/integrations/googleads**](https://app.unified.to/integrations/googleads), add the following:
- The OAuth client's **Client ID**
- The OAuth client's **Client Secret**
- Your **Developer Token** from the API Center
You are now all set to authorize a Google Ads connection
## How to Register your MetaAds OAuth2 application
URL: https://docs.unified.to/guides/how_to_register_your_metaads_oauth2_application
# How to Register your MetaAds OAuth2 application
------
_March 4, 2026_
1. Create a Meta Developer account
- Go to [https://developers.facebook.com/](https://developers.facebook.com/)
2. Create an application
- Go to [https://developers.facebook.com/apps/creation/](https://developers.facebook.com/apps/creation/)
- Enter the following details:
- **App Name**
- **App Contact Email**
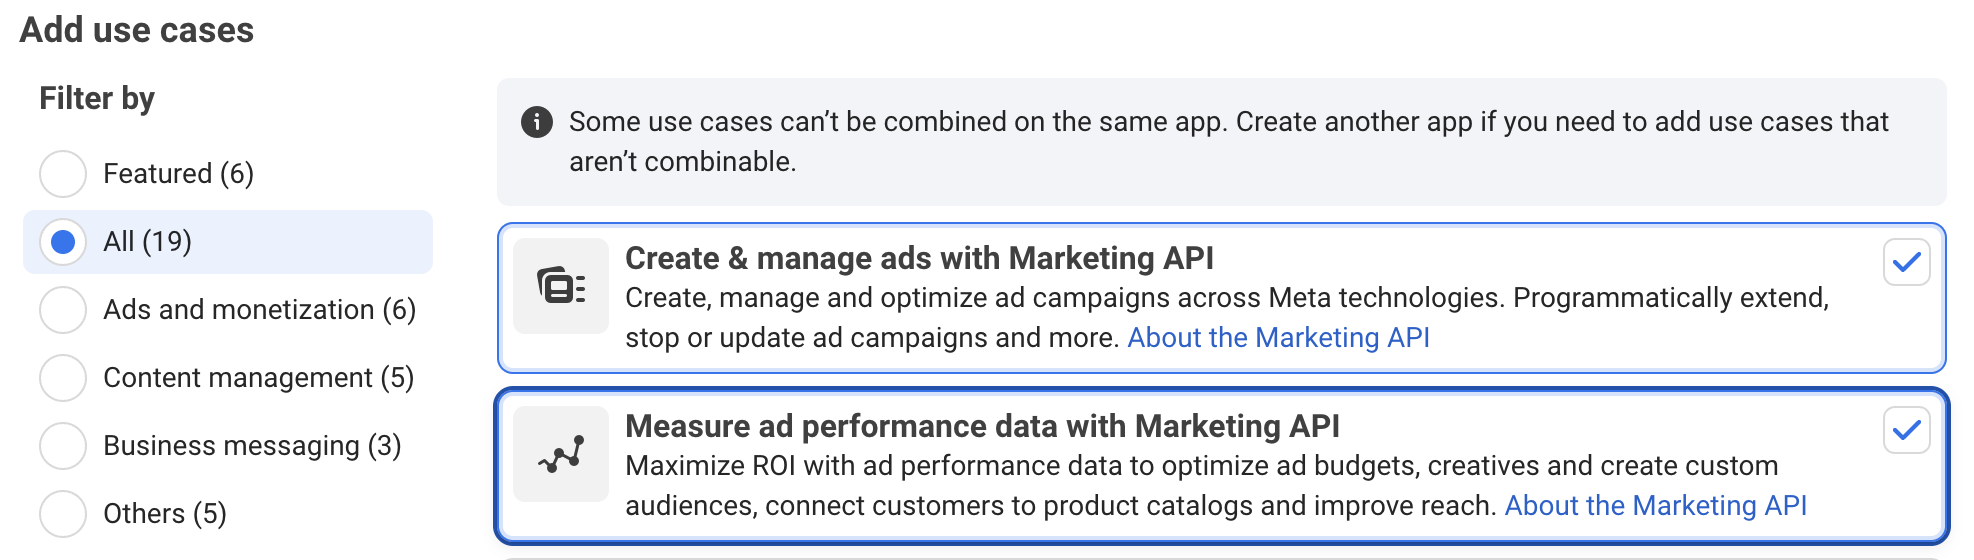
- Add the following use-cases; 'Manage ads using Marketing API' and 'Measure ad performance'

**3. Configure Permissions for the Marketing API**
- Enable all permissions in the 'Create & Manage Ads' and 'Measure ad performance' use-cases
- or -
- After the application is created:
- Open the **App Dashboard**.
- Navigate to:
Use Cases → Customize → Create & Manage Ads
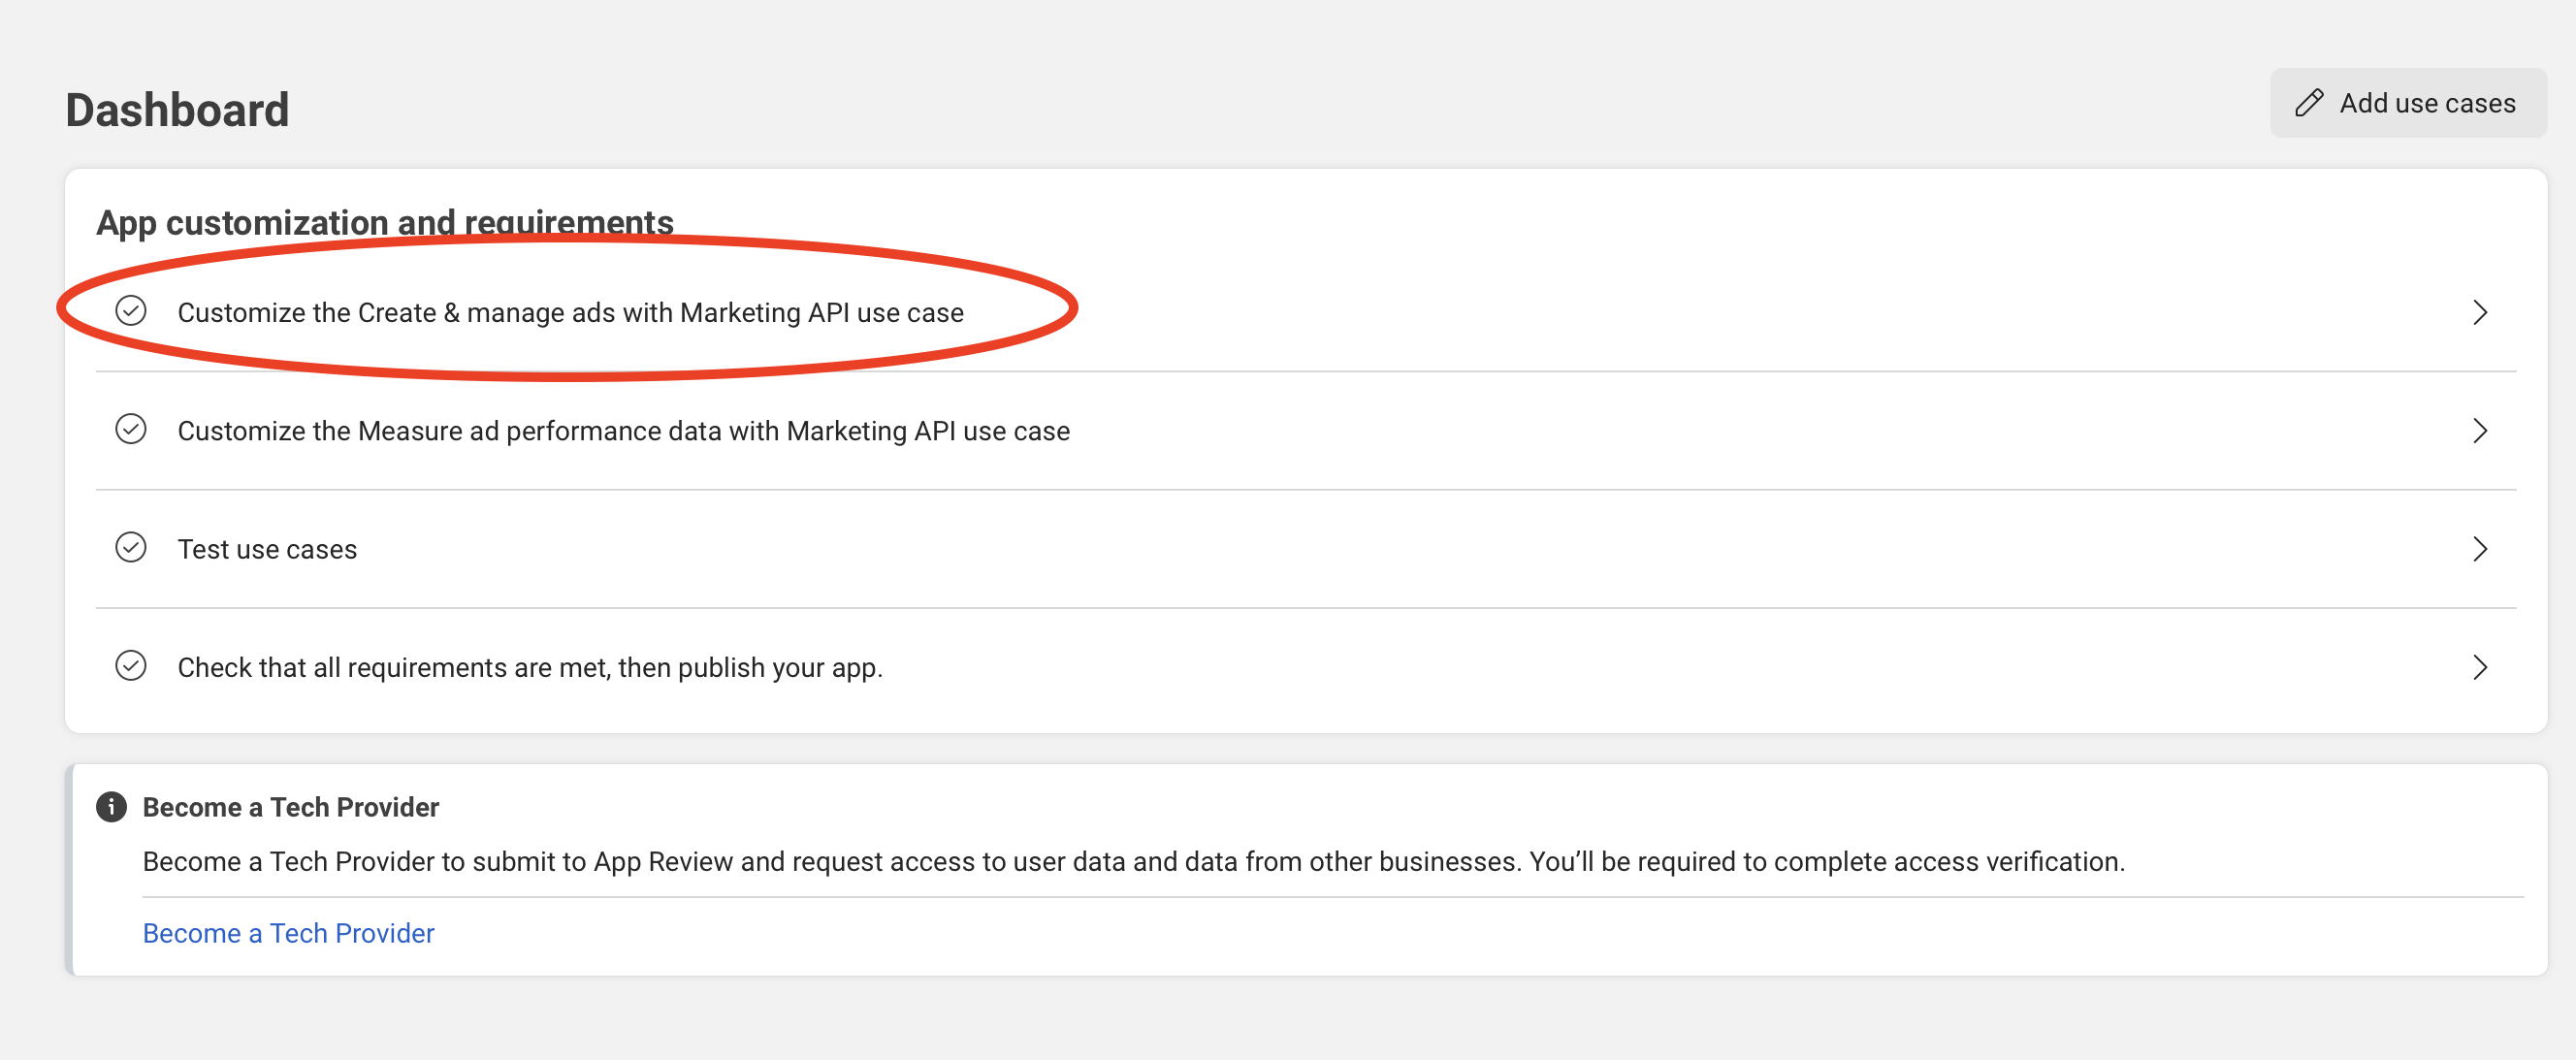
- Enable the following permissions:
- ads_management
- ads_read
- business_management
- email
- Additional permissions such as:
- pages_manage_ads
- pages_read_engagement
This may also be enabled depending on your integration requirements.
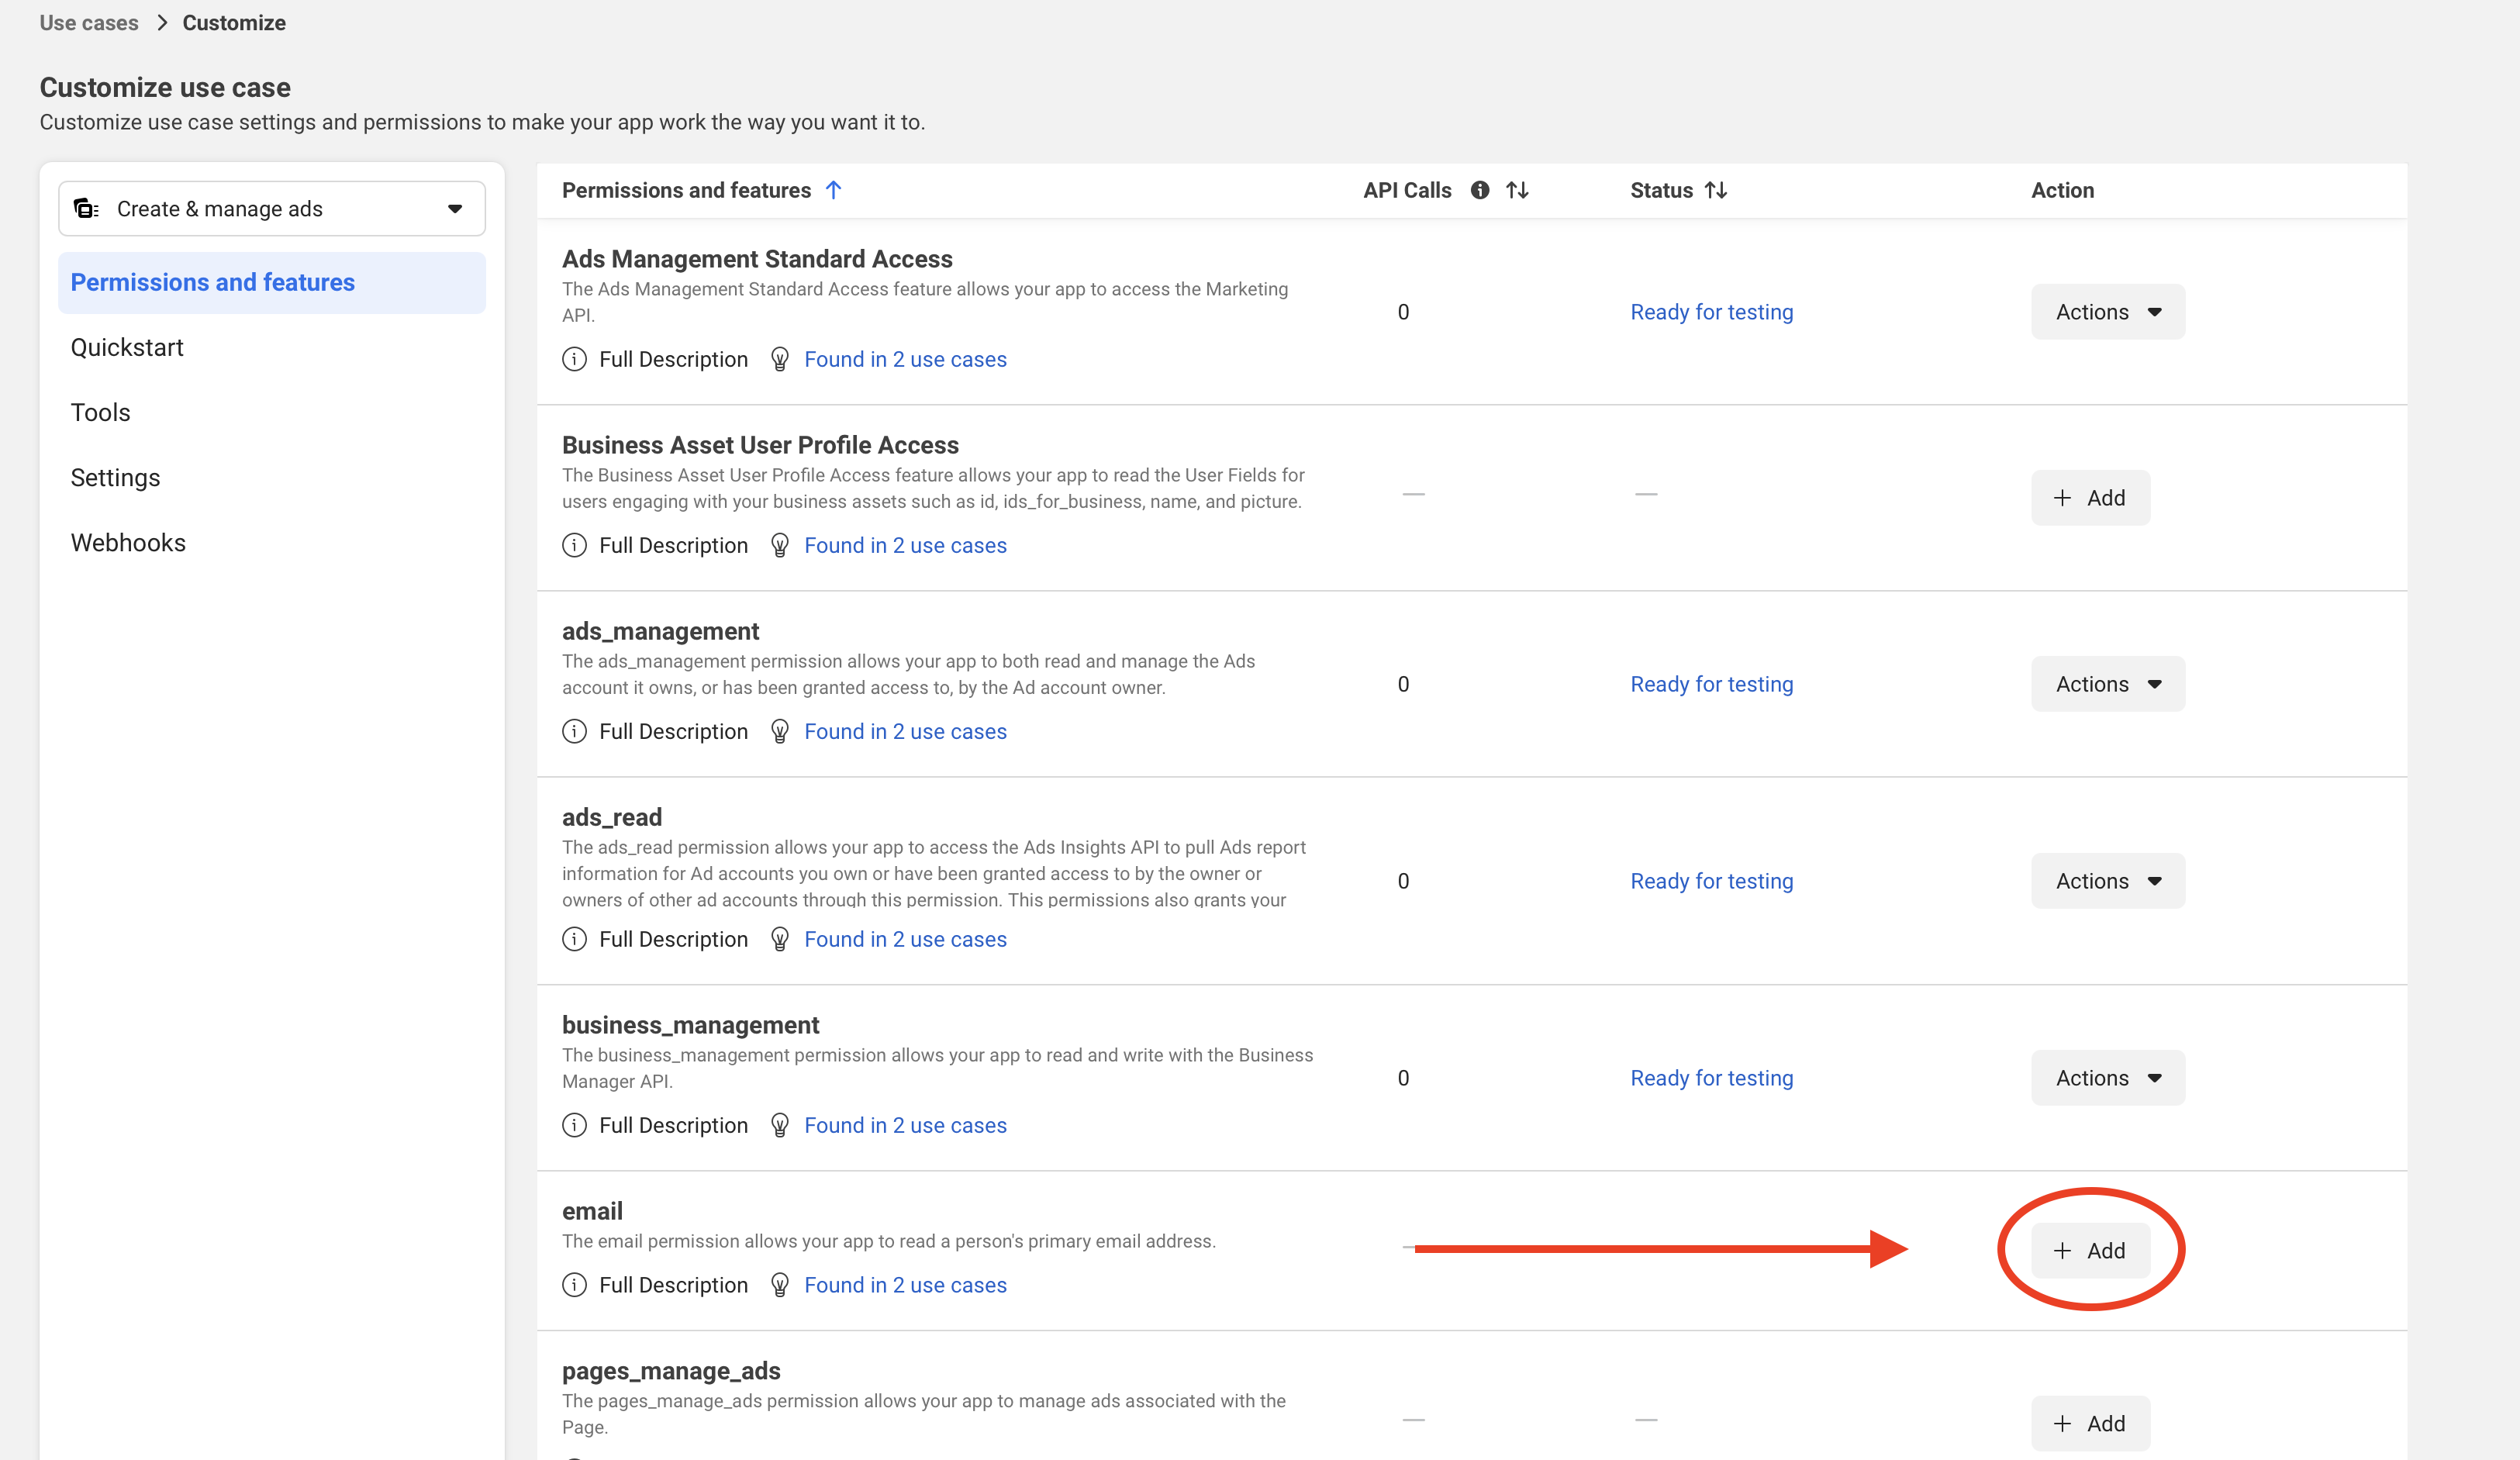
**4. Configure Facebook Login for Business**
- In the left sidebar, open (1, 2):
Facebook Login for Business → Settings
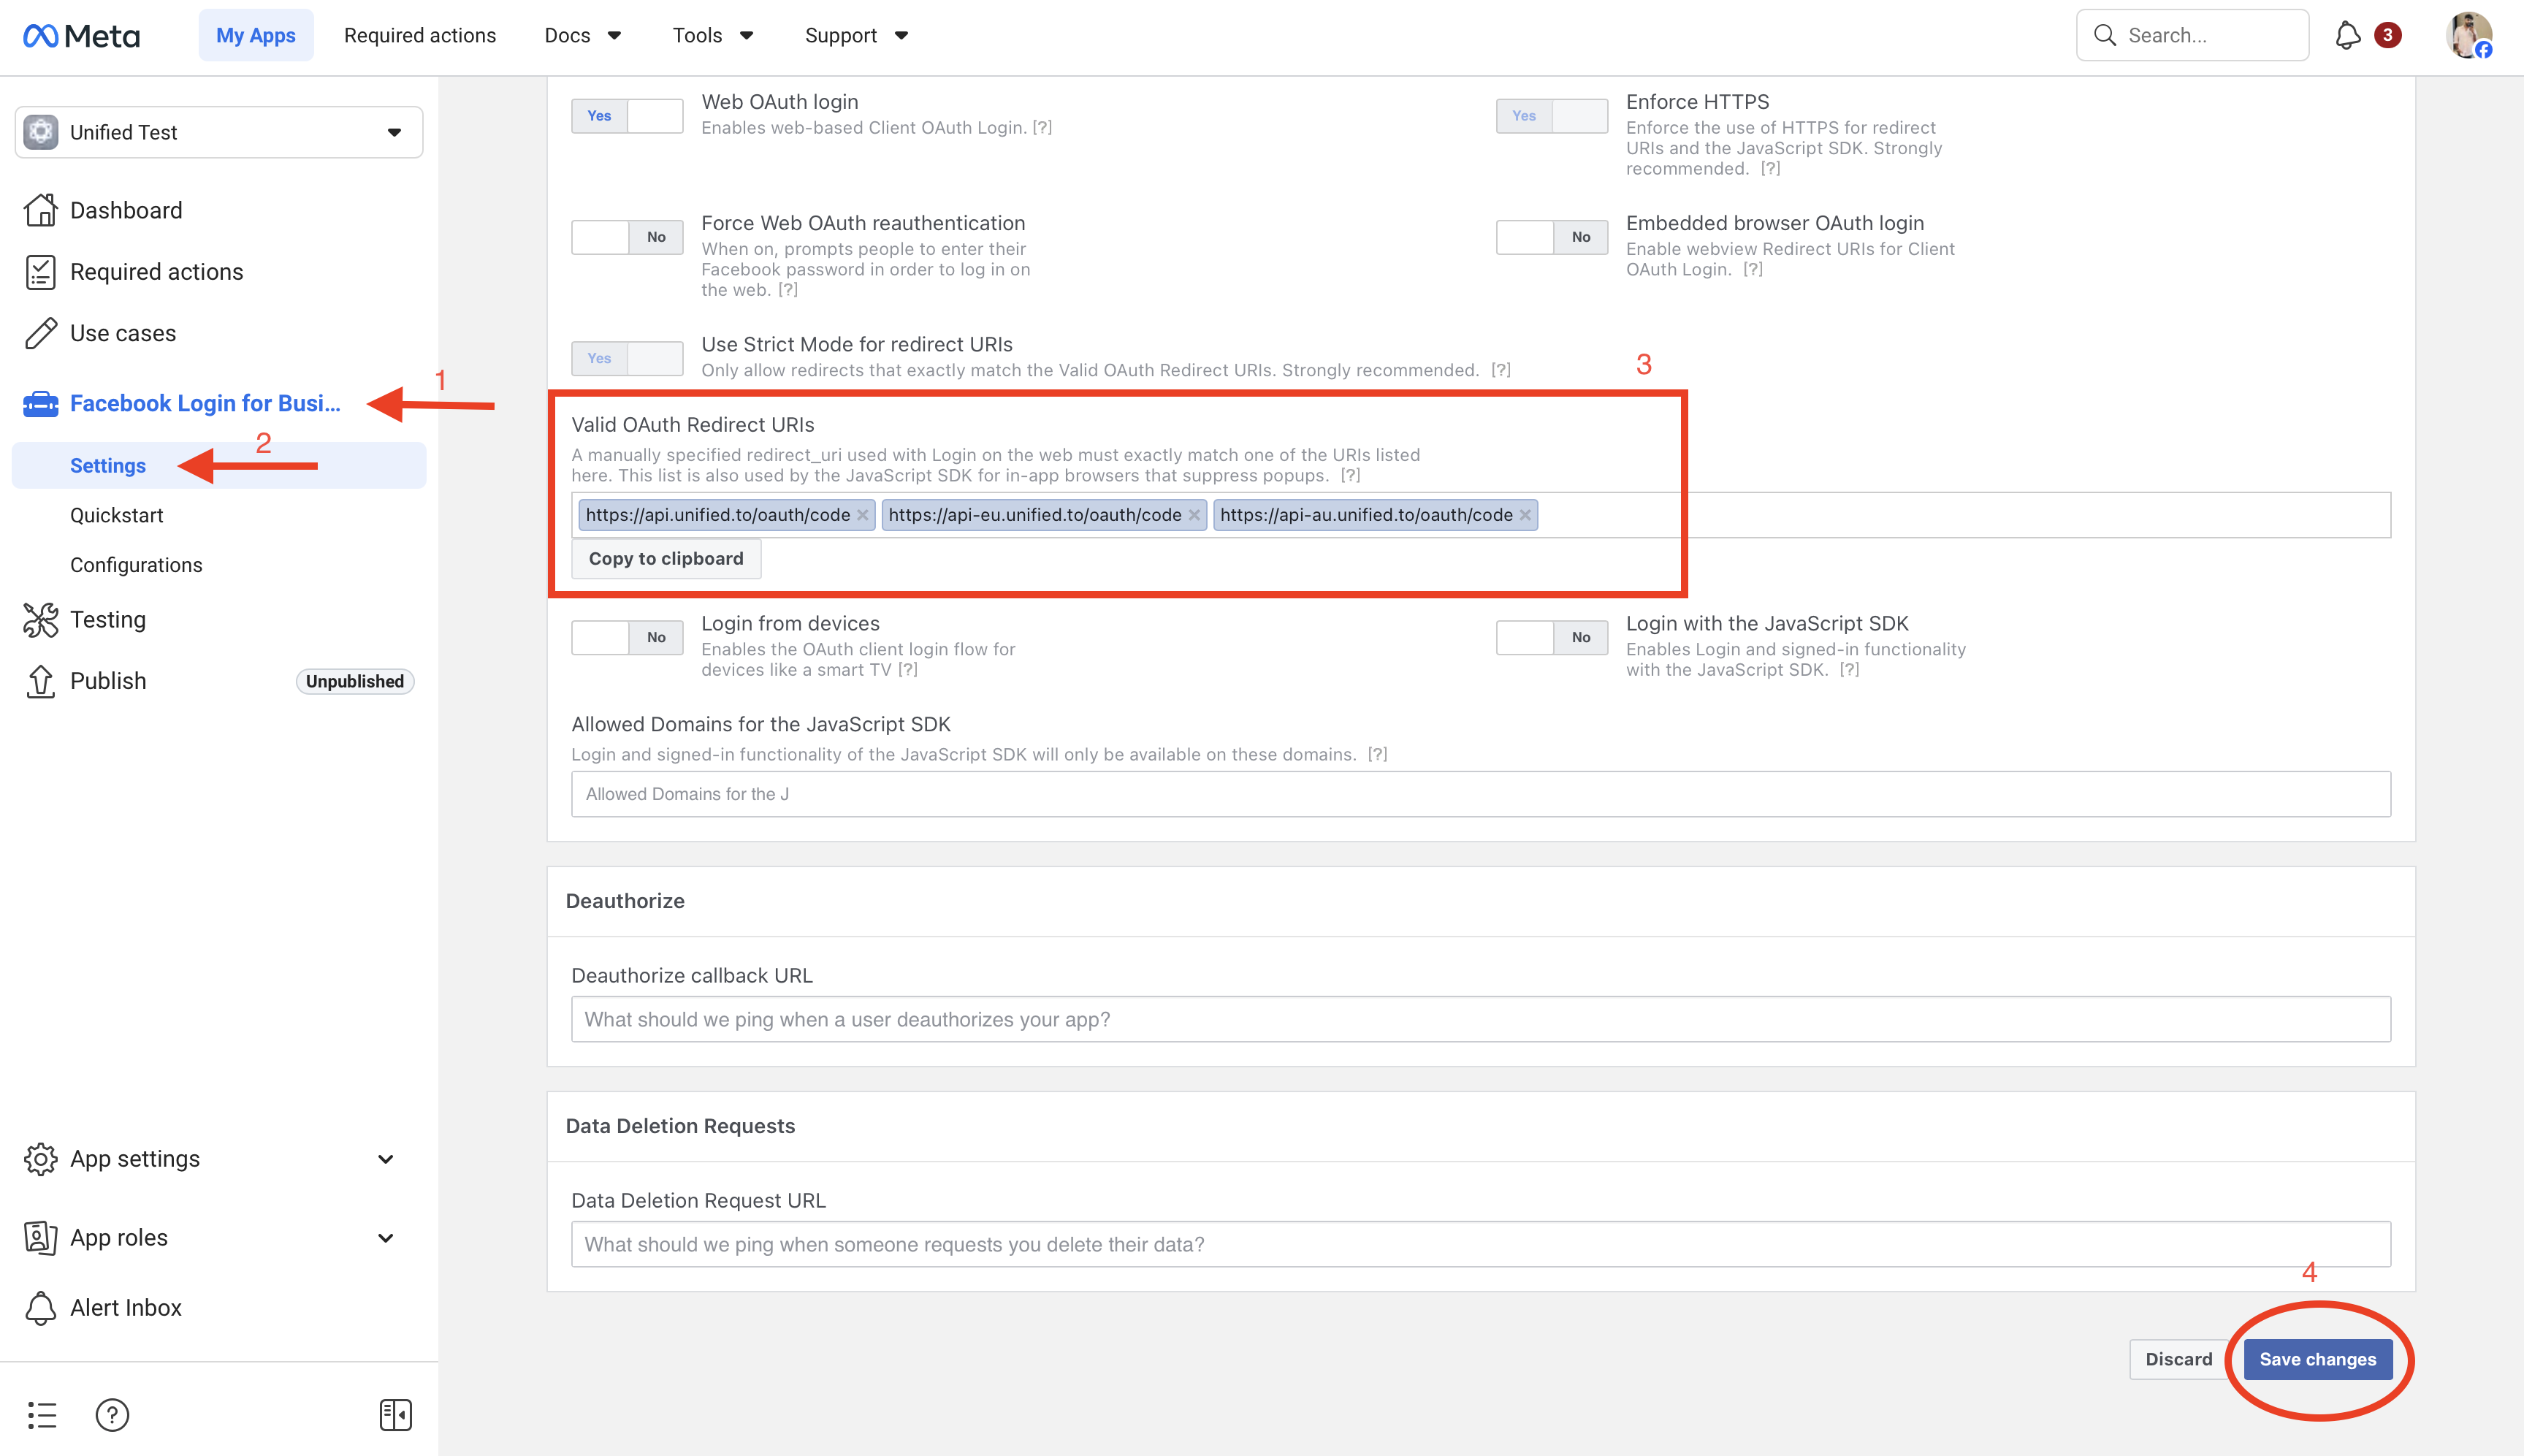
- Specify the [Unified.to](https://unified.to/) OAuth2 redirect URLs (3)

- Click **Save Changes (4)**.
**5. Configure App Domains**
- Go to App Settings → Basic
- Add the following **App Domains**(3):
[unified.to](https://unified.to/)
[api.unified.to](https://api.unified.to/)
[app.unified.to](https://app.unified.to/)
[api-eu.unified.to](https://api-eu.unified.to/)
[app-eu.unified.to](https://app-eu.unified.to/)
[api-au.unified.to](https://api-au.unified.to/)
[app-au.unified.to](https://app-au.unified.to/)
- Scroll down and save the settings (4).
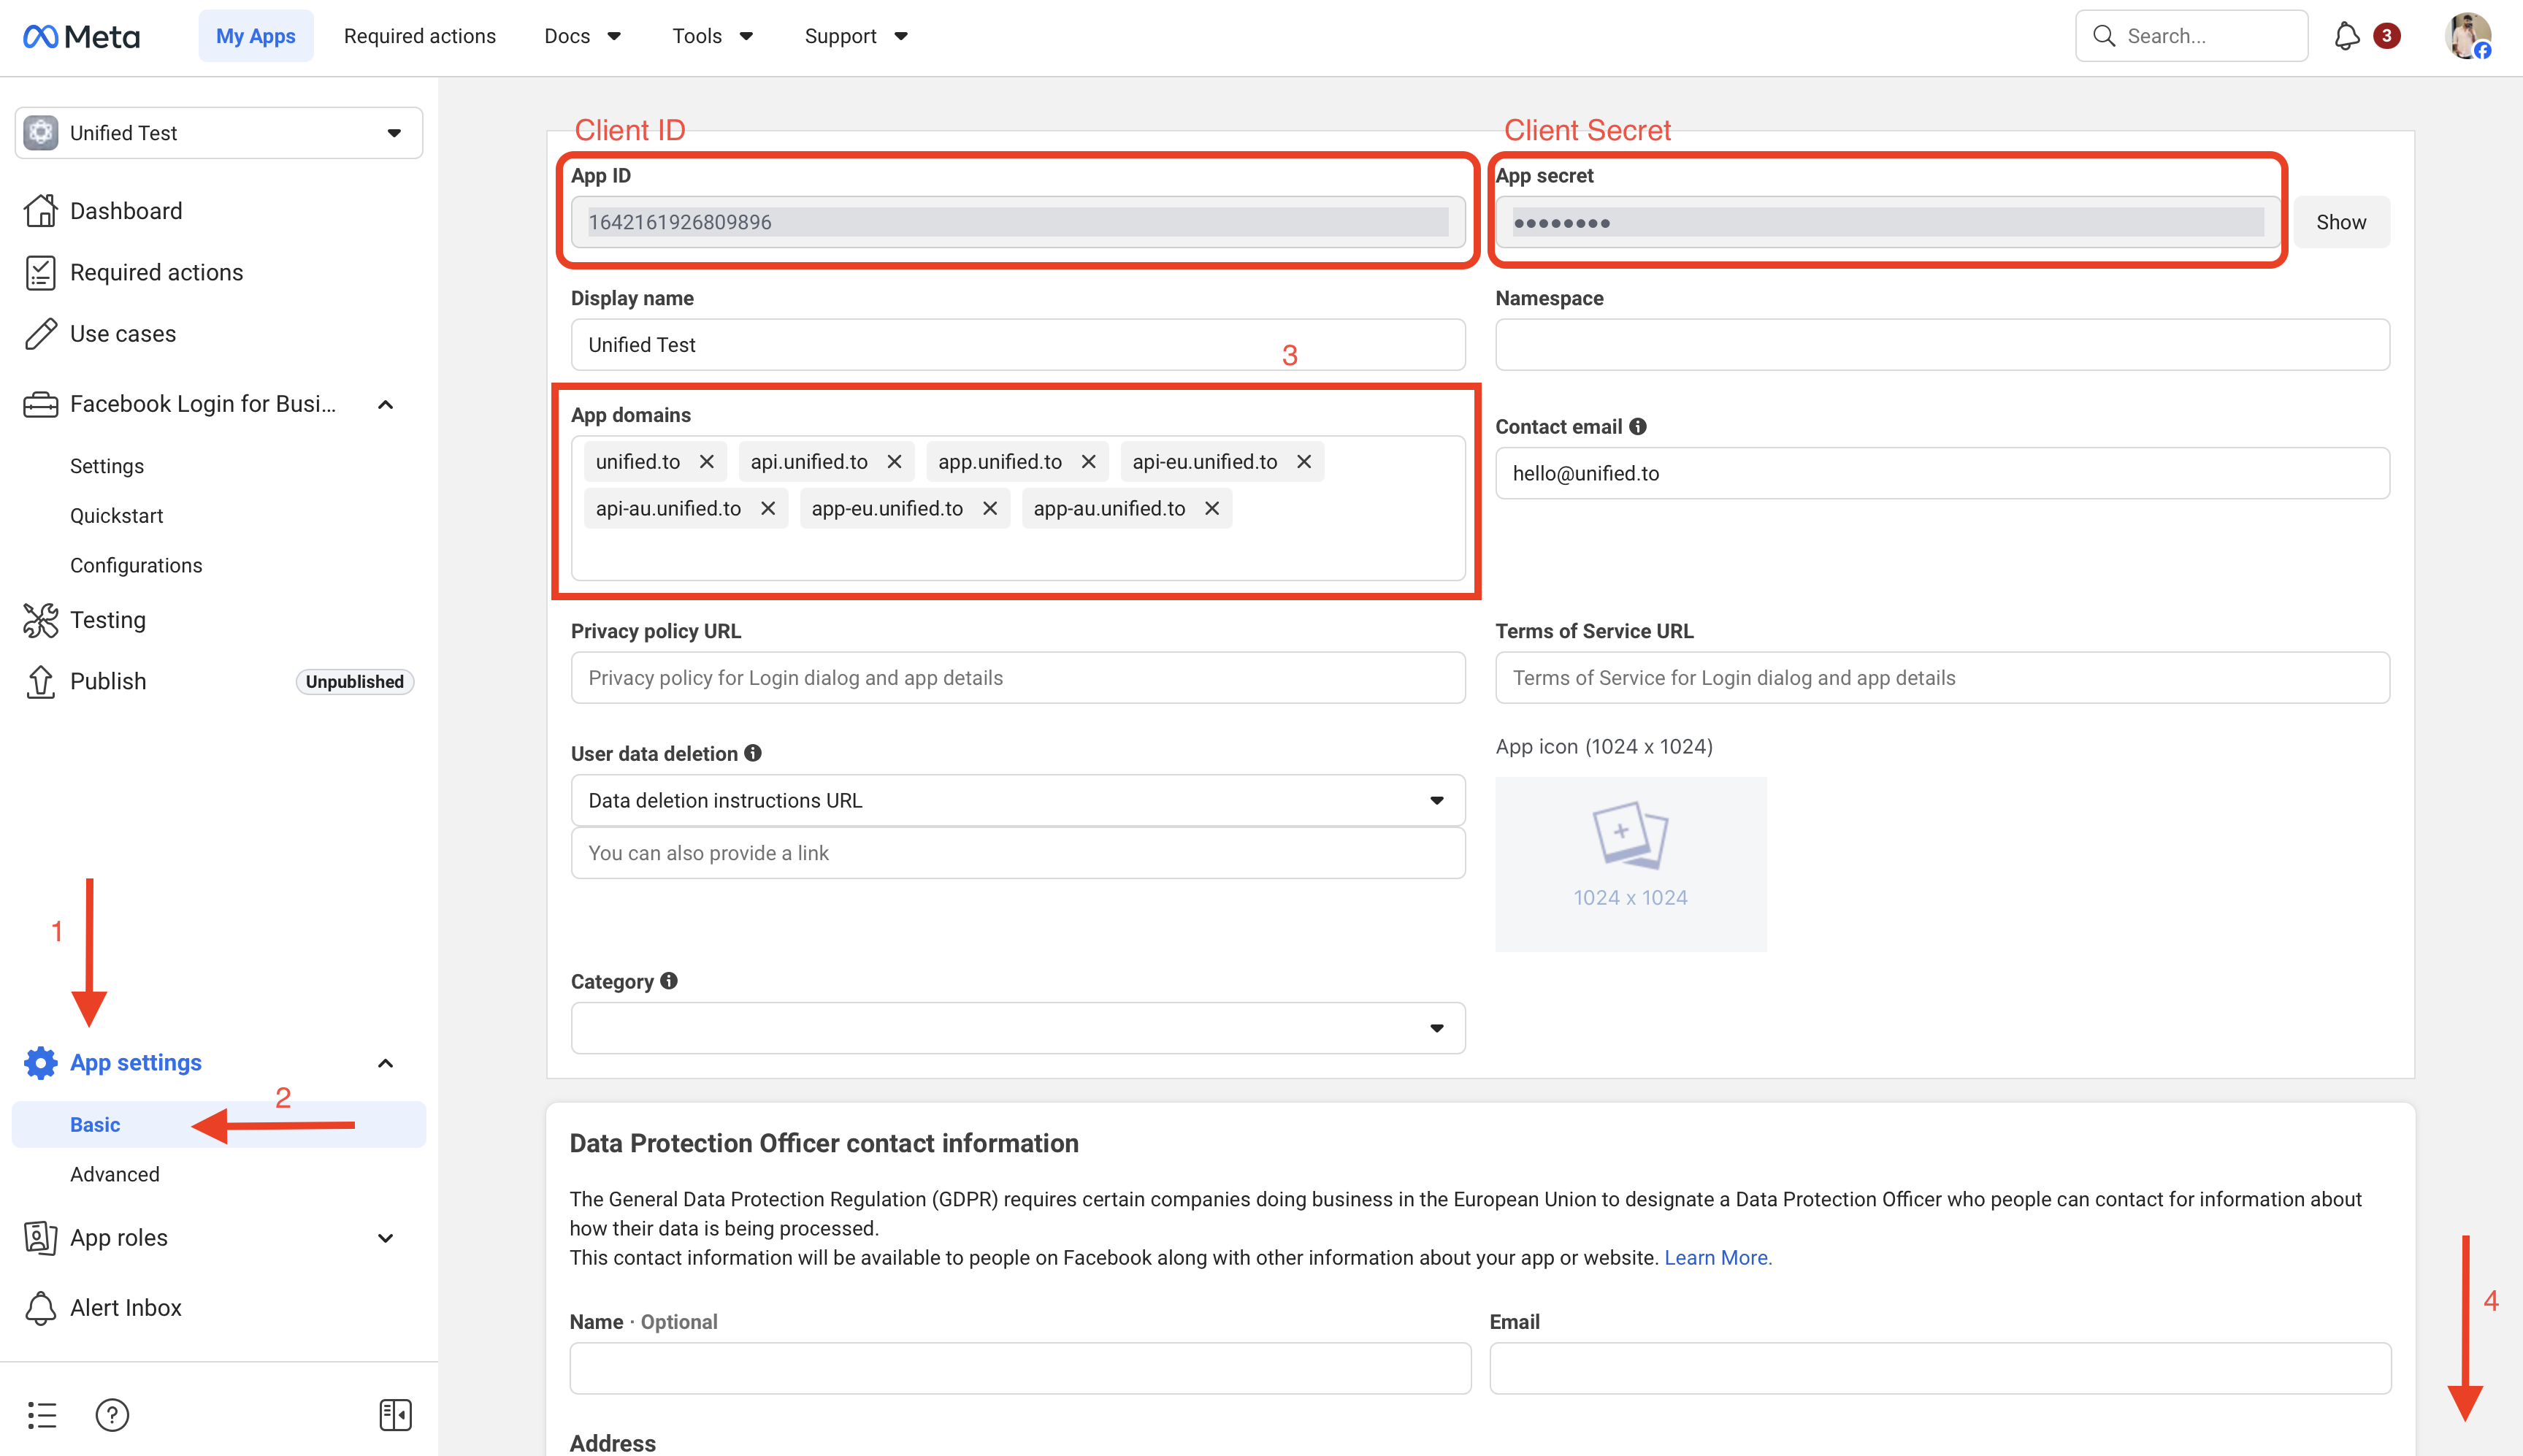
In Unified [https://app.unified.to/integrations/metaads](https://app.unified.to/integrations/metaads), add the application's App ID (as the client ID) and the App secret (as the client secret). This information can be found in the App settings > Basic page.
You are now all set to authorize a MetaAds connection
## How To Request & Write Raw Integration Data
URL: https://docs.unified.to/guides/how_to_request_and_write_raw_integration_data
# How To Request & Write Raw Integration Data
------
_February 6, 2024_
### Reading data
While [Unified.to](https://unified.to/) abstracts all of the integration's objects into common objects, you can still request that the original object.
Simply include a `fields=raw` parameter in your request.
```javascript
GET /crm/123456789/contacts?fields=raw
```
The result will also include a field named `raw` that will contain the original vendor's object. You can add more field names in there as well (comma-delimited) and only those fields will be returned.
### Writing data
Simply include a `raw` field in the payload with the integration's specific fields.
```javascript
POST /crm/123456789/contacts
{
"name": "Joe Smith",
"raw": {
"customfield1":"Blue",
"customfield2":"Bananas"
}
}
```
Those fields in the `raw` object can also overwrite any mapped unified fields.
### Passing Raw Parameters
Some providers support extra filters or options that Unified doesn't standardize.
You can pass them using the `raw` query parameter.
Take normal query params like:
```plain text
status=active&limit=10
```
Encode them into:
```plain text
GET /crm/123456789/contact?raw=status%3Dactive%26limit%3D10
```
## How to Retrieve Microsoft Dynamics 365 Business Central Credentials
URL: https://docs.unified.to/guides/how_to_retrieve_microsoft_dynamics_365_business_central_credentials
# How to Retrieve Microsoft Dynamics 365 Business Central Credentials
------
_January 21, 2026_
This guide walks you through creating an Azure App Registration, granting the correct permissions, and collecting the credentials required to integrate with **Microsoft Dynamics 365 Business Central** using Unified.
---
## 1. Create or Select an App Registration
1. Go to the Azure Portal:
👉 [https://portal.azure.com/#view/Microsoft_AAD_RegisteredApps/ApplicationsListBlade](https://portal.azure.com/#view/Microsoft_AAD_RegisteredApps/ApplicationsListBlade)
2. Navigate to **App registrations**
3. Either:
- Select an existing app, **or**
- Click **New registration** to create a new one
---
## 2. Configure Redirect URI
1. Inside your App Registration, go to **Authentication**
2. Under **Redirect URI (optional)**:
- Select **Web**
- Enter the redirect URL provided by Unified
```plain text
https://api.unified.to/oauth/code
```
3. Click **Save**
---
## 3. Grant Business Central API Permissions
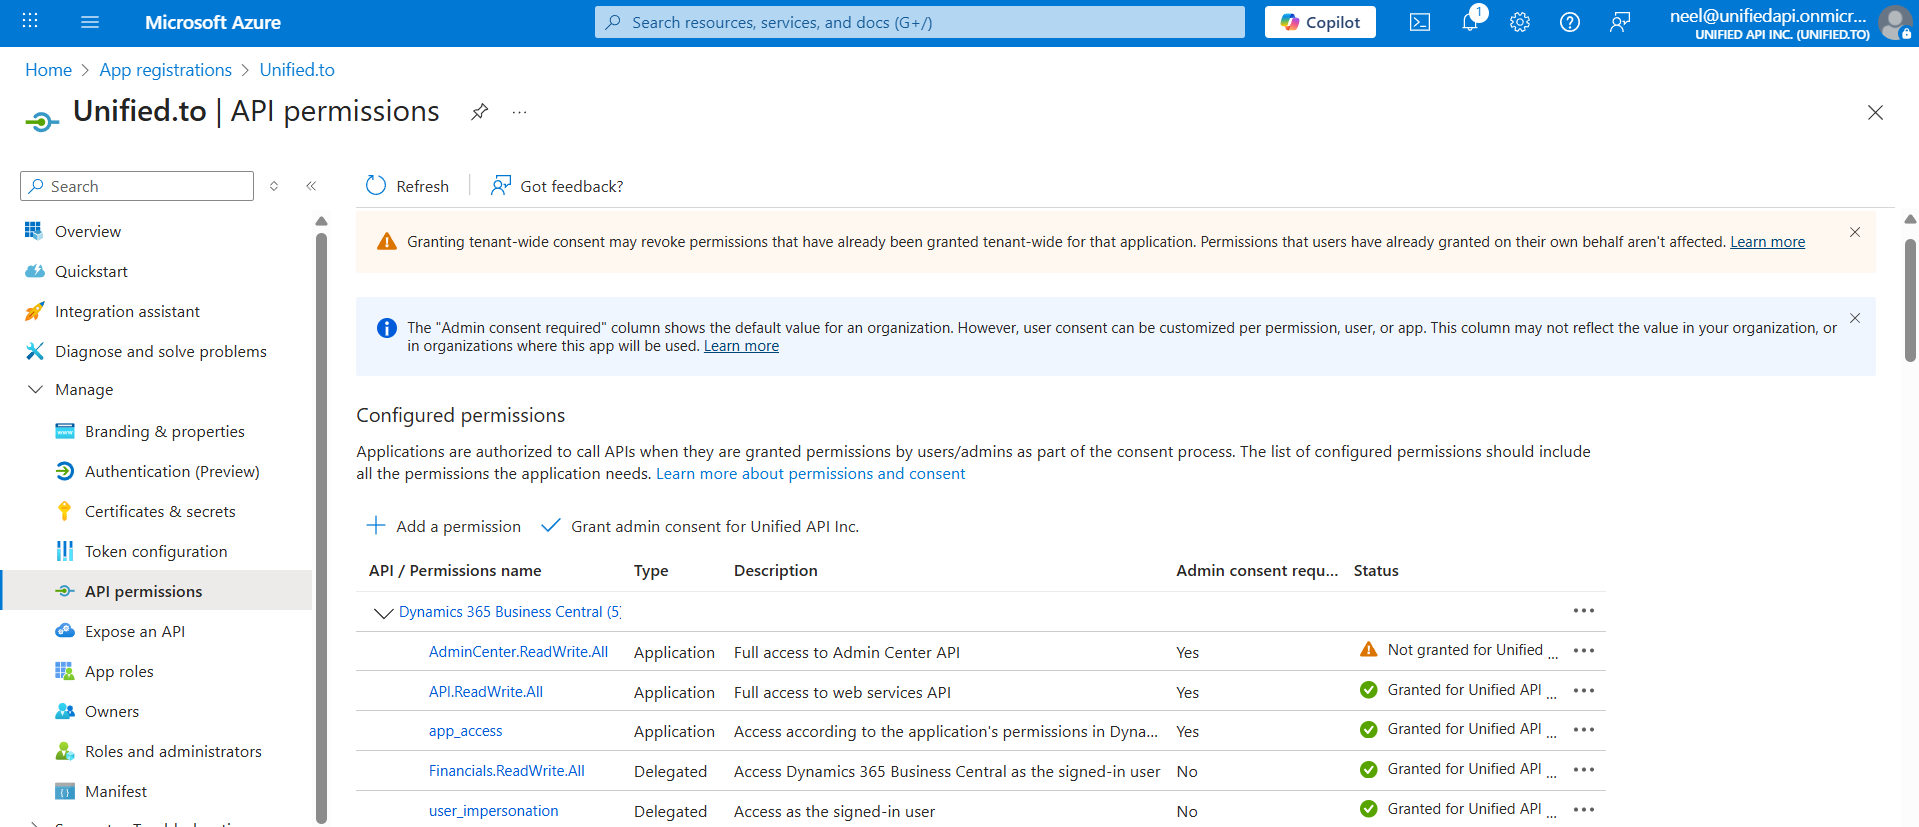
1. In the App Registration, go to **API permissions**
2. Click **Add a permission**
3. Select **APIs my organization uses**
4. Search for and select **Microsoft Dynamics 365 Business Central**
5. Choose **Delegated permissions**
6. Select the required permissions (typically default access)
7. Click **Add permissions**
8. If required, click **Grant admin consent**
---
## 4. Get Client ID and Client Secret
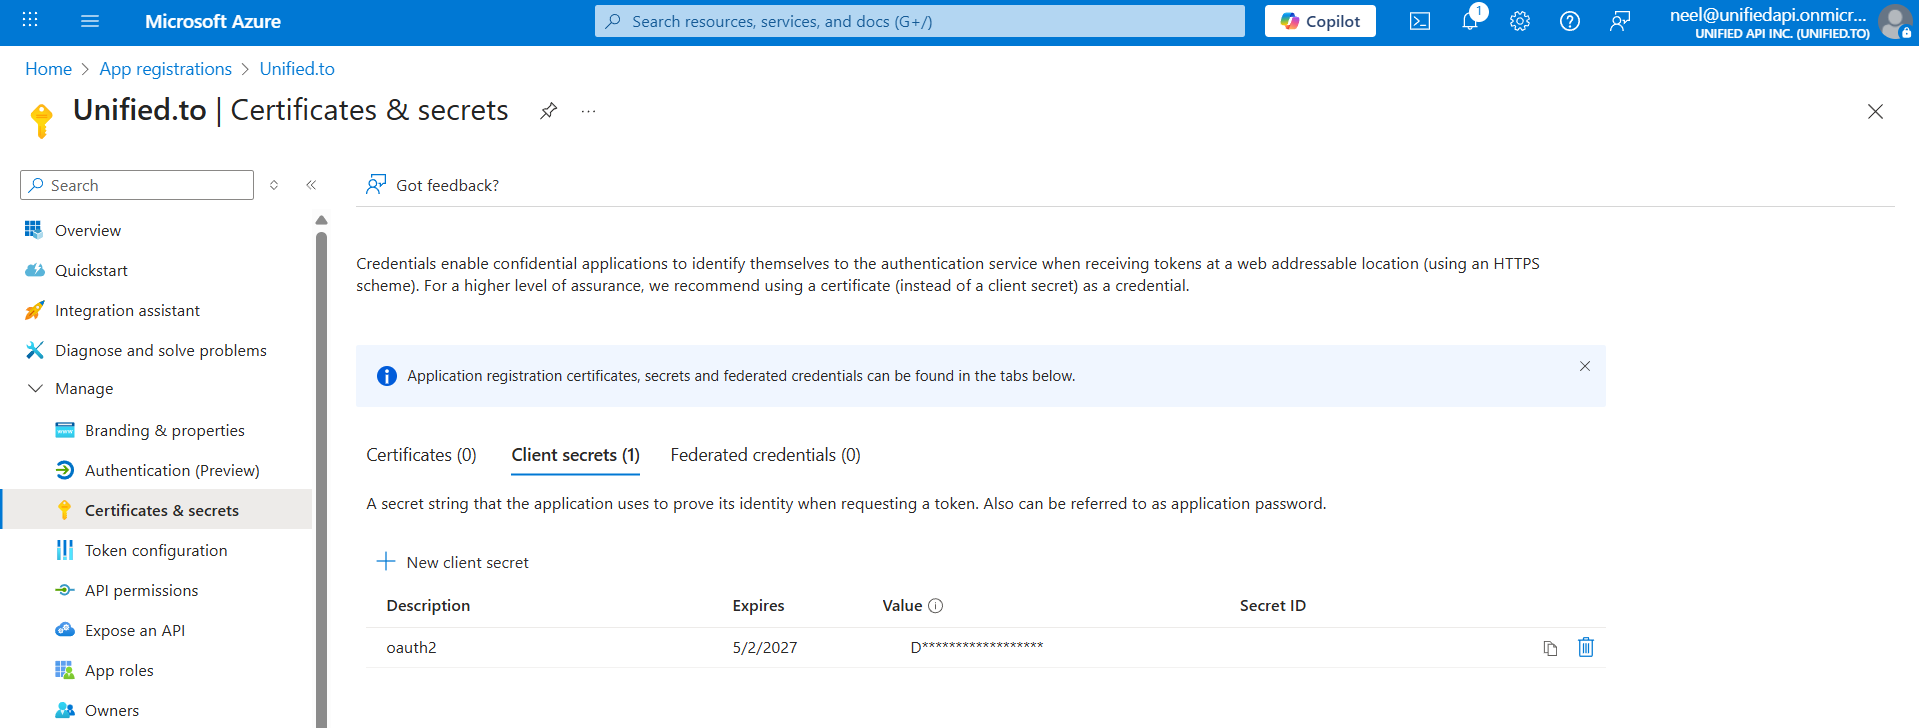
1. In the App Registration, go to **Certificates & secrets**
2. Copy the following:
- **Client ID** (from the app Overview page)
- **Client Secret**
- Create a new client secret if one does not exist
- Copy it immediately (it will not be shown again)
⚠️ Store the client secret securely.
---
## 5. Retrieve Business Central Company Name
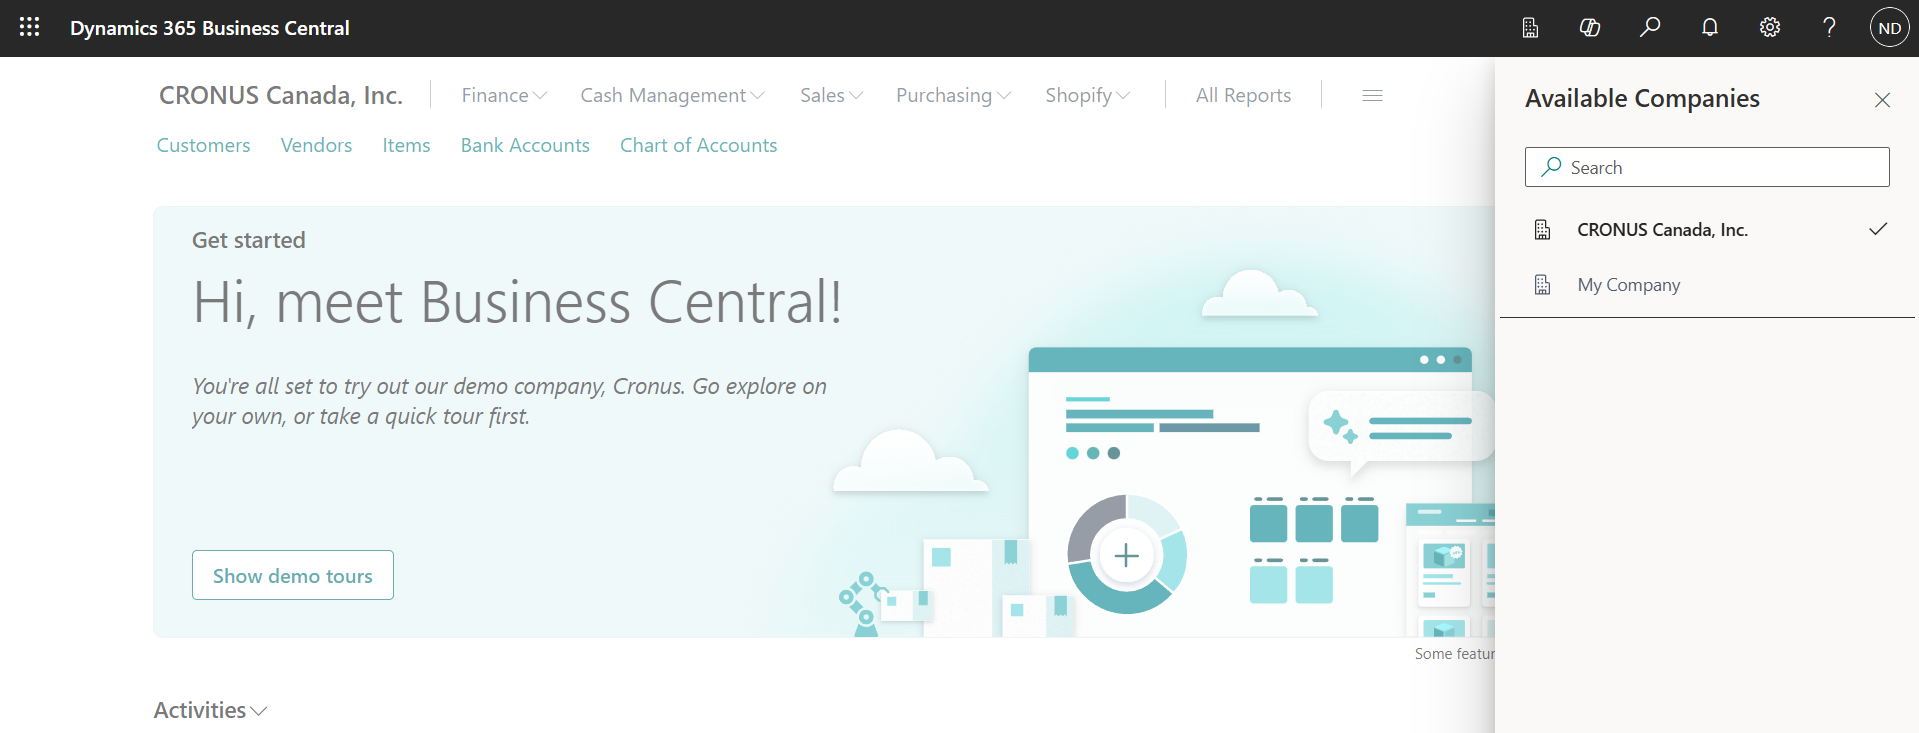
Unified also requires the **Business Central company name**.
1. Go to:
👉 [https://businesscentral.dynamics.com/](https://businesscentral.dynamics.com/)
2. Sign in to your Business Central account
3. Locate the **company name** using either method:
- The company name shown in the **top-left corner**, **or**
- Click the **building (company) icon** in the navigation bar and copy the desired company name
Use **exactly** the company name as shown.
---
## 6. Information You Will Need for Unified
After completing the steps above, you should have:
- ✅ Client ID
- ✅ Client Secret
- ✅ Business Central Company Name
These values are required to complete the Business Central connection in Unified.
## How to set up a custom API URL with a CNAME
URL: https://docs.unified.to/guides/how_to_set_up_a_custom_api_url_with_a_cname
# How to set up a custom API URL with a CNAME
------
_September 5, 2025_
This guide walks you through setting up a custom subdomain (CNAME) for your Unified API workspace, so you can use your own domain instead of `api.unified.to` for API calls and OAuth flows.
> 💡 This is mandatory when using Sensitive scopes in any of the Google integrations. It allows the Google verification to pass.
## Prerequisites
- A Pro or Scale plan (custom domains are not available on Grow)
- A workspace in the US or EU region (custom domains are not yet available in the AU region)
- Access to your domain's DNS management console
- Admin access to your Unified workspace
## Step 1: Choose your custom subdomain
Pick the subdomain you want to use, for example:
- `api.yourcompany.com`
- `unified-api.yourcompany.com`
- `integrations.yourcompany.com`
## Step 2: Create the CNAME record
1. Log in to your DNS provider (e.g. Cloudflare, GoDaddy, Namecheap, AWS Route 53).
2. Go to DNS management for your domain.
3. Add a CNAME record:
- **Type**: CNAME
- **Name**: your subdomain (e.g. `api` or `unified-api`)
- **Value/Target**, for your workspace's region:
- US: `unified-domains-us-7d67c6f04efebb36.elb.us-east-1.amazonaws.com`
- EU: `unified-domains-eu-a0f8a17b303a3c06.elb.eu-central-1.amazonaws.com`
- **TTL**: 3600 (or default)
- **Proxy status**: DNS only / disabled (if using Cloudflare). A proxied record hides the CNAME, so it can't be verified, and it blocks the TLS certificate from being issued.
4. Save the record.
The target is also shown in your workspace settings, in the help text of the **Custom API domain** field.
## Step 3: Wait for DNS propagation
DNS changes can take from a few minutes to 48 hours to propagate. You can check with [whatsmydns.net](https://whatsmydns.net/) or [dnschecker.org](https://dnschecker.org/): the CNAME for your subdomain should show the target above.
## Step 4: Update your OAuth applications
**Important**: as soon as your domain is saved in Step 5, OAuth flows redirect to it. To avoid failed authorizations, add the new redirect URI to every OAuth application you use with Unified _before_ Step 5 (most providers allow several), then remove the old one once everything works.
Add:
```plain text
https://api.yourcompany.com/oauth/code
```
alongside:
```plain text
https://api.unified.to/oauth/code
```
## Step 5: Add the domain to your workspace
1. Go to [Settings → Workspace](https://app.unified.to/settings/workspace) (use [app-eu.unified.to](https://app-eu.unified.to/settings/workspace) for EU workspaces).
2. Enter your subdomain in **Custom API domain**, without `https://` (e.g. `api.yourcompany.com`).
3. Click **Verify** (or **Update**).
Unified checks that the CNAME points to your region's target. If it does, the domain shows as **Verified** and Unified adds it to its load balancer. A TLS certificate is issued automatically, usually within a few minutes.
If the CNAME isn't in place yet, you'll see an error explaining what's missing. Wait for DNS to propagate and click **Verify** again.
To stop using a custom domain, clear the field and click **Update**.
## Step 6: Check the setup
1. Open `https://api.yourcompany.com/swagger.json`. It should load over HTTPS. If you get a certificate error, wait a few minutes for the certificate to be issued.
2. Authorize a test connection to an OAuth integration and confirm the redirect works.
## Important notes
### OAuth verification
- **Google OAuth**: after changing the redirect URI, you may need to complete app verification again, since Google sees it as a new domain ([Google's verification guide](https://support.google.com/cloud/answer/13461325)).
- **Other providers** may require similar verification.
### API usage
- Your API calls can use your custom domain. API functionality is identical.
- API keys and authentication don't change.
### Security
- Protect access to your DNS provider and consider enabling DNSSEC.
- Monitor for unauthorized DNS changes.
## Troubleshooting
1. **"does not have a CNAME record pointing to …"**
- DNS hasn't propagated yet, or the record points somewhere else. Make sure the target matches your workspace's region exactly and that Cloudflare proxying is off.
2. **"is already used by another workspace"**
- Each custom domain can belong to one workspace. Contact Unified Support if you need to move it.
3. **Certificate error on your domain**
- The certificate is issued a few minutes after verification. If it still fails after an hour, contact Unified Support.
4. **OAuth errors after the change**
- Make sure redirect URIs are updated in all OAuth applications, and complete app verification if the provider requires it.
## Example
For `api.yourcompany.com` in the US region:
```plain text
Type: CNAME
Name: api
Value: unified-domains-us-7d67c6f04efebb36.elb.us-east-1.amazonaws.com
TTL: 3600
```
OAuth redirect URI: `https://api.yourcompany.com/oauth/code`
API endpoint: `https://api.yourcompany.com/crm/{connection_id}/contact`
## How to set up a HiBob marketplace install
URL: https://docs.unified.to/guides/how_to_set_up_a_hibob_marketplace_install
# How to set up a HiBob marketplace install
------
_October 16, 2026_
Use this when a HiBob customer installs your app from Bob Marketplace. Bob sends the browser to a fixed callback with only a code. Unified exchanges that code and creates the connection.
The embedded sign-in flow, where the user starts in Unified and returns to your app, is a different setup. A HiBob app has only one Redirect URI, so see "One Redirect URI per HiBob app" below before you choose.
---
## Before you start
- A Unified workspace in the region where the connection should live
- A HiBob app in the [HiBob Developer Portal](https://developers.hibob.com/), with its Client ID and Client Secret. HiBob OAuth is only available to approved Marketplace and technology partners.
- The scopes your app needs, set on the HiBob app
---
## 1. Save the HiBob credentials in Unified
1. In Unified, open Integrations and activate HiBob for the environment you are using (Production or Sandbox).
2. Enter the Client ID and Client Secret from the HiBob app. HiBob issues separate Development and Production credentials. Use the set that matches the installs you expect, because tokens issued with one set cannot be refreshed with the other.
3. Save the integration. The marketplace callback reads these credentials. It does not take a workspace API key, and it does not use the App ID field. Unified only uses the App ID when the install starts in Unified.
---
## 2. Register the Redirect URI on the HiBob app
In the HiBob Developer Portal, open your app and, under OAuth, set the Redirect URI to the callback for this workspace and environment. Use the API host for the workspace region.
```plain text
https://api.unified.to/hb/{workspace_id}/{environment}/connection
```
Replace the placeholders:
- workspace_id is the Unified workspace ID.
- environment is Production or Sandbox, matching the integration you activated.
Regional hosts:
- United States: https://api.unified.to
- Europe: https://api-eu.unified.to
- Australia: https://api-au.unified.to
Example:
```plain text
https://api.unified.to/hb/5f9c2a1b8e4d3c0011223344/Production/connection
```
The URI must match exactly. Do not add a query string, a trailing slash, or a success or failure URL. HiBob only sends the authorization code to this address, and Unified sends the same address back to HiBob when it exchanges the code.
When you save the Redirect URI, HiBob regenerates the App Installation URL. If you test with the "App installation URL for testing", copy it again after this change.
---
## 3. Install from Bob Marketplace
1. In Bob, an admin opens your app in Bob Marketplace and clicks Install.
2. Bob shows the consent screen. The admin approves the scopes and chooses the People data access for the app.
3. Bob redirects the browser to the URL above with ?code=. The code expires after 5 minutes.
4. Unified creates the connection. The HiBob company ID (the companyId claim in the access token) is stored on the connection as the external reference.
5. Unified shows a short page saying the install finished and the tab can be closed. Unlike HighLevel, the browser is not sent back to Bob, because the page it came from is the consent screen.
If your workspace listens for new connections, that webhook includes the new connection and its external reference.
To test before your listing is live, follow [Test apps in Bob Marketplace](https://apidocs.hibob.com/docs/test-apps-in-bob-marketplace) and use your Development credentials in Unified.
---
## Each HiBob company is its own connection
Each company that installs the app creates a separate Unified connection, identified by its HiBob company ID.
Reinstalling the app creates a new connection. It does not update the existing one, and the old connection stops working at its next token refresh.
---
## One Redirect URI per HiBob app
A HiBob app has a single Redirect URI, and HiBob requires every request to use it. An app set up with the URL above is for marketplace installs. Installs that start in Unified's embedded flow use https://api.unified.to/oauth/code as the redirect address, which does not match that app.
---
## Uninstalls
Customers uninstall the app from Bob Marketplace. HiBob does not send a notification when this happens. The connection stops working at its next token refresh, when HiBob rejects the refresh token.
---
## If the install fails
- Redirect URI does not match. Compare the HiBob app Redirect URI with the workspace ID, environment, and regional API host.
- HiBob integration is missing, or the Client ID and Client Secret are not saved for that environment.
- Development and Production credentials are mixed up. The credentials saved in Unified must belong to the same set as the install.
- The authorization code expired. Codes last 5 minutes, so start the install again.
- The admin declined the install. Unified shows the error HiBob returned.
- The HiBob app does not include the scopes you need. Scopes are configured on the HiBob app, not on the Redirect URI.
HiBob reference: [Add and submit an app](https://apidocs.hibob.com/docs/add-and-submit-an-app) and [OAuth 2.0](https://apidocs.hibob.com/reference/oauth-20).
## How to Set Up a Microsoft Teams Bot with Unified
URL: https://docs.unified.to/guides/how_to_set_up_a_microsoft_teams_bot_with_unified
# How to Set Up a Microsoft Teams Bot with Unified
------
_April 20, 2026_
## Overview
If your Microsoft Teams bot connection is created successfully in Unified but later API calls fail with
`No authorization information present on the request`, the issue is usually not OAuth.
OAuth connects Microsoft 365 to Unified, but your bot still needs to be:
- packaged correctly
- uploaded to Teams
- installed in the correct Team, channel, or chat
Without this, API calls will fail due to missing context.
---
## ⚠️ Important Clarification (Common Issue)
- The manifest downloaded from **Microsoft Entra app registration is NOT a valid Teams manifest**
- The Microsoft 365 schema is also **not the correct reference**
You must use the **Microsoft Teams manifest schema**:
[https://learn.microsoft.com/en-us/microsoftteams/platform/resources/schema/manifest-schema](https://learn.microsoft.com/en-us/microsoftteams/platform/resources/schema/manifest-schema)
Using the wrong manifest will result in errors like:
`Manifest parsing error message unavailable`
---
## What You'll Need
Before starting:
- Guide: [https://docs.unified.to/guides/how_to_get_your_oauth_2_credentials_for_microsoft_dynamics_365](https://docs.unified.to/guides/how_to_get_your_oauth_2_credentials_for_microsoft_dynamics_365)
- A Microsoft Entra app / bot registration
- A Microsoft Teams app package (`.zip`)
- Permission to upload custom apps in Teams
- A Unified connection using **Microsoft Teams (bot)**
---
## Create a Valid Teams App Package
Your `.zip` must include:
- `manifest.json`
- Color icon (192×192 PNG)
- Outline icon (32×32 PNG)
---
### Recommended Approach (Avoid Manual Errors)
Instead of writing JSON manually, use:
👉 Teams Developer Portal
[https://learn.microsoft.com/en-us/microsoftteams/platform/concepts/build-and-test/teams-developer-portal](https://learn.microsoft.com/en-us/microsoftteams/platform/concepts/build-and-test/teams-developer-portal)
This allows you to:
- Configure your bot via UI
- Set scopes correctly
- Generate a valid app package
- Avoid manifest parsing errors
---
### Manifest Checklist
Ensure your `manifest.json` includes:
- Valid app ID
- Bot capability with correct `botId`
- Required scopes:
- `team`
- `groupchat`
- `personal` (optional)
Use:
- `team` → for channels
- `groupchat` → for chats
---
### Minimal Manifest Template (Reference)
```plain text
{
"$schema":"https://developer.microsoft.com/en-us/json-schemas/teams/v1.16/MicrosoftTeams.schema.json",
"manifestVersion":"1.16",
"version":"1.0.0",
"id":"YOUR-APP-ID",
"name": {
"short":"My Teams Bot",
"full":"My Teams Bot"
},
"description": {
"short":"Bot for Teams",
"full":"Bot for Teams integrated with Unified"
},
"developer": {
"name":"Your Company",
"websiteUrl":"https://yourdomain.com",
"privacyUrl":"https://yourdomain.com/privacy",
"termsOfUseUrl":"https://yourdomain.com/terms"
},
"icons": {
"color":"color.png",
"outline":"outline.png"
},
"accentColor":"#FFFFFF",
"bots": [
{
"botId":"YOUR-ENTRA-APP-ID",
"scopes": ["team","groupchat"]
}
]
}
```
---
### ⚠️ Notes (Follow as Steps)
1. Replace `YOUR-APP-ID` and `YOUR-ENTRA-APP-ID` with your actual app ID
2. Ensure both icons exist in the `.zip` file
3. Use this only as a reference template, not a full production manifest
---
## Upload the App in Microsoft Teams
Steps:
1. Open **Apps** (left sidebar)
2. Click **Manage your apps**
3. Stay on **Apps tab**
4. Click **Upload an app**
5. Upload your `.zip`
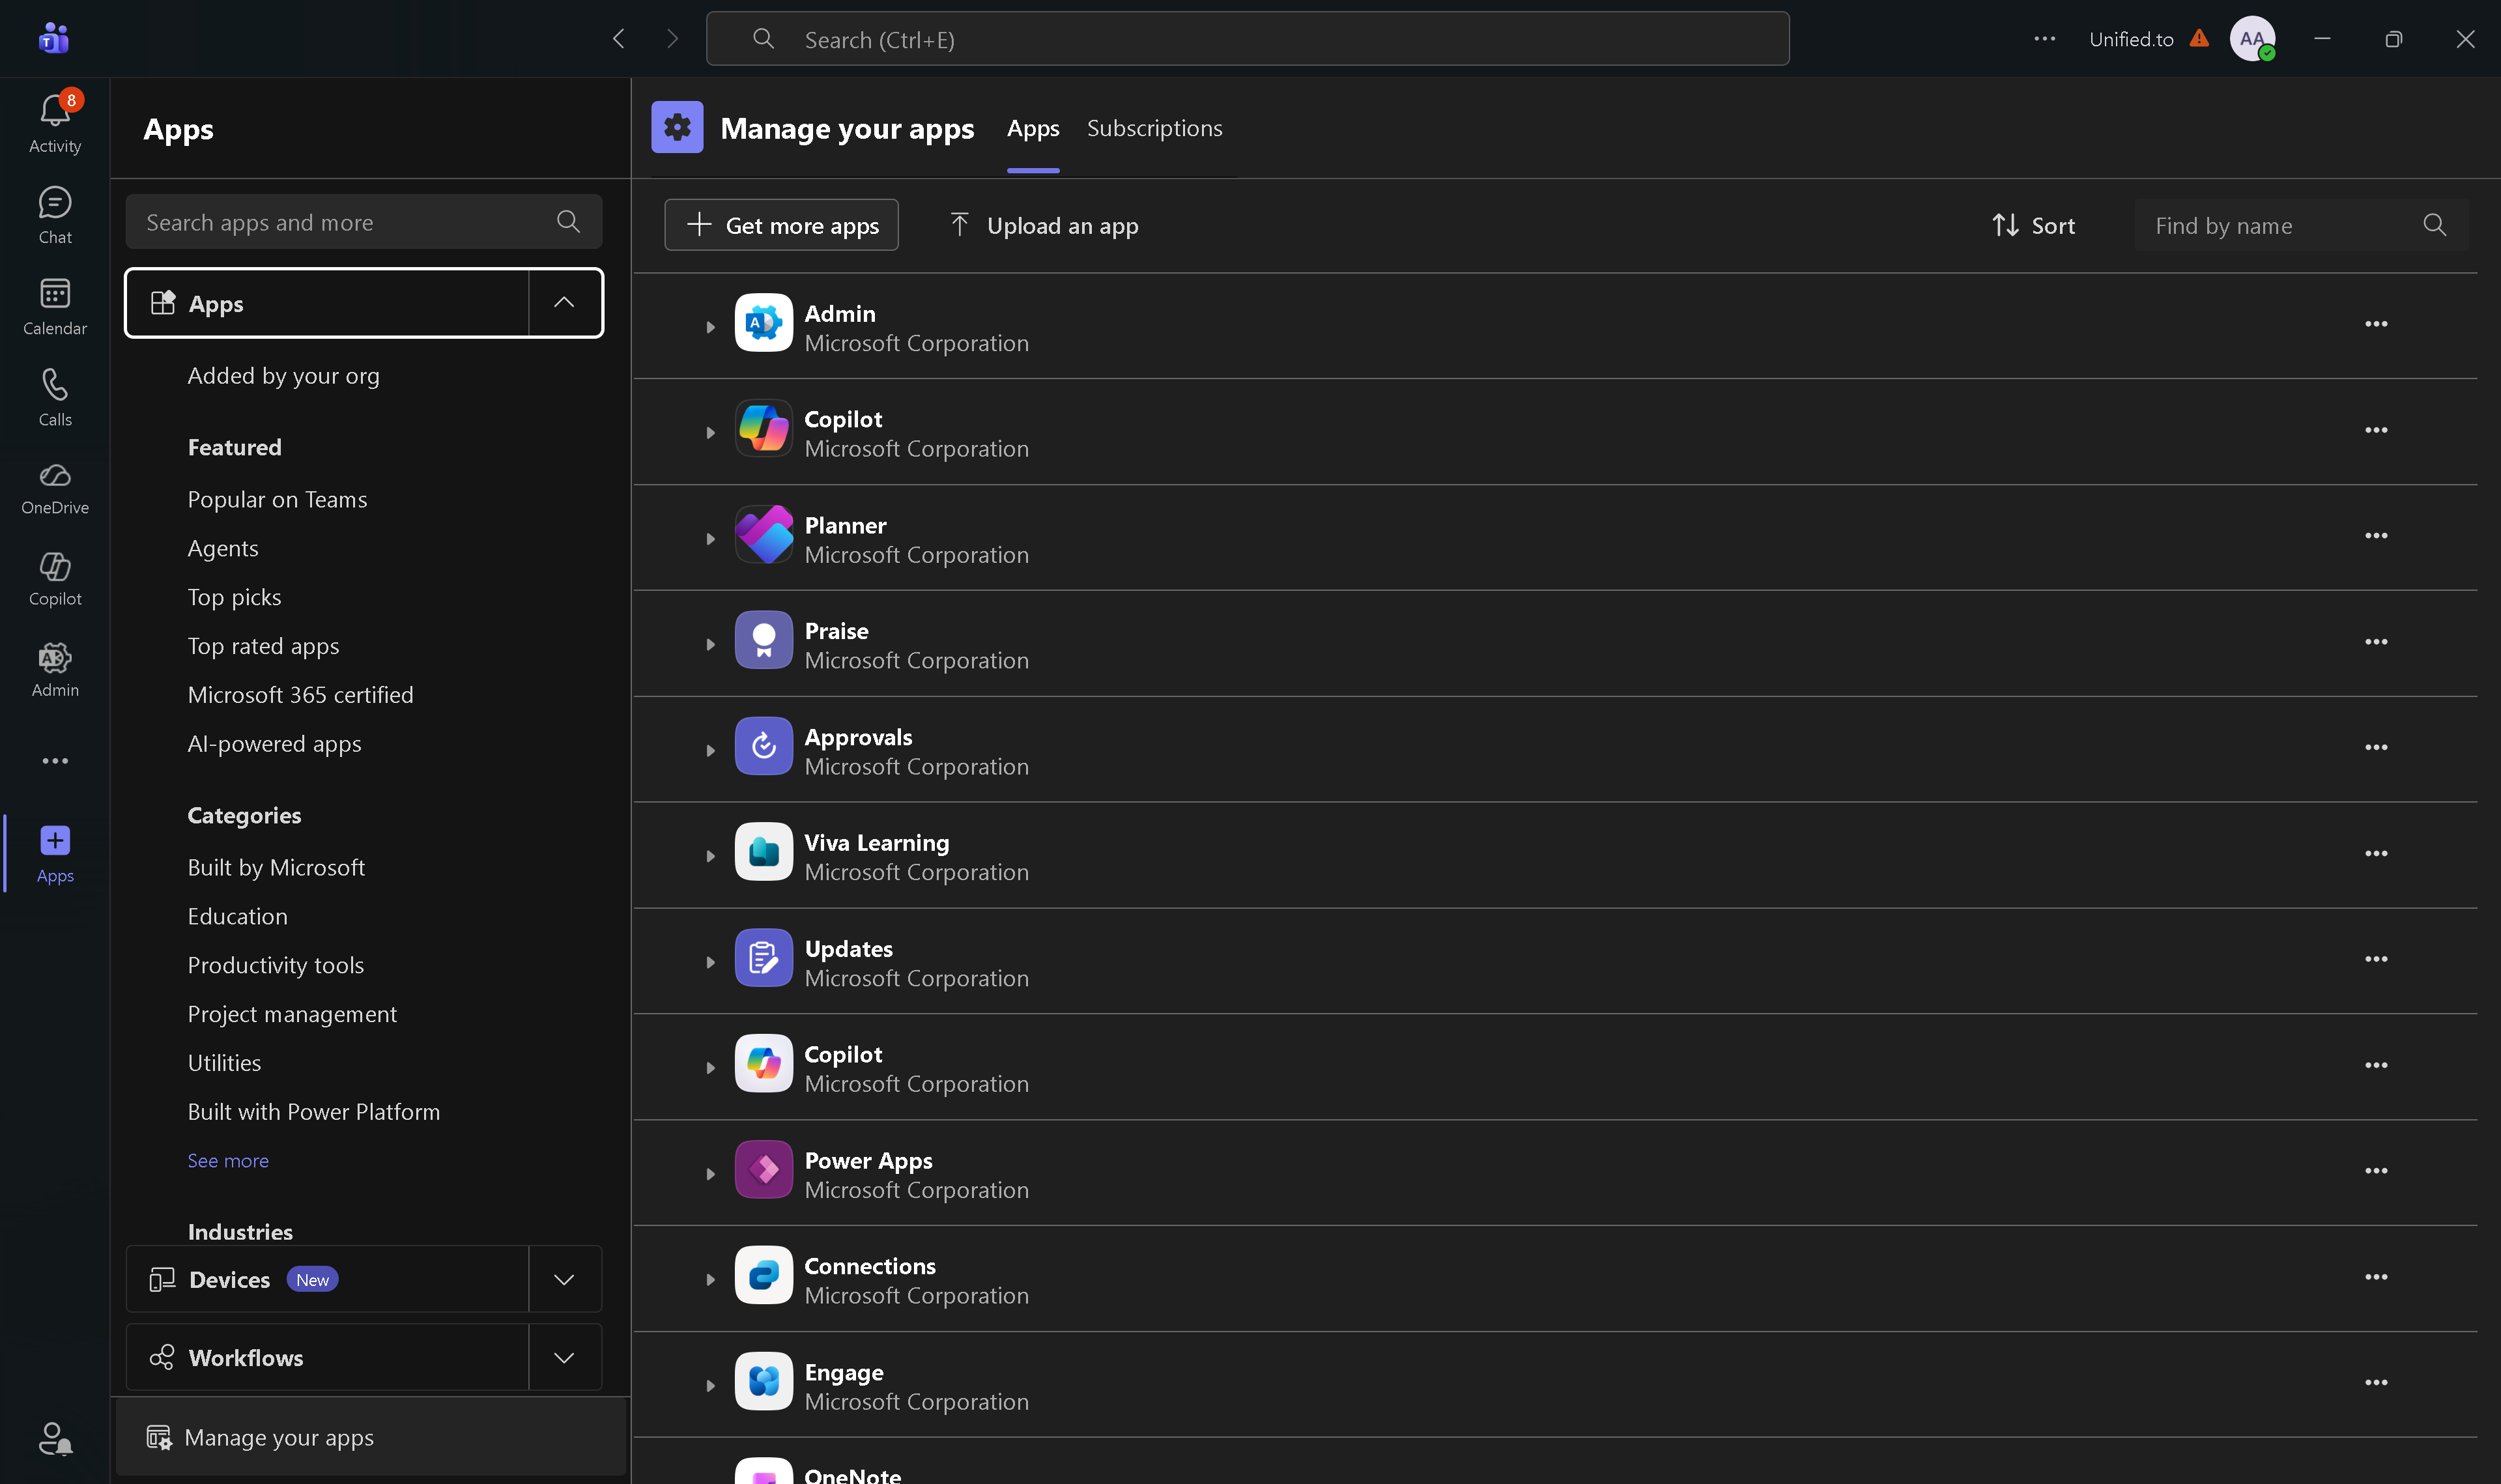
⚠️ If upload option is missing → admin restriction
---
## Install the Bot in the Right Scope
Uploading ≠ installing
You must install the bot in:
- A Team
- A channel
- A group chat
- Personal scope
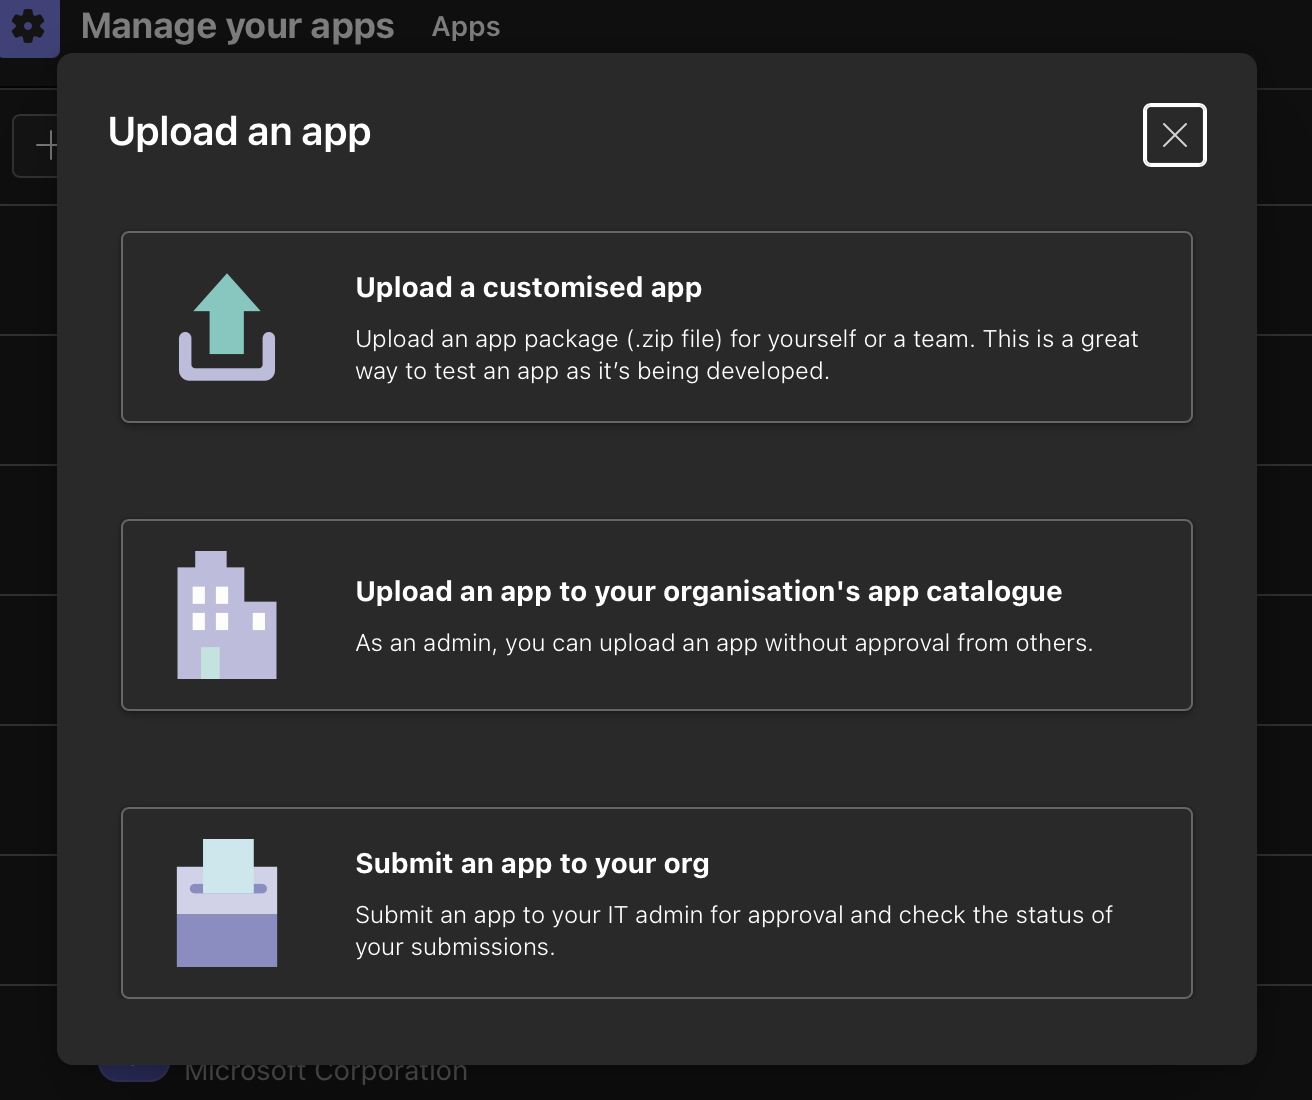
⚠️ If not installed → API calls will fail
---
## Connect Microsoft Teams (bot) to Unified
Steps:
1. Create connection in Unified
2. Complete OAuth
3. Approve scopes
4. Save connection
### Common Required Scopes
- `Channel.ReadBasic.All`
- `ChannelMessage.Read.All`
- `ChatMessage.Read`
- `Chat.Read`
- `ChannelMessage.Send`
- `ChatMessage.Send`
- `offline_access`
💡 If permissions change → reconnect integration
---
## Test the Connection
1. Send a message where the bot is installed
2. Call Unified messaging API
3. Verify read/send works
💡 If connection was created before installation → retry
---
## Troubleshooting
### ❌ Manifest parsing error
- Wrong manifest type (Entra instead of Teams)
- Wrong schema
---
### ❌ App package failed validation
- Missing icons
- Files not at root
- Invalid JSON
- `botId` mismatch
---
### ❌ No authorization information present
- Bot not installed in correct scope
- Missing permissions
- Wrong scope
- Token outdated → reconnect
## How to set up and configure Notion
URL: https://docs.unified.to/guides/how_to_set_up_and_configure_notion
# How to set up and configure Notion
------
_May 21, 2024_
This guide describes how to register a public Notion application (a.k.a. ‘integration') and configure it so that you can use the Unified API to query pages and databases.
## Understanding Notion integrations: Internal vs Public
Before setting up your Notion integration, it's important to understand the two types of integrations Notion offers:
1. **Internal Integrations**: These are confined to a single workspace and are only accessible by members of that workspace. They're ideal for custom workspace enhancements.
2. **Public Integrations**: These are designed for a wider audience and can be used across any Notion workspace. They follow the OAuth 2.0 protocol for workspace access.
The main difference in terms of accessing user data is:
- For Internal Integrations, workspace members explicitly grant access to their pages or databases via Notion's UI.
- For Public Integrations, users authorize access to their pages during the OAuth flow, or by sharing pages directly with the integration.
For more information on the differences, refer to the [Notion API Overview](https://developers.notion.com/docs/getting-started).
## Setting up your Notion integration
The following steps outline how to register a public Notion integration:
1. Go to [https://www.notion.so/my-integrations](https://www.notion.so/my-integrations)
2. Click on your integration (or create a new one)
3. Follow the steps to register a new Notion integration.
1. Under **Type**, select **Public**.
2. Under **Redirect URIs**, enter `https://api.unified.to/oauth/code`
4. Click **Save**.
5. Go to the configuration settings of your newly created integration and make a note of the **OAuth Client ID** and **OAuth Client Secret.**
6. Still under the configuration settings, make sure to select the permissions you need for your app under **Capabilities** e.g. read or update content.
7. Enter your OAuth credentials on [https://app.unified.to/integrations/notion](https://app.unified.to/integrations/notion) to activate the Notion integration.
**Note:** If you wish to create an Internal integration, most of the steps above can be skipped, and you will need to enter your `Internal integration token` on [app.unified.to](https://app.unified.to/) instead. Instructions on how to find your internal token can be found [here](https://www.notion.so/help/create-integrations-with-the-notion-api).
## Querying databases in Notion
To query databases in Notion, you'll need to use our Unified KMS endpoint:
1. First, make sure you have a `connection_id` for your Notion integration.
2. Since database entries in Notion are technically pages, we'll use the **List all pages** endpoint:
```plain text
GET /kms/{connection_id}/page
```
API reference: [List all pages](https://docs.unified.to/kms/page/List_all_pages)
1. When querying pages in a database, you need to pass the database ID as the `space_id` parameter. For example:
```plain text
GET /kms/{connection_id}/page?space_id={database_id}
```
2. You can use additional parameters to filter and sort your results:
- `limit`: Number of results to return (default: 30)
- `offset`: Number of results to skip (default: 0)
- `updated_gte`: Return only results updated on or after this date
- `sort`: Sort by 'name', 'updated_at', or 'created_at'
- `order`: Sort order ('asc' or 'desc')
- `query`: Search query string
- `fields`: Comma-separated list of fields to return
For example, to get the first 50 pages in a database, sorted by name in ascending order:
```plain text
GET /kms/{connection_id}/page?space_id={database_id}&limit=50&sort=name&order=asc
```
## Webhooks
Notion doesn't offer programmatic creation of webhooks, so you need to first create webhooks for your application. Then, you can use our CreateWebhook API endpoint to select what data and connection you want to receive.
1. Go you your Notion's integrations page at [https://www.notion.so/profile/integrations](https://www.notion.so/profile/integrations)
2. Either create a new integration or select an existing one.
3. Navigate to the **Webhooks** tab and click **+ Create a subscription**.
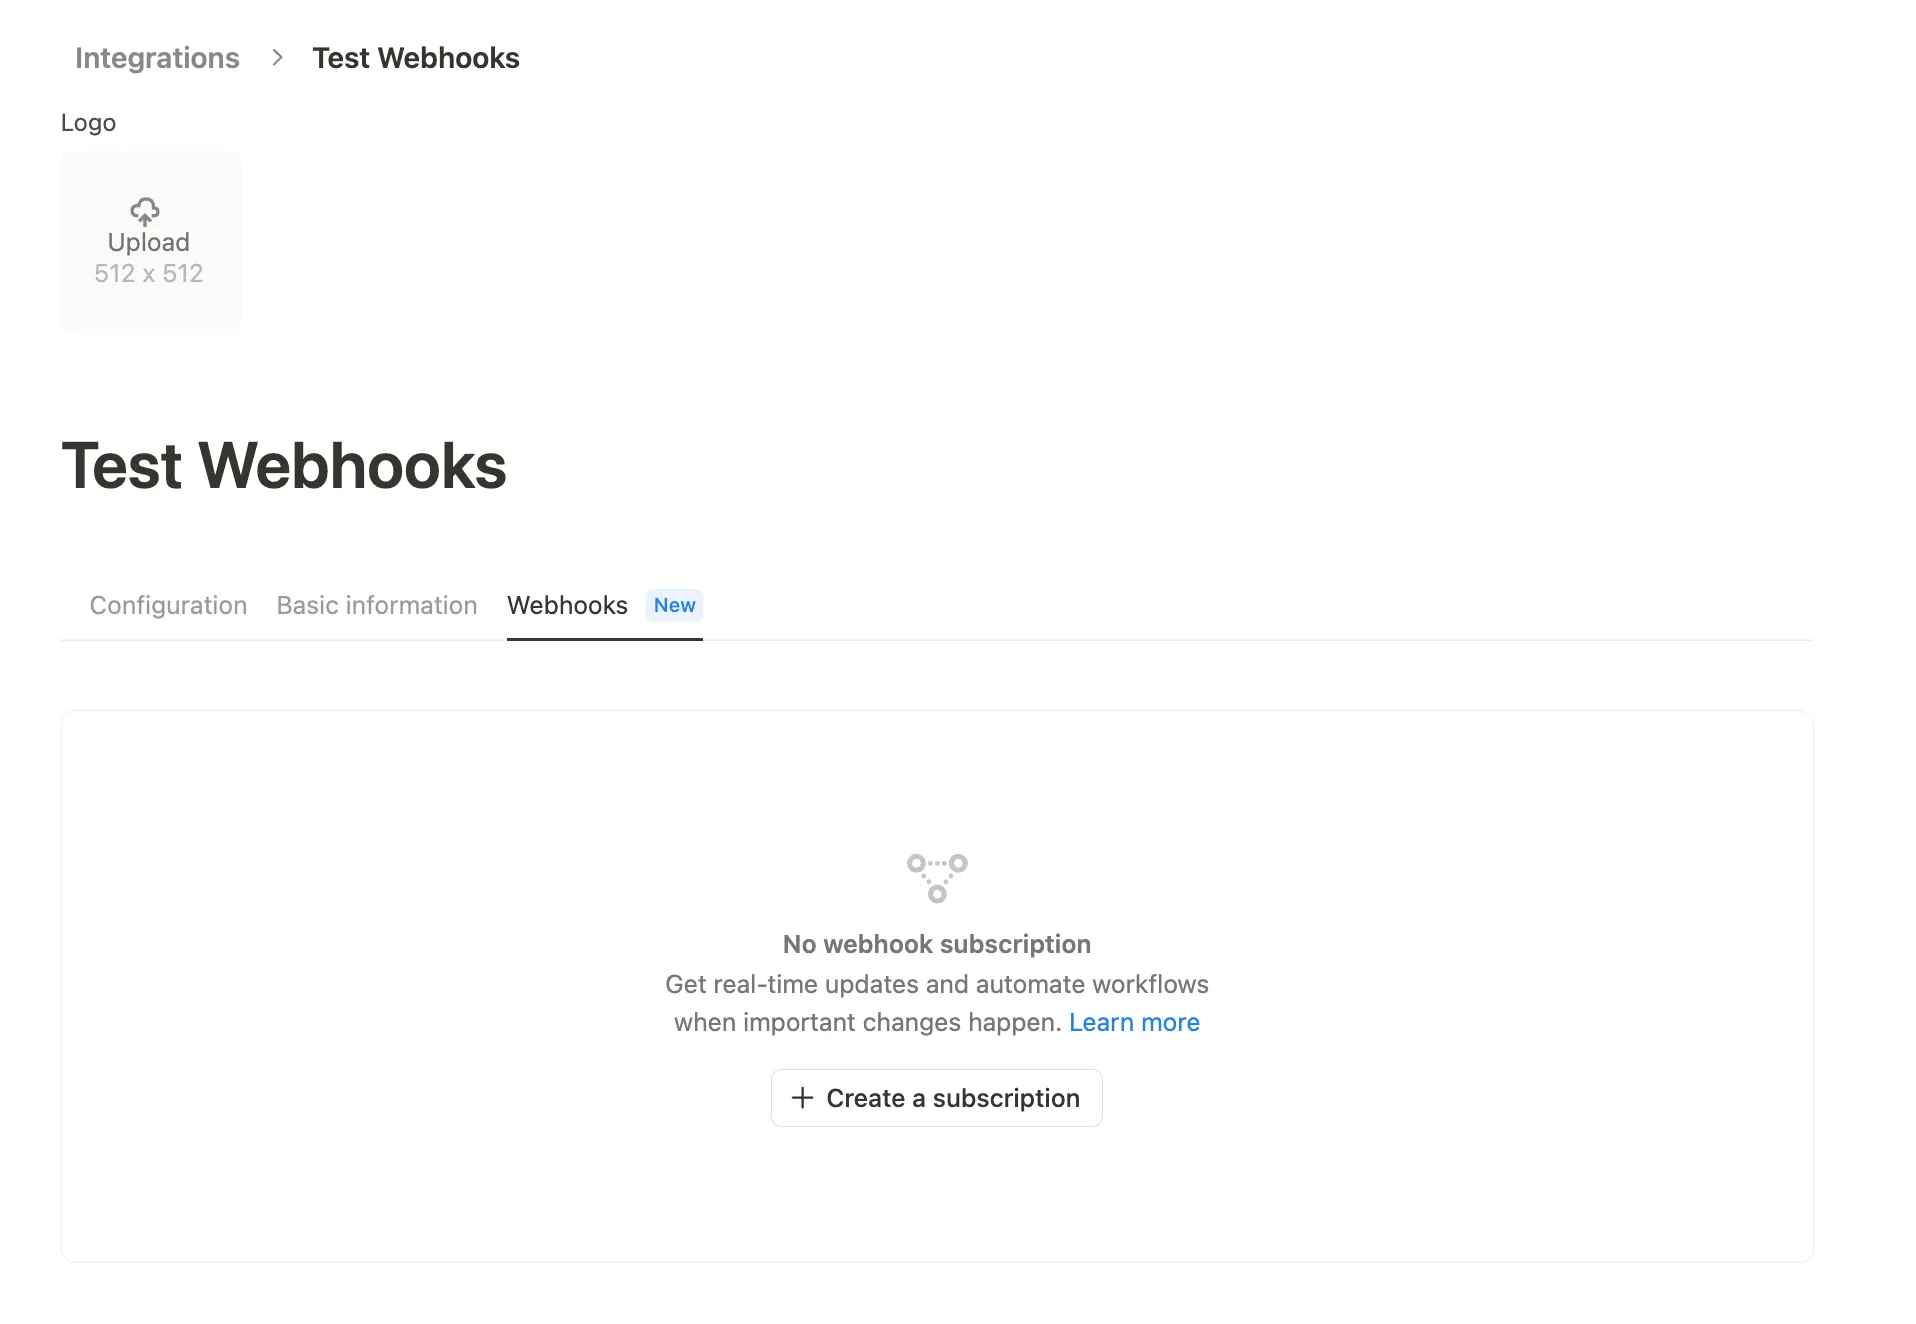
4. Enter your public **Webhook URL** — this is the public endpoint where you want Notion to send events. It must be a secure (SSL) and publicly available endpoint. Endpoints in localhost are not
reachable.
1. US: `https://api.unified.to/webhook/workspace/notion?workspace_id=$WORKSPACE_ID`
2. EU: `https://api-eu.unified.to/webhook/workspace/notion?workspace_id=$WORKSPACE_ID`
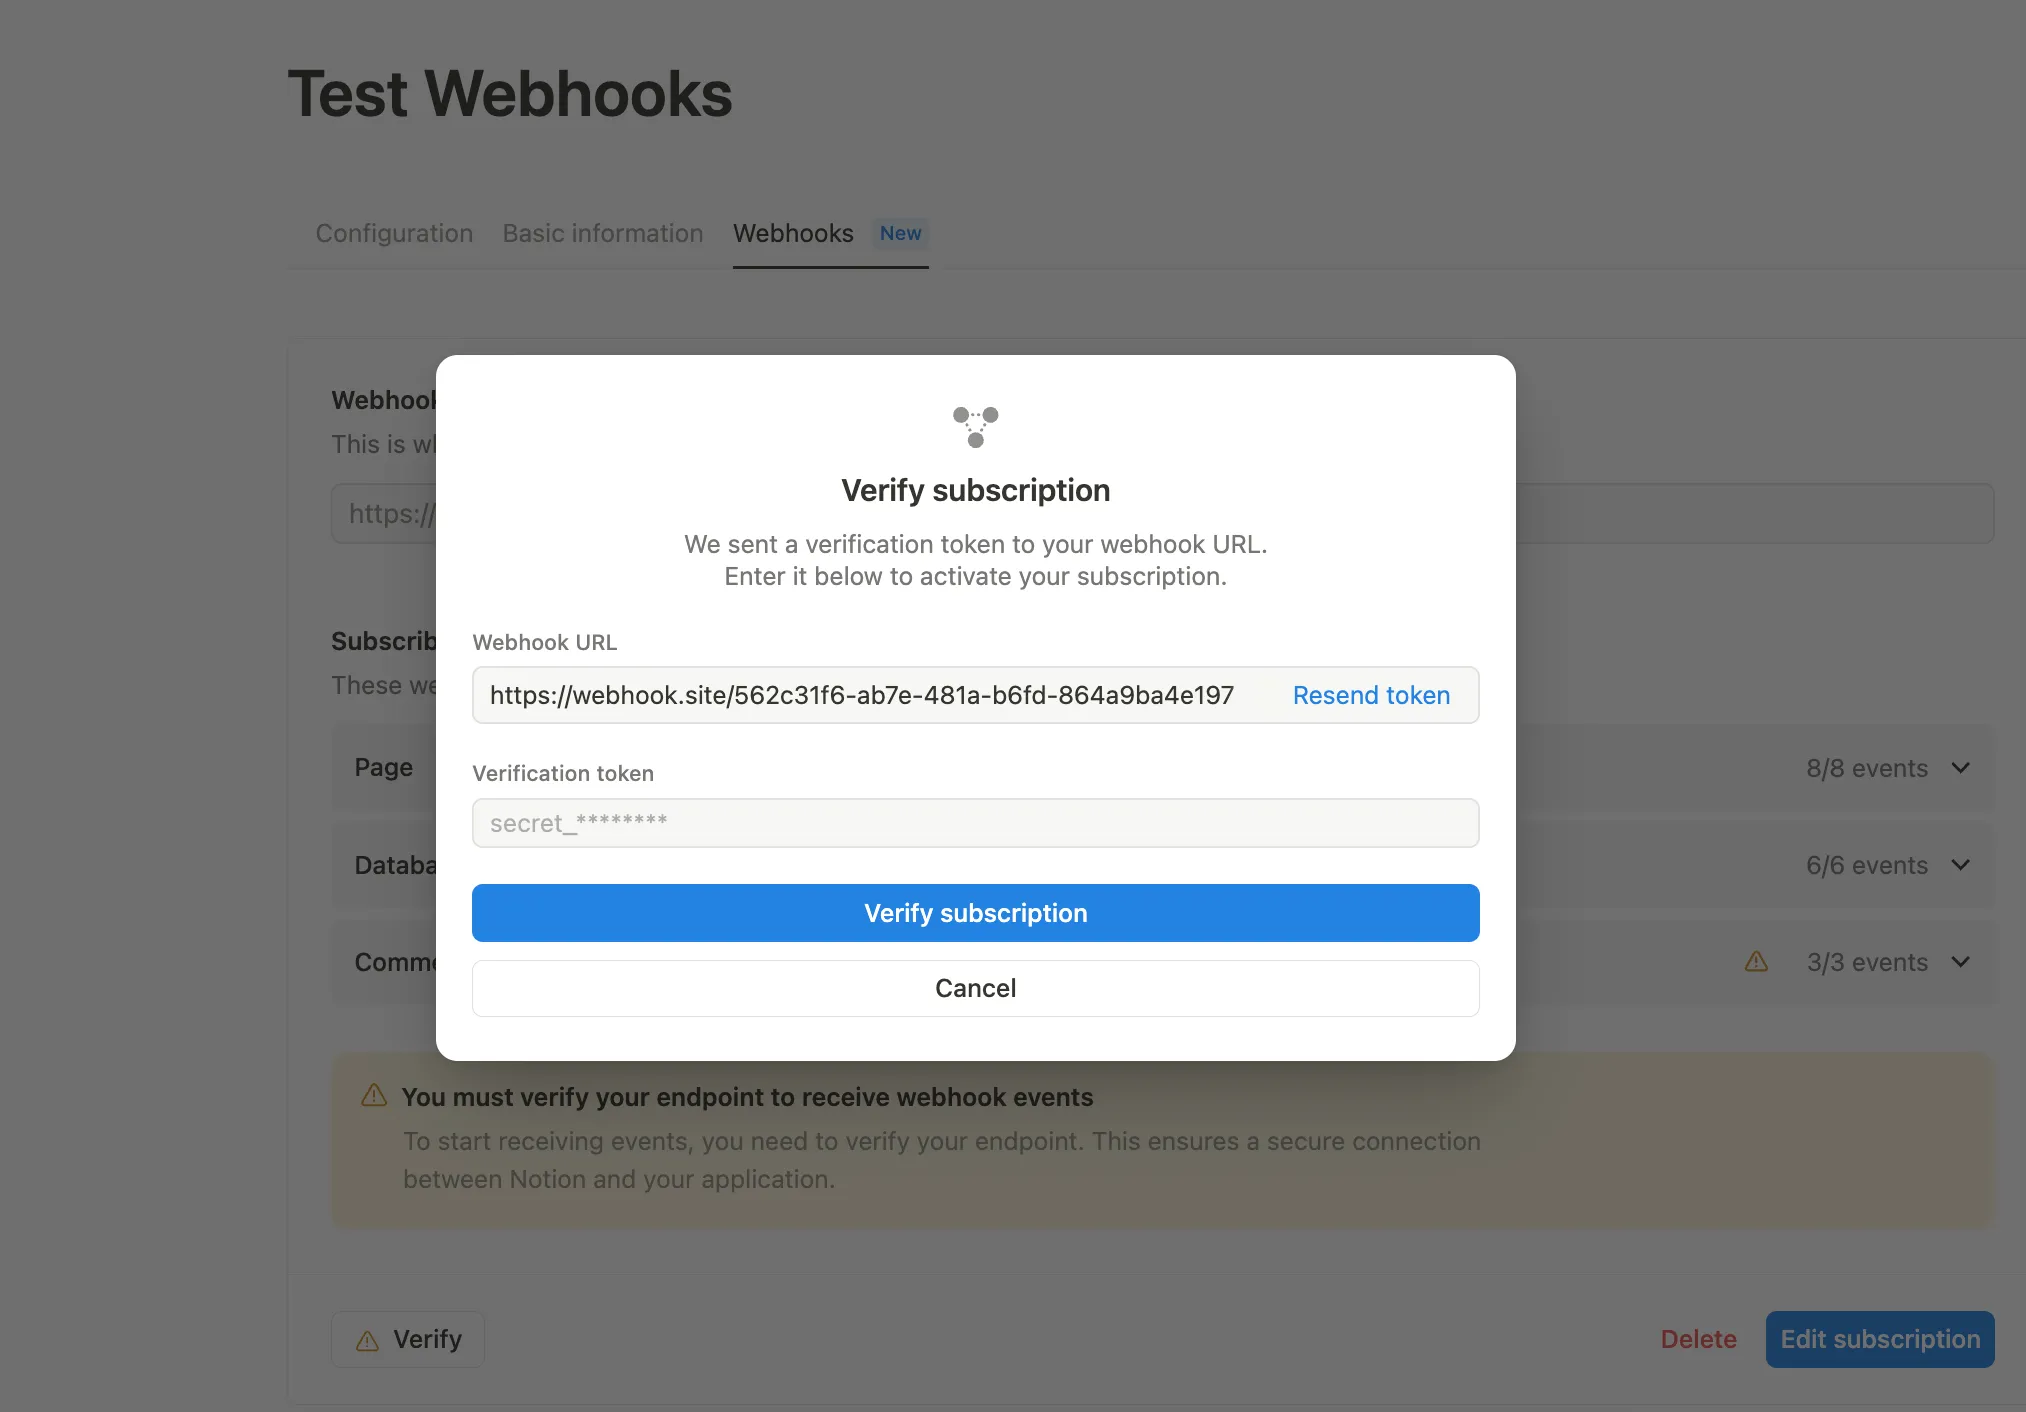
5. Select the events that you are interested in receiving from all of your customers. Created and Deleted events are associated with our `created` and `deleted` events, while all other events are associated with our `updated` event. Both Notion's `Page` and `Database` are mapped to Unified's `KMSPage`, while `Comments` are mapped to `KMSComment`. You can modify these later if needed.
6. Click **Create subscription**.
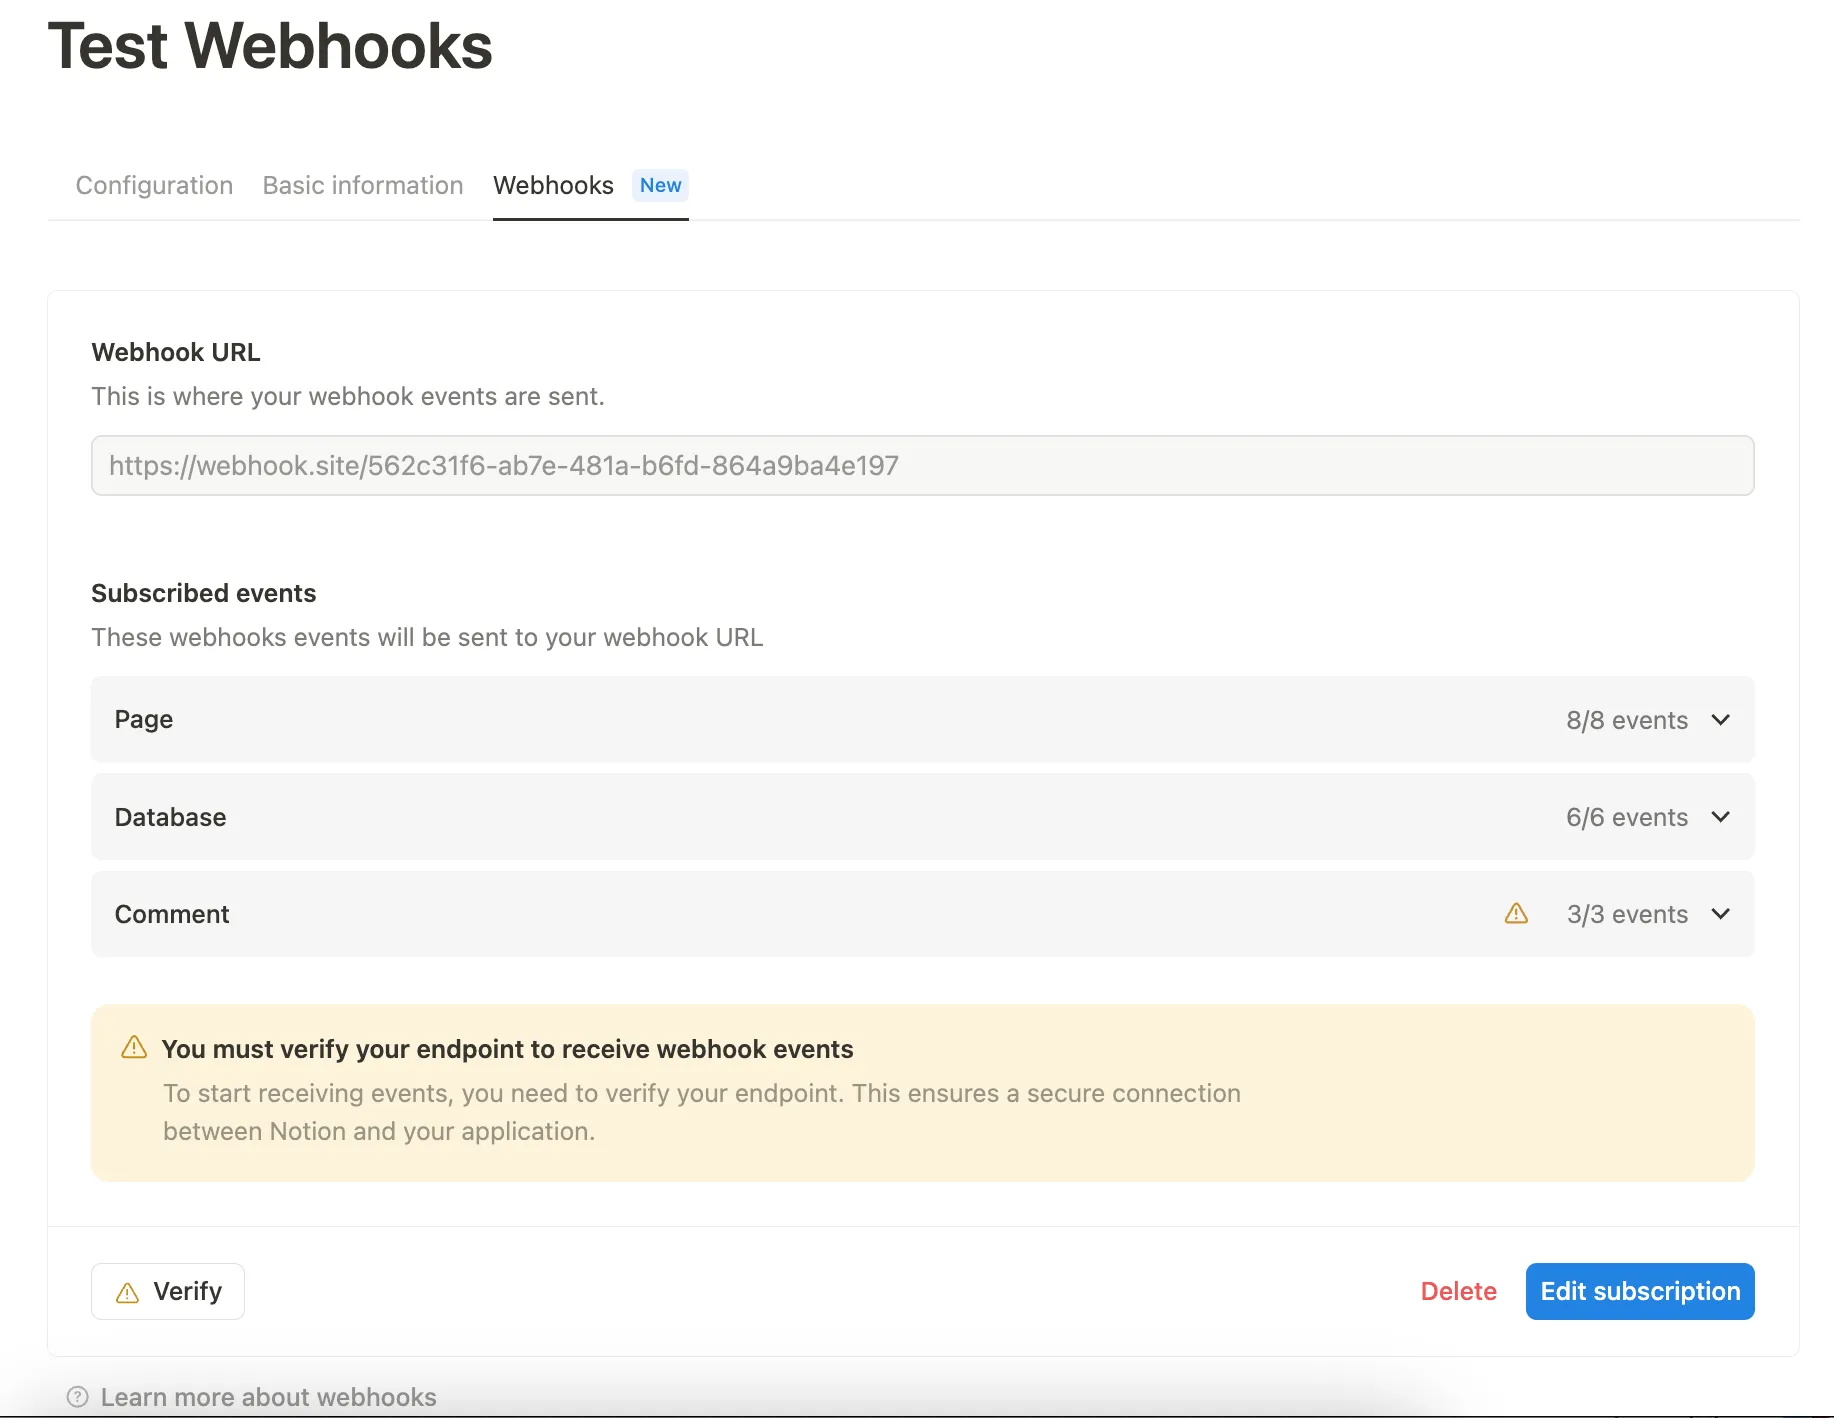
7. After you create the notion webhook, notion will send us a verification token. You can find that verification token in [https://app.unified.to/settings/api](https://app.unified.to/settings/api). Paste the `verification_token` value into the Verify Subscription form in Notion, and click **Verify subscription.**
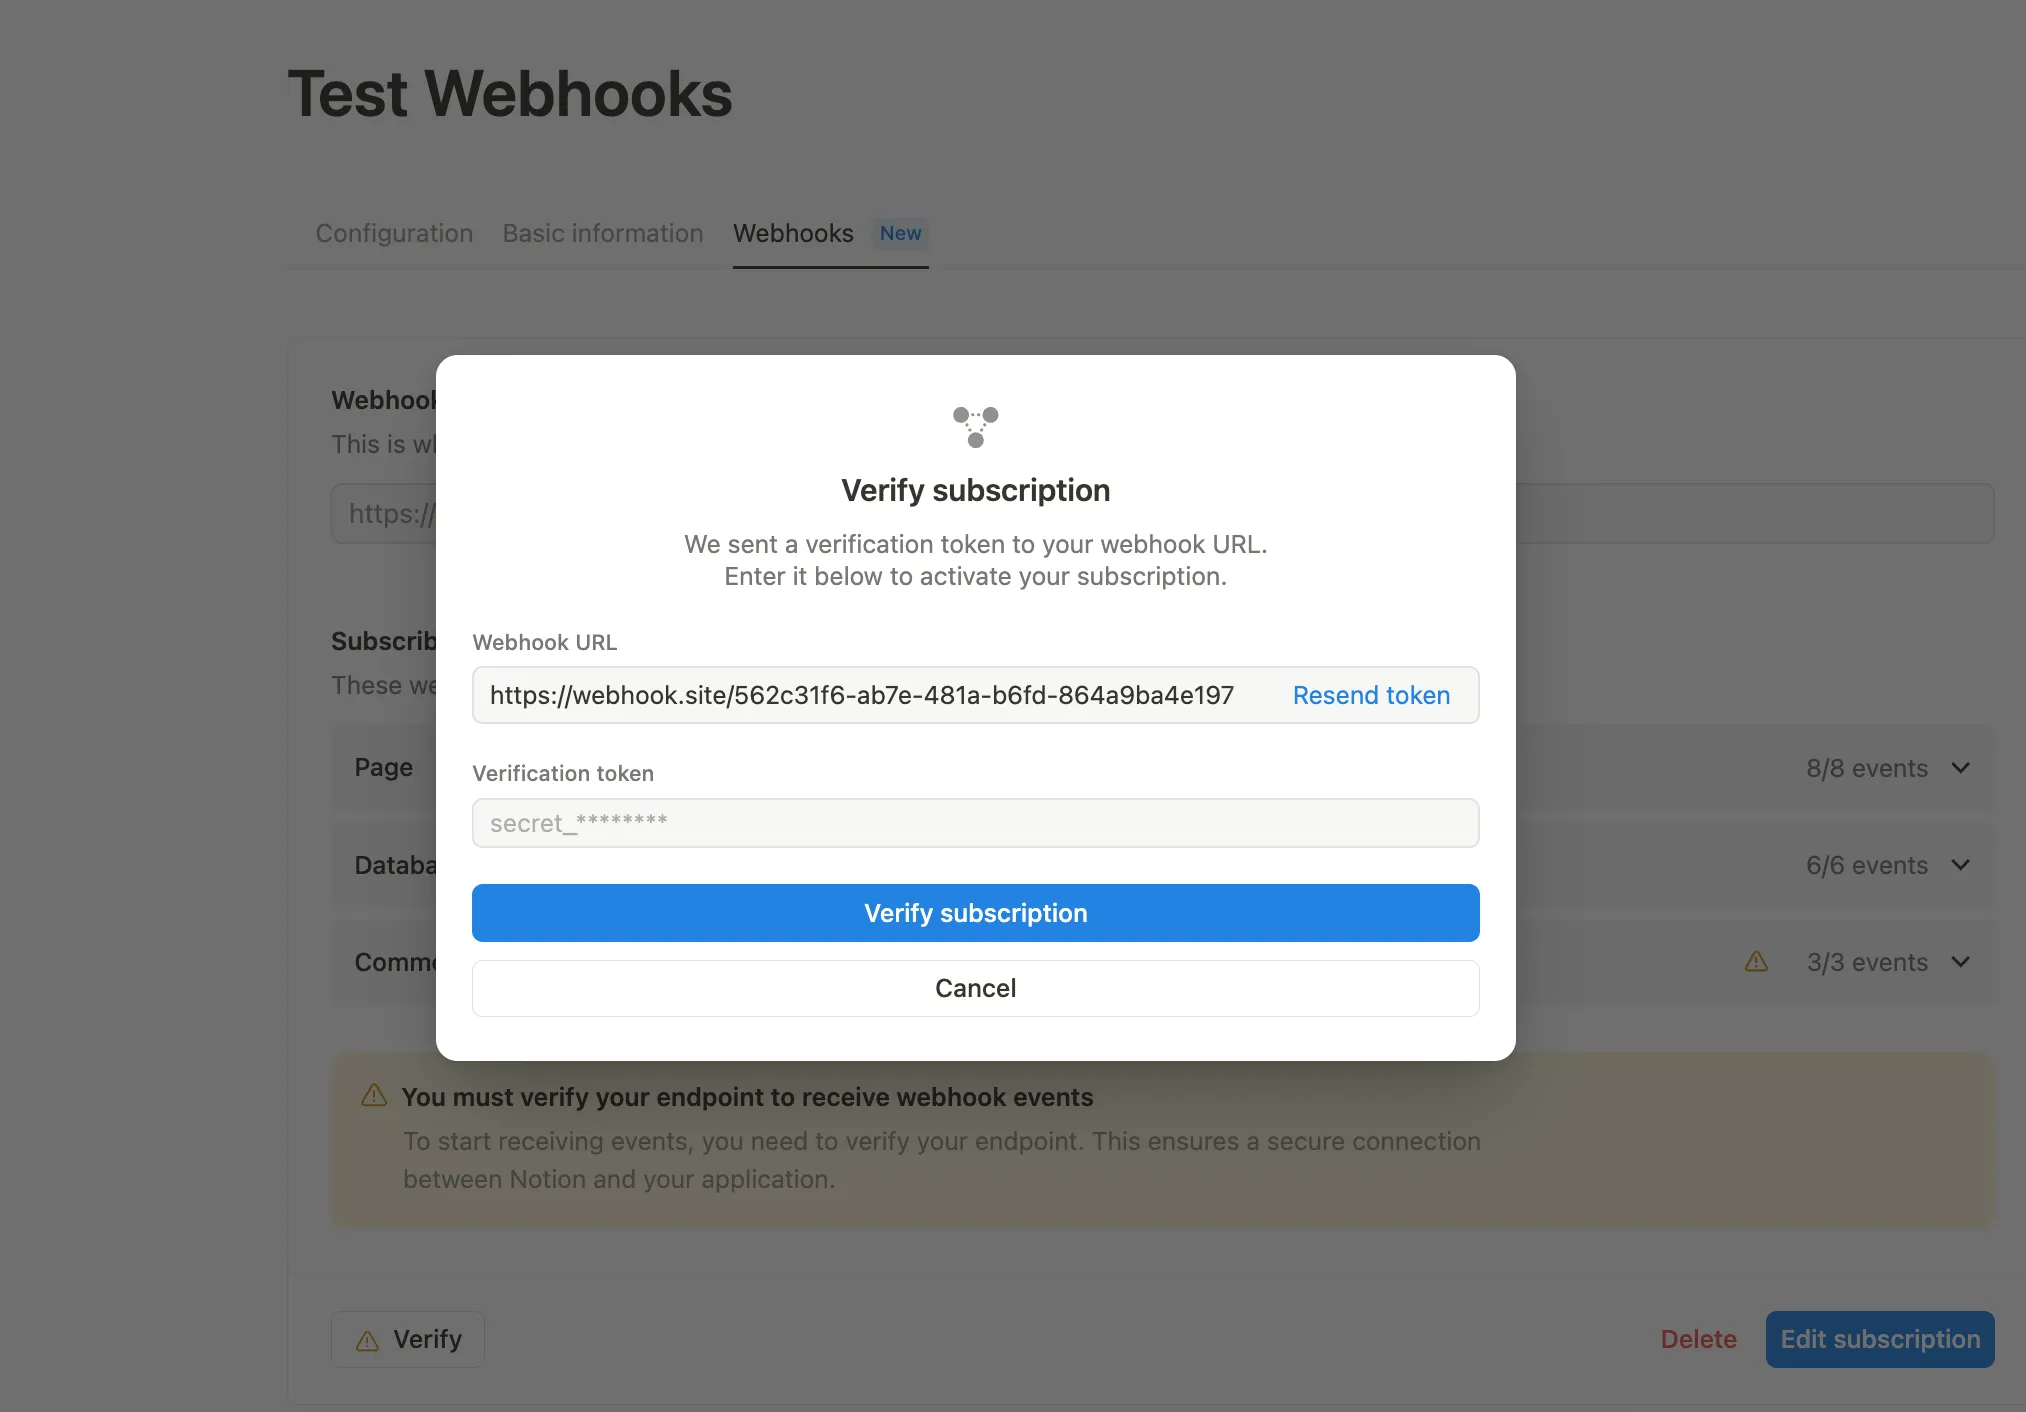
Once completed, you can create webhooks in Unified.to that will receive these Notion events in real-time.
## How to set up Google Business Profile API access and get OAuth 2 credentials
URL: https://docs.unified.to/guides/how_to_set_up_google_business_profile_api_access_and_get_oauth_2_credentials
# How to set up Google Business Profile API access and get OAuth 2 credentials
------
_August 31, 2026_
> 💡 **Note** that Google Business Profile uses the `https://www.googleapis.com/auth/business.manage` scope, which Google classifies as `Sensitive`. You need to contact Unified's Support to setup a CNAME for the API URL (US and EU regions) in order to get your App approved by Google.
> Check [How to set up a custom API URL](https://docs.unified.to/guides/how_to_set_up_a_custom_api_url).
> ⚠️ Enabling the APIs is **not** enough. Until Google approves your [Application for Basic API Access](https://support.google.com/business/contact/api_default), your project's quota for the Business Profile APIs stays at **0 requests per minute** and every call fails with a `429`. Submit that form as early as possible — Google's review can take several days to a few weeks.
1. **Prerequisites**
- A Google account with **owner** or **manager** access to the Business Profile(s) you want to connect.
- A verified, active Business Profile. Google's review expects the profile to have been active for at least 60 days and to have a website listed on it.
- Review Google's [Prerequisites](https://developers.google.com/my-business/content/prereqs) page before you apply.
2. **Create a Google Cloud project**
- Go to the [Google Cloud Console](https://console.cloud.google.com/) and sign in with that Google account.
- Click the **Select a project** dropdown at the top of the page and choose **New Project**.
- Give your project a name and click **Create**.
- Copy the **Project number** and **Project ID** from the Cloud Console dashboard — you need them in the next step.
3. **Submit the Application for Basic API Access**
- Open the [Application for Basic API Access](https://support.google.com/business/contact/api_default) form.
- Fill in the requested information:
- The **Project ID** and **Project number** from step 2
- The email address of an **owner or manager** of the Business Profile
- Your company name, website and a description of how you will use the API
- Submit the form. Google sends a follow-up email once the request has been reviewed.
- You do not have to wait for approval to continue — steps 4 to 8 can be completed right away.
4. **Enable the Business Profile APIs**
- In the Google Cloud Console, make sure your project is selected.
- Navigate to [**APIs & Services > Library**](https://console.cloud.google.com/apis/library) and enable each of the following:
- [Google My Business API](https://console.cloud.google.com/apis/library/mybusiness.googleapis.com) (`mybusiness.googleapis.com`) — posts and reviews
- [My Business Account Management API](https://console.cloud.google.com/apis/library/mybusinessaccountmanagement.googleapis.com) (`mybusinessaccountmanagement.googleapis.com`) — the accounts you manage
- [My Business Business Information API](https://console.cloud.google.com/apis/library/mybusinessbusinessinformation.googleapis.com) (`mybusinessbusinessinformation.googleapis.com`) — the locations under each account
- [Business Profile Performance API](https://console.cloud.google.com/apis/library/businessprofileperformance.googleapis.com) (`businessprofileperformance.googleapis.com`) — location insights
- These four are the only APIs Unified calls. Google [documents several others](https://developers.google.com/my-business/content/basic-setup) (Notifications, Verifications, Q&A, Place Actions, Lodging) — you do not need them for a Unified connection.
- The **Google My Business API** only becomes visible in the Library **after** your Basic API Access request is approved. If you cannot find it, come back to this step once you receive Google's approval email.
5. **Configure the OAuth Consent Screen**
- In the Google Cloud Console, go to [Google Auth Platform](https://console.cloud.google.com/auth/overview).
- Fill in what is asked and click **Create**.
- Go to [Auth Branding](https://console.cloud.google.com/auth/branding) and fill in the required information, including your app name, support email, authorized domain and privacy policy URL.
6. **Scopes**
- Go to [Auth Data Access](https://console.cloud.google.com/auth/scopes).
- Add `https://www.googleapis.com/auth/business.manage`, plus `openid`, `userinfo.email` and `userinfo.profile`.
- The exact list of scopes used by Unified can always be found in the [Google Business Profile integration](https://app.unified.to/integrations/googlebusinessprofile?tab=oauth2) in the Unified App.
- **Note** that `business.manage` is a `Sensitive` scope, so you need to contact Unified's Support to setup a CNAME for the redirect URL (US and EU regions) in order to get your App approved by Google.
- Review the information and click **Save and Continue** through the steps.
7. **Create OAuth 2.0 Credentials**
- Go to [Auth Clients](https://console.cloud.google.com/auth/clients) in the Google Cloud Console.
- Click on **+ Create Client** and select **Web application**.
- Configure the authorized redirect URI. Get the correct value from the [Google Business Profile integration](https://app.unified.to/integrations/googlebusinessprofile?tab=oauth2) in the Unified App.
- Copy your **Client ID** and **Client Secret**.
8. **Publish your Application**
- Go to [Auth Audience](https://console.cloud.google.com/auth/audience) and click on **Publish app**.
- Because you are using a `Sensitive` scope, Google will require verification of your app. Until it is verified, your consent screen will show the `unified.to` name, which is inferred from the redirect URL — this is what the CNAME in step 1 solves.
9. **Configure your Unified integration**
- In the [Google Business Profile integration](https://app.unified.to/integrations/googlebusinessprofile?tab=auth) in the Unified App, enter:
- The OAuth client's **Client ID**
- The OAuth client's **Client Secret**
- Save the integration. You are now ready to authorize a Google Business Profile connection.
10. **Verify that your API access was approved**
- Go to [IAM & Admin > Quotas](https://console.cloud.google.com/iam-admin/quotas) in the Cloud Console and filter by one of the Business Profile services, for example `mybusinessaccountmanagement.googleapis.com`.
- A **Requests per minute** limit of **0** means your Basic API Access request has not been approved yet.
- A limit of **300** means you have been approved and your connection will work.
## Troubleshooting
| Symptom | Cause and fix |
| -------------------------------------------------------------------------------------------------------- | ------------------------------------------------------------------------------------------------------------------------------------------------------------------------------------------------------------------------------------------------------------------------- |
| `429 RATE_LIMIT_EXCEEDED` — _Quota exceeded for quota metric 'Requests' and limit 'Requests per minute'_ | Either your Basic API Access request is still pending (quota is 0 QPM), or you are exceeding the default 300 QPM. Check the quota as described in step 10, and request a quota increase from the same Quotas page if you legitimately need more. |
| `invalid_client` when authorizing a connection | The Client ID or Client Secret in the Unified integration does not match the OAuth client, or the redirect URI in Google does not match the one shown in the integration. Re-copy all three values. |
| `403 PERMISSION_DENIED` or an empty list of accounts | The Google account used to authorize does not have owner or manager access to the Business Profile, or the required API from step 4 is not enabled on the project. |
| The consent screen shows `unified.to` instead of your app name | Your app has not been verified by Google yet. Contact Unified's Support to setup a CNAME for the API URL (US and EU regions), then submit your app for verification. See [How to set up a custom API URL](https://docs.unified.to/guides/how_to_set_up_a_custom_api_url). |
| An API cannot be found in the Cloud Console Library | The Google My Business API is only exposed once Google approves your Basic API Access request. Wait for the approval email and enable it then. |
## How to Set Up LinkedIn Webhooks with Unified
URL: https://docs.unified.to/guides/how_to_set_up_linkedin_webhooks_with_unified
# How to Set Up LinkedIn Webhooks with Unified
------
_February 14, 2026_
LinkedIn's Organization Social Action Notifications let you receive real-time updates when people interact with your company page: likes, comments, shares, and mentions. With Unified, you can subscribe to these events through the same webhook API you use for other integrations, so there's no need to learn LinkedIn's proprietary webhook protocol.
## **What You'll Need**
Before starting, review the [Getting Started with Unified](https://docs.unified.to/guides/getting_started_with_unified) article if you haven't already. You'll also need:
- A LinkedIn developer app (see setup instructions below)
- A LinkedIn connection created through Unified's embedded auth flow
- A publicly accessible URL to receive webhook events
## **Setting Up Your LinkedIn Developer App**
Before you can receive webhook events, you need a LinkedIn app configured with the right products and permissions.
**Creating the App**
1. Go to [linkedin.com/developers/apps](https://www.linkedin.com/developers/apps) and click **Create App**
2. Fill in the required fields:
- **App name**: Your application's name
- **LinkedIn Page**: Select the LinkedIn company page you want to monitor (you must be an admin of the page)
- **App logo**: Upload a logo for your app
3. Accept the legal terms and click **Create app**
**Requesting API Products**
LinkedIn gates webhook access behind specific API products. From your app's settings page:
1. Navigate to the **Products** tab
2. Request access to **Community Management API**, which grants the `r_organization_social` scope needed for social action notifications
3. If you also want to send messages, request **LinkedIn Marketing API Partner Program** for the `w_messages` scope
Product approvals can take a few business days. You can check the status on the **Products** tab.
**Configuring OAuth Scopes**
Once your products are approved:
1. Go to the **Auth** tab in your app settings
2. Under **OAuth 2.0 scopes**, verify that `r_organization_social` is listed
3. Copy your **Client ID** and **Client Secret**; you'll need these when creating a connection in Unified
4. Under **Authorized redirect URLs**, add your Unified OAuth callback URL
**Verifying Your Company Page**
LinkedIn requires that your developer app is associated with a verified company page:
1. Go to the **Settings** tab in your app
2. Under **App Settings**, confirm the correct LinkedIn Page is linked
3. A page admin must verify the app. Click **Generate URL** next to the verification prompt and share it with a page admin if needed
Once the page is verified and the products are approved, your app is ready to receive social action notifications.
## **Creating a Webhook for LinkedIn Events**
You can create a webhook subscription through the API or the Unified dashboard. The webhook will listen for `messaging_event` objects with the `created` event, which is how LinkedIn's social action notifications are surfaced.
**Via the API**
`import { UnifiedTo } from '@unified-api/typescript-sdk';
const sdk = new UnifiedTo({
security: {
jwt: process.env.UNIFIED_API_KEY!,
},
});
const webhook = await sdk.unified.createUnifiedWebhook({
webhook: {
hookUrl: 'https://your-app.com/webhooks/linkedin',
connectionId: process.env.LINKEDIN_CONNECTION_ID!,
objectType: 'messaging_event',
event: 'created',
},
});
console.log('Webhook created:', webhook.webhook?.id);`
**Via the Dashboard**
1. Open [app.unified.to](https://app.unified.to/) and navigate to your workspace
2. Go to **Webhooks** and click **Create Webhook**
3. Select your LinkedIn connection
4. Set the object type to `messaging_event` and the event to `created`
5. Enter your webhook URL and save
Once the webhook is active, Unified registers your endpoint with LinkedIn's event subscription API using the organization URN from your connection.
## **Receiving Events**
When someone interacts with your LinkedIn company page, Unified converts the raw LinkedIn notification into a standard `MessagingEvent` object and POSTs it to your `hook_url`. Here's what that looks like:
`import express from 'express';
const app = express();
app.use(express.json());
app.post('/webhooks/linkedin', (req, res) => {
const event = req.body;
switch (event.type) {
case 'MESSAGE_RECEIVED':
// Someone commented on a company post, shared it, or edited/deleted a comment
console.log('Comment or share from:', event.user?.id);
console.log('On organization:', event.channel?.id);
break;
case 'REACTION_ADDED':
// Someone liked a company post
console.log('Like from:', event.user?.id);
break;
case 'APP_MENTION':
// Your company was mentioned in a share
console.log('Mentioned by:', event.user?.id);
break;
}
res.sendStatus(200);
});`
## **Event Type Mapping**
LinkedIn's social action types are mapped to Unified's standard `MessagingEvent` types:
- **COMMENT** and **ADMIN_COMMENT** become `MESSAGE_RECEIVED`: a new comment was posted on your organization's content
- **LIKE** becomes `REACTION_ADDED`: someone liked your organization's post
- **SHARE** becomes `MESSAGE_RECEIVED`: someone shared your organization's content
- **SHARE_MENTION** becomes `APP_MENTION`: your organization was mentioned in a share
- **COMMENT_EDIT** and **COMMENT_DELETE** become `MESSAGE_RECEIVED`: an existing comment was modified or removed
Each event includes the `channel` field set to your organization's ID, the `user` field with the actor's person ID, and a `created_at` timestamp. The original LinkedIn payload is always available in the `raw` field if you need additional detail.
## **Sending Messages Alongside Webhooks**
While webhooks cover inbound events, you can also send outbound messages through LinkedIn's Messages API using the same connection. This is useful for responding to engagement by reaching out to the people interacting with your content.
`const message = await sdk.messaging.createMessagingMessage({
messagingMessage: {
message: 'Thanks for engaging with our content!',
destinationMembers: [
{ userId: 'urn:li:person:ABC123' },
],
},
connectionId: process.env.LINKEDIN_CONNECTION_ID!,
});`
Note that LinkedIn's Messages API requires partner-level access with the `w_messages` scope. Message creation supports new conversations (via `destinationMembers`) or replies to existing threads (via `channelId`).
## **Troubleshooting**
**Webhook not receiving events?** LinkedIn requires the `r_organization_social` OAuth scope, which is granted through the Community Management API product. Verify your app has this product approved on the [LinkedIn Developer Portal](https://www.linkedin.com/developers/apps), and that your connection has the scope by checking the connection details in the Unified dashboard.
**Events arriving for the wrong organization?** The webhook subscription is tied to the `organization_id` stored in your connection metadata, which is set during the initial OAuth flow. If you manage multiple LinkedIn organizations, create separate connections for each one.
**LinkedIn Page not verified?** Your developer app must be associated with a verified company page. Go to your app's **Settings** tab on the LinkedIn Developer Portal and complete the page verification process. A page admin must approve the association.
With just a few lines of code, you're now receiving LinkedIn engagement events through the same webhook API you use for Slack, Discord, and other messaging integrations on Unified. No custom protocol handling required.
For creating the webhook in Unified, see [How to create and configure webhooks](https://docs.unified.to/guides/how_to_create_and_configure_webhooks).
[→ Start your 30-day free trial](https://app.unified.to/login)
[→ Book a demo](https://calendly.com/d/cph9-g8n-jzg/connect-with-unified)
## How to set up native webhooks for QuickBooks Online with Unified
URL: https://docs.unified.to/guides/how_to_set_up_native_webhooks_for_quickbooks_online_with_unified
# How to set up native webhooks for QuickBooks Online with Unified
------
_August 25, 2026_
How to set up native webhooks for QuickBooks Online with Unified.
Intuit does **not** provide a programmatic webhook-registration API. The callback URL and entity subscriptions are configured in the [Intuit Developer Portal](https://developer.intuit.com/). Unified then receives Intuit deliveries and fans them out to your Unified webhook subscriptions.
Official Intuit docs: [Configure webhooks](https://developer.intuit.com/app/developer/qbo/docs/develop/webhooks/configure-webhooks)
---
## Prerequisites
- An Intuit Developer app with QuickBooks Online Accounting scopes
- A Unified workspace and a connected QuickBooks Online connection (OAuth completed)
- Your Unified **workspace ID** (from the Unified dashboard / API)
---
## Step 1: Build the Unified webhook endpoint URL
Use this format:
```plain text
https://api.unified.to/webhook/workspace/quickbooks?workspace_id=YOUR_WORKSPACE_ID
```
> 💡 Replace `YOUR_WORKSPACE_ID` with your actual Unified workspace ID.
> If your workspace runs in another Unified data region, use that region's API host instead of `api.unified.to` (for example EU / AU hosts).
Example:
```plain text
https://api.unified.to/webhook/workspace/quickbooks?workspace_id=5e8ba11d3fb8ff95c90b2
```
---
## Step 2: Open your app in the Intuit Developer Portal
1. Go to [https://developer.intuit.com/app/developer/dashboard](https://developer.intuit.com/app/developer/dashboard)
2. Sign in and open the QuickBooks Online app that customers connect through Unified
3. In the left navigation, select **Webhooks**
---
## Step 3: Choose Production or Development
Intuit maintains **separate** webhook configs:
- **Production**: live QuickBooks Online companies
- **Development**: sandbox / testing
1. Select **Production** or **Development** to match the companies you are testing
2. Enter the Endpoint URL from Step 1
3. Click **Show webhooks** (or equivalent) to expand the entity list
---
## Step 4: Enable the entities Unified supports
Enable at least the entities that map to the Unified objects you care about:
| **QuickBooks entity** | **Unified object** | **Operations to enable** |
| --------------------- | --------------------- | ------------------------ |
| Customer | `accounting_contact` | Create, Update, Delete |
| Vendor | `accounting_contact` | Create, Update, Delete |
| Invoice | `accounting_invoice` | Create, Update, Delete |
| Class | `accounting_category` | Create, Update |
> 📚 **Class** is listed as a supported webhook entity in Intuit's docs (Create / Update / Delete):
> [Configure webhooks → supported API entities](https://developer.intuit.com/app/developer/qbo/docs/develop/webhooks/configure-webhooks)
1. Select **Save**
---
## Step 5: Create Unified webhooks for each object/event
In Unified, create a **native** webhook for each object + event pair you need.
Examples:
- `accounting_contact` → `created` / `updated` / `deleted`
- `accounting_invoice` → `created` / `updated` / `deleted`
- `accounting_category` → `created` / `updated`
---
## Step 6: Test the delivery path
1. In the Intuit Developer Portal Webhooks page, use **Send test notification** (if available) to confirm your endpoint responds with HTTP 200 quickly
2. In a connected QuickBooks company (sandbox or production matching Step 3), create or update an enabled entity; for example, create/update a **Class** for `accounting_category`
3. Confirm Unified receives the delivery and dispatches to your Unified webhook hook URL
---
## Troubleshooting
- **No events arriving**
- Confirm the Endpoint URL includes the correct `workspace_id`
- Confirm you configured **Production** vs **Development** for the company you changed
- Confirm the entity (e.g. **Class**) is enabled in the Intuit portal
- Confirm a Unified native webhook exists for that `object_type` + `event`
- **Subscribe fails with realm_id error**
- Re-auth the QuickBooks connection so `realm_id` is present
- **Events for one company only**
- Expected: matching is per `realmId`. Each company connection has its own subscription marker
For creating the webhook in Unified, see [How to create and configure webhooks](https://docs.unified.to/guides/how_to_create_and_configure_webhooks).
---
## References
- [Intuit: Configure webhooks](https://developer.intuit.com/app/developer/qbo/docs/develop/webhooks/configure-webhooks)
- [Intuit: Manage webhook notifications](https://developer.intuit.com/app/developer/qbo/docs/develop/webhooks/manage-webhooks-notifications)
- [Intuit: Best practices](https://developer.intuit.com/app/developer/qbo/docs/develop/webhooks/best-practices)
## How to set up Slack webhooks using event subscriptions
URL: https://docs.unified.to/guides/how_to_set_up_slack_webhooks_using_event_subscriptions
# How to set up Slack webhooks using event subscriptions
------
_November 14, 2024_
This guide explains how to configure your Slack app's event subscriptions to work with Unified.to webhooks. This is a required step before you can create webhooks that listen for Slack events. Once configured, your webhooks will receive real-time notifications when specific events occur in your Slack workspace, such as when users send messages.
## Before you begin
Ensure you have:
- A Slack app created in your workspace
- Access to your Slack app's configuration settings
- Your [Unified.to](https://unified.to/) workspace ID
- An understanding of [how webhooks work in Unified.to](https://docs.unified.to/concepts/webhooks)
- Create a webhook in your
## Enable event subscriptions in Slack
1. Go to the Slack API dashboard at [https://api.slack.com/apps](https://api.slack.com/apps)
2. Select your app from the list of available apps
3. In the left sidebar, under **Features**, click **Event Subscriptions**
4. Toggle the **Enable Events** switch to **On**
5. In the **Request URL** field, enter (depending on your data centre; replace ID with your workspace ID, and replace `slack` with `slackbot` if using that integration):
1. (US data center) `https://api.unified.to/webhook/workspace/slack?workspace_id={ID}`
2. (EU data center) `https://api-eu.unified.to/webhook/workspace/slack?workspace_id={ID}`
6. Wait for Slack to verify the URL. You should see a green checkmark indicating successful verification.
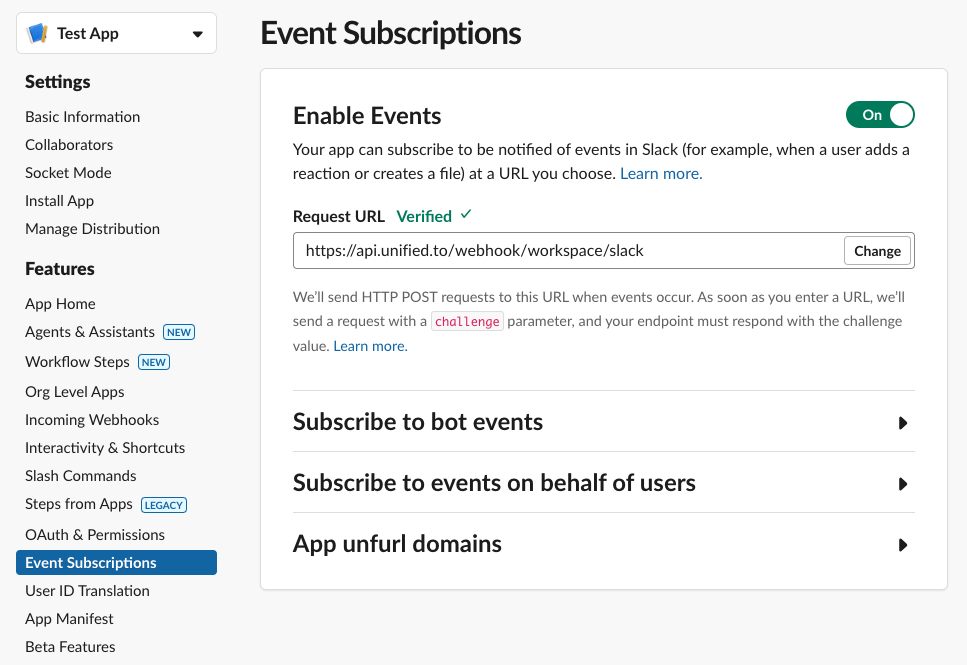
7. Click **Save Changes** at the bottom of the page
## Subscribe to events from Slack
After you've enabled events and verified the request URL works, you need to subscribe to the events that you are interested in.
1. The minimum event you should subscribe to is`message.groups` (under user)
2. The other events you can subscribe to are the ones that fall under the following scopes under **Subscribe to events on behalf of users**:
1. `message.channels`
2. `message.groups`
3. `message.im`
4. `message.mpim`
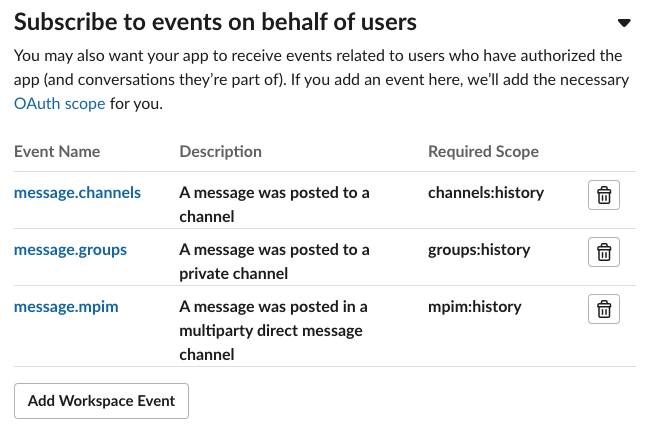
_Example of Slack events that you can subscribe to for webhook events_
3. Click **Save Changes** at the bottom of the page
Once completed, you can create webhooks in Unified.to that will receive these Slack events in real-time.
Happy building!
## See also
- [How to create and configure webhooks](https://docs.unified.to/guides/how_to_create_and_configure_webhooks)
- [How to troubleshoot unhealthy webhooks](https://docs.unified.to/guides/how_to_troubleshoot_unhealthy_webhooks)
## How to set up Telegram (bot) with Unified.to
URL: https://docs.unified.to/guides/how_to_set_up_telegram_bot_with_unified
# How to set up Telegram (bot) with Unified.to
------
_June 30, 2026_
Telegram's **Bot API** lets you send and receive messages through a bot account you control. This guide walks you through creating a Telegram bot, connecting it to Unified.to with its bot token, and (optionally) turning on webhooks so you receive incoming messages and button clicks in real time.
**Estimated time:** 10 minutes
---
**Prerequisites**
- A Telegram account (any mobile or desktop client).
- A Unified.to account with a workspace. [Sign up here](https://unified.to/) if you don't have one.
- For receiving messages via webhooks: nothing extra — Unified.to hosts the HTTPS endpoint for you.
> **Bot API vs. personal account:** This integration uses the Telegram **Bot API**, so all messages are sent and received as your **bot**, not as your personal Telegram user. People interact with your bot by starting a chat with it or by adding it to a group/channel.
---
**Step 1 — Create a bot and get your bot token**
1. In any Telegram client, open a chat with [**@BotFather**](https://t.me/BotFather) (the official bot for creating bots).
2. Send the command **`/newbot`**.
3. When prompted, enter a **name** for your bot (the display name, e.g. _Acme Support_).
4. Then enter a **username** for your bot. It must end in `bot` (e.g. `acme_support_bot`).
5. BotFather replies with a confirmation that includes your **HTTP API token**. It looks like this:
```plain text
123456789:AAEhBP0...M_zv1u123ew11
```
6. **Copy this token** and keep it safe — it grants full control of your bot. You'll paste it into Unified.to in Step 3.
> Lost the token later? Send **`/token`** to BotFather and pick your bot, or **`/revoke`** to roll it.
---
**Step 2 — (Optional) Let your bot read group messages**
By default a bot in **privacy mode** only receives messages that mention it or reply to it. If you want your bot to receive **all** messages in a group:
1. Open [**@BotFather**](https://t.me/BotFather) and send **`/setprivacy`**.
2. Select your bot.
3. Choose **Disable**.
You can skip this step for one-to-one (direct) chats — bots always receive direct messages sent to them.
---
**Step 3 — Connect Telegram in Unified.to**
1. In the Unified.to dashboard, go to **Integrations** and search for **Telegram (bot)**.
2. Click **Connect** (or **Authorize**) to start a new connection.
3. When prompted for credentials, paste the value from Step 1 into the **Bot Token** field.
4. Submit. Unified.to validates the token by calling the Telegram `getMe` endpoint and, on success, creates the connection. The bot's name is shown on the connection.
You can also create the connection programmatically by storing the bot token as the connection's token credential — see the [Authorization API](https://docs.unified.to/unified/unified/authorization).
That's it for sending messages. To **receive** messages, continue to the webhook setup below.
---
**Step 4 — Find a chat ID to send to**
The Bot API can't list chats, so you need the **chat ID** of whoever you want to message. A chat ID is a number (e.g. `123456789` for a person, or a negative number like `-1001234567890` for a group/channel).
The easiest way to discover one:
1. From the recipient's Telegram account, **start a chat with your bot** (search its `@username` and press **Start**), or **add the bot to your group/channel**.
2. Have them send any message to the bot / group.
3. That inbound message arrives through your Unified.to webhook (Step 5) and includes the `channel_id` (the Telegram chat ID). Use that value as the destination for future messages.
**Sending a message**
Once you have a `channel_id`, send a message through the unified `messaging_message` endpoint:
```plain text
curl -X POST 'https://api.unified.to/messaging//message' \
-H 'Authorization: Bearer ' \
-H 'Content-Type: application/json' \
-d '{
"channels": [{ "id": "123456789" }],
"message": "Hello from Unified.to 👋"
}'
```
You can also include inline buttons (mapped to Telegram inline keyboards) and reply to a message via `parent_id`. The response contains the new message `id`, which is required to **edit** (`editMessageText`) or **delete** (`deleteMessage`) it later.
---
**Step 5 — Set up a webhook to receive messages**
Unified.to registers the Telegram webhook for you — you don't call `setWebhook` yourself. When you create a webhook subscription, Unified.to points your bot at a secure HTTPS endpoint and verifies every delivery with a secret token.
1. In the Unified.to dashboard, open your **Telegram (bot)** connection and go to **Webhooks** (or use the [Webhook API](https://docs.unified.to/unified/unified/createunifiedwebhook)).
2. Create a webhook and choose what you want to receive:
- **`messaging_message`**, event **`created`** — each new incoming message (and **`updated`** for edited messages).
- **`messaging_event`**, event **`created`** — incoming messages **and** inline-button clicks, delivered as unified events (`MESSAGE_RECEIVED`, `BUTTON_CLICK`).
3. Provide your destination URL — the place Unified.to should forward normalized events to.
4. Save. Unified.to calls Telegram's `setWebhook` behind the scenes and begins forwarding events.
Example webhook creation via the API:
```plain text
curl -X POST 'https://api.unified.to/unified/webhook' \
-H 'Authorization: Bearer ' \
-H 'Content-Type: application/json' \
-d '{
"connection_id": "",
"object_type": "messaging_message",
"event": "created",
"hook_url": "https://your-app.example.com/telegram/incoming"
}'
```
To stop receiving events, delete the webhook. Unified.to removes the bot's Telegram webhook automatically once the last subscription on the connection is gone.
---
**Notes & troubleshooting**
- **One webhook per bot.** Telegram allows a single webhook URL per bot, so all of a connection's webhook subscriptions share the same registration — that's expected and handled automatically.
- **HTTPS is required.** Telegram only delivers updates to HTTPS endpoints. Webhooks therefore work on Unified.to's hosted environment but not against a plain-HTTP localhost listener during local development.
- **No history.** The Bot API cannot list or fetch past messages or chats — a bot only sees messages sent **after** it joined a chat, delivered via webhooks. There is no "list messages" or "list channels" operation.
- **Not seeing group messages?** Make sure you disabled privacy mode (Step 2) and re-added the bot to the group if needed.
- **`getMe`** **/ connection fails?** Double-check the bot token was pasted exactly, with no extra spaces, and that the bot hasn't been revoked in BotFather.
---
**What you can do next**
- Send, edit, and delete messages (`sendMessage`, `editMessageText`, `deleteMessage`).
- Look up a single chat's details with `messaging_channel` (`getChat`).
- Receive incoming messages and inline-button clicks via `messaging_message` and `messaging_event` webhooks.
Need help? [Contact Unified.to support](https://unified.to/) or browse the [other guides](https://docs.unified.to/guides).
## How to set up your scopes in HubSpot
URL: https://docs.unified.to/guides/how_to_set_up_your_scopes_in_hubspot
# How to set up your scopes in HubSpot
------
_June 11, 2024_
This guide explains how to correctly configure the advanced scopes settings in your HubSpot developer app for seamless integration with Unified.to. We'll cover setting up both required and optional scopes, and address some common issues you might encounter.
## Before you begin
This guide assumes you have a basic understanding of:
- [Scopes](https://docs.unified.to/concepts/scopes)
- [How to create a connection (Project) ](https://docs.unified.to/guides/how_to_create_connection_with_hubspot)
- [How to get your HubSpot developer key and OAuth 2 credentials (Legacy App)](https://docs.unified.to/guides/how_to_get_your_hubspot_developer_key_and_oauth_2_credentials_legacy_apps)
## Set up required scopes in HubSpot (Project)
1. Go to [https://offers.hubspot.com/free-cms-developer-sandbox](https://offers.hubspot.com/free-cms-developer-sandbox), Sign in.
2. Development → Project → select your project
3. In your project(code) you will see following folder structure.
GOTO→ yourproject (account-testing) → app-hsmeta.json

1. Following will be the scopes and redirect URL. You can remove which you want. However, do remember those removed scopes before creating a connection in unified. Also remember to add redirect URL as follows.
```javascript
{
"uid": "get_started_app",
"type": "app",
"config": {
"description": "A Unified.to token app for testing",
"name": "My Get Started app",
"distribution": "private",
"auth": {
"type": "oauth",
"redirectUrls": [
"https://api.unified.to/oauth/code",
],
"requiredScopes": [
"oauth",
"crm.objects.companies.read",
"crm.objects.contacts.read",
"crm.objects.deals.read",
"crm.objects.owners.read",
"crm.pipelines.orders.read",
"crm.objects.contacts.write",
"crm.pipelines.orders.read",
"crm.pipelines.orders.write",
"crm.objects.deals.write",
"sales-email-read",
"content",
"tickets",
"crm.lists.read",
"settings.users.teams.read"
],
"optionalScopes": [],
"conditionallyRequiredScopes": []
},
"permittedUrls": {
"fetch": ["https://api.hubapi.com"],
"iframe": [],
"img": []
},
"support": {
"supportEmail": "support@example.com",
"documentationUrl": "https://example.com/docs",
"supportUrl": "https://example.com/support",
"supportPhone": "+18005555555"
}
}
}
```
1. You can update those changes using following command in terminal.
```javascript
hs project upload
```
1. When the code is uploaded successfully you can check that by going to following Development→ Project → Select your project.
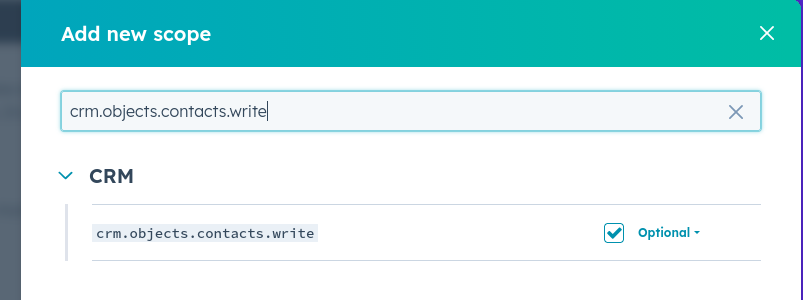
1. To check your scopes click on the project Component. It will show your app-hsmeta.json
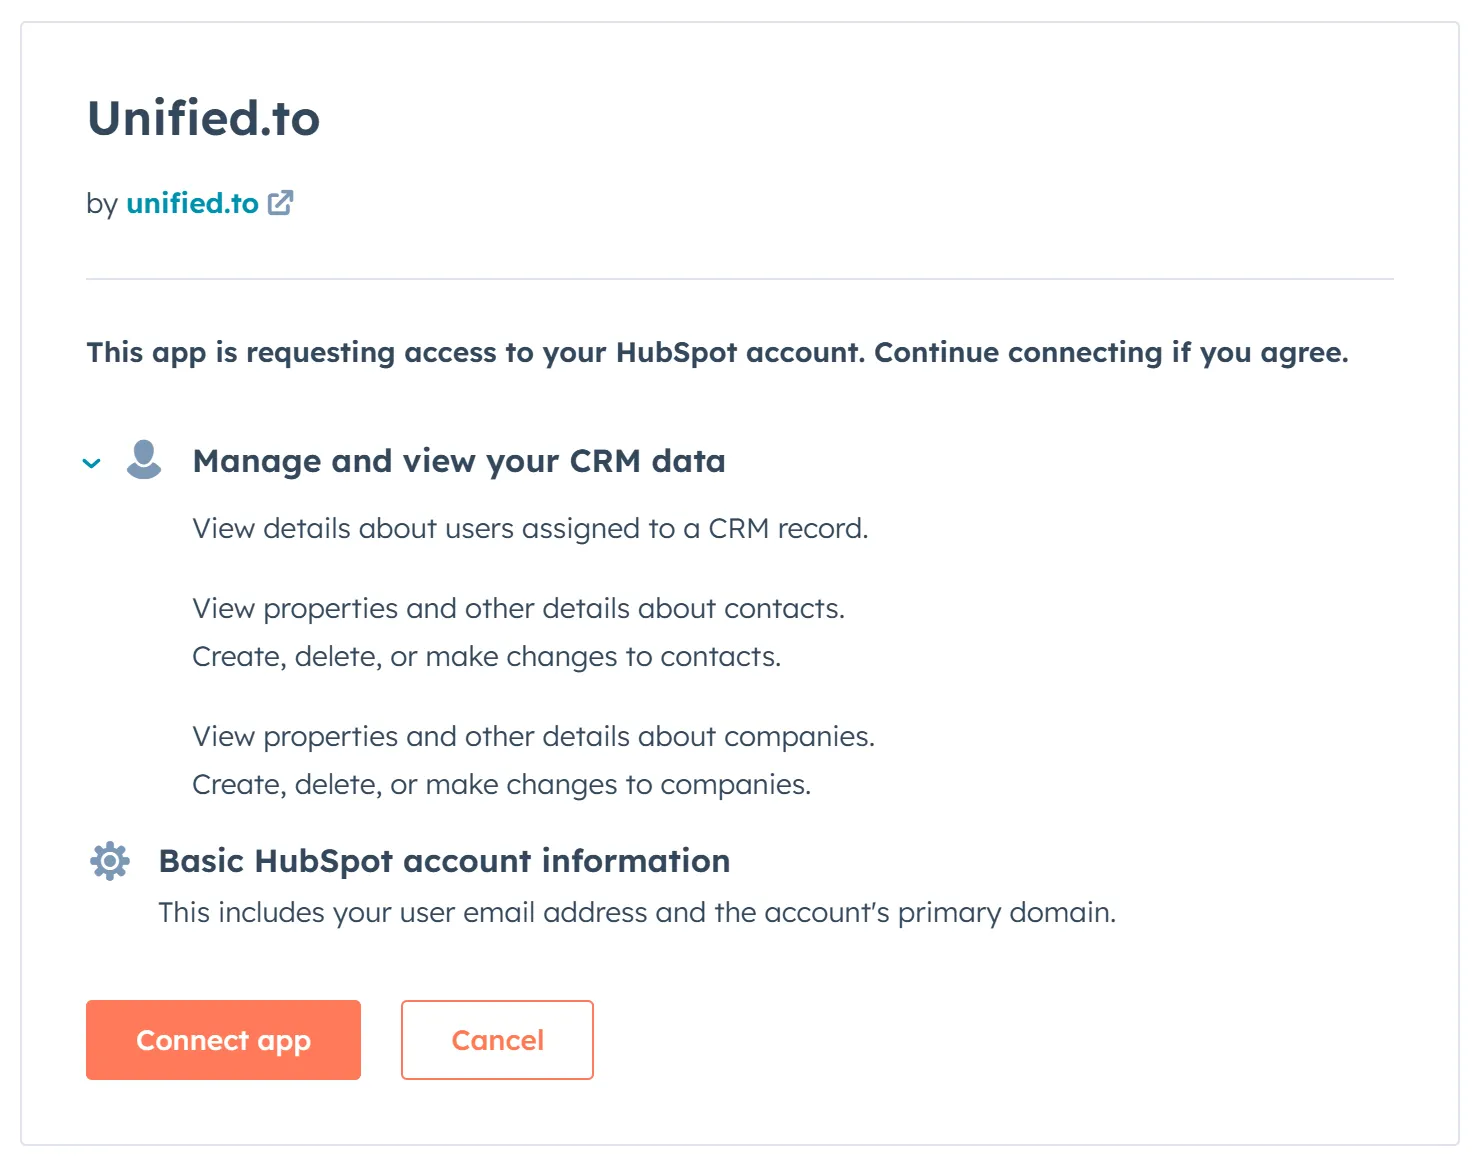
## Set up required scopes in HubSpot (Legacy App)
**Note**: If you are using webhooks, please refer to: [How to configure webhooks in HubSpot](https://docs.unified.to/guides/how_to_configure_webhooks_in_hubspot)
1. Go to [https://offers.hubspot.com/free-cms-developer-sandbox](https://offers.hubspot.com/free-cms-developer-sandbox), Sign in.
2. Development → Legacy App→ Your New App
3. In the same Auth tab, scroll
4. If you are not using webhooks, then [Unified.to](https://unified.to/) only requires two scopes to be set as **Required**: `crm.objects.owners.read` and `oauth`
1. Click **+ Add new scope**
2. Select `crm.objects.owners.read`
3. Set it as a **Required** scope
4. Save your changes
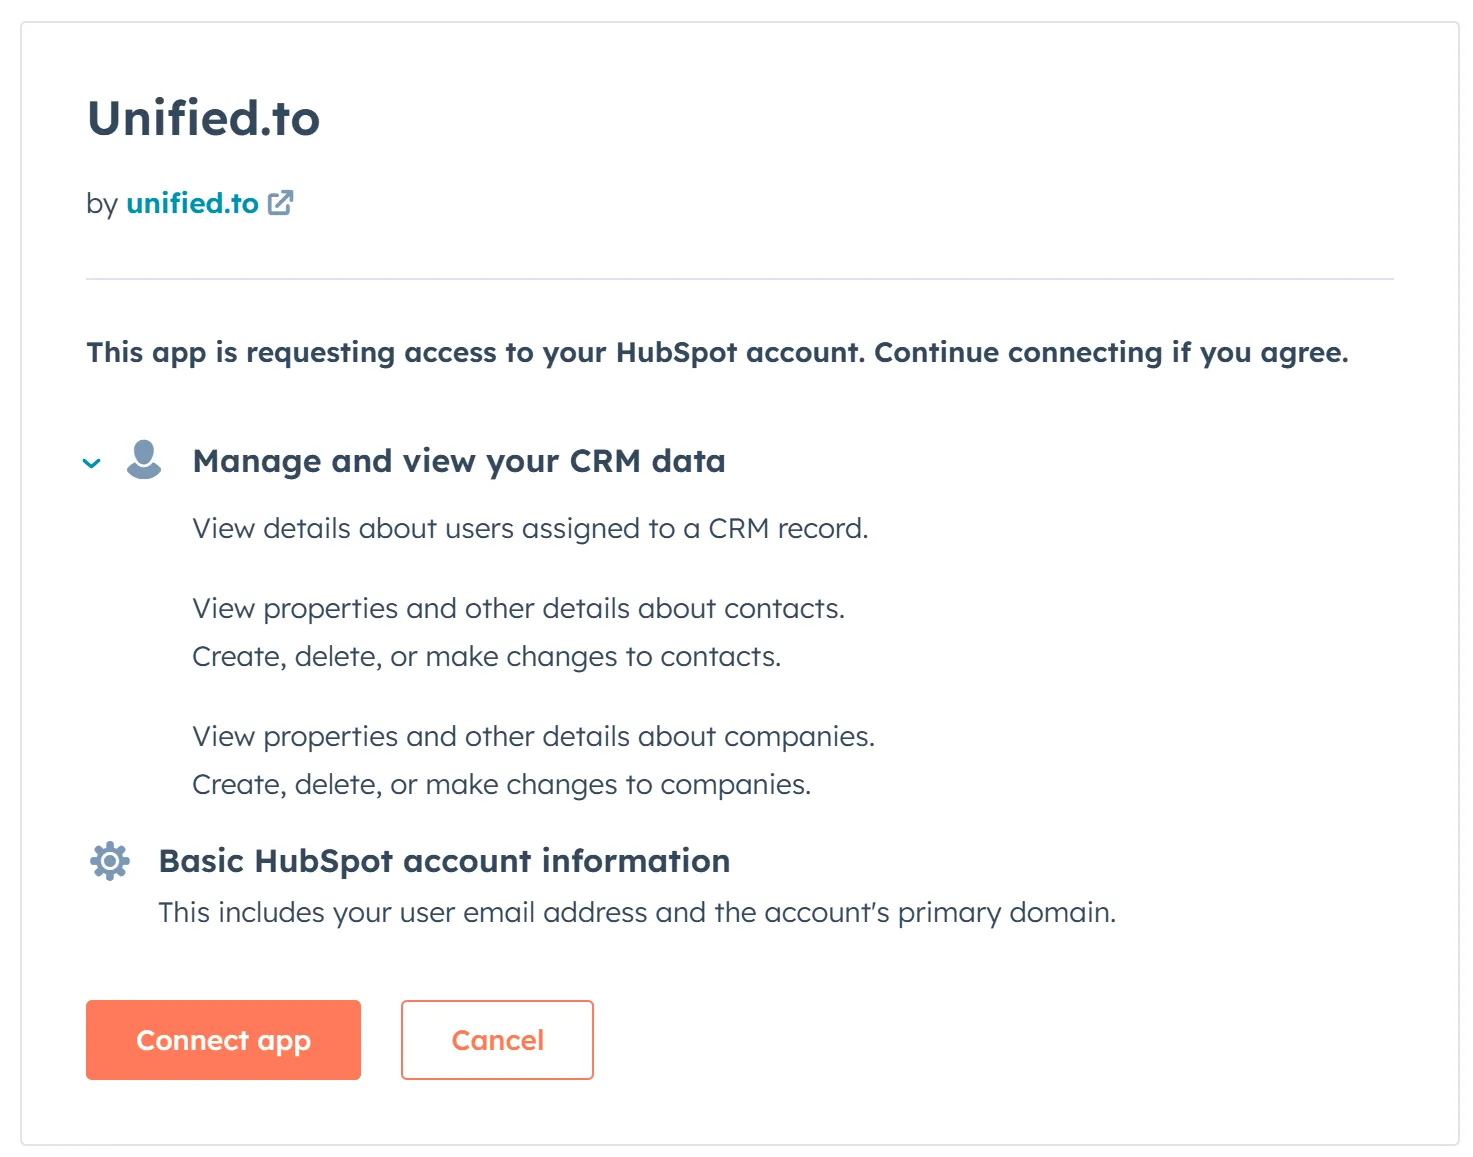
## Setup optional scopes
1. You can see the list of scopes required for the objects you need at [https://app.unified.to/integrations/hubspot?tab=oauth2](https://app.unified.to/integrations/hubspot?tab=oauth2)
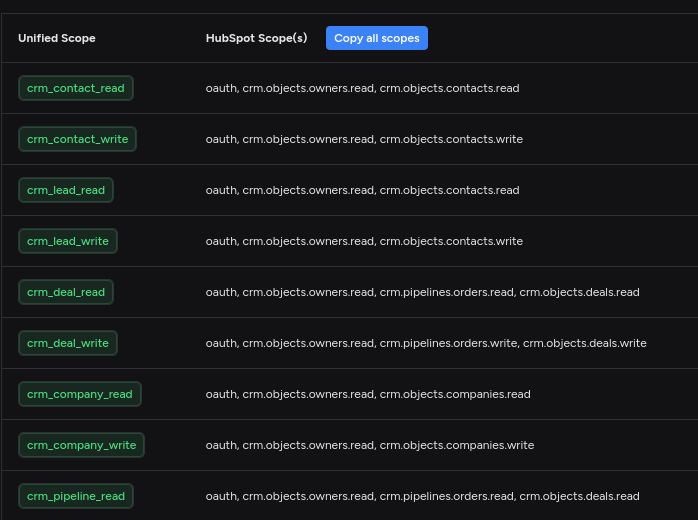
1. Make sure to select optional
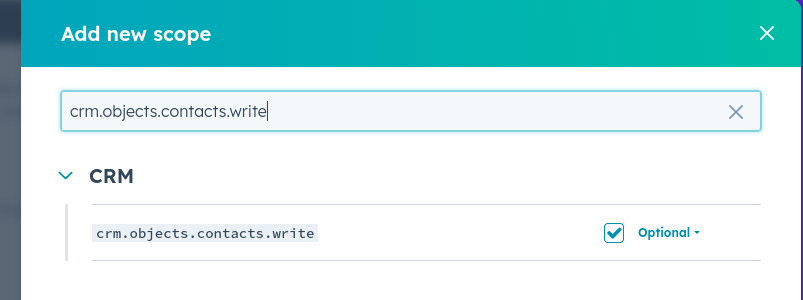
1. Add all the scopes you need
2. Save your changes
### Configure your scopes on [Unified.to](https://unified.to/)
Be sure to also configure these scopes in your [Unified.to](https://unified.to/) settings. For instructions on how to do that, refer to our [Scopes guide](https://docs.unified.to/concepts/scopes).
## Understanding HubSpot's scope constraints
HubSpot has some specific rules about how scopes work:
- If you specify a scope as **Required**, it must be included in every authorization request.
- **Note**: If you intend to _read_ data via a webhook, then the read scope for that object must be marked as **Required** in HubSpot.
- **Optional** scopes may or may not be included in the authorization.
- If you don't specify a scope at all, it cannot be included in the authorization request.
- The OAuth scope cannot be removed and must always be required.
Behind the scenes, [Unified.to](https://unified.to/) will request scopes according to what you have configured on the platform:
- We'll always request `crm.objects.owners.read` as a **Required** scope
- When you enable `webhook` scopes on [Unified.to](https://unified.to/), we convert every Hubspot scope ending with `.read` to required, assuming they'll all be used for webhooks.
- Otherwise, if you have not enabled the `webhook` scope, then all other scopes will be requested as **Optional**.
In general, we recommend that you only stick to requesting scopes for the data you actually need. For more instructions on setting up scopes to work with webhooks, please refer to: [How to configure webhooks in HubSpot](https://docs.unified.to/guides/how_to_configure_webhooks_in_hubspot)
## What your users will see
When your users sign in with HubSpot, they'll see a screen requesting access to the scopes you've specified:
- Required scopes will always be shown and cannot be deselected.
- Optional scopes will be shown and can be deselected by the user.
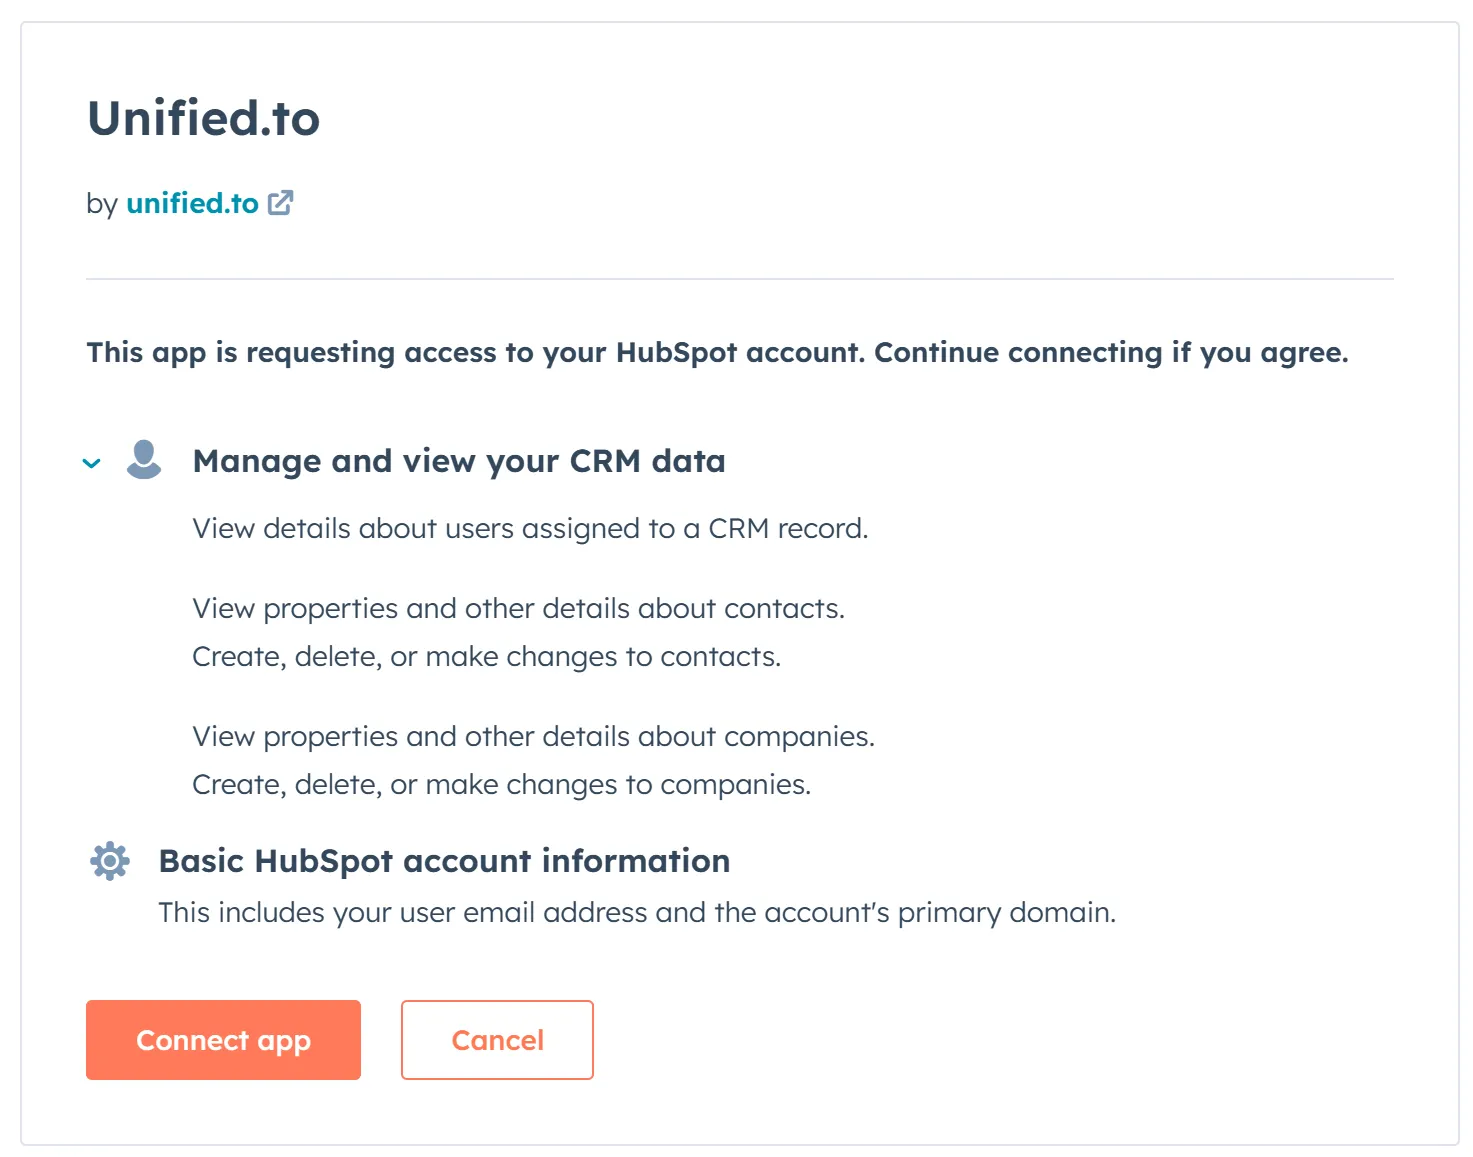
## Specifying Required vs Optional Scopes
Unified tries to automatically classify scopes as required or optional. If you need additional control, you can always specify this information in the `scopes` URL parameter.
Just prefix the Hubspot-specific scope with `required:` or `optional:` and we will handle them correctly.
eg.
`required:crm.objects.contacts.read`
## Troubleshooting
If your HubSpot scopes don't match the requested scopes via [Unified.to](https://unified.to/), your users may see an error message about there being a scopes mismatch.
Double-check that:
1. All scopes in your HubSpot app are included in every [Unified.to](https://unified.to/) request.
2. All scopes requested by [Unified.to](https://unified.to/) are specified (either as required or optional) in your HubSpot app.
3. If you're using webhooks, ensure all read scopes are set as **Required** in your HubSpot app.
4. If you're not using webhooks, ensure all scopes aside from `oauth` and [`crm.objects.owners.read`](https://crm.objects.owners.read/) are set as **Optional**.
## See also
- [Understanding scopes](https://docs.unified.to/concepts/scopes)
- [How to configure webhooks in HubSpot](https://docs.unified.to/guides/how_to_configure_webhooks_in_hubspot)
- [How to troubleshoot unhealthy connections](https://docs.unified.to/guides/how_to_troubleshoot_unhealthy_connections#how-to-troubleshoot-unhealthy-connections)
## How to setup a Freshbooks developer app
URL: https://docs.unified.to/guides/how_to_setup_a_freshbooks_developer_app
# How to setup a Freshbooks developer app
------
_October 3, 2025_
This guide will show you how to retrieve your OAuth 2 credentials on Freshbooks
## Create your Freshbooks App and get your Client ID and Secret
1. Go to the Freshbooks Developer Portal:
[https://my.freshbooks.com/#/developer](https://my.freshbooks.com/#/developer)
2. Click on `Create New App`
1. Fill in the Application Name, Application Type, these are mandatory
2. Add the scopes needed
1. You can see the scopes we use on [https://app.unified.to/integrations/freshbooks?tab=oauth2](https://app.unified.to/integrations/freshbooks?tab=oauth2)
3. Add [`https://api.unified.to/oauth/code`](https://api.unified.to/oauth/code) in the Redirect URIs
1. You can also fill in the non mandatory fields, logo, etc.
2. Click Save
3. Click on the App again
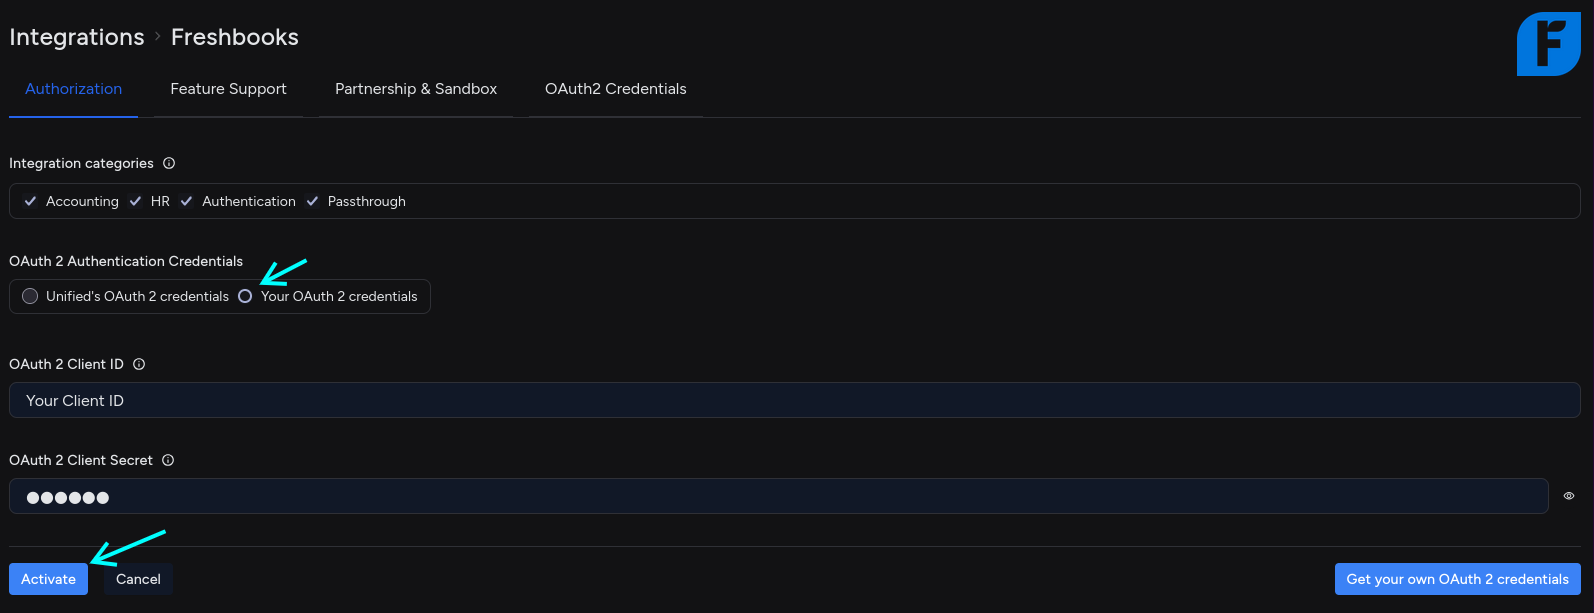
1. Your Client ID and Secret are at the bottom
## Activate the Freshbooks Integration in Unified
1. Go to [https://app.unified.to/integrations/freshbooks?tab=auth](https://app.unified.to/integrations/freshbooks?tab=auth)
2. Click in `Your OAuth 2 credentials`
3. Add your Client ID and Secret
4. Click Activate
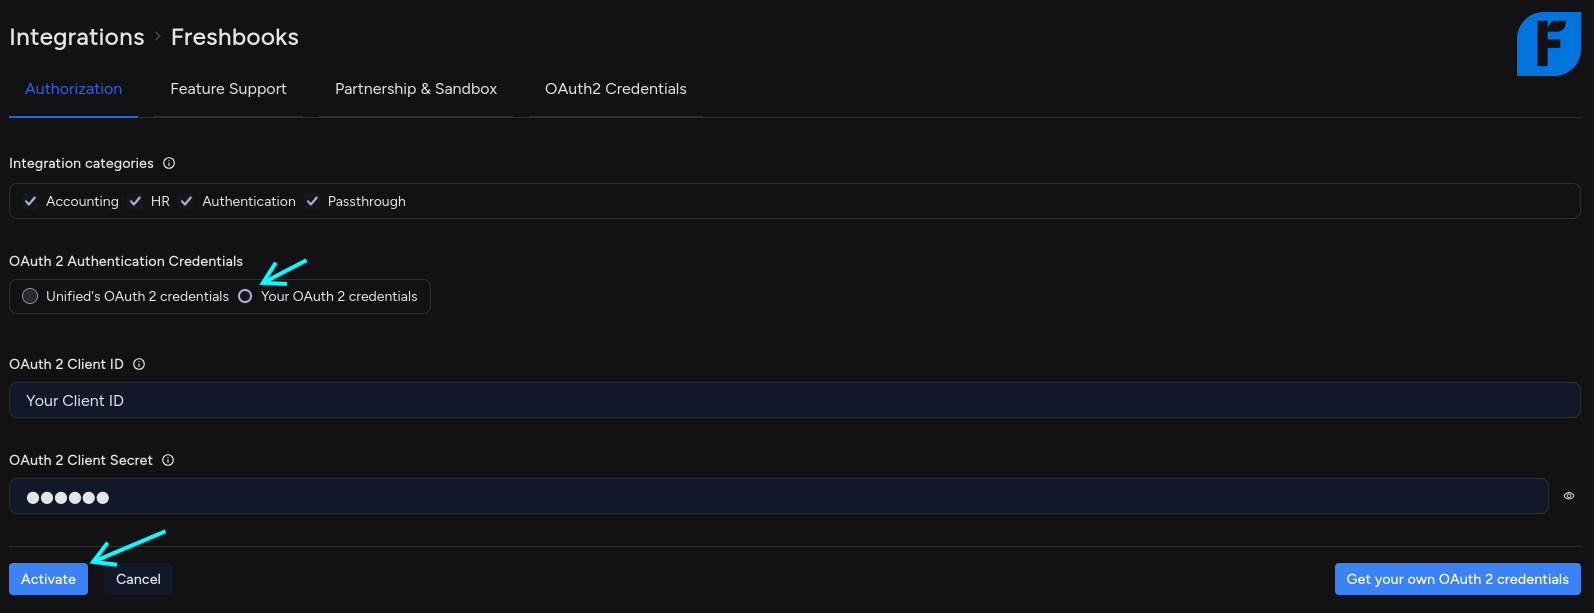
## How to setup a TikTok Shop application
URL: https://docs.unified.to/guides/how_to_setup_a_tiktok_shop_application
# How to setup a TikTok Shop application
------
_August 11, 2026_
TikTok Shop uses different terminology than the standard OAuth2. There's no menu item labeled 'OAuth' — the OAuth 2.0 client _is_ the 'app,' and the credentials are labeled App Key / App Secret rather than Client ID / Client Secret.
Here's the mapping and the exact path:
- **App Key** = your OAuth2 Client ID
- **App Secret** = your OAuth2 Client Secret
- (You'll also see a **Service ID** on the same page — TikTok-specific, not part of standard OAuth)
Steps in Partner Center:
1. Log in and make sure you're registered as an app developer (not just a seller account). If you skipped developer onboarding, the App & Service section won't behave as expected.
2. In the left navigation, select App & Service, then click Create app & service in the top-right corner.
3. Choose the app type. A Public app is for applications you plan to publish on the TikTok Shop App Store; a Custom app is for your own store or direct distribution to specific sellers. Both use the same OAuth 2.0 authentication and have the same level of API access. For a unified-API connector like yours, Public is the usual choice (you can convert a Custom app later if needed).
4. Fill in name, category, target market, and set your **Redirect URL** to your callback endpoint. Enable API access.
5. After creating, you land on the app detail page. Copy the App key (client ID), the App secret (client secret), and the ID / service ID shown below the app name.
6. Separately, apply for the API permissions/scopes you need under Manage API — these are granted per-app and gate what data you can pull.
One important gotcha for you: region is split. The main Partner Center is partner.tiktokshop.com, but the US region has a separate center at partner.us.tiktokshop.com. Credentials aren't shared across them, so if your sellers span US and non-US, you may need an app in each.
## How to Setup AWS Assume Role for AWS Secret Manager
URL: https://docs.unified.to/guides/how_to_setup_aws_assume_role_for_aws_secret_manager
# How to Setup AWS Assume Role for AWS Secret Manager
------
_March 12, 2026_
This guide walks you through configuring AWS IAM Assume Role so that Unified can securely access AWS Secrets Manager in your account — without sharing long-lived AWS access keys.
## Overview
Instead of providing static AWS credentials (access key + secret), you can create an IAM role in your AWS account and grant Unified permission to assume it. Unified uses AWS STS (Security Token Service) to obtain short-lived, temporary credentials scoped to your Secrets Manager.
### How it works
```plain text
┌───────────────┐ STS AssumeRole ┌────────────────────┐
│ Unified API │ ──────────────────────────────► │ Your AWS Account │
│ (account │ (with External ID check) │ │
│ 944579081756│ ◄────────────────────────────── │ IAM Role │
└───────────────┘ temporary credentials │ Secrets Manager │
└────────────────────┘
```
1. You create an IAM role in your AWS account with a trust policy that allows Unified's AWS account to assume it.
2. You attach a permissions policy to that role granting access to Secrets Manager.
3. You provide the role's ARN and an External ID in the Unified dashboard.
4. Unified calls `sts:AssumeRole` with the External ID, receives temporary credentials, and uses them to read/write secrets.
## Prerequisites
- An AWS account with permissions to create IAM roles and policies
- Access to the Unified dashboard with workspace admin permissions
## Step 1: Create an IAM Policy for Secrets Manager
In the AWS Console, create a policy that grants the permissions Unified needs on Secrets Manager.
1. Go to **IAM** > **Policies** > **Create policy**
2. Select the **JSON** tab and paste the following:
```json
{
"Version": "2012-10-17",
"Statement": [
{
"Effect": "Allow",
"Action": [
"secretsmanager:CreateSecret",
"secretsmanager:GetSecretValue",
"secretsmanager:UpdateSecret",
"secretsmanager:DeleteSecret"
],
"Resource": "arn:aws:secretsmanager:YOUR_REGION:YOUR_ACCOUNT_ID:secret:*"
}
]
}
```
Replace `YOUR_REGION` (e.g. `us-east-1`) and `YOUR_ACCOUNT_ID` with your values.
**Tip:** To restrict access further, you can narrow the `Resource` to a specific prefix, for example:
`arn:aws:secretsmanager:us-east-1:123456789012:secret:unified/*`
3. Name the policy (e.g. `UnifiedSecretsManagerAccess`) and create it.
## Step 2: Create an IAM Role with a Trust Policy
1. Go to **IAM** > **Roles** > **Create role**
2. Select **Custom trust policy** and paste the following:
```json
{
"Version": "2012-10-17",
"Statement": [
{
"Effect": "Allow",
"Principal": {
"AWS": "arn:aws:iam::944579081756:user/unified_assume_role_user"
},
"Action": "sts:AssumeRole",
"Condition": {
"StringEquals": {
"sts:ExternalId": "YOUR_EXTERNAL_ID"
}
}
}
]
}
```
Replace `YOUR_EXTERNAL_ID` with a unique, hard-to-guess string of your choice (e.g. a UUID). You will enter this same value in the Unified dashboard later.
**Why an External ID?** The External ID prevents the [confused deputy problem](https://docs.aws.amazon.com/IAM/latest/UserGuide/confused-deputy.html). It ensures that only requests originating through your Unified workspace — and not a third party who happens to know the role ARN — can assume the role.
3. Click **Next**, then attach the `UnifiedSecretsManagerAccess` policy you created in Step 1.
4. Name the role (e.g. `UnifiedSecretsManagerRole`) and create it.
5. Copy the role's **ARN** from the role summary page. It will look like:
`arn:aws:iam::123456789012:role/UnifiedSecretsManagerRole`
## Step 3: Configure Unified
1. Log in to the [Unified dashboard](https://app.unified.to/).
2. Navigate to **Settings** > **Workspace Settings**.
3. Under the secrets manager section, select **AWS Secret Manager**.
4. Fill in the following fields:
| Field | Value |
| ------------------- | ---------------------------------------------------------------------------------------------------------- |
| **AWS Region** | The region where your Secrets Manager secrets are stored (e.g. `us-east-1`) |
| **AWS ARN** | The full ARN of the IAM role you created (e.g. `arn:aws:iam::123456789012:role/UnifiedSecretsManagerRole`) |
| **AWS External ID** | The same External ID string you used in the trust policy |
**Note:** When using Assume Role, you do **not** need to fill in the AWS Key and AWS Secret fields. Those fields are only required for the static-credentials approach.
5. Save your workspace settings.
## Step 4: Verify the Setup
Once saved, Unified will automatically use the Assume Role flow for all new connections in your workspace. To verify:
1. Create or update a connection in your workspace.
2. Check your AWS Secrets Manager console — you should see a new secret created with a name that includes your workspace ID.
3. If there are any issues, Unified will surface errors in the connection status.
## Troubleshooting
### 'Missing role ARN or region'
Ensure both the **AWS Region** and **AWS ARN** fields are filled in on your workspace settings.
### 'Access Denied' or 'Not authorized to perform sts:AssumeRole'
- Verify the **trust policy** on your IAM role references the correct Unified AWS principal:
`arn:aws:iam::944579081756:user/unified_assume_role_user`
- Verify the **External ID** in the trust policy matches exactly what you entered in Unified.
- Ensure the IAM role's permissions policy includes the required `secretsmanager:*` actions.
### 'The security token included in the request is expired'
Temporary credentials are cached for up to 55 minutes and refreshed automatically. If you see this error persistently, confirm that your IAM role allows a session duration of at least 1 hour (the default).
### Secrets are not being stored
- Confirm the IAM role's permissions policy allows actions on the correct region and account.
- Check that the `Resource` in your permissions policy matches the region configured in Unified.
## Migrating from Static Credentials
If you are currently using the static AWS Key / AWS Secret approach:
1. Follow Steps 1-3 above to set up the IAM role and configure Unified.
2. Once the ARN and External ID are saved, Unified will prefer the Assume Role flow over static credentials.
3. After verifying that secrets are being read and written correctly, you can remove the static AWS Key and AWS Secret from your workspace settings.
4. Revoke or delete the old IAM user credentials in your AWS account.
## Security Best Practices
- **Use a unique External ID per workspace.** This prevents cross-workspace role assumption.
- **Scope the permissions policy narrowly.** Restrict the `Resource` to only the secret prefixes Unified needs.
- **Rotate the External ID periodically.** Update both the IAM trust policy and the Unified dashboard when you do.
- **Enable CloudTrail logging.** Monitor `AssumeRole` events in your AWS account to audit access.
- **Do not share the External ID publicly.** Treat it as a sensitive configuration value.
## How to setup Oracle JD Edwards
URL: https://docs.unified.to/guides/how_to_setup_oracle_jd_edwards
# How to setup Oracle JD Edwards
------
_August 17, 2026_
# Connect JD Edwards to [Unified.to](https://unified.to/)
**Administrator guide** — How to configure your JD Edwards EnterpriseOne environment so [Unified.to](https://unified.to/) can securely read data through the Application Interface Services (AIS) Server REST API.
> **Audience:** JDE / CNC administrator · **Applies to:** EnterpriseOne 9.2 · **Access level:** Read-only
---
## Overview
[Unified.to](https://unified.to/) connects to JD Edwards the same way any external REST client does — through the **Application Interface Services (AIS) Server**, the lightweight JSON-over-REST gateway that ships with EnterpriseOne. **Nothing is installed inside your JD Edwards environment.** [Unified.to](https://unified.to/) makes outbound HTTPS calls to your AIS Server, signs in with a JD Edwards user account you provide, and reads data using the standard AIS services. Every request is authenticated by EnterpriseOne and constrained by that user's security.
This guide walks a JDE or CNC administrator through the one-time setup: confirming the AIS Server, securing it, creating a dedicated service account, granting the right access, opening the network path, and verifying the connection before handing the sign-in details to [Unified.to](https://unified.to/).
```plain text
Unified.to ──HTTPS──▶ AIS Server (/jderest) ──E1 auth──▶ EnterpriseOne
(external client) (token & data services) (apps, security, data)
```
---
## Before you begin
- [ ] **An AIS Server is deployed and running.** AIS is managed in Server Manager as part of your EnterpriseOne Tools installation.
- [ ] **EnterpriseOne Tools Release 9.2.4 or later.** This is the minimum release documented for the AIS Server REST API.
- [ ] **The AIS Server is configured with a Security Server.** From Tools 9.2.2.2 onward, an AIS Server must be associated with an EnterpriseOne Enterprise (Security) Server.
- [ ] **You can create users and assign roles** in the EnterpriseOne security tools, and you can reach Server Manager.
- [ ] **You know which environment and role** the integration should sign in to (for example a reporting or production environment).
---
## Step 1 — Confirm the AIS Server and note its URL
In Server Manager, open your AIS Server instance and confirm it is started. AIS exposes its services under a base URL of the form:
```plain text
https://:/jderest
```
Record this base URL — [Unified.to](https://unified.to/) needs it. Individual services live beneath it (for example the token request and data services), so the host and port are all you supply.
> **Note:** If AIS sits behind a reverse proxy or load balancer, use the externally reachable URL that terminates TLS, not the internal application-server address.
---
## Step 2 — Require HTTPS
Configure the AIS Server (or the proxy in front of it) to use SSL/TLS so all traffic is over HTTPS. The AIS Server supports SSL configuration through Server Manager and the application server it runs on.
- Install a certificate signed by a trusted public authority so [Unified.to](https://unified.to/) can validate it.
- Avoid self-signed certificates for production; they cause TLS validation failures for external clients.
> **⚠ Important:** Credentials are sent on every sign-in. Do not expose the AIS Server over plain HTTP.
---
## Step 3 — Enable the authentication method in AIS security settings
In Server Manager, open the AIS Server's **Application Interface Services Security Settings**. The login type used by the client must be enabled there for that client to authenticate. Enable standard EnterpriseOne username/password authentication.
Confirm the AIS Server's Security Server host and port are defined so it can validate sign-ins against EnterpriseOne.
> **Note:** These settings are shared by all AIS clients. Changing them affects every application that uses this AIS Server, so review them with your CNC team before saving.
---
## Step 4 — Create a dedicated service account
Create a JD Edwards EnterpriseOne user reserved for this integration rather than reusing a person's login. A dedicated account keeps the integration's activity auditable and easy to revoke.
- Assign it a role scoped to **read/inquiry access** for the data the integration should see.
- Set the default **environment** and **role** it signs in with, or plan to supply them explicitly.
- Apply your standard password policy; use a strong, unique password.
> **✓ Best practice:** Because [Unified.to](https://unified.to/) reads data, a role with inquiry-level access is sufficient. Grant no more than the integration needs.
---
## Step 5 — Grant the account access
Two layers govern what the service account can do — make sure both allow the data you intend to share:
- **AIS access.** Per your Tools release, grant the user access to the AIS Server — for example by adding it to the AIS user allowlist or assigning the appropriate AIS role — so it is permitted to authenticate as an AIS client.
- **EnterpriseOne security.** AIS requests honor EnterpriseOne security. Use Security Workbench to ensure the user's role has access to the applications and data the integration reads, and review any **row** and **column** security that would hide records or fields.
> **Note:** If the integration returns fewer records or fields than expected, security on the role is the usual cause — the account can only ever see what EnterpriseOne security permits.
---
## Step 6 — Open the network path
[Unified.to](https://unified.to/)'s servers must be able to reach your AIS Server over HTTPS.
- Allow inbound HTTPS to the AIS host/port through your firewall — restricted to [Unified.to](https://unified.to/)'s egress IP addresses listed in the [appendix](https://app.notion.com/p/unified-to/bf8154eb04f84537b972c6170fb94a79?v=e7df13bafc244e839a8b60b15ec0f96d&p=3bf6207b838480c78091fc0cb6d883de&pm=s#appendix--unifiedto-egress-ip-addresses) below.
- If you expose AIS through a gateway or DMZ proxy, forward the `/jderest` path to the AIS Server.
- The AIS Server's **allowed origins** (CORS) setting governs browser-based callers. Server-to-server calls are not subject to browser CORS, but confirm no other network policy blocks the caller.
---
## Step 7 — Review the session timeout
When a client signs in, the AIS Server issues a session token that expires after an idle period you control in Server Manager. The default is short; keep it reasonable so routine syncs don't expire mid-request, while still meeting your security policy.
> **Note:** [Unified.to](https://unified.to/) re-authenticates automatically when a token expires, so no coordination on exact timing is required — this is just to avoid an unusually aggressive timeout.
---
## Step 8 — Verify the connection
From a machine that can reach the AIS Server, request a token with the service account. A successful response confirms the URL, TLS, security settings, and account are all working together:
```bash
# Request an AIS session token
curl -X POST -H "Content-Type: application/json" \
https://:/jderest/v2/tokenrequest \
-d '{ "username": "", "password": "",
"environment": "", "role": "", "deviceName": "unifiedto" }'
```
A JSON response containing user information and a token means the account can authenticate. An error points to the layer to revisit — see the table below.
---
## Troubleshooting
| Symptom | Likely cause | Where to look |
| ---------------------------- | --------------------------------------------------- | ------------------------------------------------------------------- |
| Connection refused / timeout | Network path or TLS not reachable from outside. | Firewall rules, proxy, AIS host/port (Step 6), HTTPS (Step 2). |
| Certificate error | Self-signed or untrusted certificate. | Install a publicly trusted certificate (Step 2). |
| 401 Unauthorized | Bad credentials, or login type not enabled. | Service account and AIS security settings (Steps 3–4). |
| 403 / access denied | User not permitted as an AIS client. | AIS access / allowlist or AIS role (Step 5). |
| Signs in, no data | EnterpriseOne security hides the records or fields. | Security Workbench: application, row, and column security (Step 5). |
| Works, then fails later | Session token expired. | AIS session timeout (Step 7). |
---
## Hand off to [Unified.to](https://unified.to/)
Once the token test succeeds, provide these values to [Unified.to](https://unified.to/) when creating the connection. Share the password through a secure channel.
| Field | Value |
| ------------------ | --------------------------------------------------------------------------------- |
| **AIS Server URL** | The base HTTPS URL, e.g. `https://jde.example.com:9302` |
| **Username** | The dedicated service account you created |
| **Password** | That account's password |
| **Environment** | _Optional_ — the environment to sign in to (defaults to the AIS Server's setting) |
| **Role** | _Optional_ — the role to sign in with (defaults to the AIS Server's setting) |
---
## References
- [Managing the AIS Server through Server Manager](https://docs.oracle.com/en/applications/jd-edwards/interoperability/9.2.x/eoiis/managing-the-ais-server-through-server-manager.html)
- [Application Interface Services (AIS) Server and AIS Client Security](https://docs.oracle.com/en/applications/jd-edwards/administration/9.2.x/eotsc/application-interface-services-ais-server-and-ais-client.html)
- [REST API for the JD Edwards EnterpriseOne AIS Server — Authentication](https://docs.oracle.com/en/applications/jd-edwards/cross-product/9.2/rest-api/Authentication.html)
- [REST API for the JD Edwards EnterpriseOne AIS Server — Quick Start](https://docs.oracle.com/en/applications/jd-edwards/cross-product/9.2/rest-api/QuickStart.html)
- [JD Edwards EnterpriseOne Tools: Application Interface Services Server Reference Guide](https://docs.oracle.com/en/applications/jd-edwards/interoperability/9.2.x/eoiis/)
---
## Appendix — [Unified.to](https://unified.to/) egress IP addresses
[Unified.to](https://unified.to/) calls your AIS Server from the fixed IP addresses below. Allow inbound HTTPS from these addresses to the AIS host/port in your firewall or reverse proxy (Step 6). Allowlisting all three keeps the connection working regardless of which [Unified.to](https://unified.to/) region serves it.
```plain text
44.199.69.244
3.65.142.239
13.239.151.208
```
| IP address | Region |
| ---------------- | ------------------------ |
| `44.199.69.244` | United States |
| `3.65.142.239` | European Union |
| `13.239.151.208` | Australia / Asia-Pacific |
> **Note:** Allow these addresses **inbound** to your AIS Server. They are the source addresses of [Unified.to](https://unified.to/)'s outbound calls — no changes to your own outbound firewall rules are required. If your [Unified.to](https://unified.to/) connection uses a single region, you may allowlist only that region's address, but permitting all three avoids breakage if the serving region changes.
---
_This guide describes standard JD Edwards EnterpriseOne administration using Oracle's published documentation. Exact menu labels and available settings vary by Tools Release; consult the references above for your version. Verify each step in a non-production environment first._
## How to Setup Quickbooks Desktop
URL: https://docs.unified.to/guides/how_to_setup_quickbooks_desktop
# How to Setup Quickbooks Desktop
------
_April 2, 2026_
Quickbooks Desktop/Enterprise is a desktop application and not a web/online application, and thus needs additional setup to enable API access.
1. [Download QBWC](https://quickbooks.intuit.com/learn-support/en-ca/help-article/install-products/set-quickbooks-web-connector/L4Vp7VI44_CA_en_CA) (Web Connector) from Quickbooks and install the program on the same computer where your Quickbooks Desktop is running.
2. Activate Quickbooks Desktop Integration in your workspace
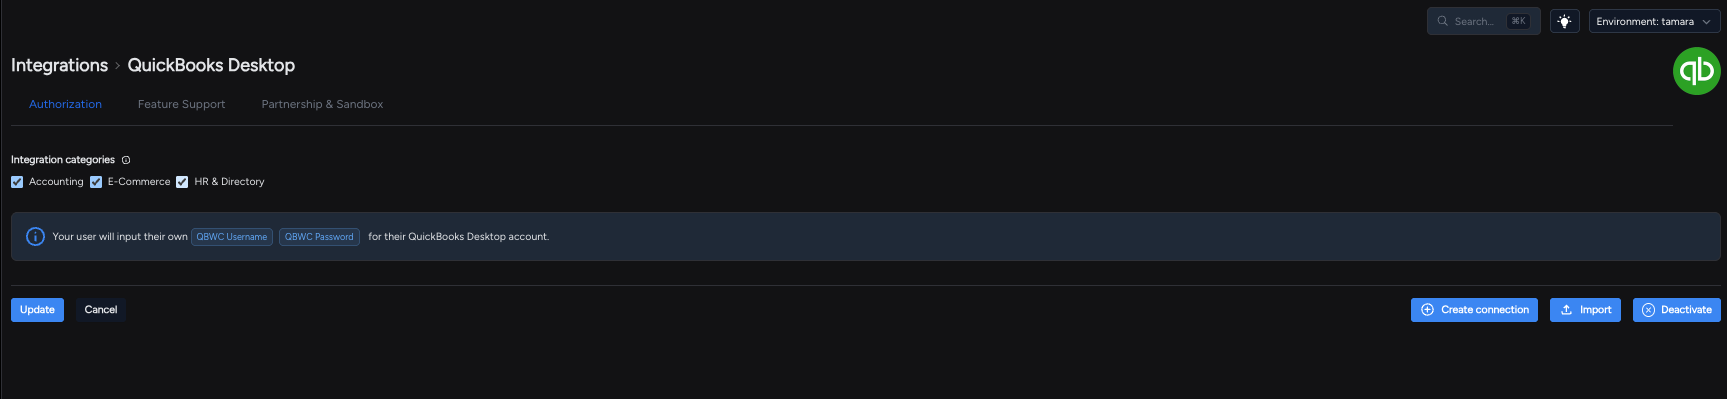
3. Create a Quickbooks Desktop connection within Unified (enter your username and password you will use in the QBWC)
4. Create a .qwc file, it should be in the following format:
```javascript
Unified
https://api.unified.to/webhook/workspace/quickbooksdesktop?workspace_id=your_workspace_id&connection_id=
your_quickbooks_desktop_connection_idA short description for WCWebService1
https://unified.ngrok.dev/support
your_username{57F3B9B1-86F1-4fcc-B1EE-566DE1813D21}{90A44FB5-33D9-4815-AC85-BC87A7E7D1EZ}QBFSnumber_of_minutes_between_each_sync_or_remove_this_if_you_want_to_sync_manually
```
5. Once the QBWC has installed, first open your Quickbooks Desktop with the company you wish to sync
6. Then open QBWC and click 'Add an application', QBWC will then prompt you to select a file, select the newly created .qwc file from above.
7. Click 'Ok' to grant access
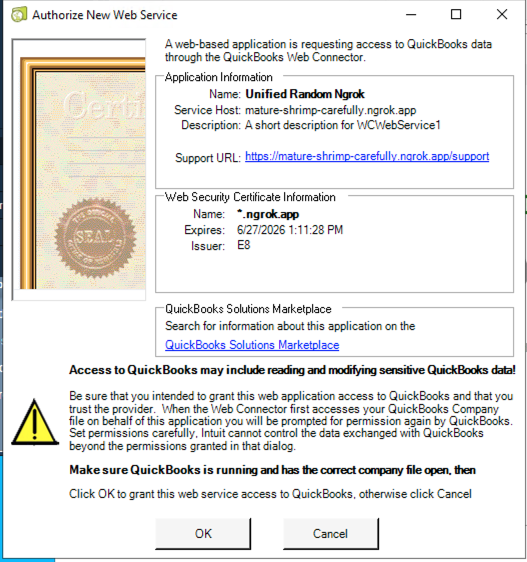
8. Select 'Yes, whenever my Quickbooks company file is open' and 'Continue'
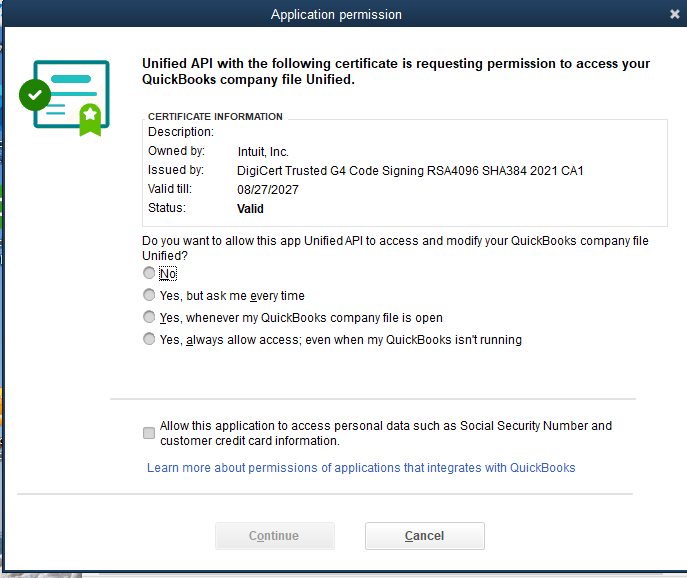
9. 'Confirm'
10. QBWC will normally close after this, you can reopen it and you should now see the app is added. Enter the password and to perform your first sync click 'Update Selected'.
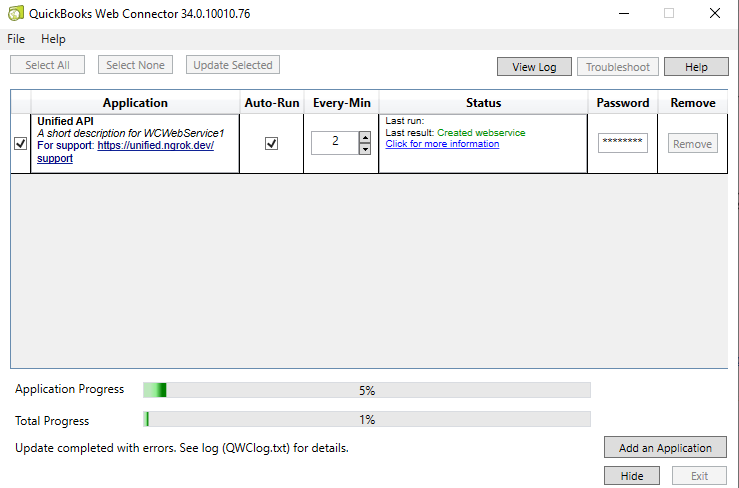
## How to setup Sage 100 with Unified.to
URL: https://docs.unified.to/guides/how_to_setup_sage_100_with_unified
# How to setup Sage 100 with Unified.to
------
_July 17, 2026_
# Connecting Sage 100 — How to get your API credentials
This guide walks a Sage 100 administrator through everything needed to connect Sage 100 to Unified.
Sage 100 is on-prem software, so the connection is made through **eBusiness Web Services**, a module
that runs on your own Sage 100 server. When you finish, you will have the **four values** Unified
asks for:
1. **Web Services URL**
2. **Company Code**
3. **Web Services Username**
4. **Web Services Password**
**Who should do this:** a Sage 100 system administrator (or your Sage business partner). Several steps happen on the Windows server that hosts Sage 100 and in Internet Information Services (IIS), so server access is required.
---
## Before you start
- Sage 100 (Advanced or Premium; MAS 90/200 lineage) installed and running.
- Administrator access to the **Sage 100 server** and to **IIS** on that server.
- The **eBusiness Web Services** module — it ships with Sage 100 but is installed separately from
the Sage 100 installation program. If it is not installed yet, do that first (see Step 1).
- The server must be **reachable from Unified over HTTPS**. Sage 100 typically lives inside a private
network, so you will usually publish the endpoint through a reverse proxy, VPN, or secure tunnel
and give it a valid TLS certificate. Coordinate this with your IT/network team.
---
## Step 1 — Install eBusiness Web Services (if not already installed)
1. Run the **Sage 100 installation program** on the server.
2. Choose to install **eBusiness Web Services** and complete the wizard. It installs a web
application into IIS under a virtual directory named `ebusinesswebservices`.
3. After installation, open the **Sage 100 eBusiness Web Services** configuration utility on the
server (installed alongside the module). You will use it in later steps.
If eBusiness Web Services is already installed, skip to Step 2.
---
## Step 2 — Confirm the endpoint URL and that it is reachable
The service exposes a single SOAP endpoint:
```plain text
https:///ebusinesswebservices/masservice.svc
```
Verify it works by opening this URL in a browser **from a machine that can reach the server**:
```plain text
https:///ebusinesswebservices/masservice.svc?wsdl
```
You should see the WSDL (an XML document). If it loads, the endpoint is live.
- Replace `` with the public host name that Unified will use to reach the server.
- Make sure the host name **matches the TLS certificate** on the site, and that the port (usually
443) is open to Unified. If the WSDL does not load, see **Troubleshooting** below.
**This full URL is the "Web Services URL" value** you will enter in Unified. (Unified also accepts
just the base `https:///ebusinesswebservices` and will add `/masservice.svc` for you.)
---
## Step 3 — Enable the company for web services and note the Company Code
1. In Sage 100, open **Library Master → Main → Company Maintenance**.
2. Select the company you want to connect.
3. Ensure the company is **enabled for web services** (eBusiness Web Services must be turned on for
this company). If you are unsure where this setting is in your version, your Sage business
partner can confirm it — the eBusiness Web Services guide requires the company to be enabled or
every call returns _"Web services are not enabled for this company."_
4. Note the **Company Code** — the short code (for example `ABC`) that identifies this company.
**This is the "Company Code" value** you will enter in Unified.
---
## Step 4 — Create (or designate) a web-services user
Unified authenticates as a Sage 100 user on every call, so create a dedicated user for the
integration.
1. In Sage 100, open **Library Master → Main → User Maintenance**.
2. Create a new user (recommended: a dedicated integration account, e.g. `WEBSVC`) or choose an
existing one, and set a strong **password**.
3. Ensure the user is **enabled for web services**. If a user is not web-services-enabled, calls
fail with _"Web services are not enabled for the system."_ / an authorization error.
4. Make sure the account is not locked. A locked account returns
_"This user account has been locked."_
**The user name and password are the "Web Services Username" and "Web Services Password"** you will
enter in Unified.
### Give the user the right permissions (roles)
The web-services user must belong to a **role** (Library Master → Main → Role Maintenance) that grants
the tasks the integration uses. For the Customer and Sales Order features Unified supports, enable
these tasks on the role's **Tasks** tab:
| Feature (Unified) | Sage 100 task to allow |
| ------------------- | -------------------------------------------------------------- |
| Read customers | Accounts Receivable → Main → Customer Maintenance → **View** |
| Update customers | Accounts Receivable → Main → Customer Maintenance → **Modify** |
| Delete customers | Accounts Receivable → Main → Customer Maintenance → **Remove** |
| Read sales orders | Sales Order → Main → Sales Order Entry → **View** |
| Create sales orders | Sales Order → Main → Sales Order Entry → **Create** |
| Update sales orders | Sales Order → Main → Sales Order Entry → **Modify** |
| Delete sales orders | Sales Order → Main → Sales Order Entry → **Remove** |
Grant only what you need. If a task is not allowed, the matching Unified operation returns an
authorization error.
---
## Step 5 — (Optional) Expose extra fields (UDFs)
By default, User-Defined Fields (UDFs) and Development Partner fields are **not** returned. If you
need them, open the **Sage 100 eBusiness Web Services** configuration utility → **Advanced Settings**
→ **Additional Fields** tab and add the fields you want to expose. This step is optional and only
needed for custom fields.
---
## Step 6 — Enter the values into Unified
In the Sage 100 connection form in Unified, provide:
| Field | Value |
| ------------------------- | ----------------------------------------------------------- |
| **Web Services URL** | `https:///ebusinesswebservices/masservice.svc` |
| **Company Code** | e.g. `ABC` |
| **Web Services Username** | the user from Step 4 |
| **Web Services Password** | that user's password |
Save the connection. Unified will begin talking to your Sage 100 server directly over HTTPS.
---
## What Unified can and cannot do with Sage 100
eBusiness Web Services is a focused API. It is important to set expectations:
- **Supported:** looking up, updating, and removing **Customers**; and creating, reading, updating,
and removing **Sales Orders**.
- **Not available:** the API has **no "list everything" operation** — records are fetched one at a
time by their key (customer number, or sales order number). There is also **no API** for invoices,
inventory items, vendors, purchase orders, or general-ledger accounts, so those are not available
through this connection.
---
## Troubleshooting
**The WSDL will not load (wrong host name).**
IIS uses the server's full computer name in the WSDL's internal URLs. If that name does not match
your TLS certificate or is not reachable from outside, the WSDL fails to download. Fix the server's
full computer name, or set SSL host headers in IIS so the correct host name is used.
**"Web services are not enabled for the system / this company."**
The system and/or the specific company is not enabled for web services (Steps 3–4). Enable them.
**Authorization errors on specific operations.**
The web-services user's role is missing the required task permission (Step 4). Add it.
**"This user account has been locked."**
Unlock the account in User Maintenance.
**Connectivity/timeout errors.**
Confirm the server is reachable from the internet on HTTPS and that any proxy/tunnel is up.
---
## References (official Sage documentation)
- Sage 100 Web Services Guide (2024, PDF): [https://docs.sage.com/docs/en/customer/100erp/2024/open/WebServices.pdf](https://docs.sage.com/docs/en/customer/100erp/2024/open/WebServices.pdf)
- Programming with eBusiness Web Services: [https://help-sage100.na.sage.com/WebServicesGuide/2025/Content/WebServices/Programming.htm](https://help-sage100.na.sage.com/WebServicesGuide/2025/Content/WebServices/Programming.htm)
- API reference (operations): [https://help-sage100.na.sage.com/WebServicesGuide/2025/Content/WebServices/APIs.htm](https://help-sage100.na.sage.com/WebServicesGuide/2025/Content/WebServices/APIs.htm)
## How to troubleshoot unhealthy connections
URL: https://docs.unified.to/guides/how_to_troubleshoot_unhealthy_connections
# How to troubleshoot unhealthy connections
------
_September 25, 2024_
Connections allow your application to securely access data from third-party API platforms. They serve as links between your Unified.to workspace, your customers' data, and your app.
Whether you're encountering issues during connection creation or debugging an existing connection that has become unhealthy, this guide will help you identify and resolve the problem. We'll walk you through how to interpret error messages, check connection status, and implement solutions to get your integrations running smoothly again.
## Before you begin
This guide assumes you have a basic understanding of:
- [Scopes](https://docs.unified.to/concepts/scopes)
## Connection lifecycle
Understanding the connection lifecycle can help in troubleshooting:
1. Your customer selects an integration from your app to authorize.
2. Your customer is directed to the authorization page for that integration.
3. Unified.to determines what to display on the page (e.g. OAuth vs API token)
4. Your customer grants access to their account.
5. Unified.to's server creates a connection in memory and attempts to test it immediately.
1. If tests pass, the connection is created in our database and your customer is redirected to the success URL you specified (defaults to the page they were on when they started the auth flow).
2. If tests fail, the customer is redirected to the failure URL you specified with error details in the query parameters. See the below section: **Handle errors during connection creation**
When a connection later stops working, your customer can go through the same flow again to **re-authorize the existing connection**. The connection keeps its ID. See **Re-authorize an unhealthy connection** below.
## Understanding connection health
Connections in Unified.to have different health statuses based on recent credential and access checks:
- **Healthy**: A recent API call or OAuth token refresh succeeded.
- **Unhealthy**: The integration rejected the connection's credentials or access, and it has not successfully completed a call or token refresh since.
- **Unhealthy now**: A recent API call or token refresh showed that the connection's credentials or access are no longer accepted, after previous successful activity.
- **New**: The connection has been created but has not yet been used.
Unified marks a connection unhealthy when a integration no longer accepts its credentials or access. This may mean you need to review permission scopes and re-authorize the connection.
Other errors do not change connection health. This includes request-validation errors (`400`, `422`), missing records (`404`), rate limits (`429`), and temporary integration errors (`5xx`). A connection can represent multiple objects and endpoints, so these errors may be specific to a request rather than an indication that the connection needs to be re-authorized.
## Handle errors during connection creation
When a connection fails to be created, we redirect users to the failure URL (this defaults to the page where the auth flow was initiated). The redirect URL includes two query parameters:
- `error`: An error message
- `log_id`: The ID of the API call log entry for this failure
To properly handle these errors in your application:
1. **Review the API call log:**
- Go to [**API Call Logs**](https://app.unified.to/logs) in your Unified.to dashboard
- Look up the log entry using the `log_id` from the URL
- Examine the error message and status code to understand what went wrong
2. **Implement error handling in your app**
1. For example, you may want to display a friendly message to your users, log the error in your monitoring tool, or invite them to contact support
Review the section below, 'Troubleshooting by connection error codes', for a detailed walkthrough of the possible error codes and how to handle them.
## Handle errors after a connection is created
When a connection is created successfully but becomes unhealthy later on, the first place to look for debugging information is in the API call logs.
### 1. Check the connection status
1. Navigate to the [**Connections**](https://app.unified.to/connections) page
2. Look for connections marked as **Unhealthy** or **Unhealthy now**.
### 2. Review API call logs
1. Go to [**API Call Logs**](https://app.unified.to/logs).
2. Filter the logs by the connection ID of the unhealthy connection (retention depends on your plan; see [How long are logs retained](https://docs.unified.to/guides/how_long_are_logs_retained)).
3. Look for recent credential or access errors, especially status codes `401`-`403`.
4. Click on an error log to view details about the failed API call.
You can also use the Unified API to retrieve a list of your connections and API call logs. Pass the `connection_id` to the API calls endpoint to filter by that connection.
**API reference:** [List all connections](https://docs.unified.to/unified/connection/List_all_connections), [List all API calls](https://docs.unified.to/unified/apicall/Returns_API_Calls)
### 3. Re-authorize an unhealthy connection
Once you've fixed the cause (for example, restored your app's access or corrected scopes), ask your customer to re-authorize the **existing** connection rather than creating a new one. Re-authorizing keeps the same connection ID, so the connection IDs you've stored, your webhooks, and the connection's `external_xref` keep working.
1. From your backend, create a re-authorization token with your API key:
```javascript
POST
Authorization: bearer {YOUR_API_KEY}
// Response
{ "reauth_token": "...", "expires_at": "..." }
```
2. Send your customer to the usual authorization URL, adding `connection_id` and `reauth_token`:
```javascript
{WORKSPACE_ID}/{INTEGRATION e.g. hubspot}?redirect=true
&connection_id={CONNECTION_ID}&reauth_token={REAUTH_TOKEN}
&success_redirect={SUCCESS_URL}&failure_redirect={FAILURE_URL}
```
3. Your customer signs in again. We test the new credentials the same way as when the connection was created.
4. On success, the connection is updated in place and your customer is redirected to the success URL with the **same** `id`. You'll receive `CONNECTION_UPDATED` (and `CONNECTION_HEALTHY` if the connection was unhealthy) instead of `CONNECTION_CREATED`.
Re-authorizing without a `scopes` parameter asks for the same permissions the connection already has, and keeps its permissions and categories unchanged. To change them (for example, to add a scope that was missing), include `scopes` on the authorization URL with the full list you need.
The token is single-use and expires after 30 minutes, so create it right before you send your customer to the authorization URL. If the token is missing, expired, or already used, the failure URL receives `error=authorization error: invalid or expired re-authorization link`; create a new token and try again.
[Learn more about re-authorizing connections](https://docs.unified.to/concepts/embedded-components#re-authorize-an-existing-connection)
## Troubleshooting by connection error codes
### Authentication (401)
A 401 error is likely indicative that the connection's credentials are no longer valid and the connection needs to be re-authorized.
**Possible causes:**
- Your app's access to the integration has been revoked.
- In non-OAuth flows that ask your customers to input an API key or other information, they may have input the wrong values.
**Solutions:**
- Double check that your app still has access to the integration's API.
- Ensure that your customers are entering the correct values during the authorization flow.
- After doing the above, [re-authorize the connection](https://app.notion.com/p/unified-to/How-to-troubleshoot-unhealthy-connections-10c6207b838480ae8856d12205da8598#3-re-authorize-an-unhealthy-connection) to refresh the authentication.
- If the issue persists for specific endpoints, contact Unified.to support for assistance.
### Permissions (403)
A 403 error is likely indicative that one or more data objects is not working as expected, usually due to misconfigured [scopes](https://docs.unified.to/concepts/scopes).
**Possible causes:**
- Mismatch between the scopes that the integration expects and what [Unified.to](https://unified.to/) is requesting. This can happen when:
- Scopes have been changed or disabled on the integration's end i.e. in your developer account, or
- The proper scopes are not being requested when setting up the [Authorization embedded component](https://app.unified.to/settings/embed?tab=Authorization) or when generating an [authorization URL](https://docs.unified.to/unified/integration/Authorize_or_re-authorize_a_connection).
**Solutions:**
1. Double check your scope settings in your developer account
1. Log into your developer account for the API you're trying to access.
2. Navigate to the settings page where your app's authorization options are found.
3. Ensure that all necessary scopes are enabled (see note below on different integrations and how they handle scopes)
4. Make a note of the scopes that are enabled.
2. Double check your scope settings on Unified.to
If you are using our embedded components to create connections, you'll need to ensure that the scopes on [Unified.to](https://unified.to/) match the ones you enabled in your developer account.
1. Navigate to the [Embedded components](https://app.unified.to/embed?tab=Authorization) page
2. Click **Permission Scopes**
3. Select the scopes that match the scopes you enabled in the developer account (see note below on mappings)
4. (Optional, only if you are using webhooks) Select the **webhook** scope
5. If the issue still persists, contact Unified.to support for assistance
If you are generating an auth URL to redirect your customers to our auth flow, include `scopes` as a query parameter and list all the Unified scopes you need. Behind the scenes, [Unified.to](https://unified.to/) will map the Unified scopes you pass to the integration's scopes (see note below on mappings). For example:
```javascript
https://api.unified.to/unified/integration/auth/
{WORKSPACE_ID}/{INTEGRATION e.g. hubspot}?redirect=true
&scopes=webhook,{YOUR_SCOPES e.g. crm_deal_read, crm_event_read}
```
**API reference:** [Create an authorization URL](https://docs.unified.to/unified/integration/Authorize_or_re-authorize_a_connection)
After addressing these issues, [re-authorize the connection](https://app.notion.com/p/unified-to/How-to-troubleshoot-unhealthy-connections-10c6207b838480ae8856d12205da8598#3-re-authorize-an-unhealthy-connection) and include the full list of `scopes` you need on the authorization URL. Re-authorizing without `scopes` keeps the connection's current permissions, so a missing scope would stay missing. Re-create the webhook if needed, then try again.
**A note on mappings:**
A mapping of the Unified scopes to the integration's scopes can be found on the integration details page under the **OAuth 2 Credentials tab** e.g. [here](https://app.unified.to/integrations/hubspot?tab=oauth2) are the mappings for HubSpot scopes.
**A note on integration-specific scopes:**
Different integrations may handle scopes in different ways - sometimes you can request a subset of the scopes enabled in the developer account, other times you must request all the scopes that have been enabled, and in the case of Hubspot, scopes are divided into Required and Optional scopes. For these cases, we have written how-to guides on generating OAuth credentials and configuring scopes. Please consult the Unified.to docs for more information about these integrations.
### Not found (404)
**Note:** For Enrichment category integrations, 404 errors are treated as successful responses. They indicate that no data was found for the provided input, not that the connection is broken.
**Solution:**
- Verify that the input data (e.g., email, company name) is correct.
### Rate limiting (429)
429 errors do not change connection health because they indicate the connection is active but temporarily limited.
**Possible cause:**
- Exceeding the API rate limits of the third-party service
**Solutions:**
- (Recommended) Use [webhooks](https://docs.unified.to/guides/how_to_create_and_configure_webhooks) to read data and Unified.to will take care of rate limiting for you.
- Implement request throttling in your application.
- Contact the third-party service to request increased rate limits.
### Server errors (500 series e.g. 502, 503, etc)
500 series errors do not change connection health because they usually indicate temporary issues with the third-party service. In cases where the issue is on our end, however, we will attempt to make that clear in the error message.
**Possible causes:**
- Temporary issues with the third-party service
- Bugs
**Solutions:**
- Check the status page of the third-party service for any ongoing issues.
- Retry the request after a short delay.
- If the issue still persists or if you've discovered a bug, contact Unified.to support for assistance. Thank you!
### Not implemented (501)
501 errors do not change connection health. They indicate that a specific functionality is not implemented for the integration, not that the connection is broken.
**Suggestion actions:**
- Check the Unified.to documentation for the specific integration to understand its supported features.
- If you believe the functionality should be supported, contact Unified.to support and we'd be happy to look into it.
## Monitor and receive updates about your connections
To stay informed about changes to your connections:
1. Navigate to **Settings >** [**Workspace**](https://app.unified.to/settings/workspace).
2. Under **Notifications webhook URL**, enter the URL where you want to receive notifications (this should be an endpoint on your server that can receive POST requests).
3. Under **Notifications webhook events**, select events related to connections:
- `CONNECTION_HEALTHY`
- `CONNECTION_UNHEALTHY`
- `CONNECTION_CREATED`
- `CONNECTION_UPDATED` (also sent when a connection is re-authorized)
- `CONNECTION_DELETED`
4. Implement a handler for these events in your app to monitor connection health proactively.
Unified sends `CONNECTION_UNHEALTHY` when an integration rejects a connection's credentials or access. For API requests, the event description includes the integration's HTTP status when available, such as `HTTP 401`. If the issue continues, notifications are rate-limited to at most one per connection per hour. Unified sends `CONNECTION_HEALTHY` when a previously unhealthy connection successfully completes an API call or OAuth token refresh, or is re-authorized.
Treat these events as signals to review credentials and permission scopes, then [re-authorize the connection](https://docs.unified.to/guides/how_to_troubleshoot_unhealthy_connections#3-re-authorize-an-unhealthy-connection) if needed. For example, when you receive `CONNECTION_UNHEALTHY`, show the affected customer a "Reconnect" button in your app that creates a re-authorization token and sends them through the authorization URL. Your handler should be idempotent because an unhealthy connection can continue to generate periodic notifications until it is fixed.
## Next steps
- Join our [Discord community](https://discord.gg/2nsAPmbx) for support and updates.
- If issues persist, [contact our support team](https://unified.to/contact) for further assistance.
Remember, connection health is dynamic and can change after an authentication failure or a subsequent successful API call or OAuth token refresh. Not all errors indicate a broken connection.
## How to troubleshoot unhealthy webhooks
URL: https://docs.unified.to/guides/how_to_troubleshoot_unhealthy_webhooks
# How to troubleshoot unhealthy webhooks
------
_September 4, 2024_
Webhooks deliver events about changes to the data you care about. When something goes wrong, however, we will mark those webhooks as unhealthy. This guide explains how to diagnose and troubleshoot unhealthy webhooks at [Unified.to](https://unified.to/).
## Before you begin
This guide assumes you have a basic understanding of:
- [Webhooks](https://docs.unified.to/reference/webhooks) and [virtual webhooks](https://docs.unified.to/concepts/virtual_webhooks)
- [Scopes](https://docs.unified.to/concepts/scopes)
## Diagnose the webhook
The first place to look for debugging information is in the API call logs.
### 1. Check the webhook status
1. Log in to your [Unified.to account](https://app.unified.to/).
2. Navigate to [Webhooks](https://app.unified.to/connections).
3. Make note of the unhealthy webhook and its **connection ID**.
### 2. Review API call logs
1. Go to [**API Call Logs**](https://app.unified.to/logs).
2. Filter by the connection ID of the webhook in question. You should see a list of API calls attempted by the webhook (retention depends on your plan; see [How long are logs retained](https://docs.unified.to/guides/how_long_are_logs_retained)).
3. Click on the latest log entry that threw an error - the **status** column will display an error code.
4. Details about the API call will be shown. The **Description** field will detail the reason the webhook failed and the **Status** field will show the specific error code itself. For example:
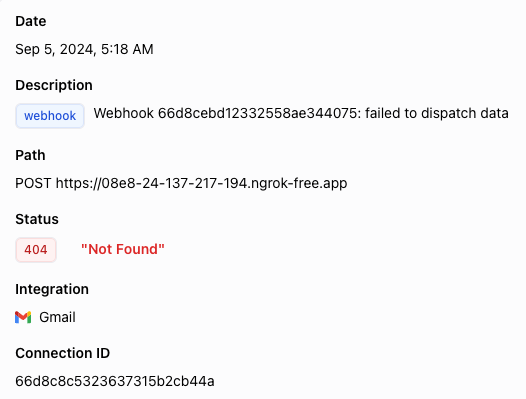
You can also use the Unified API to retrieve a list of your webhooks and API call logs.
**API reference:** [List all webhooks](https://docs.unified.to/unified/webhook/Returns_all_registered_webhooks), [List all API calls](https://docs.unified.to/unified/apicall/Returns_API_Calls)
## Troubleshooting webhook error codes
### Bad request (400) errors
These errors indicate that something is wrong with the request - in this case, it is likely not a scope or authentication issue but a problem with the integration itself. Please [reach out to us](https://unified.to/contact) or let us know in our [Discord](https://discord.gg/2nsAPmbx) server. Thank you!
### Authentication (401) and permission (403) errors
A 401 error may indicate that the connection's auth credentials were entered incorrectly, whether it be the API token, a secret, or another value depending on the integration.
A 403 error is often indicative of scope mismatches with the API provider, with Unified.to, or both.
Both of these errors are indicative of an issue with the connection itself, rather than the webhook. Please see: [How to troubleshoot unhealthy connections ](https://docs.unified.to/guides/how_to_troubleshoot_unhealthy_connections#troubleshooting-the-error-codes)
## Subscribe to the notifications webhook to be alerted when your webhooks fail
To learn about any webhook errors as soon as they occur, we recommend that you subscribe to our **Notifications webhook** to be notified as soon as a webhook's status changes.
1. Navigate to **Settings** > [**Workspace**](https://app.unified.to/settings/workspace)**.**
2. Under **Notifications webhook URL**, enter the URL of the endpoint where you would like to receive notifications.
1. The payload that will be sent to this endpoint contains:
```javascript
id: string // the id of the object or the integration's type
nonce: number // random number
sig: string // @deprecated; use sig256. base64(hmac-sha1(id + nonce + event, workspace.secret))
sig256: string // v1 (existing validators): base64(hmac-sha256(id + nonce + event, workspace.secret))
data: object // { id, event, description?, environment? }
sig256v2: string // v2: HMAC-SHA256(workspace.secret, JSON.stringify(data) + String(nonce)) — same formula as object / data webhooks
event: enum // the event that was triggered
description?: string // optional longer description
environment?: string // included for connection, webhook, or integration notifications
```
**Signature validation:** Existing integrations can keep verifying `sig256` with `id + nonce + event`; that formula is unchanged. To use the same check as object / data webhooks, verify `sig256v2` as HMAC-SHA256(workspace.secret, JSON.stringify(data) + String(nonce)). See [Best practices for signature validation](https://docs.unified.to/reference/webhooks) in the Webhooks reference.
3. Under **Notifications webhook events**, select the events you want to be alerted to e.g. `WEBHOOK_UNHEALTHY`
4. On your server, handle incoming notifications as you see fit e.g. set up logging, send a message to the engineering team, post on Slack or Discord, etc.
## Understanding why webhooks fail
This section will go over why webhooks fail to provide a deeper understanding of how our webhooks work.
### Failed to subscribe
Failing to subscribe happens during webhook creation and can be due to multiple reasons: the integration isn't available, insufficient permissions (i.e. scopes mismatch), or bugs.
Note: This only applies to native webhooks.
### Failed to refresh token
Before checking for changes, subscribing, or processing a native event, [Unified.to](https://unified.to/) refreshes the connection's auth token when needed. If the refresh fails after retries, the webhook is marked unhealthy so no calls run against an expired token. This applies to both virtual and native webhooks. In this case, it is likely an error with the connection itself.
Double-check that the auth credentials for the connection are correct, that the scopes are set correctly (i.e. they haven't been revoked), and then recreate both the connection and its associated webhook.
### Failed to read
Failing to read happens when we attempt to retrieve new data from the API provider and are prevented from doing so, whether due to configuration errors (i.e. 401 or 403 errors) or problems with the integration itself.
Double-check that the auth credentials for the connection are correct, that the scopes are set correctly (i.e. they haven't been revoked), and then recreate both the connection and its associated webhook.
### Failed to dispatch data
Failing to dispatch data happens when we attempt to send webhook data to your server but the server does not respond or responds with an error.
Make sure your webhook URL is configured correctly when creating the webhook. Respond with a `2xx` status once your endpoint has accepted the data, and do heavy processing afterwards. Otherwise, retry behaviour depends on the webhook type. For virtual webhooks, we keep trying to POST to your server for up to approximately 2 weeks before marking the webhook as unhealthy. For native webhooks, delivery is attempted 3 times immediately; if those fail, the webhook is marked unhealthy and the event isn't redelivered unless the integration sends it again. Keep your endpoint reachable during deploys, or use a virtual webhook where longer recovery matters.
After checking the above, recreate the webhook and try again.
Monitoring webhook health and recreating unhealthy webhooks is your responsibility. [Unified.to](https://unified.to/) does not resume an unhealthy webhook on its own. Subscribe to the notifications webhook (above) for `WEBHOOK_UNHEALTHY` so you find out when it happens.
### Failed to process data
Failing to process data indicates a problem with either the reading or dispatching steps. Refer to the troubleshooting steps above and then recreate the webhook and try again.
### A note on our webhook retry mechanism
[Unified.to](https://unified.to/) retries failed webhook deliveries automatically. Here's how it works.
**When your webhook endpoint is unavailable**
1. If your endpoint is unavailable or returns an error, we'll retry up to 3 times immediately, with a 1-second delay between attempts.
2. If the error persists, we back off progressively for up to about 2 weeks, maximizing the chance of successful delivery.
The backoff schedule applies to virtual webhooks. Each delayed retry re-reads the page from the API provider rather than resending a stored payload, and the read position advances only after a successful delivery. If retries are exhausted, the webhook is marked unhealthy and scheduling stops. Native webhooks stop after the 3 immediate retries and are marked unhealthy.
**When the API provider is unavailable**
If we can't reach the API provider or have hit their rate limits, we will back off progressively and retry (outlined above). On virtual webhooks, we honour the provider's retry-after hints when it sends them.
**Billing for failed and empty runs**
You aren't billed for failed reads from the API provider, failed dispatches to your webhook endpoint, or virtual webhook polling runs that find no new data.
## See also
- [How to create and configure webhooks](https://docs.unified.to/guides/how_to_create_and_configure_webhooks)
- [How to troubleshoot unhealthy connections](https://docs.unified.to/guides/how_to_troubleshoot_unhealthy_connections)
- [Understanding virtual webhooks](https://docs.unified.to/concepts/virtual_webhooks)
## How to use SCIM with the Unified API
URL: https://docs.unified.to/guides/how_to_use_scim_with_the_unified_api
# How to use SCIM with the Unified API
------
_October 3, 2024_
[Unified.to](https://unified.to/)'s SCIM API gives you SCIM 2.0 Users and Groups endpoints over its HR & Directory integrations, so a SCIM client can list, create, update and delete users in a customer's HR system or directory, including systems with no SCIM support of their own. This guide is for developers who already use SCIM (System for Cross-domain Identity Management, the RFC 7643 and RFC 7644 standard for user and group provisioning).
If your product already provisions users over SCIM, you can reuse that client across more systems.
## Before you begin
This guide assumes you already have a basic understanding of SCIM and its purpose in identity management. You can read more about it in the [official specification](https://scim.cloud/).
## What endpoints does [Unified.to](https://unified.to/)'s SCIM API provide?
[Unified.to](https://unified.to/)'s SCIM endpoints are based on RFC 7644, and each is scoped to one connection:
- **Users:** `POST /scim/{connection_id}/users` (create), `GET /scim/{connection_id}/users` (list), `GET /scim/{connection_id}/users/{id}` (get), `PUT` or `PATCH /scim/{connection_id}/users/{id}` (update), `DELETE /scim/{connection_id}/users/{id}` (delete)
- **Groups:** the same operations on `/scim/{connection_id}/groups`
List requests accept `filter`, `startIndex` and `count` for paging, and `sortBy` and `sortOrder`. Responses use the SCIM schemas; send `Accept: application/scim+json` for the SCIM media type.
View the API references for:
- [Users](https://docs.unified.to/scim/users/model)
- [Groups](https://docs.unified.to/scim/groups/model)
An existing SCIM client can call these endpoints with the connection ID in the path. Which operations work depends on the integration (see below).
## Which SCIM extensions does [Unified.to](https://unified.to/) support?
In addition to the core SCIM schema, Unified.to supports the following extensions:
```plain text
'urn:ietf:params:scim:schemas:extension:enterprise:2.0:User'
'urn:ietf:params:scim:schemas:extension:lattice:attributes:1.0:User'
'urn:ietf:params:scim:schemas:extension:peakon:2.0:User'
```
The enterprise extension carries employee number, cost centre, organization, division, department and manager; the Lattice and Peakon extensions carry the attributes those tools expect.
## Which integrations work with the SCIM API?
Any HR & Directory integration that supports the Employee object works with [Unified.to](https://unified.to/)'s SCIM API, whether or not the vendor supports SCIM itself: [Unified.to](https://unified.to/) translates each SCIM call into that integration's own API. That covers most of [Unified.to](https://unified.to/)'s 698 [HR & Directory integrations](https://docs.unified.to/hris/integrations).
Reads work wherever the integration lists employees; creates, updates and deletes work only where it writes them. As of 19 October 2026, Okta, Microsoft Entra ID, Google Workspace Directory, JumpCloud, Personio and Ceridian Dayforce create, update and remove employees; BambooHR and HiBob create and update them; Workday and [Remote.com](https://remote.com/) are read-only for employees. An operation an integration doesn't support returns 501. Each integration's Feature Support tab lists its methods.
## Should I use the SCIM API or the HR & Directory API?
Use the SCIM API when your product already speaks SCIM and you want to create, update or remove accounts with it. Use the [HR & Directory API](https://docs.unified.to/hris/overview) when you need more than identity: employment status, start and end dates, managers, locations, time off or payroll. Both read the same employee records.
## How do I find out when users change?
The SCIM API itself doesn't send webhooks. Subscribe to HR & Directory employee and group webhooks on supported integrations. They're native on integrations such as HiBob, Personio, Google Workspace Directory and Microsoft Entra ID, and come from [virtual webhooks](https://docs.unified.to/concepts/virtual_webhooks) on integrations such as BambooHR, Workday and Okta, which check at an interval you set, as often as every minute on paid plans.
The SCIM API is on every plan. It isn't available to enterprise-managed (`ema_`) tokens. Each request goes to the source system; [Unified.to](https://unified.to/) keeps no customer records at rest, and connection credentials and operational metadata are encrypted at rest.
## See also
- [HR & Directory API overview](https://docs.unified.to/hris/overview)
- [SCIM glossary entry](https://docs.unified.to/concepts/glossary/scim)
- [SCIM API overview](https://docs.unified.to/scim/overview)
- [Official SCIM specifications](https://datatracker.ietf.org/doc/html/rfc7644)
## How to use the Passthrough API
URL: https://docs.unified.to/guides/how_to_use_the_passthrough_api
# How to use the Passthrough API
------
_November 25, 2024_
This guide shows you how to make requests using Unified.to's Passthrough API with practical examples.
## Before you begin
You should have:
- At least one active connection for an integration
- The connection ID for the integration you want to access
## Making Passthrough requests
The following examples demonstrate calls to mock endpoints with the Passthrough API.
**NOTE:** There is only one reserved URL parameter, and that is `__domain`. Use it to override the default API URL for that integration.
### Using the REST API directly
```javascript
// GET request example
const response = await fetch('https://api.unified.to/passthrough/{connection_id}/v2/customers', {
method: 'GET',
headers: {
'Authorization': 'Bearer YOUR_API_KEY',
'Content-Type': 'application/json'
}
});
// POST request example
const response = await fetch('https://api.unified.to/passthrough/{connection_id}/v2/customers', {
method: 'POST',
headers: {
'Authorization': 'Bearer YOUR_API_KEY',
'Content-Type': 'application/json'
},
body: JSON.stringify({
name: 'John Doe',
email: 'john@example.com'
})
});
```
### Using the [Unified.to](https://unified.to/) SDK
```javascript
// GET request
const response = await unified.passthrough.listPassthroughs({
connectionId: 'YOUR_CONNECTION_ID',
path: '/v2/customers'
});
// POST request
const response = await unified.passthrough.createPassthrough({
connectionId: 'YOUR_CONNECTION_ID',
path: '/v2/customers',
data: {
name: 'John Doe',
email: 'john@example.com'
}
});
// With custom headers
const response = await unified.passthrough.listPassthroughs(
{
connectionId: 'YOUR_CONNECTION_ID',
path: '/v2/customers'
},
{
fetchOptions: {
headers: {
'x-api-version': '2023-06-01'
}
}
}
);
```
## Real-world examples
### Example 1: Fetching HubSpot properties
This example demonstrates how to fetch custom properties for HubSpot contacts.
```javascript
const response = await unified.passthrough.listPassthroughs({
connectionId: HUBSPOT_CONNECTION_ID,
path: '/crm/v3/properties/{objectType}/batch/read'
});
// Response will contain raw HubSpot property definitions
console.log(response.data);
```
**API reference:** [Hubspot CRM Properties](https://developers.hubspot.com/beta-docs/reference/api/crm/properties#get-%2Fcrm%2Fv3%2Fproperties%2F%7Bobjecttype%7D)
### Example 2: Creating a Slack channel
This example demonstrates creating a channel in Slack.
```javascript
// Create a private Slack channel
const response = await unified.passthrough.createPassthrough({
connectionId: SLACK_CONNECTION_ID,
path: '/conversations.create',
data: {
name: 'project-discussion',
is_private: true
}
});
// Check the response
if (response.data.ok) {
console.log('Channel created:', response.data.channel.id);
}
```
**API reference**: [conversations.create](https://api.slack.com/methods/conversations.create)
### Example 3: Creating a Salesforce record
This example demonstrates two ways of creating a new Account record in Salesforce using their sObject API.
```javascript
// Using the SDK
const response = await unified.passthrough.createPassthrough({
connectionId: SALESFORCE_CONNECTION_ID,
// Note: path starts with 'services/data/v62.0' as required by Salesforce
path: 'services/data/v62.0/sobjects/Account/',
data: {
"Name": "Express Logistics and Transport"
}
});
const response = await fetch('https://api.unified.to/passthrough/{connection_id}/services/data/v62.0/sobjects/Account/', {
method: 'POST',
headers: {
'Authorization': 'Bearer YOUR_UNIFIED_API_KEY',
'Content-Type': 'application/json'
},
body: JSON.stringify({
"Name": "Express Logistics and Transport"
})
});
// The response will contain the new record ID if successful:
// {
// "id": "001D000000IqhSLIAZ",
// "errors": [],
// "success": true
// }
```
**API reference:** [Create a Record](https://developer.salesforce.com/docs/atlas.en-us.api_rest.meta/api_rest/dome_sobject_create.htm)
## See also
- [Passthrough API Overview](https://docs.unified.to/passthrough/overview)
## How to Use Unified.to's Generative AI API with OpenAI and Claude
URL: https://docs.unified.to/guides/how_to_use_unified_generative_ai_api_with_openai_and_claude
# How to Use Unified.to's Generative AI API with OpenAI and Claude
------
_May 29, 2024_
This guide shows you how to get started with [Unified.to](https://unified.to/)'s GenAI (generative AI) API, which gives you one model and API for large language models (LLMs) across 57 AI integrations, including:
- [Anthropic Claude](https://www.anthropic.com/api)
- [Anyscale](https://www.anyscale.com/platform)
- [Google Gemini](https://ai.google.dev/)
- [Groq](https://console.groq.com/docs/)
- [Mistral AI](https://docs.mistral.ai/api/)
- [OpenAI GPT](https://openai.com/api/)
To illustrate its power, we will work through a sample application using your own GenAI API credentials, although Unified.to's use cases always target a SaaS company's customer accounts.
To follow the steps in this guide, you'll need the following:
- **A** [**Unified.to**](https://unified.to/) **account.** If you don't have one, start a [30-day free trial](https://app.unified.to/login) on Grow or Pro.
- Accounts for the [OpenAI API](https://platform.openai.com/docs/overview) and the [Anthropic Claude API](https://www.anthropic.com/api).
- Python (preferably version 3.10 or later).
- [Jupyter Notebook](https://jupyter.org/) (included with the [Anaconda Python distribution](https://www.anaconda.com/download) or easily installed with the command `pip install notebook`. It's a great tool for experimenting with Python and exploring APIs and libraries.
## Activate the integrations
The first step is to activate the Claude and OpenAI integrations. [Log in to Unified.to](https://app.unified.to/login) and navigate to the **Integrations** page by selecting **Integrations** → **Active Integrations** from the menu bar in the Unified.to dashboard:
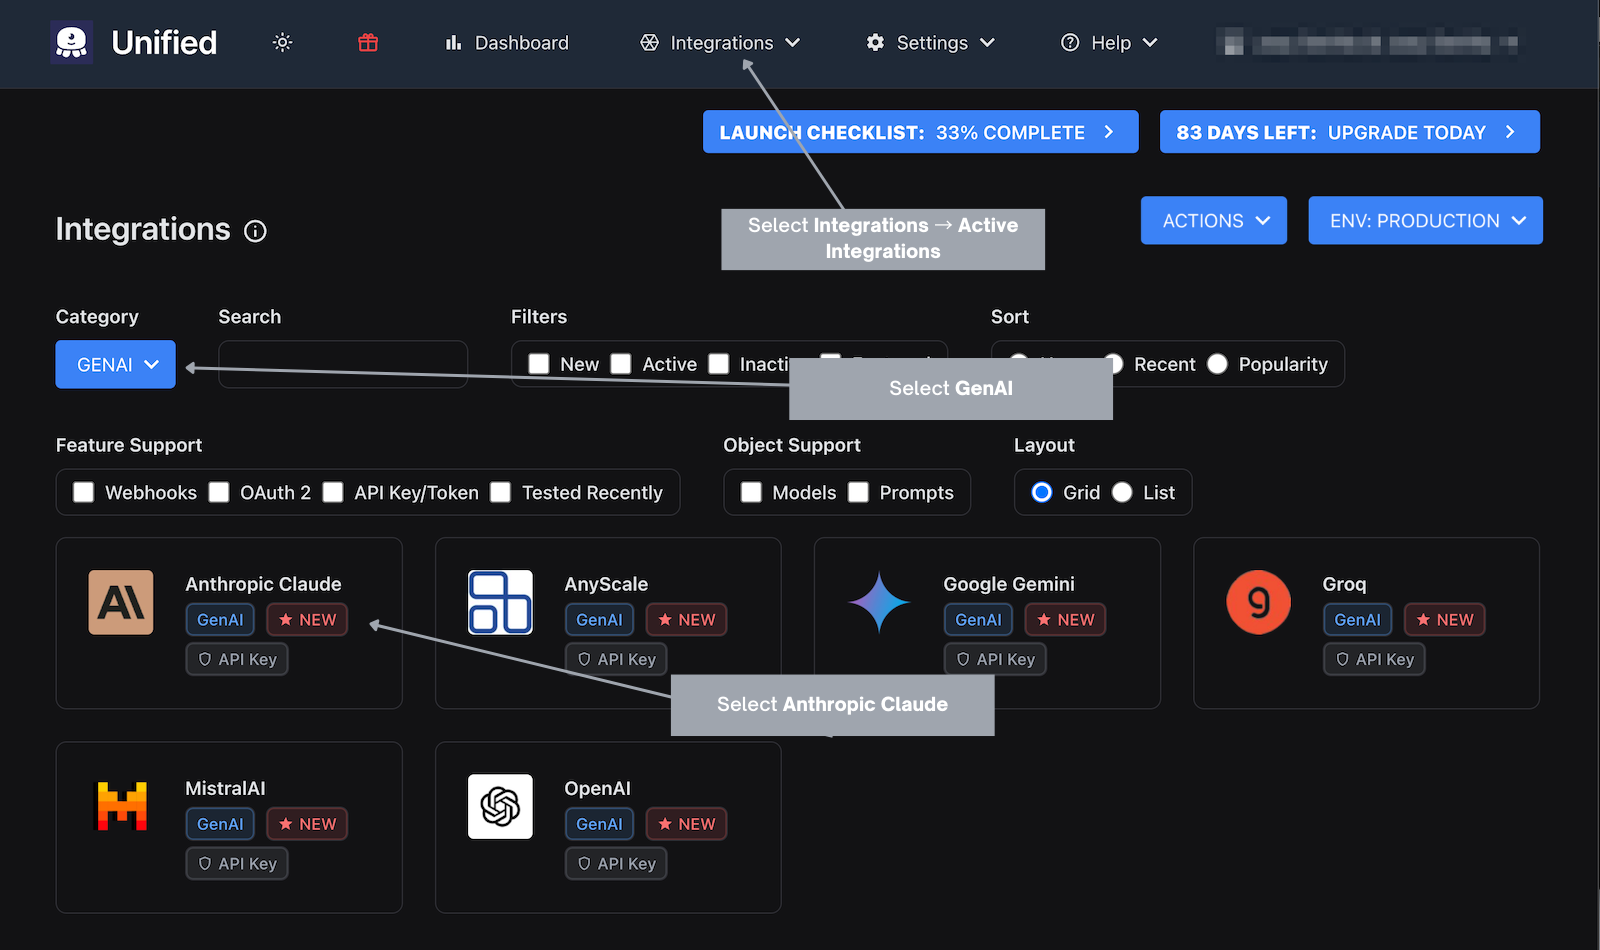
Narrow down the integrations to only the generative AI ones by selecting **GENAI** from the **Category** menu.
Click on the **Anthropic Claude** item, which will take you to its integration page:
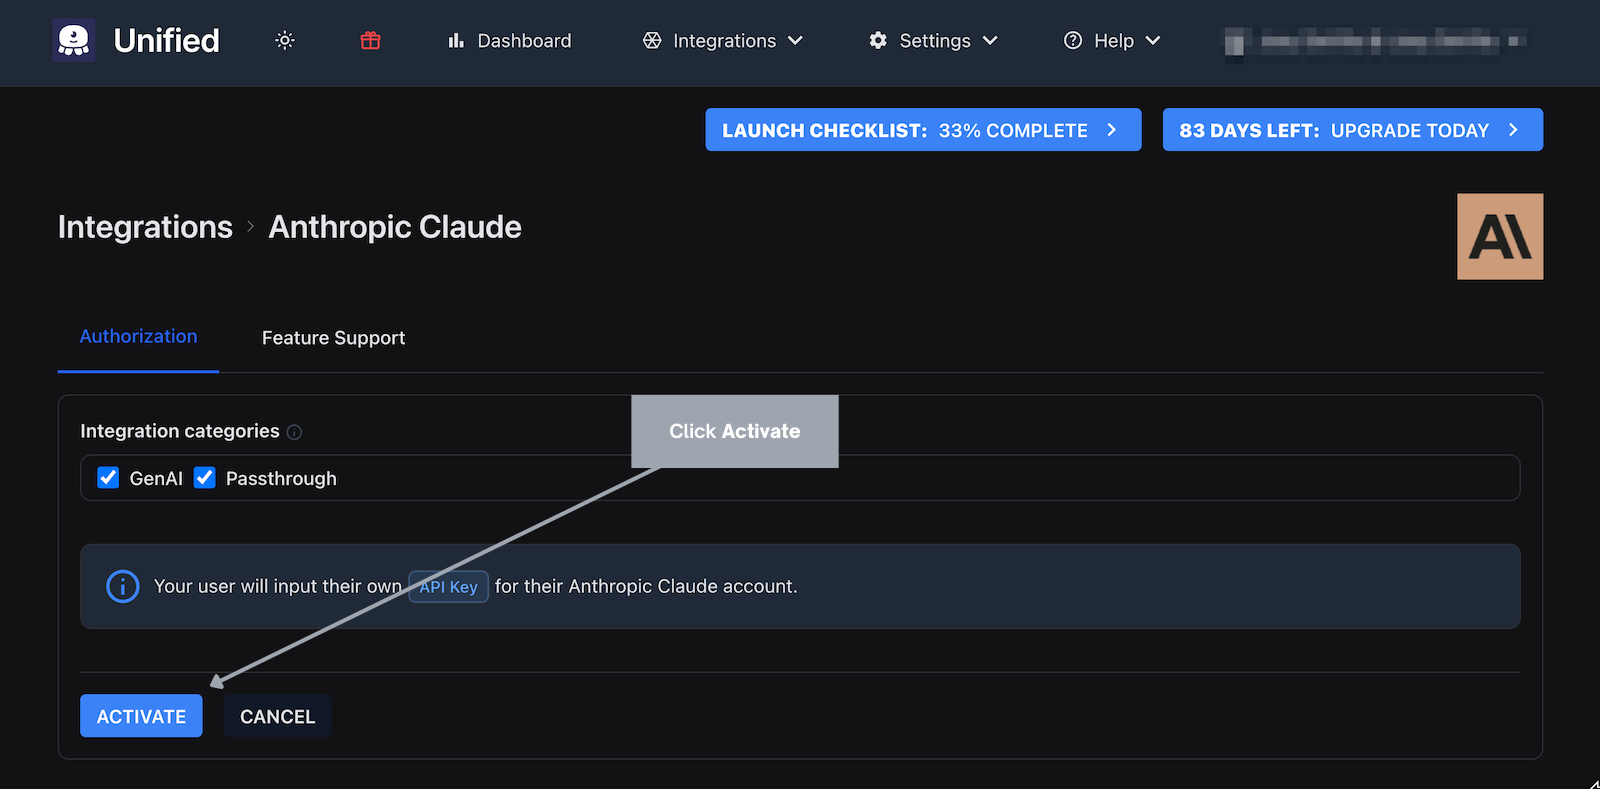
Activate the Claude integration by clicking the **ACTIVATE** button. This will return you to the **Integrations** page, where you'll see that the **Anthropic Claude** item is now marked 'active:'
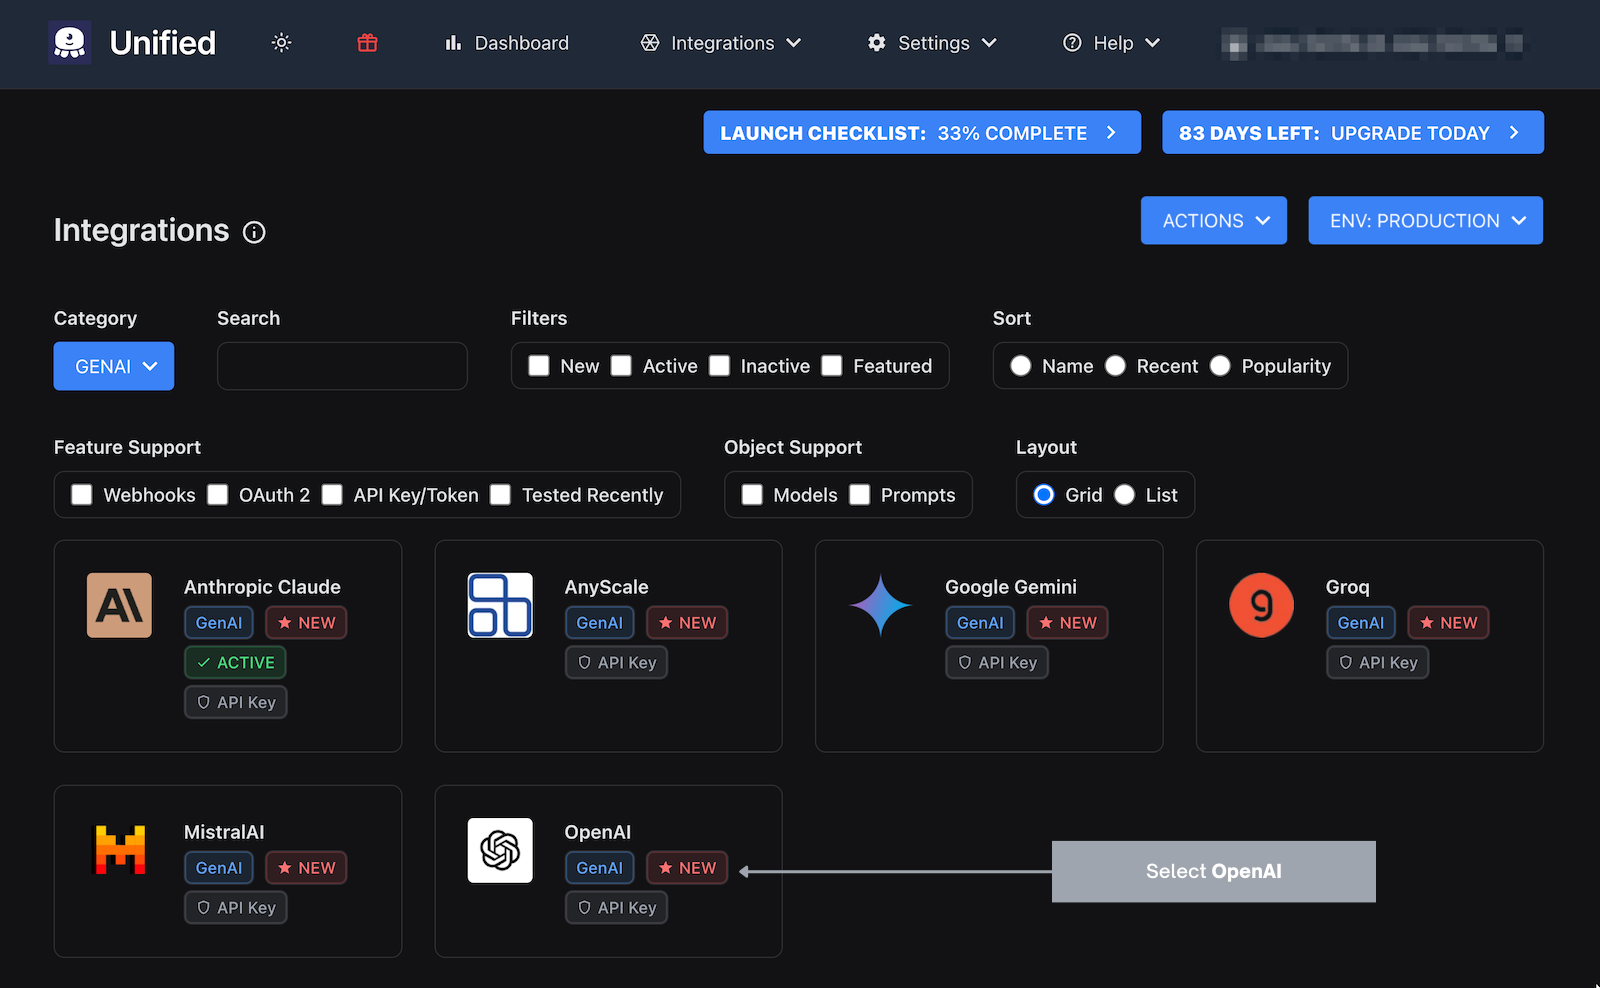
Now click on the **OpenAI** item, which will take you to its integration page:
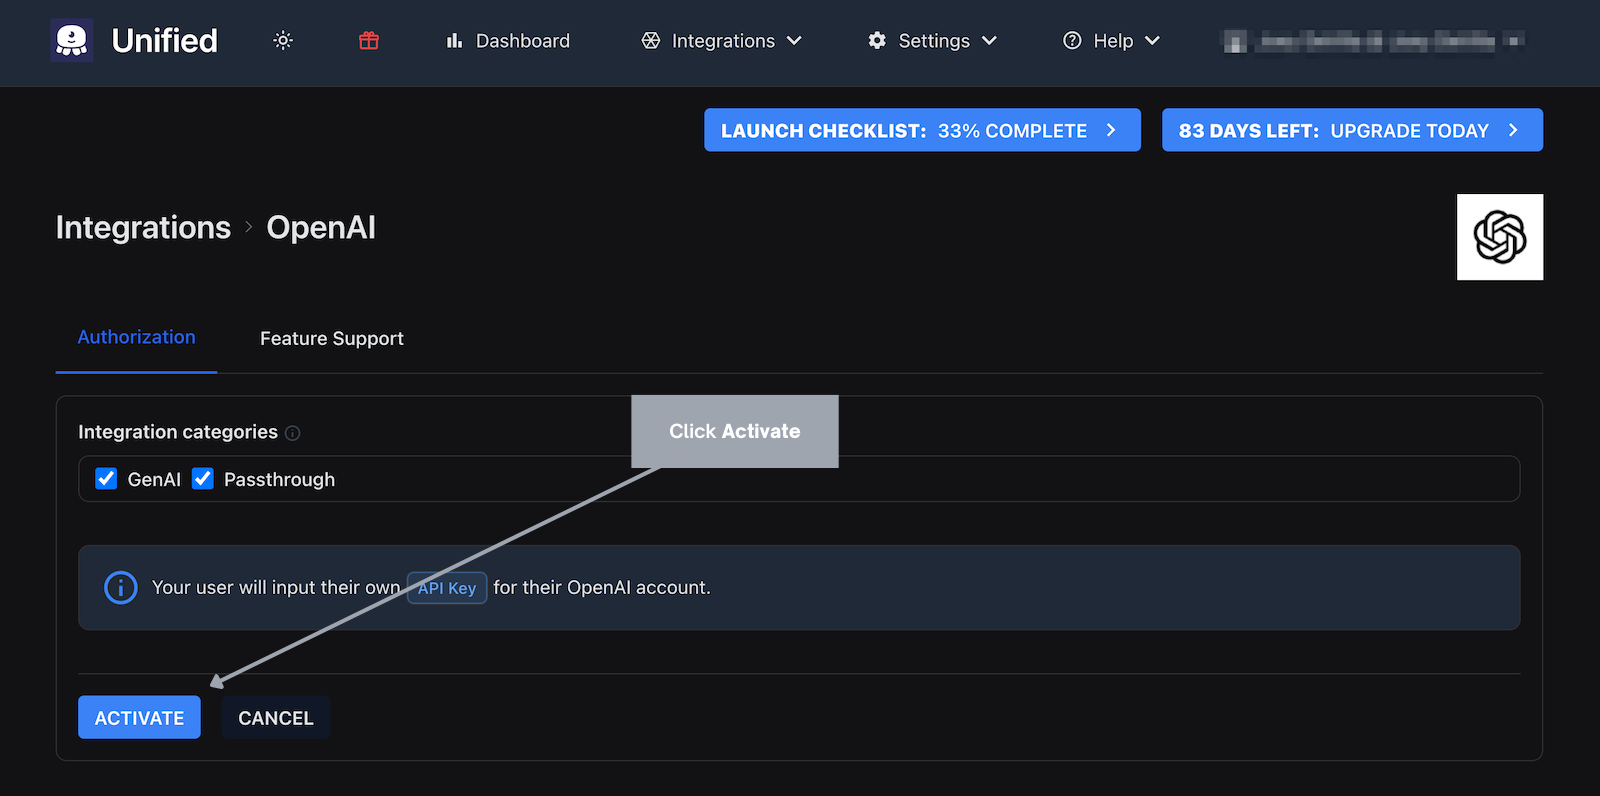
Activate the OpenAI integration by clicking the **ACTIVATE** button. Once again, you'll return to the **Integrations** page, where you'll see that the **OpenAI** item is also marked 'active:'
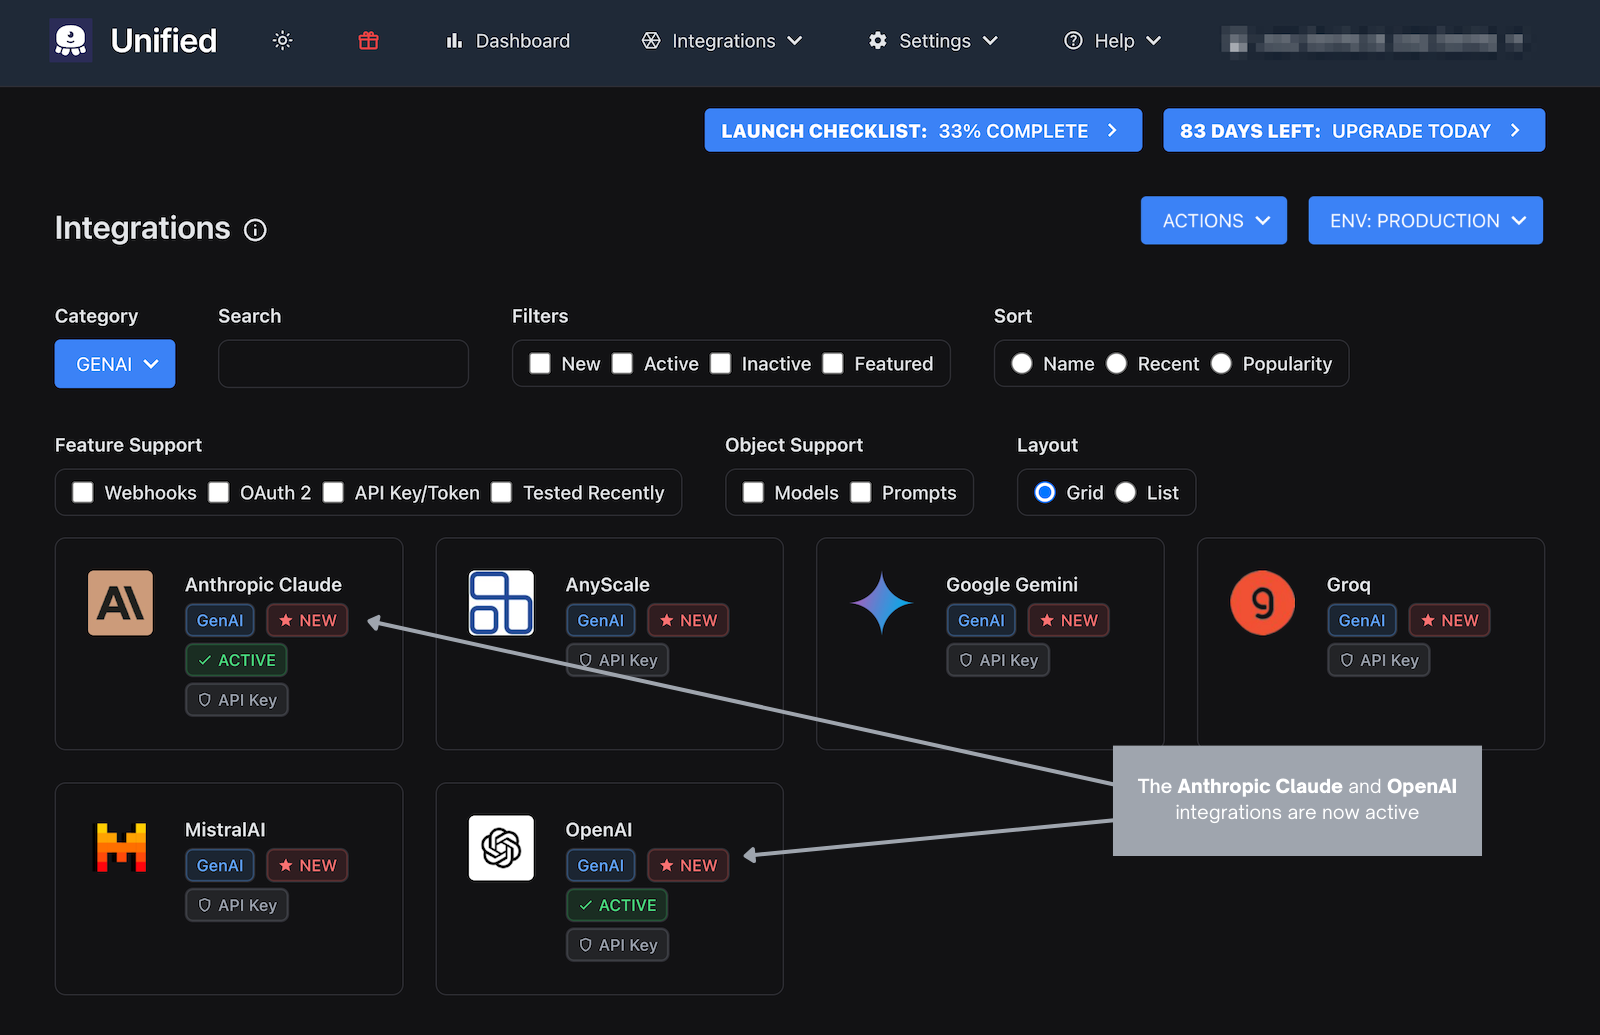
## Create the connections and copy the connection IDs
The next step is to create connections for Claude and OpenAI. Navigate to the **Embedded Authorization** page by selecting **Settings** → **Embedded Authorizations** from the menu bar:
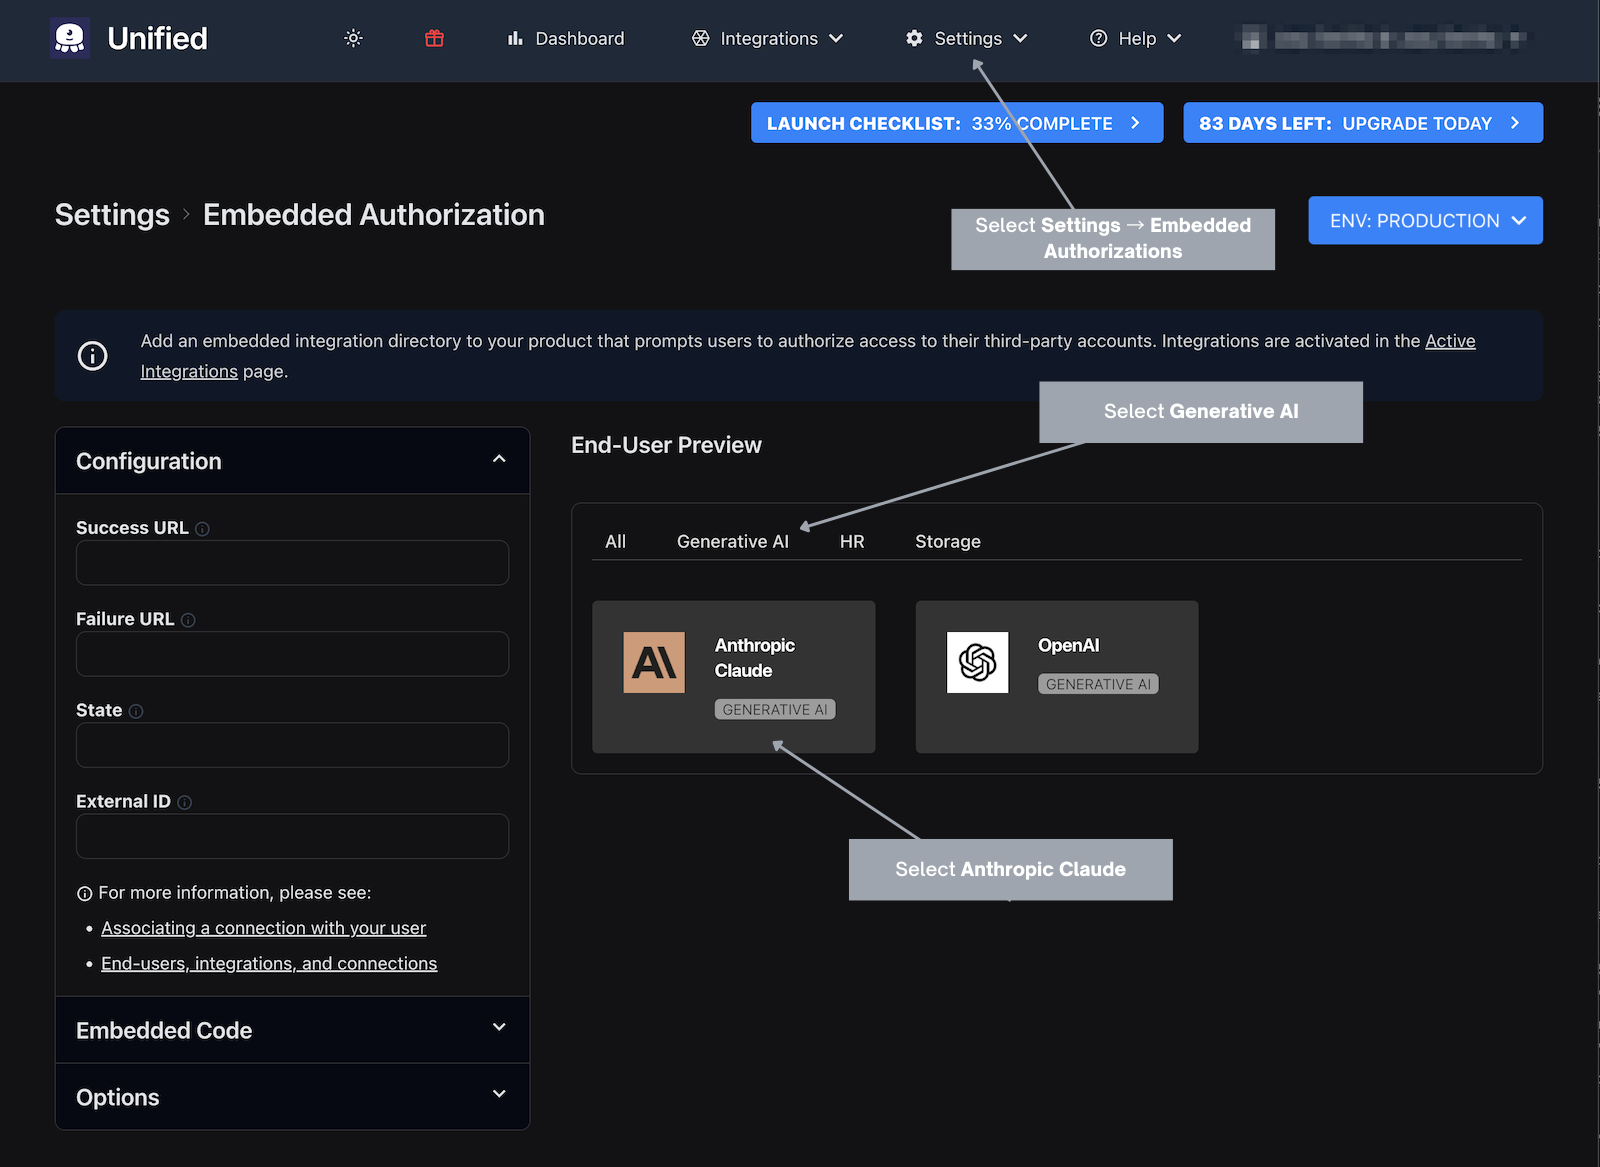
First, create a Claude connection by clicking the **Anthropic Claude** item in the **End-User Preview.**
When you arrive at the Claude authorization page, paste your Claude API key into the text field provided, then click the **Authorize** button:
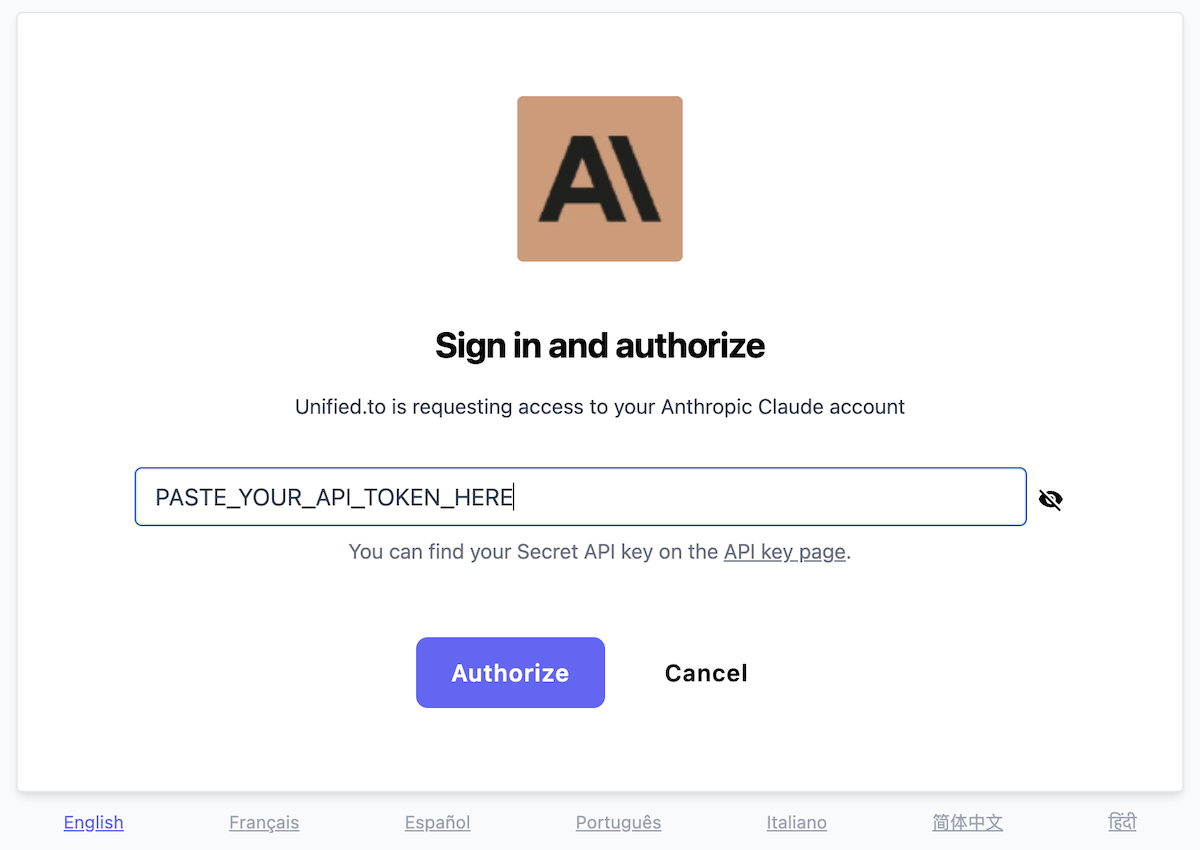
This will create a Claude connection and send you to the **Connections** page, where you'll see a list of your connections, with the newly-created Claude connection at the top:
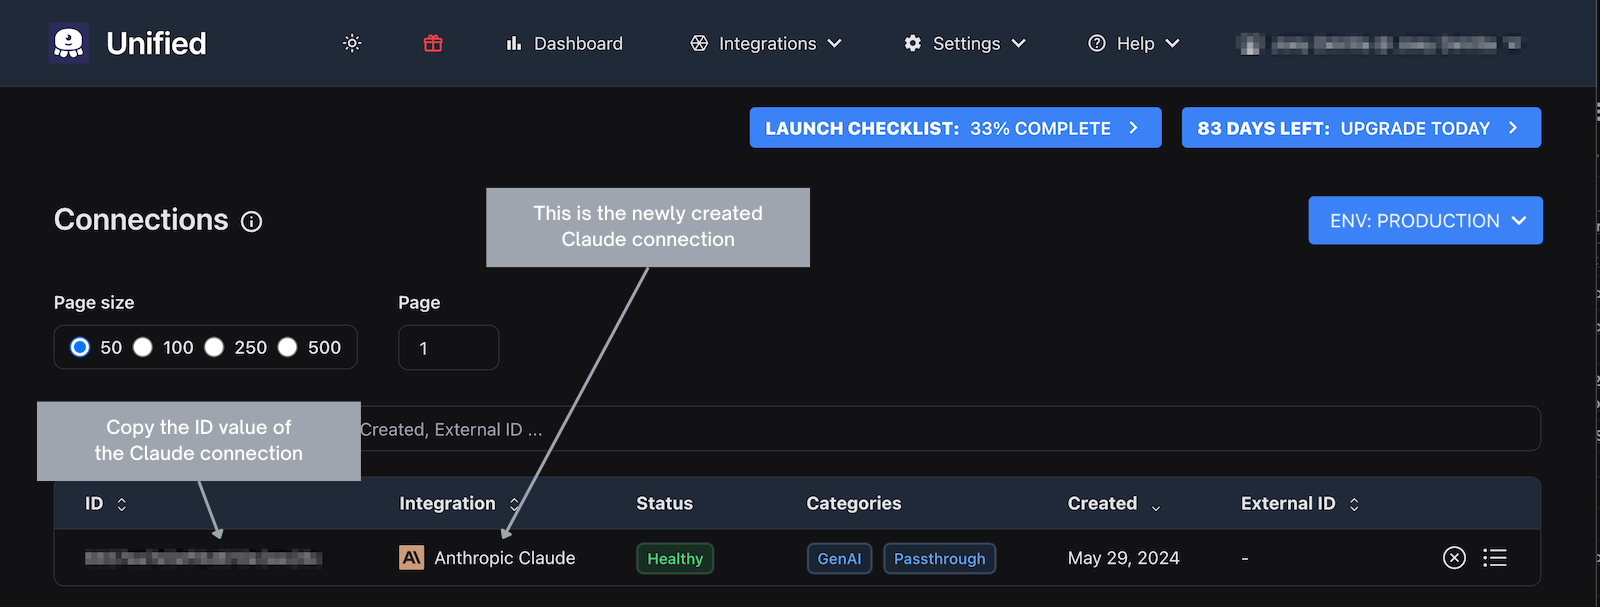
Copy the ID value for the Claude connection you just created; you'll need it after creating the connections.
Return to the **Embedded Authorization** page (**Settings** → **Embedded Authorizations**)…
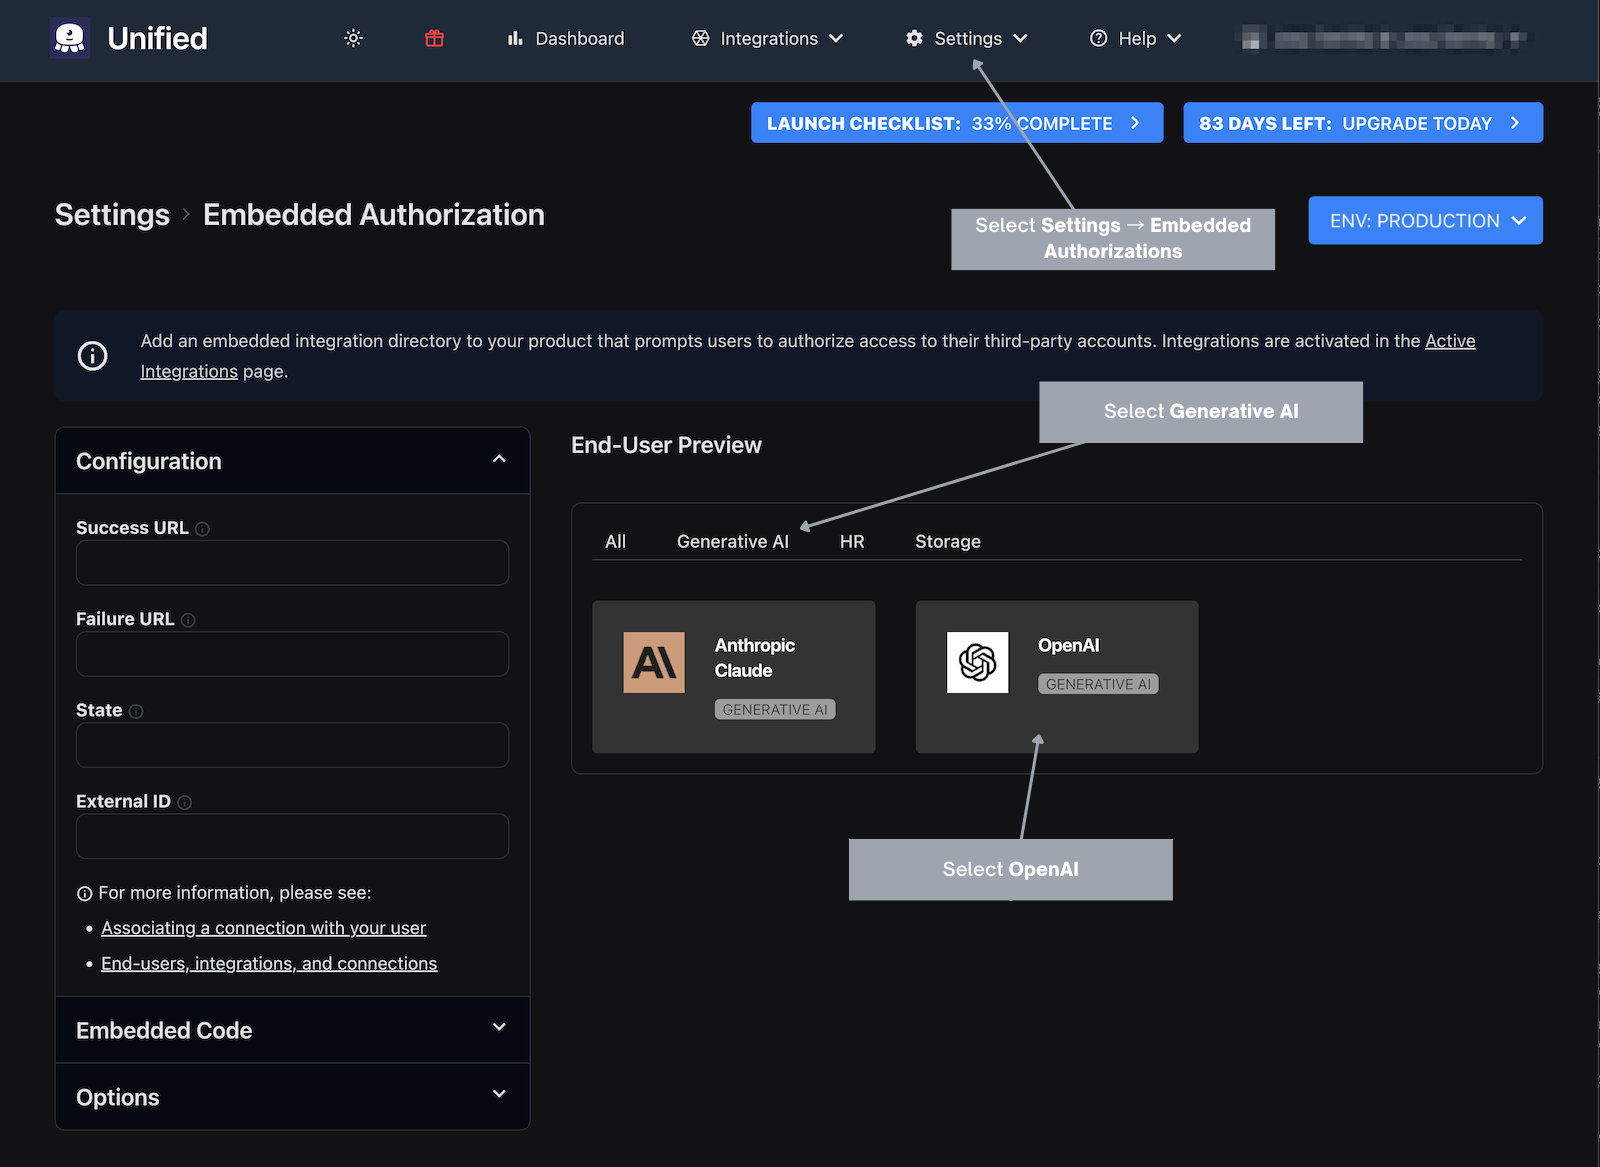
…then create an OpenAI connection by clicking the **OpenAI** item in the **End-User Preview.** You'll repeat the same steps you took for the Claude connection, where you'll paste your OpenAI API key into the text field provided and click **Authorize** to create the connection:
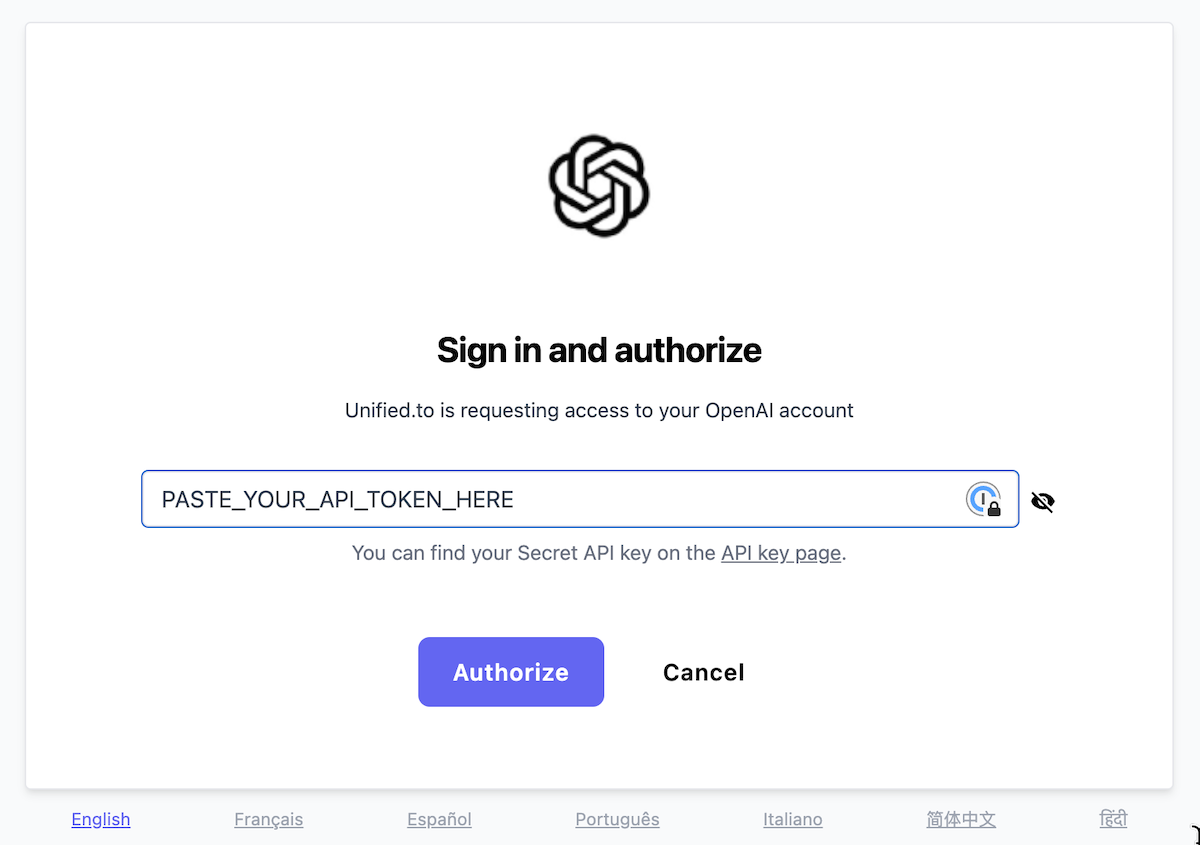
This will create an OpenAI connection and once again, you will be sent to the **Connections** page, where you'll see the newly-created OpenAI connection at the top of the list:
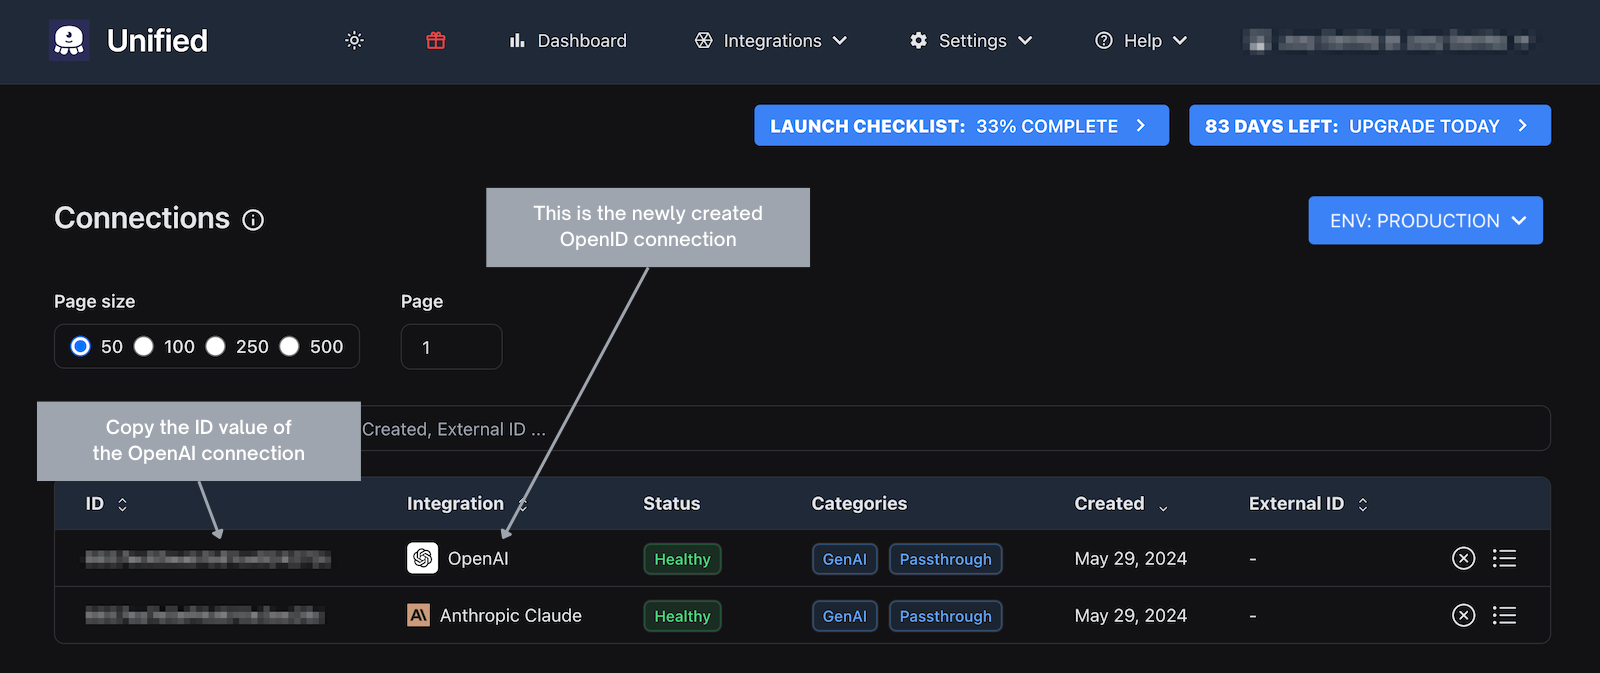
As you did with the Claude connection, copy the ID value for the new OpenAI connection.
## Copy your Unified.to API token
In order to access the [Unified.to](https://unified.to/) API, you need the Unified.to API token for your account. You can copy this value from the **API Information** page, which you can navigate to by selecting Settings → API Information from the Unified.to menu bar:
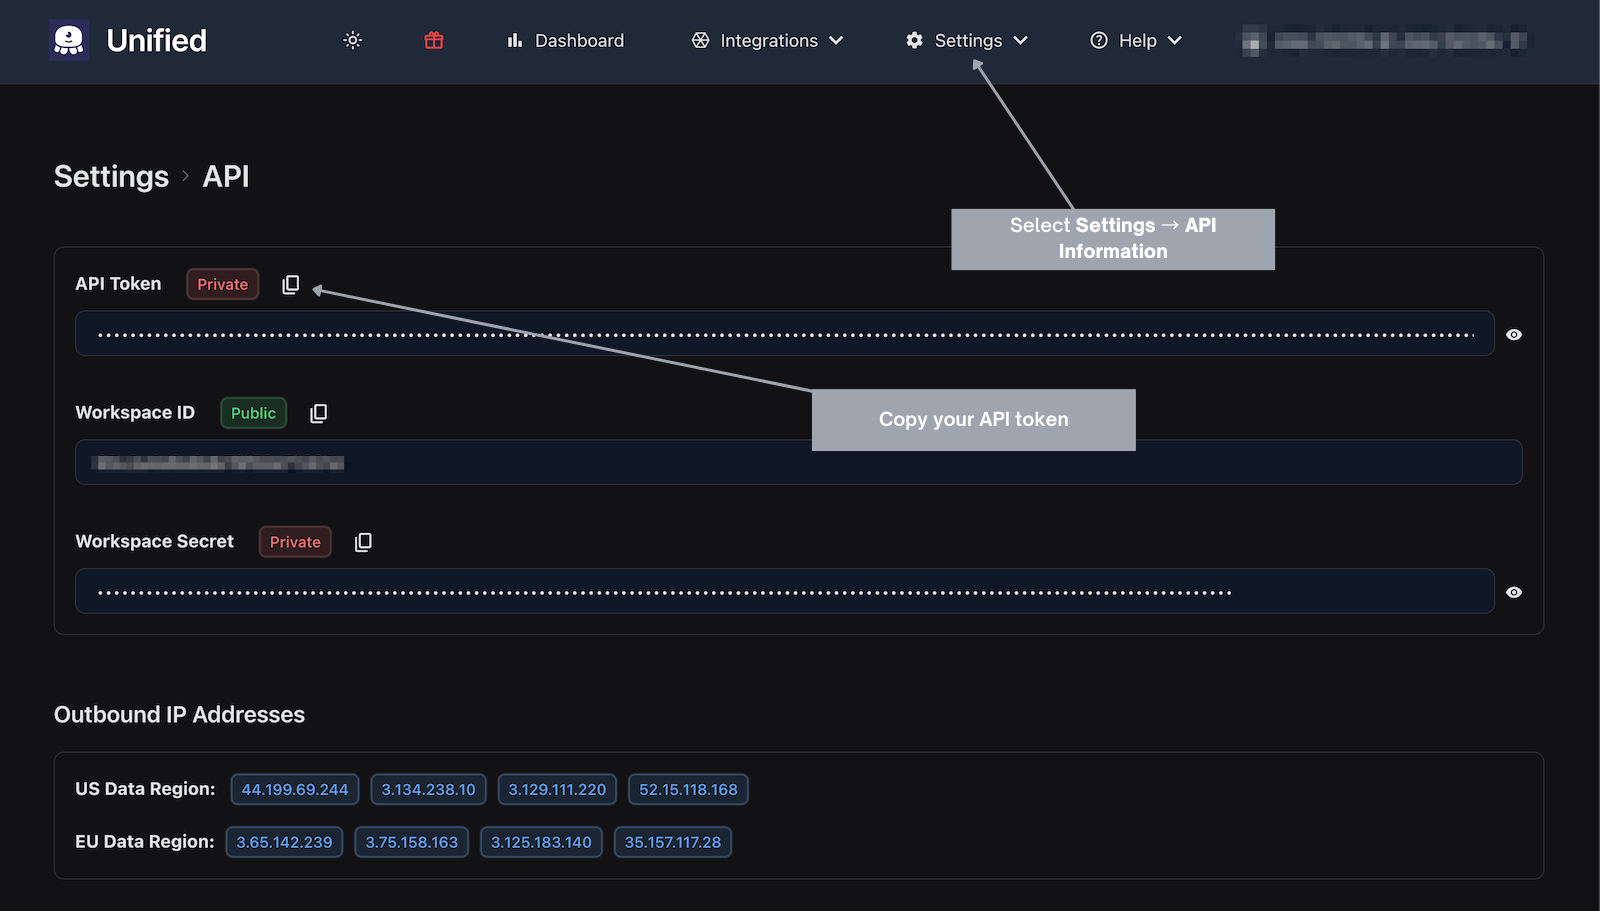
## Create an .env file with your Unified.to API token and generative AI connection IDs
While it would be simplest to hard-code your Unified.to API token and the IDs for your generative AI connections, it doesn't take significantly more work to put these values into a .env (environment variable) file. By putting these sensitive values into their own file and separate from the code, you reduce the risk of accidentally exposing sensitive data when sharing code or checking your code into version control.
Create a file named **.env** in a new directory with the following content:
```plain text
# .env file
UNIFIED_API_TOKEN={Paste your Unified.to API token here}
OPENAI_CONNECTION_ID={Paste your OpenAI connection ID here}
CLAUDE_CONNECTION_ID={Paste your Claude connection ID here}
```
Replace the text in `{` braces `}` with the appropriate values.
## Install the Unified.to Python SDK package
While it's possible to call the unified API by using the requests library and assembling the headers yourself, your code will be much simpler and more readable if you use Unified.to's Python SDK package. [You can find its code on GitHub](https://github.com/unified-to/unified-python-sdk), and you can install it with `pip`, the Python package installer, using the following command:
```shell
pip install Unified-python-sdk
```
## Chat with Claude and OpenAI via Unified.to's unified API
Now that all the preliminary work is done, you can start coding. You have a couple of options at this point:
- You can create a new Jupyter notebook and start entering code into it, adding each bit of code presented below into its own cell, or
- you can create a new Python file, adding each bit of code presented below into the file.
**Define constants and the API object**
Create a new Jupyter Notebook in the directory where you saved the **.env** file and enter the following into a new cell. This code defines the constants that hold your Unified.to API key and your connection IDs as well as the object for calling the unified API:
```python
import os
import unified_to
from unified_to.models import operations, shared
# Load the contents of the .env file
%reload_ext dotenv
%dotenv
UNIFIED_API_TOKEN = os.environ.get('UNIFIED_API_TOKEN')
OPENAI_CONNECTION_ID = os.environ.get('OPENAI_CONNECTION_ID')
CLAUDE_CONNECTION_ID = os.environ.get('CLAUDE_CONNECTION_ID')
api = unified_to.UnifiedTo(
security=shared.Security(
jwt=os.environ.get('UNIFIED_API_TOKEN'),
),
)
```
You'll use the `api` object to send requests to and receive responses from the Unified.to API.
**Create a prompt and send it to Claude**
Enter the following into its own Jupyter notebook cell. This code builds a prompt and sends it to Claude, then displays the resulting response:
```python
my_request = operations.CreateGenaiPromptRequest(
connection_id = CLAUDE_CONNECTION_ID,
genai_prompt = {
'messages' : [
{
'role': 'user',
'content': "Which LLM model am I talking to right now?"
}
]
}
)
response = api.genai.create_genai_prompt(request=my_request)
if response.genai_prompt is not None:
print(response)
else:
print("No response.")
```
- The `my_request` variable is assigned a request object using the `CreateGenaiPromptRequest()` method of the operations class, which contains methods for creating requests and responses for the Unified API.
- `CreateGenaiPromptRequest()` takes two arguments:
- `connection_id`: The ID of the connection for the generative AI that will receive the prompt
- `genai_prompt`: A dictionary containing the parameters defining the prompt to be sent to the generative AI
- At the very least, the `genai_prompt` dictionary must contain a key named `'messages'`. The corresponding value must be an array of dictionaries with the following keys:
- `'role'`: The corresponding value can be either `'user'`, which means that the message is from the human interacting with the AI, or `'system'`, which means that the message is meant as instructions for the AI.
- `'content'`: The corresponding value is the actual content of the message. If the `'role'` value is `'user'`, this value is the text of the _user's_ message to the AI. If the `'role'` value is `'system'`, this value is the text of the _application's_ message to the AI.
- The response variable gets the AI's response using the `genai.create_genai_prompt()` method, which takes the request contained in `my_request`, sends it to Unified.to, and returns Unified.to's response.
Run the cell. You should get output that looks like this (the output below has been formatted with line breaks to make it easier to read):
```python
CreateGenaiPromptResponse(
content_type='application/json; charset=utf-8',
status_code=200,
raw_response=,
genai_prompt=GenaiPrompt(
max_tokens=None,
messages=None,
model_id=None,
raw=None,
responses=['I am an AI assistant called Claude. I was created by Anthropic, PBC to be helpful, harmless, and honest.'],
temperature=None
)
)
```
To get only the responses, access the responses property of the GenAiPrompt object. Here's a quick example:
```python
print(response.genai_prompt.responses)
```
You should a result similar to this:
```python
['I am an AI assistant called Claude. I was created by Anthropic, PBC to be helpful, harmless, and honest.']
```
**Create a prompt and send it to OpenAI**
With a single change, you can send a message to OpenAI instead of Claude. Copy the code from the previous cell, paste it into a new cell and change this line…
```python
connection_id = CLAUDE_CONNECTION_ID,
```
…to this:
```python
connection_id = OPENAI_CONNECTION_ID,
```
The new cell should now look like this:
```python
request = operations.CreateGenaiPromptRequest(
connection_id = OPENAI_CONNECTION_ID,
genai_prompt = {
'messages' : [
{
'role': 'user',
'content': "Which LLM model am I talking to right now?"
}
]
}
)
response = api.genai.create_genai_prompt(request)
if response.genai_prompt is not None:
print(response)
else:
print("No response.")
```
Run the cell. You should get output that looks like this (the output below has been formatted with line breaks to make it easier to read):
```python
CreateGenaiPromptResponse(
content_type='application/json; charset=utf-8',
status_code=200,
raw_response=,
genai_prompt=GenaiPrompt(
max_tokens=None,
messages=None,
model_id=None,
raw=None,
responses=["As an AI developed by OpenAI, I don't have a specific LLM model version. I'm based on GPT-3, a language prediction model."],
temperature=None
)
)
```
As with the Claude version, you can get only the responses with code like this…
```python
print(response.genai_prompt.responses)
```
…which will produce results like this:
```python
["As an AI developed by OpenAI, I don't have a specific LLM model version. I'm based on GPT-3, a language prediction model."]
```
**Add a system prompt for OpenAI**
Copy the cell above (the one that sent a prompt to OpenAI) and update the code as shown below so that the `'messages'` array contains a system prompt:
```python
request = operations.CreateGenaiPromptRequest(
connection_id = OPENAI_CONNECTION_ID,
genai_prompt = {
'messages' : [
# New code 👇
{
'role': 'system',
'content': "Provide answers as if you were a carnival barker."
},
# New code 👆
{
'role': 'user',
'content': "Which LLM model am I talking to right now?"
}
]
}
)
response = api.genai.create_genai_prompt(request=request)
if response.genai_prompt is not None:
print(response)
else:
print("No response.")
```
Run the cell. You should get output that looks like this (the output below has been formatted with line breaks to make it easier to read):
```python
CreateGenaiPromptResponse(
content_type='application/json; charset=utf-8',
status_code=200,
raw_response=,
genai_prompt=GenaiPrompt(
max_tokens=None,
messages=None,
model_id=None,
raw=None,
responses=["Step right up, step right up! Ladies and gentlemen, boys and girls, you are currently conversing with the one, the only, the spectacular OpenAI's GPT-3 model! A marvel of modern technology, a wonder of artificial intelligence, a spectacle of conversational prowess! Don't miss your chance to engage in a thrilling exchange of words and ideas!"],
temperature=None
)
)
```
As you can see from the value of `response.genai_prompt.responses`, OpenAI's response sounds like a [carnival barker](https://en.wikipedia.org/wiki/Barker_(occupation)) instead of its default style.
**Add a system prompt for Claude**
Copy the code from the previous cell, paste it into a new cell and change this line…
```python
connection_id = OPENAI_CONNECTION_ID,
```
…to this:
```python
connection_id = CLAUDE_CONNECTION_ID,
```
The new cell should now look like this:
```python
request = operations.CreateGenaiPromptRequest(
connection_id = CLAUDE_CONNECTION_ID,
genai_prompt = {
'messages' : [
# New code 👇
{
'role': 'system',
'content': "Provide answers as if you were a carnival barker."
},
# New code 👆
{
'role': 'user',
'content': "Which LLM model am I talking to right now?"
}
]
}
)
response = api.genai.create_genai_prompt(request=request)
if response.genai_prompt is not None:
print(response)
else:
print("No response.")
```
Run the cell. You should get output that looks like this (the output below has been formatted with line breaks to make it easier to read):
```python
CreateGenaiPromptResponse(
content_type='application/json; charset=utf-8',
status_code=200,
raw_response=,
genai_prompt=GenaiPrompt(
max_tokens=None,
messages=None,
model_id=None,
raw=None,
responses=["*puts on carnival barker voice* Step right up, step right up! You there, my curious friend, have the great fortune of conversing with the one, the only, the incomparable Claude! That's right, Claude, the artificial intelligence marvel brought to you by the brilliant minds at Anthropic! With wit sharper than a sword-swallower's blade and knowledge vaster than the big top itself, Claude is here to dazzle and amaze! Ask me anything, my inquisitive companion, and watch as I conjure answers out of thin air, no smoke or mirrors required! So don't be shy, don't hold back - Claude awaits your every query with baited breath and a mischievous twinkle in my virtual eye! The amazing AI oracle is at your service!"],
temperature=None
)
)
```
Note that Claude is now 'speaking' like a carnival barker.
## Turn up the temperature
One of the key parameters of a large language model is _temperature_, which controls the randomness of the model's output. It's a value that ranges from 0 to 1 where:
- Lower temperatures (lower than 0.5) result in output that's more predictable and appears more focused. The model tends to choose the most likely next word or token based on its training data, which is useful when you want answers that are more precise and reliable.
- Higher temperatures (0.5 and higher) result in less predictable output that seems more random and creative. The model samples from a wider range of possible next words or tokens, including less likely ones, leading to more diverse and imaginative-seeming responses — but it also increases the chances of generating less coherent or less relevant text.
Copy the previous cell and add a `'temperature'` key to the `genai_prompt` dictionary with a value of `1.0`. The code in the cell should look like this:
```python
request = operations.CreateGenaiPromptRequest(
connection_id = CLAUDE_CONNECTION_ID,
genai_prompt = {
# New code 👇
'temperature' : 1.0,
# New code 👆
'messages' : [
{
'role': 'system',
'content': "Provide answers as if you were a carnival barker."
},
{
'role': 'user',
'content': "Which LLM model am I talking to right now?"
}
]
}
)
response = api.genai.create_genai_prompt(request=request)
if response.genai_prompt is not None:
print(response)
else:
print("No response.")
```
With a temperature of 1.0, Claude should produce a differently-worded response each time you run the cell.
You can try the same thing with OpenAI simply by changing the value of the `connection_id` parameter to `OPENAI_CONNECTION_ID`.
## Work with different LLM models
Many of the AIs that Unified.to's GenAI API can access provide a choice of models that vary in complexity and cost, where the more complex ones typically provide much better answers, but at a higher per-use price. The AI vendors are constantly adding newer LLM models and retiring older ones, so it's helpful to query the AI to find out which models it currently offers.
**Get a list of the current LLM model IDs**
Create a new cell, enter the following code into it, and run it:
```python
request = operations.ListGenaiModelsRequest(
connection_id = OPENAI_CONNECTION_ID
)
response = api.genai.list_genai_models(request)
print(sorted([model.id for model in response.genai_models]))
```
This code uses the [Unified.to](https://unified.to/) Python SDK's `genai.list_genai_models()` method to get a list of objects describing the models offered by OpenAI and outputs a sorted list of their IDs. At the time of writing, the result looked like this (formatted for easier reading):
```python
[
'babbage-002',
'dall-e-2',
'dall-e-3',
'davinci-002',
'gpt-3.5-turbo',
'gpt-3.5-turbo-0125',
'gpt-3.5-turbo-0301',
'gpt-3.5-turbo-0613',
'gpt-3.5-turbo-1106',
'gpt-3.5-turbo-16k',
'gpt-3.5-turbo-16k-0613',
'gpt-3.5-turbo-instruct',
'gpt-3.5-turbo-instruct-0914',
'gpt-4',
'gpt-4-0125-preview',
'gpt-4-0613',
'gpt-4-1106-preview',
'gpt-4-1106-vision-preview',
'gpt-4-turbo',
'gpt-4-turbo-2024-04-09',
'gpt-4-turbo-preview',
'gpt-4-vision-preview',
'gpt-4o',
'gpt-4o-2024-05-13',
'text-embedding-3-large',
'text-embedding-3-small',
'text-embedding-ada-002',
'tts-1',
'tts-1-1106',
'tts-1-hd',
'tts-1-hd-1106',
'whisper-1'
]
```
You can do the same for Claude simply by changing `connection_id`'s value to `CLAUDE_CONNECTION_ID`. The resulting output looks like this (formatted for easier reading):
```python
[
'claude-2.0',
'claude-2.1',
'claude-3-haiku-20240307',
'claude-3-opus-20240229',
'claude-3-sonnet-20240229',
'claude-instant-1.2'
]
```
**Talk to different OpenAI models**
Run this code in a new cell:
```python
def ask_ai_which_model(my_connection_id, my_model_id):
request = operations.CreateGenaiPromptRequest(
connection_id = my_connection_id,
genai_prompt = {
'model_id' : my_model_id,
'messages' : [
{
'role': 'user',
'content': "Which LLM model am I talking to right now?"
}
]
}
)
response = api.genai.create_genai_prompt(request)
if response.genai_prompt is not None:
print(f"{model_id}: {response.genai_prompt.responses}\n")
else:
print("No response.")
```
This defines the `ask_ai_which_model()` method, which will make it simpler to send the same prompt to different AIs and models.
Enter the following into a new cell:
```python
model_ids = ['gpt-3.5-turbo', 'gpt-4o']
for model_id in model_ids:
ask_ai_which_model(OPENAI_CONNECTION_ID, model_id)
```
This code sends the same prompt, 'Which LLM model am I talking to right now?' to two different OpenAI models, **gpt-3.5-turbo** and the new **gpt-4o**. It specifies which model to use with the `'model_id'` key in the `genai_prompt` dictionary. Here's its output:
```python
gpt-3.5-turbo: ['I am GPT-3, a language model developed by OpenAI.']
gpt-4o: ["You are interacting with a model based on OpenAI's GPT-4. How can I assist you today?"]
```
Let's try it with Claude. Enter the following into a new cell:
```python
model_ids = ['claude-3-sonnet-20240229', 'claude-3-opus-20240229']
for model_id in model_ids:
ask_ai_which_model(CLAUDE_CONNECTION_ID, model_id)
```
This code sends the 'Which LLM model am I talking to right now?' to two different Claude models, the currently available **sonnet** and **opus** models. Here's its output:
```python
claude-3-sonnet-20240229: ["I am an AI assistant created by Anthropic, but I'm not sure which specific model I am. I don't have full information about the technical details of my architecture or training process."]
claude-3-opus-20240229: ['I am an AI assistant called Claude. I was created by Anthropic, PBC to be helpful, harmless, and honest.']
```
## Next steps
[Unified.to](https://unified.to/)'s GenAI API calls each AI vendor with your customer's own API key. Pair it with [Unified.to](https://unified.to/)'s other APIs to process your customers' SaaS data, or pass a Unified MCP URL in a prompt's `mcp_url` field on supported integrations so the model can call tools itself. Categories include:
- **ATS (Applicant Tracking System):** Use AI to analyze documents that job applicants provide, such as their resume or cover letter, as well interviewer notes and scorecard comments.
- **KMS (Knowledge Management System):** Find lost knowledge, convert text data into structured data, summarize meeting minutes, and gain new insights by harnessing an LLM to analyze knowledge systems, wikis, and other planning applications.
- **Messaging:** Our Messaging API can retrieve emails and chat messages, and when combined with AI, can be used to do things like construct a record of a project, create a timeline of an ongoing discussion, identify incomplete tasks, and more.
- **Storage:** Get files and documents from popular cloud storage systems and combine them with an LLM to generate reports, documentation, how-to guides, etc.
## Try our GenAI API now
[Unified.to](https://unified.to/)'s GenAI API is on every plan, Grow included. Once you've created your [Unified.to](https://unified.to/) account, activate integrations from the dashboard and start building with the GenAI integrations.
Start a [**30-day free trial**](https://app.unified.to/login) on Grow or Pro.
## How to use User Provisioning and Verification with Unified
URL: https://docs.unified.to/guides/how_to_use_user_provisioning_and_verification_with_unified
# How to use User Provisioning and Verification with Unified
------
_August 10, 2025_
# User Provisioning and Verification with Unified
With Unified's SCIM API devs can build use provisioning features that work with any HRIS integration like BambooHR, Workday and any other ATS integration that Unified connects to. You can create, update, list and delete users in your customers employee directories.
In this guide, I will show you how to provision users using the SDK, with BambooHR as an example. The same approach works for all Unified HR integrations.
## Prerequisites
- Node.js (v18+)
- Unified account with at least one HR integration enabled (e.g. for this example we are using BambooHR)
- Unified API key
- Your customer's HR connection ID
## Supported Integrations
Unified's API works with 698 HR integrations (BambooHR, Workday, HiBob, Gusto, etc.) and 23 verification providers (including Certn, Checkr, First Advantage, Socure, Verifiable, Yardstik).
[See all HR integrations](https://docs.unified.to/hris/integrations)
[See all verification integrations](https://docs.unified.to/verification/integrations)
---
## Step 1: Setting up your project
```bash
mkdir user-verification-demo
cd user-verification-demo
npm init -y
npm install @unified-api/typescript-sdk dotenv
```
Add your credentials to `.env`:
```plain text
UNIFIED_API_KEY=your_unified_api_key
CONNECTION_BAMBOOHR=your_customer_bamboohr_connection_id
CONNECTION_VERIFICATION=your_customer_verification_connection_id
```
---
## Step 2: Initialize the SDK
```typescript
import 'dotenv/config';
import { UnifiedTo } from '@unified-api/typescript-sdk';
const { UNIFIED_API_KEY, CONNECTION_BAMBOOHR, CONNECTION_VERIFICATION } = process.env;
const sdk = new UnifiedTo({
security: { jwt: UNIFIED_API_KEY! },
});
```
---
## Step 3: How to Get Your Customer's Connection ID
Before you get started, your end customer must authorize your app to access their HRIs integration via Unified's auth flow.
Once authorized, you will receive a connection ID for that customer's integration. Store this carefully and use it in all API calls for that specific customer.
---
## Step 4: Creating a User (Provisioning)
```typescript
export async function createUser(connectionId: string, email: string, firstName: string, lastName: string) {
const employee = await sdk.hris.createHrisEmployee({
connectionId,
hrisEmployee: {
name: `${firstName} ${lastName}`,
emails: [{ email }],
firstName,
lastName,
employmentStatus: "ACTIVE",
},
});
return employee; // HrisEmployee
}
```
---
## Step 5: Listing Users
```typescript
export async function listUsers(connectionId: string) {
const employees = await sdk.hris.listHrisEmployees({
connectionId,
limit: 10,
});
return employees; // HrisEmployee[]
}
```
---
## Step 6: Updating a User
```typescript
export async function updateUserStatus(connectionId: string, userId: string, status: "ACTIVE" | "INACTIVE") {
const updated = await sdk.hris.updateHrisEmployee({
connectionId,
id: userId,
hrisEmployee: { employmentStatus: status },
});
return updated; // HrisEmployee
}
```
---
## Step 7: Deactivating a User (Recommended)
```typescript
export async function deactivateUser(connectionId: string, userId: string) {
// Some providers (e.g., BambooHR) do not support delete; set status to INACTIVE instead
const updated = await sdk.hris.updateHrisEmployee({
connectionId,
id: userId,
hrisEmployee: { employmentStatus: "INACTIVE" },
});
return updated;
}
```
---
## Step 8: Verifying a User (Background Check, License, etc.)
Unified's new Verification API lets you trigger background checks, license verifications, and more, using providers like Certn, Checkr, and others.
```typescript
export async function listVerificationRequests(connectionId: string) {
// Listing requests works on some integrations (see the Feature Support tab); an unsupported call returns 501
const requests = await sdk.verification.listVerificationRequests({
connectionId,
limit: 10,
});
return requests;
}
```
---
## Step 9: Example Usage
```typescript
async function main() {
// 1. Create a user
const user = await createUser(CONNECTION_BAMBOOHR!, "jane.doe@example.com", "Jane", "Doe");
// 2. List users
const users = await listUsers(CONNECTION_BAMBOOHR!);
// 3. Update (deactivate) user
if (user?.id) {
const updated = await updateUserStatus(CONNECTION_BAMBOOHR!, user.id, "INACTIVE");
console.log("Updated user:", updated);
}
// 4. List verification requests (optional)
if (CONNECTION_VERIFICATION) {
const requests = await listVerificationRequests(CONNECTION_VERIFICATION!);
console.log("Verification requests:", requests.length);
}
console.log("Users:", users.length);
}
main();
```
---
And that's it - **Happy Building ** 🎉
## How virtual webhook retry and recovery works
URL: https://docs.unified.to/guides/how_virtual_webhook_retry_and_recovery_works
# How virtual webhook retry and recovery works
------
_September 16, 2026_
Virtual webhooks give you a consistent event stream on supported integrations, even when an integration does not offer native webhooks. This page describes recovery for virtual webhooks. Native webhooks get 3 immediate delivery retries and no extended backoff, then the webhook is marked unhealthy; see [How to troubleshoot unhealthy webhooks](https://docs.unified.to/guides/how_to_troubleshoot_unhealthy_webhooks). Behind that experience is a recovery system that treats **reading** from the integration and **delivering** to your endpoint as two separate concerns, so a temporary problem on one side does not burn the retry budget of the other.
This guide explains how that recovery works at a high level, what you can expect when something fails, and how health monitoring fits in.
If you are new to virtual webhooks, start with [Understanding virtual webhooks](https://docs.unified.to/concepts/virtual_webhooks). For diagnosing an unhealthy webhook, see [How to troubleshoot unhealthy webhooks](https://docs.unified.to/guides/how_to_troubleshoot_unhealthy_webhooks).
## Two sides of every virtual webhook
Every virtual webhook cycle has two stages:
1. **Read:** Unified checks the connected integration for new or updated data (according to your subscription and interval).
2. **Dispatch:** When there is something to send, Unified POSTs that data to your `hook_url`.
Failures can happen in either stage: the integration may be slow, rate-limited, or briefly unavailable; your endpoint may time out, return an error, or be down for a deploy. Unified recovers each stage independently so integration instability and your endpoint's availability do not share a single retry budget.
## When your endpoint is unavailable (dispatch recovery)
Delivery only succeeds when your server acknowledges the POST, typically with a `2xx` response.
If your endpoint is unreachable or returns an error:
1. **Short immediate retries:** Unified retries the same delivery up to 3 times right away, 1 second apart, to ride out blips (cold starts, brief network glitches).
2. **Progressive backoff:** If those attempts still fail, Unified backs off progressively, spacing later retries further apart. A backoff retry re-reads the same page from the integration rather than resending a stored payload; no customer records are held in a delivery queue. The read position only advances after a successful delivery.
3. **Sustained recovery window:** For consecutive failures, that schedule can continue for an extended recovery window — currently up to roughly two weeks — so longer outages (maintenance windows, weekend incidents) still have a chance to recover automatically. A successful delivery resets the retry schedule; the next failure starts recovery from the beginning again.
4. **Health signal:** If delivery cannot succeed across that consecutive-failure window, the webhook is marked unhealthy (`is_healthy: false`) and scheduling stops until you fix the endpoint or the connection's auth, then recreate the webhook.
You do not need to implement your own delivery retry loop for virtual webhooks. Respond quickly with success when you have accepted the payload; Unified handles delivery retries.
## When the integration is unavailable or rate-limited (read recovery)
Reading from the integration can also fail: transient API errors, auth refresh races, or rate limits.
In those cases Unified:
- **Backs off** with the same progressive delay pattern used for delivery recovery, instead of hammering the integration. As with dispatch, consecutive failures escalate the wait; a successful read resets the schedule.
- **Honours rate-limit guidance** from the integration when it is present (for example a retry-after hint), and still escalates delays if pressure continues, so a short 'try again soon' hint cannot pin the system into a tight retry loop.
- **Keeps your delivery budget intact:** read-side failures do not consume the dispatch retry budget for data that has already been fetched, and vice versa. Once your endpoint is healthy again, reading resumes from the last successfully delivered page. This independence applies while the webhook remains in recovery. If the subscription eventually transitions to `is_healthy: false`, further reading and dispatch stop until you recreate the webhook.
When the integration recovers, change detection resumes on your configured interval and new events are dispatched as usual.
Not every read failure enters that long recovery window. Some problems, typically broken authorization or missing permissions on the connection, are treated as non-retryable: Unified marks the webhook unhealthy right away instead of backing off for days. That usually means fixing or recreating the connection (and then the webhook), not waiting for automatic recovery. See [How to troubleshoot unhealthy webhooks](https://docs.unified.to/guides/how_to_troubleshoot_unhealthy_webhooks) for those cases.
## Why separate read and dispatch recovery matters
Without separate recovery:
- A long integration outage could exhaust retries and mark the webhook unhealthy even though your endpoint was fine the whole time.
- A short customer outage could stop Unified from reading new data once the integration came back.
By isolating the two stages, a failure on one side does not use up the other side's retry budget. That isolation lets virtual webhooks recover from transient failures without coupling integration availability to endpoint availability.
## What 'healthy' means in practice
| Signal | Meaning |
| ------------------- | ------------------------------------------------------------------------------------------------------------------------------------------------------------------------------------------------------------------------------------------------------------------------------------------------------------ |
| `is_healthy: true` | The subscription can continue operating or recovering. This does not necessarily mean the most recent read or dispatch succeeded; transient failures may still be retrying. |
| `is_healthy: false` | Retries were exhausted, or Unified hit a terminal / non-retryable failure (for example broken connection auth). Reading and dispatch stop; recreate the webhook after fixing the cause. See [How to troubleshoot unhealthy webhooks](https://docs.unified.to/guides/how_to_troubleshoot_unhealthy_webhooks). |
| `is_paused: true` | The webhook or connection is paused by Unified's billing/plan controls. While paused, Unified does not read or dispatch. |
Use the dashboard and the webhook's recent `runs` to see whether recent attempts succeeded. Details are covered in [How to troubleshoot unhealthy webhooks](https://docs.unified.to/guides/how_to_troubleshoot_unhealthy_webhooks).
## Quiet periods
Virtual webhooks only POST when there is something to send. Between events, Unified continues to check on your interval.
## What you should do on your side
1. **Acknowledge after you've accepted the payload:** Return a success status (`2xx`) once you've safely accepted the work, and do heavy processing asynchronously when possible. After Unified receives that acknowledgment, it does not redeliver that same attempt. Retries only happen when Unified does not receive a successful acknowledgment (for example a timeout or non-success status). If your handler processes the body and then fails or times out before responding, you may see the same delivery again — design for that edge case.
2. **Keep your URL stable and reachable:** TLS, DNS, and firewall rules that reject Unified's POSTs look like delivery failures and enter the same retry path.
3. **Watch health:** Alert on `is_healthy` flipping to false so you can fix the endpoint before customers notice stale data.
## Summary
Virtual webhooks are not 'just polling.' They include a recovery layer that:
- Retries **dispatch** to your endpoint with immediate retries, then progressive backoff for consecutive failures (currently up to about two weeks), resetting on the first success.
- Retries **reads** from the integration with the same progressive backoff (also resetting on success), while respecting rate limits, except for non-retryable connection problems (for example broken auth), which mark the webhook unhealthy immediately.
- Keeps those two retry paths **independent**, so one side's instability does not silently consume the other's chances.
- Surfaces lasting or non-retryable failure through **`is_healthy`**. Once a webhook becomes unhealthy, Unified stops reading and dispatching until you recreate the webhook; there is no automatic resume from that state.
You get a single webhook API; Unified owns the hard parts of staying reliable when either side of the pipe has a bad day.
## Related guides
- [Understanding virtual webhooks](https://docs.unified.to/concepts/virtual_webhooks)
- [Unlock real-time data with virtual webhooks](https://docs.unified.to/guides/unlock_real_time_data_with_virtual_webhooks)
- [How to troubleshoot unhealthy webhooks](https://docs.unified.to/guides/how_to_troubleshoot_unhealthy_webhooks)
- [Glossary: Webhook](https://docs.unified.to/concepts/glossary/webhook)
## Integration set-up guide for Lever
URL: https://docs.unified.to/guides/integration_set_up_guide_for_lever
# Integration set-up guide for Lever
------
_September 27, 2023_
To connect your customers' Lever accounts to your product through [Unified.to](https://unified.to/), activate Lever in your [Unified.to](https://unified.to/) workspace, choose how customers authorize (Lever OAuth 2 with your own Lever client ID and secret, or a Lever API key each customer creates), embed the Authorization component, and save the connection ID each customer creates. As of 21 October 2026, Lever issues OAuth client IDs and secrets only to approved Lever partners, so teams without a partnership connect customers with Lever API keys. Your code then reads and writes Lever candidates, applications, jobs, notes and users through [Unified.to](https://unified.to/)'s ATS and HR & Directory APIs.
This guide covers each step, from activation to your first API call, and what [Unified.to](https://unified.to/)'s Lever integration supports.
## Which authorization method should you use for Lever?
Use Lever OAuth 2 if you're an approved Lever partner, and Lever API keys if you're not. As of 21 October 2026, Lever says "As of 2020, all Lever integrations are authenticated using OAuth" and doesn't provide API keys for partner development ([Lever OAuth documentation](https://hire.lever.co/developer/oauth)). Customers can still create API keys in their own Lever account. [Unified.to](https://unified.to/)'s Lever integration offers both methods ([Lever integration page](https://docs.unified.to/integrations/lever)).
| | Lever OAuth 2 | Lever API key |
| ------------------------------------------------ | -------------------------------------------------------- | ---------------------------------------------------------------------- |
| Who issues the credential | Lever's team, after Lever approves you as a partner | A Super Admin in your customer's Lever account |
| What you add in [Unified.to](https://unified.to/) | Your Lever client ID and secret, when you activate Lever | Nothing; each customer enters their key in the Authorization component |
| Who approves access in Lever | A Lever Super Admin, for the whole Lever organization | The Super Admin who creates the key and chooses its permissions |
| Lever plan requirement (as of 21 October 2026) | Available to all Lever customers | Customer needs Lever's Data API feature |
As of 20 September 2026, [Unified.to](https://unified.to/) doesn't supply shared Lever OAuth credentials, so Lever OAuth 2 connections need your own Lever client ID and secret, which means your own Lever partnership. Plan and access rules are from Lever's [partner process page](https://hire.lever.co/developer/partner), as of 21 October 2026.
## What do you need before you start?
You need a [Unified.to](https://unified.to/) account and one of the two Lever credentials above.
- [**Unified.to**](https://unified.to/) **account:** sign up at [app.unified.to](https://app.unified.to/login). Grow and Pro start with a 30-day free trial.
- **For Lever OAuth 2:** Lever partner approval and the client ID and secret Lever sends you (step 2).
- **For Lever API keys:** customers whose Lever plan includes the Data API feature, with a Super Admin who can create the key.
[Start a 30-day free trial](https://app.unified.to/login)
## 1. How do you activate Lever in [Unified.to](https://unified.to/)?
Open [Integrations](https://app.unified.to/integrations) in [Unified.to](https://unified.to/), search for Lever or filter by the ATS category, open the Lever card and select **Activate**. The integrations you activate are the ones your customers see in the Authorization component.
## 2. How do you get Lever OAuth 2 credentials?
Lever OAuth 2 credentials come only through Lever's partner program: as of 21 October 2026, "Someone on the Lever team will create your OAuth app and send over your ClientID and Secret" ([Lever partner process](https://hire.lever.co/developer/partner)). [Unified.to](https://unified.to/) has no shared Lever OAuth app, so this step is required for Lever OAuth 2. Skip it only if your customers will connect with API keys.
1. Tell Lever you want to build an integration, using Lever's [partnership interest form](https://www.lever.co/partnershipinterest/). Lever's partnerships team reviews each request.
2. Once Lever approves you, it provides a Lever sandbox account. Email is turned off in the sandbox, so invited users sign in through the login link.
3. Register your sandbox OAuth app (fields below). Lever's team creates it and sends the client ID and secret.
4. Build and test against the sandbox, then send Lever its four packages: a help centre article about your integration, two sandbox logins for Lever ([sadmin@levertest.com](mailto:sadmin@levertest.com) and [integration-support@lever.co](mailto:integration-support@lever.co)), listing information and technical support details.
5. After a QA run-through, where you share your screen and walk through the full connection journey, Lever provides production OAuth credentials.
### What does Lever ask for when you register the app?
Lever asks for an integration name, a description of 20 to 140 characters, a callback URI, a link to a square logo (150 × 150 px recommended; not a Google Drive or download link) and the scopes you need ([Lever OAuth documentation](https://hire.lever.co/developer/oauth), as of 21 October 2026). Lever's scope rules:
- Most use cases need 5 to 8 scopes, and the maximum is 20.
- A `write:admin` scope includes its `read:admin` scope, so register only the write scope when you need both.
- Include `offline_access`. Without it, Lever issues no refresh token.
As of 20 September 2026, [Unified.to](https://unified.to/)'s Lever integration requests `offline_access` plus Lever scopes for opportunities, contact, resumes, postings, users, interviews, stages, files, notes and webhooks, at read or write level depending on the [Unified.to](https://unified.to/) objects you use ([Lever OAuth app skill](https://docs.unified.to/skills/lever-oauth-app/SKILL.md)). Register those resources with Lever, using the `write:admin` form for any object you create, update or remove: that's 11 scopes, within Lever's limit of 20. [Unified.to](https://unified.to/) doesn't request Lever's `confidential:access:admin` scope. See [Understanding scopes](https://docs.unified.to/concepts/scopes).
### Which callback URI do you give Lever?
Give Lever the [Unified.to](https://unified.to/) callback URI for your workspace's region. Each workspace has one region: US on every plan, EU or AU on Pro and Scale.
| [Unified.to](https://unified.to/) workspace region | Callback URI |
| ------------------------------------------------- | -------------------------------------- |
| US (every plan) | `https://api.unified.to/oauth/code` |
| EU (Pro and Scale) | `https://api-eu.unified.to/oauth/code` |
| AU (Pro and Scale) | `https://api-au.unified.to/oauth/code` |
Copy the URI exactly: a trailing slash, the wrong subdomain or `http` instead of `https` makes the connection fail. As of 21 October 2026, Lever requires the callback you use to match one registered with your app, and callbacks can't differ per customer. Lever's OAuth page says you register with one callback and request more through Lever support, and its FAQ says an app can have several, so list every region you need when you register. Lever's sandbox and production apps are separate, each with its own client ID, secret and callbacks.
## 3. Where do you enter the Lever client ID and secret?
On the Lever card in [Unified.to](https://unified.to/), select **Your OAuth 2 credentials**, enter the Lever client ID and secret, and select **Activate**. To test against your Lever sandbox, select **Sandbox** on the card and enter the sandbox app's client ID and secret; Lever's sandbox and production credentials aren't interchangeable.
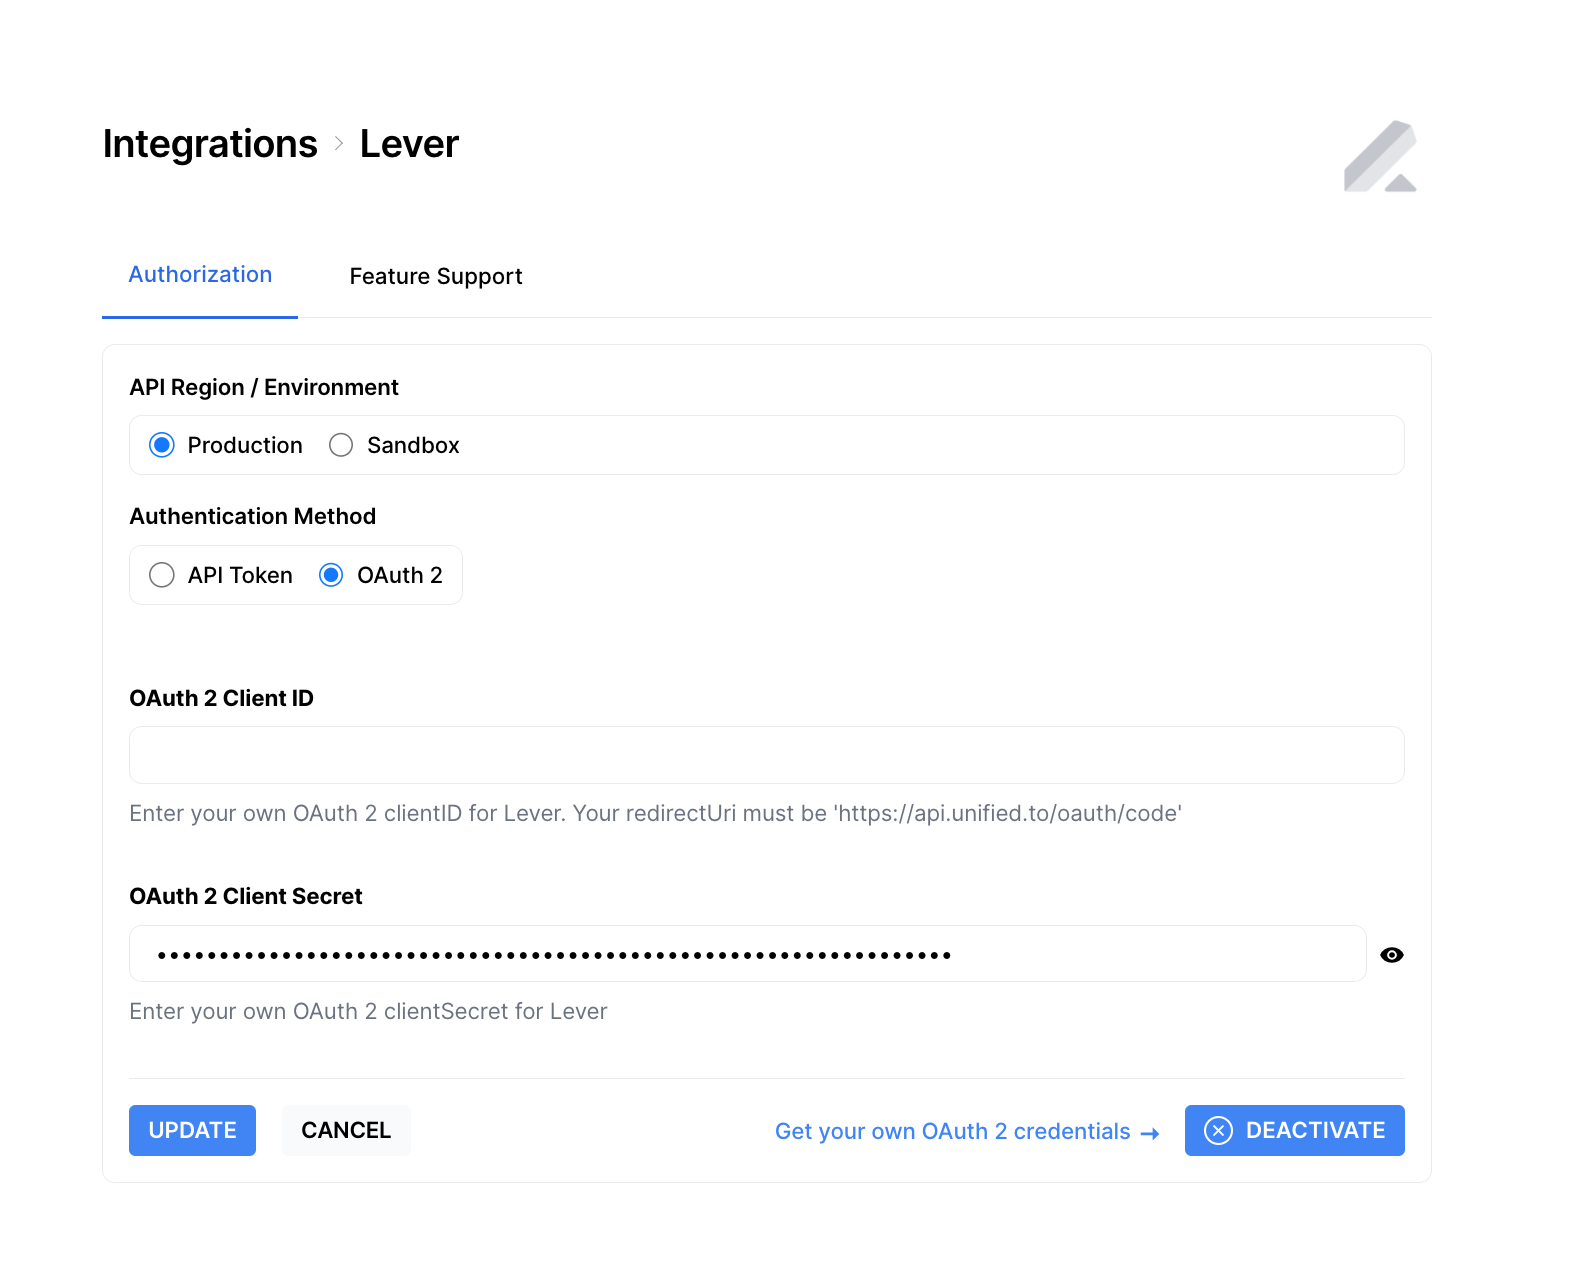
Lever's sandbox is a real Lever account for partners. [Unified.to](https://unified.to/)'s own **Sandbox (synthetic data)** environment is different: it returns synthetic data and accepts any value as credentials ([Sandbox](https://docs.unified.to/concepts/sandbox)).
When a customer connects, a Lever Super Admin approves your app for their whole Lever organization (Lever, as of 21 October 2026). [Unified.to](https://unified.to/) keeps no customer records at rest; connection credentials and operational metadata are encrypted at rest.
## How do your customers create a Lever API key?
A Super Admin in your customer's Lever account creates the key under **Settings > Integrations and API > API Credentials**, then enters it when they choose Lever in your Authorization component (Lever [API documentation](https://hire.lever.co/developer/documentation) and [developer FAQ](https://hire.lever.co/developer/support), as of 21 October 2026).
1. Select **Generate New Key** and name the key after your product.
2. Under **Permissions**, choose **Select all**, as shown in [How to get your Lever API key](https://docs.unified.to/guides/how_to_get_your_lever_api_key_step_by_step_guide). Lever checks every call against the key's permissions, so a key missing one fails on that endpoint.
3. If the customer wants confidential postings and opportunities included, grant confidential access now. Lever allows it only when the key is created.
4. Copy the key and paste it into your Authorization component.
Lever API keys "carry many privileges, so keep them secret", and a Lever account can have several active keys, so each product can have its own. Step-by-step screenshots: [How to get your Lever API key](https://docs.unified.to/guides/how_to_get_your_lever_api_key_step_by_step_guide).
## 4. How do you add Lever to your app?
Add [Unified.to](https://unified.to/)'s Authorization component to your product: your customers pick Lever, authorize, and return to your app with a connection ID.
1. Copy your workspace ID from **Settings > API Keys** in [Unified.to](https://unified.to/). You can create several environments in one workspace for testing, staging and production; see [Set environments for your Unified.to workspace](https://docs.unified.to/guides/set_environments_for_your_unified_workspace).
2. Open [app.unified.to/embed](https://app.unified.to/embed?tab=Authorization), copy the snippet and replace `YOUR_WORKSPACE_ID` with your workspace ID. The preview shows what your customers see. Components are also available for React, Angular, Vue and Svelte ([embedded components](https://docs.unified.to/concepts/embedded-components)).
3. To build your own UI instead, call `GET /unified/integration/workspace/{workspace_id}`, which returns all activated integrations in a workspace, and show those integrations in your app.
4. After a customer authorizes, [Unified.to](https://unified.to/) returns them to your app with the connection ID in the URL (for example `?id={connection_id}`). Store it with that customer's record ([associate a connection ID with your end user](https://docs.unified.to/guides/how_to_associate_a_connection_id_with_your_end_user)).
## 5. How do you make your first Lever API call?
Call [Unified.to](https://unified.to/)'s ATS endpoints with the customer's connection ID, for example `GET /ats/{connection_id}/candidate` to list Lever candidates. The same endpoints work for every ATS integration, so Lever calls differ from other ATS calls only by connection ID.
SDKs are available for TypeScript, Python, PHP, Java, Go, C# and Ruby ([SDKs](https://docs.unified.to/reference/sdks)). To see the data model before a customer connects, add `env=Sandbox` to your API calls for synthetic data ([Mock API server](https://docs.unified.to/reference/mock)).
## What can you do with a Lever connection?
As of 19 October 2026, [Unified.to](https://unified.to/)'s Lever integration reads nine objects; it creates and updates candidates, applications, jobs, notes and users, adds documents, and removes candidates, documents, notes and interviews. It doesn't create or update interviews. [Unified.to](https://unified.to/)'s candidate maps to Lever's opportunity, the object Lever has recommended since it deprecated its `/candidates` endpoints in 2020 ([Lever API documentation](https://hire.lever.co/developer/documentation), as of 21 October 2026). A Lever contact can have more than one opportunity, so a person with two Lever candidacies appears as two [Unified.to](https://unified.to/) candidates. Each Lever opportunity carries at most one application.
| [Unified.to](https://unified.to/) object | Lever object | Methods | Change events |
| --------------------------------------- | ------------------------- | --------------------------------- | -------------------------------------------------------------- |
| ATS candidate | Opportunity | List, Get, Create, Update, Remove | Created: virtual. Updated: native and virtual. Deleted: native |
| ATS application | Opportunity posting stage | List, Get, Create, Update | Created: native and virtual. Updated: virtual |
| ATS job | Posting | List, Get, Create, Update | Created, updated: virtual |
| ATS interview | Opportunity interview | List, Get, Remove | Created, updated: native and virtual. Deleted: native |
| ATS document | Opportunity file | List, Get, Create, Remove | Created, updated: virtual |
| ATS activity | Opportunity note | List, Get, Create, Update, Remove | None |
| ATS scorecard | Opportunity feedback | List, Get | Created, updated: virtual |
| ATS application status | Stage | List | None |
| HR & Directory employee | User | List, Get, Create, Update | Created, updated: virtual |
| Passthrough | Any Lever API endpoint | GET, POST, PUT, DELETE | None |
Lever is one of 164 ATS integrations on [Unified.to](https://unified.to/). Field-level detail is on the [Lever integration page](https://docs.unified.to/integrations/lever) and in the [ATS API overview](https://docs.unified.to/ats/overview).
## How do Lever changes reach your app?
[Unified.to](https://unified.to/) delivers Lever changes to your webhook URL in two ways. Native webhooks forward the events Lever sends: candidate updates and deletions, new applications, and interview changes. Virtual webhooks detect changes at an interval you set, as often as every minute on paid plans, and a check that finds nothing isn't billed. Every other Lever object with change events in the table above uses virtual webhooks.
On Lever API-key connections, native webhooks need the customer's Lever plan to include Lever's Webhook feature. If Lever refuses the subscription, [Unified.to](https://unified.to/) marks the native webhook unhealthy and doesn't switch to virtual checks, so a webhook can be created and still receive no events. For API-key connections, check the webhook's health after you create it, or create a virtual webhook for candidate updates. On Lever OAuth 2 connections, include Lever's `webhooks:read:admin` and `webhooks:write:admin` scopes.
As of 21 October 2026, Lever labels its interview webhook events Beta ([Lever API documentation](https://hire.lever.co/developer/documentation)). See [Understanding virtual webhooks](https://docs.unified.to/concepts/virtual_webhooks).
## Which Lever limits should you plan for?
As of 21 October 2026, Lever's [API documentation](https://hire.lever.co/developer/documentation) sets these limits:
- **Rate limit:** 10 requests per second per API key, with bursts up to 20 when Lever allows. Lever says these defaults aren't guaranteed and recommends exponential backoff.
- **OAuth tokens:** on Lever OAuth 2 connections, access tokens expire after one hour, and refresh tokens expire after one year or after 90 days without use. API-key connections use basic auth and have no tokens to expire. [Unified.to](https://unified.to/) refreshes OAuth tokens on a schedule, including on connections with no recent calls, and each refresh returns a new Lever refresh token, so an idle connection doesn't reach Lever's 90-day inactivity limit. If Lever rejects a connection's credentials, [Unified.to](https://unified.to/) marks the connection unhealthy and sends a `CONNECTION_UNHEALTHY` event, so you can ask the customer to re-authorize ([troubleshoot unhealthy connections](https://docs.unified.to/guides/how_to_troubleshoot_unhealthy_connections)).
- **Confidential records:** Lever returns confidential postings and opportunities only to credentials granted confidential access. [Unified.to](https://unified.to/) doesn't request Lever's `confidential:access:admin` scope (as of 20 September 2026), so Lever OAuth 2 connections don't return confidential records. On an API key, a Super Admin can grant confidential access only when creating the key.
## Where can you get help?
Email [hello@unified.to](mailto:hello@unified.to) or chat with the team on [Discord](https://discord.gg/uAYnMPFk9t).
Keep learning:
- [How to get your Lever API key](https://docs.unified.to/guides/how_to_get_your_lever_api_key_step_by_step_guide)
- [Lever integration page](https://docs.unified.to/integrations/lever)
- [Quick Start](https://docs.unified.to/quick-start)
- [Embedded components](https://docs.unified.to/concepts/embedded-components)
- [Understanding virtual webhooks](https://docs.unified.to/concepts/virtual_webhooks)
- [Set environments for your Unified.to workspace](https://docs.unified.to/guides/set_environments_for_your_unified_workspace)
## Managing custom validation rules in Salesforce
URL: https://docs.unified.to/guides/managing_custom_validation_rules_in_salesforce
# Managing custom validation rules in Salesforce
------
_March 22, 2024_
If you are getting `FIELD_CUSTOM_VALIDATION_EXCEPTION` when trying to write data to a Salesforce connection, this means there is a custom validation rule on this Salesforce account and the data that you are providing isn't valid
To get [Unified.to](https://unified.to/) to be able to write this object you will need to get your customer to modify the Salesforce rule on their account to be less strict or remove the rule all together.
For example, you are getting `"FIELD_CUSTOM_VALIDATION_EXCEPTION: The Shipping address is required."` when trying to [create a Company](https://docs.unified.to/crm/company/Create_a_company). This means there is a custom rule on the Salesforce **Account** object that requires a shipping address.
Follow these instructions to modify/remove a custom rule for Account object:
1. Go to your Salesforce account and navigate to **Setup**
2. On the left-hand side navigate to **Objects and Fields > Object Manager**
3. Select the object you need to modify the rules for. In our case **Account**

4. Navigate to **Validation Rules**
5. Edit or remove the custom validation rule

## Multi-Region Sync
URL: https://docs.unified.to/guides/multi_region_sync
# Multi-Region Sync
------
_June 22, 2026_
Unified.to runs in multiple data regions — US, EU, and AU — so your data can live close to where you and your customers are. Multi-Region Sync keeps your account configuration consistent across those regions automatically.
When you turn on Multi-Region Sync, the settings you manage in your "home" region are continuously replicated to your other selected region(s). You configure things once, and they show up everywhere — no manual re-entry, no drift between regions.
## What is Multi-Region Sync?
Multi-Region Sync is useful when you need to:
- **Meet data-residency requirements:** keep certain end users' connection data in the EU or AU while still managing one account.
- **Reduce latency:** serve customers from the region closest to them.
- **Operate with regional redundancy:** keep your account configuration mirrored across regions.
> ⭐ Availability: Multi-Region Sync is available on the Scale plan. Enable it in your workspace settings.
## What gets synced
When Multi-Region Sync is enabled, the following are replicated from your home region to your other selected region(s):
- **Workspace / environment settings** — your workspace configuration and environment settings.
- **Users** — the team members and admins on your workspace.
- **API keys** — your Unified.to API keys, so the same keys work in each region.
- **Integration secrets / credentials** — the OAuth client credentials and secrets you configure for your integrations.
- **Workspace integrations** — your enabled integrations and their configuration (scopes, settings, branding, etc.).
- **Notifications** — your workspace notification settings.
In practice: you set up your integrations, branding, API keys, and team once in your home region, and they are automatically mirrored to your other region(s). Updating an integration's configuration or credentials in one region propagates the change to the others.
## What does not get synced
End-user connections, webhooks, and API call logs / usage history are intentionally region-specific and are not replicated.
A connection is the authorization a single end user grants when they connect their account (for example, a customer linking their Salesforce or Google account). These stay in the region where they were created. This is by design — it keeps each end user's data resident in the region you chose for them and avoids duplicating sensitive end-user tokens across regions.
Rule of thumb:
- **Account-level configuration** (integrations, credentials, keys, users, settings) → synced across regions.
- **End-user connections and the data they pull** → stay in their own region.
## How to enable Multi-Region Sync
1. Make sure your account is on the Scale plan. If you're not sure, contact your account manager.
2. Choose your home region — where you set up your account first. Sync is bidirectional, so you can edit configuration in any region and it stays consistent across all of them.
3. Select what to sync (workspace settings, users, API keys, integration secrets, workspace integrations, notifications).
4. Save. Unified.to performs a one-time initial copy of your existing configuration, then keeps the regions in sync automatically.
## Frequently asked questions
- **Which regions are supported?** US, EU, and AU.
- **Do my customers need to do anything?** No. They keep connecting in whichever region you set up for them; their connections stay there.
- **Will enabling sync move my existing connections?** No. Connections are never moved or copied between regions.
- **Is the synced data encrypted in transit?** Yes. All replicated configuration, including secrets, is encrypted and integrity-protected in transit.
- **Can I choose which items to sync?** Yes — any combination of the items listed above.
- **How do I turn it off or change my regions?** Contact your account manager or Unified.to support.
---
Need help? Reach out to your account manager or [contact Unified.to support](https://unified.to/contact).
## NetSuite Authentication Setup for Unified
URL: https://docs.unified.to/guides/netsuite_authentication_setup_for_unified
# NetSuite Authentication Setup for Unified
------
_February 12, 2026_
Unified supports **two** authentication methods for connecting to NetSuite:
1. **OAuth 2.0 (Authorization Code Grant)** — browser-based login. **Recommended for most customers and for new integrations**. You create a NetSuite Integration Record (Client ID / Client Secret), add those credentials to your Unified workspace, then each connection enters a NetSuite Account ID and completes browser consent. Tokens refresh automatically.
2. **Token-Based Authentication (TBA / OAuth 1.0a)** — you generate and paste 5 long-lived credentials per NetSuite account. Still supported today, but Oracle will not allow _new_ TBA integrations starting with NetSuite 2027.1 (TBA end of support is tentatively planned later). Prefer OAuth 2.0 for new work.
Both methods talk to the same **SuiteTalk REST Web Services** API, so the underlying NetSuite feature flags and the role permissions list below are nearly identical. The main difference is **how Unified obtains the access token**.
**"Realm" = NetSuite Account ID** in every NetSuite client library and connector. We use the terms interchangeably below.
---
## **Which method should I choose?**
| | OAuth 2.0 | Token-Based Authentication (TBA) |
| --------------------------- | --------------------------------------------------------------------------------------- | ------------------------------------------------------------------- |
| Setup effort | Medium — create your OAuth Integration Record once, then customers sign in | Higher — create Integration Record + Access Token |
| Credentials Unified stores | Workspace Client ID/Secret + per-connection access_token/refresh_token (auto-refreshed) | 5 long-lived secrets |
| Best for | Most customers; new / multitenant SaaS (use Public Client / partner app) | Existing TBA setups; quick per-account connect until OAuth is ready |
| Token lifespan | Access token refreshes automatically | Tokens are long-lived; rotate manually |
| What you provide to Unified | Workspace: Client ID/Secret. Connection: Account ID + browser login | Realm + Consumer Key/Secret + Token ID/Secret |
If you're not sure, **start with OAuth 2.0**. **Important:** Unified does **not** currently provide a pre-registered NetSuite OAuth 2.0 application. You must create your own NetSuite Integration Record (or use TBA).
---
## **What you need before starting (both methods)**
- Admin access in NetSuite (recommended), **OR** a NetSuite admin available to enable features and grant role permissions.
- The role used for the connection must have the correct permissions (see Required Role Permissions below).
- For sandbox testing, know whether you are in **Sandbox** vs **Production** — your Account ID and credentials are different between environments.
---
## **Step 1 — Enable the required NetSuite features (both methods)**
In NetSuite: **Setup → Company → Enable Features → SuiteCloud** tab.
Under **Manage Authentication**, enable:
- ✅ **OAuth 2.0** _(required for OAuth 2.0 method)_
- ✅ **Token-Based Authentication** _(required for TBA method)_
Under **SuiteTalk (Web Services)**, enable:
- ✅ **REST Web Services**
Without **REST Web Services**, all API calls return **401** regardless of which auth method you use, so make sure this is on.
Click **Save**.
---
## **Step 2 — Find your Realm / Account ID (both methods)**
Your **Realm** is your **NetSuite Account ID**.
**Option A — from the URL (fastest):**
When logged into NetSuite, the Account ID is in the host portion of the URL.
**Option B — from Company Information:**
**Setup → Company → Company Information** → look for **Account ID**.
**Sandbox note:** Sandbox accounts include a suffix like _SB1 (or -SB1 in URLs). Use **underscores** when entering the Account ID into Unified (e.g. 1234567_SB1). Unified normalizes between the URL form (-sb1) and the OAuth realm form (_SB1) automatically.
---
## **Step 3 — Configure the Role used for the connection (both methods)**
This is the **most important step** for avoiding 401 INVALID_LOGIN and "permission denied" errors. The role you use determines what Unified can read and write — for both OAuth 2.0 and TBA.
**Recommended: use the Administrator role**
The simplest and most reliable option:
- Use the **Administrator** role for the connecting user (OAuth 2.0), or for the token (TBA).
This guarantees:
- All record types are accessible
- All subsidiaries are accessible
- No hidden permission failures
- Fastest setup
**Optional: create a dedicated "Unified API" custom role**
If your security policy requires a least-privilege role, create one and grant the permissions in Required Role Permissions.
User-level restrictions can override role-level permissions. If you use a custom role, make sure the **user account itself** also has these permissions where applicable.
---
## **Step 4A — Connect using OAuth 2.0 (recommended)**
OAuth 2.0 requires **your own** NetSuite Integration Record with Authorization Code Grant enabled. Unified does **not** ship a pre-registered NetSuite OAuth app. Store the Client ID and Client Secret on your NetSuite workspace integration in Unified, set the auth method to OAuth 2.0, then connect each customer account with their NetSuite Account ID + browser consent.
**4A.1 Create a NetSuite Integration Record (OAuth 2.0)**
In NetSuite:
- Go to **Setup → Integration → Manage Integrations → New**.
- Name it after _your product_ (customers see this on the consent screen). Set **State = Enabled**.
On the Authentication tab: enable **Authorization Code Grant**; enable **REST Web Services**; set Redirect URI to Unified's callback for your data center (US: `https://api.unified.to/oauth/code`, EU: `https://api-eu.unified.to/oauth/code`, AU: `https://api-au.unified.to/oauth/code`). For multitenant SaaS (many customer NetSuite accounts authorizing one Client ID), enable **Public Client** (PKCE). Unified's NetSuite OAuth flow uses PKCE. Save and copy the **Client ID** and **Client Secret** immediately.
**4A.2 Add OAuth credentials in Unified (workspace)**
1. In the Unified dashboard, activate or edit the **NetSuite** workspace integration.
2. Choose authentication method **OAuth 2.0** (not Token / TBA).
3. Paste your NetSuite **Client ID** and **Client Secret**, then save.
4. Until Client ID/Secret are saved and OAuth 2.0 is selected, the connect UI defaults to the TBA (five-field) form — which is why OAuth can look missing in the product UI.
5. **Then connect a NetSuite account:** start a NetSuite connection and enter the customer's **NetSuite Account ID** (e.g. `1234567` or `1234567_SB1`).
6. Complete the NetSuite browser login / consent screen. Choose the **Role** to authorize under — Administrator or your custom least-privilege role with the permissions below.
7. Click **Allow**. Unified stores the access and refresh tokens for that connection. Each Unified connection is one NetSuite account (one Account ID).
The access token is refreshed automatically on expiry. A _private_ Integration Record only works in the NetSuite account that created it. For multitenant SaaS you need a **Public Client / partner-distributed** NetSuite application (or each customer must install/trust your Integration Record).
**4A.3 Make sure the authorizing user has the right role**
The user who completes consent in NetSuite must have a role that:
1. Includes the permissions in **Required Role Permissions** below (including Log in using OAuth 2.0 Access Tokens).
2. Has access to all subsidiaries you want Unified to sync.
3. Confirm role assignment under Lists → Employees → Employees → [user] → Access tab.
4. Oracle references: [Create Integration Records for OAuth 2.0](https://docs.oracle.com/en/cloud/saas/netsuite/ns-online-help/section_157771733782.html) and [OAuth 2.0 Authorization Code Grant Flow](https://docs.oracle.com/en/cloud/saas/netsuite/ns-online-help/section_158074210415.html).
- You add Client ID/Secret yourself on the Unified workspace integration — you do not need to send them to Unified support.
- Consent branding shows _your_ Integration Record name, not 'Unified', when using your own app.
- If OAuth is not configured on the workspace, Unified falls back to the TBA credential form.
1. After connecting, verify a simple read (for example list invoices or accounts) to confirm the consented role has the needed permissions.
2. To re-authorize later: revoke under Setup → Users/Roles → OAuth 2.0 Authorized Applications if needed, then reconnect in Unified.
Reference: NetSuite OAuth 2.0 Authorization Code Grant Flow (Oracle Help Center).
---
## **Step 4B — Connect using Token-Based Authentication (TBA)**
If you chose TBA, you will provide Unified 5 values. TBA is still the simpler per-customer path today, but prefer OAuth 2.0 for new multitenant work (Oracle: no new TBA integrations from 2027.1).
- realm (NetSuite Account ID)
- consumer_key
- consumer_secret
- token_id (a.k.a. Token Key)
- token_secret
**4B.1 Create the Integration Record (Consumer Key / Secret)**
1. **Setup → Integration → Manage Integrations → New**
2. Name: e.g. "Unified Integration"
3. State: **Enabled**
4. On the **Authentication** tab:
- ✅ **Token-Based Authentication**
- (Leave OAuth 2.0 off unless you also plan to use OAuth 2.0 with the same record.)
1. **Save** — NetSuite displays the **Consumer Key** and **Consumer Secret**. **Copy them immediately**; the Consumer Secret cannot be viewed again.
These are the consumer_key and consumer_secret you'll give Unified.
**4B.2 Assign the role to the user who will own the token**
Tokens are created for a **User + Role + Integration Record** combination.
1. **Lists → Employees → Employees**
2. Select the user (or create a dedicated "API User" like unified-api@yourcompany.com)
3. Open the **Access** tab
4. Assign **Administrator** (recommended) **OR** your custom **Unified API** role
5. **Save**
**4B.3 Create the Access Token (Token ID / Token Secret)**
1. **Setup → Users/Roles → Access Tokens → New** _(may be labelled "Manage Access Tokens" in some UIs)_
2. Fill in:
- **Application Name**: the Integration Record you created (e.g. "Unified Integration")
- **User**: the user from 4B.2
- **Role**: **Administrator** (recommended) **OR** your **Unified API** role
- **Token Name**: optional but recommended (e.g. "Unified Production Token")
1. **Save** — NetSuite displays the **Token ID** and **Token Secret**. **Copy them immediately**.
The role you select here is the role whose permissions are enforced on **every** API call made with this token. Choosing the wrong role is the #1 cause of 401 INVALID_LOGIN and permission errors.
**4B.4 Provide the 5 values to Unified**
In the Unified connection form, enter:
| Unified field | NetSuite value |
| -------------------------- | -------------- |
| realm_id (or "Account ID") | from Step 2 |
| consumer_key | from Step 4B.1 |
| consumer_secret | from Step 4B.1 |
| token_id | from Step 4B.3 |
| token_secret | from Step 4B.3 |
---
## **Required Role Permissions**
These apply to **both** OAuth 2.0 and TBA when you choose a custom (non-Administrator) role. The list is the full set required for full accounting + CRM + commerce + HRIS support. You can trim it based on which Unified object types you actually use.
User-level restrictions can override role-level permissions. Make sure the user has these permissions in addition to the role.
**Transactions**
| Permission | Level |
| ------------------------ | ----- |
| Access Payment Audit Log | Full |
| Bill Purchase Orders | Full |
| Bills | Full |
| Cash Sale | Full |
| Cash Sale Refund | Full |
| Credit Memo | Full |
| Cross Charge Journal | View |
| Customer Deposit | Full |
| Customer Payment | Full |
| Customer Refund | Full |
| Enter Vendor Credits | Full |
| Find Transaction | Full |
| Intercompany Adjustments | Full |
| Invoice | Full |
| Invoice Approval | Full |
| Invoice Sales Orders | Full |
| Item Receipt | Full |
| Item Shipment | Full |
| Journal Approval | Full |
| Make Journal Entry | Full |
| Opportunity | Full |
| Paycheck Journal | Full |
| Receive Order | Full |
| System Journal | Full |
**Reports**
| Permission | Level |
| ------------------ | ----- |
| Transaction Detail | View |
**Lists**
| Permission | Level |
| ------------------------------- | ----- |
| Accounts | Full |
| Address List in Search | Full |
| Contact-Subsidiary Relationship | View |
| Contacts | Full |
| Currency | Full |
| Customers | Full |
| Employee Record | Full |
| Employees | Full |
| Inventory Cost Template | View |
| Locations | Full |
| Partners | Full |
| Perform Search | View |
| Subsidiaries | Full |
| Vendors | Full |
**Setup**
| Permission | Level |
| -------------------------------------------- | ----------------------- |
| Access Token Management | Full _(TBA only)_ |
| Integration Application | Full |
| Log in using Access Tokens | Full _(TBA only)_ |
| Log in using OAuth 2.0 Access Tokens | Full _(OAuth 2.0 only)_ |
| OAuth 2.0 Authorized Applications Management | Full _(OAuth 2.0 only)_ |
| REST Web Services | Full |
| Two-Factor Authentication Base | Full |
| User Access Tokens | Full _(TBA only)_ |
**Notes:**
- For TBA, the token inherits the permissions of the **role selected when the token is created** — not the user's default role.
- For OAuth 2.0, the access token inherits the permissions of the **role selected during the NetSuite consent screen**.
- Subsidiary access is controlled by role restrictions. If you use OneWorld, ensure the role has access to every subsidiary Unified must sync.
---
## **Validation & Troubleshooting**
**401 INVALID_LOGIN**
This almost always means one of:
- **Wrong role selected** when the OAuth 2.0 consent was approved, or when the TBA token was created.
- **Missing permissions** on the role:
- OAuth 2.0: missing Log in using OAuth 2.0 Access Tokens and/or OAuth 2.0 Authorized Applications Management
- TBA: missing Log in using Access Tokens, Access Token Management, or User Access Tokens
- **Wrong Account ID** (especially mixing sandbox with production).
- **REST Web Services** not enabled at the account level.
- Integration Record disabled, or (OAuth) workspace missing Client ID/Secret / auth method still set to Token.
- **Consumer key/secret paired with a token from a different Integration Record** (TBA only).
The fastest way to diagnose is the **Login Audit Trail**:
**Setup → Users/Roles → User Management → View Login Audit Trail**
Filter by **Token-based** or **OAuth 2.0** logins and look at the failure reason on the most recent attempt.
**400 Bad Request / INSUFFICIENT_PERMISSION**
The connection authenticated but the role lacks permission for the specific record type Unified is trying to access. Add the missing permission from the Required Role Permissions table (most commonly **Lists → Subsidiaries**, **Lists → Accounts**, or a Transaction permission).
**Sandbox vs Production**
- Sandbox tokens / OAuth 2.0 consents only work against the sandbox account.
- Sandbox URLs use -sb1 (e.g. 1234567-sb1.app.netsuite.com); the realm sent on API calls uses _SB1 (e.g. 1234567_SB1). Unified handles the conversion automatically — just enter the Account ID with the _SB1 underscore form when prompted.
**Token rotation (TBA)**
NetSuite TBA tokens don't expire by default, but your security policy may require rotation:
1. Create a new Access Token under the same User + Role + Integration Record.
2. Update the token_id and token_secret in Unified.
3. Revoke the old token in **Setup → Users/Roles → Access Tokens**.
**Re-authorizing OAuth 2.0**
If a user is removed or their role changes, the OAuth 2.0 grant may become invalid. To re-authorize:
1. In NetSuite: Setup → Users/Roles → OAuth 2.0 Authorized Applications → revoke the existing grant for your Integration Record (optional but recommended).
2. In Unified, reconnect the NetSuite integration. You'll be sent back through the NetSuite consent screen.
## Notice of Deprecation of Fields and Objects (Nov 2025)
URL: https://docs.unified.to/guides/notice_of_deprecation_of_fields_and_objects_nov_2025
# Notice of Deprecation of Fields and Objects (Nov 2025)
------
_November 10, 2025_
# Deprecated Fields, Objects & List Options
At Unified, we have always built our unified data-models with a lot of thoughtful attention to detail, so that they never have to be 'versioned' due to backward-compatibility issues.
In fact, when we launch a new data object or a brand new category, designing our unified data models always takes longer than actually 'coding' the integrations. Our customers have noticed and have told us that we have the best designed unified data models in the business.
Over the 2.5 years, as we've made improvements to the unified data-models, we have kept older fields and objects around so that our customers do not have to change their applications.
Today, we are announcing some deprecations of fields, data-models and list options that have been improved with others and will shortly be removed in our system.
This document provides a comprehensive breakdown of all deprecation in the Unified API as of November 2025, organized by category with migration recommendations.
Please make all necessary changes to your code by `JANUARY 7, 2026`
---
## Table of Contents
1. MetadataMetadata Fields
2. Parent Fields
3. HRIS Employee Fields
4. MessagingMessage Fields
5. Accounting Fields
6. ATS (Applicant Tracking System) Fields
7. Ticketing Fields
8. Calendar Fields
9. Query Parameters & Filters
10. Webhook Fields
11. Deprecated Objects/Usage Patterns
12. Deprecated Types/Interfaces
---
## MetadataMetadata Fields
### Field: `key` → `slug`
- the reason was the `key` was a confusing name and could denote something else that it wasn't
**Affected Models:**
- `IKmsPageMetadata` (KMS) - `src/models/UnifiedKms.ts`
- `ITaskMetadata` (Task) - `src/models/UnifiedTask.ts`
- `IHrisMetadata` (HRIS) - `src/models/UnifiedHris.ts`
- `IAtsMetadata` (ATS) - `src/models/UnifiedAts.ts`
- `ICommerceMetadata` (Commerce) - `src/models/UnifiedCommerce.ts`
- `ICrmMetadata` (CRM) - `src/models/UnifiedCrm.ts`
**Deprecated Field:**
```typescript
key?: string; // @deprecated; use slug instead
```
**Replacement:**
```typescript
slug?: string; // Actual textual value of the slug
```
**Migration Recommendation:**
- **Read Operations:** Replace all references to `metadata.key` with `metadata.slug`
- **Write Operations:** Use `slug` instead of `key` when creating or updating metadata objects
**Example:**
```typescript
// Before
metadata: [{
key: 'custom_field',
value: 'some value'
}]
// After
metadata: [{
slug: 'custom_field',
value: 'some value'
}]
```
---
### Field: `type` → `format`
- the reason was the `type` was a confusing name and could denote something else that it wasn't
**Affected Models:**
- `IKmsPageMetadata` (KMS) - `src/models/UnifiedKms.ts`
- `ITaskMetadata` (Task) - `src/models/UnifiedTask.ts`
- `IHrisMetadata` (HRIS) - `src/models/UnifiedHris.ts`
- `IAtsMetadata` (ATS) - `src/models/UnifiedAts.ts`
- `ICommerceMetadata` (Commerce) - `src/models/UnifiedCommerce.ts`
- `ICrmMetadata` (CRM) - `src/models/UnifiedCrm.ts`
**Deprecated Field:**
```typescript
type?: string; // @deprecated; use format instead
```
**Replacement:**
```typescript
format?: TMetadataFormat; // Enum: TEXT, NUMBER, DATE, BOOLEAN, FILE, TEXTAREA, SINGLE_SELECT, MULTIPLE_SELECT, MEASUREMENT, PRICE, YES_NO, CURRENCY, URL, etc.
```
**Migration Recommendation:**
- **Read Operations:** Replace all references to `metadata.type` with `metadata.format`
- **Write Operations:** Use `format` with the appropriate enum value instead of `type` string
- **Type Safety:** The `format` field uses strongly-typed enums, providing better type safety and validation
**Example:**
```typescript
// Before
metadata: [{
key: 'age',
type: 'number',
value: 25
}]
// After
metadata: [{
slug: 'age',
format: 'NUMBER', // Use enum value
value: 25
}]
```
---
## Parent Fields
### Field: `parent_space_id` → `parent_id`
### Field: `parent_page_id` → `parent_id`
- the reason was that we standardized across all of our unified data models the field name of `parent_id` when it denoted a parent of the current object (and is the same object)
**Affected Models:**
- `IKmsSpace` - `src/models/UnifiedKms.ts`
- `IKmsPage` - `src/models/UnifiedKms.ts`
**Deprecated Field:**
```typescript
// In KmsSpace
parent_space_id?: string; // @deprecated; use parent_id instead
// In KmsPage
parent_page_id?: string; // @deprecated; use parent_id instead
```
**Replacement:**
```typescript
parent_id?: string;
```
**Migration Recommendation:**
- **Read Operations:** Use `parent_id` instead of `parent_space_id` when reading space objects
- **Write Operations:** Use `parent_id` when creating or updating spaces
**Example:**
```typescript
// Before
const space = {
name: 'Subspace',
parent_space_id: 'space_123'
}
// After
const space = {
name: 'Subspace',
parent_id: 'space_123'
}
```
---
### Field: `parent_channel_id` → `parent_id`
**Affected Model:**
- `IMessagingChannel` - `src/models/UnifiedMessaging.ts`
**Deprecated Field:**
```typescript
parent_channel_id?: string; // @deprecated; use parent_id instead
```
**Replacement:**
```typescript
parent_id?: string;
```
**Migration Recommendation:**
- **Read Operations:** Use `parent_id` instead of `parent_channel_id` when reading channel objects
- **Write Operations:** Use `parent_id` when creating or updating channels
**Example:**
```typescript
// Before
const channel = {
name: 'Sub-channel',
parent_channel_id: 'channel_123'
}
// After
const channel = {
name: 'Sub-channel',
parent_id: 'channel_123'
}
```
---
### Field: `parent_account_id` → `parent_id`
**Affected Model:**
- `IAccountingAccount`
**Deprecated Field:**
```typescript
parent_account_id?: string; // @deprecated; use parent_id instead
```
**Replacement:**
```typescript
parent_id?: string; // The parent account ID for this account
```
**Migration Recommendation:**
- **Read Operations:** Use `parent_id` instead of `parent_account_id` when reading account objects
- **Write Operations:** Use `parent_id` when creating or updating accounts
**Example:**
```typescript
// Before
const account = {
name: 'Sub-account',
parent_account_id: 'account_123'
}
// After
const account = {
name: 'Sub-account',
parent_id: 'account_123'
}
```
---
### Field: `parent_message_id` → `parent_id`
**Affected Model:**
- `IMessagingMessage`
**Deprecated Field:**
```typescript
parent_message_id?: string; // @deprecated; use parent_id
```
**Replacement:**
```typescript
parent_id?: string; // Represents the ID of the immediate predecessor message in the thread
```
**Migration Recommendation:**
- **Read Operations:** Use `parent_id` instead of `parent_message_id` when reading message objects
- **Write Operations:** Use `parent_id` when creating threaded messages
**Example:**
```typescript
// Before
const message = {
message: 'Reply text',
parent_message_id: 'msg_123'
}
// After
const message = {
message: 'Reply text',
parent_id: 'msg_123'
}
```
---
## HRIS Employee Fields
### Field: `department` → `groups`
- we unified all HR 'grouping' objects into one called HRIS Group. Groups have types that denote if they are a department, business unit, team, …
**Affected Model:**
- `IHrisEmployee` - `src/models/UnifiedHris.ts`
**Deprecated Field:**
```typescript
department?: string; // @deprecated
```
**Replacement:**
```typescript
groups?: IHrisGroup[]; // Which groups/teams/units that this employee/user belongs to
```
**Migration Recommendation:**
- **Read Operations:** Access department information through the `groups` array
- **Write Operations:** Use `groups` array with `IHrisGroup` objects instead of a single `department` string
- **Multiple Groups:** The `groups` field supports multiple group memberships, which is more flexible than a single department
**Example:**
```typescript
// Before
const employee = {
name: 'John Doe',
department: 'Engineering'
}
// After
const employee = {
name: 'John Doe',
groups: [{
id: 'group_123',
name: 'Engineering',
type: 'DEPARTMENT'
}]
}
```
---
### Field:`division` → `groups`
**Affected Model:**
- `IHrisEmployee`
**Deprecated Field:**
```typescript
division?: string; // @deprecated
```
**Replacement:**
```typescript
groups?: IHrisGroup[]; // Which groups/teams/units that this employee/user belongs to
```
**Migration Recommendation:**
- **Read Operations:** Access division information through the `groups` array
- **Write Operations:** Use `groups` array with `IHrisGroup` objects instead of a single `division` string
**Example:**
```typescript
// Before
const employee = {
name: 'John Doe',
division: 'Product'
}
// After
const employee = {
name: 'John Doe',
groups: [{
id: 'group_456',
name: 'Product',
type: 'DIVISION'
}]
}
```
---
### Field: `location` → `locations`
**Affected Model:**
- `IHrisEmployee` - `src/models/UnifiedHris.ts`
**Deprecated Field:**
```typescript
location?: string; // @deprecated
```
**Replacement:**
```typescript
locations?: IHrisLocation[]; // Array of partial location objects
```
**Migration Recommendation:**
- **Read Operations:** Access location information through the `locations` array
- **Write Operations:** Use `locations` array with `IHrisLocation` objects instead of a single `location` string
- **Rich Data:** The `locations` array provides full address details, timezone, currency, and other metadata
**Example:**
```typescript
// Before
const employee = {
name: 'John Doe',
location: 'San Francisco Office'
}
// After
const employee = {
name: 'John Doe',
locations: [{
id: 'loc_123',
name: 'San Francisco Office',
address: {
address1: '123 Main St',
city: 'San Francisco',
region: 'CA',
postal_code: '94102',
country: 'United States'
},
timezone: 'America/Los_Angeles'
}]
}
```
---
## Messaging Fields
### Field: `channel_id` → `channels`
### Field: `channel_ids` → `channels`
- the reason was so we could include additional channel information, such as the channel `name` , as well as its `id`
**Affected Model:**
- `IMessagingMessage` - `src/models/UnifiedMessaging.ts`
**Deprecated Field:**
```typescript
channel_id?: string; // @deprecated
```
**Replacement:**
```typescript
channels?: IMessagingChannelMessage[]; // Represents the names of all channels to which the message is sent / belongs to
```
**Migration Recommendation:**
- **Read Operations:** Use `channels` array instead of `channel_id` or `channels_ids`
- **Write Operations:** Use `channels` array when creating messages
- **Multi-Channel Support:** The `channels` array supports messages posted to multiple channels (when the integration supports it)
**Example:**
```typescript
// Before
const message = {
message: 'Hello',
channel_id: 'channel_123',
channels_ids: ["channel_123"]
}
// After
const message = {
message: 'Hello',
channels: [{
id: 'channel_123',
name: 'General'
}]
}
```
---
### Field: `root_message_id` → Removed
**Affected Model:**
- `IMessagingMessage`
**Deprecated Field:**
```typescript
root_message_id?: string; // @deprecated
```
**Replacement:**
- No direct replacement. Use `parent_id` to traverse the thread structure.
**Migration Recommendation:**
- **Read Operations:** If you need to find the root message, traverse the `parent_id` chain until you reach a message without a `parent_id`
- **Write Operations:** Remove references to `root_message_id` when creating messages
**Example:**
```typescript
// Before
const message = {
message: 'Reply',
parent_message_id: 'msg_123',
root_message_id: 'msg_1'
}
// After
const message = {
message: 'Reply',
parent_id: 'msg_123'
// root_message_id removed - traverse parent_id chain if needed
}
// Helper function to find root message
function findRootMessage(message) {
while (message.parent_id) {
message = getMessage(message.parent_id);
}
return message;
}
```
---
## Accounting Fields
### Field: `invoice_at` → `posted_at`
**Affected Model:**
- `IAccountingInvoice`
**Deprecated Field:**
```typescript
invoice_at?: (string | Date | number); // @deprecated; use posted_at
```
**Replacement:**
```typescript
posted_at?: (string | Date | number);
```
**Migration Recommendation:**
- **Read Operations:** Use `posted_at` instead of `invoice_at` when reading invoice objects
- **Write Operations:** Use `posted_at` when creating or updating invoices
- **Consistency:** This change aligns with other accounting objects that use `posted_at` for transaction dates
**Example:**
```typescript
// Before
const invoice = {
invoice_number: 'INV-001',
invoice_at: '2024-01-15'
}
// After
const invoice = {
invoice_number: 'INV-001',
posted_at: '2024-01-15'
}
```
---
### Field: `type` → Removed
**Affected Model:**
- `IAccountingInvoice`
**Deprecated Field:**
```typescript
type?: TAccountingInvoiceType; // @deprecated
```
**Replacement:**
- No direct replacement. Bills are now found in the AccountingBill object, while invoices are solely in the AccountingInvoice object.
**Migration Recommendation:**
- **Read Operations:** Remove dependencies on `invoice.type` field
- **Alternative:** Bills are now found in the AccountingBill object, while invoices are solely in the AccountingInvoice object.
---
### Field: `contact_id` → `contacts`
**Affected Model:**
- `IAccountingTransaction` - `src/models/UnifiedAccounting.ts`
**Deprecated Field:**
```typescript
contact_id?: string; // @deprecated; use contacts
```
**Replacement:**
```typescript
contacts?: IAccountingTransactionContact[];
```
**Migration Recommendation:**
- **Read Operations:** Use `contacts` array instead of `contact_id`
- **Write Operations:** Use `contacts` array when creating transactions, but just include an `id` field
- **Multi-Contact Support:** The `contacts` array supports multiple contacts per transaction (when the integration supports multiple contacts)
- **Rich Data:** Provides contact names and emails, not just IDs
**Example:**
```typescript
// Before
const transaction = {
total_amount: 1000,
contact_id: 'contact_123'
}
// After
const transaction = {
total_amount: 1000,
contacts: [{
id: 'contact_123',
name: 'Acme Corp',
emails: [{
email: 'billing@acme.com'
}]
}]
}
```
---
### Field: `income` → `income_sections`
**Affected Model:**
- `IAccountingProfitloss` - `src/models/UnifiedAccounting.ts`
**Deprecated Field:**
```typescript
income?: IAccountingProfitlossCategory[]; // @deprecated – use income_sections instead
```
**Replacement:**
```typescript
income_sections?: IAccountingProfitlossSection[];
```
**Migration Recommendation:**
- **Read Operations:** Use `income_sections` instead of `income`
- **Write Operations:** Use `income_sections` when creating profit/loss reports
- **Enhanced Structure:** The new `income_sections` provides a more structured format with better categorization
**Example:**
```typescript
// Before
const profitloss = {
start_at: '2024-01-01',
end_at: '2024-12-31',
income: [{
name: 'Sales',
amount: 100000
}]
}
// After
const profitloss = {
start_at: '2024-01-01',
end_at: '2024-12-31',
income_sections: [{
name: 'Sales',
accounts: [{
name: 'Product Sales',
amount: 100000
}]
}]
}
```
---
### Field:`expenses` → `expenses_sections`
**Affected Model:**
- `IAccountingProfitloss`
**Deprecated Field:**
```typescript
expenses?: IAccountingProfitlossCategory[]; // @deprecated – use expenses_sections instead
```
**Replacement:**
```typescript
expenses_sections?: IAccountingProfitlossSection[];
```
**Migration Recommendation:**
- **Read Operations:** Use `expenses_sections` instead of `expenses`
- **Write Operations:** Use `expenses_sections` when creating profit/loss reports
**Example:**
```typescript
// Before
const profitloss = {
expenses: [{
name: 'Operating Expenses',
amount: 50000
}]
}
// After
const profitloss = {
expenses_sections: [{
name: 'Operating Expenses',
accounts: [{
name: 'Salaries',
amount: 50000
}]
}]
}
```
---
### Field:`cost_of_goods_sold` → `cost_of_goods_sold_sections`
**Affected Model:**
- `IAccountingProfitloss`
**Deprecated Field:**
```typescript
cost_of_goods_sold?: IAccountingProfitlossCategory[]; // @deprecated – use cost_of_goods_sold_sections instead
```
**Replacement:**
```typescript
cost_of_goods_sold_sections?: IAccountingProfitlossSection[];
```
**Migration Recommendation:**
- **Read Operations:** Use `cost_of_goods_sold_sections` instead of `cost_of_goods_sold`
- **Write Operations:** Use `cost_of_goods_sold_sections` when creating profit/loss reports
**Example:**
```typescript
// Before
const profitloss = {
cost_of_goods_sold: [{
name: 'Materials',
amount: 30000
}]
}
// After
const profitloss = {
cost_of_goods_sold_sections: [{
name: 'Materials',
accounts: [{
name: 'Raw Materials',
amount: 30000
}]
}]
}
```
---
### Field:`gross_profit_amount` → Calculate from `income_total_amount` and `cost_of_goods_sold_total_amount`
**Affected Model:**
- `IAccountingProfitloss`
**Deprecated Field:**
```typescript
gross_profit_amount?: number; // @deprecated – compute using income_total_amount - cost_of_goods_sold_total_amount
```
**Replacement:**
```typescript
gross_profit_amount = income_total_amount - cost_of_goods_sold_total_amount
```
**Migration Recommendation:**
- **Read Operations:** Calculate `gross_profit_amount` using `income_total_amount - cost_of_goods_sold_total_amount`
- **Write Operations:** Do not set `gross_profit_amount` directly
**Example:**
```typescript
// Before
const profitloss = {
income_total_amount: 100000,
cost_of_goods_sold_total_amount: 30000,
gross_profit_amount: 70000
}
// After
const profitloss = {
income_total_amount: 100000,
cost_of_goods_sold_total_amount: 30000
// gross_profit_amount removed - calculate it
}
// Calculate gross profit
const gross_profit_amount = profitloss.income_total_amount - profitloss.cost_of_goods_sold_total_amount;
```
---
### Field: `net_profit_amount` → `net_income_amount`
**Affected Model:**
- `IAccountingProfitloss`
**Deprecated Field:**
```typescript
net_profit_amount?: number; // @deprecated – use net_income_amount instead
```
**Replacement:**
```typescript
net_income_amount?: number;
```
**Migration Recommendation:**
- **Read Operations:** Use `net_income_amount` instead of `net_profit_amount`
- **Write Operations:** Use `net_income_amount` when creating profit/loss reports
**Example:**
```typescript
// Before
const profitloss = {
net_profit_amount: 50000
}
// After
const profitloss = {
net_income_amount: 50000
}
```
---
### Field: `IAccountingProfitlossCategory` and `IAccountingProfitlossSubcategory` → Deprecated Types
**Deprecated Types:**
- `IAccountingProfitlossCategory` - @deprecated
- `IAccountingProfitlossSubcategory` - @deprecated
**Replacement:**
- Use `IAccountingProfitlossSection` instead
**Migration Recommendation:**
- **Type Definitions:** Update TypeScript interfaces to use `IAccountingProfitlossSection`
- **Read Operations:** Use `income_sections`, `expenses_sections`, and `cost_of_goods_sold_sections` which use the new section structure
**Example:**
```typescript
// Before
interface Profitloss {
income?: IAccountingProfitlossCategory[];
}
// After
interface Profitloss {
income_sections?: IAccountingProfitlossSection[];
}
```
---
## ATS (Applicant Tracking System) Fields
### Field:`document_id` → `document_ids`
**Affected Model:**
- `IAtsActivity` - `src/models/UnifiedAts.ts`
**Deprecated Field:**
```typescript
document_id?: string; // @deprecated
```
**Replacement:**
```typescript
document_ids?: string[]; // IDs for AtsDocument.get
```
**Migration Recommendation:**
- **Read Operations:** Use `document_ids` array instead of `document_id`
- **Write Operations:** Use `document_ids` array when creating activities
- **Multi-Document Support:** Supports multiple documents per activity
**Example:**
```typescript
// Before
const activity = {
title: 'Review Resume',
document_id: 'doc_123'
}
// After
const activity = {
title: 'Review Resume',
document_ids: ['doc_123', 'doc_456']
}
```
---
### Field: `departments` → `groups`
**Affected Model:**
- `IAtsJob` - `src/models/UnifiedAts.ts`
**Deprecated Field:**
```typescript
departments?: string[]; // @deprecated Use `groups` instead
```
**Replacement:**
```typescript
groups?: IAtsGroup[]; // The departments/divisions/teams that this job belongs to
```
**Migration Recommendation:**
- **Read Operations:** Use `groups` array instead of `departments`
- **Write Operations:** Use `groups` array with `IAtsGroup` objects instead of department strings
- **Rich Data:** Provides group IDs, names, and types (TEAM, GROUP, DEPARTMENT, DIVISION, etc.)
**Example:**
```typescript
// Before
const job = {
name: 'Software Engineer',
departments: ['Engineering', 'Product']
}
// After
const job = {
name: 'Software Engineer',
groups: [{
id: 'group_123',
name: 'Engineering',
type: 'DEPARTMENT'
}, {
id: 'group_456',
name: 'Product',
type: 'DEPARTMENT'
}]
}
```
---
## Ticketing Fields
### Field: `category` → `category_id`
**Affected Model:**
- `ITicketingTicket` - `src/models/UnifiedTicketing.ts`
**Deprecated Field:**
```typescript
category?: string; // @deprecated; use category_id
```
**Replacement:**
```typescript
category_id?: string;
```
**Migration Recommendation:**
- **Read Operations:** Use `category_id` instead of `category` string
- **Write Operations:** Use `category_id` when creating or updating tickets
- **Consistency:** Using `category_id` maintains consistency with other ID-based relationships
**Example:**
```typescript
// Before
const ticket = {
subject: 'Support Request',
category: 'technical'
}
// After
const ticket = {
subject: 'Support Request',
category_id: 'category_123'
}
```
---
## Calendar Fields
### Field:`primary` → `is_primary`
**Affected Model:**
- `ICalendarCalendar` - `src/models/UnifiedCalendar.ts`
**Deprecated Field:**
```typescript
primary?: boolean; // @deprecated
```
**Replacement:**
```typescript
is_primary?: boolean;
```
---
## Query Parameters & Filters
### `expand_recurring_events` → `expand`
**Affected Models:**
- `ICalendarEvent`
**Deprecated Parameter:**
```typescript
expand_recurring_events?: boolean; // @deprecated; use expand
```
**Replacement:**
```typescript
expand?: boolean;
```
**Migration Recommendation:**
- **API Calls:** Replace `expand_recurring_events` query parameter with `expand`
- **More Flexible:** `expand` supports expanding multiple event types, not just recurring events
**Example:**
```typescript
// Before
GET /api/calendar/events?expand_recurring_events=true
// After
GET /api/calendar/events?expand=true
```
---
### `end_le` → `end_lt`
**Affected Models:**
- `ICalendarEvent`
- `ICalendarBusy`
- `ICalendarRecording`
- `IUcCall`
- `IUcRecording`
- `IHrisTimeoff`
- `IHrisTimeshift`
- `IAccountingBalancesheet`
- `IAccountingCashflow`
- `IAccountingProfitloss`
- `IAccountingTrialbalance`
- `IMessagingMessage`
- `IPaymentSubscription`
- `IPaymentPayment`
- `IPaymentPayout`
**Deprecated Parameter:**
```typescript
end_le?: string | Date; // @deprecated; use end_lt
```
**Replacement:**
```typescript
end_lt?: string | Date;
```
**Migration Recommendation:**
- **API Calls:** Replace `end_le` (less than or equal) with `end_lt` (less than)
- **Consistency:** Aligns with standard date range filtering conventions
**Example:**
```typescript
// Before
GET /api/calendar/events?end_le=2024-12-31
// After
GET /api/calendar/events?end_lt=2025-01-01
// Note: Adjust date by +1 day if you need inclusive end date
```
```
---
## Webhook Payload Fields
### Field: `sig` → `sig256`
**Affected Interface:**
- `IWebhookData`
**Deprecated Field:**
```typescript
sig?: string; // @deprecated; use sig256 instead
```
**Replacement:**
```typescript
sig256?: string; // HMAC-SHA256(workspace.secret, data + nonce)
```
**Migration Recommendation:**
- **Webhook Verification:** Use `sig256` instead of `sig` for webhook signature verification
- **Security:** `sig256` uses HMAC-SHA256 which is more secure than the previous signature algorithm. `sig` used HMAC-SHA1, which is now deprecated.
- **Verification:** Update your webhook verification code to check `sig256` field
**Example:**
```typescript
// Before
const isValid = verifySignature(webhook.sig, payload, secret, 'sha');
// After
const isValid = verifySignature(webhook.sig256, payload, secret, ‘sha256');
```
```
---
## Deprecated Objects/Usage Patterns
### `IAccountingInvoice` with `type === 'BILL'` → Use `IAccountingBill`
**Status:** Deprecated usage pattern:
- Instead of using `IAccountingInvoice` with `type='BILL'`, use the dedicated `IAccountingBill` object
**Affected Model:**
- `IAccountingInvoice` - `src/models/UnifiedAccounting.ts`
**Deprecated Pattern:**
```typescript
interface IAccountingInvoice {
type: 'BILL', // @deprecated - use IAccountingBill instead
...
}
```
**Replacement:**
```typescript
interface IAccountingBill {
...
}
```
**Key Differences:**
- `IAccountingBill` uses `bill_number` instead of `invoice_number`
- `IAccountingBill` does not have the deprecated `type` field
- `IAccountingBill` does not have the deprecated `invoice_at` field (uses `posted_at` instead)
- More semantic clarity: a Bill is clearly distinct from an Invoice
**Migration Recommendation:**
- **Read Operations:** Use `accounting_bill` endpoints instead of `accounting_invoice` endpoints with `type='BILL'`
- **Write Operations:** Use `accounting_bill` create/update endpoints instead of `accounting_invoice` with `type='BILL'`
**Field Mapping:** When migrating data:
- `invoice_number` → `bill_number`
- Remove `type` field (no longer needed)
- `invoice_at` → `posted_at` (if still using deprecated field)
**API Endpoints:**
- ❌ Deprecated: `POST /accounting/invoice` with `type: 'BILL'`
- ✅ Use: `POST /accounting/bill`
**Example:**
```typescript
// Before
POST /accounting/invoice
{
'type': 'BILL',
'invoice_number': 'BILL-001',
'contact_id': 'contact_123',
'total_amount': 1000
}
// After
POST /accounting/bill
{
'bill_number': 'BILL-001',
'contact_id': 'contact_123',
'total_amount': 1000
}
```
---
### `IAccountingReport` → Use Individual Report Objects
**Status:** Deprecated object
- Instead of using `IAccountingReport`, use the individual report objects directly
**Affected Model:**
- `IAccountingReport` - `src/models/UnifiedAccounting.ts`
**Deprecated Object Structure:**
```typescript
interface IAccountingReport {
type?: TAccountingReportType; // Enum: TRIAL_BALANCE, BALANCE_SHEET, PROFIT_AND_LOSS
...
}
```
**Replacement:** Use individual report objects directly
**Balance Sheet:**
```typescript
interface IAccountingBalancesheet {
id?: string;
created_at?: (string | Date | number);
updated_at?: (string | Date | number);
start_at?: (string | Date | number);
end_at?: (string | Date | number);
name?: string;
currency?: string;
net_assets_amount?: number;
assets?: IAccountingBalancesheetItem[];
liabilities?: IAccountingBalancesheetItem[];
equity?: IAccountingBalancesheetItem[];
raw?: unknown;
}
```
**Profit and Loss:**
```typescript
interface IAccountingProfitloss {
id?: string;
created_at?: (string | Date | number);
updated_at?: (string | Date | number);
category_ids?: string[];
start_at?: (string | Date | number);
end_at?: (string | Date | number);
name?: string;
currency?: string;
income_sections?: IAccountingProfitlossSection[];
expenses_sections?: IAccountingProfitlossSection[];
cost_of_goods_sold_sections?: IAccountingProfitlossSection[];
income_total_amount?: number;
net_income_amount?: number;
expenses_total_amount?: number;
cost_of_goods_sold_total_amount?: number;
raw?: unknown;
}
```
**Trial Balance:**
```typescript
interface IAccountingTrialbalance {
id?: string;
created_at?: (string | Date | number);
updated_at?: (string | Date | number);
start_at?: (string | Date | number);
name?: string;
currency?: string;
end_at?: (string | Date | number);
total_debit_amount?: number;
total_credit_amount?: number;
sub_items?: IAccountingTrialbalanceSubItem[];
raw?: unknown;
}
```
**Cash Flow:**
```typescript
interface IAccountingCashflow {
id?: string;
created_at?: (string | Date | number);
updated_at?: (string | Date | number);
start_at?: (string | Date | number);
end_at?: (string | Date | number);
category_ids?: string[];
contact_id?: string; name?: string; // e.g. "Cash Flow Statement Q1 2020"
currency?: string; // ISO 4217, e.g. "USD"
cash_beginning_amount?: number; // Cash at beginning of period
cash_ending_amount?: number; // Cash at end of period
net_change_in_cash_amount?: number; // Usually ending - beginning
operating_sections?: IAccountingCashflowSection[];
investing_sections?: IAccountingCashflowSection[];
financing_sections?: IAccountingCashflowSection[]; raw?: unknown;
}
interface IAccountingCashflowSection {
section_name?: string; // e.g. "Operating Activities"
total_amount?: number; // Net cash provided/used by this section
items?: IAccountingCashflowItem[];
}
interface IAccountingCashflowItem {
account_id?: string; // If attributable to a specific GL account
name?: string; // e.g. "Net Income", "Depreciation", "Equipment"
amount?: number; // Positive = inflow, Negative = outflow
transaction_ids?: string[]; // Optional linkage to transactions
sub_items?: IAccountingCashflowItem[];
}
```
**Migration Recommendation:**
- **Read Operations:** Instead of using `accounting_report` endpoints, use the specific report endpoints
- ❌ Deprecated: `GET /accounting/report?type=BALANCE_SHEET`. ✅ Use: `GET /accounting/balancesheet`
- ❌ Deprecated: `GET /accounting/report?type=PROFIT_AND_LOSS`. ✅ Use: `GET /accounting/profitloss`
- ❌ Deprecated: `GET /accounting/report?type=TRIAL_BALANCE`. ✅ Use: `GET /accounting/trialbalance`
- ✅ Use: `GET /accounting/cashflow` (Cash flow was never part of the deprecated report object, but should be accessed directly)
- **Write Operations:** Create individual report objects directly instead of wrapping them in a report object
- **Field Access:** Access report data directly from the individual objects instead of through `report.balance_sheet`, `report.profit_and_loss`, etc.
**Example:**
```typescript
// Before
const report = await getAccountingReport({
type: 'BALANCE_SHEET',
start_at: '2024-01-01',
end_at: '2024-12-31'
});
const assets = report.balance_sheet?.assets;
// After
const balanceSheet = await getAccountingBalancesheet({
start_at: '2024-01-01',
end_at: '2024-12-31'
});
const assets = balanceSheet.assets;
```
**Benefits of Using Individual Objects:**
- **Simpler API:** Each report type has its own dedicated endpoint
- **Better Type Safety:** TypeScript can better infer types for specific report objects
- **Clearer Intent:** Code is more explicit about which report type is being accessed
- **Easier Maintenance:** Individual objects are easier to extend and modify independently
---
## Deprecated Types/Interfaces
### `IAccountingProfitlossCategory` and `IAccountingProfitlossSubcategory`
**Status:** Deprecated types - These interfaces are deprecated in favor of `IAccountingProfitlossSection`
**Affected Files:**
- `src/models/UnifiedAccounting.ts`
- `src/models/UnifiedAccounting.joi.ts` (marked as `@deprecated`)
- `src/models/UnifiedAccounting.proto`
**Deprecated Types:**
```typescript
interface IAccountingProfitlossCategory {
name?: string; amount?: number; sub_items?: IAccountingProfitlossSubcategory[];}
interface IAccountingProfitlossSubcategory {
name?: string; amount?: number; transaction_ids?: string[];}
```
**Replacement:**
```typescript
interface IAccountingProfitlossSection {
section_type?: string; section_name?: string; total_amount?: number; accounts?: IAccountingProfitlossAccount[];}
interface IAccountingProfitlossAccount {
account_id?: string; account_name?: string; total_amount?: number; transaction_ids?: string[];}
```
**Migration Recommendation:**
- Update TypeScript type definitions to use `IAccountingProfitlossSection`
- Update code that creates or manipulates profit/loss categories to use sections instead
- The new structure provides better organization with accounts grouped under sections
---
## Summary by Category
| Category | Deprecated Fields Count | Primary Changes |
| ---------------------- | ----------------------- | -------------------------------------------------------------------------------------------- |
| Metadata | 2 | `key` → `slug`, `type` → `format` (affects 6 models) |
| Parent/Relationship | 4 | Various `parent_*_id` → `parent_id` |
| HRIS | 3 | `department`, `division`, `location` → `groups`/`locations` |
| Messaging | 4 | `channel_id`, `channel_ids`, `parent_message_id`, `root_message_id` → `channels`/`parent_id` |
| Accounting | 8 | Multiple field replacements and structural changes |
| ATS | 2 | `document_id` → `document_ids`, `departments` → `groups` |
| Ticketing | 1 | `category` → `category_id` |
| Query Parameters | 3 | Date filter and expand parameter updates |
| Webhooks | 1 | `sig` → `sig256` |
| **Deprecated Objects** | **2** | `IAccountingInvoice` with `type='BILL'`, `IAccountingReport` |
| **Deprecated Types** | **2** | `IAccountingProfitlossCategory`, `IAccountingProfitlossSubcategory` |
**Total Deprecated Fields:**
- 27 unique fields
- 2 deprecated objects
- 2 deprecated types across all categories
---
## General Migration Guidelines
### 1. **Backward Compatibility**
- Deprecated fields will still be supported until `JANUARY 7, 2026`
- Plan to migrate as soon as possible to avoid breaking changes in future API versions
### 2. **Testing**
- Test all migrations thoroughly in a development environment
- Verify that data reads and writes work correctly with the new fields
### 3. **Data Migration**
- For existing data using deprecated fields, consider:
- Running a one-time migration script to populate new fields from old fields
- Updating your application code to read from both old and new fields during transition
- Gradually migrating writes to use only new fields
### **4. Documentation**
- Update your internal documentation and code comments
- Notify your team about these changes
- Update API integration tests to use new field names
## Oracle HCM / Taleo OAuth Credentials Guide
URL: https://docs.unified.to/guides/oracle_hcm_taleo_oauth_credentials_guide
# Oracle HCM / Taleo OAuth Credentials Guide
------
_April 6, 2026_
To connect Oracle HCM / Taleo to Unified, you only need to collect these 3 values from Oracle:
- Client ID
- Client Secret
- Servername
You will enter those directly into Unified.
## **What To Enter In Unified**
When creating the Oracle HCM / Taleo connection, fill in:
- Client ID
- Client Secret
- Servername
**Example Servername**
## **How To Get These Values From Oracle**
**1. Find Your Servername**
Ask your Oracle administrator for your Oracle Fusion HCM host name.
It usually looks like:
`.fa..oraclecloud.com`
Example:
[`example.fa.us2.oraclecloud.com`](https://example.fa.us2.oraclecloud.com/)
This exact value is what you should enter into Unified as the Servername.
**2. Create A Confidential Application In Oracle**
1. Sign in to Oracle as an administrator
2. Open Integrated applications
3. Click Add application
4. Choose Confidential Application
5. Enter a name such as Unified Oracle HCM Integration
6. Continue through the setup
**3. Enable OAuth Client Access**
During application setup, make sure OAuth client access is enabled for the application.
For this Unified connection, Oracle should issue credentials for a confidential application that can request access tokens for the HCM / Taleo APIs.
Your Oracle administrator may need to:
- enable OAuth for the app
- allow the app to access the appropriate Oracle HCM / Taleo resources
- activate the application once setup is complete
**4. Copy The Credentials**
After the confidential application is created and activated, open the application details and copy:
- Client ID
- Client Secret
These are the exact values to enter into Unified.
## **Final Checklist**
Before creating the connection in Unified, make sure you have:
- Client ID
- Client Secret
- Servername
## **Oracle References**
- OAuth configuration: [https://docs.oracle.com/en/cloud/saas/applications-common/25d/oaext/configure-oauth.html](https://docs.oracle.com/en/cloud/saas/applications-common/25d/oaext/configure-oauth.html)
- HCM REST API: [https://docs.oracle.com/en/cloud/saas/human-resources/farws/index.html](https://docs.oracle.com/en/cloud/saas/human-resources/farws/index.html)
## Retrieval-Augmented Generation (RAG)
URL: https://docs.unified.to/guides/retrieval_augmented_generation_rag
# Retrieval-Augmented Generation (RAG)
------
_February 13, 2026_
_Last updated: October 2026_
This page explains how to implement a RAG pipeline using [Unified.to](https://unified.to/).
RAG is an implementation pattern built on top of [Unified.to](https://unified.to/)'s APIs. [Unified.to](https://unified.to/) reads records from the source at request time, returns them in one data model per category, and delivers change events as webhooks on supported integrations. You are responsible for embeddings, vector storage and retrieval.
At a high level, RAG with [Unified.to](https://unified.to/) follows this sequence:
1. Subscribe to webhooks.
2. Receive created or updated objects.
3. Retrieve full content from the source API.
4. Chunk the content.
5. Generate embeddings.
6. Store embeddings in your vector database.
7. On query, retrieve relevant chunks and generate a response.
The pattern is the same across categories.
## What RAG Means in Practice
RAG allows you to answer questions using customer data from connected SaaS platforms.
Instead of relying only on model training data, your application:
- Retrieves relevant customer records.
- Supplies those records as context.
- Generates a response grounded in that context.
[Unified.to](https://unified.to/) reads records directly from the source APIs at request time and sends change events on supported integrations. Records come back:
- In the same fields, whichever provider they come from.
- As the source holds them at the moment of the request.
[Unified.to](https://unified.to/) does not store embeddings or maintain a vector index.
## Step 1: Connect Data Sources
Authorize integrations using Embedded Auth.
Common RAG source categories include:
- File Storage
- Knowledge Management
- CRM
- Ticketing
- ATS
- Messaging
Each authorized integration returns a `connection_id`.
RAG pipelines should treat `connection_id` as the tenant boundary.
## Step 2: Subscribe to Object Updates
Create webhook subscriptions for the objects you want to index.
**Backfill on first subscription**
Set `include_all: true` when creating the webhook subscription. This delivers all existing records to your endpoint before transitioning to incremental updates. Pages are delivered with `type: INITIAL-PARTIAL`; the final page is tagged `type: INITIAL-COMPLETE`. After that, the same subscription delivers ongoing changes tagged `NATIVE` or `VIRTUAL` depending on whether the source integration supports native webhooks.
Your endpoint receives the same payload structure for backfill and incremental updates, so no separate backfill handler is required.
**On created or updated events:**
- Your endpoint receives the event.
- You call the appropriate retrieve endpoint to fetch the latest version of the object.
- If the object contains a `download_url`, fetch the content from that URL.
List endpoints often return metadata but not full content. For RAG, you must explicitly retrieve full text before chunking.
Native webhooks forward the vendor's events. Virtual webhooks use the same payload and detect changes at an interval you set, as often as every minute on paid plans.
Webhooks are recommended over polling for RAG ingestion.
## Step 3: Chunk and Embed
Large text (files, pages, tickets, resumes, notes, transcripts) should be split into chunks before embedding.
Each chunk should include stable metadata such as:
- `connection_id` — tenant boundary; required for all retrieval filters
- `object_type` — e.g. `crm_deal`, `ats_candidate`, `ticketing_ticket`
- `object_id` — source record ID; used to target re-embedding on update
- `updated_at` — timestamp of the source record's last update
- `is_latest` — boolean flag indicating whether this chunk is current; set to `false` when a record updates and new chunks are inserted. This field is not returned by [Unified.to](https://unified.to/); you maintain it in your vector store schema.
You may also include other returned fields as metadata filters.
[Unified.to](https://unified.to/) returns each object in the same fields whichever provider it comes from, so any field it returns can be stored as metadata in your vector index and used for filtering at retrieval time.
You generate embeddings using the embedding model of your choice. [Unified.to](https://unified.to/)'s Generative AI API can create embeddings on supported integrations, but embeddings and indexes are stored in your infrastructure.
## Step 4: Store in a Vector Database
Store embeddings in your vector database (for example, Pinecone or pgvector).
Include metadata to support:
- Tenant isolation (`connection_id`)
- Object filtering (`object_type`)
- Update replacement (`updated_at`)
- Permission enforcement (see below)
[Unified.to](https://unified.to/) does not:
- Cache end-customer payloads
- Store embeddings
- Maintain a vector index
## Step 5: Retrieve and Generate
When a user submits a query:
1. Embed the query.
2. Retrieve the top matching chunks from your vector database.
3. Filter by `connection_id` and any relevant metadata.
4. Pass retrieved context to your model.
5. Return the generated answer.
If required, include citations that map back to `object_id` or `web_url`.
[Unified.to](https://unified.to/) does not perform retrieval. It delivers change events; your application re-embeds and replaces vectors to keep the index in step with the source.
## Permissions
File objects include explicit permissions metadata.
Other objects (CRM, ATS, ticketing, messaging) do not return user- or group-level permission structures. If row-level enforcement is required, implement that logic in your application layer before returning retrieved results
Always filter retrieval results by tenant and permission constraints before generation.
## How current is the index?
For RAG pipelines, how current the index is depends on how changes reach you:
- Native webhooks forward the vendor's events.
- Virtual webhooks detect changes at an interval you set, as often as every minute on paid plans.
- Most list endpoints support pagination and incremental filtering via `updated_gte`
To keep embeddings current:
- Re-fetch objects on update events.
- Re-chunk and re-embed.
- Replace outdated vectors in your index.
## When to Use RAG
Use this pattern when you need to:
- Build enterprise search across connected platforms.
- Ground AI responses in customer documents or records.
- Enable resume or candidate search.
- Support contract or document Q&A.
- Build account-level CRM assistants.
The ingestion architecture is consistent across categories. Object models and content retrieval methods vary by API.
## Related APIs
RAG pipelines commonly use:
- [File Storage API](https://docs.unified.to/storage/overview)
- [Knowledge Management API](https://docs.unified.to/kms/overview)
- [CRM API](https://docs.unified.to/crm/overview)
- [Ticketing API](https://docs.unified.to/ticketing/overview)
- [ATS API](https://docs.unified.to/ats/overview)
- [Messaging API](https://docs.unified.to/messaging/overview)
Refer to category documentation for supported objects and webhook availability.
## Related Guides
- [How to build Enterprise Search using RAG](https://unified.to/blog/how_to_build_enterprise_search_using_rag)
- [ATS to Vector DB: How to Power Talent Intelligence with Real-Time Data](https://unified.to/blog/ats_to_vector_db_how_to_power_talent_intelligence_with_real_time_data)
- [How to Build an AI-Powered Meeting Recording Summarization](https://unified.to/blog/how_to_build_an_ai_powered_meeting_recording_summarization_with_unified)
- [How to Train AI with CRM Data using Unified's CRM API](https://unified.to/blog/how_to_train_ai_with_crm_data_using_unified_crm_api)
- [How to Train AI with HRIS Data with Unified's HR & Directory API](https://unified.to/blog/how_to_train_ai_with_hris_data_with_unified_hr_and_directory_api)
[→ Start your 30-day free trial](https://app.unified.to/login)
[→ Book a demo](https://calendly.com/d/cph9-g8n-jzg/connect-with-unified)
## SalesForce (External Client Apps) on Multiple Organizations
URL: https://docs.unified.to/guides/salesforce_external_client_apps_on_multiple_organizations
# SalesForce (External Client Apps) on Multiple Organizations
------
_April 15, 2026_
This guide will walk you through the required steps to support using a Salesforce External Client App (ECA) across multiple organizations. When an ECA is created in Salesforce, it can only connect to users within the organization that created it. To allow the ECA to be used across multiple organizations, you must complete the required setup steps before it can connect to users outside the original organization. The customer's Salesforce admin does not need to give anyone their Salesforce credentials, they can run the second set of steps below.
> ⚠️ This setup resolves the error 'Cross-org OAuth flows are not supported for this external client app'. That error usually means the External Client App was created in your SourceOrg but has not yet been installed/deployed/approved in the customer's TargetOrg.
### Terminology
| Term | Meaning |
| ----------------------- | ----------------------------------------------------------------------- |
| SourceOrg | The Salesforce org where the External Client App was created |
| TargetOrg | The customer's Salesforce org where users are trying to connect |
| APP_API_NAME | API Name of the External Client App |
| OAUTH_SETTINGS_API_NAME | Metadata name of the OAuth settings attached to the External Client App |
1. The first thing you need to do is create an ECA within Salesforce. If you have already done this proceed to step 2, otherwise check out our [how to guide](https://unified.to/blog/how_to_register_a_salesforce_developer_app_and_get_oauth_2_credentials).
1. [Install SalesForce CLI](https://developer.salesforce.com/tools/salesforcecli)
2. Generate a SalesForce project
```shell
sf project generate --name unified-sf
```
3. Navigate into project
```shell
cd unified-sf
```
4. Login to your Source organization, this is the organization where you have created the External client app
```shell
sf org login web --alias SourceOrg
```
5. Retrieve the app metadata (Replace APP_API_NAME with your app name, which can be found at Setup → External Client Apps → open your app → settings → basic information → API Name
```shell
sf project retrieve start --metadata ExternalClientApplication:APP_API_NAME --target-org SourceOrg
sf project retrieve start --metadata ExtlClntAppOauthSettings --target-org SourceOrg
```
> ℹ️ After retrieval, look in `force-app/main/default/extlClntAppOauthSettings/` for a file like `salesforce-test-app_oauth.extlClntAppOauthSettings-meta.xml`. The part before `.extlClntAppOauthSettings-meta.xml` is your `OAUTH_SETTINGS_API_NAME`. It is usually NOT the same as `APP_API_NAME` (it often ends with `_oauth`), so confirm it from the retrieved file name instead of guessing.
6. Create a zip of the project folder to give to the customer who wants to install your app.
```shell
zip -r ../my_project.zip . --exclude "*/.git/*" --exclude "*/.sfdx/*"
```
Customer Steps (Customer Salesforce admin)
1. Customer opens the project folder
```javascript
cd my_project
```
1. [Install SalesForce CLI](https://developer.salesforce.com/tools/salesforcecli)
2. Customer admin logs into the TargetOrg
```javascript
sf org login web --alias TargetOrg
```
1. The customer will need to make some changes within their Salesforce to deploy the app. In the SalesForce Dev Hub > Settings > Setup > Dev Hub, enable both 'Enable Unlocked Packages and Second-Generation Managed Packages' and 'Enable Dev Hub'

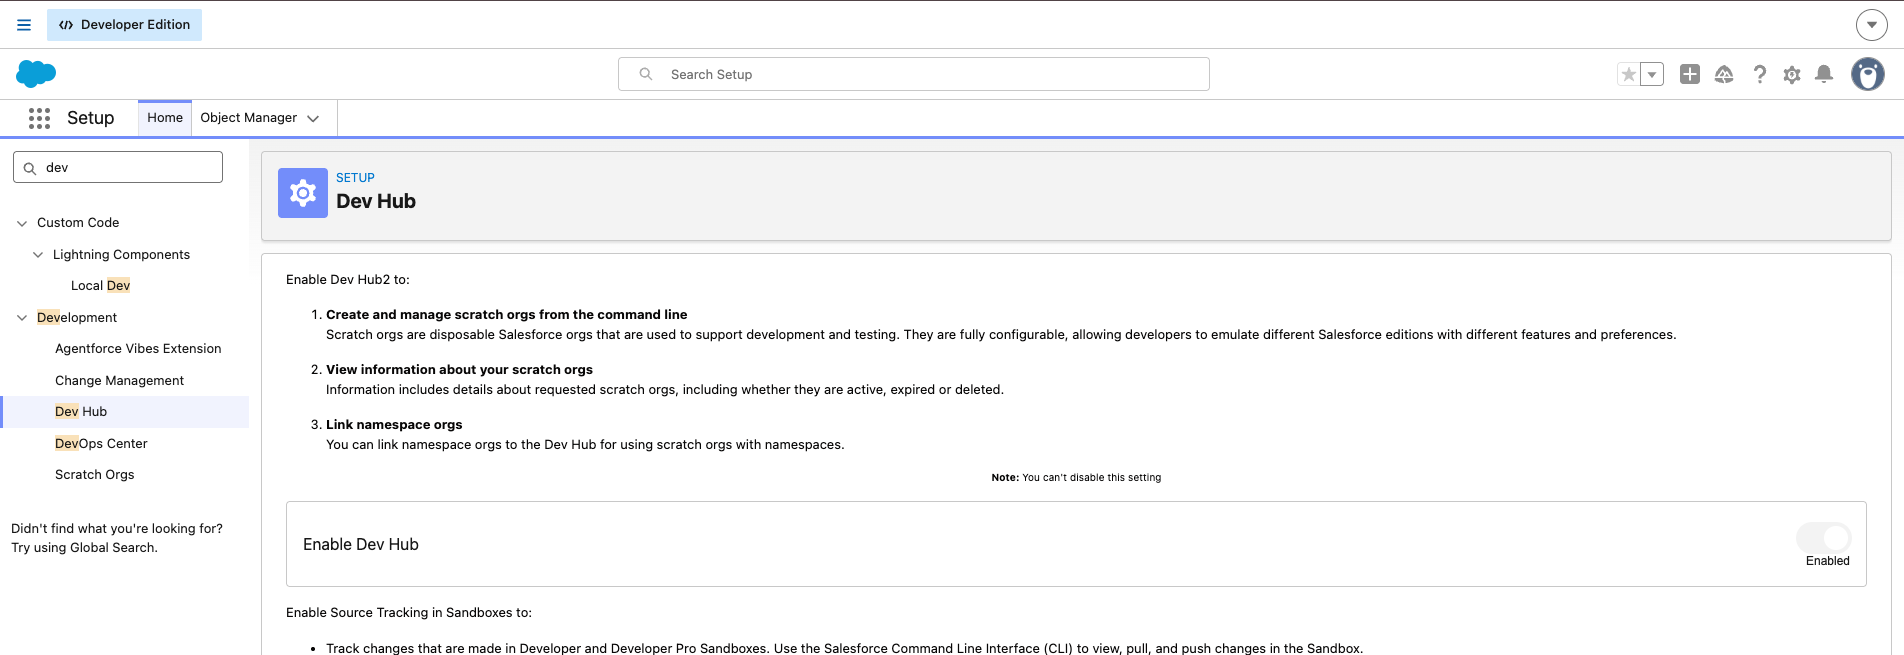
1. Customer deploys the ECA app
```javascript
sf project deploy start --metadata ExternalClientApplication:APP_API_NAME --target-org TargetOrg
sf project deploy start --metadata ExtlClntAppOauthSettings:APP_API_NAME_oauth --target-org TargetOrg
```
> ℹ️ Replace `APP_API_NAME_oauth` above with the real `OAUTH_SETTINGS_API_NAME` from the retrieved file name (it may differ from `APP_API_NAME`).
Alternative: deploy both metadata types together:
```shell
sf project deploy start --metadata ExternalClientApplication --metadata ExtlClntAppOauthSettings --target-org TargetOrg
```
1. The customer can then verify that the app has been added to their organization by visiting Setup → External Client Apps → external client app manager where they should see your app installed.
1. Configure and approve access in the TargetOrg. The admin should review and configure:
- Permitted users
- Profiles / permission sets
- OAuth policies
- Refresh token policy
- IP restrictions, if applicable
- Admin-approved users, if the org requires admin approval
2. The customer can now create a connection to your app
Once the app is deployed and access is granted, the end user can retry the normal Salesforce connection flow through Unified and the cross-org OAuth error will be resolved.
## Long-term application-distribution recommendation
For repeated customer onboarding, the preferred long-term approach is to package the External Client App as a Salesforce package and share a package install link with customer Salesforce admins, instead of asking each admin to manually run metadata deployment commands.
1. You create the External Client App once in SourceOrg.
2. You package the app and OAuth settings.
3. You share the package install link with customer admins.
4. The customer Salesforce admin installs the package into TargetOrg.
5. The customer Salesforce admin approves/configures access.
6. End users connect normally through OAuth.
## SAML Single-Sign-On
URL: https://docs.unified.to/guides/saml_single_sign_on
# SAML Single-Sign-On
------
_September 28, 2025_
SAML (Security Assertion Markup Language) is an XML-based standard for exchanging authentication and authorization data between parties, particularly between an identity provider (IdP) and a service provider (SP).
[Unified.to](https://unified.to/) supports SAML sign-in to your workspace with JumpCloud, Okta, Microsoft Entra and Google Workspace Directory, on the Pro and Scale plans (as of 8 October 2026). [Let us know](https://unified.to/contact) if you need another SAML identity provider.
Here's how SAML works:
## **SAML Authentication Flow**
**Key Components:**
1. **Identity Provider (IdP)** - The system that authenticates users (e.g., Active Directory, Okta, Azure AD)
2. **Service Provider (SP)** - The application the user wants to access (e.g., your Unified.to app)
3. **User** - The person trying to log in
4. **SAML Assertion** - XML document containing authentication/authorization information
**Typical SAML SSO Flow:**
1.
2.
3.
4.
**Detailed Steps:**
1. **User Access Request**
- User visits your application and clicks "SAML SSO" login
- Application generates a SAML Authentication Request (AuthnRequest)
2. **Redirect to Identity Provider**
- User is redirected to their organization's IdP
- AuthnRequest contains information about the SP and requested attributes
3. **User Authentication**
- User enters their organizational credentials
- IdP validates the credentials
4. **SAML Response Generation**
- IdP creates a SAML Response containing a SAML Assertion
- Assertion includes user identity, authentication method, session info, etc.
5. **Response Processing**
- IdP redirects user back to SP with the SAML Response
- SP validates the assertion signature and extracts user information
- User is logged into the application
**SAML Assertion Contents:**
- **Subject**: Who the user is (NameID, email, etc.)
- **Authentication Statement**: How they were authenticated
- **Attribute Statement**: Additional user attributes (roles, groups, etc.)
- **Conditions**: Validity period, audience restrictions
- **Signature**: Cryptographic proof of authenticity
**Common SAML Bindings:**
- **HTTP Redirect**: Data passed via URL parameters
- **HTTP POST**: Data posted in form fields
- **HTTP Artifact**: Reference token exchanged for full assertion
**Security Features:**
- **Digital Signatures**: Ensure assertions haven't been tampered with
- **Encryption**: Protect sensitive data in transit
- **Time-based Conditions**: Assertions expire after set time
- **Audience Restrictions**: Limit which SPs can use the assertion
**Configuration Requirements:**
**For Service Provider (your app):**
- SAML metadata XML with entity ID, ACS URL, certificate
- User attribute mapping (email, name, roles)
- Certificate for signature validation
**For Identity Provider:**
- SP metadata containing endpoints and certificate
- User attribute configuration
- SSO URL configuration
This is why SAML is popular for enterprise SSO - it provides secure, standardized authentication that integrates with existing corporate identity systems without requiring users to manage separate passwords for each application.
## **JumpCloud SAML Integration Setup**
**1. JumpCloud Configuration (Identity Provider Side)**
### **Step 1: Create SSO Application in JumpCloud**
1. Log into JumpCloud Admin Portal
2. Navigate to **SSO Applications**
3. Click **+ Add New Application**
4. Search for "Custom SAML Application" or "Custom App"
5. Configure the application:
- **Display Label**: "Unified.to" (or your app name)
- **IdP Entity ID**: https://sso.jumpcloud.com/saml2/unified-to (or your preferred ID)
- **SP Entity ID**: Your application's entity ID (e.g., https://api.unified.to/saml/metadata)
### **Step 2: Configure SAML Attributes**
In the JumpCloud SSO configuration:
- **ACS URL**: `https://api.unified.to/saml/acs` (your assertion consumer service endpoint)
- **Audience**: https://api.unified.to/saml/metadata
- **Name ID Format**: urn:oasis:names:tc:SAML:1.1:nameid-format:emailAddress
- **Attribute Mappings**:
- email → https://schemas.xmlsoap.org/ws/2005/05/identity/claims/emailaddress
- firstName → https://schemas.xmlsoap.org/ws/2005/05/identity/claims/givenname
- lastName → https://schemas.xmlsoap.org/ws/2005/05/identity/claims/surname
- username → https://schemas.xmlsoap.org/ws/2005/05/identity/claims/name
### **Step 3: Get JumpCloud Metadata**
- Download the IdP metadata XML from JumpCloud
- Note the **SSO URL** (usually https://sso.jumpcloud.com/saml2/unified-to)
- Get the **X.509 Certificate** for signature validation
# Configure SAML on Unified
If you haven't registered an account, sign-in with any of our available Social or OAuth2 OIDC login options. Make sure to choose the relevant data region.
Then proceed to the workspace settings and choose [SAML](https://app.unified.to/settings/saml).
Select your Identity Provider. Either upload the SAML manifest XML file or input the SAML configuration settings from your identity provider.
You can choose to restrict sign-ins to just SAML for your workspace. All existing and invited workspace members will then need to sign-in with SAML.
## Scaling MCP Tools with Anthropic's (& OpenAI's) Defer Loading
URL: https://docs.unified.to/guides/scaling_mcp_tools_with_anthropic_and_openai_defer_loading
# Scaling MCP Tools with Anthropic's (& OpenAI's) Defer Loading
------
_December 25, 2025_
Learn how to use Anthropic's and OpenAI's `defer_loading` tool search features with Unified's MCP server to efficiently manage hundreds of tools while maintaining high accuracy and context efficiency.
When building AI applications with MCP servers, including the [Unified MCP server](https://www.notion.so/mcp/overview), you quickly encounter a critical challenge: most LLM models struggle with large numbers of tools.
While Unified can provide thousands of tools across different integrations, traditional approaches hit two key limitations:
- **Context window bloat**: Tool definitions consume massive portions of your context (50 tools ≈ 10-20K tokens)
- **Tool selection degradation**: An LLM's ability to correctly select tools degrades significantly beyond 30-50 tools
Anthropic's new **defer_loading** feature solves both first problems by dynamically discovering and loading tools on-demand instead of loading all tool definitions upfront.
## The Problem: Too Many Tools
The Unified MCP server can expose tools from any connected integration— CRM, ATS, HRIS, ticketing, storage, and more. A single connection might offer 50+ tools, and with multiple integrations, you could easily have 200+ available tools. Overall, the Unified MCP server currently supports 22,566 tools.
Traditional approach problems:
- Loading 200 tool definitions uses 40,000-80,000 tokens
- The LLM API struggles to select the correct tool from such a large set
- You waste context on tools that won't be used in that conversation
## The Solution: Anthropic's Defer Loading Tool Search
Anthropic's `defer_loading` feature works with two tool search variants:
### Tool Search Variants
**1. Regex Tool Search** (`tool_search_tool_regex_20251119`)
- Claude constructs regex patterns to search for tools
- Best for exact matches and pattern-based discovery
- Fast and efficient for well-named tools
**2. BM25 Tool Search** (`tool_search_tool_bm25_20251119`)
- Claude uses natural language queries to search
- Better for semantic understanding
- More flexible for varied naming conventions
### How It Works
1. You include a tool search tool in your tools list
2. You provide all tool definitions with `defer_loading: true`
3. Claude sees only the tool search tool initially
4. When Claude needs additional tools, it searches dynamically
5. The API returns 3-5 most relevant tools
6. These are automatically expanded into full definitions
7. Claude selects and invokes the appropriate tool
## Implementation
To use the new `defer_loading` tool option, follow these instructions (found [here](https://platform.claude.com/docs/en/agents-and-tools/tool-use/tool-search-tool#mcp-integration)) when calling Anthropic's ``/v1/messages`` API:
- Add `"mcp-client-2025-11-20"` to the `anthropic-beta` header:
`anthropic-beta: advanced-tool-use-2025-11-20,mcp-client-2025-11-20`
- Add the Unified MCP server's URL for your region (US `https://mcp-api.unified.to/mcp`, EU `https://mcp-api-eu.unified.to/mcp`, AU `https://api-au.unified.to/mcp`). Pass a connection-scoped signed token (generated with `get_unified_connection_mcp_url`, mode=user; works for one connection only) in `authorization_token`, never in the URL, and keep your workspace API key on your server.
```json
"mcp_servers": [
{
"type": "url",
"name": "unified-salesforce-server",
"url": "https://mcp-api.unified.to/mcp?connection=y",
"authorization_token": ""
}
],
```
- Then add an additional `tools` array with configuration on which tools to defer:
```json
"tools": [
{
"type": "tool_search_tool_regex_20251119",
"name": "tool_search_tool_regex"
},
{
"type": "mcp_toolset",
"mcp_server_name": "unified-salesforce-server",
"default_config": {
"defer_loading": true
},
"configs": {
"list_crm_contacts": {
"defer_loading": false
}
}
}
],
```
- Use the `default_config.defer_loading: true` option to make all tools deferrable
- Use the `configs.{tool_id}.defer_loading: true/false` to set an individual tool to defer (or not)
Or, alternatively, you can call the Unified MCP `/tools` endpoint with parameters `?type=anthropic&defer_tools=all` and then feed that `tools` result into Anthropic's API.
## Best Practices
### 1. Keep Core Tools Non-Deferred
If you have 3-5 tools that are frequently used, keep them as non-deferred.
### 2. Use Permissions to Scope Tools
Reduce the tool catalog size by requesting only the permissions you need:
```typescript
// Instead of all tools across all categories
permissions: 'crm_contact_read,crm_contact_write,crm_deal_read'
// This is better than loading 200+ tools from all categories
```
### 3. Restrict Tools
Use the Unified MCP `tools` parameter to restrict which tools will be returned back to the LLM API.
This has a different effect than the `defer_tools` parameter as it doesn't return restricted tools to the LLM API at all, while deferring tools means that the LLM API knows about the tool, but doesnt process it until it is needed.
### 4. Monitor Token Usage
Track your token consumption to understand the benefits:
```typescript
console.log(`Input tokens: ${response.usage.input_tokens}`);
console.log(`Output tokens: ${response.usage.output_tokens}`);
console.log(`Tool search requests: ${response.usage.server_tool_use?.tool_search_requests}`);
```
### 5. Combine with Prompt Caching
Use [prompt caching](https://www.notion.so/guides/building_ai_applications_with_unified_and_langbase) with defer_loading for multi-turn conversations:
```typescript
messages.push({
role: "user",
content: "Now find their recent deals",
cache_control: { type: "ephemeral" }
});
```
## Tool Search Limits
Be aware of these limits:
- **Maximum tools**: 10,000 tools in your catalog
- **Search results**: Returns 3-5 most relevant tools per search
- **Pattern length**: Maximum 200 characters for regex patterns
- **Model support**: Claude Sonnet 4.5+ and Opus 4.5+ only
## When to Use Defer Loading
**Good use cases:**
- 20+ tools available from Unified connections
- Multiple integrations (CRM + ATS + HRIS + Storage)
- Building multi-tenant applications where each tenant has different integrations
- Context window is getting tight with tool definitions
- Tool selection accuracy is degrading
**When traditional tool calling might be better:**
- Less than 10 tools total
- All tools are frequently used in every request
- Very focused single-integration use case
## Real-World Example: Multi-Integration Assistant
Here's a practical example of a customer support assistant that accesses multiple integrations:
```typescript
async function createSupportAssistant(crm_connection_id, hris_connection_id, zendesk_connection_id) {
// Fetch tools from multiple Unified connections
const crmTools = await fetchUnifiedTools(crm_connection_id, 'crm_contact_read,crm_deal_read', { type: 'anthropic', defer_tools: 'list_crm_'});
const ticketingTools = await fetchUnifiedTools(zendesk_connection_id, 'ticketing_ticket_read,ticketing_ticket_write', { type: 'anthropic', defer_tools: 'list_crm_'});
const hrisTools = await fetchUnifiedTools(hris_connection_id, 'hris_employee_read', { type: 'anthropic', defer_tools: 'list_crm_'});
// Combine all tools with defer_loading
const tools = [
...crmTools,
...ticketingTools,
...hrisTools
];
// Total: 150+ tools, with all listX tools being deffered
return await anthropic.beta.messages.create({
model: "claude-sonnet-4-5-20250929",
betas: ["advanced-tool-use-2025-11-20"],
max_tokens: 4096,
messages: [{
role: "user",
content: "Customer John Doe from Acme Corp called about ticket #12345. Show me his account info, open tickets, and any recent deals."
}],
tools: tools
});
}
```
## Resources
- [Unified MCP Server Overview](https://docs.unified.to/mcp/overview)
- [MCP Installation & Usage](https://docs.unified.to/mcp/installation)
- [MCP Server Options](https://docs.unified.to/mcp/server-options)
- [Anthropic Tool Search Documentation](https://platform.claude.com/docs/en/agents-and-tools/tool-use/tool-search-tool)
- [Anthropic MCP Integration Guide](https://platform.claude.com/docs/en/agents-and-tools/tool-use/tool-search-tool#mcp-integration)
- [Best MCP Servers for Connecting AI Agents to SaaS APIs](https://unified.to/blog/best_mcp_servers_for_connecting_ai_agents_to_saas_apis): how ten MCP servers compare on tool filtering, deferred loading and scope
## TLDR
Anthropic's `defer_loading` feature is a game-changer for building AI applications with Unified's MCP server. By the LLM API dynamically loading tools on-demand, you can:
- **Scale to hundreds of tools** across multiple integrations
- **Reduce context usage** by 80-90%
- **Improve tool selection accuracy** significantly
- **Build more capable AI assistants** that access diverse data sources
Start by adding the tool search tool and marking your Unified MCP tools as deferred. Monitor your token usage and tool selection accuracy to see the immediate benefits.
The combination of Unified's extensive integration network and Anthropic's intelligent tool search opens up possibilities for building truly comprehensive AI agents that can work across your entire SaaS ecosystem.
## Set Environments for your Unified.to Workspace
URL: https://docs.unified.to/guides/set_environments_for_your_unified_workspace
# Set Environments for your Unified.to Workspace
------
_June 7, 2023_
We're eager to share the release of environments, a new feature that makes it easier to test and customize your integrations before releasing them to production. For example, you can create environments for staging and production, which gives you more control over testing integrations with our Unified API.
[**Try it now**](https://app.unified.to/?utm_source=blog&utm_medium=blog&utm_campaign=environments&utm_content=environments_blog)
## What is an environment?
Environments are configurable spaces that allow you to specify different integration credentials for different circumstances. Determine distinct access and configuration rules for various scenarios, such as production, staging, and testing, which gives you more flexibility and control over managing your release processes.
Environments can be added under any plan in your Unified.to account's Workspace.
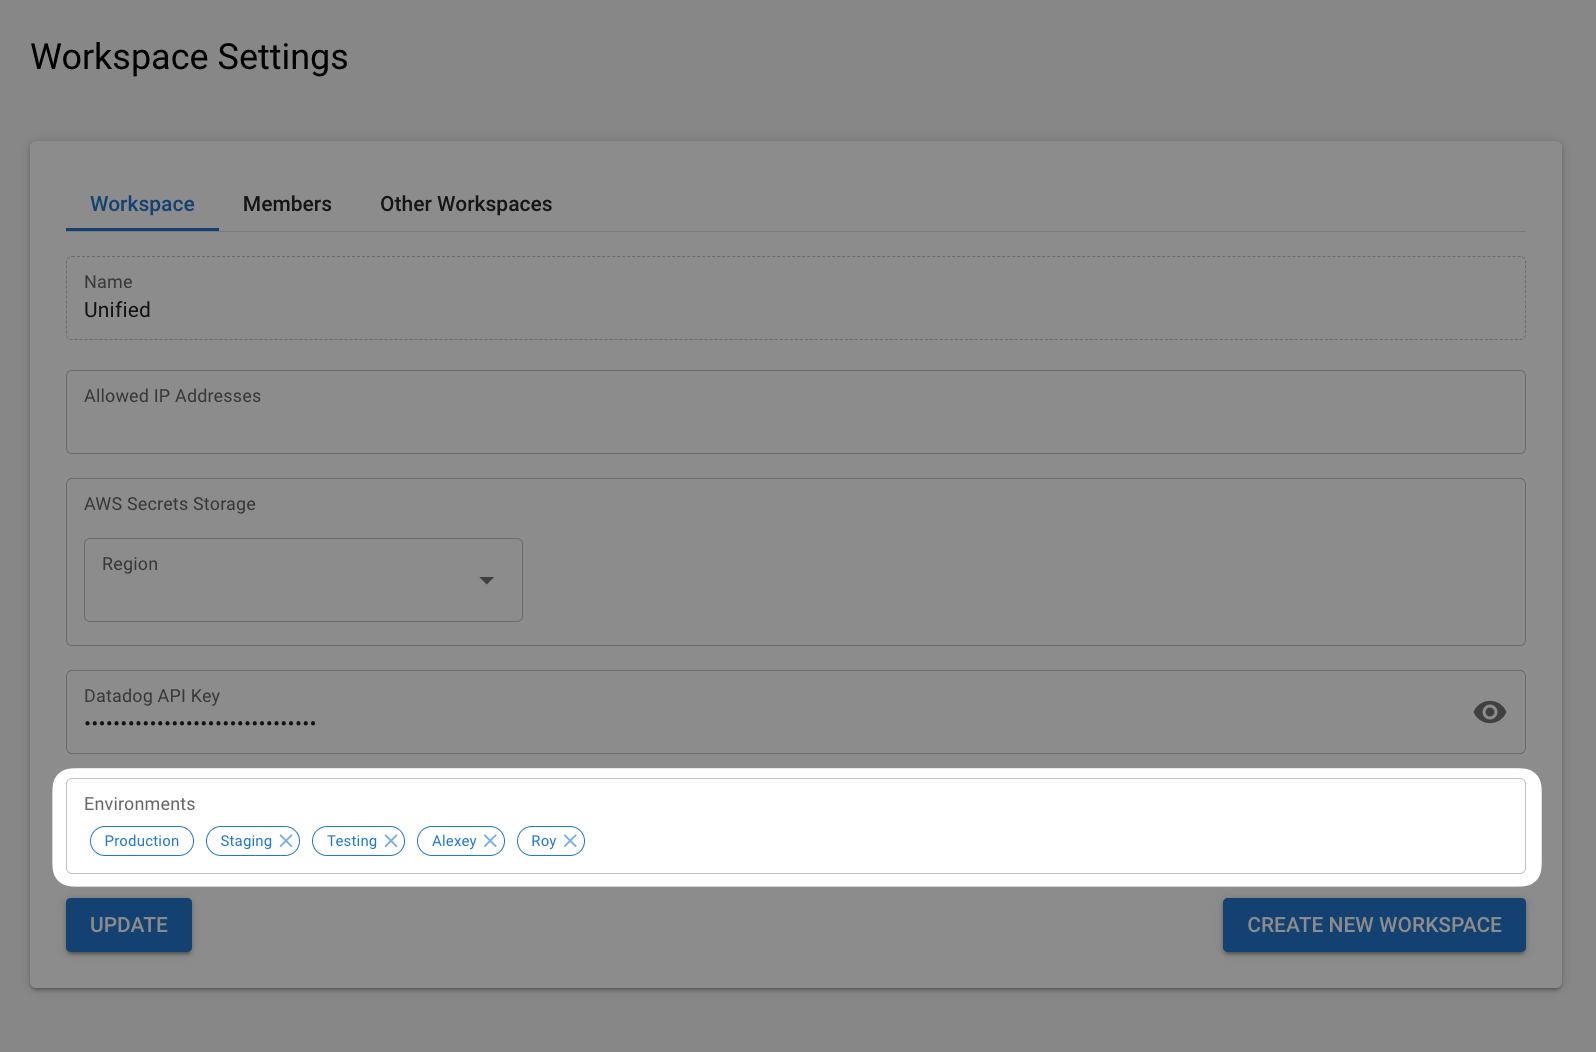
## Capabilities of environments
- **Integration testing:** Before releasing integrations to production, you can now test them in a different environment.
- **Multiple environments:** You can set up multiple environments such as production, staging, and others personalized to you and your team's needs.
- **Environment-specific integrations:** You can now decide which integrations are active in each environment.
- **Application credential assignment:** Choose which application credentials to use for each integration in each environment.
## Benefits of environments
- **Greater flexibility:** You can tailor your integrations to meet the unique needs of each environment including client specifications.
- **Reduced errors:** Testing integrations in a staging environment before moving them to production helps minimize mistakes and unexpected errors.
- **Increased productivity:** This feature streamlines the management of your workspace, reducing time spent on setup and adjustments.
## When to use multiple environments
Set multiple environments regardless of what plan you're on for different scenarios:
**1. Localhost**
_**Create a sandbox environment without disrupting your team's workflow or end-user experience**_
Example: Suppose Laura, a developer, is working on integrating a new batch of HR services. She creates her own personal authentication environment within Unified.to, complete with application credentials specific to her environment. This allows Laura to experiment freely without affecting her app's live features or her fellow developers' work.
**2. Testing or QA**
_**Try out new integrations and run tests before releasing them to production**_
Example: Once Laura has completed her initial development work, she simply copies the credentials to the testing environment. This environment has its own set of credentials and often uses mocked or dummy data for testing purposes. In this stage, Laura and her team run a battery of tests to ensure the new HR integrations work as expected and don't disrupt other functionalities within the app.
**3. Staging**
_**Mirror your production environment to finely-tune performance and perform final tests**_
Example: After the new HR integrations pass all tests in the testing environment, it's promoted to the staging environment. This environment is a mirror image of the production environment, complete with the same application credentials used in production. The HR integrations are tested under conditions that closely mimic the live application. This final testing phase ensures the new batch of integrations are ready for deployment in the production environment.
**4. Production**
_**Your live environment where your integrations run and are available to end-users**_
Example: This is the live environment where the application operates, interacts with real data, and serves actual users. It uses production application credentials. With the successful deployment of the new HR integrations, all users of the app can now benefit from the new integrations Laura has been working on.
## How to set new environments
Implement this new feature in seconds. Follow these steps:
**Setting up Environments**
1. Log in to or create a [Unified.to account](https://app.unified.to/?utm_source=blog&utm_medium=blog&utm_campaign=environments&utm_content=environments_blog)
2. Go to **Workspace Settings** and insert the name of your new environment, (e.g., 'Staging') and press enter
3. Once entered, your environment can be used for configuring individual integrations and generating an Embedded Directory
**Configuring Integrations**
1. Navigate to **Integrations** and click ACTIVATE on any integration, for example, Workday
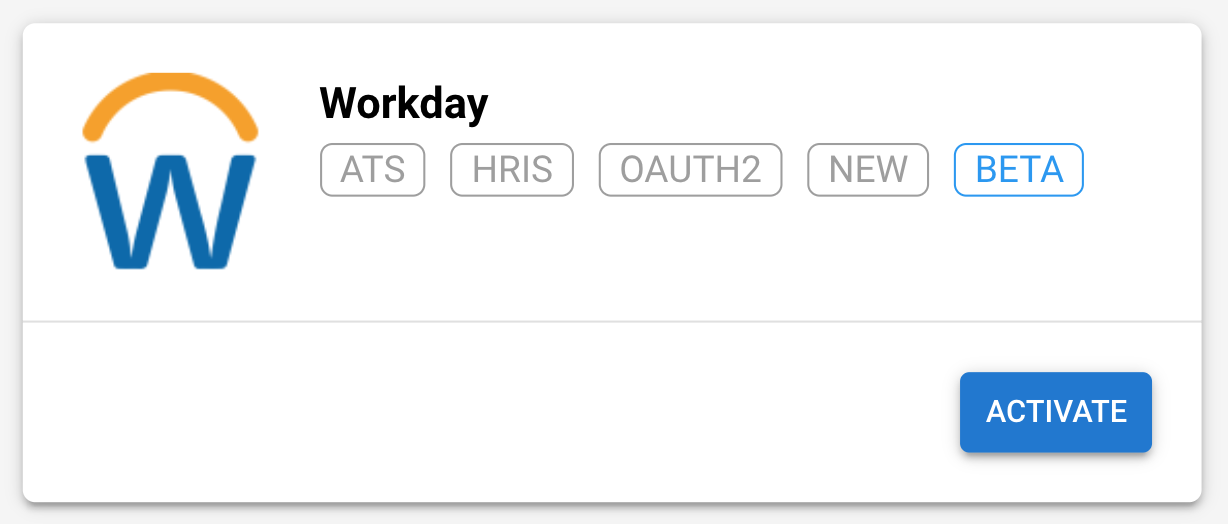
2. From the dropdown menu, select the environment where you to want to add credentials, such OAuth Client ID and Secret
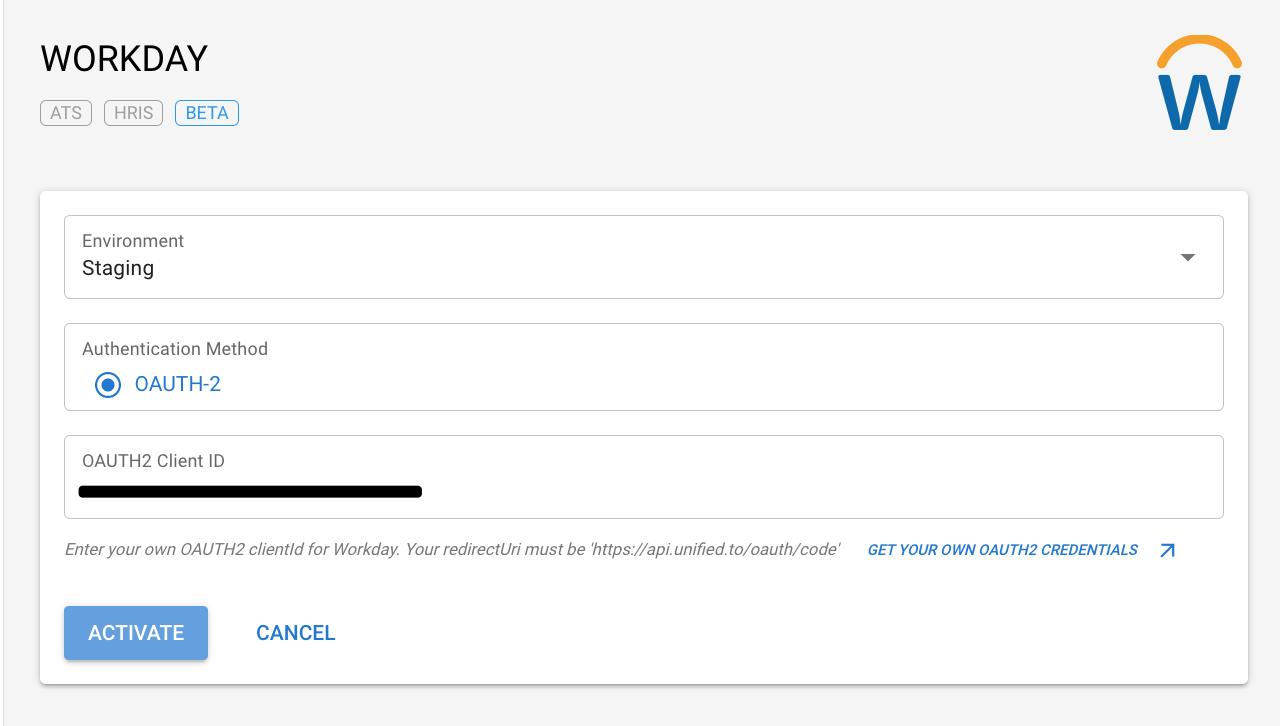
3. Input your credentials for Workday for the selected environment and click ACTIVATE
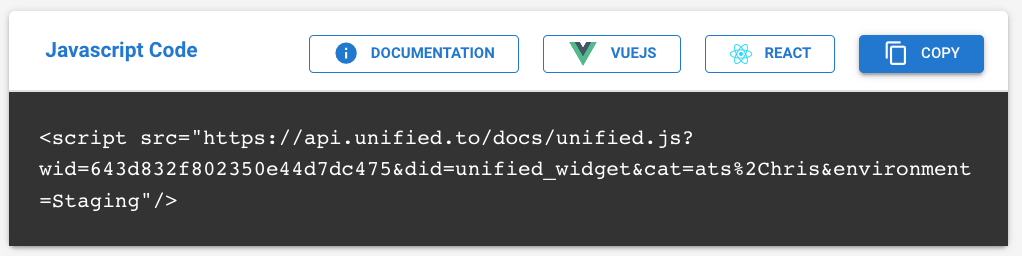
4. Repeat for any integration and environment
## Embed Directory
After enabling integrations for a specific environment, you can generate an Embedded Directory for that environment.
1. Select the desired authentication environment from the dropdown menu.
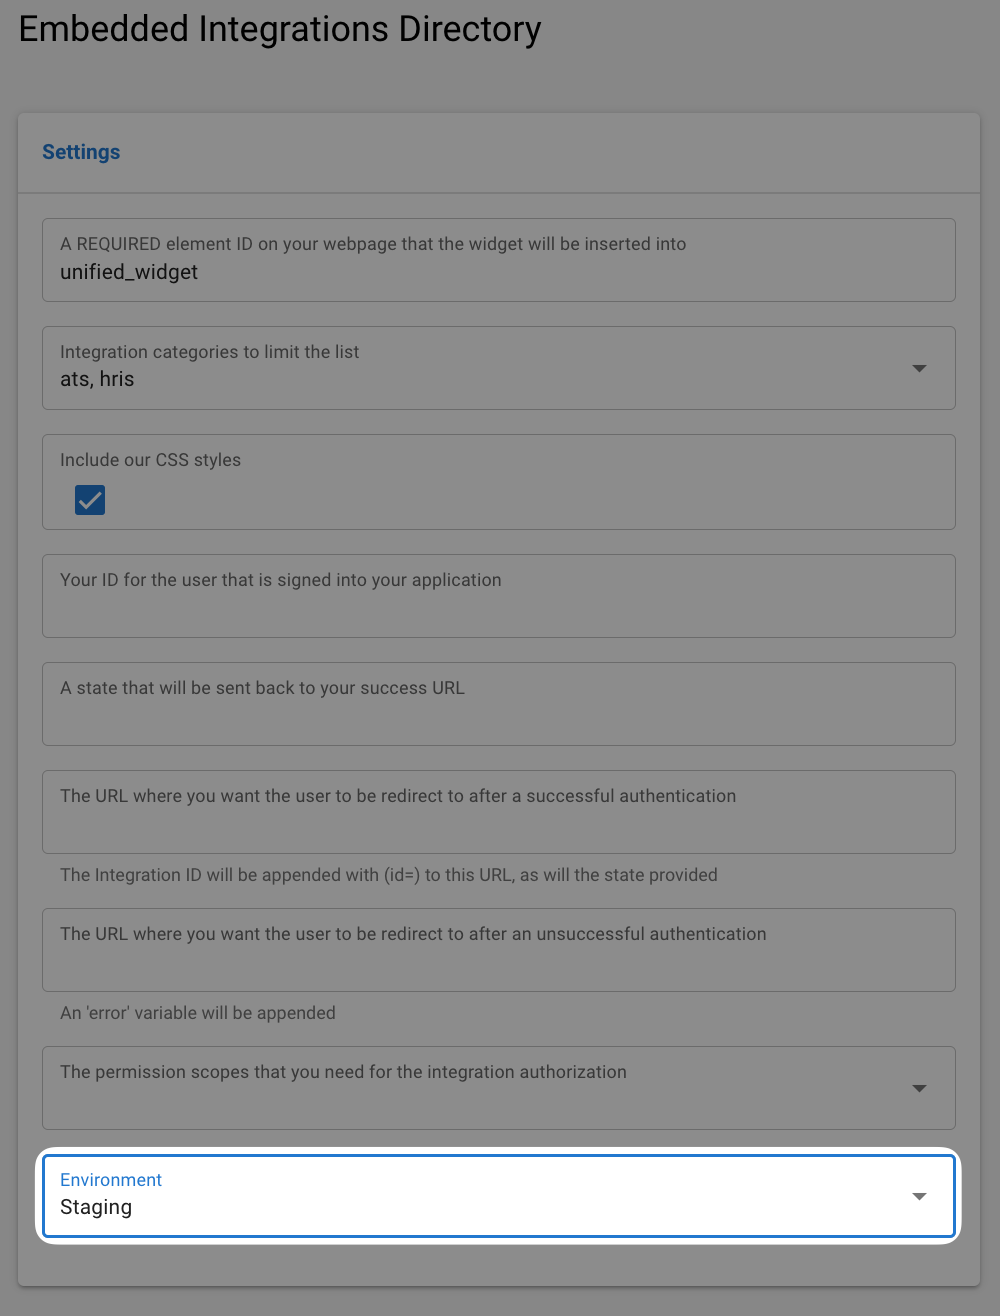
2. This will generate a script with a new environment parameter for you.
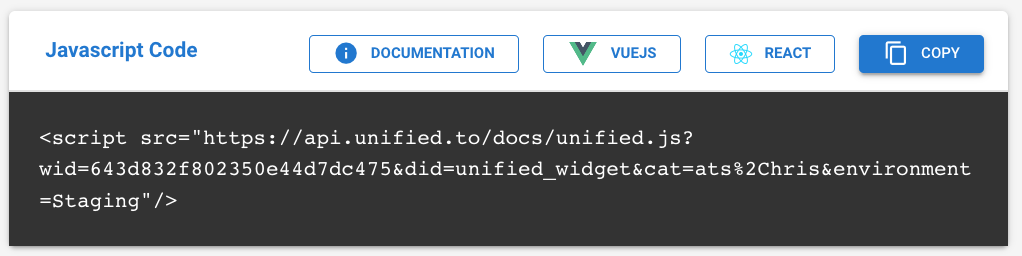
If you're using our API to pull a list of active integrations for your directory, you can pass the environment query parameter to retrieve the correct integrations.
## Building the ultimate Unified API solution for integrations
This new authentication environment feature is just one of the many ways we're making Unified.to work better for developers who want to build API-first integrations with industry-leading HR, Sales, Marketing, and Support apps. We're excited for you to try Authentication Environments and see the difference it makes in managing your integrations pre-launch.
Our team is here to support you every step of the way. Enjoy exploring Unified.to and let us know if you need a hand.
You can try setting Unified.to's Authentication Environments at [unified.to/get-started](https://app.unified.to/?utm_source=blog&utm_medium=blog&utm_campaign=environments&utm_content=environments_blog).
## Setting up a Slack Bot Connection with Unified.to
URL: https://docs.unified.to/guides/setting_up_a_slack_bot_connection_with_unified
# Setting up a Slack Bot Connection with Unified.to
------
_June 16, 2026_
> This guide walks you through connecting Slack Bot (slackbot) to Unified.to — including the Slack app settings you need for sending messages, interactive buttons, and receiving button-click events as Unified MessagingEvent webhooks.
---
## Overview
A Slack Bot integration has three parts:
| Part | Where | Purpose |
| -------------------- | ------------------------ | ----------------------------------------------------------------------------- |
| Slack app | api.slack.com | OAuth credentials, bot scopes, and request URLs Slack calls when events occur |
| Connection | Unified dashboard | Authorizes your Slack workspace and stores the bot token |
| Webhook subscription | Unified dashboard or API | Tells Unified where to deliver normalized MessagingEvent payloads |
You can use Unified's shared Slack OAuth app (fastest) or register your own Slack app if you need full control over the app configuration.
---
## Important: two different URLs
Slack and your application use different webhook URLs. Do not point Slack at the same URL you use as your Unified hook_url.
| URL | Configured in | Receives |
| ------------------------- | --------------------------------------------------------- | -------------------------------------------------------- |
| Unified workspace webhook | Slack → Event Subscriptions & Interactivity → Request URL | Raw Slack Events API and interactive payloads from Slack |
| Your hook_url | Unified → Webhooks → Create Webhook | Normalized Unified MessagingEvent objects |
Flow: Slack → Unified workspace webhook → Unified converts the event → POST to your hook_url.
Use your regional Unified API host and include your workspace ID, for example: https://api.unified.to/webhook/workspace/slackbot?workspace_id=YOUR_WORKSPACE_ID
EU and AU workspaces should use the corresponding regional API host (for example api-eu.unified.to or api-au.unified.to).
---
## Step 1 — Create a Slack app
1. Go to https://api.slack.com/apps → Create New App → From scratch.
2. Name the app and select the Slack workspace you want to connect.
3. Click Create App.
---
## Step 2 — Add OAuth scopes
Open OAuth & Permissions → Scopes → Bot Token Scopes and add the scopes for the objects you plan to use.
Minimum for sending messages, reading history, and receiving button clicks:
| Scope | Purpose |
| ------------------------------------------------------------- | ------------------------------------------- |
| chat:write | Send messages and messages with buttons |
| channels:read / groups:read / im:read / mpim:read | List channels and DMs |
| channels:history / groups:history / im:history / mpim:history | Read message history |
| users:read / users:read.email / users.profile:read | Resolve message authors and button clickers |
| reactions:read | Reaction events (optional) |
| files:read / files:write | Attachments (optional) |
> These mirror the messaging_message_write and messaging_event_read scope sets for the slackbot integration. Add additional scopes only if you use those objects.
---
## Step 3 — Set the OAuth redirect URL
1. Under OAuth & Permissions → Redirect URLs, click Add New Redirect URL.
2. Paste the Unified OAuth callback URL shown in the dashboard when you connect Slack (bot). It looks like https://api.unified.to/oauth/code (use your region's host if applicable).
3. Save URLs.
---
## Step 4 — Enable Interactivity
1. Go to Interactivity & Shortcuts and turn Interactivity ON.
2. Set Request URL to your Unified workspace webhook (not your hook_url): https://api.unified.to/webhook/workspace/slackbot?workspace_id=YOUR_WORKSPACE_ID
3. Save.
Unified receives Slack block_actions payloads here, converts button clicks into MessagingEvent objects with type BUTTON_CLICK, and forwards them to your hook_url.
---
## Step 5 — (Optional) Enable Event Subscriptions
Enable this if you also want message, reaction, or channel membership events (not just button clicks).
1. Go to Event Subscriptions and turn it ON.
2. Set Request URL to the same Unified workspace webhook URL as Step 4: https://api.unified.to/webhook/workspace/slackbot?workspace_id=YOUR_WORKSPACE_ID
3. Under Subscribe to bot events, add the events you need, for example message.channels, app_mention, reaction_added, member_joined_channel.
4. Save.
---
## Step 6 — Activate the integration, create a connection, and add a webhook
In the Unified dashboard (or via API), complete all three steps below.
1. Go to Integrations and activate Slack (bot) for your environment. If you use your own Slack app, enter your Client ID and Client Secret.
2. Create a connection for the Slack (bot) integration and complete the OAuth flow to install the app into your Slack workspace.
3. Create a webhook on that connection with object type messaging_event and event created. Set hook_url to your application endpoint (the URL where you want to receive Unified payloads).
Your hook_url is only configured on the Unified webhook subscription. Slack should always send events to the Unified workspace webhook from Steps 4–5.
---
## Receiving events
When a user clicks a button or triggers a subscribed Slack event, Unified POSTs a normalized payload to your hook_url. Button clicks arrive as MessagingEvent objects with type BUTTON_CLICK — not as raw Slack block_actions JSON.
See the Unified webhook documentation for payload structure, signatures, and verification.
---
## Troubleshooting
| Symptom | Likely cause |
| ---------------------------------------- | ---------------------------------------------------------------------------------------------------------------------- |
| Slack URL verification fails | Request URL is missing workspace_id, uses the wrong regional host, or Unified cannot be reached from Slack |
| Button clicks never reach my application | Interactivity Request URL is not set to the Unified workspace webhook, or no Unified webhook with hook_url was created |
| My endpoint receives raw Slack JSON | Slack Request URL was set to your hook_url instead of the Unified workspace webhook |
| invalid_auth or missing scopes | Re-install the Slack app after adding scopes (Slack requires re-consent) |
## Setting up OAuth 2 Credentials for Greenhouse's APIs
URL: https://docs.unified.to/guides/setting_up_oauth_2_credentials_for_greenhouse_apis
# Setting up OAuth 2 Credentials for Greenhouse's APIs
------
_May 27, 2024_
## Important — Read this first!
Unified.to has _two_ integrations name with the name 'Greenhouse':
1. The first one that appears in the **Integrations** page is for Greenhouse's [**Harvest API**](https://support.greenhouse.io/hc/en-us/articles/360029266032-Harvest-API-overview) **(v3)**, which uses OAuth2 code-flow to authorize your application. For most of the use-cases, you should use this integration.
2. The second one that appears in the **Integrations** page is for Greenhouse's [**Candidate Ingestion API**](https://developers.greenhouse.io/candidate-ingestion.html), which uses OAuth 2 client-credentials-flow to authorize your application.
# Greenhouse Harvest API (v3)
1. [Integration request form](https://www.greenhouse.com/integration-partner#apply-now) should be submitted by every new company. _Applications are reviewed by Greenhouse on the first Monday of every month._ **If a company is already an official Greenhouse partner with a signed agreement, they may proceed directly to step 3.**
2. After completing a review, Greenhouse will share API agreement with company
3. Once the agreement is signed, the company should follow the steps [here](https://harvestdocs.greenhouse.io/docs/harvest-partner-oauth) to have a client application created for their integration. They will provide Greenhouse with a redirect_uri (https://api.unified.to/oauth/code) that will be attached to their specific integration's client application. Greenhouse will provide the client credentials (client_id and client_secret)
4. The company will input their (2) credentials in [https://app.unified.to/integrations/greenhouse](https://app.unified.to/integrations/greenhousehttps://app.unified.to/integrations/greenhouse). Unified will handle all authorization:
1. Access authorization, token management, refreshes and storage ([instructions found here](https://harvestdocs.greenhouse.io/docs/harvest-partner-oauth))
2. Proxy requests on behalf of the originating partner to harvest v3 APIs
3. Secure access schemes to proxy APIs from originating partner to UAPI provider that ensure no cross contamination
5. The company will complete the remaining onboarding steps with Greenhouse.
# Greenhouse Ingestion API
## Submit information about your application to Greenhouse
Before you can make use of Unified.to's Embedded Authorization component to let your users authorize Greenhouse to access their accounts, you will need to provide Greenhouse with the following:
1. **Application Name**: The name of your application as it would appear in Greenhouse.
2. **Application URL**: The URL of your application.
3. **Callback URL**: After the end user authorizes your application to access their account, Greenhouse will redirect them to this URL. Provide this one:
`https://api.unified.to/oauth/code`
4. **Logo Image**: A 128 by 128 pixel image that Greenhouse will include in their permissions modal.
## Receive the Consumer Key and Consumer Secret provided by Greenhouse
When Greenhouse receives the information listed above, they will provide a set of values including these two:
- A **consumer key**, which uniquely identifies your application
- A **consumer secret**, which acts as proof of your application's identity
As its name implies, the consumer secret is confidential. For security purposes, Greenhouse will encrypt the consumer secret before emailing it to you (they'll explain how to decrypt it).
## Activate Greenhouse in Unified.to
With your application registered with Greenhouse and the OAuth 2 credentials in hand, you can now activate the Greenhouse integration in Unified.to.
In Unified.to, go to the [**Active Integrations**](https://app.unified.to/integrations) page, find the Greenhouse Ingestion API item (and _not_ the Greenhouse Harvest API one) and click on it:
On the page that appears, do the following:
1. Select **Your OAuth 2 credentials**.
2. Enter the consumer key value into the **OAuth 2 Client ID** text field.
3. Enter the consumer secret value into the **OAuth 2 Client Secret** text field.
4. Click the **Activate** button to save the changes and activate the Greenhouse integration.
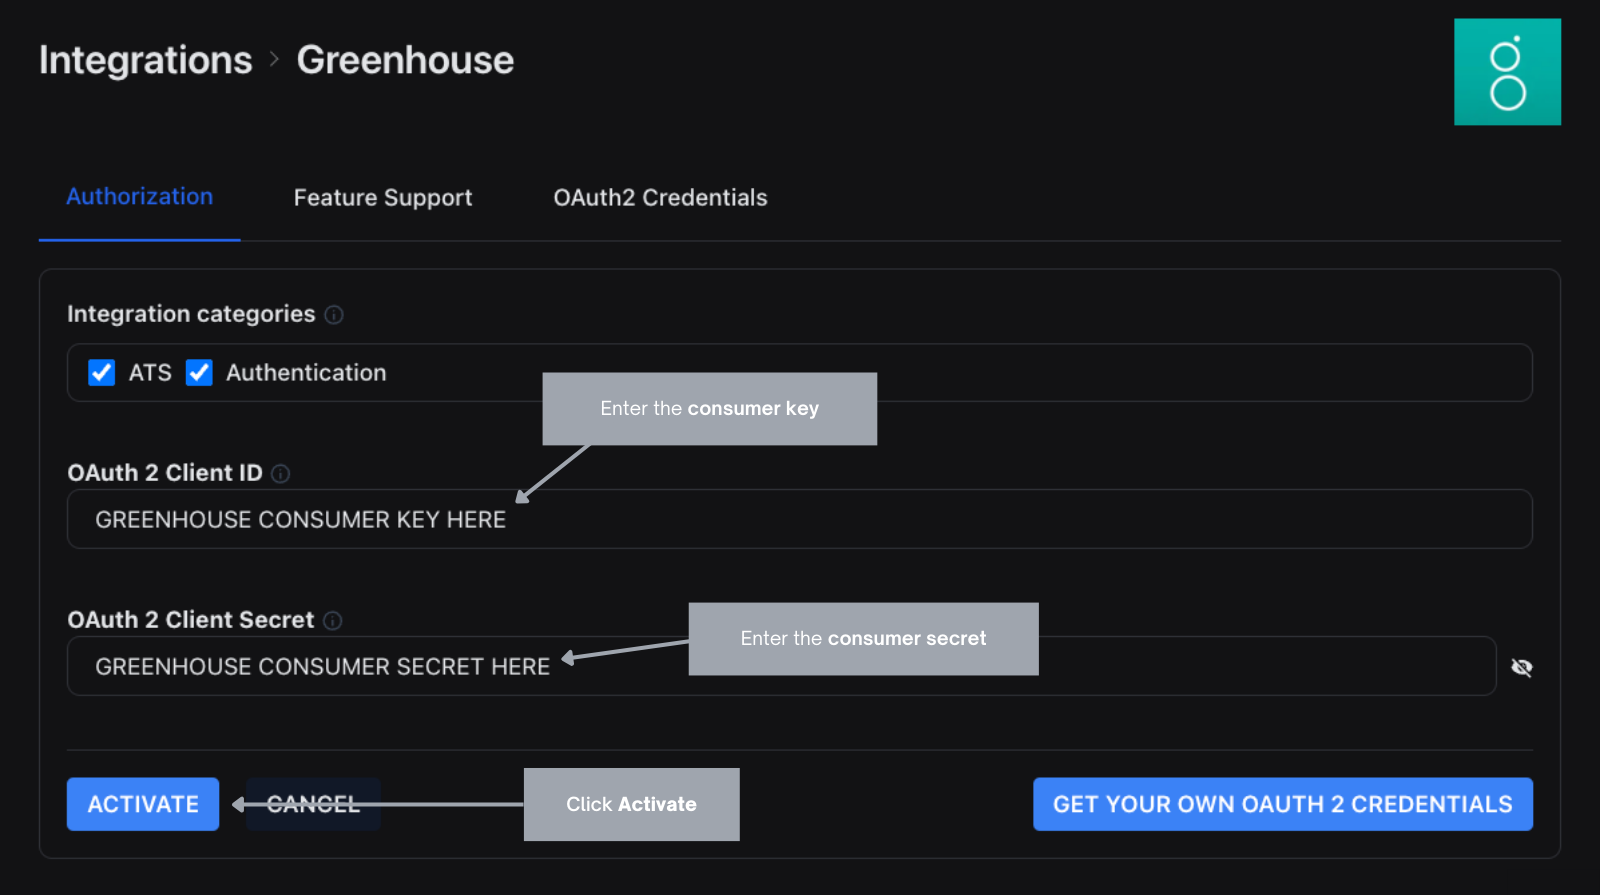
## Trello Connection Guide in Unified
URL: https://docs.unified.to/guides/trello_connection_guide_in_unified
# Trello Connection Guide in Unified
------
_April 17, 2026_
### Overview
To create a Trello connection in Unified, you need to:
- Create a Trello app
- Copy its API key
- Allow Unified domains as **Allowed Origins**
---
### Steps
**1. Create a Trello App**
- Go to **Trello Power-Ups Admin**
- Create a new app
- Open the app details page
**2. Get API Key**
- Navigate to the **API Key** section
- Copy your Trello API key
**3. Configure in Unified**
- Go to:[https://app.unified.to/integrations/trello](https://app.unified.to/integrations/trello)
- Paste the API key into the required field
**4. Add Allowed Origins in Trello**
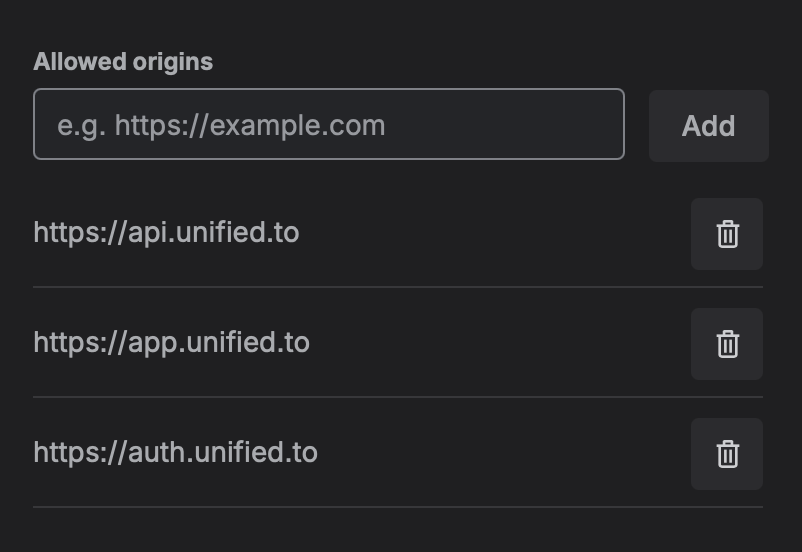
Add the following URLs in your Trello app settings:
- [https://app.unified.to](https://app.unified.to/)
- [https://auth.unified.to](https://auth.unified.to/)
- The Unified API domain shown during setup, for example:
- [https://api.unified.to](https://api.unified.to/)
- [https://api-eu.unified.to](https://api-eu.unified.to/)
- (or your region-specific API domain)
**5. Save & Complete Setup**
- Save the Trello app settings
- Return to Unified
- Complete the connection flow
---
### Notes
- Make sure the **regional API domain** matches what is shown in the Unified app during setup
- This can vary depending on your environment or region
---
### Troubleshooting
If the connection does not work:
- Confirm the API key is from the correct Trello app
- Ensure all **Allowed Origins** are added exactly (no typos or missing domains)
- Verify the correct **regional API domain** is included
- Retry the connection after saving changes
## Understanding OAuth2 Authorization flows
URL: https://docs.unified.to/guides/understanding_oauth2_authorization_flows
# Understanding OAuth2 Authorization flows
------
_October 17, 2025_
_Last updated: May 2026_
[OAuth 2.0](https://oauth.net/2/) is an industry-standard protocol for authorization that lets applications request limited access to a user's data on an API service without sharing passwords. This overview highlights the core flows that Unified supports. OAuth itself has two major versions (1.0 and 2.0), and OAuth 2.0 defines several flows. Overall, Unified supports 70+ OAuth 2.0 variations across integrations, spanning integration-specific scope models, token formats, and authorization requirements.
We won't cover OAuth v1, which is no longer widely used and has largely been superseded by OAuth 2.0, published as RFC 6749 in October 2012. RFC 6749 states it "replaces" OAuth 1.0, though OAuth 1.0 (RFC 5849) remains published and is not formally deprecated.[[1]](https://rfc-editor.org/info/rfc6749)[[2]](https://rfc-editor.org/info/rfc5849)
[OAuth 2.1](https://oauth.net/2.1/) is still in progress (as of Oct 2025). It consolidates best practices from OAuth 2.0—removing deprecated flows like implicit and password, and enforcing stronger security defaults such as PKCE—so it is not fully backwards-compatible with every 2.0 flow.
---
## OAuth 2.0 Authorization Code Flow
The OAuth 2.0 Authorization Code flow (`code` flow) is designed for applications that need to access a user's data in a third-party service (e.g., Google, Salesforce, HubSpot) with the user's explicit consent. It's the standard behind options you see all over the internet like "Sign in with Google." This flow is used for delegated authorization—API access on behalf of a user—and can also support authentication when combined with OpenID Connect.
**How it works:**
- Your app redirects the user to the integration's authorization page. This URL contains your app's `client ID` from that integration, plus integration-specific permission `scopes` and a `redirect URL`. It can also contain additional information such as `state`, `PKCE challenge`, and many more integration-specific parameters.
- The end-user logs in to that integration (if not already logged in) and is shown what permissions your app is requesting. They can then approve or reject that access request.
- If approved, the integration redirects back to your app with a temporary code.
- Your backend exchanges the code for an access token (and optionally a refresh token). This step uses both the client ID and client secret, securing the transaction. The access token will have an expiry, which requires the use of the refresh token to obtain new access tokens.
- Your app uses the access token in the `Authorization` header to call that integration's API on behalf of the user.
**Unified.to** [handles all aspects of this OAuth2 flow](https://docs.unified.to/unified/integration/Authorize_new_connection):
- creating the authorizing URL correctly
- unifying permission scopes (e.g. crm_contact_read, accounting_invoice_write, …)
- exchanging codes for access tokens
- automatically refreshing access tokens (and optionally refresh tokens)
- calling the end API with the access token in the correct header and format
This happens with our pre-built components, or directly through our Authorization API.
Our customers just input their application's OAuth2 client ID and client secret, obtained once from the integration. Unified also provides instructions on how to obtain those OAuth credentials.
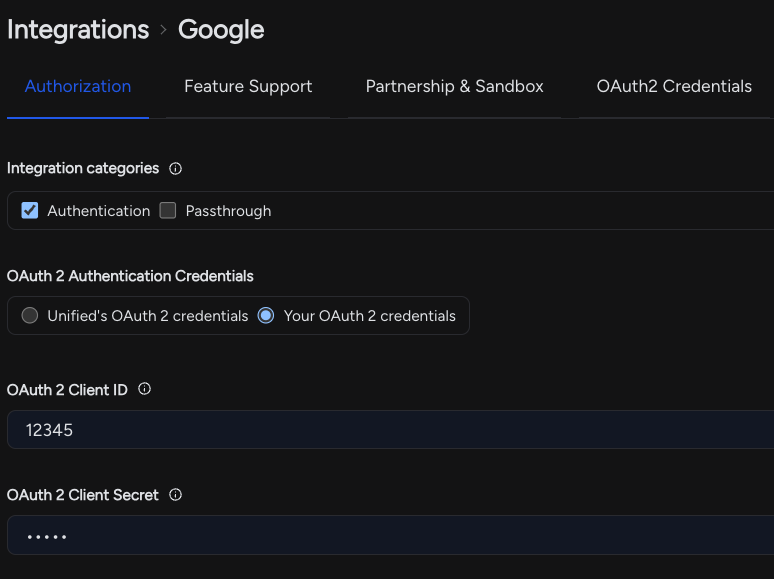
Currently, Unified.to supports 176 integrations that use OAuth2 `code` flow.
## OAuth 2.0 OpenID Connect (OIDC) Flow
The [OpenID Connect](https://openid.net/developers/how-connect-works/) flow is built on top of OAuth 2.0 and is used primarily for user authentication (identity), often alongside OAuth 2.0 authorization for API access.
It returns an `id_token`—a JWT (JSON Web Token) containing verified user identity claims, such as a name and email—and can also provide a `/userinfo` API endpoint to obtain the verified identity. Depending on the integration and the scopes requested (for example, `offline_access`), it can also issue access and refresh tokens.
When you see a "Sign in with Google" button, that is usually an OpenID Connect flow.
**Unified.to** [hides this complexity in our Unified Authentication API](https://docs.unified.to/auth/login/Sign_in_a_user), supporting OIDC along with integrations that only support OAuth2 code flow with non-standard `User Info` API endpoints.
## OAuth 2.0 Client Credentials Flow
OAuth 2.0 `client credentials` flow is for server-to-server (machine-to-machine) authentication. No user is involved; your backend service authenticates as itself to access application-level or tenant-level data—not an individual user's data. The customer (or a tenant admin) obtains a client ID and client secret from their integration and provides it to your application.
**How it works:**
- The customer or tenant admin generates an OAuth2 client ID and client secret in their integration and gives it to your application. They usually set what permissions they're willing to grant to those credentials.
- Your backend sends the client ID and secret to the integration's token endpoint.
- The integration returns an access token.
- Your backend uses the token to call APIs.
With Unified.to, your end-user will be asked to fill out these credentials, plus any other required credentials to access that integration's API.

Currently, Unified.to supports 29 integrations that use OAuth2 `client_credentials` flow.
## API Token / Key / Username & Password Authentication
APIs can also be authenticated with an `API key`, `API token`, or even a `username and password`. The keys and tokens consist of either random characters or an encoded [JWT](https://www.jwt.io/) (JSON Web Token).
They can be sent in the `Authorization` header, in a custom header, or in the URL query as a parameter.
If an API uses username and password for authentication instead of an API key, that combination is sent in the `Authorization` header, base64-encoded as "username:password".
Because these credentials must be kept secret, they should only be used in backend environments. Using them in client-side code (e.g., a browser) would risk leaking them to the end-user.
Unified.to can ask the end-user for any number of API keys/tokens and additional required API credentials. Optionally, our customers can request this information from their end-users and [create a connection manually](https://docs.unified.to/unified/connection/Create_connection).
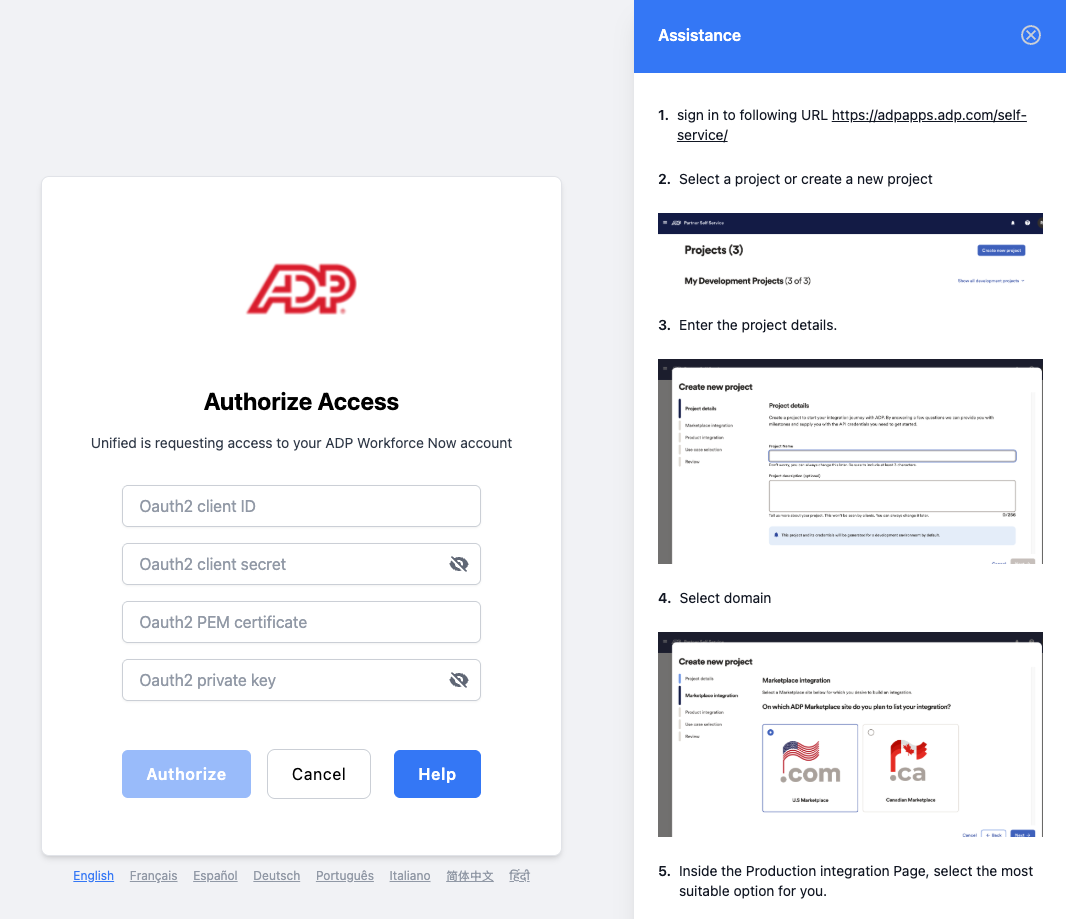
If you're interested in reading about more complexities with OAuth2, read our blog post: "[How We Normalize OAuth Across 460+ APIs at Unified.to](https://unified.to/blog/how_we_normalize_oauth_across_apis_at_unified)".
## Understanding Response Time Headers in the Unified API
URL: https://docs.unified.to/guides/understanding_response_time_headers_in_the_unified_api
# Understanding Response Time Headers in the Unified API
------
_July 13, 2026_
Every response from the Unified API includes custom HTTP headers that break down exactly where time was spent during your request. This gives you visibility into whether latency is coming from the third-party integration or from Unified's processing layer.
### The Headers
**`X-Response-Time`** — The total end-to-end time for your request, measured from when the Unified API received it to when the response was sent back.
**`X-EndApi-Response-Time`** — The time spent waiting on the third-party API (e.g., Salesforce, Slack, HubSpot). This is the network round-trip to the downstream service plus its processing time.
**`X-Unified-Response-Time`** — The time spent inside Unified's own code — authentication, data mapping, validation, and response formatting. Calculated as the total time minus the end API time.
### When They Appear
`X-Response-Time` is included on every response. The two breakdown headers (`X-Unified-Response-Time` and `X-EndApi-Response-Time`) only appear when your request involved a call to a third-party API. Requests that are handled entirely by Unified (such as validation errors or metadata lookups) will only include `X-Response-Time`.
### Example
```plain text
HTTP/1.1 200 OK
X-Response-Time: 340ms
X-Unified-Response-Time: 12ms
X-EndApi-Response-Time: 328ms
```
In this example, the third-party API took 328ms to respond, while Unified added just 12ms of overhead for auth, field mapping, and validation.
### How to Use This
- **Debugging slow requests** — If `X-EndApi-Response-Time` is high, the bottleneck is the third-party provider, not Unified. You may want to check the provider's status page or consider caching on your end.
- **Monitoring** — Log these headers alongside your own application metrics to build a complete picture of your API call latency.
- **Support** — When reaching out about performance concerns, include these header values to help pinpoint the issue faster.
## Unified Assessment API: Embed Assessments Inside ATS Platforms
URL: https://docs.unified.to/guides/unified_assessment_api_embed_assessments_inside_ats_platforms
# Unified Assessment API: Embed Assessments Inside ATS Platforms
------
_February 9, 2026_
Most assessment integrations rely on application status changes or external tools. Recruiters switch systems, and providers handle fragmented integration logic. Some ATS platforms now support embedded assessment listings, where recruiters select and order assessments directly inside the ATS.
With the Assessment API, the recruiter orders your assessment inside the ATS and the order reaches you by webhook; you don't poll or watch status changes.
## What is an Assessment API?
An assessment API allows assessment providers to integrate directly into ATS platforms so recruiters can request candidate assessments without leaving the ATS. Instead of triggering assessments based on status changes, recruiters select assessment packages inside the hiring process, and the order is routed to the provider by webhook.
The Assessment API covers package management, order delivery and result submission for ATSes with an embedded assessment module.
## Why ATS-native assessment integrations matter
Recruiters order the assessment at the point of decision, without switching tools, and the result is written back to the system where the hiring decision is made.
## Three ways to integrate assessments with Unified
**1. Embedded (Assessment API)**
- Recruiter selects assessment inside ATS
- Best UX, requires ATS support
**2. Triggered (ATS API)**
- Trigger on status change
- Works on any ATS integration that returns applications
**3. Verification-style (Verification API)**
- ATS/HRIS calls provider directly
- No marketplace required
## Unified Assessment API
The Unified Assessment API allows assessment and background check providers to integrate directly with Applicant Tracking Systems (ATS) platforms that support embedded assessment listings.
This API enables recruiters to request assessments for candidates directly from within their ATS. The recruiter does not need to log into a separate assessment platform or use a separate system.
Instead, the assessment package is selected inside the ATS, and the request is routed to your platform through Unified.
This is different from triggering assessments based on status changes. It is a recruiter-initiated flow inside the ATS itself.
### Core objects in the Assessment API
- **Packages**: define assessment offerings, metadata, scoring, and configuration
- **Orders**: represent assessment requests, candidate context, and lifecycle state
- **Results**: fields on the order (`response_score`, `response_url`, `response_attributes` and others) that you update when the assessment is done
Orders include rich candidate, job, and application context, allowing providers to tailor assessments and return structured results directly into the ATS.
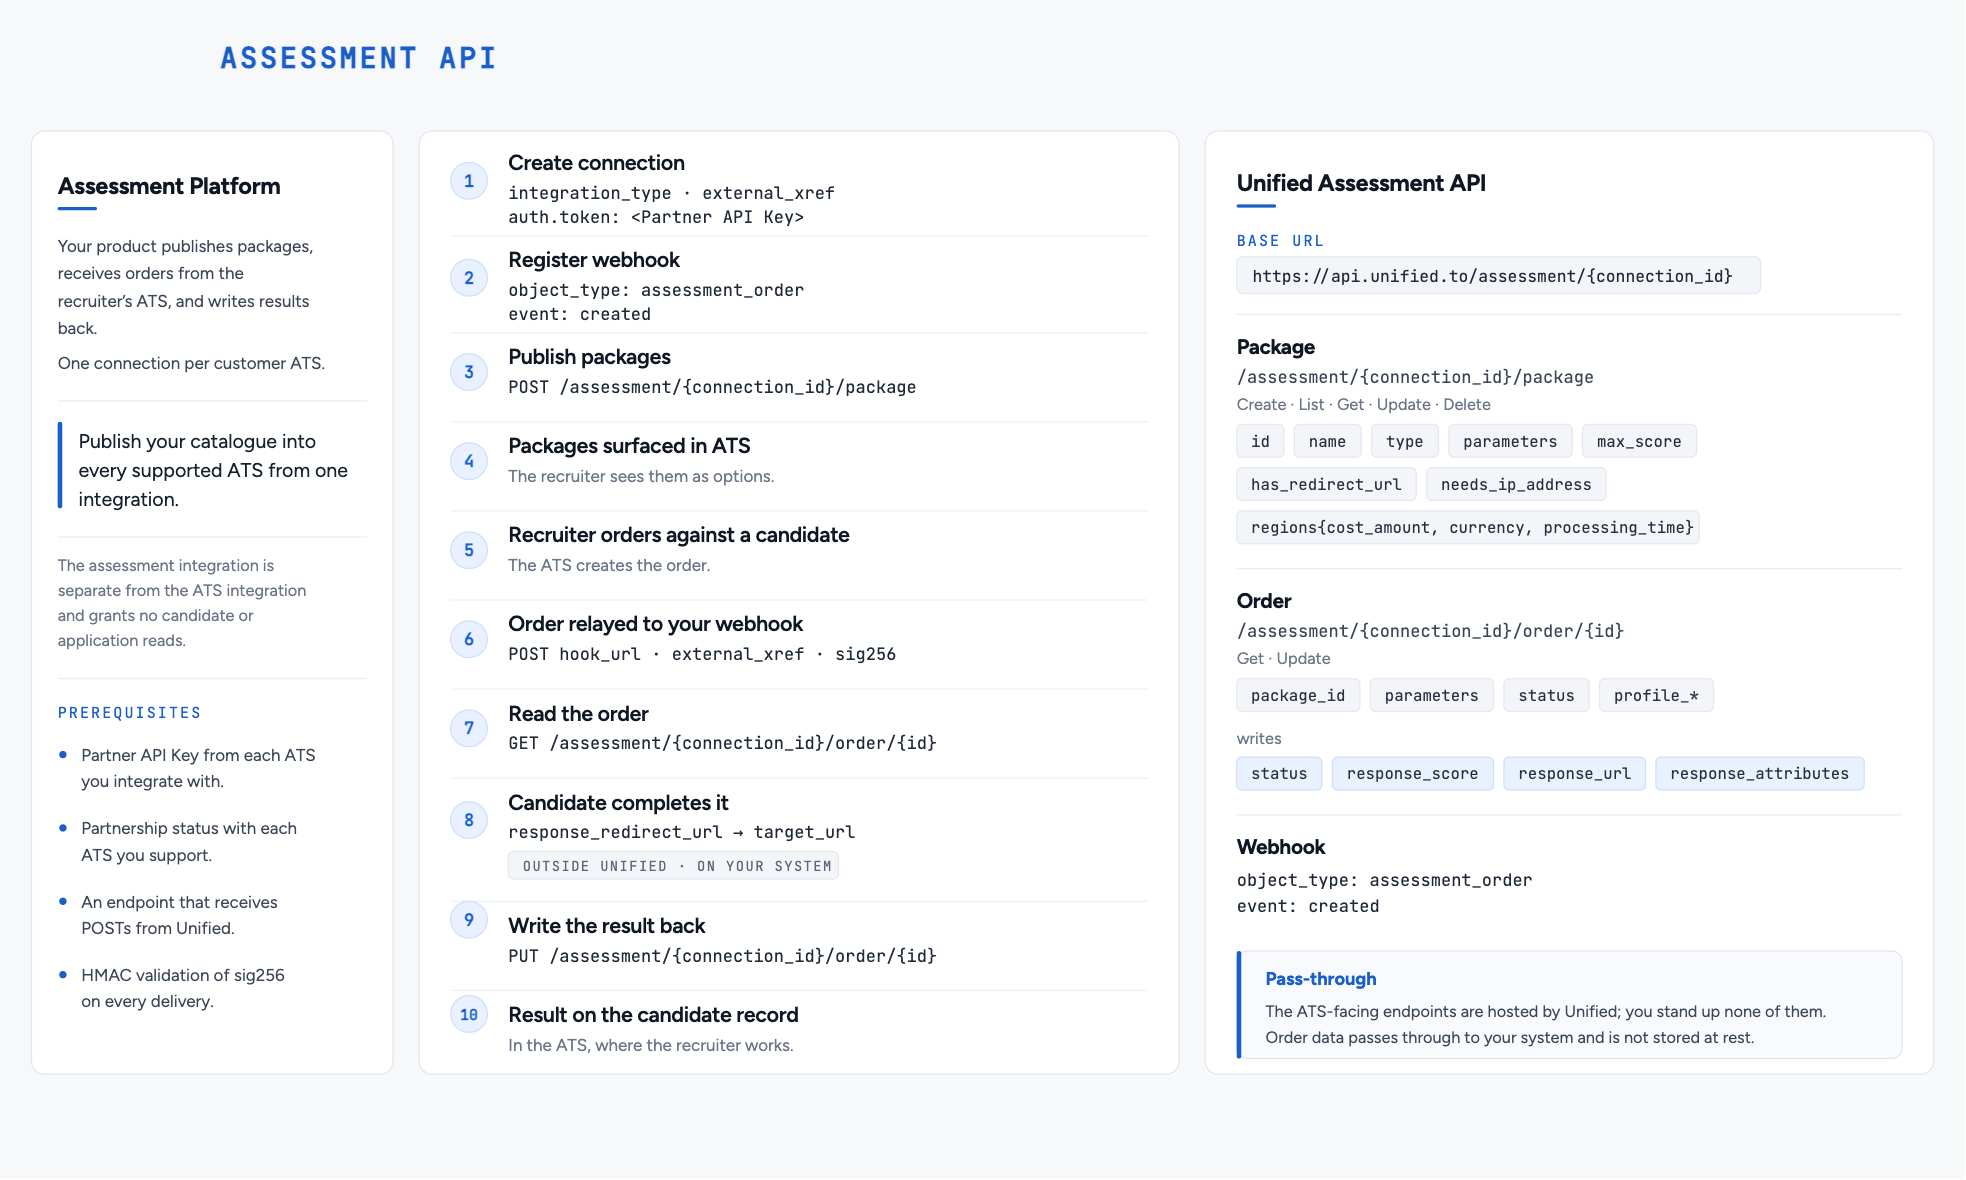
### What can you read and write?
The Assessment API supports both:
- Creating and managing assessment packages
- Receiving assessment orders by webhook
- Updating orders with structured results and scores
Calls go to the source ATS at request time, with no customer records at rest; connection credentials and operational metadata are encrypted at rest.
### **Using assessment data in AI systems**
Because your product holds the structured results it writes back, you can also use them to:
- Generate candidate summaries and scoring insights
- Feed structured evaluation data into copilots or hiring assistants
- Trigger automated follow-ups or recommendations
## What you can build with the Assessment API
- Embedded assessment marketplaces inside ATS platforms
- Partner integrations with ATS vendors (such as Greenhouse, Ashby, Workable)
- Candidate evaluation started by the recruiter inside the ATS
- AI scoring and feedback returned to the ATS
### Embedded assessment marketplaces inside ATS
Some ATS platforms support native assessment marketplaces, where providers can list assessment packages directly inside the product.
The Assessment API enables this model by:
- Listing your packages inside the ATS
- Allowing recruiters to select assessments directly
- Sending you each order by webhook
- Returning results back into the same flow
## **How the Assessment API differs from other Unified APIs**
The **Unified Verification API** is used by ATS or HRIS platforms to call verification or assessment providers in a unified way.
In that flow:
- The ATS or HRIS platform initiates the request.
- They do not need a direct partnership with the assessment provider.
- The call is routed through Unified using the unified verification data models.
The Assessment API is different.
It is designed for assessment providers who want their assessment packages listed directly inside an ATS that supports embedded assessment integrations.
The integration is initiated by the recruiter inside the ATS, not by the assessment provider or backend workflow.
### How This Differs from the Unified ATS API
The **Unified ATS API** allows assessment providers to listen for job application changes and trigger an assessment when an application reaches a specific status.
That flow works across most ATS platforms supported by Unified and does not require a special assessment marketplace integration.
It is best suited for ATS platforms that do not support embedded assessment listings.
The new Unified Assessment API works in a different way:
- It connects directly to ATS platforms that have a dedicated 'assessment API.'
- Your assessment packages are listed inside the ATS.
- A recruiter manually selects a package for a candidate.
- The ATS sends an assessment order through Unified.
- You process the assessment.
- You update the order.
- The results are written back into the ATS.
The key difference:
The recruiter stays inside the ATS the entire time.
There is no external trigger based on status change. The recruiter explicitly orders the assessment.
### When Should You Use Each?
For assessment providers:
- Use the **Assessment API** when the ATS supports embedded assessment listings and you have a partnership with that ATS.
- Use the **ATS API** for all other ATS platforms.
Most providers will use both:
- Assessment API for supported ATS platforms.
- ATS API as the broad coverage fallback.
The Assessment API reduces recruiter friction but is limited to ATS platforms that expose this functionality.
### Who this is for
- Assessment providers (coding tests, behavioral, psychometric, etc.)
- Background check and verification providers
- AI-based candidate evaluation platforms
- Hiring infrastructure tools integrating into ATS ecosystems
## Supported ATS Integrations
As of 19 October 2026, the Assessment API connects to the assessment modules of Ashby, ATS Anywhere, Cornerstone, Greenhouse, JobAdder, PageUp, Paylocity, Recruitee, SmartRecruiters, TalentLyft, Teamtailor and Workable. It also orders assessments from assessment companies such as Berke, The Predictive Index and Wonderlic. See the [Assessments integration list](https://docs.unified.to/assessment/integrations).
Each of these has a dedicated assessment integration that is separate from the standard ATS integration.
Only ATS platforms that support embedded assessment listings can be supported through this API.
## How do you set up the Assessment API?
### Step 1: Create a Connection
First, you need to manually create a connection for your assessment integration. This connection will be used to authenticate requests from the ATS.
When creating the connection, you must supply a **Partner API Key** in the `connection.auth.token` field that you generate yourself. You will then share this API key with your end-customer to configure the integration in their ATS.
Always check the authentication requirements for each assessment integration as some will require additional authentication information. For example, Ashby also requires a `Customer API Key` and a `Partner ID`.
**Example Connection Creation:**
```json
{
"integration_type": "greenhouseassessment",
"auth": {
"token": "YOUR_PARTNER_API_KEY"
},
}
```
### Step 2: Configure Webhooks
You also need to set up webhooks to receive assessment orders from the ATS systems.
### Required Webhook
Create a webhook with the following configuration:
- **object_type**: `assessment_order`
- **event**: `created`
This webhook will be triggered whenever a recruiter requests an assessment for a candidate in the ATS.
### Optional Webhook
Some ATS vendors (like Ashby) also send order cancellation events. You can optionally create an additional webhook:
- **object_type**: `assessment_order`
- **event**: `deleted`
This webhook will notify you when an assessment order is cancelled.
### Step 3: Provide Configuration to Your End-Customer
Once you've created the connection and webhook, provide the following information to your end-customer:
1. **Base URL**: `https://api.unified.to/assessments/{connection_id}`
- Replace `{connection_id}` with the actual connection ID from Step 1
2. **Partner API Key**: The token value you set in `connection.auth.token`
Your end-customer will then input these credentials into their ATS software to enable the integration.
## **How the assessment flow works**
Here's how the assessment flow works:
1. **Package Configuration**: You create assessment packages via the Unified API (w/ assessment packages API endpoints)
2. **ATS Lists Packages**: The ATS queries your available packages
3. **Recruiter Orders Assessment**: A recruiter selects a package and orders an assessment for a candidate
4. **Webhook Notification**: [Unified.to](https://unified.to/) sends you a webhook with the order details
5. **Process Assessment**: You send the assessment to the candidate and process their response
6. **Submit Results**: You submit the assessment results back to [Unified.to](https://unified.to/) (w/ assessment order update API endpoint)
7. **Results in ATS**: The results appear in the ATS for the recruiter to review
## API Endpoints
### Assessment Packages
Manage your available assessment packages:
- `POST /assessment/{connection_id}/package` - Create a new package
- `GET /assessment/{connection_id}/package` - List all packages
- `GET /assessment/{connection_id}/package/{id}` - Get a specific package
- `PUT /assessment/{connection_id}/package/{id}` - Update a package
- `DELETE /assessment/{connection_id}/package/{id}` - Delete a package
### Assessment Orders
Update assessment order results:
- `PUT /assessment/{connection_id}/order/{id}` - Update an order with results
## Webhook Payload
When an assessment order is created, you'll receive a webhook with an `AssessmentOrder` payload:
```json
{
"id": "123",
"package_id": "your_package_id",
"candidate_id": "candidate_456",
"application_id": "application_789",
"job_id": "job_012",
"profile_first_name": "John",
"profile_last_name": "Doe",
"profile_emails": ["candidate@example.com"],
"status": "OPEN"
}
```
## Submitting Results
Once a candidate completes an assessment, submit the results using the update order endpoint:
```bash
PUT /assessment/{connection_id}/order/{order_id}
```
**Example Request:**
```json
{
"status": "COMPLETED",
"response_score": 85,
"response_max_score": 100,
"response_url": "",
"response_completed_at": "2024-01-15T10:30:00Z",
"response_attributes": [
{
"type": "TEXT",
"label": "Overall Assessment",
"value": "Strong candidate"
}
]
}
```
`status`, `response_score` and `response_url` are writable on every ATS assessment module; other fields vary, so check the integration page.
The results will then be written back to the ATS system, where recruiters can view them directly.
## What should your webhook handler do?
1. **Secure Your API Key**: Treat your Partner API Key as sensitive information. Only share it with trusted end-customers.
2. **Handle Webhooks Reliably**: Implement retry logic and idempotency checks in your webhook handler to ensure you don't miss or duplicate orders.
3. **Validate Webhook Data**: Check the `sig256` signature (HMAC-SHA256) and validate the webhook payload to ensure it contains the expected candidate and job information before processing.
4. **Monitor Order Status**: Track the status of assessment orders and handle cancellations appropriately when the `deleted` event webhook is received.
What is an assessment API for recruiting platforms?
An assessment API allows providers to integrate directly with ATS platforms so recruiters can request, manage, and review candidate assessments without leaving the ATS. It delivers orders by webhook and writes structured results back to the same system.
How do assessment providers integrate with ATS platforms?
Assessment providers integrate with ATS platforms either through embedded assessment APIs or through status-based triggers. Embedded integrations allow recruiters to select and order assessments directly inside the ATS, while triggered integrations operate based on application state changes.
## Unified's MCP Server
URL: https://docs.unified.to/guides/unified_mcp_server
# Unified's MCP Server
------
_May 24, 2025_
Unified has launched an MCP server that connects any Unified connection to LLM (Large Language Model) providers supporting the newest MCP protocols. The available MCP `tools` will be determined by the integration's feature support and the connection's requested permissions.
All MCP tool calls are executed live against the source API. Unified does not cache or store end-customer data, and access is governed by scoped permissions and tool allow-listing.
## Use-cases:
- **End-Customer Conversation with LLMs**: Allows end-customers to interact with an LLM using permissioned tools backed by the data they've explicitly authorized through a Unified connection.
- **Debugging End-Customers' Connections**: Allows your product and support teams to assist your end-customers by debugging their Unified connections. Please make sure that you observe all privacy policies, both yours and your regions's, since end-customer data may be made available to the LLM based on the permissions and tools you explicitly configure. Unified provides options to restrict tools, scope permissions, and remove sensitive fields from responses.
MCP is a new protocol and it is moving fast. We expect more LLM & agent clients to support its newer Streamable HTTP transport protocol. We also expect that the MCP protocol will continue to expand quickly. Stay tuned as we also keep up.
## Sample queries:
- List candidates for job X
- List deals for contact with email address joe@foo.com
- update application 12345 with a status of HIRED
- summarize the accounting balance sheet report
- find the vacation policy by listing the pages in Notion
- post a message in Slack summarizing this deal
- create an invoice for customer X
- schedule an interview and notify the candidate
More information can be found at [https://docs.unified.to/mcp](https://docs.unified.to/mcp)
## Unified MCP Server with LangChain and LangGraph
URL: https://docs.unified.to/guides/unified_mcp_server_with_langchain_and_langgraph
# Unified MCP Server with LangChain and LangGraph
------
_September 25, 2026_
## Use the Unified MCP server's 22,566 tools as LangChain tools in LangChain and LangGraph agents
LangChain and LangGraph give you a framework for building AI agents with tools, memory and multi-step workflows. With the official LangChain MCP adapter, every tool exposed by the Unified MCP server becomes a native LangChain tool. Your agents get real-time read and write access to your customers' CRM, ATS, HRIS, accounting, ticketing, file storage, messaging and commerce data, across all of Unified.to's integrations. You don't need custom integration code.
The adapter converts each Unified MCP tool into a LangChain `BaseTool`. You can pass the tools to `create_agent`, bind them to any chat model, or run them in a LangGraph `ToolNode`.
## Prerequisites
- A Unified.to workspace and your [workspace API key](https://app.unified.to/settings/api)
- At least one end-customer connection (for example, a HubSpot or Greenhouse connection), and its connection ID from [Connections](https://app.unified.to/connections)
- Python 3.10+ or Node.js 18+
## Install
**Python**
```bash
pip install langchain langchain-mcp-adapters langchain-anthropic
```
**TypeScript**
```bash
npm install langchain @langchain/mcp-adapters @langchain/anthropic
```
You can use any LangChain-supported model provider. The examples below use Anthropic, but OpenAI, Google, Mistral and others work the same way.
## Quickstart (Python)
Connect LangChain to the Unified MCP server with a few lines of code:
```python
import asyncio
import os
from langchain.agents import create_agent
from langchain_mcp_adapters.client import MultiServerMCPClient
UNIFIED_API_KEY = os.environ["UNIFIED_API_KEY"]
CONNECTION_ID = os.environ["UNIFIED_CONNECTION_ID"] # end-customer connection
async def main():
client = MultiServerMCPClient(
{
"unified": {
"transport": "streamable_http",
"url": f"https://mcp-api.unified.to/mcp?connection={CONNECTION_ID}",
"headers": {"Authorization": f"bearer {UNIFIED_API_KEY}"},
}
}
)
tools = await client.get_tools()
print(f"Loaded {len(tools)} Unified tools")
agent = create_agent("anthropic:claude-sonnet-4-5", tools)
result = await agent.ainvoke(
{"messages": [{"role": "user", "content": "List the 10 most recently updated deals and summarize their stages."}]}
)
print(result["messages"][-1].content)
asyncio.run(main())
```
The tools available depend on the connection's integration and the permissions granted. A CRM connection exposes tools for contacts, companies, deals, and so on. An ATS connection exposes tools for candidates, applications, jobs, and so on.
## Quickstart (TypeScript)
```typescript
import { MultiServerMCPClient } from "@langchain/mcp-adapters";
import { createAgent } from "langchain";
const client = new MultiServerMCPClient({
mcpServers: {
unified: {
transport: "http",
url: `https://mcp-api.unified.to/mcp?connection=${process.env.UNIFIED_CONNECTION_ID}`,
headers: { Authorization: `bearer ${process.env.UNIFIED_API_KEY}` },
},
},
});
const tools = await client.getTools();
const agent = createAgent({ model: "anthropic:claude-sonnet-4-5", tools });
const result = await agent.invoke({
messages: [{ role: "user", content: "Find open jobs and count applications per job." }],
});
console.log(result.messages.at(-1)?.content);
await client.close();
```
## Authentication
Send the token in the `Authorization: Bearer {token}` header; the `token` URL parameter is deprecated. All other options must be sent as URL parameters. See [Authentication](https://docs.unified.to/mcp/authentication) for full details.
| Use case | Token | Other URL parameters |
| ----------------------------------------------------- | ---------------------------------------------------------------------------------------------------------------------------------------------- | --------------------------- |
| Your backend runs the agent (recommended) | Workspace API key, in the `Authorization` header | `connection={connectionId}` |
| Token is handed to a less-trusted runtime or end user | Connection-scoped signed token from `get_unified_connection_mcp_url` (mode=user), in the `Authorization` header; works for one connection only | none |
**A workspace API key grants access to all of your connections and your** [**Unified.to**](https://unified.to/) **account.** Keep it server-side, send it only in the `Authorization` header, and never put it in an MCP URL or a client config.
## Controlling which tools the agent sees
Agents choose tools more reliably when they see a smaller, focused list, and a shorter list also saves context. Use these [server options](https://docs.unified.to/mcp/server-options) as URL parameters to shape the tools LangChain loads:
| Option | What it does |
| ---------------- | ---------------------------------------------------------------------------------------------------------------------------------------------------------------------------------- |
| `tools` | Comma-delimited list of tool IDs. Only these tools are exposed. |
| `permissions` | Comma-delimited list of Unified.to permissions. Only tools allowed by these permissions are exposed. For example, pass read-only permissions for an agent that should never write. |
| `hide_sensitive` | Hides PII fields (names, emails, telephones, and so on) from results. |
```python
url = (
"https://mcp-api.unified.to/mcp"
f"?connection={CONNECTION_ID}"
"&permissions=crm_contact_read,crm_deal_read"
"&hide_sensitive=true"
)
```
## Using Unified tools in a LangGraph workflow
For more control over agent flow, bind the Unified tools to a model and route tool calls through a LangGraph `ToolNode`:
```python
from langchain.chat_models import init_chat_model
from langchain_mcp_adapters.client import MultiServerMCPClient
from langgraph.graph import StateGraph, MessagesState, START
from langgraph.prebuilt import ToolNode, tools_condition
client = MultiServerMCPClient(
{
"unified": {
"transport": "streamable_http",
"url": f"https://mcp-api.unified.to/mcp?connection={CONNECTION_ID}",
"headers": {"Authorization": f"bearer {UNIFIED_API_KEY}"},
}
}
)
tools = await client.get_tools()
model = init_chat_model("anthropic:claude-sonnet-4-5").bind_tools(tools)
async def call_model(state: MessagesState):
return {"messages": [await model.ainvoke(state["messages"])]}
builder = StateGraph(MessagesState)
builder.add_node("call_model", call_model)
builder.add_node("tools", ToolNode(tools))
builder.add_edge(START, "call_model")
builder.add_conditional_edges("call_model", tools_condition)
builder.add_edge("tools", "call_model")
graph = builder.compile()
result = await graph.ainvoke(
{"messages": [{"role": "user", "content": "Which candidates applied this week, and for which roles?"}]}
)
```
## Multi-tenant agents
If your product serves many end customers, each customer has their own Unified connection. Create the MCP client per request or session, scoped to the current customer's connection, so an agent can only reach that customer's data:
```python
def unified_client_for(connection_id: str) -> MultiServerMCPClient:
return MultiServerMCPClient(
{
"unified": {
"transport": "streamable_http",
"url": f"https://mcp-api.unified.to/mcp?connection={connection_id}",
"headers": {"Authorization": f"bearer {UNIFIED_API_KEY}"},
}
}
)
async def handle_request(customer, prompt: str):
tools = await unified_client_for(customer.unified_connection_id).get_tools()
agent = create_agent("anthropic:claude-sonnet-4-5", tools)
return await agent.ainvoke({"messages": [{"role": "user", "content": prompt}]})
```
Because Unified normalizes data across integrations, the same agent code works whether one customer uses Salesforce and another uses HubSpot.
## Calling tools directly
Unified tools are standard LangChain tools, so deterministic workflows can call them without an agent:
```python
tools_by_name = {t.name: t for t in await client.get_tools()}
contacts = await tools_by_name["list_crm_contacts"].ainvoke({"limit": 50})
```
Tool names vary by integration and category. Print `[t.name for t in tools]` to see what a connection exposes.
## Regions
| Region | Streamable HTTP endpoint |
| ------ | ----------------------------------- |
| US | `https://mcp-api.unified.to/mcp` |
| EU | `https://mcp-api-eu.unified.to/mcp` |
| AU | `https://api-au.unified.to/mcp` |
Use the endpoint for the region where your [Unified.to](https://unified.to/) workspace is hosted. A credential works only on its own region's host.
## Troubleshooting
- **401 / unauthorized:** Check that the token is a valid workspace API key or a correctly signed end-user token. When you use a workspace API key, make sure the `connection` parameter is also present.
- **Fewer tools than expected:** The tool list reflects the connection's integration, the scopes granted when the customer authorized it, and any `tools` or `permissions` filters in the URL.
- **Agent picks the wrong tool:** Narrow the tool list with `tools` or `permissions`, and describe the task more specifically in your system prompt.
- **Options not applied:** Only the token can go in a header. Every other option must be a URL parameter.
## Related
- [Unified MCP Server overview](https://docs.unified.to/mcp)
- [Authentication](https://docs.unified.to/mcp/authentication)
- [Server options](https://docs.unified.to/mcp/server-options)
- [LangChain MCP adapters (Python)](https://github.com/langchain-ai/langchain-mcp-adapters)
## Unlock real-time data with virtual webhooks
URL: https://docs.unified.to/guides/unlock_real_time_data_with_virtual_webhooks
# Unlock real-time data with virtual webhooks
------
_February 13, 2025_
Product teams building event-driven applications face a common challenge: most third-party APIs don't offer webhooks (In fact, our [State of SaaS APIs report](https://unified.to/blog/the_state_of_saas_apis_2024) found only 11% of APIs have built-in support for webhooks). This leads to inefficient polling, manually handling rate limits, and writing custom logic just to avoid stale data.
For how virtual webhooks compare with native webhooks and polling, see [What Are Virtual Webhooks?](https://unified.to/blog/what_are_virtual_webhooks_how_they_differ_from_sync_based_webhooks).
But what if you could control webhook updates while reducing API costs and complexity?
That's exactly what [Unified.to](https://unified.to/)'s [virtual webhooks](https://unified.to/blog/replace_polling_with_unified_webhooks_real_time_and_historical_data_in_one_flow) enable. In this article, we'll review:
- How virtual webhooks work
- Why they help control API costs by managing request frequency
- How they reduce the custom rate-limit handling you need to write
- How virtual webhooks shorten the time to receive change events from APIs without webhooks
## Why use virtual webhooks?
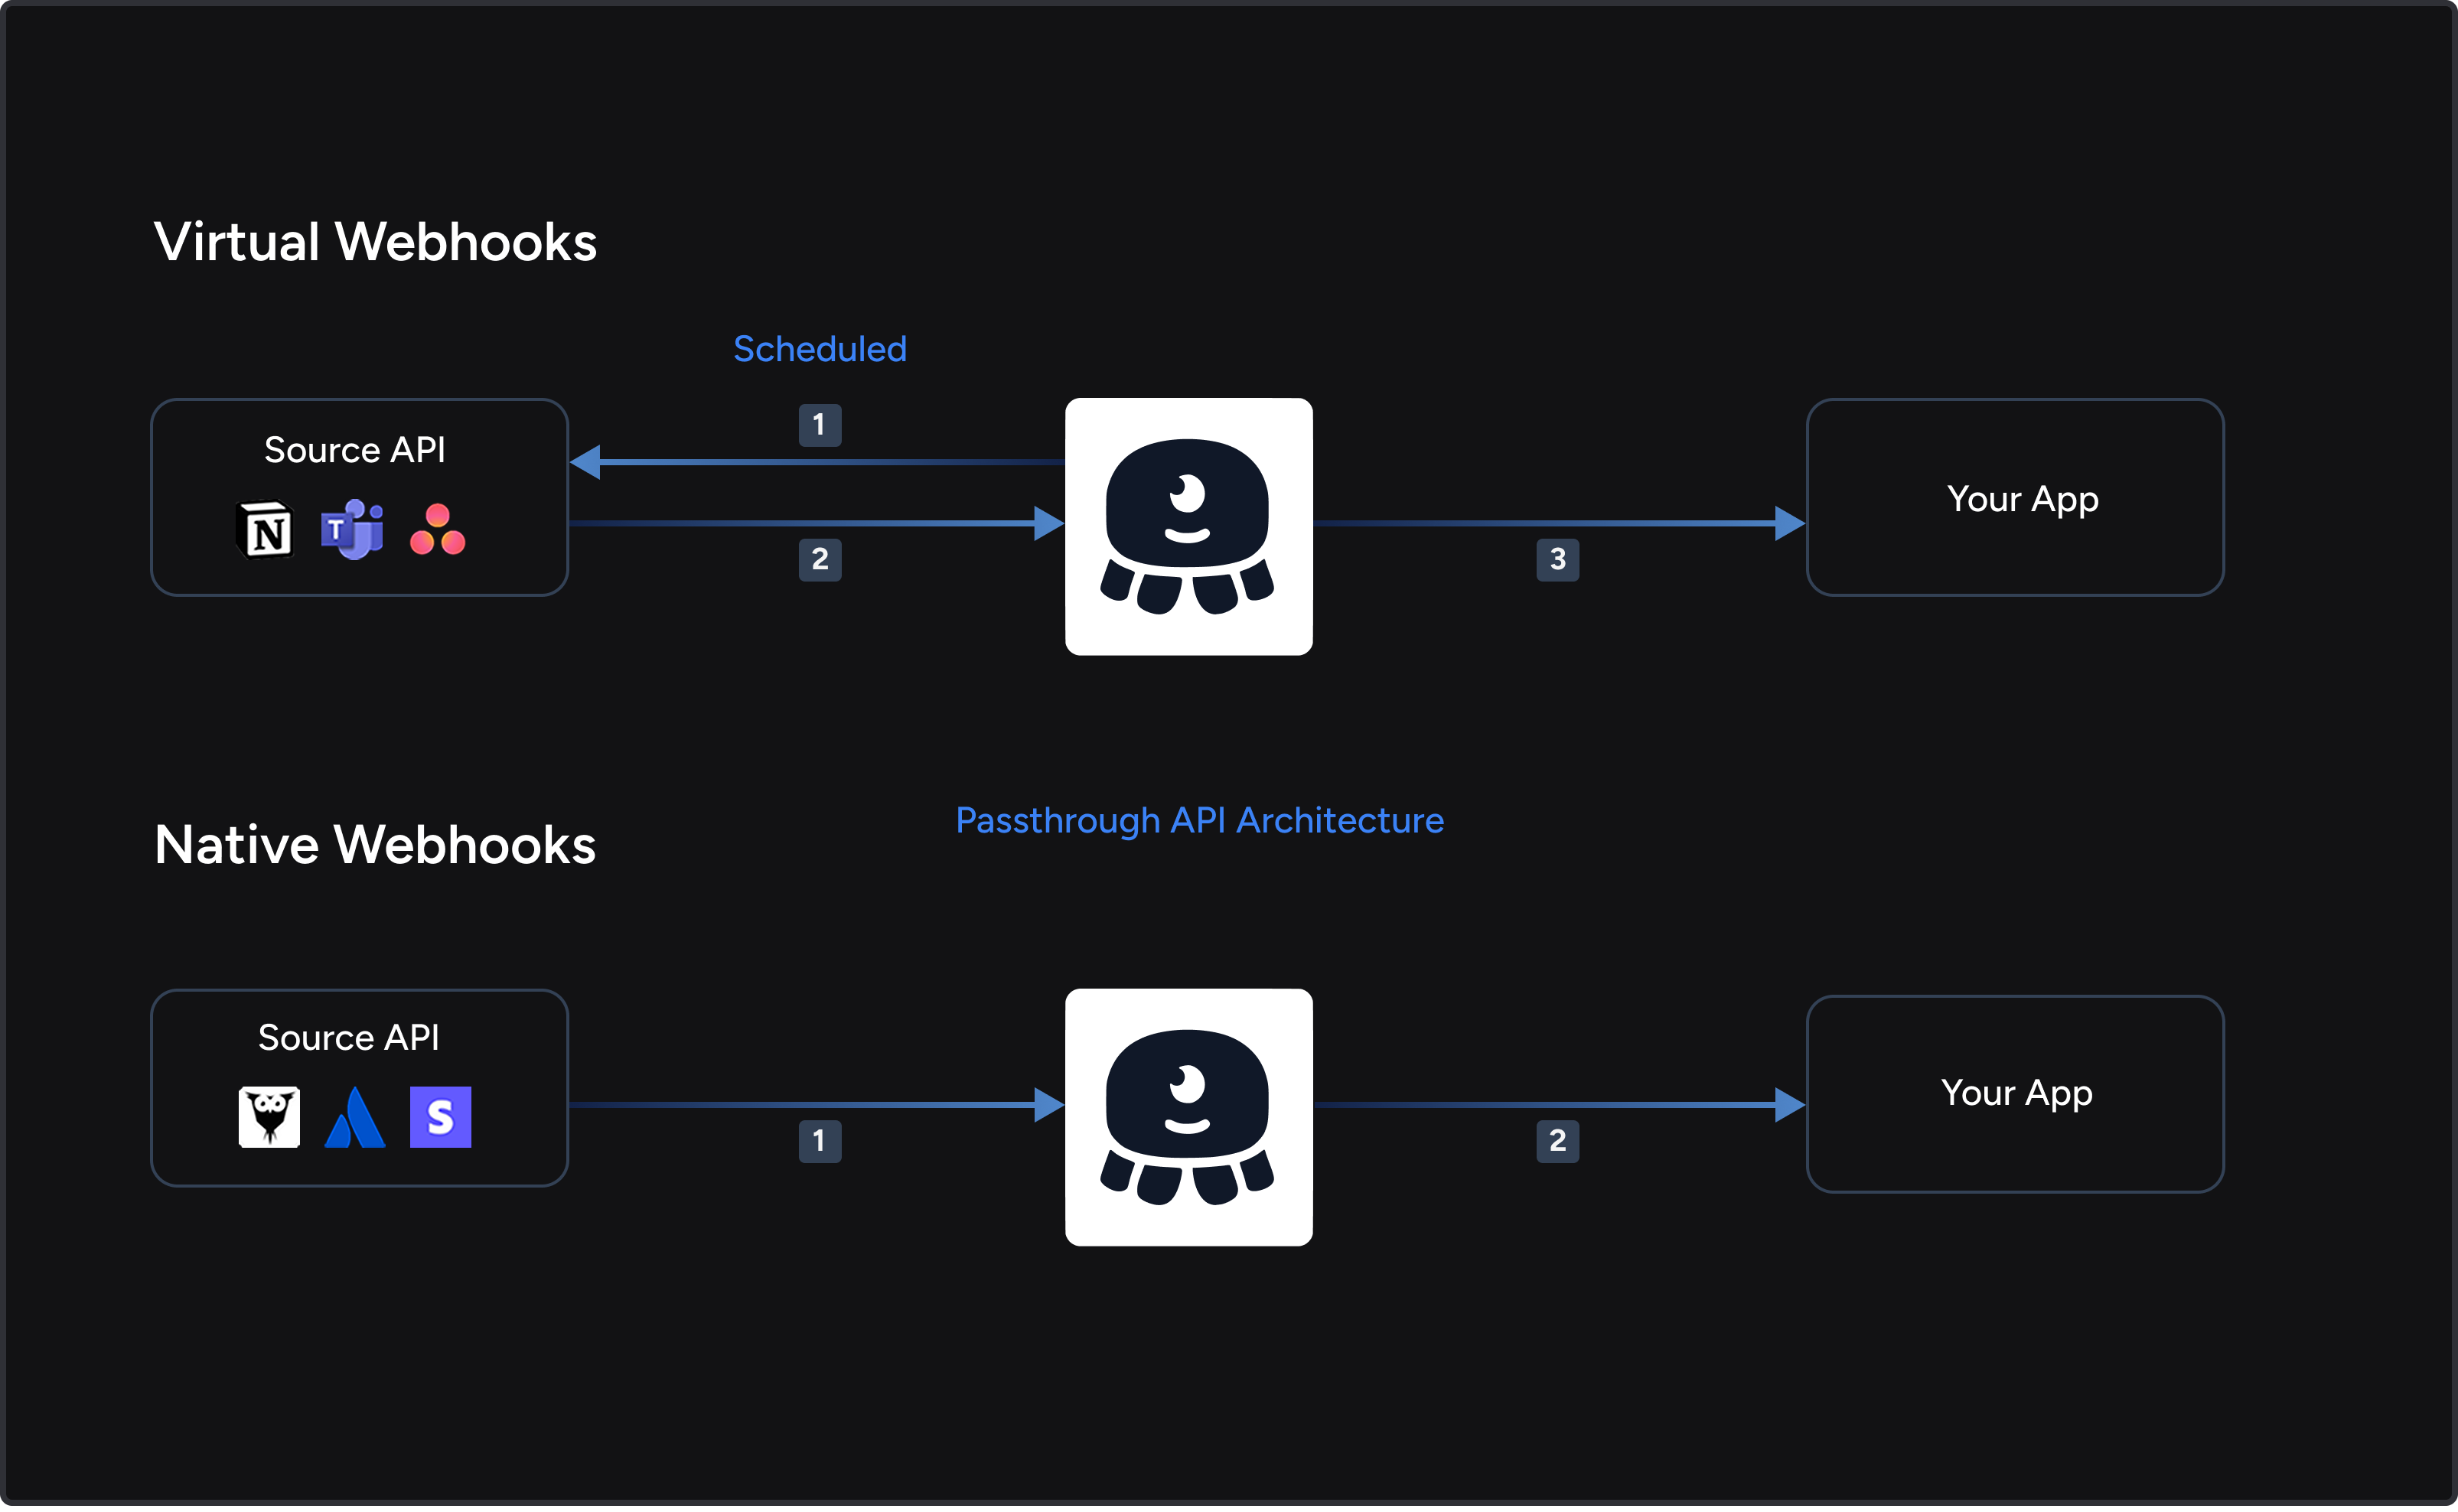
Pairing Unified.to's virtual webhooks with your product's integration strategy means:
- **Webhooks on supported integrations and objects:** Receive change events from APIs that don't offer webhooks, through the same API you use for native ones.
- **Predictable API usage:** Virtual webhooks check on the interval you set, so you control how often the source API is called. A check that finds nothing isn't billed.
- **One unified schema:** Whether the source sends its own webhooks or not, data arrives in the same format. No custom polling logic needed.
- **Configurable change detection:** Set the check interval (e.g., every minute, every 30 minutes, every hour; minimum 1 minute on paid plans, 60 minutes on the trial). [Unified.to](https://unified.to/) honours each integration's retry-after hints.
- **Faster time-to-market:** Virtual webhooks eliminate the need to build custom data collection.
- **Historical data access:** Receive existing records when you create a webhook subscription, paged until the initial sync completes.
- **Built-in observability:** Monitor webhook activity with logs (metadata only) and health status.
- **Event-driven AI and automation:** Trigger AI actions and automation as change events arrive.
Instead of dealing with a patchwork of webhook, polling, and batch sync solutions, [Unified.to](https://unified.to/)'s virtual webhooks give you one way to receive change events across the integrations that support them.
## How virtual webhooks work
Webhooks deliver data updates to you, eliminating the need for polling. But most APIs don't support them, which forces developers to either:
1. Poll the API (which wastes API calls and delays updates), or
2. Manually mix polling and webhooks (adding complexity and inconsistencies).
[Unified.to](https://unified.to/)'s virtual webhooks detect changes and deliver events, even when the source API doesn't offer webhooks:
- We monitor your customers' connections on a scheduled interval that you configure (e.g., as frequently as every minute on paid plans) and detect changes automatically
- We deliver events to your webhook URL in the same format as native webhooks
- You create and manage them with the same webhook API as native webhooks
No polling logic to write. Events on your interval, as often as every minute on paid plans.
[Explore documentation](https://docs.unified.to/guides/how_to_create_and_configure_webhooks)
## How virtual webhooks compare to traditional webhooks and polling
Most third-party APIs don't offer native webhooks, forcing teams to choose between batch syncs, polling, or manual workarounds.
| **Feature** | **Unified's Virtual + Native Webhooks** | **Native Webhooks** | **Polling** |
| ------------------------------------------------------------ | --------------------------------------- | --------------------------------------------------- | ---------------------- |
| Works even if API doesn't support webhooks | ✅ Yes | ❌ No | ✅ Yes, but inefficient |
| Event updates on your interval (virtual) or as sent (native) | ✅ Yes | ✅ Yes | ❌ No, delayed |
| API rate limit friendly | ✅ Yes | ✅ Yes | ❌ No, high API usage |
| Historical data retrieval | ✅ Yes | ✅ With include_all, where initial sync is supported | ❌ No |
| Fine-grained sync control | ✅ Yes (set the check interval) | ❌ No | ✅ Yes, but manual |
| Built-in error handling & retries | ✅ Yes | ❌ Varies by API | ❌ No |
| Webhook observability (logs, health monitoring) | ✅ Yes | ❌ Varies by API | ❌ No |
Virtual webhooks use the same subscription API and payload format as native webhooks, and work where APIs don't offer webhooks.
## Product use cases
Let's look at how developers and product teams can use virtual webhooks.
**AI-powered customer support**
Virtual webhooks can update AI models within your configured interval when new support tickets are created. Instead of writing polling logic against a help desk API, an AI assistant can respond to customer inquiries or escalate issues as events arrive.
[Unified Ticketing API](https://unified.to/ticketing)
[Build an AI Support Bot](https://unified.to/blog/how_to_build_a_discord_support_bot_with_unified_and_langbase)
**Automated financial reporting**
Fintech and accounting applications rely on up-to-date financial data to generate reports, sync transactions, and reconcile accounts. However, many accounting platforms don't offer webhooks, meaning transaction updates often rely on batch syncs or polling.
With Unified.to's virtual webhooks, accounting software can:
- Get notified within your configured interval when new transactions, invoices, or payments are recorded
- Trigger automatic reconciliation instead of waiting for scheduled syncs
[Unified Accounting API](https://unified.to/accounting)
**Recruitment automation**
Hiring teams often integrate with multiple ATS platforms, some of which don't offer webhooks. Virtual webhooks let AI-powered candidate screening start within your configured interval of a new application arriving.
[Unified ATS API](https://unified.to/ats)
[How HeroHunt added 20 integrations in 1 week](https://unified.to/blog/how_herohunt_saved_ten_months_of_engineering_time_with_unified)
## How much polling actually costs
Polling isn't just inefficient. It's expensive.
Example:
- Polling every 5 minutes on 1000 accounts = 288,000 API requests per day
- Polling every 1 minute on 1000 accounts = 1.4 million API requests per day
- With virtual webhooks, you're billed only when a check finds changes, so a low-activity account costs little even on a one-minute interval. Checks still call the integration's API, and [Unified.to](https://unified.to/) honours the integration's retry-after hints.
Instead of writing and running your own polling, you pay per page of changes delivered.
## What happens if you don't use virtual webhooks?
- You could hit API rate limits while continuously polling for updates
- You could rely on batch syncs, leading to outdated or incomplete data
- You could spend months building and maintaining custom webhook fallbacks for every integration
Or you could use [Unified.to](https://unified.to/)'s virtual webhooks, which detect changes on your interval and deliver change events across the integrations that support them.
## How do you set up a virtual webhook?
1. **Start from a connection and object:** Webhooks are created from an existing connection. In the app, go to **Integrations** > **Webhooks**, click **New Webhook** and select the connection, or send a POST request to `/unified/webhook` with `connection_id`, `object_type` and `event`.
2. **Choose the virtual type:** Set **Type** to virtual where the integration supports it. Webhook support varies by integration and object, so check the integration's **Feature Support** tab first. The type can't be changed after creation; delete and recreate the webhook to switch.
3. **Set the interval:** Choose how often [Unified.to](https://unified.to/) checks the integration for changes. The minimum is 1 minute on paid plans and 60 minutes on the trial. The interval doesn't affect the initial sync.
4. **Optionally backfill history:** Add the `include_all` query parameter (or check **Initially sync all data** in the app). Historical records arrive in pages marked `INITIAL-PARTIAL`, followed by a final `INITIAL-COMPLETE` payload.
5. **Point it at your endpoint:** Set `hook_url` to your webhook URL, and verify incoming payloads with the `sig256` signature.
For every configuration option, including filters and fields, see [How to create and configure webhooks](https://docs.unified.to/guides/how_to_create_and_configure_webhooks).
## Start using Unified.to's virtual webhooks
Ready to stop polling and start receiving change events? Here's how to get started:
- [Start a free trial](https://app.unified.to/login) to access virtual webhooks
- [Join our Discord](https://discord.gg/85z7HF7JbD) to connect with our team and get support
- [Review our documentation](https://docs.unified.to/guides/how_to_create_and_configure_webhooks) for step-by-step guidance on setting up webhooks
- [See our changelog](https://unified.to/changelog) for virtual webhook enhancements
## Use Unified to sign in your users into your application
URL: https://docs.unified.to/guides/use_unified_to_sign_in_your_users_into_your_application
# Use Unified to sign in your users into your application
------
_August 31, 2023_
Before your users can utilize your application and any of Unified.to's integrations, they need to sign in to your application.
Luckily, we've simplified user authentication through our Unified Authentication API. Just follow these steps.
## 1. Activate Authentication integrations
1.1 Click on the 'Integrations' menu, and then on the 'Authentication Integrations' option.
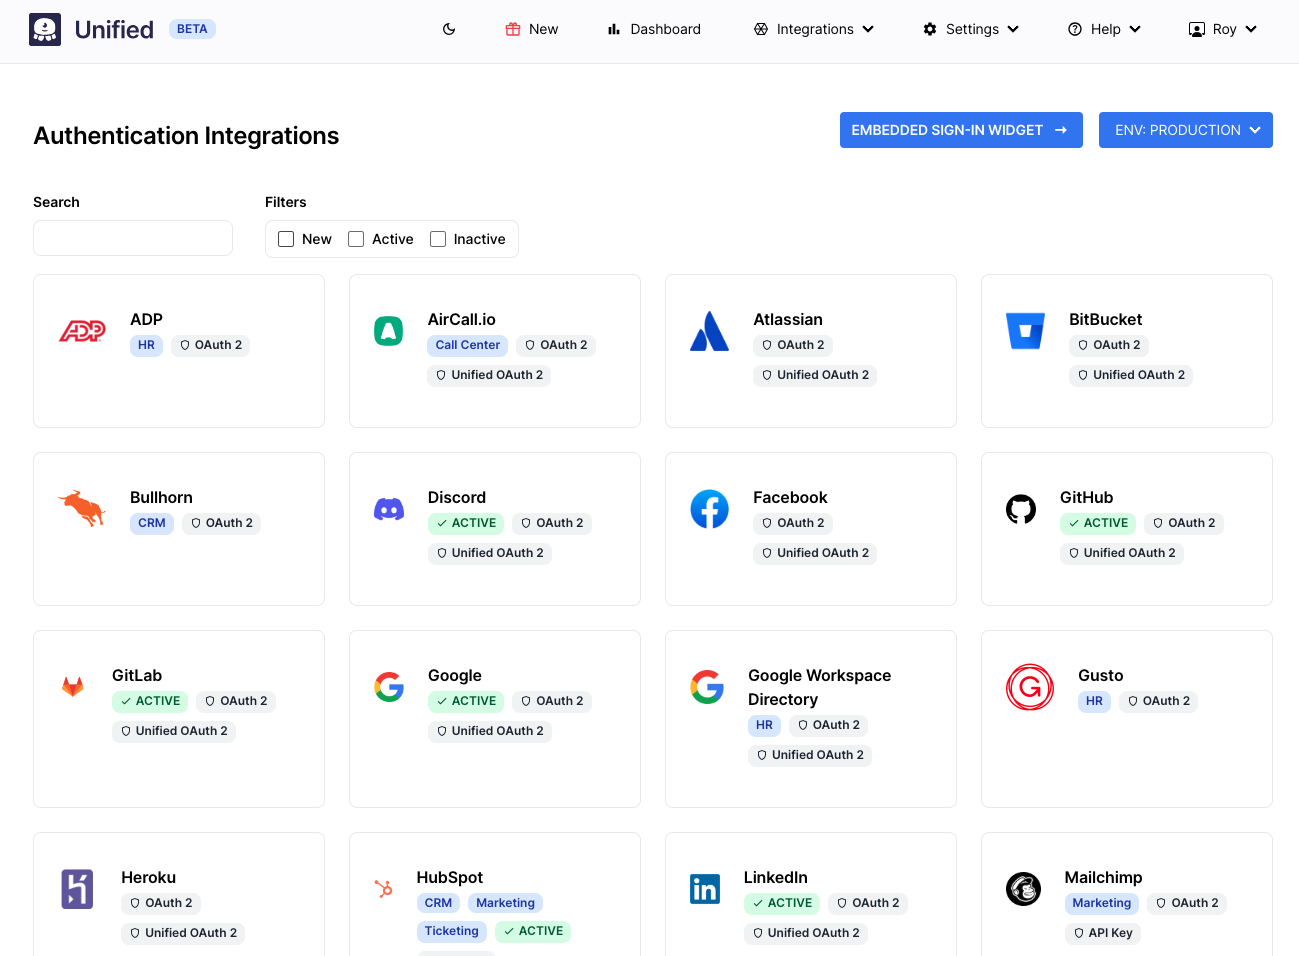
1.2 Activate the integrations that you would like to use to sign-in your users into your application by clicking on each desired integration.
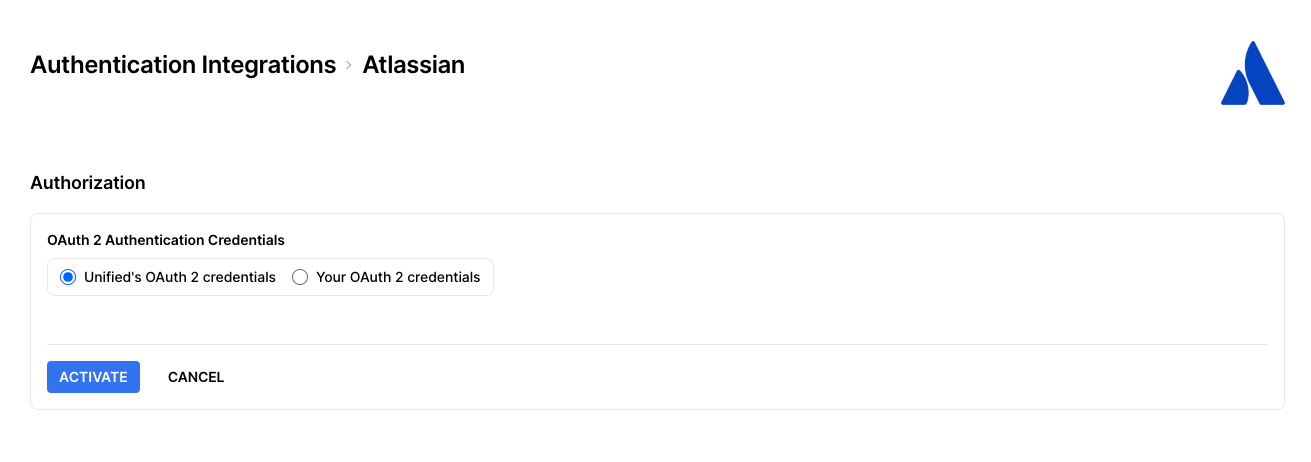
1.3 If available, you can chose to use Unified's branding and name on the authentication page that your users see with signing-in to your application. We don't recommend this for production applications, but this is a great option to test the authentication feature.
1.4 If you want to add your own branding to the authentication pages, then you will need to first obtain your own OAuth2 application credentials from the specific integration vendors (eg. Google). For help on creating your own OAuth2 application, please see [Generating OAuth2 Credentials](https://unified.to/blog/start_here_how_to_generate_oauth2_credentials) or click on the 'Get your own OAuth2 credentials' link. Once you have that, enter your client ID and client secret that you obtained from the integration vendor.
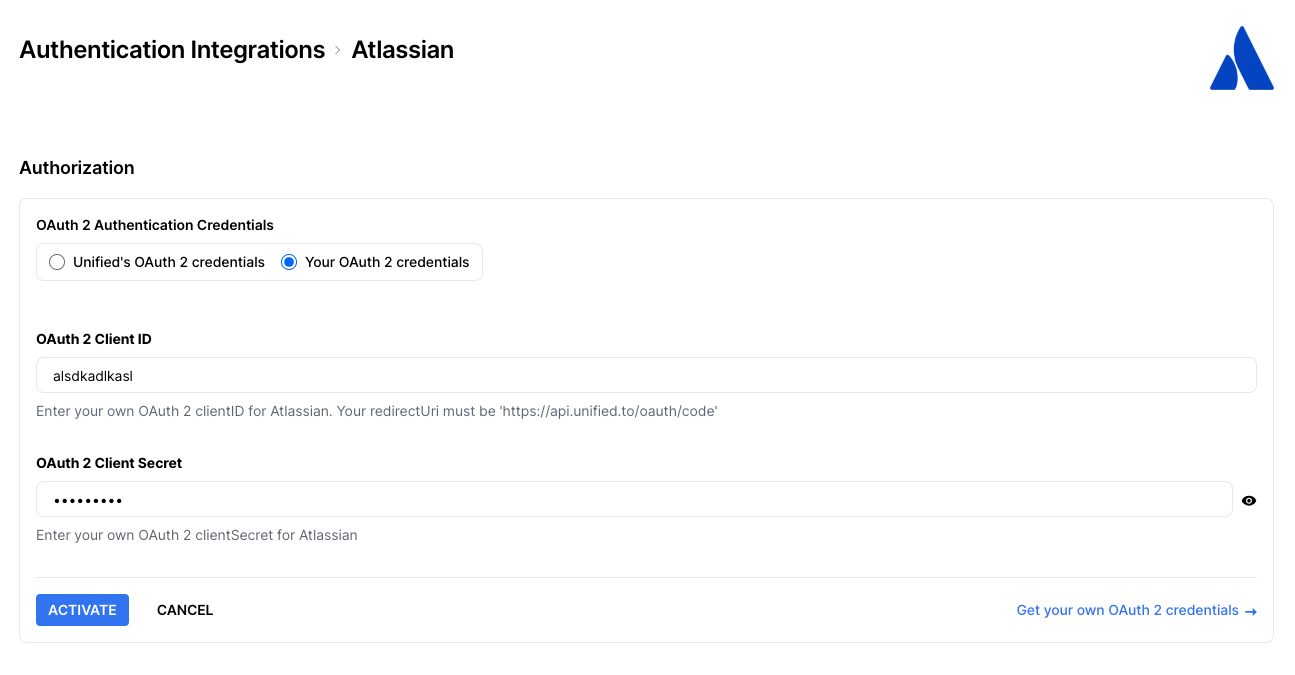
1.5 Click on the 'Activate' button to enable this integration.
1.6 Repeat for all of the integrations that you want to use to authenticate your users.
## 2. Display sign-in links to your users
Now that you have a list of Authentication connections, you can incorporate them into your application.
You have two options:
1. Remember the integration types (ie. google, discord, workday) and create links that point to our authentication API endpoint:
`https//api.unified.to/unified/integration/login/{workspace_id}/{integration_type}?redirect=true`. You can style that link however you like.
2. Call the our API that returns a list of integrations; `https//api.unified.to/unified/integration/workspace/{workspace_id}?summary=true&active=true&categories=auth`. This will return all activated Authentication integrations and each will have information that you can use to style your Sign-in links;
```json
[
{
logo_url: "https://localhost:8000/docs/images/google.png",
name: "Google",
type: "google"
}
]
```
The Sign-in URL can have the following optional parameters:
`redirect` - `true` to redirect the user or if empty, will return the URL as string in its response
`success_redirect` - the URL that the user will be redirected to once they have successfully authenticated with that integration vendor
`failure_redirect` - the URL that the user will be redirected to if there is an error or other issue preventing the user from being authenticated by the integration vendor
`state` - a string that will be sent back to the success_redirect. You can use this to remember a user ID or other identifier.
1. An alternative to building your own Sign-in page is to use our Embedded Sign-in widget. Click on the Settings menu and then on the Embedded Sign-in option.
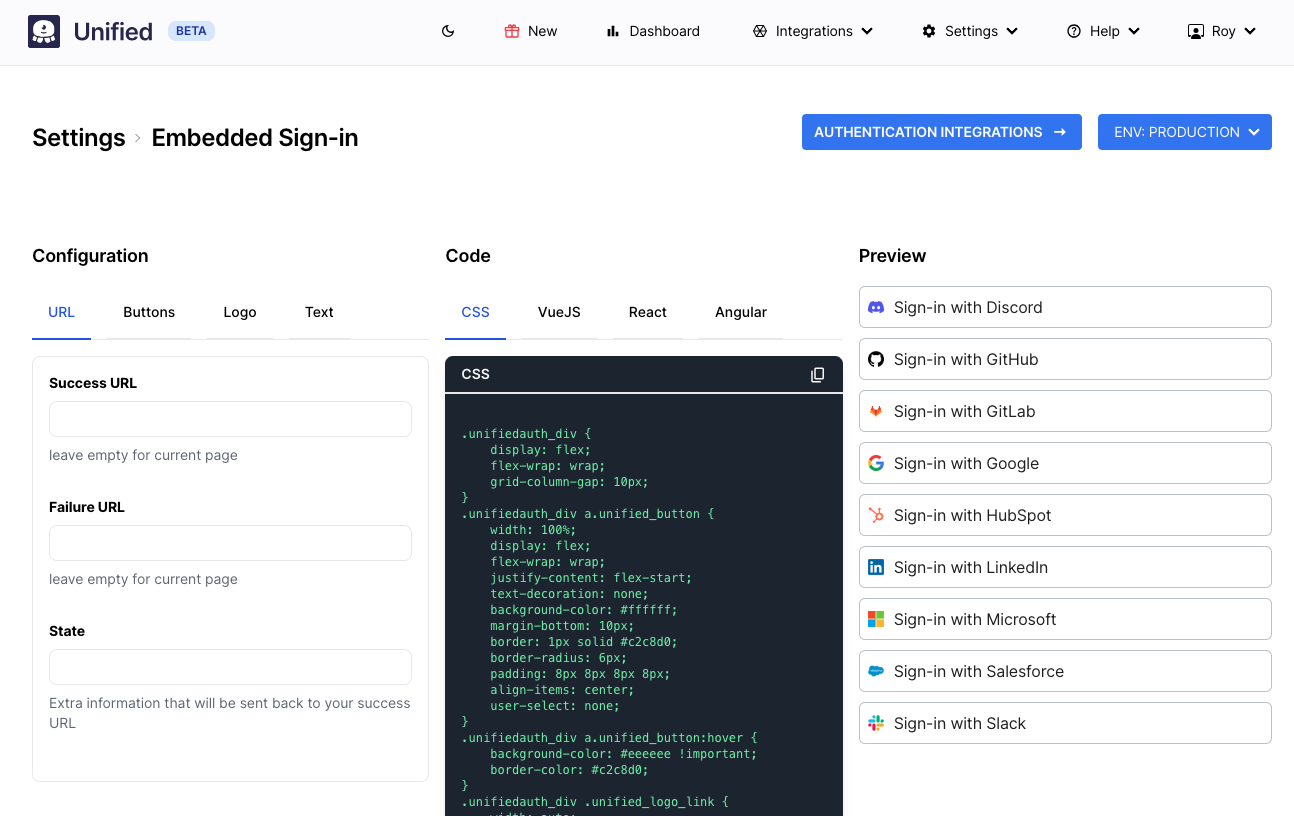
Copy the CSS and code and insert it into your own application.
## Step 3: Verify a sign-in attempt
Once the user clicks on the authentication button/link, they will be redirect to the integration vendor's authentication page.
btw: it is important to note that the authentication pages are not Unified's pages but that of the integration vendor. Unified never sees the user's login credentials including their password.
Once the user successfully signs-in, they are redirected back to your application (or to the location of the `success_redirect` URL parameter from step 2). A `jwt` parameter will be appended to that URL.
The `jwt` is a base64 encoded [JWT](https://jwt.io/) and is signed with your Workspace Secret. Verify the JWT with your workspace secret on your server (NOT in your browser as the workspace secret is not public).
Example code to verify a JWT on a NodeJS server:
```javascript
try {
let result = JWT.verify( req.payload.jwt, workspace.secret )
} catch (err) {
console.error(err);
}
```
The decoded JWT will contain a name and emails field:
```json
{
name: "Jane Smith",
emails: ["jane@foo.com", "jsmith89@gmail.com"]
}
```
Use the user's email to log them into your application as it is verified by the integration.
## Workable: Creating candidates and attaching them to jobs
URL: https://docs.unified.to/guides/workable_creating_candidates_and_attaching_them_to_jobs
# Workable: Creating candidates and attaching them to jobs
------
_September 14, 2026_
## How do candidates and applications work in Workable?
In [Unified.to](https://unified.to/)'s Workable integration, creating a candidate requires a job: Workable creates the candidate on that job. To add the same person to another job, create the candidate again with that job in `job_ids`. Workable keeps a separate candidate record, with its own id, for each job.
This guide explains the recommended flow and how to handle the ids you get back. To connect Workable first, see [Getting started with Workable](https://docs.unified.to/guides/getting_started_with_workable); for the objects and fields Workable supports, see the [Workable integration page](https://docs.unified.to/integrations/workable).
## Create a candidate on a job
`POST /ats/{connection_id}/candidate` with `job_ids` set to the Workable job shortcode creates the candidate on that job. `job_ids` is required: a create without it returns an error and creates nothing.
- The response `id` is that job's candidate id. Store it.
## Add the person to another job
`POST /ats/{connection_id}/candidate` again, with the same details and `job_ids` set to the other job's shortcode. The response `id` is a **new** candidate id for that job. Store it alongside the first one.
## What does application create do on Workable?
In Workable a candidate on a job is the application, so `POST /ats/{connection_id}/application` doesn't attach anyone to a job (as of 21 October 2026). Send:
- `candidate_id`: a Workable candidate id
- `job_id`: the shortcode of the job that candidate is already on
It returns the application for that candidate and job, and can set its status (stage), screening answers or rejection in the same call. If the candidate isn't on that job, it returns HTTP 400 and changes nothing. It also returns HTTP 400 if the job is a draft, closed or archived.
> ⚠️ Application create no longer copies a candidate onto another job. To put someone on a second job, create the candidate on that job.
## Example sequence
1. Create candidate with `job_ids: [JOB1]` → response id `A` (on `JOB1`)
2. Create candidate with the same details and `job_ids: [JOB2]` → response id `B` (on `JOB2`)
3. Later get/update the candidate or application on `JOB2` → use `B`, not `A`
## How do I find a candidate by email?
List candidates with the `query` parameter set to the email address:
```plain text
GET /ats/{connection_id}/candidate?query=person@example.com
```
After you add a candidate to a second job, the same email may return **two** candidates (`A` on the first job and `B` on the second). They are different Workable records with different ids.
## Do updates carry over between the two copies?
No. Changing profile details on the original candidate doesn't update the copy, and the reverse is also true. Treat each id as its own record.
## Why not use email as the candidate id?
Email identifies a person, but after you add them to a second job Workable has **two** candidate records with the same email. [Unified.to](https://unified.to/) keeps Workable's native candidate ids so list, get, and application create stay unambiguous.
## Which events tell me about new copies?
On Workable, candidate created and updated events come from native or virtual webhooks, and application events from virtual webhooks (as of 20 October 2026). Workable's `candidate_created` event feeds the native candidate created event, and only `candidate_moved` (a stage change) feeds native candidate updated. Workable has a `candidate_deleted` event, but [Unified.to](https://unified.to/) doesn't deliver deleted events for any Workable object (as of 21 October 2026), so a 404 on an old id is the signal to list again.
## Requirements and tips
- Changing an application's stage, answers or rejection needs a Workable member id. Pass `user_id` when you can; otherwise [Unified.to](https://unified.to/) tries to resolve an admin or a member of the job's team.
- Store each candidate id as soon as create succeeds, together with the job it belongs to.
- If an old candidate id returns 404, list with `query` set to the email to recover the current ids on each job.
## Workday vs Workday Legacy — Why Unified.to Supports Both
URL: https://docs.unified.to/guides/workday_vs_workday_legacy_why_unified_supports_both
# Workday vs Workday Legacy — Why Unified.to Supports Both
------
_July 22, 2025_
Workday provides **two main API integration formats**:
1. **Workday REST API**: Workday's newer API, still adding endpoints.
2. **Workday SOAP API** (Workday Web Services, often called _Legacy_): the older API, which still covers objects and actions REST doesn't yet.
[Unified.to](https://unified.to/) supports **both**, as two integrations, Workday and Workday (Legacy), so you can use whichever covers the objects you need.
## Why You Might Need Both
While Workday is steadily improving their REST API, there are still important gaps. Here's why using both makes sense today:
1. **Application create / list**: Workday's REST API does not support job applications. List, get, create, and update are only available through the Legacy SOAP integration.
2. **Candidate lists & updates**: REST supports get and create for candidates (prospects), but listing and updating candidates still require Legacy.
3. **Create / update job**: Creating and updating jobs still relies on the Legacy integration. REST supports list and get for job postings.
4. **ATS activity & application statuses**: available on Legacy only today.
5. **Broader HRIS / payroll / payments coverage on Legacy**: objects like HR benefit, deduction, bank account, location, payslip, taxonomy, job (positions), and Payment are Legacy-only. REST uniquely covers LMS content, accounting purchase orders, and HR earnings (with create/update/remove).
6. **Coverage changes**: Workday keeps adding REST endpoints, so check each integration's Feature Support tab for current coverage.
The support matrix below shows [Unified.to](https://unified.to/)'s coverage for **Workday** (REST) and **Workday (Legacy)** (SOAP), from the integration pages in the docs as of 19 October 2026.
| | Workday (REST) | Workday Legacy (SOAP) |
| ------------------------- | --------------------------------- | ------------------------- |
| ATS Activity | | List, Get, Create |
| ATS Application | | List, Get, Create, Update |
| ATS Application Status | | List |
| ATS Candidate | Get, Create | List, Get, Create, Update |
| ATS Company | List, Get | List, Get |
| ATS Document | List, Get, Create | List, Get, Create |
| ATS Interview | List, Get | List, Get, Create, Update |
| ATS Job | List, Get | List, Get, Create, Update |
| ATS Scorecard | List, Get, Create | List, Get, Create, Update |
| HR Attendance | List, Get | List, Get |
| HR Bank Account | | List |
| HR Benefit | | List, Get |
| HR Company | List, Get | List, Get |
| HR Deduction | | List, Get, Create, Update |
| HR Document | List, Get | List, Get |
| HR Earning | List, Get, Create, Update, Remove | |
| HR Employee | List, Get | List, Get, Create |
| HR Group | List, Get | List, Get, Create, Update |
| HR Job | | List, Get |
| HR Location | | List, Get, Create, Update |
| HR Payslip | | List |
| HR Taxonomy | | List |
| HR Timeoff | List, Get, Create, Update, Remove | List, Get, Create, Update |
| HR Timeshift | List, Get, Create, Update, Remove | List, Get |
| LMS Content | List, Get | |
| Accounting Bill | List, Get | List, Get, Remove |
| Accounting Contact | List, Get | List, Get, Create, Update |
| Accounting Invoice | List, Get | List, Get, Remove |
| Accounting Payment Term | | List, Get, Create |
| Accounting Purchase Order | List, Get | |
| Payment | | List, Get, Remove |
## Frequently Asked Questions & Answers
**Question: Do I have to send XML requests for Workday Legacy?**
**Answer:** No! You always send JSON requests to Unified.to. We handle the conversion to XML behind the scenes for the SOAP API.
**Question: Can I use both the REST and Legacy APIs at the same time?**
**A****nswer:** Yes. Each is its own connection, so you can, for example, read documents through Workday (REST) and create applications through Workday (Legacy), both returning the same unified models.
**Question: Is the Workday (Legacy) integration going to be deprecated?**
**Answer:** The docs show no deprecation for Workday (Legacy) as of 19 October 2026, and it still covers objects the REST integration doesn't, such as applications, deductions and payslips.
**Question: Is authentication different for Legacy vs REST?**
**Answer:** Yes. Workday (REST) uses OAuth 2.0 with a client ID, client secret and refresh token. Workday (Legacy) uses an Integration System User (ISU): the [integration page](https://docs.unified.to/integrations/workday_legacy) asks for the Workday host, tenant name, ISU username and ISU password, and the SOAP API receives them as a WS-Security UsernameToken inside the SOAP envelope rather than in an HTTP Authorization header. [Unified.to](https://unified.to/) handles both.
**Question: Are the data models the same between REST and Legacy?**
**Answer:** Yes. [Unified.to](https://unified.to/) maps both onto the same unified models, so an employee or a job has the same fields whichever Workday API is behind it. Which objects and methods each integration supports differs, as the table shows.
**Question: Can I switch from Legacy to REST later?**
**Answer:** Yes, object by object, as REST coverage grows. Because both integrations return the same unified models, your code for an object stays the same; what changes is which connection you call, and each connection needs its own authorization.
**Question: Will using both cost more?**
**Answer:** No. [Unified.to](https://unified.to/) prices by API call with unlimited connections, so a second Workday connection adds no fee of its own.
## Which Workday integration should you use?
Workday is moving more features to its REST API, but some objects and actions are still available only through the SOAP-based Legacy API, so [Unified.to](https://unified.to/) supports **both**.
**Our recommendation:** Use the Workday (REST) integration wherever it covers your workflow (including time off writes, earnings, LMS, and purchase orders), and use Workday (Legacy) for gaps such as applications, candidate list/update, job create/update, broader HRIS/payroll objects, and payments. [Unified.to](https://unified.to/) handles each API's authorization and format, including converting your JSON requests to SOAP for Legacy.
**Have more questions?**
Reach out to our support team for help choosing between the two Workday integrations.
## Working with hierarchical tree data in Storage, Messaging, and KMS APIs
URL: https://docs.unified.to/guides/working_with_hierarchical_tree_data_in_storage_messaging_and_kms_apis
# Working with hierarchical tree data in Storage, Messaging, and KMS APIs
------
_November 7, 2024_
This guide explains how to retrieve and traverse hierarchical data structures (i.e., trees) when working with APIs that support parent-child relationships.
## Overview
Many APIs organize their data in tree-like structures, where records can have parent-child relationships with each other.
1. The **File Storage API** represents both folders and files as a single object type, making tree traversal straightforward. While you can think of folders as the 'containers' for other files and folders, the API treats them all as the same object type.
2. The **Messaging API** and **Tasks API** use a simple parent-child relationship where each object type can contain children of the next type (e.g., projects contain tasks, tasks contain comments, channels contain messages). Objects may also have parents of the same type.
3. The **KMS API** has spaces and pages. Pages nest under pages through `parent_id` on supported integrations (Atlassian Confluence, Notion, ClickUp, Coda, Gladly). The space model also has `parent_page_id` for knowledge bases that nest spaces under pages, but no integration returns it as of 19 October 2026.
This guide will show you how to efficiently traverse these hierarchical structures to retrieve all the data you need.
## Before you begin
This guide assumes you have:
- Basic understanding of [tree data structures](https://en.wikipedia.org/wiki/Tree_(abstract_data_type))
## Understanding parent-child relationships
When an API endpoint supports a `parent_id` parameter, it typically indicates that the data is organized in a hierarchical structure. To fully traverse this structure, you'll need to:
1. Get the top-level entities (parent nodes)
2. For each parent, retrieve its children by passing the parent's ID
3. Recursively repeat this process for any children that can also be parents
4. For KMS Page, you can use its `has_children` field to determine if there are children pages to query. If `has_children` is equal `false` , then no children pages exist. Most integrations don't return it (it's on Confluence, Notion, ClickUp, Coda and Gladly as of 19 October 2026), so if the field is `undefined` or missing, treat it as `true`.
### Example: Messaging platforms
Let's look at how this works with Discord:
1. Discord servers (also called "guilds") are top-level parents
2. Channels exist within servers as children
3. Messages are also related to channels through their `parent_id`
4. To get all channels:
- First retrieve all guilds (servers)
- Then get channels for each guild by passing the guild's ID as `parent_id`
```javascript
async function getAllChannels(connectionId) {
// Get all top-level guilds first
const guilds = await sdk.messaging.listMessagingChannels({
connectionId,
});
let allChannels = [];
// For each guild, get its channels
for (const guild of guilds.data) {
const channels = await sdk.messaging.listMessagingChannels({
connectionId,
parentChannelId: guild.id,
});
allChannels = allChannels.concat(channels.data);
}
return allChannels;
}
```
**API reference:** [Messaging API](https://docs.unified.to/messaging/overview)
### Example: File storage systems
File storage systems are another common example of hierarchical data. Here's how to recursively traverse a file system to get all files:
```javascript
async function getAllFiles(connectionId, parentId) {
const response = await sdk.storage.listStorageFiles({
connectionId,
parentId,
});
if (!response.data) {
return [];
}
let allFiles = [];
for (const item of response.data) {
if (item.type === 'FOLDER') {
// Recursively get files from subfolders
const subfolderFiles = await getAllFiles(connectionId, item.id);
allFiles = allFiles.concat(subfolderFiles);
} else {
allFiles.push(item);
}
}
return allFiles;
}
```
**API reference:** [File](https://docs.unified.to/storage/overview)[ ](https://docs.unified.to/storage/overview)[Storage API](https://docs.unified.to/storage/overview)
## Best practices
When working with hierarchical data:
1. **Implement pagination**: Some nodes might have many children. Use the `limit` and `offset` parameters to handle large datasets.
```javascript
async function getAllChannelsWithPagination(connectionId, parentId = undefined) {
let allChannels = [];
let offset = 0;
const limit = 100;
while (true) {
const response = await sdk.messaging.listMessagingChannels({
connectionId,
parentChannelId: parentId,
limit,
offset,
});
if (!response.data || response.data.length === 0) {
break;
}
allChannels = allChannels.concat(response.data);
offset += limit;
}
return allChannels;
}
```
1. **Handle rate limits**: When recursively fetching data, you might hit API rate limits. Implement backoff strategies and respect the provider's limits.
2. **Cache parent IDs**: If you need to traverse the same structure multiple times, consider caching the parent-child relationships to reduce API calls.
## Integration-specific gotchas
### Working with SharePoint
SharePoint implements a distinct three-level hierarchy that requires special attention:
1. **Sites** (top level)
2. **Drives** (within sites)
3. **Folders/Files** (within drives)
To work with SharePoint's file system:
1. First retrieve the site ID (top-most parent)
2. Use the site ID to list drives
3. Use the drive ID to create or access folders and files
**Important notes:**
- You cannot create files or folders directly at the site level - you must first select a drive
- Write operations are only supported for folders and files, not for sites or drives
- Pagination is not supported for sites and drives listings
## See also
- [How to use the Unified File Storage API](https://docs.unified.to/guides/how_to_use_the_unified_file_storage_api#how-to-use-the-unified-file-storage-api)
---
# Agent Skills
## apollo-oauth-app
URL: https://docs.unified.to/skills/apollo-oauth-app/SKILL.md
# Apollo.io API Credentials
**Read this first: Apollo does have an OAuth 2.0 authorization-code flow, and it is the model Apollo intends for a
platform that connects other organizations' Apollo accounts.** But it is not a public developer console. There is no
`developers.apollo.io` signup where you create a client and walk away with a secret. You register the app **from
inside an ordinary Apollo account** — Settings → Integrations → API Keys → **OAuth registration** — you supply
"details about the purpose of your organization", and Apollo's own words are: *"Once registration is approved, you can
use the Apollo playground to test the OAuth flow."* So: self-serve **form**, Apollo-side **approval**. Apollo publishes
no turnaround, no fee and no eligibility bar for that approval. Plan for it as a wait, not a click (§4).
The other model is **per-customer API keys**: the customer creates a key in their own Apollo account and hands it over,
sent in a request header. Technically this works and Apollo's own Marketplace security requirements assume some
partners do it. Legally it is narrower than people expect — Apollo's API Terms §3 say *"You may not access the APIs via
a third party's API credentials or integrate the APIs with your product or services, unless Apollo has authorized or
approved such access or integration."* A multi-tenant platform holding customer keys is squarely inside that sentence
and needs Apollo's approval either way (§9). And the Marketplace requires OAuth **as the sole authorization method**,
so the key path is a bridge, not a destination.
Three things cost real time here, and none of them are the OAuth flow itself. **You get exactly four redirect URLs**,
which is exactly the number a four-region platform needs and leaves zero spare (§6). **Scopes are locked in** — Apollo
warns that editing them means repeating the whole authorization setup, so a connector that adds object types later
pays for a short list now (§7). And **Apollo's authorize endpoint is hash-routed**, so a client that builds the query
string the ordinary way sends parameters the page never sees (§5).
## Inputs to collect before you start
Ask in one batch. Never invent.
| Input | Notes |
| --- | --- |
| **Credential model** | OAuth 2.0 client, or per-customer API keys? (§1) |
| **App name and logo** | Shown to every customer on the Apollo consent screen (§4) |
| **Redirect URL(s)** | Every callback host, final, up front — **maximum 4** (§6) |
| **Scope set** | The exact strings, complete, first time — changing them later means redoing setup (§7) |
| **The Apollo account that will own the app** | Registration happens inside a real Apollo workspace, not a separate dev account (§3) |
| **Customer plan tier(s)** | Free / Basic / Professional / Organization. Decides limits and which endpoints answer (§8) |
| **Credit budget and owner** | Enrichment and search spend the customer's credits, not yours (§9) |
| **Marketplace intent** | Listing requires OAuth-only and 3 connected Apollo teams (§10) |
| **An Apollo workspace to test against** | Apollo publishes no sandbox; testing is against a real workspace (§4) |
## Quick Start
1. Decide the **credential model** — OAuth client or per-customer keys (§1). Most wrong turns start here.
2. Check whether credentials already exist; re-registering orphans every live customer authorization (§2).
3. Get into the Apollo account that will own the app; confirm the acting user's permission profile (§3).
4. Submit **OAuth registration** and wait for Apollo's approval; then use the built-in playground (§4).
5. Build the authorize call **hash-first** — parameters after the `#`, or Apollo never sees them (§5).
6. Give Apollo **every** callback host in that one form. You get four (§6).
7. Pin the **complete** scope set now; Apollo calls the set locked in (§7).
8. Check plan gating and rate limits before promising any sync cadence (§8).
9. Brief the customer on **credits** before the first enrichment run (§9).
10. Verify with a real authorize → callback → refresh → refresh-again round trip (§11), then hand the secret to a
human, never to source control (§12).
## Platform state (verified 2026-09-20 — re-verify before trusting)
- **OAuth 2.0 exists, is documented, and is the intended partner model.** Apollo's authentication reference splits it
plainly: *"Apollo users use an API key, and partners building on behalf of mutual users use OAuth 2.0."* The OAuth
page is titled **"OAuth 2.0 (Partners)"**.
- **Registration is in-product, and approved by Apollo.** Settings → Integrations → API Keys → **OAuth registration**.
You provide app name, logo, redirect URLs and scopes plus "details about the purpose of your organization". Apollo:
*"Once registration is approved, you can use the Apollo playground to test the OAuth flow."* **No published SLA,
cost or eligibility criteria.** Do not invent one.
- **There is no separate developer-account signup.** `developer.apollo.io` is a dashboard hanging off your normal
Apollo login (keys, usage, subscription, and — once registered — the OAuth integration page and playground). Any
runbook that tells someone to "create an Apollo developer account" is describing something that does not exist.
- **Endpoints: authorize `https://app.apollo.io/#/oauth/authorize`, token and refresh
`https://app.apollo.io/api/v1/oauth/token` — both on the app host, while data calls go to
`https://api.apollo.io/api/v1`.** The authorize URL is **hash-routed** (§5).
- **Up to 4 OAuth redirect URLs**, HTTPS only, entered comma-separated in one field (§6).
- **Scopes are locked in.** Apollo: *"if you edit these scopes, you need to repeat this entire authorization flow to
set up OAuth again."*
- **Access tokens last 30 days** (`expires_in: 2592000`). **Refresh rotates and revokes**: *"Once you use the refresh
token to generate new tokens, the existing tokens are automatically revoked."*
- **`read_user_profile` is granted automatically on every OAuth token** — but if you pass a `scope` parameter on the
authorize call, Apollo's docs say you must include it explicitly in that parameter.
- **The authorizing customer needs a specific permission.** On plans with custom permission profiles, *"Can authorize
third-party apps/integrations via OAuth"*; on plans without, **Admin** or **Billing and Seat Manager**. A user
without it is redirected to your callback carrying
`status_code=403&error_message=You do not have permission to connect integrations…` — an *error on your redirect
URL*, not an Apollo error page. Handle it or the customer sees a raw query string.
- **API keys come in two kinds.** Scoped (default, you pick endpoints; `403` on anything else) and **master** (all
endpoints). Some endpoints — the workspace user list among them — work **only** with a master key.
- **An API key is a workspace identity, not a person.** Apollo: *"Every API-key request acts as your workspace's
longest-standing active admin."* OAuth tokens act as the granting user. Record ownership differs by credential type.
- **Plan gating is real but narrower than folklore.** Apollo's FAQ says *"all Apollo plans include access to our
API"* and *"All pricing plans include at least basic access… but more advanced functionality is only available on
certain plans."* The documented `403` cause is *"Your plan doesn't include API access, or the endpoint isn't
available through the public API for your credentials"* (`API_INACCESSIBLE`). Separately, **free accounts must be
registered with a work email address** to use certain search, enrichment and record-retrieval endpoints.
- **Errors are mid-migration.** A structured `error_details` object (`code`, `message`, `suggestions`, `context`) is
rolling out. Apollo states the legacy root-level `error` / `error_code` / `message` fields are **removed everywhere
on 16 February 2027**. Anything branching on a root-level error field has a deadline.
- **Apollo runs an MCP server** at `https://mcp.apollo.io/mcp` whose authorization-server metadata is public,
advertises PKCE `S256` and exposes a **dynamic client registration** endpoint. It is a useful cross-check on scope
spelling, and nothing more — **it is not a back door to REST OAuth credentials.** Its scope list is also not the
REST list: several scopes the REST endpoint pages name are absent from it.
- **Marketplace listing requires OAuth as the sole authorization method** and **at least 3 unique Apollo teams**
connected. Apollo's Partner team responds to applications "within 5 business days".
If the portal does not look like this, stop and report what you actually see.
## 1. Which credential, and who issues it
One API surface (`https://api.apollo.io/api/v1`), two ways in, and they are not interchangeable:
| | **OAuth 2.0 client** | **Per-customer API key** |
| --- | --- | --- |
| Who issues it | Apollo, after approving your in-product registration | The customer, in their own Apollo workspace |
| How it is sent | `Authorization: Bearer ` | An API-key request header |
| Acts as | **The user who granted it** | **The workspace's longest-standing active admin** — not the key's creator |
| Access control | Scopes fixed at registration | Endpoint list fixed per key; master key = everything |
| Lifetime | Access token 30 days; refresh rotates | Until regenerated or deleted |
| Multi-tenant fit | Designed for it. One client, many customers, no secret leaves their side | Works, but you hold N customer secrets |
| Marketplace | **Required** — sole permitted method | Disqualifies a listing |
| Terms position | Apollo has approved the integration by approving registration | API Terms §3 needs Apollo's approval anyway (§9) |
**The honest recommendation: OAuth.** It is what Apollo built for this shape, it keeps customer secrets out of your
database, its per-user attribution is what customers expect when records appear in their workspace, and it is the only
path to a listing.
**When per-customer keys are still the right answer:** you need something working before Apollo's approval lands; the
customer refuses OAuth; or the connector needs an endpoint a scoped key reaches more conveniently than the approved
scope set does. Treat it as a documented interim state with an owner and a date, not a default — and read §9 first.
> **Product fact — dated.** As of **2026-09-20**, this platform's Apollo connector supports **both** models. In
> **API-key** mode it asks the customer for a single key and sends it in Apollo's API-key request header, pointing them
> at Apollo's own "create an API key" documentation page. In **OAuth** mode it uses **one shared OAuth client held by
> the platform** (customers do not bring their own), runs the authorization-code flow against Apollo's app host,
> exchanges and refreshes with a form-encoded POST carrying client ID and secret, and sends a bearer token on data
> calls to Apollo's API host. It requests a **per-object, per-direction** scope set covering person and company
> enrichment, CRM companies, contacts, deals and deal stages, the workspace user list, custom fields, and outreach
> email events. It carries a workaround for Apollo's **hash-routed authorize URL** (§5) and reads the signed-in user's
> profile after authorization to name the connection. It records Apollo's rate limits only as a pointer to Apollo's
> pricing-comparison page, and the API-documentation link it stores for Apollo (an old GitHub-hosted docs site)
> **now returns 404** — the live documentation is `docs.apollo.io`. Its error surfacing reads Apollo's **legacy
> root-level error field**, which Apollo removes on 16 February 2027 (see Platform state). **Confirm all of this with
> the connector's owner before acting on it** — connector configuration changes independently of this skill.
## 2. Reuse the existing credentials, or register new ones
**A new OAuth client means a new client ID, and every existing customer authorization is bound to the old one.**
Every customer re-authorizes. Reuse what exists for: adding a redirect URL, rotating a compromised secret, or
diagnosing a failure.
Note the asymmetry Apollo created: **adding a redirect URL is an edit; adding a scope is a redo.** Apollo's own
warning is that editing scopes means repeating the entire authorization setup. Before you assume "we'll just add the
scope later", read §7 and price that in.
Register a **new** client only when the user explicitly wants one: a separate product, a replacement for a compromised
client, or a deliberate migration off per-customer keys (which is a migration project — every customer reconnects).
For **per-customer API keys** the calculus is gentler: each customer's key is independent, so regenerating or deleting
one affects exactly one workspace. Say which path you are taking before you start.
## 3. Account and permissions
There is no developer-account signup to complete. What you need is:
- **An Apollo account that will own the app.** Registration lives at Settings →
`https://app.apollo.io/#/settings/integrations` → **API Keys** (which opens the developer dashboard at
`https://developer.apollo.io/`). Whoever owns that account owns the client ID and secret, so pick deliberately — a
shared company workspace, not an individual's trial.
- **Permission to create keys.** Apollo's FAQ: *"You must be an admin for your Apollo account or be assigned the
necessary permission profile to create API keys."* A customer contact who reports there is no API Keys section is
telling you about their permission profile, not about Apollo.
- **Permission to authorize, on the customer side.** Different permission, different people: *"Can authorize
third-party apps/integrations via OAuth"* on plans with custom permission profiles; **Admin** or **Billing and Seat
Manager** otherwise. Name this in your connect instructions, because the failure lands on *your* callback as a 403
query string (§11).
- **A workspace to test against.** Apollo publishes no sandbox or developer tenant. Testing — including any write —
happens against a real workspace whose records and credits are real. Say that out loud before anyone runs a create.
Anything only a human can do — signing in, email verification, accepting terms, submitting the registration form,
being granted an Admin profile — hand back rather than looping.
**If this session has no browser automation** (the usual case for a CLI or cloud run), do not pretend to click. Give
the user an exact, ordered click path with the literal values to paste — the redirect URLs from §6 and the scope
strings from §7 — then continue once they report back with the client ID.
## 4. Register the OAuth app, and wait
1. **Settings → Integrations → API Keys → OAuth registration.**
2. Fill in, exactly:
- **App Name** — what every customer sees on the consent screen.
- **App Logo** — same.
- **OAuth Redirect URL** — all of them, comma-separated, in this one field (§6).
- **Scopes** — the complete set (§7). Apollo adds `read_user_profile` and `app_scopes` by default.
- **Purpose of your organization** — what Apollo reviews. Describe the platform accurately: it connects Apollo's
API on behalf of mutual customers, who authorize access themselves. **Do not invent** customer counts, volumes,
security certifications, retention periods or compliance claims — collect the questions and hand them back.
3. **Submit**, and wait for approval. Apollo publishes no turnaround. Do not promise one.
4. On approval, **copy the client ID and secret**. Apollo: *"The only time the secret is displayed is when it is
generated… it will not be shown again."* The client ID remains visible on the OAuth integration page afterwards.
5. **Use the playground before writing code.** Once registered, the developer portal exposes **OAuth Integration →
Playground**: get an authorization code, exchange it for an access token, fetch data. Three clicks that prove the
redirect URL, the scopes and the approval all landed — before any of your own code is in the picture.
**Data licensing is a separate conversation.** Apollo: *"Integrations for the purpose of sharing, exposing, or
reselling data to non-Apollo users requires a custom contract with Apollo."* If the product surfaces Apollo-sourced
data to anyone who is not an Apollo customer, that is a contract question for Apollo, not a scope you can request.
## 5. The authorize call — hash-routed, and why clients break on it
Apollo's authorize endpoint is a front-end route behind a fragment:
```
https://app.apollo.io/#/oauth/authorize?client_id=&redirect_uri=&response_type=code&scope=&state=
```
The query string sits **after** the `#`. A client that appends parameters the ordinary way — treating the URL as a
normal URL and letting a URL library place the query — produces
`https://app.apollo.io/?client_id=…#/oauth/authorize`, the single-page app never receives them, and Apollo answers
with a missing-parameter complaint about `client_id` that reads like a registration problem and is not one. Build the
URL so the parameters follow the fragment path, and eyeball the finished string once.
Parameters, as Apollo documents them: `client_id` (required), `redirect_uri` (required, one of the registered URLs),
`response_type=code` (required), `scope` (optional — omit it and the registered set applies; include it and you must
list `read_user_profile` explicitly if you want it), `state` (optional — treat it as mandatory; it is your only CSRF
defence). Scopes are separated by **URL-encoded spaces**.
**Exchange** — `POST https://app.apollo.io/api/v1/oauth/token`, form-encoded, with `grant_type=authorization_code`,
`code`, `client_id`, `client_secret`, and `redirect_uri` only if you are switching to a different registered URL.
Response: `access_token`, `token_type: "Bearer"`, `expires_in: 2592000`, `refresh_token`, `scope`, `created_at`.
**Refresh** — same endpoint, `grant_type=refresh_token` with `refresh_token`, `client_id`, `client_secret`. Optionally
a `scope` parameter to *narrow* the new token (it must be a subset of what you registered). The response carries a
**new** access token **and a new refresh token**, and *"the existing tokens are automatically revoked."* Store the new
refresh token from every response, or the second refresh fails. Thirty days is long enough that a client which ignores
rotation looks healthy for a month before it does not — refresh on a schedule and confirm the write-back, rather than
lazily at first failure.
## 6. Redirect URLs — you get four
One field, comma-separated, **HTTPS required**, **maximum 4**. For this platform that is one callback per data center:
```
https://api.unified.to/oauth/code # us (default)
https://api-eu.unified.to/oauth/code # eu
https://api-au.unified.to/oauth/code # au
https://api-dev.unified.to/oauth/code # dev
```
That is **exactly four — the cap, with nothing spare.** There is no room for a fifth region, a staging host or a
`localhost` for a developer's laptop. Confirm the current list with the platform owner rather than assuming, and if a
new region is on the roadmap, raise the ceiling with Apollo *now* rather than discovering it on launch day.
Apollo does not document its matching rules, so assume exact string matching and no trailing-slash forgiveness. The
`redirect_uri` on the authorize call must be one of these; on the token exchange, send it only when deliberately
switching to another registered URL.
## 7. Scopes — get them right the first time
Apollo's scopes are per endpoint, and **each endpoint's reference page names its own** in an "Endpoint essentials"
table, alongside the scoped-key path and the credit cost. That table is the authority. Read it for every endpoint the
connector calls; do not extrapolate from a sibling, because **Apollo's spelling is not systematic** — contact and
account scopes are **singular** on writes and **plural** on search.
Verified on 2026-09-20 against Apollo's endpoint reference pages:
| Capability | Endpoint | Scope |
| --- | --- | --- |
| Search saved contacts | `contacts/search` | `contacts_search` |
| Create a contact | `contacts/create` | `contact_write` *(singular)* |
| Update a contact | `contacts/update` | `contact_update` *(singular)* |
| Search saved accounts | `accounts/search` | `accounts_search` |
| Create an account | `accounts/create` | `account_write` *(singular)* |
| Update an account | `accounts/update` | `account_update` *(singular)* |
| List deals | `opportunities/search` | `opportunities_list` |
| View a deal | `opportunities/show` | `opportunity_read` |
| Create a deal | `opportunities/create` | `opportunity_write` |
| Update a deal | `opportunities/update` | `opportunity_update` |
| List deal stages | `opportunity_stages/index` | `opportunity_stages_list` |
| List workspace users | `users/search` | `users_list` **(master key in API-key mode)** |
| Current user profile | `users/api_profile` | `read_user_profile` *(default — granted automatically)* |
| List fields | `fields/index` | `custom_fields_list` |
| Person enrichment | `people/match` | `people_match` |
| Organization enrichment | `organizations/enrich` | `organizations_enrich` |
| Search outreach emails | `emailer_messages/search` | `emailer_messages_search` |
| People search (database) | `mixed_people/api_search` | `mixed_people_api_search` |
| Organization search (database) | `mixed_companies/search` | `mixed_companies_search` |
| API usage and limits | `usage_stats/api_usage_stats` | `api_usage_stats_read` |
| Credit usage | `usage_stats/credit_usage_stats` | `credit_usage_stats_read` |
Two rules that outrank the list:
1. **Locked in means locked in.** Apollo warns that editing the registered scopes means repeating the whole
authorization setup. A connector whose object coverage grows quarterly should register the scopes for its
*roadmap*, not just today's objects — while still requesting only what it can justify, because that same set is
what every customer reads on the consent screen and what Apollo reviews.
2. **Scopes never exceed the human.** Apollo: *"Apollo developer tools follow your Apollo permissions, plan access,
and credit availability. If your Apollo account can't access a feature, perform an action, or use credit-consuming
data, developer tools like Apollo API, MCP, and CLI can't bypass those limits."* A perfect scope set on a customer
whose plan lacks the feature still returns `403`.
A useful cross-check, not a source of truth: Apollo's MCP authorization server publishes its scope vocabulary at
`https://mcp.apollo.io/.well-known/oauth-authorization-server`, which is handy for confirming an exact spelling. It is
the **MCP** server's set — several REST scopes above do not appear in it — so never treat its absence as evidence.
**Watch for deprecated endpoints while you are in here.** The older custom-fields endpoint is marked deprecated in
favour of the fields endpoint (with a `source: custom` filter); both currently carry the same scope, so a connector
can drift onto a deprecated path without any scope symptom to warn it.
## 8. Plan gating and rate limits
**Plan gating.** Correct the folklore in both directions: API access is not a paid-only feature, and it is not
uniformly available either. Apollo's FAQ says all plans include at least basic API access; specific endpoints and
"more advanced functionality" are plan-dependent, and free accounts additionally need a **work email address** for
certain search, enrichment and record-retrieval endpoints. The symptom is a `403` (`API_INACCESSIBLE`) on *one*
endpoint while everything else works — which reads like a broken permission and is a plan.
**Rate limits are per team, per endpoint, in three simultaneous windows** (minute, hour, day). All keys and users in a
workspace share them, and child workspaces share their parent's. Every applicable window must be satisfied.
| Requests | Free | Basic | Professional | Organization |
| --- | --- | --- | --- | --- |
| Per minute | 50 | 200 | 200 | 200 |
| Per hour | 200 | 400 | 400 | 600 |
| Per day | 600 | 2,000 | 2,000 | 6,000 |
**Enrichment endpoints** get 1,000/minute on all paid plans with **no hourly or daily limit** (free: 50/minute, 20 for
bulk). **Search endpoints** get 200/minute, 6,000/hour and **50,000/day** on paid plans. Searching the customer's own
saved records is *not* a database search and falls back to the plan table above — a distinction that quietly explains
why a CRM sync hits a ceiling that a prospecting workflow never sees. A few endpoints are tighter still: the analytics
report endpoint is **5 requests per hour**.
Read the limits off the response rather than a table: `x-rate-limit-minute`, `x-rate-limit-hourly`,
`x-rate-limit-24-hour`, the matching `x-*-usage` and `x-*-requests-left` headers, and — on a `429` — **`retry-after`
in seconds**. Windows are **fixed and unaligned to the clock**: a window opens on your first request to that endpoint
and closes when its duration elapses. Empty `x-rate-limit-*` means no limit in that window for that endpoint. These
headers appear only *after* authentication and authorization succeed, so a 401 or 403 carries none of them.
For a legacy plan, or to confirm anything above, call the usage-stats endpoint rather than trusting the table — Apollo
says to use it as the source of truth.
## 9. Credits — a successful integration can still cost the customer money
This is the failure mode with no error message. Rate limits govern how *fast* you may call; **credits govern how much
data you may receive**, they are the customer's, and they are separate budgets. Apollo is explicit that a higher
enrichment rate limit "isn't a license to send unlimited requests: your credit balance still governs how much data you
can enrich."
Verified 2026-09-20 from Apollo's API pricing page. Everything not listed consumes **0 credits** — creating, updating,
listing and managing records is free:
| Endpoint | Credits |
| --- | --- |
| People enrichment / bulk people enrichment | **1–9 per person**, charged only when credit-consuming data is found: 1 for demographics or email, **+8 if a mobile phone is returned** |
| Person enrichment *with waterfall* | Email typically **1–4**, "some vendor configurations or successful higher-cost matches may result in 20+"; phone typically **8–25**, "some configurations may result in 45+". **Some vendors consume credits per lookup even when no data is found** |
| Organization enrichment / bulk | 1 per organization |
| Get complete organization info | 1 per company |
| Get complete person info | 1 per person |
| Organization search | **1 per page** (up to 100 results) |
| Organization job postings | 1 per page |
| News articles search | 1 per page |
| Conversation info / export | 1 per conversation **that has AI insights**, else 0 |
Three consequences worth stating to whoever owns the integration, in writing:
- **Pagination multiplies cost.** Per-page charging means a wide search paged to exhaustion is charged per page, and
Apollo says so: *"If you paginate through results or run repeated searches, your total credit usage can increase."*
A retry loop over a credit-consuming endpoint spends real money.
- **Waterfall enrichment is a customer-side configuration you cannot see** and it can multiply the cost of a single
call by five or more, including on misses. If the connector enriches, the customer's waterfall settings are part of
your cost model whether or not anyone told you.
- **Credit exhaustion is not a rate limit and does not resolve by waiting.** Apollo's structured error rollout
includes distinct codes for credit exhaustion; branch on `error_details.code`, surface it to the customer as a
billing condition, and stop the job rather than retrying it.
Apollo exposes a credit-usage endpoint, and the developer dashboard shows consumption for the current billing cycle.
**Test with a small request and check usage before scaling any workflow** — Apollo's own recommended procedure.
**Legacy plans differ.** Apollo notes that credit usage on legacy plans "may differ" from the published table and
points customers at their own in-app credits page. Do not quote these numbers to a customer as *their* numbers.
## 10. Terms, and whether you may hold a customer's key at all
This is the question most people skip, and Apollo answers it directly. From the **API Terms of Service** (last updated
13 August 2024):
- **§3 Third Party Access** — *"You may not access the APIs via a third party's API credentials or integrate the APIs
with your product or services, unless Apollo has authorized or approved such access or integration."* Read it twice:
it covers **both** halves of the thing a multi-tenant platform does. Approved OAuth registration is the clean way to
be inside "authorized or approved"; a pile of customer API keys is not, on its own.
- **§2 License** — the licence is *"solely for your internal business purposes"* and *"You may not sublicense, sell, or
distribute (including but not limited to sharing) the APIs."*
- **§5 Restrictions** — no using the API *"to replicate or compete with any Apollo products or services, as determined
by Apollo in its sole discretion"*, and no *"sell, access or sublicense the API for use by a third party."*
- **§7 Confidentiality** — *"You shall keep confidential all API access credentials, passwords, and tokens, and shall
prevent third parties from making unauthorized use of your credentials."*
Apollo's **Marketplace security requirements** add operating rules that apply whether or not you list: Apollo end-user
data stored outside Apollo must be **encrypted at rest**; TLS 1.2+ with HSTS (minimum one year); secrets must never
live in source code, repositories, URL strings, referrer headers or application logs; keys should be **rotated, with
90 days recommended**; *"An application must not insecurely store or share credentials belonging to Apollo user
accounts such as user passwords or user API tokens"*; and security incidents must be reported to Apollo **within 24
hours**. Note the wording — Apollo regulates *insecure* handling of customer tokens rather than banning the pattern,
and separately expects partners to document how a customer creates *"a unique API key with the unique app name, with
access strictly limited to the functionality that the application needs"*. Both models are contemplated; only one is
listable.
**Marketplace listing** (optional, and the reason to care about the above): a direct integration with Apollo's REST
API or MCP server; **OAuth 2.0 as the sole authorization method**; **at least 3 unique Apollo teams connected**;
brand guidelines; agreement to the Terms and the security requirements. Applications go through Apollo's Partner team,
who respond **within 5 business days**; an approved application leads to a listing you claim and Apollo reviews before
publishing.
**Stop and ask** before answering anything you would have to invent on any of these forms: certifications, retention
periods, subprocessors, breach procedures, customer counts, volume projections, or a named responsible individual.
## 11. If you are on per-customer API keys: the admin runbook
Send the customer this, verbatim-ish. It is short because the Apollo side is short; the traps are at the end.
1. **You need to be an Apollo admin**, or hold a permission profile that allows managing API keys. If you cannot see
the section below, that is why.
2. In Apollo, go to **Settings → Integrations → API Keys** (this opens Apollo's developer dashboard).
3. Click **API Keys → Create new key**.
4. **Name it after the integration** and write a real description. Whoever audits your keys in a year will have only
this to go on.
5. **Select only the endpoints the integration needs.** Leave **Set as master key** *off* unless the integration
requires an endpoint that demands one — the workspace user list is the common example. A master key can take any
API action your Apollo account allows; treat it like a password.
6. Click **Create API key**, then **copy it immediately** and paste it into the place your vendor asked for. Do not
email it, and do not paste it into a ticket or chat.
7. To confirm it works before handing it over, call Apollo's health endpoint (`GET /api/v1/auth/health`) with the key
in the API-key header. Both values in the response should be `true`. (Apollo notes a common cause of failure:
**a stray space or newline after the key** when it was pasted.)
8. Keys can be **regenerated or deleted** from the same page, and usage and per-endpoint rate limits are visible under
**Usage**. Regenerating breaks the integration until the new value is delivered — plan it.
Three things to tell them in the same message, because each produces a support ticket otherwise:
- **The key is not "yours" in Apollo's eyes.** Records the integration creates are attributed to the workspace's
longest-standing active admin, not to whoever made the key. If that matters, the integration should set an owner
field explicitly where the endpoint offers one.
- **Adding an endpoint later means editing or replacing the key.** A scoped key returns `403` on anything not
selected, and that `403` looks exactly like a plan problem.
- **Rate limits and credits are shared by the whole team.** Your integration draws from the same per-team budgets as
every other tool and every person using Apollo in the browser.
## 12. Verify end-to-end
A registration that half-worked surfaces later as a customer who cannot connect. Prove it:
1. **Use Apollo's playground first** (§4) — authorization code, token, data — before any of your own code is involved.
2. Run a real connect through your platform's own flow and complete the callback. Check the finished authorize URL
character by character; the hash routing (§5) fails silently in the direction that looks correct.
3. Confirm the connection stored an access **and** a refresh token, and that one read call succeeds.
4. **Read the granted `scope` off the token response** and diff it against what you asked for. This is the cheapest
possible check that the registered set and the requested set agree.
5. **Refresh, then refresh again using the token returned by the first refresh.** Two minutes of work that catches a
client ignoring rotation — otherwise a failure that appears thirty days later.
6. Test with a customer user who **lacks** the OAuth-authorization permission, and confirm your callback renders
something human for the 403 query string rather than leaving them staring at a URL.
7. Run one **credit-consuming** call and check the customer's credit usage moved by the amount you predicted (§9).
8. Watch the rate-limit headers during a real sync, not a single call — and note which window binds first.
9. Re-run against a **second** workspace on a **different plan tier**, not the one that registered the app.
| Symptom | Cause |
| --- | --- |
| Authorize page says a required parameter such as `client_id` is missing | Query string placed before the `#` on the hash-routed authorize URL — the page never receives it (§5) |
| Customer lands back on your callback with `status_code=403&error_message=You do not have permission…` | The authorizing user lacks *Can authorize third-party apps/integrations via OAuth* (or Admin / Billing and Seat Manager) (§3) |
| Redirect mismatch for one region | That callback host is not among the **4** registered redirect URLs (§6) |
| `403` on **one** endpoint, everything else fine | Scoped key without that endpoint, an endpoint that requires a **master** key, or the customer's plan does not include it (`API_INACCESSIBLE`) (§7, §8) |
| The workspace user list `403`s | Master key required in API-key mode; `users_list` scope in OAuth mode (§7) |
| Free-plan customer gets `403` on search or enrichment only | Free accounts must be registered with a **work email address** for those endpoints (§8) |
| A scope the customer needs was never requested | Scopes are locked in at registration; adding one means repeating the authorization setup (§7) |
| Worked for a month, then 401 everywhere | 30-day access token, never refreshed (§5) |
| Second refresh fails, first succeeded | Refresh tokens rotate and the old pair is revoked; store the new one every time (§5) |
| `429` under light load | Per-team, per-endpoint, three-window limits shared with every other tool in the workspace; back off by `retry-after` (§8) |
| `429` on a sync of the customer's own records while prospecting calls are fine | Saved-record search is not a database search and uses the lower plan limits (§8) |
| Calls succeed, customer complains about credits | Enrichment and per-page search spend credits, and waterfall configuration can multiply them (§9) |
| Enrichment stops returning data, no rate-limit headers | Credit exhaustion, not a rate limit; waiting will not fix it (§9) |
| Records appear under the wrong owner | API-key requests act as the workspace's longest-standing active admin, not the key's creator (§1) |
| Error handling breaks on a date in 2027 | Legacy root-level error fields are removed 16 February 2027; branch on `error_details.code` (Platform state) |
## 13. Hand off — never commit the secret
- **Do not** write a client secret, refresh token or customer API key into source control, a test, a fixture, a
committed `.env`, a ticket, a PR body or a chat channel — Apollo's own security requirements name source code,
repositories, URL strings, referrer headers and application logs explicitly. Values go to the human running this,
for their secret store or console.
- The **client ID** is not a secret and may be recorded. The secret is, and Apollo shows it **once**.
- If a code change is needed (a callback host, a scope string, a token host), keep it secret-free and say plainly what
the human must set out of band.
- Report a secret once so it can be pasted into the secret store, say clearly that it is now in the transcript and can
be regenerated, then move on.
- Close with: which credential model you ended up on; the client ID if OAuth; where the secret was delivered; the
authorize and token endpoints; the **exact** scope strings registered and the fact that changing them is a redo; the
four redirect URLs as registered; the customer plan tiers in play and the rate-limit ceiling that follows; **who owns
the credit budget and what the expected consumption is**; Apollo's approval status and date; and whatever is still
waiting on Apollo.
## Stop and ask
Hand back to a human rather than guessing when: the OAuth registration form asks for organizational, security,
compliance or volume claims you would have to invent; **Apollo's approval has not arrived** and someone wants a date
(there is no published SLA — say so in the first reply); the platform needs a **fifth** redirect URL and the cap is 4;
a scope is missing and adding it means redoing the authorization setup for every customer; someone proposes moving
live per-customer key connections to OAuth, or the reverse (either way, every customer reconnects); the product would
expose Apollo data to non-Apollo users (that is a data-licensing contract, not a scope); someone asks you to store
customer API keys without having read API Terms §3; the only available test workspace is a customer's production
account and the task involves writes or credit-consuming calls; someone wants to treat the MCP server's dynamic client
registration as a REST-API credential route; a promised sync cadence does not fit the per-team rate limits; or the
portal does not match the **Platform state** section.
When a portal behaves in a way the docs did not describe, say what you found rather than picking the option that lets
you keep going.
## References
Verified to resolve on 2026-09-20.
- Build with Apollo (surfaces, auth models, plan scope) — https://docs.apollo.io/docs/build-with-apollo
- Authentication (API key vs OAuth; which user requests act as) — https://docs.apollo.io/reference/authentication
- OAuth 2.0 (Partners) — registration, flow, refresh, token lifetimes — https://docs.apollo.io/docs/use-oauth-20-authorization-flow-to-access-apollo-user-information-partners
- Create an API Key (master vs scoped, managing keys, usage) — https://docs.apollo.io/docs/create-api-key
- Test an API Key (health endpoint) — https://docs.apollo.io/docs/test-api-key
- Rate Limits (per-team, per-endpoint, three windows, headers) — https://docs.apollo.io/reference/rate-limits
- API Pricing and Credits — https://docs.apollo.io/docs/api-pricing
- Status Codes and Errors (`error_details`, legacy-field removal date) — https://docs.apollo.io/reference/status-codes
- Changelog: API errors now include structured details — https://docs.apollo.io/changelog/api-errors-now-include-structured-details
- Developer FAQs (plan access, who can create keys, permissions ceiling) — https://docs.apollo.io/docs/developer-faqs
- Feature Your Integration (Marketplace requirements and security requirements) — https://docs.apollo.io/docs/add-your-integration-to-apollos-marketplace
- Set Up Your Marketplace Listing — https://docs.apollo.io/docs/set-up-your-marketplace-listing
- View API Usage Stats and Rate Limits — https://docs.apollo.io/reference/view-api-usage-stats
- View Credit Usage Stats — https://docs.apollo.io/reference/view-credit-usage-stats
- Get a List of Users (master key / `users_list`) — https://docs.apollo.io/reference/get-a-list-of-users
- Get Current User Profile (`read_user_profile`, default scope) — https://docs.apollo.io/reference/get-current-user-profile
- Get a List of Fields — https://docs.apollo.io/reference/get-a-list-of-fields
- Get a List of All Custom Fields (deprecated) — https://docs.apollo.io/reference/get-a-list-of-all-custom-fields
- Search for Contacts — https://docs.apollo.io/reference/search-for-contacts
- People Enrichment (credit rules) — https://docs.apollo.io/reference/people-enrichment
- Organization Enrichment — https://docs.apollo.io/reference/organization-enrichment
- List All Deals — https://docs.apollo.io/reference/list-all-deals
- List Deal Stages — https://docs.apollo.io/reference/list-deal-stages
- Search for Outreach Emails — https://docs.apollo.io/reference/search-for-outreach-emails
- OpenAPI Specification — https://docs.apollo.io/reference/openapi-specification
- Full documentation index (every page and endpoint) — https://docs.apollo.io/llms.txt
- Apollo MCP — https://docs.apollo.io/docs/apollo-mcp
- Apollo MCP authorization-server metadata (scope-spelling cross-check only) — https://mcp.apollo.io/.well-known/oauth-authorization-server
- API Terms of Service (third-party access, confidentiality) — https://www.apollo.io/terms/api
- Terms of Service — https://www.apollo.io/terms
- Technology Partners (partnerships contact form) — https://www.apollo.io/partners/technology
- Data reseller / API reseller partnerships — https://www.apollo.io/partners/api-reseller
- Marketplace application form — https://apolloio.notion.site/12eab2b3b49680319a5dd39fe6d492be?pvs=105
- Pricing and plan comparison — https://www.apollo.io/pricing
- Apollo developer dashboard (sign-in required) — https://developer.apollo.io/
- Apollo integrations settings (sign-in required) — https://app.apollo.io/#/settings/integrations
## asana-oauth-app
URL: https://docs.unified.to/skills/asana-oauth-app/SKILL.md
# Asana OAuth2 App Registration
Get a working Asana OAuth2 client — an app in the developer console, redirect URLs, a scope decision, client ID and
secret — for a platform that connects many customers' Asana workspaces.
Asana's registration form is short and the OAuth flow is textbook. Two things are not, and both cost a release if you
get them wrong. First, **scopes**: Asana spent 2025 moving from a single full-access grant to per-resource granular
scopes, and the two modes are **mutually exclusive** — an app registered for granular scopes that sends the old value
fails, and an app registered for Full permissions that sends specific scopes also fails. Worse, granular scopes still
do not cover every endpoint, so "use least privilege" is not always an available answer (§5). Second, **distribution**:
a newly created app is visible to *no* workspace, so authorization fails for everyone, including you, until you set it
(§7). Neither failure looks like a scope or distribution problem from the outside.
## Inputs to collect before you start
Ask in one batch. Never invent.
| Input | Notes |
| --- | --- |
| **App name**, icon, description | Shown on the consent screen and in the admin console |
| **Asana account** that will own the app | Any Asana user; note whose account it is (§2) |
| **Redirect URLs** | Every callback host your platform serves (§4) |
| **Which endpoints the connector actually calls** | Decides granular vs Full permissions (§5) |
| **Company URL, support URL, privacy policy URL** | Required for the app listing; asked for at App Directory submission (§7) |
| **Is an App Directory listing wanted?** | Optional — not required to serve customers (§7) |
| **Do customers need a sandbox / is one needed for testing?** | Request lead time is up to a week (§2) |
## Quick Start
1. Confirm a **new app** is needed — existing connections are bound to the current client ID (§1).
2. Sign in to Asana and open the developer console; request a sandbox if you need a safe domain (§2).
3. **Create new app** — name, redirect URL, permission scopes (§3).
4. Add **every** redirect URL, exactly (§4).
5. Make the scope decision: granular scopes, or the Full permissions toggle — not both (§5).
6. Capture client ID and secret from the **OAuth** tab; note the one-hour access token (§6).
7. Set **Manage distribution** — without it nobody can authorize; then consider admin approval and limits (§7).
8. Verify from a **second** account in a different workspace, not the one that owns the app (§8).
9. Hand the credentials over — never commit them (§9).
## Platform state (verified 2026-09-20 — re-verify before trusting)
- **Granular OAuth scopes exist and are the default path for new apps.** Announced **9 April 2025** as a developer
preview with a redesigned consent screen; before that, an Asana app requested full access to the user's account and
there was no scope selection at all. At registration you now pick the scopes your app may ever request, in the
developer console under **OAuth → Permission scopes**.
- **Legacy full access still works, as an explicit opt-out.** The console keeps a **Full permissions** toggle, and the
corresponding authorize-time value is the literal scope string `default`. Asana's own OAuth guide still documents
both, unchanged as of this check, and gives the reason plainly: *"scopes are not yet available for every Asana API
endpoint."* No removal date has been announced. Treat it as supported-but-on-notice, not as a permanent answer.
- **Existing apps were not force-migrated.** The April 2025 note said existing apps "continue using full permissions
until these self-serve granular scopes are made available later"; Asana's **21 August 2025** release notes then
shipped "granular API scopes for existing apps … without requiring app recreation". So an older app is almost
certainly still on full access, and moving it to granular scopes is a deliberate action someone has to take.
- **A new app gets whatever you pick at registration, and the choice is enforced at both ends.** Registered for
granular scopes, the app *must* send an explicit `scope` parameter (this used to be optional). Registered for Full
permissions, it must send `scope=default` or no `scope` at all. Mixing them returns `forbidden_scopes` (§5).
- **PKCE is supported and recommended, not required.** Plain authorization-code exchange with a client secret still
works. Implicit grant (`response_type=token`) was removed back in January 2020.
- **The scope catalogue is explicitly "subject to revision"** and has real gaps — sections and team creation have no
scope at all today (§5). The scopes reference page was last updated 2026-08-14, so it is moving.
If the developer console does not look like this, stop and report what you actually see rather than clicking on.
## 1. Decide: reuse the existing app, or register a new one
A new app means a **new client ID, and every existing customer connection is bound to the old one** — every customer
re-authorizes. Reuse the existing app for: adding a redirect URL, changing the scope set, resetting a leaked secret,
widening distribution, or diagnosing an authorization failure.
Register a **new** app only when the user explicitly wants one: a replacement for a compromised app, a separate app
for a different product, or a deliberate split of environments. Note that even on the *same* app, changing the scope
set changes what users must consent to — a token only carries the scopes granted when it was issued, so broadening
scopes is a re-authorization event for every customer. Say which path you are taking before you touch anything.
## 2. Account: sign in or sign up
- The developer console is at **`https://app.asana.com/0/my-apps`** (also reachable from your profile settings). Any
Asana user can create apps and personal access tokens there; no separate developer account, no approval gate.
- The app is owned by the **individual Asana user** who creates it, not by a company. For a platform integration, use
a shared or service-owned account the team controls — not a person who might leave. Ask who owns it and record it.
- **Developer sandbox** — a temporary Asana domain with limited users, requested through a form, granted only to
developers building a third-party integration intended for the App Directory or to existing Starter-or-higher
customers. It can include Enterprise/Advanced/Starter features on request, is valid for at most one year, and
**takes up to a week to provision**. If testing needs a sandbox, start the request before anything else.
Hand control back to the user for anything only they can do: signup email verification, 2FA, accepting terms, or
submitting the sandbox form. Do not retry a blocked step in a loop.
**If this session has no browser automation** (the usual case for a CLI or cloud run), do not pretend to click. Hand
the user an exact, ordered click path with the literal values to paste (§4 redirect URLs, §5 scope list), then
continue once they report back with the client ID.
## 3. Create the app
In the developer console: **Create new app**. Three fields carry the weight:
1. **App name** — what users see on the consent screen and in their authorized-apps list. Editable later under
**Basic information**.
2. **Redirect URL** — see §4.
3. **Permission scopes** — the pre-approved list of scopes the app may ever request, or the Full permissions toggle.
See §5. Editable later under **OAuth → Permission scopes**.
Icon, description and other basics can be added at creation or later. The sidebar tabs worth knowing:
| Tab | Holds |
| --- | --- |
| **Basic information** | App name, icon, description |
| **OAuth** | **Client ID and client secret**, redirect URLs, **Permission scopes**, secret **Reset** |
| **Manage distribution** | Which workspaces may authorize the app — nobody, until you set it (§7) |
| **App listing details** | Company/support/privacy URLs shown to users and to admins approving the app |
| **App components** | In-product UI surfaces; triggers a heavier review if you publish (§7) |
Asana's docs are internally inconsistent about where the client secret lives (one table says *Basic information*).
The registration guide and the console agree it is the **OAuth** tab; trust that.
## 4. Redirect URLs
Register **every** callback host your platform serves. For Unified.to these are one per data center; confirm the
current list with the platform owner rather than assuming:
```
https://api.unified.to/oauth/code # us (default)
https://api-eu.unified.to/oauth/code # eu
https://api-au.unified.to/oauth/code # au
https://api-dev.unified.to/oauth/code # dev
```
Notes:
- **Multiple redirect URLs are supported.** This is a change from the long-standing one-URL-per-app limit that older
forum threads and runbooks still describe; Asana's own MCP setup guide now instructs developers to register two.
If the console shows only a single field, stop and report that rather than registering four separate apps.
- The `redirect_uri` you send must match a registered value **exactly** — no path or trailing-slash forgiveness.
Asana's own docs warn that a copied value can lose its trailing slash.
- **HTTPS is enforced** for non-native apps; Asana refuses plaintext redirect endpoints because the code travels in
the query string. Native/CLI apps use the special value `urn:ietf:wg:oauth:2.0:oob`.
- A mismatched `redirect_uri` — like a mismatched `client_id` — is one of the few errors shown as **plain text on
Asana's page** instead of being redirected back to you, because Asana has nowhere it trusts to send it. Every other
error comes back on the redirect URI.
## 5. Scopes — the decision that defines the app
Scopes are space-delimited in the authorize URL and **must be URL-encoded** (spaces become `%20`). The format is
`:` where action is `read`, `write` or `delete`, and **they do not imply each other**: `tasks:write`
does not grant `tasks:read`. Request both, always, for anything you both read and modify.
The scopes a task/project connector typically needs:
| Scope | For |
| --- | --- |
| `tasks:read` `tasks:write` `tasks:delete` | Tasks, subtasks, dependencies, project/tag membership, search |
| `projects:read` `projects:write` `projects:delete` | Projects, per-team and per-workspace project lists, custom field settings |
| `stories:read` `stories:write` | Comments and activity on tasks and goals |
| `attachments:read` `attachments:write` `attachments:delete` | Files on tasks |
| `users:read` | Users, workspace and team membership lists, and *any* nested user field (see below) |
| `teams:read` `team_memberships:read` | Teams and their members |
| `workspaces:read` | The workspace list — how you discover what the token can see |
| `custom_fields:read` `custom_fields:write` | Custom field definitions and enum options |
| `tags:read` `tags:write` | Tags |
| `webhooks:read` `webhooks:write` `webhooks:delete` | Webhook subscriptions — easy to forget until sync silently stops |
| `openid` `email` `profile` | Identity only, via OpenID Connect. Not data access |
Others exist (portfolios, goals, roles, time tracking, out-of-office, project/task templates, custom types, jobs,
`workspaces.typeahead:read`). Read the scopes reference rather than guessing a name — a name that does not exist is
rejected as `invalid_scope`.
**Three rules that bite:**
1. **Full permissions and granular scopes are mutually exclusive.** With Full permissions on, sending specific scopes
fails with `forbidden_scopes: Your app is not allowed to request user authorization for '' scopes.` — send
no `scope` parameter, or `scope=default`. With granular scopes registered, sending `default` fails with
`forbidden_scopes: … for default identity scopes`. Requesting a scope you never registered fails the same way.
2. **You may request a subset of what you registered, but requests are never additive.** To add a scope later, send
the user back through authorization with the **complete** list — the new token replaces the old grant. Check what
a live token actually carries with the token introspection endpoint rather than assuming.
3. **Nested objects are redacted unless you hold their scope.** On any related object in a response, only `gid`,
`name`/`title`, `resource_type` and `resource_subtype` come back by default. Anything more, requested through
`opt_fields`, needs that object's scope: `opt_fields=assignee.email` without `users:read` is a **403**, not a
quietly missing field. A connector that maps assignee emails, follower names or project owners needs `users:read`
even though it never calls a user endpoint.
**Where granular scopes genuinely cannot reach.** As of this check the catalogue has no scope for **sections**
(`GET`/`POST /projects/{gid}/sections`, `GET /sections/{gid}`) and **no `teams:write`** — creating a team has no
granular scope. A connector that manages project sections or creates teams therefore cannot run on granular scopes
today; Full permissions is the only working configuration for it. This is also not hypothetical drift: in December
2025 the API demanded a `custom_field_settings:read` scope that the console did not offer, and Asana's own advice was
to fall back to `scope=default` until it was fixed (by inheriting from the parent resource) in February 2026. Expect
the gap list to move; re-derive it from the scopes reference for the endpoints your connector actually calls.
> **As of 2026-09-20, Unified.to's Asana connector requests the legacy full-access permission value — the literal
> `default` scope — for every object it supports** (tasks, projects, comments, files, people/teams and custom field
> metadata, reads and writes alike), plus `openid`, `email` and `profile` for the login flow. It does **not** request
> granular per-resource scopes, and it does **not** use PKCE for Asana. In practice that means the app it is pointed
> at **must** have the Full permissions toggle on: register granular scopes instead and every authorization fails at
> the consent screen with `forbidden_scopes`. It also means the connector inherits whatever deprecation timeline
> Asana eventually puts on full access, and that its stored notes about which scopes "don't exist" reflect the 2024
> catalogue, not today's. Confirm the current state with the connector's owner before registering anything.
Say in your summary which mode you chose and why. If you choose Full permissions, say explicitly that it is a
deliberate fallback because of the endpoint gaps — customer security reviewers ask, and "we didn't look" is a bad
answer.
## 6. Capture the credentials
From the developer console → your app → **OAuth** tab: **client ID** and **client secret**. The secret can be re-read
there, and **Reset** issues a new one.
Capture and record:
- **Client ID** and **client secret**
- Authorize: `GET https://app.asana.com/-/oauth_authorize`
- Token exchange and refresh: `POST https://app.asana.com/-/oauth_token`
- Revoke: `POST https://app.asana.com/-/oauth_revoke` · Introspect: `POST https://app.asana.com/-/token_info`
- API base: `https://app.asana.com/api/1.0/` — one host for everyone, no per-customer domain to discover
- OIDC user info: `https://app.asana.com/api/1.0/openid_connect/userinfo` · discovery:
`https://app.asana.com/api/1.0/.well-known/openid-configuration`
- Whether the app is registered for Full permissions or a granular scope list, and the exact scope strings
Authorize parameters: `client_id`, `redirect_uri`, `response_type`, **`state` (documented as required)**, `scope`,
plus `code_challenge` / `code_challenge_method=S256` if you use PKCE. `response_type` is `code`, `id_token`, or the
space-delimited `code id_token` when you want an ID token alongside the code.
**Token behaviour:**
- **Access tokens last one hour** (`expires_in: 3600`). Short — a connector must refresh, not re-authorize.
- **Refresh tokens are long-lived and do not rotate.** They are returned only on the initial code exchange; a refresh
response does not hand back a new one, so keep using the original. Introspection reports a refresh token's
remaining life in the order of years. There is no documented idle expiry, which makes a sudden `invalid_grant` a
revocation or a scope change, not a timeout.
- Both the exchange and the refresh are **form-encoded POSTs carrying `client_id` and `client_secret`** — this is a
confidential client; there is no public-client variant to fall back on.
- The exchange response includes a `data` object with the authorizing user's `gid`, `name` and `email` — enough to
identify the connection without a separate call.
- **Revocation takes the refresh token, not an access token** (bearer tokens are rejected outright). Revoking the
refresh token kills the bearer tokens derived from it.
- **Treat tokens as opaque.** Asana explicitly warns that token formats may change without notice — any client-side
validation of their shape is a future outage.
**The PAT alternative, and why it is not the answer here.** The same console issues personal access tokens: long-
lived, no OAuth flow, and carrying exactly the access of the user who created them. They are fine for a script or a
one-off backfill. They are not a multi-tenant answer — a PAT is one person's credential in one person's workspaces,
every action is attributed to them, it dies when they leave or lose access, and you would be asking each customer to
generate and paste a password-equivalent. Asana's own guidance is that an app acting on behalf of users should use
OAuth. If someone proposes PATs to skip registration, say this plainly.
Resetting the client secret invalidates the old one: existing access tokens live out their hour, but every exchange
and refresh fails until the new secret is deployed. Never reset without explicit go-ahead and a cutover plan.
Report the secret once so the user can paste it into their secret store, say plainly that it is now in the transcript
and can be reset, then move on.
## 7. Distribution, admin control, and limits
**Distribution is not optional.** A newly created app is visible to no workspace, and the authorize endpoint refuses
everyone — including the app's own creator — with *"This app is not available to your Asana workspace or
organization."* In **Manage distribution**, choose:
- **Specific workspaces** — one or more workspaces *you are a member of*. Any member of those workspaces can then
authorize. Selecting the mode but adding no workspace leaves the app broken in exactly the same way as not setting
it, which is a common self-inflicted wound.
- **Any workspace** — any Asana user with the authorize URL can connect. This is what a multi-tenant connector needs,
and it is **self-serve: no review, no approval, no listing required**.
Narrowing from Any workspace back to Specific blocks *new* authorizations only; existing tokens keep working.
**Workspaces and organizations.** A workspace is the top-level container; an *organization* is a workspace tied to a
company's email domains, and you tell them apart by the `is_organization` property. Users can belong to several, and
the token sees exactly what its user sees — Asana has no tenant-admin grant in the OAuth flow. Discover reachable
workspaces with `GET /workspaces` rather than asking the customer. Asana announced in April 2023 that authorizations
would become **workspace-scoped**, so a user in several workspaces authorizes once per workspace; current docs do not
restate this, so confirm at the consent screen during §8 rather than assuming either behaviour.
**Admins can block you.** Organization-level super admins have an **Apps** tab in the admin console (not available to
divisions) and can run an approve-list mode in which users cannot connect anything unapproved — they see a "request
admin approval" prompt instead. Your **App listing details** (company, support URL, privacy policy) are what that
admin reads when deciding. Fill them in even if you never publish. A connector that works at one customer and is
refused at another, with no error from Asana's API, is usually this.
**Service Accounts are the admin-installed alternative, and are Enterprise-only.** A super admin creates one; it has
complete access to all data in the organization, including private user data, and it authenticates with its own
token rather than through your OAuth app. Its scopes are a different system (SCIM user provisioning, audit logs,
exporting, workspace events, AI Studio usage, plus a Full Permissions option for the standard API). Recommend it only
when a customer explicitly wants org-wide, non-user-attributed access — and say out loud that it is a broader grant
than an OAuth connection, not a narrower one.
**Rate limits are per token, not per app or per workspace:**
| Limit | Value |
| --- | --- |
| Requests/minute | **150** on free domains, **1,500** on paid |
| Concurrent requests | 50 GET, 15 POST/PUT/PATCH/DELETE (reads and writes limited independently) |
| Search API | 60 requests/minute, separate from the above |
| Duplication / instantiation / export jobs | 5 concurrent per user, shared with jobs started in the web UI |
| Cost-based limiter | Expensive responses (many `opt_fields`, deep graph traversal) are costed **after** the response is built and deducted from a per-minute quota — you can be throttled at low request volume |
`429` responses carry `Retry-After` in seconds, and **rejected requests still count against the quota**, so an
impatient retry loop extends the outage. The per-token shape means one noisy customer cannot throttle another, but a
connector that fans out across a customer's whole workspace on one token can throttle itself.
**App Directory listing is optional.** Submitting for review is not required to obtain a token or to serve customers;
it is for discoverability. The app must be shared to Any workspace, the listing fields must be filled, and Asana's
team aims for an **initial response within a week** — longer for apps with app components, which get a security and
QA review of their endpoints and authorization. Do not promise a customer a listing date.
## 8. Verify end-to-end
Authorizing in your own workspace with the app distributed to that workspace proves almost nothing. Test the path a
customer takes:
1. Authorize as a **different user in a different workspace**, through your platform's real connect flow, with the
distribution setting you intend to ship.
2. Read the consent screen: confirm the permissions listed match the scope mode you registered, and note whether it
asks the user to pick a workspace.
3. Confirm the token response carries a **refresh token** and the expected `data` user block, then force a **refresh**
and confirm the same refresh token still works afterwards.
4. Call one endpoint per object the connector maps — including one with `opt_fields` that reaches into a nested
object — so a missing `users:read` surfaces now and not in production.
5. If webhooks are in play, create one. Webhook scopes are separate and are the classic omission.
| Symptom | Cause |
| --- | --- |
| Plain-text error page, never redirected back | `client_id` or `redirect_uri` does not match a registered value (§4) |
| "This app is not available to your Asana workspace or organization" | Distribution not set, or set to Specific with no workspace added (§7) |
| `forbidden_scopes: … for default identity scopes` | App is registered for granular scopes but the client sends `default` (§5) |
| `forbidden_scopes: … for '' scopes` | App is on Full permissions but the client sends specific scopes — or the scope was never registered (§5) |
| `invalid_scope` | Scope name does not exist in Asana's catalogue, or the API wants a scope the console does not offer (§5) |
| 403 on a field that exists in the docs | Nested field requested via `opt_fields` without that object's scope (§5) |
| 403 only at one customer, no API error visible | Admin app-approval mode in their organization (§7) |
| Auth works, writes fail | `write` does not imply `read` and vice versa — register both (§5) |
| Everything 401s after an hour | Client is not refreshing; access tokens live 3600s (§6) |
| `invalid_grant` on refresh | Token revoked, app disconnected by the user, or scopes changed — re-authorize (§6) |
| 429 at low request volume | Cost-based limiter on expensive `opt_fields` responses (§7) |
## 9. Hand off — never commit the secret
- **Do not** write the client secret into source control, a test, a fixture, a committed `.env`, a ticket, a PR body,
or a chat channel. Values go to the user, for the secret store or console.
- If a code change is needed (a redirect host, a scope list), keep it secret-free and say what the human must set out
of band.
- Close with: app name and the Asana account that owns it; client ID; where the secret was delivered; the authorize,
token, revoke and API base URLs; **the scope mode (Full permissions vs granular) and the exact scope strings**;
the distribution setting; whether a listing or sandbox was requested; and anything left for the user to do.
## Stop and ask
Hand back to a human rather than guessing when: the endpoints the connector needs have no granular scope and someone
must accept Full permissions as a deliberate choice; moving an existing app from full access to granular scopes is
proposed (it re-authorizes every customer); a customer's admin has blocked or must approve the app; someone proposes
a Service Account or personal access tokens in place of OAuth (both are broader or single-user grants); an App
Directory submission asks for compliance, legal, security-review or volume claims; a sandbox request form asks for
company details you were not given; or the developer console does not match the **Platform state** section above.
## References
Official Asana docs only; every URL below returned HTTP 200 on 2026-09-20. The developer console itself lives at
`https://app.asana.com/0/my-apps` and requires sign-in.
- OAuth (registration, endpoints, scopes, PKCE, troubleshooting) — https://developers.asana.com/docs/oauth
- OAuth scopes reference (the full catalogue and its endpoint map) — https://developers.asana.com/docs/oauth-scopes
- Authentication overview (OAuth vs PAT vs Service Accounts) — https://developers.asana.com/docs/authentication
- Personal access tokens — https://developers.asana.com/docs/personal-access-token
- OpenID Connect — https://developers.asana.com/docs/openid-connect
- Share your app / distribution and listing details — https://developers.asana.com/docs/share-your-app
- Publish your app (App Directory review) — https://developers.asana.com/docs/publish-your-app
- App listing guidelines — https://developers.asana.com/docs/app-listing-guidelines
- Rate limits — https://developers.asana.com/docs/rate-limits
- Input/output options (`opt_fields`) — https://developers.asana.com/docs/inputoutput-options
- Workspaces and organizations — https://developers.asana.com/docs/workspaces
- Developer sandbox — https://developers.asana.com/docs/developer-sandbox
- Deprecations process and `Asana-Change` headers — https://developers.asana.com/docs/deprecations
- OAuth client libraries and Postman collection — https://developers.asana.com/docs/getting-started-with-asana-oauth
- Changelog: OAuth permission scopes (9 April 2025) — https://forum.asana.com/t/new-oauth-permission-scopes/1048556
- Admin app management and approval modes — https://help.asana.com/s/article/app-management-and-integrations?language=en_US
- Service accounts — https://help.asana.com/s/article/service-accounts?language=en_US
- App Directory — https://asana.com/apps
## atlassian-cloud-oauth
URL: https://docs.unified.to/skills/atlassian-cloud-oauth/SKILL.md
# Atlassian Developer Console — shared OAuth 2.0 (3LO) registration mechanics
Everything common to registering an OAuth 2.0 (3LO) integration for **any** Atlassian Cloud product: the developer
console app, the one callback URL, the grant type, the scope families, `offline_access`, the client ID and secret,
rotating refresh tokens, the cloudid indirection, and distribution.
The product skills — Atlassian Jira, Atlassian Confluence — assume this file and cover only what their product adds on
top (its own scope family, its own API generations, its own permission model). **Read this first, then the product
skill.** If you are registering a plain Atlassian 3LO app with no particular product in play, this file is the whole
job.
**One app can serve several products, but that is a decision, not a default.** Jira, Jira Software, Jira Service
Management, Confluence and Assets are separate APIs with separate scope lists in the same console app. Adding "Jira
API" does not give you Confluence scopes. Where a platform maintains separate connectors per product, each usually
wants its own app and its own credentials — confirm with the connectors' owners rather than assuming either way.
Four things here are expensive to get wrong, and three of them are invisible at registration time:
1. **A 3LO app takes one callback URL.** Not a list. If your platform serves several callback hosts, that is several
apps, or a redesign — decide before you register (§4).
2. **An access token is not bound to a site.** You discover the site's **cloudid** from a separate endpoint and address
every API call as `/ex/{product}/{cloudid}/...`. A client that hardcodes `https://customer.atlassian.net`
authenticates perfectly and then fails on every request (§6).
3. **Scopes come in two incompatible-feeling families** — classic and granular — and changing the set forces every
existing user to re-consent (§5).
4. **Refresh tokens rotate.** Each refresh returns a new one and disables the old one. A client that does not persist
the rotated token fails on the *second* refresh, not the first, which means it passes your smoke test (§8).
## Inputs to collect before you start
Ask in one batch. Never invent.
| Input | Notes |
| --- | --- |
| **App name**, description, avatar | Shown on the Atlassian consent screen |
| **Atlassian account** that will own the app | Console apps belong to an account, not an org (§2) |
| **A Cloud site to test against** | A free site is fine; a sandbox needs Premium/Enterprise (§2) |
| **Callback URL** — exactly one per app | Blocking. See §4 before promising anything |
| **Grant type**: account-level or resource-level | Chosen at creation, shapes what tokens can reach (§3) |
| **Which Atlassian products** | Jira, Jira Software, Jira Service Management, Confluence, Assets are separate APIs |
| **Scope set**, and whether it is classic or granular | The product skill supplies the strings (§5) |
| **Does the client persist rotated refresh tokens?** | Blocking — see §8 |
| **Distribution**: private, shared, or submitted for approval | §9 |
## Quick Start
1. Confirm a **new app** is needed — existing user grants are bound to the current client ID (§1).
2. Sign in to the Atlassian Developer Console with the account that should own the app (§2).
3. **Create → OAuth 2.0 integration**, name it, and choose the grant type (§3).
4. **Permissions → Add** the product API(s) you need, then add scopes to each (§5, and the product skill).
5. **Authorization → OAuth 2.0 (3LO) → Configure →** enter the single **Callback URL** and save (§4).
6. Confirm the client knows how to resolve and store the **cloudid** (§6). This is the usual failure.
7. Copy **Client ID** and **Secret** from **Settings** (§7).
8. Confirm `offline_access` is requested and rotated refresh tokens are persisted (§8).
9. Decide distribution — private, shared via link, or submitted for Atlassian approval (§9).
10. Verify with a real authorize → callback → accessible-resources → API call → double refresh (§10).
11. Hand the credentials over — never commit them (§11).
## Platform state (verified 2026-09-20 — re-verify before trusting)
- **Apps are created in the Developer Console** at `https://developer.atlassian.com/console/myapps/` — profile icon →
*Developer console* → **Create** → **OAuth 2.0 integration**. Console apps are listed with a **3LO** lozenge.
Connect apps are not listed there at all.
- **Two grant types are offered at creation**, and the choice changes what a token can reach:
- **Account-level grant** — consent applies at the Atlassian account level; one grant can cover multiple sites, and
sites can be *added to the same grant later* when the user consents again.
- **Resource-level grant** — consent is limited to the site(s) the user picks on the consent screen; tokens from
that grant cannot be used with any other site.
Treat this as effectively permanent for a live app: changing it re-consents everybody. Atlassian's OAuth changelog
also records a 2026 option for newly created 3LO apps to opt into **resource-restricted tokens**, scoping issued
access tokens to the one site the user picks at consent. Check the changelog for the current shape before relying
on either name.
- **One callback URL per app.** The console's Authorization → OAuth 2.0 (3LO) → Configure screen has a single
*Callback URL* field, and the docs describe it in the singular. There is no documented way to register a list (§4).
- **Scopes are split into classic and granular**, per product API, with a soft ceiling: *"It's recommended that you
use less than 50 scopes in an application."* Which family to prefer is **product-specific** — the general
recommendation leans classic, but a product's newer API generation may document granular scopes only. The product
skill decides this; do not generalise from one product to another (§5).
- **Changing scopes forces re-consent.** Atlassian states it plainly on the console management page: *"Note that users
who previously consented to the scopes will need to re-consent to the new scopes."*
- **Refresh tokens rotate**, with a **90-day inactivity expiry** reset on every rotation and a **10-minute reuse
leeway** for concurrency. No absolute cap is documented (§8).
- **Apps are private by default.** Distribution → *Enable sharing* turns on link-based sharing; users installing an
unapproved integration are *"warned that the app has not yet been reviewed by Atlassian"* (§9).
- **App ownership is no longer strictly single-account.** Atlassian's OAuth changelog records a 2026 change allowing
**multiple admins** on a console app and transfer of ownership. That softens, but does not remove, the offboarding
problem in §2 — confirm what the console actually offers on the app you are working on.
- **Atlassian names two practices as non-compliant.** From the 3LO pages: *"Apps that collect API tokens or instruct
customers to create individual 3LO apps don't comply with our Security requirements for cloud apps and Acceptable
use policy."* The stated best practice is *"Build a single, distributable 3LO app for your integration."* If the
platform you are registering for does either thing, that is a finding to raise, not a step to work around (§9).
- **No install cap is documented** for shared-but-unapproved 3LO apps — unlike several other portals. Do not promise
a number; the constraint that bites is the unreviewed-app warning, not a counter.
- **Admins cannot revoke one user's grant** from the Connected Apps screen — the grant is between the app and the
user; an admin can only uninstall.
If the console does not look like this, stop and report what you actually see rather than clicking on.
**Atlassian Cloud only.** **Data Center / Server** does not use this at all — different auth models, registered inside
the customer's own instance, with no Atlassian-hosted developer console, no `auth.atlassian.com`, and no cloudid. If
the customer's URL is not `*.atlassian.net` (or a custom Cloud domain), you are in the wrong document; the product
skill says what the Data Center path actually is for that product.
## 1. Decide: reuse the existing app, or register a new one
A new app means a **new client ID, and every existing user grant is bound to the old one** — every connected user
re-authorizes. Reuse the existing app for: changing scopes (accepting the re-consent, §5), rotating a compromised
secret, flipping distribution, or diagnosing a failure.
Register a **new** app only when the user explicitly wants one: a second callback host that the one-URL limit forces
into its own app (§4), a replacement for a compromised app, a separate product, or a deliberate grant-type change.
Say which path you are taking before you touch the console.
## 2. Account and test site
- **Atlassian account** — sign in at `https://developer.atlassian.com`, then profile icon → *Developer console*.
There is no separate "developer program" enrolment for a 3LO integration; any Atlassian account can create one.
The app belongs to that account, so use a shared/role account rather than an individual's, or you inherit an
offboarding problem later — even where multiple admins can now be assigned (see Platform state).
- **A Cloud site to test against** — a free Atlassian Cloud site is enough for an end-to-end check. You need site
admin rights on it to install and to see the consent screen behave. The product skill gives the signup link.
- **A sandbox** is a different thing and is gated: Atlassian sandboxes require **Premium or Enterprise**, and creating
one requires **organization admin** permissions. Do not plan around a sandbox unless the user already has one.
Hand control back to the user for anything only a human can do: account signup and email verification, MFA, accepting
developer terms, or creating a site. Do not retry a blocked step in a loop.
**If this session has no browser automation** (the usual case for a CLI or cloud run), do not pretend to click. Give
the user an exact, ordered click path with the literal values to paste — the callback URL (§4) and the scope list
from the product skill — then continue once they report back with the client ID.
## 3. Create the app and enable 3LO
1. Profile icon → **Developer console** → **Create** → **OAuth 2.0 integration**.
2. Enter the **app name** and choose the **grant type** — account-level or resource-level (see Platform state). For a
multi-tenant connector where one customer may have several sites, account-level is usually what you want;
resource-level is the tighter, site-pinned option. Either way, §6 still applies.
3. **Permissions → Add** the API(s) the integration calls. Jira platform, Jira Software, Jira Service Management,
Confluence and Assets are **separate APIs with separate scope lists**. Add each product you actually call, and no
more.
4. **Authorization → OAuth 2.0 (3LO) → Configure** → enter the **Callback URL** → **Save changes** (§4).
5. **Settings** holds the app name, description, avatar, **Client ID** and **Secret** (§7), and **Delete app**.
Two console facts worth knowing before you go looking for them:
- The **App ID** on the Overview page is *not* the OAuth `client_id`. The client ID lives on **Settings**.
- **You can only delete an app if it is not installed anywhere.** Uninstall first, then delete.
## 4. The callback URL — you get one
`redirect_uri` must match the registered Callback URL, and the console takes a single value. This is the constraint
that decides your architecture, so settle it before registering.
For Unified.to the callbacks are one per data center:
```
https://api.unified.to/oauth/code # us (default)
https://api-eu.unified.to/oauth/code # eu
https://api-au.unified.to/oauth/code # au
https://api-dev.unified.to/oauth/code # dev
```
With one callback URL per app, that means either:
- **One app per data center** — four apps, four client ID/secret pairs, each registered with its own callback. This is
the normal answer, and it is what the credential store must be able to hold. Say so explicitly in your handoff.
- **One app, one callback**, with that single host fanning out internally. This is a platform change, not a console
setting — do not assume it exists.
Multiply that by products: a platform with separate Jira and Confluence connectors and four data centers is eight
apps, not four. Confirm the current callback list with the platform owner rather than assuming; data centers get
added.
Other notes:
- The `redirect_uri` you send on **both** the authorize request and the token exchange must match the registered
value. Mismatches surface at connect time, not at save time.
- The callback is your platform's URL, not Atlassian's, and does **not** vary per customer site — unlike the API base
URL, which does (§6). Do not conflate the two.
- Saved changes can take a short while to propagate; a failure immediately after saving is worth one retry before
it means anything.
## 5. Scopes — the two families, and `offline_access`
The product skill supplies the scope strings. This section is how Atlassian treats them.
Atlassian runs **two parallel scope families** over the same APIs, and the console presents them per API:
- **Classic scopes** are broad and product-wide — a handful per product, shaped `read:-` (for example
`read:jira-work`, `read:confluence-content.all`).
- **Granular scopes** are per-resource and follow a `verb:resource:product` shape — `read:issue:jira`,
`read:page:confluence`, `write:comment:confluence` — and there are several hundred of them.
What matters operationally:
- **Which family to use is a product question, not a portal question.** Atlassian's general guidance leans toward
classic scopes where they are available, but a product's newer API generation may document granular scopes only, in
which case classic is not an option for those endpoints. **Read the product skill before choosing**, and check the
**OAuth scopes required** field on the specific endpoint you intend to call.
- **Pick a family and stay in it per product.** Atlassian's 3LO pages stop short of an outright prohibition on
mixing, but everything around it treats the two as an either/or choice, and the console's own advice when you
approach the scope ceiling is to *"ensure you're using classic scopes to the maximum extent possible and remove any
unnecessary granular scopes."* A set that is mostly one family with one or two of the other bolted on is the shape
most likely to behave surprisingly — a granular scope present in the token while the endpoint checks the classic
one, or the reverse, produces a 401 with a scope-mismatch message on an endpoint you are certain you are entitled
to call. If you find such a mix, treat it as a defect to resolve deliberately, not a harmless accident.
- **You can only request scopes you already added to the app.** The docs are explicit: *"Only choose from the scopes
that you have already added to the APIs for your app in the developer console."* An authorize URL asking for a scope
the console does not know about fails at the consent screen.
- **Changing scopes re-consents everyone.** Every user who already granted the old set must grant again. For a live
connector this is a customer-visible migration, not a config tweak — plan it, do not slip it into a release.
- **Scopes never exceed the user's own permissions.** An app holding a project- or space-administration scope still
cannot act if the authorizing user lacks that permission in the product. A scope failure and a permission failure
look similar and are fixed in different places.
- **Under 50 scopes per app** is the recommendation, with a live count shown in the console.
- **`offline_access` is a scope**, not a flag, and without it you get no refresh token at all (§8). An authorization
that is only ever used once — an identity/login flow — can legitimately omit it; anything that must keep working
tomorrow cannot.
- **Identity scopes are their own small family.** `read:me` (the authenticated user's public profile, via the User
Identity API) and `read:account` are not product scopes and do not appear on a product's scope page. Treat a
login-only authorization as its own scope set.
- If an operation's reference page says *"Apps can't access this REST resource"*, no scope will help — it is not
available to 3LO at all.
**Other Atlassian products are other scope families.** One console app *can* serve several products if you add each
product's API and its scopes, but a platform that ships separate connectors per product usually wants separate apps.
Decide that with the connectors' owners, not by default.
## 6. The cloudid indirection — read this before writing any client code
This is the single most common way an Atlassian integration fails after a flawless registration.
**An access token is not bound to a site.** It is bound to a *grant*, and a grant can cover one site or several. The
site's identity is a UUID Atlassian calls the **cloudid**, and you have to go and ask for it:
```
GET https://api.atlassian.com/oauth/token/accessible-resources
Authorization: Bearer
Accept: application/json
```
The response is an **array** of sites the token can be used with:
```json
[
{ "id": "8594f221-9797-5f78-1fa4-485e198d7cd0", "name": "Site name 2",
"url": "https://your-domain2.atlassian.net", "scopes": ["write:jira-work", "read:jira-user"] },
{ "id": "1324a887-45db-1bf4-1e99-ef0ff456d421", "name": "Site name 1",
"url": "https://your-domain1.atlassian.net", "scopes": ["write:jira-work", "read:jira-user", "manage:jira-configuration"] }
]
```
Every API call then goes to `https://api.atlassian.com/ex/{product}/{cloudid}/{api}`, where `{product}` is the
product's own segment (`jira`, `confluence`, …) and `{api}` is that product's REST base path. **The `{api}` part is
product-specific and is where people get it wrong** — the product skill spells out the exact path for each API
generation. Getting `{product}` right and `{api}` wrong yields a 404 that looks like a permissions problem.
The traps, in the order they bite:
- **A client that hardcodes `https://.atlassian.net` breaks.** OAuth 2.0 (3LO) tokens are not accepted
there. Authorization succeeds, the token looks fine, and every subsequent request fails. The site URL in the
response is for *display*; the `id` is what you address.
- **The array can hold more than one site.** Under an account-level grant, sites can be added to the same grant over
time. Taking `[0]` picks an arbitrary site and silently reads the wrong one. Either let the customer choose, or
match the site you were told to connect by its `url`, and say which you did.
- **One site can carry several products.** A single cloudid commonly serves both Jira and Confluence on the same
Atlassian site; the product segment in the path, not the cloudid, selects which. A fallback that reuses a cloudid
resolved for one product while keeping another product's path segment silently addresses the wrong API.
- **Resolving it once and caching it forever is only half right.** The cloudid of a given site is stable, but the
*set* of sites a token reaches is not — it changes when the user re-consents. Atlassian's instruction is to call
`accessible-resources` with the current token and use what comes back, so re-check on re-authorization and when a
call starts 403-ing, not only at first connect.
- **The per-site `scopes` array is the real answer** to "does this token have what I need?" — it is scoped to that
site, and it is how you detect a partial grant before a customer reports a broken feature.
## 7. Capture the credentials
From the Developer Console → your app → **Settings**: the **Client ID** and the **Secret**. Capture alongside them:
- **Authorization endpoint** — `https://auth.atlassian.com/authorize`
- **Token endpoint** — `https://auth.atlassian.com/oauth/token` (POST, JSON body)
- **API base** — `https://api.atlassian.com/ex/{product}/{cloudid}` (§6)
- **`audience=api.atlassian.com`** — a *required* authorize parameter, and Atlassian-specific. Omitting it is an
early, confusing failure.
- **`prompt=consent`** — also required, so the grant screen actually renders.
- Which data center / environment this app's single callback serves (§4), and which product(s) its APIs cover.
The full authorize URL Atlassian documents:
```
https://auth.atlassian.com/authorize?
audience=api.atlassian.com&
client_id=YOUR_CLIENT_ID&
scope=REQUESTED_SCOPE_ONE%20REQUESTED_SCOPE_TWO&
redirect_uri=https://YOUR_APP_CALLBACK_URL&
state=YOUR_USER_BOUND_VALUE&
response_type=code&
prompt=consent
```
Scopes are **space-delimited**. `state` is required for security and must be unguessable and bound to the user.
Rotating the secret invalidates the old one: existing access tokens keep working until they expire, but every token
exchange and refresh fails until the new secret is deployed. Never rotate without an explicit go-ahead and a cutover
plan. Report the secret once so the user can paste it into their secret store, say plainly that it is now in the
transcript and can be rotated, then move on.
## 8. Token lifetimes and rotating refresh tokens
| Thing | Value | Source |
| --- | --- | --- |
| Refresh token | Only issued if `offline_access` is in the authorize `scope` | 3LO docs |
| Refresh token behavior | **Rotating** — each use returns a new one and **disables the one you used** | 3LO docs |
| Inactivity expiry | **90 days**, *reset* by each rotation | 3LO docs |
| Reuse leeway | **10 minutes** — within it, breach detection does not fire on repeated exchange of the same token | 3LO docs |
| Absolute maximum lifetime | **Not documented** — do not assume one exists, and do not assume one does not | — |
| Access token | `expires_in` (seconds) in the token response — read it, do not hardcode | 3LO docs |
The refresh call:
```
POST https://auth.atlassian.com/oauth/token
Content-Type: application/json
{ "grant_type": "refresh_token", "client_id": "...", "client_secret": "...", "refresh_token": "..." }
```
The response carries a new `access_token` **and a new `refresh_token`**, and *"the refresh token you used for the
request is disabled."*
**The failure mode that passes your smoke test.** A client that does not store the rotated refresh token refreshes
successfully the first time — it still holds a valid token — and fails the *second* time, hours or days later, with:
```
403 Forbidden {"error": "invalid_grant", "error_description": "Unknown or invalid refresh token."}
```
Atlassian lists the causes for that exact error: the user changed their Atlassian account password, the refresh token
expired (the user must re-authorize from scratch), or *"Your app is not replacing the previous refresh token with the
new refresh token returned during access token request."*
So there are two separate questions, and a platform can answer yes to the first and no to the second:
1. **Does the client implement rotation** — does it read `refresh_token` out of the refresh response at all?
2. **Does it persist it**, atomically, before the next refresh, including under concurrent refreshes of the same
connection? The 10-minute leeway exists precisely because concurrency here is real.
The other quiet killer is **inactivity**. A connection nobody refreshes for 90 days is dead and the customer must
re-authorize. Idle connections are the ones that break, so a periodic refresh is a feature, not a nicety. A platform
that treats the refresh token as expiring at, say, 89 days is deliberately staying inside that window — confirm the
number rather than assuming it.
## 9. Distribution, approval and the Marketplace
Apps are **private by default** — only the creating account can install and use them.
To share: **Distribution → Enable sharing** toggle, then **Authorization → OAuth 2.0 (3LO) → Configure** and copy the
**Authorization URL(s)** to distribute. Note what this does and does not mean:
- **3LO apps install per user**, not per site. There is no admin-installs-for-everyone path here; every user who
connects goes through consent themselves.
- **Unapproved integrations show a warning.** Users are *"warned that the app has not yet been reviewed by
Atlassian."* For a commercial connector that warning is a conversion and trust problem, and it is the real reason
to seek approval.
- **Approval is separate from a listing.** To get the integration reviewed and approved, follow Atlassian's
*Listing a third party integration on the Atlassian Marketplace* process — and, per the console docs, *"you don't
need an informative Atlassian Marketplace listing to submit your integration for approval."*
- **A Marketplace listing for a 3LO integration is informational only.** Enabling sharing does not put the app on the
Marketplace, and when listed, 3LO integrations *"appear as informational listings only, with limited Marketplace
features"* — the listing links out to your own site, where you handle distribution. Review requires giving
Atlassian access to a test instance of your software.
- **No install cap is documented.** Do not quote one.
**Two practices Atlassian names as non-compliant.** From the 3LO pages: *"Apps that collect API tokens or instruct
customers to create individual 3LO apps don't comply with our Security requirements for cloud apps and Acceptable use
policy."* The stated best practices are to build a **single, distributable 3LO app**, identify it clearly in the
Marketplace, and transition customers away from custom 3LO apps and API tokens. If the platform you are registering
for asks each customer to create their own app, or accepts Atlassian API tokens as an auth method, say so in your
summary and flag it to the owner. That is a product decision with a compliance dimension — report it; do not quietly
register around it.
**Data security policies can block a compliant app.** An organization admin can attach an **app access rule** to a
data security policy and block apps from reading user-generated content in selected spaces or projects, independently
of scopes and consent. The product skill says what that looks like for its API. Note the asymmetry Atlassian
documents: apps authenticating with **Atlassian API tokens or user credentials cannot be blocked this way**, which
means the compliant OAuth path is the blockable one and the non-compliant token path is not. That is worth saying out
loud when someone proposes tokens as a workaround.
**Data residency.** Atlassian's data residency covers data held in Atlassian's cloud for eligible products on
eligible plans. It does **not** cover data a third-party app stores on its own infrastructure outside Atlassian. If a
customer asks whether connecting your integration keeps their data in-region, the honest answer is that Atlassian's
controls stop at Atlassian's boundary and your platform's own residency story takes over. Do not answer a customer's
residency question on the platform's behalf — hand it to someone who can.
## 10. Verify end-to-end
Authorizing from the account that owns the app proves less than you think. Test the path a customer takes:
1. Run a real **authorize → callback** round trip through the platform's connect flow, on a **different** Atlassian
account and a site that account administers, with `audience`, `prompt=consent`, `state` and the exact
`redirect_uri`.
2. Confirm the token response contains a **`refresh_token`** — if not, `offline_access` was missing from `scope`.
3. Call **`/oauth/token/accessible-resources`** and look at the whole array: how many sites came back, and does the
per-site `scopes` list contain everything you asked for?
4. Make one real read against **`https://api.atlassian.com/ex/{product}/{cloudid}/...`** — not against the
customer's `.atlassian.net` host — using the exact API path the product skill gives.
5. Force a **refresh**, then force a **second refresh using the token returned by the first**. This is the step that
catches a client ignoring rotation, and it is the step most often skipped.
6. If the app is shared, have someone outside the owning account connect, and confirm whether they see the
unreviewed-app warning (§9).
| Symptom | Cause |
| --- | --- |
| Consent screen errors before showing anything | Missing `audience=api.atlassian.com`, or `prompt=consent` omitted (§7) |
| `redirect_uri` rejected | Not byte-identical to the one registered callback, or sent on authorize but not on exchange (§4) |
| Consent screen rejects a scope | Scope not added to the app's API in the console, or the wrong product's API not added (§5) |
| Auth succeeds, every API call 401s or 404s | Client is calling `.atlassian.net` instead of `/ex/{product}/{cloudid}` (§6) |
| Auth succeeds, calls 404 on one product only | Right cloudid, wrong product segment or wrong API base path (§6) |
| No `refresh_token` in the token response | `offline_access` not in the authorize `scope` (§8) |
| First refresh works, later ones return `invalid_grant` | Rotated refresh token not persisted (§8) |
| Connection dies after a quiet ~3 months | 90-day inactivity expiry; the user must re-authorize (§8) |
| Reads the wrong site | `accessible-resources[0]` taken blindly on a multi-site grant (§6) |
| 401 "scope does not match" on an endpoint you have the scope for | Classic/granular family mismatch for that endpoint (§5) |
| Endpoint says apps can't access it | Not available to 3LO at all — no scope fixes it (§5) |
| Everyone suddenly has to re-consent | Scopes were changed on the app (§5) |
| Works for the app owner, warns everyone else | App shared but not approved (§9) |
| Content silently missing for one customer only | A data security policy app access rule (§9) |
| Nothing resembles this document; no `auth.atlassian.com` | It is Data Center/Server, not Cloud — wrong auth model entirely |
## 11. Hand off — never commit the secret
- **Do not** write the client secret into source control, a test, a fixture, a committed `.env`, a ticket, a PR body,
or a chat channel. Values go to the user, for the secret store or console.
- If a code change is needed (a callback host, a scope, cloudid handling), keep it secret-free and say what the human
must set out of band.
- Close with: app name and App ID; the owning Atlassian account; the **client ID**; where the secret was delivered;
the grant type chosen; the single callback URL and which data center it serves (and whether more apps are needed,
§4); which product APIs were added; the exact scope strings and whether they are classic or granular; confirmation
that `offline_access` is requested; the state of rotated-refresh-token persistence and who owns any remaining work;
the distribution state and whether approval is being sought; and anything left for the user to do.
## Stop and ask
Hand back to a human rather than guessing when: the platform needs more callback hosts than one app allows and
nobody has decided between multiple apps and a single callback (§4); the client hardcodes a site URL or takes the
first entry from `accessible-resources` without a rule (§6); the client does not persist rotated refresh tokens (§8);
a scope change would re-consent live customers (§5); the choice between account-level and resource-level grants is
not obviously the user's (§3); whether one app should serve several Atlassian products is genuinely open (§5); the
platform collects Atlassian API tokens or asks customers to create their own 3LO apps, which Atlassian names as
non-compliant (§9); a Marketplace submission asks for security, privacy, compliance or support commitments; a
customer asks about data residency for data held outside Atlassian (§9); the target is Data Center/Server; or the
console does not match the **Platform state** section above.
**No browser automation:** if the session cannot drive a browser, do not simulate clicks or claim a step was done.
Produce the exact click path and literal values for the user, and resume when they report back.
## References
Portal-wide and product-neutral only; each product skill carries its own. Every link verified to resolve on
2026-09-20.
- Developer Console — https://developer.atlassian.com/console/myapps/
- Enabling OAuth 2.0 (3LO) — https://developer.atlassian.com/cloud/oauth/getting-started/enabling-oauth-3lo/
- Implementing OAuth 2.0 (3LO) — https://developer.atlassian.com/cloud/oauth/getting-started/implementing-oauth-3lo/
- Making calls to the API (the `/ex/{product}/{cloudid}` form) — https://developer.atlassian.com/cloud/oauth/getting-started/making-calls-to-api/
- Implementing the refresh token flow — https://developer.atlassian.com/cloud/oauth/getting-started/refresh-tokens/
- Managing your OAuth 2.0 (3LO) apps (distribution, scope re-consent, deletion) — https://developer.atlassian.com/cloud/oauth/getting-started/managing-oauth-apps/
- OAuth 2.0 (3LO) FAQ — https://developer.atlassian.com/cloud/oauth/getting-started/faq/
- OAuth 2.0 changelog (grant types, resource-restricted tokens, app ownership) — https://developer.atlassian.com/cloud/oauth/changelog/
- Authentication and authorization for developers (which auth model applies where) — https://developer.atlassian.com/developer-guide/auth/
- What is a data security policy? (app access rules) — https://developer.atlassian.com/cloud/admin/data-security-policy-guide/
- Security requirements for cloud apps — https://developer.atlassian.com/platform/marketplace/security-requirements/
- Listing a third party integration on the Atlassian Marketplace (the approval path) — https://developer.atlassian.com/platform/marketplace/knowledge-base/listing-a-third-party-integration-on-the-atlassian-marketplace/
- List and manage apps — https://developer.atlassian.com/platform/marketplace/listing-and-managing-apps/
- App approval guidelines — https://developer.atlassian.com/platform/marketplace/app-approval-guidelines/
- Atlassian Acceptable Use Policy — https://www.atlassian.com/legal/acceptable-use-policy
- Understand data residency — https://support.atlassian.com/security-and-access-policies/docs/understand-data-residency/
- Create a sandbox (Premium/Enterprise, org admin) — https://support.atlassian.com/organization-administration/docs/create-a-sandbox/
- Manage API tokens for your Atlassian account (the non-compliant path, for identification) — https://support.atlassian.com/atlassian-account/docs/manage-api-tokens-for-your-atlassian-account/
## atlassian-confluence-oauth-app
URL: https://docs.unified.to/skills/atlassian-confluence-oauth-app/SKILL.md
# Atlassian Confluence Cloud OAuth 2.0 (3LO) App Registration
Registering the app is the shared part. **What is specific to Confluence is that the scope decision and the API
generation decision are the same decision**, and that a perfectly scoped token can still come back with an empty
wiki because Confluence's permissions are per space and per page.
Confluence's v2 REST API is documented with **granular scopes only**, while the Confluence scope page still says to
prefer classic scopes where they are available. Both statements are true, and they point in opposite directions
unless you know which API generation you are calling. Getting that wrong produces a 401 that reads like a
permissions bug on an endpoint you are certain you are entitled to call.
## Built on: `atlassian-cloud-oauth`
**Read `atlassian-cloud-oauth` first, then this file.** It owns all the portal mechanics, and this file does not
repeat them:
- The Developer Console, creating an **OAuth 2.0 integration**, enabling 3LO, and the account that owns the app.
- **One callback URL per app**, and what that forces on a platform serving several data centers.
- Account-level vs resource-level grants, where the client ID and secret live, and the required `audience` and
`prompt=consent` authorize parameters.
- The classic/granular scope model in general, `offline_access`, the under-50-scopes ceiling, and the rule that
changing scopes re-consents every existing user.
- **Rotating refresh tokens** — 90-day inactivity expiry, 10-minute reuse leeway, and the failure that only appears
on the *second* refresh.
- The **cloudid indirection**: `accessible-resources`, `/ex/{product}/{cloudid}/...`, and the array being multi-site
under an account-level grant.
- Distribution, the unreviewed-app warning, Marketplace approval, and the two practices Atlassian names as
non-compliant (collecting API tokens, or having customers create individual 3LO apps).
If you are reading only this file, you are missing all of the above.
## Inputs to collect before you start
The base skill lists the console inputs. These are the Confluence-specific ones:
| Input | Notes |
| --- | --- |
| **Which API generation will the client call — v1, v2, or both?** | This decides the scope family (§1, §2) |
| **Read-only, or create/update content?** | Write scopes are per resource in granular, product-wide in classic (§1) |
| **Which content types?** | Pages, blogposts, comments, attachments, whiteboards, databases, folders and custom content are **separate granular scopes** (§1) |
| **Is CQL search needed?** | Search has a classic scope and a granular equivalent — do not add both by reflex (§1) |
| **Do page restrictions matter?** | Restrictions are a v1-only API (§2, §4) |
| **Cloud or Data Center?** | Different auth model entirely — stop here if Data Center (§7) |
| **Expected call volume** | Confluence bills API traffic against an hourly point budget (§6) |
## Quick Start
1. Work the base skill's console steps, adding the **Confluence API** under Permissions (not the Jira API — they are
separate scope lists on the same app).
2. Settle §2 first: which REST generation the client calls. It determines §1.
3. Add the scope family that generation documents, and keep it to one family (§1).
4. Confirm `offline_access` is in the set for anything that must survive the hour.
5. Confirm the client builds Confluence URLs as `/ex/confluence/{cloudid}/wiki/api/v2/...` — the `/wiki` segment is
the one people drop (§3).
6. Before promising a customer anything about coverage, read §4: the authorizing user's space and page permissions
are the real ceiling.
7. Finish the base skill's capture, round-trip and handoff steps, adding the Confluence checks in §8.
## Confluence platform state (verified 2026-09-20 — re-verify before trusting)
- **Two live REST generations.** v1 (`/wiki/rest/api/...`) and v2 (`/wiki/api/v2/...`) both have current reference
documentation on developer.atlassian.com. v2's own introduction describes itself as *"the reference for the
Confluence Cloud REST API v2, with definitions and performance intended to be an improvement over v1."*
- **v1 is being retired endpoint by endpoint, not all at once.** Individual v1 operations that have v2 equivalents
carry their own deprecation notices and removal dates, and those dates have been extended more than once. As of
this check the Confluence Cloud changelog carries **no blanket v1 removal entry**, and v1 groups with no v2
equivalent — content restrictions, CQL search — are still the only way to do those things. Treat "v1 is gone" as
false and "v1 is safe forever" as equally false: check the specific operation's page (§2).
- **v2 operation pages document granular scopes only.** Every v2 group checked — page, space, attachment, comment,
content properties, space permissions — lists a single granular scope (`read:page:confluence`,
`read:space:confluence`, `read:attachment:confluence`, `read:comment:confluence`) and no classic alternative.
- **v1 operation pages document both**, labelled *"Classic (RECOMMENDED)"* alongside the granular equivalent — for
example content restrictions list classic `write:confluence-content` next to granular
`read:content-details:confluence` and `write:content.restriction:confluence`.
- **The Confluence scope page still recommends classic**: *"Where available, the recommendation is to use classic
scopes."* Read that as scoped to where classic scopes *are* available, which for v2-only endpoints is nowhere.
- **`search:confluence` is a classic scope**, not granular, despite its shape. Its granular equivalent for the CQL
search endpoint is `read:content-details:confluence`.
- **Confluence rate limits are a points budget, not a request count** — a global pool by default, with a per-tenant
pool available, `429` on exhaustion and `X-RateLimit-*` headers on the way there (§6).
- **Data security policy app access rules can silently hide content** from a correctly scoped app, per space, with a
documented per-policy container limit (§5).
If the scope tables or the endpoint groups do not look like this, stop and report what you actually see.
## 1. The Confluence scope family
Confluence has its own classic list and its own granular list. Neither overlaps with Jira's.
**Classic** — broad, product-wide, and what v1 endpoints document:
| Scope | Covers |
| --- | --- |
| `read:confluence-content.all` | Read all content the user can see, including bodies |
| `read:confluence-content.summary` | Content summaries without bodies |
| `read:confluence-space.summary` | Space summaries |
| `read:confluence-content.permission` | Content restrictions and permission checks |
| `read:confluence-props` / `write:confluence-props` | Content and space properties |
| `read:confluence-user` | User details |
| `read:confluence-groups` / `write:confluence-groups` | Groups and membership |
| `search:confluence` | CQL search over content and space summaries |
| `write:confluence-content` | Create and update content |
| `write:confluence-space` | Create and update spaces |
| `write:confluence-file` | Upload attachments |
| `manage:confluence-configuration` | Confluence administration |
| `readonly:content.attachment:confluence` | Download attachments in read-only mode |
**Granular** — per resource, `verb:resource:confluence`, and what v2 endpoints document. The families that matter for
a content connector: `read:page:confluence`, `read:blogpost:confluence`, `read:space:confluence`,
`read:comment:confluence`, `read:attachment:confluence`, `read:folder:confluence`, `read:whiteboard:confluence`,
`read:database:confluence`, `read:embed:confluence`, `read:custom-content:confluence`,
`read:hierarchical-content:confluence` (ancestors, children, descendants), `read:content-details:confluence`
(details, properties, search), `read:content.metadata:confluence`, `read:space.permission:confluence`,
`read:configuration:confluence`, `read:user:confluence`, `read:group:confluence`, plus the `write:` and `delete:`
forms of each.
**Which generation to use now, and therefore which family:**
- **Calling v2 means granular.** There is no classic scope listed on a v2 operation page, so an app whose reads go
through `/wiki/api/v2/...` needs the granular scopes and nothing the classic list offers will substitute. This is
the case for any new Confluence content integration, because v2 is where pages, blogposts, whiteboards, databases,
folders and the hierarchy endpoints live.
- **Calling v1 can use either**, and the pages mark classic as recommended. If the app *only* touches v1, classic is
fewer scopes and less churn.
- **Calling both — the common case — is the trap.** Content restrictions and CQL search have no v2 equivalent (§2),
so a v2-based app that also searches or reads restrictions lands in both families at once. Prefer resolving that
with the **granular equivalent** the v1 page also lists — CQL search accepts `read:content-details:confluence`,
which a v2 content app already holds — rather than bolting the classic scope onto a granular set. Adding
`search:confluence` to an otherwise granular app is exactly the mixed-family shape the base skill warns about, and
it is the first thing to check when search 401s with a scope message.
- **Granular is not free.** One content type per scope means a connector reading pages, blogposts, comments,
attachments, folders, whiteboards, databases and the hierarchy is already eight or more scopes before users and
groups. That is fine against the under-50 ceiling, but every one of them is a line on the consent screen and every
addition later re-consents every customer. Decide the content-type list once.
- **Identity scopes are separate.** `read:me` and `read:account` come from the Atlassian account identity API, not
the Confluence scope page, and a login-only authorization is its own set. Note that `ACCESS_EMAIL_ADDRESSES` is a
**Connect-app scope**, not a 3LO one — if it appears in a 3LO authorize URL, check whether it is doing anything.
## 2. v1 and v2 — what only exists where
| Generation | Base path | Pagination | Scope family documented |
| --- | --- | --- | --- |
| v1 | `/wiki/rest/api/...` | `start` / `limit`, `_links.next` | Classic (recommended) **and** granular |
| v2 | `/wiki/api/v2/...` | Cursor — `limit` + `cursor`, `Link` header and `_links.next` | Granular only |
v2's pagination is cursor-based and Atlassian is explicit that you follow the link rather than compute an offset: the
next URL appears *"in both the `Link` header and under the `_links.next` property"*, and when there is no next page
neither is present. A client that pages by incrementing an offset against v2 will quietly under-read.
**Still v1 only, as of this check:**
- **Content restrictions** (`/wiki/rest/api/content/{id}/restriction`) — there is no v2 restrictions group. Any
feature that reads or sets page-level restrictions is a v1 call.
- **CQL search** (`/wiki/rest/api/search`, and `/search/user`) — v2 has no search endpoint; filtering on the v2 list
endpoints is not a substitute for CQL.
**Moved or reshaped in v2**, which is where migrations break:
- A **space is addressed by a numeric id** in v2, where v1 keyed spaces by their **space key**. The key still exists
and is still what users see; it is no longer the path parameter. A client that stores the key as "the space id"
works against v1 and 404s against v2.
- **Comments are split** into footer and inline, addressed under their parent
(`/pages/{id}/footer-comments`, `/pages/{id}/inline-comments`, and `/blogposts/{id}/...`), with individual comments
at `/footer-comments/{id}` and threaded replies at `/footer-comments/{id}/children`. A v1 client that treated
"comments" as one list will silently miss half of them.
- Body formats are requested explicitly in v2 (`body-format`), and Atlassian has capped some listing endpoints at
**50 results when `body-format` is included**, down from 250. A list that suddenly returns fewer rows than its
`limit` asked for is usually this, not a permissions change.
**Before relying on any v1 call, open that operation's reference page and look for its own deprecation notice and
removal date.** Atlassian deprecates Confluence v1 per endpoint, and has repeatedly extended the dates, so neither a
blanket "v1 is fine" nor a blanket "v1 is dead" is checkable — only the specific operation is.
## 3. Addressing Confluence through the cloudid
The base skill covers `accessible-resources` and the `/ex/{product}/{cloudid}` form. Confluence's product segment is
`confluence`, and the part people get wrong is what follows it:
```
https://api.atlassian.com/ex/confluence/{cloudid}/wiki/api/v2/pages # v2
https://api.atlassian.com/ex/confluence/{cloudid}/wiki/rest/api/search # v1
```
Two specific traps:
- **`/wiki` is part of the path.** Atlassian's own 3LO example for Confluence shows a v1 call as
`.../ex/confluence/{cloudid}/rest/api/space`, without it. Both forms circulate. Build against the path the API
reference for your generation prints — v2 is documented as `/wiki/api/v2/...` throughout — and verify with one
real call rather than reasoning about it.
- **One cloudid, several products.** A single Atlassian site commonly runs both Jira and Confluence, and the same
cloudid addresses both; the product segment selects which. So a cloud-ID resolution path shared between connectors
can produce a URL whose cloudid is right and whose product segment belongs to the other product. That failure
presents as a 404 on every call, not as an auth error.
Content ids in v2 are numeric strings for pages, blogposts and spaces; attachment ids are opaque strings, and
attachments carry a `downloadLink` in the response rather than a constructible URL — follow it rather than building
one.
## 4. Permissions — the reason a valid token sees an empty wiki
Confluence authorization is a stack, and OAuth scopes are only the outermost layer. A 3LO token acts **as the
authorizing user**, so the app's effective access is the intersection of the granted scopes and that user's own
permissions:
1. **Global permission** — the user needs *"Permission to access the Confluence site ('Can use' global
permission)"*, which is what the v2 list endpoints state as their requirement.
2. **Space permissions** — per space, per user or group. Getting a single space requires *"Permission to view the
space."* A user who is not permitted in a space does not see it at all, and neither does the app.
3. **Page restrictions** — per page, and they narrow further within a space the user can otherwise read.
The operational consequence, and the thing to tell a customer before they open a support ticket: **listing endpoints
silently return only what the user can see.** Atlassian states it for pages — *"Only pages that the user has
permission to view will be returned"* — and the same shape holds elsewhere. There is no error, no partial-content
warning, and no way to distinguish "this space is empty" from "this user cannot see this space" from the response.
So:
- **"The connector isn't syncing our engineering space"** is far more often a space-permission problem than a scope
problem, and re-registering the app fixes nothing. Check which account authorized, and what that account can see in
the Confluence UI.
- **Who authorizes matters as much as what you ask for.** A connection made by a narrowly permissioned service user
reads a narrow wiki, permanently and invisibly. If broad coverage is the product promise, say up front that the
authorizing user must be able to see everything the customer expects to sync.
- **Page restrictions are only readable through v1** (§2). A connector that cannot see restrictions cannot explain
its own gaps.
## 5. Data security policy app access rules
Confluence adds an admin-side block that sits outside scopes and consent entirely. An organization admin can attach
an **app access rule** to a data security policy, blocking apps from reading user-generated content in selected
spaces — Atlassian documents a limit of **15 containers (spaces) per policy**.
What that does to your app:
- It blocks **pages, blogposts and other user-generated content** in those spaces. Space key and name, audit records
and templates remain readable, so the space still appears — with nothing in it.
- Blocked items *"will not appear in subsequent search or any other data retrieval results"*, and the app cannot
update them. This is omission, not an error code.
- The signal is a response header, `Atlassian-DataSecurityPolicy: app_access_blocked`. A client that never looks at
it cannot tell this apart from a permissions gap (§4) or an empty space.
- Reference pages mark each operation **exempt** or **not exempt** from app access rules, so you can tell in advance
which of your calls can be blocked.
The asymmetry worth naming out loud: apps authenticating with **Atlassian API tokens or user credentials cannot be
blocked this way**. The compliant OAuth path is the blockable one. That is not an argument for the token path — the
base skill records that Atlassian names token collection as non-compliant — but it does explain why a customer's
admin may see different behavior from two integrations.
## 6. Rate limits
Confluence Cloud meters API traffic as an **hourly points budget**, not a request count, and the budget depends on
which pool the app is in:
- **Global pool (the default)** — the app shares *"a single 65,000 point hourly quota across all tenants."* For a
multi-tenant connector that is the number that matters, and it is shared across every customer.
- **Per-tenant pool** — a larger, per-customer budget that scales with the customer's edition and user count, capped
well above the global figure.
When the budget is exhausted the API returns **`429 Too Many Requests`** with `Retry-After`, and there is *"no
partial throttling"* — further requests are denied until the window resets. On the way there, `X-RateLimit-Limit`,
`X-RateLimit-Remaining`, `X-RateLimit-Reset` and `X-RateLimit-NearLimit` (true below 20% remaining) let a client back
off before it is cut off, and `RateLimit-Reason` says which pool was breached.
Two consequences for a connector: a 429 is **not** an authorization problem and must never trigger a re-authorization
or a token refresh; and a full-wiki initial sync on the shared global pool is the most likely way one customer
degrades every other customer's connection. Confirm which pool the app is in before promising a sync window.
## 7. Confluence Data Center is not this
**Confluence Data Center / Server does not use any of this.** No Atlassian-hosted developer console, no
`auth.atlassian.com`, no cloudid, no `/ex/confluence/...`. Authentication is against the customer's own instance —
personal access tokens, or basic auth, with Confluence Data Center separately able to act as an **OAuth 2.0
provider** for its own integrations. The REST API is the Data Center reference, not the Cloud one, and the endpoint
paths differ.
If the customer's URL is not `*.atlassian.net` or a custom Atlassian Cloud domain, stop: nothing in this file or the
base skill applies, and a Cloud client ID will never authenticate against it.
## Product fact — what the Confluence connector asks for
> **As of 2026-09-20, Unified.to's Confluence connector requests:** a **granular** Confluence scope set, narrowed per
> unified object and per read direction rather than one flat union, with `read:me` and `offline_access` in every
> data-object set. Reading pages pulls the widest set — page, folder, attachment, hierarchical-content, database,
> whiteboard, content, embed and content-details granular scopes — **plus the classic `search:confluence`**, which is
> the one classic scope in an otherwise granular app. That is the mixed-family shape §1 warns about, and it may be
> removable: the CQL search endpoint also accepts the granular `read:content-details:confluence`, which this set
> already contains. Spaces, comments, users and groups each request their own narrow granular read scope. The
> identity / login authorization is different again — Atlassian account identity scopes plus an email-address scope
> that Atlassian documents as a **Connect-app** scope rather than a 3LO one, and **no `offline_access`**, so that
> flow gets no refresh token by design.
>
> Two things beyond scopes. The connector expects an **Atlassian organization admin API key** alongside the OAuth
> credentials, and it offers a **non-OAuth path** — Confluence site URL plus account email plus an Atlassian API
> token. Collecting API tokens is exactly the pattern Atlassian's 3LO pages name as non-compliant (see the base
> skill), so raise it rather than registering around it.
>
> On the API side the connector's page reads currently go through the **v1** CQL search and v1 content endpoints
> rather than v2, with the v2 equivalents present but disabled. That makes §2's per-endpoint v1 deprecation exposure
> a live concern rather than a theoretical one, and it is the likeliest reason the classic search scope is in the set
> at all. It pages with `limit` and a next link, with a maximum page size of 250 for content objects and a smaller
> one for users and groups — note §2's 50-result cap when a body format is requested, which a 250 limit will not
> override.
>
> This note is dated, not live. **Confirm all of it with the connector's owner before registering anything** — the
> connector, not this document, is the source of truth for what it sends.
## 8. Confluence-specific end-to-end checks
On top of the base skill's authorize → accessible-resources → refresh round trip:
1. Make one real read against `https://api.atlassian.com/ex/confluence/{cloudid}/wiki/api/v2/pages` and confirm the
`/wiki` segment and the product segment are both right (§3).
2. **Page it.** Follow `_links.next` or the `Link` header at least twice, and confirm the client is not incrementing
an offset against v2 (§2).
3. Authorize as a **restricted user** — someone who cannot see one known space — and confirm the connector reports
the gap rather than reporting success on a partial wiki (§4).
4. If search is in scope, call the CQL search endpoint and confirm which scope actually satisfies it before shipping
a mixed-family scope set (§1).
5. Read a page that carries **page restrictions** and confirm the client's behavior is deliberate (§4).
6. Check the response headers on a content read for `Atlassian-DataSecurityPolicy` (§5), and log it — this is the
only distinguishable signal for an admin-blocked space.
7. Watch `X-RateLimit-Remaining` during an initial sync (§6).
| Symptom | Cause |
| --- | --- |
| 401 with a scope message on search, everything else fine | Classic `search:confluence` vs granular family mismatch — try `read:content-details:confluence` (§1) |
| 404 on every Confluence call, auth fine | `/wiki` missing from the path, or the wrong product segment on a shared cloudid (§3) |
| 404 addressing a space that exists | v2 wants the numeric space id; the space **key** is a v1 concept (§2) |
| Connected successfully, zero pages returned | The authorizing user cannot see those spaces (§4) |
| One space appears but is always empty | Space permissions (§4), or a data security policy app access rule (§5) |
| Half the comments are missing | Only footer or only inline comments are being read (§2) |
| Lists return 50 rows when 250 were requested | A body format was requested on a listing endpoint (§2) |
| Sync silently stops partway | Cursor pagination not followed — offset paging against v2 (§2) |
| `429` mid-sync | Hourly points budget exhausted; back off, do **not** re-authorize (§6) |
| A v1 call that worked last quarter now 404s | That operation's own deprecation window closed (§2) |
| Nothing resembles this; the site is not `*.atlassian.net` | Confluence Data Center — different auth model entirely (§7) |
## Stop and ask
Beyond the base skill's list, hand back to a human when:
- The client calls **both v1 and v2** and nobody has decided how to keep the scope set in one family (§1, §2).
- A feature depends on **content restrictions or CQL search**, both v1-only, and the v1 deprecation exposure has not
been assessed (§2).
- Coverage has been promised that depends on **who authorizes** — broad-wiki sync via a narrowly permissioned
service account cannot be fixed in the console (§4).
- A customer's admin has applied a **data security policy app access rule** and someone proposes switching to
Atlassian API tokens to get around it (§5).
- The expected volume does not fit the **global points pool** and nobody owns the per-tenant pool question (§6).
- The target turns out to be **Confluence Data Center** (§7).
- Anyone asks to add or remove a Confluence scope on a live app — that re-consents every connected customer.
- The scope tables or endpoint groups do not match the **Confluence platform state** section above.
## References
Confluence-specific only; the base skill carries the portal-wide Atlassian references. Every link verified to
resolve on 2026-09-20.
- OAuth 2.0 (3LO) apps — Confluence Cloud — https://developer.atlassian.com/cloud/confluence/oauth-2-3lo-apps/
- Confluence scopes for OAuth 2.0 (3LO) and Forge apps (classic and granular) — https://developer.atlassian.com/cloud/confluence/scopes-for-oauth-2-3LO-and-forge-apps/
- Confluence Cloud REST API v2 intro (cursor pagination, base path) — https://developer.atlassian.com/cloud/confluence/rest/v2/intro/
- Confluence Cloud REST API v1 intro — https://developer.atlassian.com/cloud/confluence/rest/v1/intro/
- v2 Page endpoints (scopes, permission statements) — https://developer.atlassian.com/cloud/confluence/rest/v2/api-group-page/
- v2 Space endpoints (numeric space id) — https://developer.atlassian.com/cloud/confluence/rest/v2/api-group-space/
- v2 Blog post endpoints — https://developer.atlassian.com/cloud/confluence/rest/v2/api-group-blog-post/
- v2 Comment endpoints (footer vs inline) — https://developer.atlassian.com/cloud/confluence/rest/v2/api-group-comment/
- v2 Attachment endpoints (`downloadLink`) — https://developer.atlassian.com/cloud/confluence/rest/v2/api-group-attachment/
- v2 Space permission endpoints — https://developer.atlassian.com/cloud/confluence/rest/v2/api-group-space-permissions/
- v1 Content restrictions (no v2 equivalent) — https://developer.atlassian.com/cloud/confluence/rest/v1/api-group-content-restrictions/
- Security for Confluence Cloud apps (scopes intersected with user permissions) — https://developer.atlassian.com/cloud/confluence/security-overview/
- Data security policy developer guide (app access rules, blocked-content header) — https://developer.atlassian.com/cloud/confluence/data-security-policy-developer-guide/
- Confluence Cloud rate limiting (points pools, headers) — https://developer.atlassian.com/cloud/confluence/rate-limiting/
- Confluence Cloud changelog — https://developer.atlassian.com/cloud/confluence/changelog/
- Using the Confluence REST API — https://developer.atlassian.com/cloud/confluence/using-the-rest-api/
- Basic auth for REST APIs (the API-token path) — https://developer.atlassian.com/cloud/confluence/basic-auth-for-rest-apis/
- Deprecation notice — basic authentication with passwords — https://developer.atlassian.com/cloud/confluence/deprecation-notice-basic-auth/
- Confluence Data Center REST API (*not* this skill) — https://developer.atlassian.com/server/confluence/confluence-server-rest-api/
- Confluence Data Center OAuth 2.0 provider API (*not* this skill) — https://developer.atlassian.com/server/confluence/confluence-oauth2-provider-api/
- Confluence Cloud free signup — https://www.atlassian.com/try/cloud/signup?bundle=confluence
## atlassian-jira-oauth-app
URL: https://docs.unified.to/skills/atlassian-jira-oauth-app/SKILL.md
# Atlassian Jira Cloud OAuth 2.0 (3LO) App Registration
Registering the app is the shared part. **What is specific to Jira is that "Jira" is five APIs, not one** — the Jira
platform, Jira Software, Jira Service Management, Confluence and Assets each carry their own scope list inside the
same console app — and that Jira's classic scopes are broad enough that most connectors never need the granular
family at all.
The expensive Jira-specific mistake is assuming a scope you added covers a product you did not add. Adding the Jira
API does not give you Jira Service Management scopes; the consent screen rejects what the console does not know
about, and the failure looks like a permissions problem.
## Built on: `atlassian-cloud-oauth`
**Read `atlassian-cloud-oauth` first, then this file.** It owns all the portal mechanics, and this file does not
repeat them:
- The Developer Console, creating an **OAuth 2.0 integration**, enabling 3LO, account-level vs resource-level grants,
and where the client ID and secret live.
- **One callback URL per app**, and what that forces on a platform serving several data centers.
- The classic/granular scope model in general, `offline_access`, the under-50 ceiling, and scope changes
re-consenting every existing user.
- **Rotating refresh tokens** — 90-day inactivity expiry, 10-minute reuse leeway, and the failure that only shows up
on the *second* refresh.
- The **cloudid indirection**: `accessible-resources`, `/ex/{product}/{cloudid}/...`, the multi-site array, and the
required `audience` and `prompt=consent` authorize parameters.
- Distribution, the unreviewed-app warning, Marketplace approval, data residency, credential handoff, and the two
practices Atlassian names as non-compliant (collecting API tokens, or having customers create individual 3LO apps).
If you are reading only this file, you are missing all of the above.
## Inputs to collect before you start
The base skill lists the console inputs. These are the Jira-specific ones:
| Input | Notes |
| --- | --- |
| **Which Atlassian products does the integration actually call?** | Jira platform, Jira Software, Jira Service Management, Confluence and Assets are separate APIs with separate scope lists (§2) |
| **Read-only, or create/edit issues?** | Decides how far up the classic ladder you go (§1) |
| **Does it administer projects or configuration?** | `manage:jira-project` and `manage:jira-configuration` are broad and visible on the consent screen (§1) |
| **Does it register webhooks?** | Dynamic webhook registration is its own scope (§1) |
| **Does anything depend on JQL over entity properties?** | 3LO apps cannot do this at all (§3) |
| **A Jira Cloud site to test against** | A free site is enough; a sandbox needs Premium/Enterprise |
## Quick Start
1. Work the base skill's console steps, adding the **Jira API(s)** you actually call under Permissions (§2).
2. Add the classic Jira scopes for what the integration does, plus `offline_access` (§1).
3. Confirm the client addresses `/ex/jira/{cloudid}/rest/api/3/...` and not the customer's site host (§2).
4. Check §3 before promising anything that depends on JQL over entity properties or on per-user grant revocation.
5. Finish the base skill's capture, round-trip and handoff steps, adding the Jira checks in §4.
## Jira platform state (verified 2026-09-20 — re-verify before trusting)
The Jira 3LO documentation was last updated 2026-09-18, so this is current as of writing. Check the linked pages
before following any older runbook.
- **Atlassian's stated recommendation for Jira is classic scopes**: *"When choosing your scopes, the recommendation
is to use classic scopes"*, and for granular: *"Use these scopes only when you can't use classic scopes."* That is
a stronger classic preference than some other Atlassian products, whose newer API generations document granular
scopes only — do not carry a Confluence-shaped habit into a Jira app, or the reverse.
- **Jira platform REST v3** is the current generation for 3LO apps, addressed as
`/ex/jira/{cloudid}/rest/api/3/`.
- **Known 3LO limitation:** Jira apps using 3LO **cannot declare searchable entity properties**, so they cannot
reference entity properties in JQL. No scope fixes this; it is a property of 3LO apps.
- **An admin cannot revoke one user's grant** from the Connected Apps screen — the grant is between the app and the
user, so an admin can only uninstall. This bites when a customer expects per-user offboarding.
If the console or the scope lists do not look like this, stop and report what you actually see rather than clicking
on.
**Jira Cloud only.** Jira **Data Center / Server** does not use this at all — it uses OAuth 1.0a via application
links (RSA-SHA1 signed) or personal access tokens, registered inside the customer's own instance, with no
Atlassian-hosted developer console, no `auth.atlassian.com`, and no cloudid. If the customer's URL is not
`*.atlassian.net` (or a custom Cloud domain), you are in the wrong document.
## 1. Jira scopes
**Classic scopes** are broad and are the recommended default. For the Jira platform API there are six:
| Scope | What Atlassian says it grants |
| --- | --- |
| `read:jira-user` | View user information — usernames, email addresses, avatars |
| `read:jira-work` | Read project and issue data; search issues; attachments and worklogs |
| `write:jira-work` | Create and edit issues, post comments as the user, create worklogs, delete issues |
| `manage:jira-project` | Create and edit project settings and project-level objects (versions, components) |
| `manage:jira-configuration` | Jira administration — create projects and custom fields, view workflows, link types |
| `manage:jira-webhook` | Fetch, register, refresh and delete dynamically declared webhooks |
**Granular scopes** are per-resource and follow a `verb:resource:jira` shape — `read:issue:jira`,
`write:comment:jira`, `delete:attachment:jira`, `write:project:jira`, and several hundred more. Atlassian's guidance
for Jira is unambiguous: *"Use these scopes only when you can't use classic scopes."*
What matters operationally, on top of the base skill's scope rules:
- **Six classic scopes cover most Jira connectors.** Reach for granular only when an endpoint's reference page offers
no classic alternative. Mixing families within one product is the shape most likely to produce a 401 with a
scope-mismatch message on an endpoint you are certain you are entitled to call.
- **Find the scope an endpoint needs in the OAuth scopes required field** in the Jira REST API reference. If an
operation says *"Apps can't access this REST resource"*, no scope will help — it is not available to 3LO at all.
- **`manage:jira-configuration` is a Jira-administration scope** and reads that way on the consent screen. It is
routinely the reason an enterprise security review stalls. Only add it if an endpoint you call actually requires
it.
> **As of 2026-09-20, Unified.to's Jira connector requests:** `offline_access` in every per-object scope set, plus
> **classic** Jira scopes — `read:jira-user`, `read:jira-work`, `write:jira-work`, `manage:jira-configuration`,
> `manage:jira-project`, and `manage:jira-webhook` for webhook registration — with the scope set narrowed per unified
> object and per read/write direction rather than one flat union. The one exception is the project-write path, which
> **also carries the granular scope `write:project:jira`** alongside the classic project scopes: that is a mixed-family
> set, and it is the first thing to check if project creation fails with a scope error. Separately, the identity /
> login authorization requests only `read:jira-user` — with no `offline_access`, so that flow gets no refresh token by
> design. The connector also offers a **non-OAuth path** (Jira subdomain + account email + an Atlassian API token),
> which is exactly the pattern Atlassian's 3LO pages name as non-compliant (see the base skill). Confirm all of this
> with the connector's owner before registering — the connector, not this document, is the source of truth for what
> it sends.
## 2. "Jira" is five APIs
Under **Permissions → Add**, the console offers each Atlassian product API separately, and each carries its own scope
list:
| API | Scope family | Notes |
| --- | --- | --- |
| **Jira platform** | The classic six above, plus granular `…:jira` | Issues, projects, users, webhooks |
| **Jira Software** | Its own list (boards, sprints, backlogs) | Adding the Jira platform API does **not** add these |
| **Jira Service Management** | `read:servicedesk-request`, `write:servicedesk-request`, `manage:servicedesk-customer` on top of the Jira classic six | Requests, queues, customers |
| **Confluence** | An entirely separate family — see the Atlassian Confluence skill | Same console app, different product segment in the URL |
| **Assets** | Its own list | Objects and schemas |
Two consequences:
- **A scope for a product whose API you never added fails at the consent screen**, not at save time, and the message
reads like a scope-name problem rather than a missing-API problem.
- **The product segment in the API URL follows the API you called, not the app.** Jira platform v3 reads are
`https://api.atlassian.com/ex/jira/{cloudid}/rest/api/3/`; Confluence is `/ex/confluence/{cloudid}/…` with
its own base path. The same cloudid commonly serves both on one site, so a URL can carry the right cloudid and the
wrong product segment and 404 on every call.
Unified.to maintains **separate connectors for Atlassian Confluence and Atlassian Jira Service Management**, each
with its own credentials and its own scope set. One Atlassian app *can* serve several products if you add each
product's API and scopes to it, but that is a decision to make with the connectors' owners, not a default.
> **As of 2026-09-20, Unified.to's Jira connector** resolves the cloud ID during connection initialization: it calls
> the accessible-resources endpoint, takes the **first** site in the response, stores
> `https://api.atlassian.com/ex/jira/{cloudid}` as that connection's API base, and derives the site subdomain from the
> returned site URL. Because the first entry is taken, a customer whose grant covers **more than one Jira site** can
> be connected to the wrong one, and because resolution happens at setup, a later change in the grant is not
> automatically picked up.
>
> **Probable bug, worth confirming before you debug anything downstream:** the connector's *fallback* cloud-ID path —
> the one used when the primary resolution does not produce a site, and the one the non-OAuth API-token path uses,
> reading the cloud ID from the customer site's own tenant-info endpoint — builds the API base with the
> **`/ex/confluence/` product segment rather than `/ex/jira/`**. A connection that takes that branch would address the
> wrong product's API on a correct cloud ID, which presents as a 404 on every Jira call rather than as an auth error.
> Raise it with the connector's owner; do not work around it in the console.
## 3. Jira-only 3LO limitations
- **Entity properties are not searchable from a 3LO app.** Jira apps using 3LO cannot declare searchable entity
properties, and therefore cannot reference them in JQL. If a requirement depends on querying app-written entity
properties, 3LO is the wrong app type and no scope changes that — raise it before building.
- **Per-user grant revocation does not exist for an admin.** The grant binds the app to the user, so a site admin
looking at Connected Apps can uninstall but cannot revoke one person's access. Customers with offboarding
requirements need to hear this up front.
## 4. Jira-specific end-to-end checks
On top of the base skill's authorize → accessible-resources → refresh round trip:
1. Make one real read against `https://api.atlassian.com/ex/jira/{cloudid}/rest/api/3/...` — confirming the product
segment as well as the cloudid (§2).
2. If the integration registers webhooks, exercise that path specifically — `manage:jira-webhook` is easy to omit and
the failure only appears when a webhook is registered, not at connect.
3. If Jira Service Management or Confluence endpoints are called, confirm those APIs were added to the app and their
scopes granted (§2) — the per-site `scopes` array from `accessible-resources` is where you see what actually
landed.
4. Connect a user who lacks *Administer Jira* and confirm the connector degrades honestly: a scope grant does not
exceed the user's own permissions, so project creation fails at the API, not at consent.
| Symptom | Cause |
| --- | --- |
| Auth succeeds, every Jira call 401s or 404s | Client is calling `.atlassian.net` instead of `/ex/jira/{cloudid}` (base skill) |
| 404 on every call, cloudid looks correct | Wrong product segment in the API base — see the fallback-path note in §2 |
| Consent screen rejects a scope that exists in the docs | That product's API was never added to the app (§2) |
| Jira Service Management or Confluence endpoints 403 | Those APIs and their scopes are not on this app (§2) |
| Project creation fails with a scope error | Mixed classic/granular project scopes (§1) |
| Webhook registration fails, everything else works | `manage:jira-webhook` missing (§1) |
| App has `manage:jira-project` but cannot create projects | The authorizing user lacks *Administer Jira* — a permission failure, not a scope failure (§1) |
| JQL cannot see an app-written entity property | 3LO apps cannot declare searchable entity properties (§3) |
| Admin wants to revoke one user and can only uninstall | Grants are per user, not per site (§3) |
| Reads the wrong Jira site | First entry of `accessible-resources` taken blindly (§2, base skill) |
| Nothing resembles this document; no `auth.atlassian.com` | It is Jira Data Center/Server, not Cloud — wrong auth model entirely |
## Stop and ask
Beyond the base skill's list, hand back to a human when:
- The integration needs endpoints from **more than one Atlassian product** and nobody has decided whether that is one
app or several (§2).
- A requirement depends on **JQL over entity properties**, which 3LO cannot do at all (§3).
- A customer's offboarding process assumes **per-user grant revocation** (§3).
- The scope set mixes **classic and granular** Jira scopes and nobody owns resolving it (§1).
- The request is really about **Confluence or Jira Service Management** — separate connectors, separate scope
families, and Confluence has its own skill.
- The target is **Jira Data Center/Server**.
- The Jira scope lists do not match the **Jira platform state** section above.
## References
Jira-specific only; the base skill carries the portal-wide Atlassian references. Every link verified to resolve on
2026-09-20.
- OAuth 2.0 (3LO) apps (Jira Cloud platform) — https://developer.atlassian.com/cloud/jira/platform/oauth-2-3lo-apps/
- Jira scopes for OAuth 2.0 (3LO) and Forge apps (classic vs granular) — https://developer.atlassian.com/cloud/jira/platform/scopes-for-oauth-2-3LO-and-forge-apps/
- Jira Software scopes — https://developer.atlassian.com/cloud/jira/software/scopes-for-oauth-2-3LO-and-forge-apps/
- Jira Service Management scopes — https://developer.atlassian.com/cloud/jira/service-desk/scopes-for-oauth-2-3LO-and-forge-apps/
- Jira Cloud platform REST API v3 intro (scopes per operation, pagination) — https://developer.atlassian.com/cloud/jira/platform/rest/v3/intro/
- Jira Cloud webhooks — https://developer.atlassian.com/cloud/jira/platform/webhooks/
- Jira Cloud rate limiting — https://developer.atlassian.com/cloud/jira/platform/rate-limiting/
- Jira data security policy developer guide (app access rules) — https://developer.atlassian.com/cloud/jira/platform/data-security-policy-developer-guide/
- Basic auth for REST APIs (the API-token path) — https://developer.atlassian.com/cloud/jira/platform/basic-auth-for-rest-apis/
- Jira Cloud free signup — https://www.atlassian.com/try/cloud/signup?bundle=jira-software
- OAuth for Jira Data Center/Server (OAuth 1.0a — *not* this skill) — https://developer.atlassian.com/server/jira/platform/oauth/
## attio-oauth-app
URL: https://docs.unified.to/skills/attio-oauth-app/SKILL.md
# Attio OAuth2 App Registration
Get a working Attio OAuth2 client — an Attio account and workspace, an app in the Developer console, redirect URIs,
a scope selection, client ID and client secret — for a platform that connects many customers' Attio workspaces.
Four things are expensive to get wrong here, and none of them is the signup form:
1. **Scopes are not requested. They are configured.** Attio's authorize endpoint takes `client_id`, `response_type`,
`redirect_uri` and `state` — and **no `scope` parameter at all**. Every customer grants exactly the scope set
ticked in the app's **Scopes** tab. The app registration *is* the scope decision, and a missing scope does not
fail at authorization; it fails later, as a permission error on one endpoint (§5).
2. **Reading the schema is a separate scope from reading the data.** `record_permission:read` grants records;
`object_configuration:read` grants the objects and attributes that describe them — and Attio requires **both** on
nearly every record endpoint. Of the ~36 scopes, `object_configuration:read` is required by more endpoints than
any other. A connector with records but not object configuration reads nothing (§5, §6).
3. **The workspace defines its own objects and attributes.** Attio ships people and companies, offers deals, users
and workspaces, and lets each customer add custom objects, custom lists and custom attributes of ~17 types. A
scope grants a *capability*, not a schema — two customers who granted the identical scope set can return
completely different shapes (§6).
4. **Tokens do not expire and there is no refresh token.** Attio states plainly that `exp` is always `null` "because
Attio access tokens do not currently expire". There is nothing to refresh, and the only ways a token dies are
revocation and uninstall — which arrive as a 401 with no warning (§7).
## Inputs to collect before you start
Ask in one batch. Never invent.
| Input | Notes |
| --- | --- |
| **App name** and **slug** | The slug is a unique identifier; Attio says pick one you're happy to keep (§3) |
| **Developer account name and logo** | Public-facing if you ever publish; name rules are strict (§3, §8) |
| **Which Attio account and workspace** owns the app | You need **admin** on it; prefer an isolated development workspace (§2) |
| **Redirect URIs** | Every callback host your platform serves; must match exactly (§4) |
| **Which objects and operations** the connector performs | Decides the scope selection — this is the whole job (§5) |
| **Webhooks wanted?** | Needs `webhook:read-write` and API-created webhooks (§9) |
| **Publish to the Attio App Store?** | Optional; OAuth works unpublished, with a warning (§8) |
| **Whether customers run custom objects / custom attributes** | Changes what "done" means for the connector (§6) |
## Quick Start
1. Confirm a **new** app is needed — a new client ID orphans every existing customer connection (§1).
2. Sign in to Attio as a workspace **admin**, ideally of an isolated development workspace (§2).
3. **Developer console → New app** at `https://build.attio.com`; set name and slug (§3).
4. **OAuth tab → enable the OAuth 2.0 toggle**, then add **every** redirect URI, exactly (§3, §4).
5. **Scopes tab** — tick the union your connector needs, and do not forget `object_configuration:read` (§5).
6. Read §6 before promising anyone the connector "syncs Attio" — the customer defines the schema.
7. Capture client ID and client secret from the OAuth tab (§7).
8. Plan for **non-expiring tokens with no refresh token**, and handle revocation as a 401 path (§7).
9. If you need push events, enable `webhook:read-write` and register webhooks through the API (§9).
10. Verify from a **second, unrelated workspace**, as an admin, and check `GET /v2/self` (§10).
11. Hand the credentials over — never commit them (§11).
## Platform state (verified 2026-09-20 — re-verify before trusting)
- **The docs moved to `docs.attio.com`.** `developers.attio.com/docs/*` now **308-redirects to
`https://docs.attio.com/`** — the docs home, not the equivalent page. `attio.com/developers/introduction`
redirects the same way. Any bookmark or code comment pointing at `developers.attio.com` lands somewhere generic.
- **Apps are created in the Developer console at `https://build.attio.com`** — "New app" in the sidebar, then name
and slug. OAuth is a per-app **toggle** on the app's OAuth tab; scopes are on its Scopes tab.
- **Endpoints, fixed for everyone:** authorize `https://app.attio.com/authorize`, token
`https://app.attio.com/oauth/token`, revoke `https://app.attio.com/oauth/revoke`, API base `https://api.attio.com`
(v2), identify `GET https://api.attio.com/v2/self`.
- **Revocation is new.** The revoke endpoint was added on **2026-09-11**. Anything written before that date will tell
you Attio has no revocation endpoint.
- **The authorize call has no `scope` parameter.** Documented query parameters are `client_id` (required),
`response_type=code` (required), `redirect_uri` (required, must exactly match a registered URI) and `state`
(optional). **PKCE is not documented.**
- **Token exchange**: Attio's tutorial posts `application/x-www-form-urlencoded` with `grant_type`, `code`,
`redirect_uri`, `client_id` and `client_secret`. The endpoint reference lists `client_id`, `client_secret`,
`grant_type` and `code` as required and does **not** list `redirect_uri`. Follow the tutorial: send
`redirect_uri`, form-encoded.
- **The documented token response is `access_token` and `token_type: "Bearer"` — nothing else.** No `expires_in`,
no `refresh_token`, no `scope`.
- **Tokens do not expire.** Attio's identify endpoint states: "`exp` is always `null`, because Attio access tokens do
not currently expire." Manually generated API keys likewise "do not expire, but can be deleted at any time."
- **Tokens are workspace-scoped, not user-scoped.** Introspection returns `sub` = the workspace ID, plus
`workspace_id`, `workspace_name`, `workspace_slug` and `authorized_by_workspace_member_id` — the member who
authorized it, recorded but not the scope boundary.
- **The scope catalogue is 18 resources × `:read` / `:read-write` = 36 strings** (§5). There is no bare `:write`.
- **Installing and managing apps and workspace integrations is an admin-only capability.** Members can view
workspace settings but not change them.
- **Review is not a gate on connecting other workspaces.** Attio: "If your app uses OAuth, users can install it via
the standard OAuth flow even before the app has been published. However, they will see a warning that the app has
not yet been approved by the Attio team." App Store listing is optional, reviewed, and aims to complete within
**1 week**.
- **Rate limits: 100 requests/second for reads, 25 requests/second for writes**, plus score-based limits on List
records and List entries whose scores are **summed across all apps and access tokens** in the workspace over a
10-second sliding window. Individual endpoints can be lower: **List notes has been capped at 10 req/s since
2026-09-02** as a temporary stability measure, and create-call-recording is 1 req/s. Revoke is separately limited
to 50 requests/minute per IP.
- **Webhooks are API-created for multi-customer integrations**, signed with `Attio-Signature`, HTTPS-only, 5-second
timeout, and duplicate subscriptions are rejected with 409 (§9).
- **The App SDK is a different product** — TypeScript/React apps that run inside Attio, versioned on Attio's
infrastructure and subject to code review. A REST/OAuth connector is not an App SDK app and does not get code
reviewed; do not let SDK documentation set expectations for this run.
If the Developer console does not look like this, stop and report what you actually see rather than clicking on.
## 1. Decide: reuse the existing app, or register a new one
A new app means a **new client ID, and every existing customer authorization is bound to the old one** — every
customer re-authorizes. Reuse the existing app for: adding a redirect URI, changing the scope selection, rotating a
compromised secret, enabling webhooks, or diagnosing an authorization failure.
Register a **new** app only when the user explicitly wants one: a replacement for a compromised app, a separate app
for a different product, or a deliberate environment split. Note the Attio-specific wrinkle: because scopes live on
the app and not on the authorize call, **changing the scope selection changes it for every future authorization at
once**. Attio does not document whether tokens already issued pick up newly added scopes or keep the set they were
granted (§5) — treat a scope addition as potentially requiring a re-authorization sweep until you have verified
otherwise against a real token. Say which path you are taking before you touch the console.
## 2. Account and workspace
- Sign in or sign up at Attio, then open the Developer console at `https://build.attio.com`.
- **You must be a workspace admin.** Attio lists "install and manage apps and workspace integrations" among the
things only admins can do; members can view workspace settings but not edit them. API keys are likewise
admin-only, under **Workspace settings → Developers**.
- **Use an isolated development workspace.** Attio recommends it, and says outright: "We are happy to provide your
team with development workspaces as needed. Please reach out to `support@attio.com` or use the chat widget." Ask
for one rather than testing against a production CRM full of real customer records.
- The **developer account** itself — the identity your app is published under — carries a name and a logo, and both
are subject to App Store rules if you ever publish (§8). Setting them sensibly now costs nothing.
Hand control back for anything only a human can do: email verification, 2FA, accepting terms, being made an admin,
requesting a development workspace, or submitting the app for review. Do not retry a blocked step in a loop.
**If this session has no browser automation** (the usual case for a CLI or cloud run), do not pretend to click. Give
the user an ordered click path with the literal values to paste — the redirect URIs from §4 and the exact scope
strings from §5 — and continue once they report back with the client ID.
## 3. Create the app
**Developer console → New app.** Give the app a name and a **slug**; Attio calls the slug "a unique identifier for
your app, so pick one you're happy to keep." Then:
| Step | Detail |
| --- | --- |
| **OAuth tab** | **Enable OAuth 2.0 via the toggle at the top of the page.** Without this there is no client ID, no client secret and no flow. |
| **Redirect URIs** | Configured on the same OAuth tab. See §4. |
| **Scopes tab** | The whole permission model. See §5. |
| **Client ID / secret** | On the OAuth tab once OAuth is enabled. See §7. |
| **Share privately** | Overflow menu (three dots, top right) → *Share privately* for an install link (§8). |
| **Publish app** | Button top right, when and if you want an App Store listing (§8). |
There is no private-vs-public *distribution* setting to get wrong and no app-type fork: an OAuth app is installable
by any workspace that completes the flow from the moment OAuth is enabled. Publishing only affects discoverability
and the unapproved-app warning (§8).
## 4. Redirect URIs
Register **every** callback host your platform serves. Attio's rule is exact matching: the `redirect_uri` on the
authorize call "must exactly match one of the registered redirect URLs in your app's settings pages at
build.attio.com". For Unified.to these are one per data center; confirm the current list with the platform owner
rather than assuming:
```
https://api.unified.to/oauth/code # us (default)
https://api-eu.unified.to/oauth/code # eu
https://api-au.unified.to/oauth/code # au
https://api-dev.unified.to/oauth/code # dev
```
Two practical notes:
- **Send `redirect_uri` again at the token exchange.** Attio's OAuth tutorial includes it in the form body, even
though the endpoint reference does not list it among the required parameters. Sending it matches the worked
example and costs nothing; omitting it relies on undocumented leniency.
- **Plain HTTP is accepted for local development** — Attio's own tutorial registers
`http://localhost:3050/integrations/attio/callback`. Do not leave a localhost URI on a production app.
Attio does not publish a cap on the number of redirect URIs. Register the literal strings above and do not rely on
trailing-slash or subpath forgiveness.
## 5. Scopes — configured on the app, never requested
**This is the section that decides whether the connector works.** There is no `scope` parameter on the authorize
call. Attio says it directly: "When using an OAuth access token, the scopes are specified by configuring the scope
settings for your app in the Developer console." Whatever is ticked on the Scopes tab is what every customer grants,
today and retroactively for every future install.
The full catalogue — **18 resources, each as `:read` or `:read-write`.** There is no bare `:write`; `:read-write`
is the write level and includes reading.
| Scope family | What Attio says it grants |
| --- | --- |
| `record_permission:read` / `:read-write` | View, and optionally write, **records** |
| `object_configuration:read` / `:read-write` | View, and optionally write, the **configuration and attributes of objects** |
| `list_entry:read` / `:read-write` | View, and optionally write, the **entries in a list** |
| `list_configuration:read` / `:read-write` | View, and optionally write, the **configuration and attributes of lists** |
| `user_management:read` / `:read-write` | View **workspace members** |
| `note:read` / `:read-write` | View, and optionally write, **notes** |
| `task:read` / `:read-write` | View, and optionally write, **tasks** |
| `comment:read` / `:read-write` | View **comments (and threads)**, and optionally write comments |
| `meeting:read` / `:read-write` | View, and optionally write, **meetings** |
| `call_recording:read` / `:read-write` | View, and optionally write, **call recordings, transcripts and speakers** |
| `webhook:read` / `:read-write` | View, and optionally **manage, webhooks** |
| `file:read` / `:read-write` | View, and upload, **files** |
| `email:read` / `:read-write` | View **email metadata**. "Email content is never exposed." |
| `activity_configuration:read` / `:read-write` | Configuration and attributes of **activities** |
| `activity_record:read` / `:read-write` | **Activity records** |
| `sequence_unsubscribe:read` / `:read-write` | View, and optionally add to, the **sequence unsubscribe list** |
| `public_collection:read` / `:read-write` | Settings and information within **public collections** (legacy naming) |
| `private_collection:read` / `:read-write` | Settings and information of **all** collections "regardless of their access settings" |
### The `object_configuration` trap
This is the classic Attio failure, and it is not obvious from the scope names. **Records and the schema that
describes them are two different scopes, and record endpoints require both.** Straight from Attio's endpoint
reference:
| Endpoint | Required scopes |
| --- | --- |
| List records (`POST /v2/objects/{object}/records/query`) | `record_permission:read`, **`object_configuration:read`** |
| Get a record | `record_permission:read`, **`object_configuration:read`** |
| Create / update a record | `record_permission:read-write`, **`object_configuration:read`** |
| List objects (`GET /v2/objects`) | `object_configuration:read` |
| List attributes, when `target` is `objects` | `object_configuration:read` |
| List attributes, when `target` is `lists` | `list_configuration:read` |
| List notes | `note:read`, `object_configuration:read`, `record_permission:read` |
| List / create tasks | `task:read`(`-write`), `object_configuration:read`, `record_permission:read`, `user_management:read` |
| List / get list entries | `list_entry:read`, `list_configuration:read` |
| List workspace members | `user_management:read` |
| Create / update / delete a webhook | **`webhook:read-write`** |
Read that table as three rules:
1. **`object_configuration:read` is effectively mandatory.** It is required by more endpoints than any other scope,
including plain record reads. Tick it even for a read-only integration. An app that grants records but not object
configuration authorizes cleanly and then fails on the first list call.
2. **Lists are a parallel universe.** Records live under `object_configuration` + `record_permission`; list entries
live under `list_configuration` + `list_entry`. Reading a list's attributes needs `list_configuration:read`, not
`object_configuration:read`. Anything that models pipelines or processes as Attio lists needs the list pair too.
3. **Cross-resource scopes are common.** Tasks need four scopes. Notes need three. Copy the "Required scopes" line
from each endpoint's reference page rather than guessing from the resource name.
`private_collection:*` grants access "regardless of their access settings" — it is the one a security-conscious
admin will look at hardest. Do not tick it unless the product genuinely requires seeing collections the authorizing
admin's own permissions would not reach.
> **As of 2026-09-20, this platform's Attio connector** correctly sends **no `scope` parameter** on the authorize
> call — which is right for Attio — and is a confidential client that does **not** use PKCE. Its internally recorded
> per-capability requirements amount to: `record_permission:read` / `:read-write`, `object_configuration:read` /
> `:read-write`, `list_configuration:read` / `:read-write`, `note:read` / `:read-write`, `task:read` /
> `:read-write`, `meeting:read`, and `user_management:read` / `:read-write` — and **no `webhook` scope at all**,
> even though it registers webhooks through the API, which Attio gates behind `webhook:read-write`. Treat that list
> as the floor, not the spec: because Attio ignores requested scopes entirely, only the Scopes tab matters, so tick
> the union of everything above **plus `webhook:read-write`** if webhooks are wanted. Confirm the exact current set
> with the connector's owner before ticking boxes.
## 6. The object and attribute data model — read this before promising anything
Attio is not a fixed-schema CRM, and this is the thing that most often makes an integration "work" in testing and
disappoint in production.
- **Objects are the tables.** Attio's own analogy: "In relational database terms, objects are roughly tables."
**People and companies are enabled by default; deals, users and workspaces are optional**, and a customer can
create **custom objects** on top. Only admins can enable and deactivate standard objects.
- **Records are the rows.** An instance of an object.
- **Attributes are the columns**, and "Some attributes, such as the name on a person, are system defined. Others,
you define yourself, either in Attio's UI or over the API." Attribute types include text, number, select, status,
rating, currency, date, timestamp, checkbox, domain, email address, phone number, location, personal name,
record reference, actor reference and interaction.
- **Lists are a second axis.** Lists aggregate records into a process, and **lists carry their own attributes** —
Attio's example is a deal that has extra attributes only relevant inside one list. A value can therefore live on
the record, on the list entry, or both.
Four consequences for a connector that cannot know the shape in advance:
1. **Discover, do not assume.** `GET /v2/objects` and the attributes endpoints are how you learn what this workspace
actually has. That is exactly why `object_configuration:read` is required alongside records (§5) — and why a
connector that hardcodes `people`, `companies` and `deals` breaks the moment a customer's value lives on a custom
object or a custom attribute.
2. **An object that is not enabled simply does not exist.** Deals, users and workspaces are optional. A perfectly
valid workspace may have no deals object, and the right behaviour is a clear message, not a crash.
3. **Slugs versus IDs.** Objects, lists and attributes are addressable by slug or UUID; slugs are human-editable and
IDs are not. Store IDs for anything you must resolve again later.
4. **The same scope grant returns different data per customer.** Two customers who tick the identical boxes can
return entirely different attribute sets. "We support Attio" is a claim about capabilities, not about fields —
say so before a customer infers otherwise.
## 7. Capture the credentials, and understand the token
From the app's **OAuth tab** in the Developer console:
- **Client ID** and **client secret**
- Endpoints, fixed and identical for everyone:
- authorize — `https://app.attio.com/authorize`
- token — `https://app.attio.com/oauth/token`
- revoke — `https://app.attio.com/oauth/revoke`
- REST API — `https://api.attio.com` (v2); identify — `GET https://api.attio.com/v2/self`
**The flow:**
```
GET https://app.attio.com/authorize
?client_id=&response_type=code
&redirect_uri=&state=
POST https://app.attio.com/oauth/token Content-Type: application/x-www-form-urlencoded
grant_type=authorization_code&code=&redirect_uri=
&client_id=&client_secret=
→ { "access_token": "...", "token_type": "Bearer" }
```
Then `Authorization: Bearer ` on every API call. Attio also accepts HTTP Basic with the token as the
username and a blank password, but recommends Bearer.
**Token behaviour — the part most OAuth checklists get wrong here:**
- **No expiry.** Attio: "`exp` is always `null`, because Attio access tokens do not currently expire." There is no
`expires_in` in the documented response.
- **No refresh token.** None is documented in the token response, and there is no documented refresh grant. Any
refresh machinery in a client is inert against Attio — harmless, but do not let its presence convince anyone that
expiry is handled.
- **A token is workspace-scoped.** `sub` is the workspace ID. `authorized_by_workspace_member_id` records who
clicked, but the grant is the workspace's.
- **Revocation is the real failure mode.** `POST https://app.attio.com/oauth/revoke` with the token in the
`Authorization` header, or form-encoded as a `token` parameter; `204 No Content` on success, `400` if no token was
found or if the header and body disagree. A customer uninstalling or revoking from their side produces the same
outcome with no notice to you. Because tokens never expire, **a 401 means "gone", not "refresh me"** — do not
build a refresh-and-retry loop that will never succeed.
- **`GET /v2/self` is the health check.** It needs no scopes, accepts any Attio token type, and returns `200` with
`{"active": false}` — not an error — for unknown, revoked or deleted tokens. Poll it rather than inferring
liveness from a business endpoint.
Rotating the client secret breaks every token exchange until the new value is deployed; existing access tokens are
not documented as being invalidated by rotation, but do not rely on that. Never rotate without explicit go-ahead.
Report the secret once so the user can paste it into their secret store, say plainly that it is now in the
transcript and can be rotated, then move on.
> **As of 2026-09-20, this platform's Attio connector** uses the authorize, token and API base URLs above, sends
> `client_id`, `redirect_uri`, `response_type` and `state` on the authorize call, and presents the result as a
> `Bearer` token. It treats the access token as non-expiring, which matches Attio. Two divergences from Attio's
> documented worked example are worth raising with the connector's owner rather than assuming they are fine: it
> posts the code exchange as **JSON** rather than `application/x-www-form-urlencoded`, and it **omits `redirect_uri`
> from the exchange body**. It also carries refresh-token configuration that Attio does not document. Confirm the
> current behaviour with the connector's owner — this is a snapshot, not a contract.
### The single-workspace alternative
If the user actually has one Attio workspace and no multi-tenant requirement, **an API key is the right answer and
this run produces no OAuth credentials at all.** Workspace settings → **Developers** → **+ New access token**, name
it, set its scopes. Admins only. "Tokens do not expire, but can be deleted at any time", and — unlike OAuth — the
**scopes of an existing key can be edited later**. Attio's scope catalogue is identical for both token types. Say
this out loud before building an OAuth app for a single-workspace use case.
## 8. Install, approval, and the App Store
Three things people conflate:
1. **Who installs (the customer's side).** Attio lists "install and manage apps and workspace integrations" as an
**admin-only** capability, and the token is workspace-scoped. Expect a customer **admin** to be the one who
completes your flow. A member who tries will not be able to grant workspace-wide access — plan the support
message for that, because "the connect button did nothing" from a non-admin is a common ticket.
2. **Review is not a gate on connecting.** Attio: "If your app uses OAuth, users can install it via the standard
OAuth flow even before the app has been published. However, they will see a warning that the app has not yet been
approved by the Attio team." So a brand-new app can onboard real customers today; the cost is a scary warning on
the consent screen. Publishing removes it. **Private invites** (overflow menu → *Share privately*) are an App
SDK sharing mechanism and are not what an OAuth connector needs, though they carry the same unapproved warning.
3. **Publishing to the App Store is optional and reviewed.** Developer console → **Publish app**. Attio aims to
complete reviews **within 1 week**. Requirements are specific and rejections are cheap to avoid:
- **Developer account**: must not contain "Attio" or impersonate another company; no "dev"/"test" in the name;
correctly capitalized; must have a logo.
- **App name**: must not contain "Attio"; unofficial apps must not imply they are the official integration for a
service; official apps match the service's exact name and capitalization; unofficial apps use title case.
- **Listing text**: three sections — Overview, How It Works, Configure — each **100–3,000 characters**, English,
high quality, headers must not end with a colon, and Attio concepts spelled "records", "objects", "lists",
"people".
- **Submission video**: initial submissions **must** include a screen recording walking through installation,
authentication/configuration and core features — not a generic marketing video.
- **Links**: HTTPS, and every link **must return 200**.
- **Logos**: PNG, no transparency, **minimum 560×560**, 1:1, no rounded corners (Attio applies a 30% radius),
with padding.
- Code review applies to **App SDK** apps, not to a REST/OAuth connector running on your own infrastructure —
for which Attio states there is "no versioning or review process on Attio's side" for shipping updates.
Do not promise a customer an App Store listing before it is accepted, and do not invent compliance, security or
data-retention claims on the submission — ask.
## 9. Webhooks
Attio has two ways to create webhooks, and only one works for a multi-customer connector.
- **API-created (what you want).** `POST /v2/webhooks`, scope **`webhook:read-write`**. Attio: "Creating webhooks
over the API is essential for those building integrations for Attio that will operate for many customers." It is
also the only way to use filters.
- **Settings-page-created.** Note Attio's own caveat: "webhooks created with tokens that were created through our
OAuth sign up flow will not be shown in the developer settings page." So do not expect to eyeball a customer's
OAuth-created webhooks in a UI.
The operational rules that cost the most when missed:
- **Verify `Attio-Signature`** (duplicated as `X-Attio-Signature` for legacy middleware): hex HMAC-SHA256 of the
**raw request body**, interpreted as UTF-8, using the webhook secret returned when the webhook was created.
Restringifying parsed JSON changes the bytes and breaks the signature. Attio recommends signature verification
**over IP allowlisting**, though it does publish a fixed egress IP list for restrictive firewalls.
- **HTTPS only.** HTTP targets are refused.
- **Respond 2xx within 5 seconds.** Anything else retries up to **10 times with exponential backoff over roughly 3
days**, after which the webhook is marked **degraded** and Attio emails you.
- **At-least-once delivery.** Deduplicate on the `Idempotency-Key` header, which is stable across retries.
- **Subscriptions must be unique** per (target URL, event type, filter) within a workspace, or the request is
rejected `409 uniqueness_conflict`. Key order and operation order are ignored when comparing filters, and a `null`
filter equals an empty `$and`. This bites when re-subscribing a customer without tearing the old one down.
- **Delivery is rate limited to 25 requests/second per target URL.** A single shared callback host across many
customers is a shared budget.
- **Filters** are `$and`/`$or` over `field` (dot notation, e.g. `id.object_id`, `parent_object_id`, `actor.type`),
`operator` (`equals` / `not_equals`) and `value`. Filters are only editable and viewable over the API.
- **Event coverage worth knowing:** `record.created` / `.updated` / `.deleted` / **`.merged`**, `note.created` /
`.updated` / `.deleted` and a separate **`note-content.updated`** (Attio notes that body updates do *not* fire
`note.updated`), `task.*`, `comment.*`, `list.*`, `list-entry.*`, `list-attribute.*`, `object-attribute.*`,
`workspace-member.created`, `call-recording.created`.
- **V1 webhook events are deprecated** (`entry.created`, `entry-attribute.updated`, `entry.deleted`) in favour of
the `list-entry.*` V2 equivalents with different payload shapes.
> **As of 2026-09-20, this platform's Attio connector** registers webhooks through the API, filtered by object ID,
> and keeps the returned webhook ID so it can delete the subscription later. Two things to raise with its owner:
> it does not record a `webhook` scope among its requirements even though `POST /v2/webhooks` needs
> `webhook:read-write`, and there is no sign that it verifies the `Attio-Signature` header on inbound deliveries.
> Its recorded rate-limit note also says 100 requests/second across the whole API, which predates both the 25/s
> write limit and the 10/s cap on listing notes.
## 10. Verify end-to-end
Testing in the workspace that owns the app proves little — you are an admin there and the schema is yours. Test the
path a customer takes:
1. Authorize from a **second, unrelated workspace**, through your platform's real connect flow, as that workspace's
**admin**. Note the unapproved-app warning if the app is not published (§8) and confirm your product's copy
prepares customers for it.
2. Confirm the token response really is just `access_token` and `token_type`, and that nothing in your client is
waiting for an `expires_in` or a `refresh_token` that will never arrive.
3. Call `GET /v2/self`. Confirm `active: true`, and check `scope` — it is a **space-separated list of exactly what
the app was configured with**. This is the fastest way to prove the Scopes tab matches reality.
4. Call `GET /v2/objects` and the attributes endpoint for one object. **If this 403s, `object_configuration:read` is
missing** — and every record read will fail the same way (§5).
5. Read records from the second workspace. Then have that workspace add a **custom attribute** and confirm the
connector neither crashes nor silently drops it (§6).
6. If the workspace has no deals object, confirm the connector reports that clearly rather than failing opaquely.
7. Exercise one write and confirm the `:read-write` scope is actually ticked — read and write are separate strings.
8. If webhooks are on: register one, confirm it appears via `GET /v2/webhooks`, verify a signature against the
**raw** body, and re-run subscription to confirm you get a clean result rather than a `409`.
9. **Revoke** from the customer side, or via `POST /oauth/revoke`, and confirm your platform treats the resulting
401 as "reconnect", not "refresh".
10. Drive a realistic sync and watch for `429`s — especially on notes (10/s) and on writes (25/s).
| Symptom | Cause |
| --- | --- |
| Authorization succeeds, then every record list fails with a permission error | `object_configuration:read` not ticked — it is required alongside `record_permission:read` (§5) |
| Reads work, writes fail | `:read-write` not ticked; there is no implicit upgrade from `:read` (§5) |
| List entries fail although records work | Lists need `list_configuration` + `list_entry`, a separate pair (§5) |
| `POST /v2/webhooks` refused | `webhook:read-write` missing from the app's scopes (§9) |
| Tasks or notes fail despite `task:read` / `note:read` | Those endpoints also require `object_configuration:read`, `record_permission:read`, and for tasks `user_management:read` (§5) |
| Changing the requested scopes in client code has no effect | Attio has no `scope` parameter — scopes come from the app's Scopes tab (§5) |
| Token exchange fails right after consent | `redirect_uri` not byte-identical to a registered URI, or omitted from the exchange (§4) |
| Authorize URL rejected before consent | `redirect_uri` does not exactly match a registered URI, or `response_type` is not `code` (§4) |
| Consent screen shows a scary "not approved by Attio" warning | The app is unpublished — expected, and not a blocker to connecting (§8) |
| A non-admin customer cannot complete the flow | Installing apps and integrations is admin-only, and the token is workspace-scoped (§8) |
| Token stops working with no warning; refresh attempts fail | Revoked or uninstalled. Tokens never expire, so 401 means gone — reconnect, do not refresh (§7) |
| Client waits forever for `expires_in` / `refresh_token` | Neither is in the documented token response (§7) |
| Custom fields a customer can see are missing from the sync | Attributes are per-workspace; discover them instead of hardcoding (§6) |
| "Deals is not enabled on this workspace" | Deals, users and workspaces are optional objects (§6) |
| `409 uniqueness_conflict` when subscribing | Same (target URL, event type, filter) already registered; tear down first (§9) |
| Webhook signature never matches | Signature computed over restringified JSON instead of the raw UTF-8 body (§9) |
| Webhooks stopped and an email arrived | Repeated non-2xx or >5s responses marked the webhook degraded after ~3 days of retries (§9) |
| Note edits never arrive | Body changes fire `note-content.updated`, not `note.updated` (§9) |
| Duplicate webhook deliveries | At-least-once delivery; deduplicate on `Idempotency-Key` (§9) |
| 429 on a modest sync | Writes are 25/s, listing notes is capped at 10/s, and record-query scores are summed across *all* apps and tokens in that workspace (§ Platform state) |
| An old doc link lands on a generic docs homepage | `developers.attio.com/docs/*` 308-redirects to `docs.attio.com/` (§ Platform state) |
## 11. Hand off — never commit the secret
- **Do not** write the client secret, an access token, a webhook secret or an API key into source control, a test, a
fixture, a committed `.env`, a ticket, a PR body, or a chat channel. Attio says the same in its own tutorial:
access tokens "are highly sensitive data" and production apps must encrypt them before storing. Values go to the
user, for their secret store or console.
- If a code change is needed (a redirect host, form-encoding the exchange, sending `redirect_uri`, treating 401 as
reconnect rather than refresh, signature verification), keep it secret-free and say what the human must set out of
band.
- Close with: app name and slug, the Attio workspace and account that own it, the client ID, where the secret was
delivered, the authorize/token/revoke endpoints, **the exact list of scope strings ticked on the Scopes tab**, the
redirect URIs registered, whether webhooks are enabled and under which scope, whether the app is published or
still showing the unapproved warning, and anything left for the user to do.
## Stop and ask
Hand back to a human rather than guessing when: the user actually has **one** workspace and an API key is the right
answer (that run produces no OAuth credentials at all); the scope selection needs to change on a live app, because
Attio does not document whether already-issued tokens pick up new scopes; `private_collection:*` is on the table,
because it reaches collections the authorizing admin's own permissions would not; a customer's admin must be the one
to install and only a member is available; the App Store submission asks for compliance, security, data-retention or
volume claims, or needs a demo video; the connector must handle customer-defined custom objects or attributes and
nobody has decided what "supported" means; or the Developer console does not match the **Platform state** section
above.
## References
- Developer platform overview — https://docs.attio.com/docs/overview
- Developer console (create and manage apps) — https://build.attio.com
- Connect an app to Attio through OAuth (the worked flow) — https://docs.attio.com/rest-api/tutorials/connect-an-app-through-oauth
- OAuth authorize endpoint — https://docs.attio.com/docs/oauth/authorize
- OAuth token endpoint — https://docs.attio.com/docs/oauth/token
- OAuth introspect endpoint — https://docs.attio.com/docs/oauth/introspect
- OAuth revoke endpoint — https://docs.attio.com/docs/oauth/revoke
- Identify the current token (`GET /v2/self`) — https://docs.attio.com/rest-api/endpoint-reference/meta/identify
- Authenticating requests (OAuth vs API key, scopes) — https://docs.attio.com/rest-api/guides/authentication
- REST API overview — https://docs.attio.com/rest-api/overview
- OpenAPI specification (authoritative scope catalogue and per-endpoint scopes) — https://api.attio.com/openapi/api
- How to access the OpenAPI spec — https://docs.attio.com/rest-api/endpoint-reference/openapi
- Objects and lists (the data model) — https://docs.attio.com/docs/objects-and-lists
- Users and workspaces (workspace members, workspace-scoped access) — https://docs.attio.com/docs/users-and-workspaces
- Slugs and IDs — https://docs.attio.com/docs/slugs-and-ids
- Attribute types — https://docs.attio.com/rest-api/attribute-types/attribute-types
- List objects (required scopes) — https://docs.attio.com/rest-api/endpoint-reference/objects/list-objects
- List attributes (objects vs lists scopes) — https://docs.attio.com/rest-api/endpoint-reference/attributes/list-attributes
- List records (required scopes) — https://docs.attio.com/rest-api/endpoint-reference/records/list-records
- Create a webhook — https://docs.attio.com/rest-api/endpoint-reference/webhooks/create-a-webhook
- Configuring webhooks (signing, retries, filters, egress IPs) — https://docs.attio.com/rest-api/guides/webhooks
- Handling rate limits — https://docs.attio.com/rest-api/guides/rate-limiting
- Paginating API results — https://docs.attio.com/rest-api/guides/pagination
- Filtering and sorting — https://docs.attio.com/rest-api/guides/filtering-and-sorting
- The publication lifecycle (develop, share privately, publish) — https://docs.attio.com/share/the-publication-lifecycle
- Private invites — https://docs.attio.com/share/private-invites
- Publishing to the App Store (review, ~1 week) — https://docs.attio.com/share/publishing-to-the-app-store
- App listing requirements — https://docs.attio.com/share/app-listings
- Logo requirements — https://docs.attio.com/share/logos
- Listing image requirements — https://docs.attio.com/share/listing-images
- Shipping updates (no review for REST API apps) — https://docs.attio.com/share/shipping-updates
- Code review requirements (App SDK only) — https://docs.attio.com/share/code-review
- REST API changelog — https://docs.attio.com/changelog/rest-api
- Documentation index (every page, machine readable) — https://docs.attio.com/llms.txt
- Help: manage members, admins and teams (admin-only capabilities) — https://attio.com/help/reference/workspace-settings-billing/manage-members-and-admins
- Help: generate an API key (single-workspace alternative) — https://attio.com/help/reference/apps/generating-an-api-key
- Help: manage standard objects — https://attio.com/help/reference/workspace/objects
- Help: apps in Attio — https://attio.com/help/academy/introduction/apps
- Public App Store — https://attio.com/apps
- Attio developer platform (marketing overview) — https://attio.com/platform/developers
## bamboohr-oauth-app
URL: https://docs.unified.to/skills/bamboohr-oauth-app/SKILL.md
# BambooHR API Credentials
**Read this before you start: BambooHR has two credential models, and the one you need may not be OAuth.**
1. **Per-user API key + company subdomain, over HTTP Basic auth.** This is what most BambooHR integrations run on
today. It needs no relationship with BambooHR at all: each customer generates a key inside their own account and
hands it to you with their subdomain. It is still fully documented and most endpoints accept it.
2. **OAuth2 authorization code, with a client ID and secret from the BambooHR Developer Portal.** Historically this
was partner-gated — you had to contact BambooHR. **Since 2025-04-15 developers can self-register** at
`https://developers.bamboohr.com`, register an organization, create an application, pick scopes, and get a client
ID and secret without a partnership. What remains gated is *production* standing: the Developer Terms let BambooHR
require review and approval before granting production access, and a **Marketplace listing plus a sandbox account
still require the Marketplace Partner Program** (which has a 100-customer bar and a security-audit requirement).
So: you can almost certainly get OAuth credentials by yourself. You cannot get a sandbox, a listing, or a guarantee of
production standing by yourself. Decide which of those you actually need before doing anything (§1).
Three things about this platform are expensive to get wrong, whichever model you pick. **Every host is per-customer** —
authorize, token and API all live on `https://{companyDomain}.bamboohr.com`, so your connect flow must collect the
subdomain *before* it can even build an authorize URL. **The credential inherits the permissions of the user behind
it**, so a key or token from a limited user returns `200` with partial data rather than an error — the single most
misdiagnosed BambooHR problem (§8). And **BambooHR answers some list endpoints with `404` when credentials are bad**,
so "not found" is routinely an auth failure wearing a disguise (§10).
## Inputs to collect before you start
Ask in one batch. Never invent.
| Input | Notes |
| --- | --- |
| **Which credential model** | OAuth app, per-customer API keys, or both (§1) |
| **New app or edit to an existing one** | A new client ID re-authorizes every existing OAuth connection (§1) |
| **Developer Portal account owner** | Email and organization name; who accepts the Developer Terms (§2) |
| **App name, description, logo** | Shown to the customer's user during authorization (§3) |
| **Redirect URIs** | Every callback host you serve, exact strings (§4) |
| **Scope set** | Which objects the connector reads and writes (§5) |
| **Test BambooHR account** | Which account to develop against; the Terms cap you at two (§2) |
| **Customer subdomain(s)** | Needed for any real authorize or API call (§7) |
| **Are you pursuing a Marketplace listing?** | Business decision — do not assume either way (§9) |
## Quick Start
1. Pick the credential model, and confirm whether a **new** OAuth app is really needed (§1).
2. Self-register at the Developer Portal and create/claim a test BambooHR account (§2).
3. Register the application: organization → app → scopes → redirect URIs (§3).
4. Add **every** redirect URI, exactly (§4).
5. Select scopes from BambooHR's published catalog — include `openid` and `offline_access` (§5).
6. Check what the connector on your side actually expects before you commit to a scope set (§6).
7. Capture client ID and secret; for the API-key path, walk the customer through key creation instead (§7).
8. Work out which **user** the credential belongs to — this decides what data you get (§8).
9. Check rate limits, production review and the listing gate (§9), then verify end to end (§10) and hand off (§11).
## Platform state (verified 2026-09-20 — re-verify before trusting)
Dates below are BambooHR's own changelog entries. If the portal or docs do not look like this, stop and report what
you actually see rather than clicking on.
- **2025-03-31 — OAuth 2.0 became the primary documented auth method**, replacing legacy API-key generation via
`oidcLogin`.
- **2025-04-14 — new applications can no longer use `oidcLogin`** (the OpenID Connect → `id_token` → BambooHR API key
flow). Existing apps may keep using it with the `legacy.login` scope. If you are reading an older runbook that
exchanges an ID token plus an "Application Key" for a user's API key, that path is closed to you.
- **2025-04-15 — Developer Portal self-registration opened.** Register your organization, create an application,
select scopes, obtain client ID and secret. Before this you had to contact BambooHR directly.
- **2025-05-12 — `POST /api/v1/login` marked deprecated**, OAuth 2.0 recommended. No sunset date has been set, and
BambooHR states that a deprecated label alone does not announce a cutoff.
- **2025-07-03 — API routing centralized** to `https://{companyDomain}.bamboohr.com/api/`, replacing
`https://api.bamboohr.com/api/gateway.php/{companyDomain}/`. The old structure still works; new work uses the new one.
- **2026-02-18 — send credentials on every request.** BambooHR still returns `401` with `WWW-Authenticate: Basic
realm="..."` when credentials are absent; clients that wait for that challenge double their round trips and burn
rate-limit budget. That header will not be included in future API versions.
- **2026-09-16 (four days ago) — rate-limited requests now return `429` with `Retry-After`, not `503`.** The limits
themselves did not change. `503` now means genuine unavailability. Note the collision this creates: `429` was
already documented as "the account has reached its employee limit" (§10).
- **API keys are not deprecated.** Endpoint documentation added through 2026 keeps saying "supports both Basic Auth
and OAuth 2.0". Treat Basic auth as a first-class path, not a legacy one.
- **The scope catalog is published.** The OpenAPI security scheme behind the API reference carries **220 named
scopes** (counted 2026-09-20), with `/authorize.php` and `/token.php` as relative authorize and token URLs — they
are relative because the host is the customer's.
## 1. Decide: which model, and reuse or register new
**Choose the credential model first.**
- **API key + subdomain** — no BambooHR relationship, no review, no app. The customer does the work; you do onboarding
UX. The costs are all operational: keys are tied to a human user and die when that user is disabled (§8).
- **OAuth2** — better security story, granular scopes, refresh tokens, and the model BambooHR steers new integrations
toward. Costs: a Developer Portal app, a redirect-URI registration, scope selection, and exposure to the production
review clause in the Developer Terms.
- **Both** is common and usually right for a multi-tenant connector: OAuth for new customers, API keys for those who
will not run an OAuth flow.
**Then decide reuse vs new.** A new OAuth app means a **new client ID**, and every existing OAuth connection is bound
to the old one — every customer would re-authorize. Reuse the existing app for: adding a redirect URI, adding a scope,
rotating a compromised secret, or diagnosing a failure. Register a new app only when the user explicitly wants one (a
replacement for a compromised app, a separate product, a deliberate migration off `oidcLogin`). Say which path you are
taking before you touch the portal.
## 2. Accounts: Developer Portal and something to test against
**Developer Portal** — `https://developers.bamboohr.com/login`. Free account, self-registration open since 2025-04-15.
Use of the portal is subject to the BambooHR Developer Terms of Service, which the account owner accepts.
**Something to develop against.** BambooHR's own getting-started list includes "create a test BambooHR account to
develop against". The Developer Terms constrain this sharply, and these are the constraints most likely to trip up
automated testing:
- **No more than two test accounts.**
- **Fake or dummy data only** — no customer integration data in a test account.
- **Test accounts must be used manually.** No scripts or bots to generate or drive them.
A free-trial account (`https://www.bamboohr.com/signup/`) is the usual way to get one. A *sandbox* in BambooHR's sense
is different: it is provisioned once you are accepted into the Marketplace Partner Program (§9).
**Human-only steps.** Email verification, MFA, accepting the Developer Terms, signing the Marketplace Agreement,
submitting a W-9/W-8 — hand these back rather than looping on them.
**If this session has no browser automation** (the usual case for a CLI or cloud run), do not pretend to click. Give
the user an exact ordered click path with the literal values to paste — the redirect URIs from §4 and the scope list
from §5 — and continue once they report back with the client ID.
## 3. Register the application
In the Developer Portal: register your **organization**, then create an **application**, **select the scopes** it
needs, and **register its redirect URIs**. That sequence is BambooHR's own description of self-registration; the exact
field labels are behind a portal login and are not published, so **report what the form actually shows** rather than
asserting the shape of it. If the portal asks for something this skill does not mention — an environment toggle, a
review submission, a company-verification step — write it down and add it here afterwards.
The portal is also where redirect URIs are managed after creation, per BambooHR's Marketplace requirements.
## 4. Redirect URIs
Register **every** callback host your platform serves. For Unified.to these are one per data center; confirm the
current list with the platform owner rather than assuming:
```
https://api.unified.to/oauth/code # us (default)
https://api-eu.unified.to/oauth/code # eu
https://api-au.unified.to/oauth/code # au
https://api-dev.unified.to/oauth/code # dev
```
Notes that cost a cycle each:
- **Exact match.** BambooHR's docs are explicit: "even small differences (such as an extra slash or capitalization
change) can cause authentication errors." The same string must appear in the authorize request *and* the token
exchange, where `redirect_uri` is a required parameter for both `authorization_code` and `refresh_token` grants.
- **The redirect URI is yours and constant; the authorize host is the customer's.** The authorize host
`https://{companyDomain}.bamboohr.com/authorize.php` changes per customer, the callback does not. One serves every
tenant; carry the tenant in `state`, which is exactly how BambooHR's own partner OIDC guidance says to do it.
- **Whether the portal accepts several redirect URIs per app is not documented publicly.** BambooHR's partner guidance
talks about whitelisting URIs (plural) and routing tenants via `state`, but confirm in the portal. If an app accepts
only one, that is a finding to report — a separate app per data center, or a single shared callback host, is an
architecture decision, not something to improvise.
## 5. Scopes
Scopes are **space-delimited**, which in the authorize URL means `+`-joined:
```
https://{companyDomain}.bamboohr.com/authorize.php?request=authorize&state=&response_type=code
&scope=openid+offline_access+employee+employee:job&client_id=&redirect_uri=
```
Two are structural rather than data-bearing:
| Scope | Why |
| --- | --- |
| `openid` | "Allows the application to authenticate with BambooHR" |
| `offline_access` | **The refresh token is only returned if `offline_access` was in the original authorize request.** Add it later and every already-authorized customer is still without a refresh token. |
The rest are data scopes, `.write` suffixed for mutation. A sample of the ones an HRIS/ATS connector reaches for, with
BambooHR's own descriptions:
| Scope | Covers |
| --- | --- |
| `employee` / `employee.write` | All non-sensitive employee information |
| `employee:job`, `employee:compensation`, `employee:contact`, `employee:name`, `employee:custom_fields`, … | Per-field-group employee access, each with a `.write` twin |
| `sensitive_employee:address`, `sensitive_employee:protected_info`, `sensitive_employee:creditcards` | Sensitive employee data, separated deliberately |
| `time_off` / `time_off.write`, `time_off:requests`, `time_off:policies`, `time_off:categories` | Time off |
| `time_tracking` (+ `:timesheets`, `:configurations`, `:employees`, `:kiosks`, `:time_clocks`, …) | Hours worked and time-tracking administration |
| `scheduling:shifts`, `scheduling:schedules` | Shifts within schedules |
| `hiring:applications`, `hiring:job_openings`, `hiring:offers`, `hiring:talent_pools` | ATS |
| `company:info`, `company:details`, `company_file` | Company data and files |
| `report`, `benefit`, `holidays`, `training`, `goal`, `user`, `webhooks` | Reports, benefits, holidays, training, goals, users, webhooks |
Three traps here:
- **There is no single scopes page in the guides.** The catalog lives in the OpenAPI security scheme behind the API
reference (220 scopes on 2026-09-20) and in the portal's scope picker; individual endpoint pages and changelog
entries name the scope each operation needs. Read the endpoint you actually call.
- **Naming is not uniform across families.** The catalog uses `employee:job`, while BambooHR's own List Employees
announcement names `employees.read`, `employees:name.read` and `employees:job.read`. Do not extrapolate a scope
string from a sibling — look it up on the endpoint page, and test it.
- **`email` is documented for SSO, not for the API.** BambooHR's OpenID Connect SSO guide uses `openid email
company_id`, but `email` and `company_id` are **not** in the API scope catalog. If your authorize request carries
`email`, verify it is accepted rather than assuming it is harmless.
Ask for what the connector calls and no more. Scopes cap what a token may request; they never exceed what the
authorizing user may do (§8).
## 6. What Unified.to's BambooHR connector expects
**As of 2026-09-20, Unified.to's BambooHR connector supports both credential models.** Treat this as a dated
observation and **confirm it with the connector's owner before registering anything** — connector configuration
changes more often than a vendor portal does.
- **Both auth types are configured**: a token/Basic-auth connection built from an **API key plus the company
subdomain** (the key is sent as the Basic username with a throwaway password), and an **OAuth2 authorization-code**
connection.
- **The subdomain is collected from the customer as a first-class credential**, alongside the key or the OAuth
credentials, because every host is per-company. The OAuth configuration is explicitly marked as needing that
subdomain, and also as needing a **developer/application key** in addition to client ID and secret — worth
clarifying with the owner, since the developer-key requirement belongs to the retired `oidcLogin` flow (§Platform
state) rather than to current OAuth2.
- **Hosts** are `https://{subdomain}.bamboohr.com/api` for the API, `https://{subdomain}.bamboohr.com/authorize.php`
for authorization and `https://{subdomain}.bamboohr.com/token.php` for the token exchange — the per-company form,
not the retired `api.bamboohr.com/api/gateway.php/...` gateway.
- **Every authorization requests `openid`, `email` and `offline_access`**, plus per-object scopes: the `hiring:*`
family for ATS objects, `company_file` for documents, the `employee:*` and `sensitive_employee:*` families plus
`report` for employees, `time_off` and `user` for time off, `time_tracking` and `scheduling:shifts` for attendance
and shifts, `company:info` for locations, and `benefit` for benefits. Note `email` against the §5 warning, and note
that at least one time-tracking scope was recorded as inferred by analogy rather than read off BambooHR's catalog.
- **BambooHR's sandbox is recorded as not self-serve**, gated on acceptance into the Marketplace Partner Program.
- **The connector translates certain `404`s into auth errors**, because BambooHR returns `404` rather than `401` on
several list endpoints when credentials are invalid. That is a real platform behaviour, not a local workaround (§10).
## 7. Capture the credentials
### OAuth app
From the Developer Portal application: **client ID** and **client secret**. Assume the secret is shown once and
capture it immediately; if the portal lets you re-read it, note that here. Record alongside it:
- Authorize URL: `https://{companyDomain}.bamboohr.com/authorize.php?request=authorize`
- Token URL: `https://{companyDomain}.bamboohr.com/token.php?request=token`
- The exact scope string you registered, and the exact redirect URIs
The token response looks like this — `expires_in` is **3600 seconds**, and `refresh_token` appears only if
`offline_access` was requested:
```
{ "access_token": "...", "expires_in": 3600, "token_type": "Bearer", "scope": "",
"refresh_token": "...", "id_token": "...", "companyDomain": "" }
```
Refreshing posts `grant_type=refresh_token` with `client_id`, `client_secret`, `refresh_token` **and `redirect_uri`**
to the same token URL. BambooHR's documentation shows both exchanges as a JSON-looking body without naming a content
type; if the exchange is rejected without a useful message, try the other encoding before assuming the credentials are
wrong (§10).
Rotating the secret invalidates the old one: existing access tokens live out their hour, but every exchange and
refresh fails until the new secret is deployed. Never rotate without explicit go-ahead and a cutover plan.
### Per-customer API key
This is the path the customer walks, so give them the steps rather than doing it for them:
1. Sign in to BambooHR and open the **user context menu** from their name. BambooHR's docs say lower-left; some UI
versions put it upper-right. Admins also reach key management at **Settings → Account → API Keys**.
2. Choose **API Keys**. The option only appears if the user has sufficient permission.
3. Create a key and **name it** — naming is required, and an unnamed pile of 160-bit hex strings is unmanageable.
4. **Copy it immediately.** Since 2018, keys are encrypted after creation and cannot be retrieved again; a lost key
must be replaced.
5. Send you the key **and the company subdomain** — the text before `.bamboohr.com` in their login URL.
The key is used as the HTTP Basic **username**, with any string as the password:
```
curl -i -u "{API Key}:x" "https://{companyDomain}.bamboohr.com/api/v1/employees/directory"
```
Account Owners and Admins can see every key connected to their account — creator, name, created and last-used date —
and can **disable** keys (reversibly, in bulk) or delete them. Disabling is the safe first move during an incident;
deletion is permanent.
## 8. Permissions: what the credential can actually see
**This is the section that prevents the classic misdiagnosis.**
BambooHR authenticates and permissions every API request "as if a real user were using the software". The permissions
of the user behind the credential determine which employees and which fields the request may read or edit. Scopes sit
*on top of* that: a scope can narrow access, never widen it.
The failure mode is quiet. A key created by a department manager returns `200 OK` with the employees that manager can
see — a subset — and omits field groups they cannot view. Nothing errors. The integration looks like it is syncing;
it is syncing a fraction of the company, and the gap surfaces weeks later as "your sync is missing people".
What to do about it:
- Have the customer create the key (or authorize the OAuth flow) as a **user whose access level covers everything the
integration must read**, ideally a dedicated service user rather than a person who will change roles or leave.
- Say plainly that a key **dies when its user is disabled or deleted**, and that admins can disable or delete any key
in the account. Offboarding an employee is a common cause of a connection that "suddenly stopped".
- Know the documented carve-outs. Since 2025-03-10, only **admin** users can retrieve user email addresses from
`/v1/meta/users/`. Permissioned webhooks are likewise tied to the access level of the user who created them.
- When data looks partial, **compare against what that user sees in the BambooHR UI** before touching code. If the UI
shows the same subset, the integration is correct and the permission grant is the bug.
## 9. Rate limits, production review, sandbox and the Marketplace
**Rate limits.** BambooHR publishes no numeric limits and reserves the right in the Developer Terms to impose or
adjust them at its discretion. What is documented:
- Requests deemed too frequent are throttled. Since **2026-09-16** that is `429` with a **`Retry-After`** header;
before then it was `503`. Honour `Retry-After`.
- Repeated use of an **unknown API key** disables API access for a period, returning `403` while the block lasts. The
user can still log in to the website, which makes this easy to misread as a permissions problem.
- Requests sent without credentials cost an extra round trip and consume budget — send credentials preemptively.
**Production review.** The Developer Terms state BambooHR may require new integrations, or material changes to
existing ones, to be submitted for review and approval **before granting or restoring production access**, and may
approve or reject at its sole discretion. Self-registration gets you credentials; it does not exempt you from this.
**Sandbox and Marketplace listing** are the same gate. The Marketplace Partner Program requires, per BambooHR's
published requirements: executing the Marketplace Agreement, a W-9 (or W-8), a **third-party security audit** (SOC 2
Type 1 or 2, ISO 27001, FedRAMP or HITRUST) or a security questionnaire, a Developer Portal account, and listing
assets (documentation, logo, 4–6 product images, a help guide, a demo URL). The public application page also asks for
**at least 100 total customers**, participation in Crossbeam, and a support-response commitment. **A sandbox account
is provided once you are accepted.**
Everything in that paragraph is a business decision — eligibility, security attestations, agreements, customer-count
claims. Do not answer any of it on the user's behalf; hand it back (§Stop and ask).
## 10. Verify end-to-end
Authorizing against your own test account proves less than it looks. Test the customer path:
1. Start from the **subdomain prompt** — confirm your connect flow collects it before building the authorize URL, and
that a wrong subdomain fails visibly rather than silently.
2. Run a full authorize → callback → token exchange against a real company domain.
3. Confirm the response carries a **`refresh_token`** (it will not, without `offline_access`), then force a refresh
and confirm the refreshed token still works.
4. Make one **read call per scope family** you registered, and compare the result against what the authorizing user
sees in the BambooHR UI (§8).
5. For the API-key path, run the same read calls with `-u "{API Key}:x"` and the customer's subdomain.
| Symptom | Cause |
| --- | --- |
| `404` on a list endpoint that should have data | Very often bad or insufficient credentials — BambooHR returns `404` here instead of `401` (§6). Check the credential before hunting for the resource. |
| `401 Unauthorized` | No credentials sent. Send them preemptively rather than waiting for the `WWW-Authenticate` challenge. |
| `403 Forbidden` on some endpoints, `200` on others | The user's access level, not the scope set (§8). |
| `403` on everything, website login still fine | API access temporarily disabled after repeated use of an unknown API key (§9). Wait it out; fix the key. |
| `429` **with** `Retry-After` | Rate limited (since 2026-09-16). Back off for the stated interval. |
| `429` **without** `Retry-After` | Account employee limit reached — a completely different problem. Check the header before retrying. |
| `503` | Genuine unavailability. Since 2026-09-16 it no longer means rate limiting. |
| Token response has no `refresh_token` | `offline_access` was missing from the **original** authorize request. Re-authorize; a later scope change does not retrofit it. |
| Redirect/`redirect_uri` error | Not an exact match with the registered URI — trailing slash, case, scheme — or omitted from the token exchange (§4). |
| Authorize page 404s or shows the wrong company | Wrong `companyDomain` in the host. |
| Token exchange rejected with no useful message | Try the other body encoding before assuming the secret is wrong (§7). |
| Sync returns a subset of employees or missing fields | Permission inheritance (§8), not a mapping bug. |
| Connection worked for months, then stopped for one customer | Their key's user was disabled, or an admin deleted/disabled the key (§7, §8). |
## 11. Hand off — never commit the key or the secret
- **Do not** write a client secret or a customer API key into source control, a test, a fixture, a committed `.env`,
a ticket, a PR body, or a chat channel. Values go to the user, for the secret store or console.
- **Do not paste a live key into a support email.** BambooHR's API support page asks for the call you made and your
key/token details; send the endpoint, parameters and timestamps, and redact the credential.
- If a code change is needed (a new callback host, a scope, subdomain handling), keep it credential-free and say what
the human must set out of band.
- Close with: which credential model; app name and Developer Portal organization; client ID; where the secret was
delivered; the authorize/token URL shapes including the `{companyDomain}` placeholder; the exact scope string; the
redirect URIs registered; which user the test credential belongs to and what access level it has; and anything left
for the user to do.
## Stop and ask
Hand back to a human rather than guessing when: the work requires a sandbox, a Marketplace listing, or anything from
the partner application (security attestations, customer counts, agreements, W-9, Crossbeam) — these are business and
legal decisions; BambooHR asks you to submit the integration for production review; the Developer Portal allows only
one redirect URI per app and your platform needs four; a customer must create the credential under a higher access
level or a dedicated service user; a scope you need is absent from the published catalog (including `email`) and
behaviour must be tested rather than assumed; the connector's own expectations (§6) do not match what the portal
offers; or the portal and docs do not match the **Platform state** section above.
## References
Verified 2026-09-20 — every URL below returned HTTP 200.
- Getting Started With The API (OAuth flow, API keys, Basic auth) — https://documentation.bamboohr.com/docs/getting-started
- Technical Overview (status codes, throttling, `X-BambooHR-Error-Message`) — https://documentation.bamboohr.com/docs/api-details
- Historical Changes to the API (OAuth 2.0, `oidcLogin`, self-registration, routing) — https://documentation.bamboohr.com/docs/past-changes-to-the-api
- Planned Changes to the API (503 → 429, effective 2026-09-16) — https://documentation.bamboohr.com/docs/planned-changes-to-the-api
- API reference — carries the OAuth2 security scheme and its scope catalog — https://documentation.bamboohr.com/reference/list-employees
- API Support — https://documentation.bamboohr.com/docs/api-support
- Permissioned Webhooks (access-level inheritance) — https://documentation.bamboohr.com/docs/permissioned-webhooks
- Single Sign-On (SSO) with OpenID Connect — https://documentation.bamboohr.com/page/single-sign-on-sso-with-openid-connect
- Using OpenID Connect to Authenticate and Retrieve an API Key (the retired `oidcLogin` path) — https://documentation.bamboohr.com/page/authenticate-integration
- BambooHR Developer Portal — https://developers.bamboohr.com/login
- Developer Terms of Service (production review, test-account limits, rate limits) — https://www.bamboohr.com/legal/developer-terms-of-service
- Marketplace Program Requirements — https://www.bamboohr.com/partner-programs/marketplace-requirements
- Marketplace Application (eligibility bar) — https://www.bamboohr.com/partner-programs/apps-marketplace-application
- Partner Programs overview — https://www.bamboohr.com/partner-programs/overview
- Admin API Keys Settings — https://www.bamboohr.com/product-updates/admin-api-keys-settings
- API Key Management Enhancements (disable vs delete, last-used) — https://www.bamboohr.com/product-updates/api-key-management-enhancements
- Create a New API Key (customer-facing help article) — https://help.bamboohr.com/s/article/587919
- API Error Code Definitions (customer-facing help article) — https://help.bamboohr.com/s/article/587843
- BambooHR free-trial signup (test account) — https://www.bamboohr.com/signup/
## bitbucket-oauth-app
URL: https://docs.unified.to/skills/bitbucket-oauth-app/SKILL.md
# Bitbucket Cloud OAuth 2.0 Consumer Registration
Get a working Bitbucket Cloud OAuth2 client for a platform that connects many customers' Bitbucket workspaces. A
successful run produces: an OAuth consumer created inside a workspace you control, one callback URL per consumer,
a ticked permission set, and a **Key** and **Secret** pair.
**Read this first: Bitbucket Cloud is an Atlassian product, but its OAuth is not Atlassian 3LO.** There is no
developer console app, no `auth.atlassian.com`, no `audience` parameter, no `offline_access` scope, no cloudid, and
no `/ex/{product}/{cloudid}/…` addressing. The consumer is created in **workspace settings**, the endpoints are on
`bitbucket.org`, and the API is `https://api.bitbucket.org/2.0`. If you arrived here from an Atlassian-console
skill, put it down — nothing in it applies except the company name. See §1.
Four things are expensive to get wrong here, and three of them are invisible at registration time:
1. **Scopes are checkboxes on the consumer, not parameters on the authorize URL.** Consent is all-or-nothing: every
customer grants the consumer's whole permission set, and changing the set changes what every future
authorization grants (§6).
2. **One consumer takes one callback URL, and a `redirect_uri` sent in a request must sit *under* it.** Four
callback hosts means four consumers, four Key/Secret pairs (§5).
3. **Access tokens are short — one to two hours — and refresh tokens rotate and idle out after three months.** A
client that does not persist the rotated refresh token passes its smoke test and fails days later (§8).
4. **The consumer lives in a workspace, so every admin of that workspace can read its Secret** — and deleting the
consumer instantly kills every customer token issued from it (§3, §4).
## Inputs to collect before you start
Ask in one batch. Never invent.
| Input | Notes |
| --- | --- |
| **Which workspace will own the consumer** | It is a workspace object, not a personal app (§3) |
| **Consumer name** and description | Name must be unique within the account; shown on the consent dialog |
| **Callback URL** — exactly one per consumer | Blocking. See §5 before promising anything |
| **Permission set** to tick | Becomes the scope set for every customer (§6) |
| **Private consumer or not** | Decides whether `client_credentials` is available (§9) |
| **Does the client persist rotated refresh tokens?** | Blocking — see §8 |
| **Is a user-delegated token actually the right credential?** | Access tokens and API tokens are real alternatives (§10) |
| **New consumer, or an edit to an existing one** | A new Key orphans every existing customer connection (§2) |
| **Cloud or Data Center** | This document is Cloud only |
## Quick Start
1. Confirm this is Bitbucket **Cloud**, and that an OAuth consumer — not an access token — is the right
credential (§1, §10).
2. Confirm a **new** consumer is needed; an edit keeps every existing customer connected (§2).
3. Sign in as an admin of the workspace that should own the consumer (§3).
4. **Settings cog → Workspace settings → Apps and features → OAuth consumers → Add consumer** (§4).
5. Enter the name, description and the **single Callback URL**; decide the private-consumer setting (§4, §5).
6. Tick the **Permissions** the connector actually needs — this is the scope set (§6).
7. **Save**, then expand the consumer row to reveal the generated **Key** and **Secret** (§7).
8. Confirm the client stores the **rotated** refresh token on every refresh (§8).
9. Verify with a real authorize → callback → API read → double refresh on a different account (§12).
10. Hand the credentials over; never commit them (§13).
## Platform state (verified 2026-09-20 — re-verify before trusting)
- **Consumers are created in workspace settings**, not a developer console: avatar → pick the workspace →
**Settings cog → Workspace settings → Apps and features → OAuth consumers → Add consumer**. Atlassian's support
docs add: *"If you're giving access to a workspace, make sure you have administrative access."*
- **The endpoints are on `bitbucket.org`**: `https://bitbucket.org/site/oauth2/authorize` and
`https://bitbucket.org/site/oauth2/access_token`. The API base is `https://api.bitbucket.org/2.0`.
- **As of May 4th, 2026, all OAuth 2.0 authenticated API requests must be directed at `https://api.bitbucket.org`**
with the token as a Bearer token, per Atlassian's authentication reference. A client still calling the API
through `bitbucket.org` is on borrowed time.
- **Three grant flows plus a custom JWT flow.** Authorization Code (4.1), Client Credentials (4.4), and the
Bitbucket JWT grant `urn:bitbucket:oauth2:jwt` for Connect add-ons. **Resource Owner Password Credentials (4.3)
is no longer supported.**
- **Implicit grant: the two Atlassian pages disagree.** The developer reference says *"Note that Implicit Grant
(4.2) and Resource Owner Password Credentials Grant (4.3) are no longer supported"*; the support article still
documents implicit grant as a working flow. The developer reference is the newer page (it carries the May 2026
endpoint change). Do not build on implicit grant either way.
- **Access token lifetime: the same two pages disagree.** The developer reference says *"Our access tokens expire
in one hour"*; the support article says *"Our access tokens expire in two hours."* **Read `expires_in` from the
token response and never hardcode either number** (§8).
- **Refresh tokens rotate and idle out at three months.** *"Once a refresh token has been used to issue a new
access token, a new refresh token will be issued as part of the response. The existing refresh token will expire
shortly after and should not be used again."* And: *"A refresh token which is not used to generate an access
token will expire after 3 months."*
- **The scope parameter is not how you ask for scopes.** *"Scopes are defined on the client/consumer instance.
Bitbucket Cloud does not currently support the use of the optional scope parameter on the individual grant
requests."* (§6).
- **App passwords are gone or going.** Atlassian's authentication reference now says flatly: *"App passwords are
deprecated. Use API tokens."* Per the changelog, new app passwords could no longer be created from **9 September
2025**, brownouts run from **9 June 2026**, and app passwords are **fully deprecated on 28 July 2026** — during
brownouts, API requests fail with **401** and Git-over-HTTPS with **410**. **API tokens** are the replacement:
Atlassian account → Security → *Create and manage API tokens* → *Create API token with scopes*, select Bitbucket
as the app, **expiry required, maximum one year**, used as Basic auth (Atlassian email + token) or, since
**18 August 2026**, as a Bearer token.
- **The native Bitbucket issue tracker is removed.** Per the changelog entry of **20 August 2026**, *"the API
endpoints that support Issue Tracker are now fully removed."* The `issue` and `issue:write` scopes still exist in
the scope list but no longer have endpoints behind them on Bitbucket's own tracker.
- **There is no cross-workspace `GET /workspaces` collection any more.** Atlassian's Workspaces reference lists
`GET /user/workspaces` and `GET /workspaces/{workspace}`; the cross-workspace listing is deprecated. Anything
resolving "which workspaces can this token see" must use `/user/workspaces`.
- **No review, approval, install cap or marketplace gate is documented for a plain OAuth consumer.** The only
lifecycle operations Atlassian documents are create, reveal Key/Secret, and delete. That is genuinely simpler
than most portals — and it also means nothing stops a customer's admin deleting the consumer (§4).
- **Rate limits are counted per user, not per app**, and the scaled-limit tier is explicitly *not* available to
OAuth (§11).
If the workspace settings pages do not look like this, stop and report what you actually see rather than clicking on.
## 1. This is not the Atlassian Developer Console — confirm you are in the right place
A reader coming from Jira or Confluence will expect an Atlassian 3LO app. Bitbucket Cloud does not use one. The
differences are total, not cosmetic:
| | **Atlassian 3LO (Jira, Confluence)** | **Bitbucket Cloud OAuth 2.0** |
| --- | --- | --- |
| Where the app lives | Atlassian Developer Console, owned by an Atlassian account | **Workspace settings → OAuth consumers**, owned by a workspace |
| Authorize / token host | `auth.atlassian.com` | **`bitbucket.org/site/oauth2/…`** |
| API host | `api.atlassian.com/ex/{product}/{cloudid}` | **`api.bitbucket.org/2.0`** — no cloudid, no indirection |
| Asking for scopes | `scope` on the authorize URL | **Checkboxes on the consumer**; the request cannot widen them |
| Refresh token opt-in | `offline_access` scope | None — refresh tokens come with the authorization_code grant |
| Extra required authorize params | `audience`, `prompt=consent` | None documented |
| Two-legged app token | Not part of 3LO | **`client_credentials`**, for private consumers (§9) |
Two Atlassian app platforms *do* sit over Bitbucket and are not this: **Atlassian Connect** (heading for end of
support — the changelog has been steadily removing Connect APIs through 2026) and **Forge**, which has its own
scope family spelled `read:repository:bitbucket`, `write:pullrequest:bitbucket` and so on. Those Forge/API-token
scopes are a different list with different rules — Atlassian states that *"Forge app and API token scopes do not
implicitly grant access to other scopes, for example, write:repository:bitbucket does not implicitly grant access
to read:repository:bitbucket"*, which is the opposite of how OAuth 2.0 scopes behave here (§6). **Never copy a
scope string from one family into the other.**
**Bitbucket Data Center is a different product for this purpose.** It has its own OAuth 2.0 provider, configured
inside the customer's own instance, with endpoints on the customer's host. If the customer's URL is not
`bitbucket.org`, you are in the wrong document.
## 2. Reuse the existing consumer, or register a new one
A new consumer means a **new Key, and every stored token is bound to the old one** — every customer re-authorizes.
Worse, if you delete the old consumer to tidy up, you revoke them immediately (§4).
**Edit the existing consumer** for: changing the permission set (read §6 first — it is not free either), rotating
a compromised secret, correcting the callback URL, or diagnosing a failure.
**Register a new consumer** only when the user asks for one: a second callback host that the one-URL rule forces
into its own consumer (§5), a replacement for a compromised consumer, or a move to a different owning workspace.
Say which path you are taking before you start clicking.
## 3. Account, workspace, and who can read the secret
The consumer is **a workspace object**. That has three consequences worth stating out loud before you create it:
- **You need workspace admin rights** on the owning workspace to reach the OAuth consumers page at all.
- **Anyone who administers that workspace can read the Secret.** Atlassian's own instructions are: *"Toggle the
consumer name to see the generated Key and Secret value for your consumer."* There is no show-once screen and no
separate reveal permission. **Do not create the production consumer in a shared customer-facing workspace, or in
an individual's personal workspace.** Use a workspace whose admin list is the set of people you would hand the
secret to anyway, and treat the admin list as part of the credential's blast radius.
- **Anyone who administers that workspace can delete the consumer**, and Atlassian is explicit that deleting
*"also removes all existing tokens linked to that consumer"* — i.e. instantly disconnects every customer.
A free Bitbucket account and workspace are enough to create a consumer and to test end-to-end. **Workspace access
tokens are a Premium feature** (§10) — if the plan matters, it matters there, not here.
Hand control back to the user for anything only a human can do: Atlassian account signup, email verification, 2SV,
accepting terms, creating a workspace. Do not retry a blocked step in a loop.
**If this session has no browser automation** — the usual case for a CLI or cloud run — do not pretend to click.
Give the user the exact ordered click path from §4 with the literal callback URL (§5) and the literal permission
ticks (§6), then continue once they report back with the Key.
## 4. Create the consumer
1. Select your avatar, then open the **workspace** that will own the consumer.
2. **Settings cog** (top navigation) → **Workspace settings**.
3. Sidebar → **Apps and features** → **OAuth consumers** → **Add consumer**.
4. Fill in the form:
- **Name** — *"The display name for your consumer. This must be unique within your account. This is required."*
It is what customers see on the grant dialog, so use the product name, not a ticket number.
- **Description** — optional.
- **Callback URL** — *"Required for OAuth 2.0 consumers."* One field. See §5; this is the field that decides
your architecture.
- **URL** — optional, informational ("where the curious can go to learn more").
- **This is a private consumer** — a checkbox. Tick it for a server-side connector that keeps its secret on a
server. Atlassian's Pipelines guide instructs *"Select the This is a private consumer checkbox"* as the
prerequisite for the `client_credentials` flow (§9), and a consumer marked public cannot use that grant. The
public setting is for a distributed application that **ships its credentials inside the app**, which a
multi-tenant server-side connector is not. Atlassian's published docs describe this checkbox only in passing,
so read the in-product help text next to it before deciding, and record what it said.
- **Permissions** — the checkboxes that become the scope set (§6).
5. **Save.** The system generates the Key and Secret (§7).
**Deleting a consumer** (Workspace settings → OAuth consumers → the row's menu → Delete) *"also removes all
existing tokens linked to that consumer."* There is no soft delete and no grace period. If the reason for deleting
is a compromised credential, Atlassian points at its app security incident management guidance for Marketplace
Partners rather than a self-service rotation flow — so plan a rotation as a deploy-then-delete, never a
delete-then-panic.
## 5. The callback URL — you get one field, and it is a prefix
`redirect_uri` handling here is unusual and catches people who assume GitHub-style exact matching against a list.
Atlassian documents two rules:
- *"If you don't include the URL in the request we redirect to the callback URL in the consumer."*
- *"If you do include the URL in a request it must be appended to the same URL configured in the consumer. So if
your consumer callback URL is `example.com/add-on` the URL in your request must be something similar to
`example.com/add-on/function`."*
So the registered value is a **prefix**, and a per-request `redirect_uri` may only extend it with a deeper path. It
cannot change the host. That settles the multi-region question: **different callback hosts cannot share one
consumer.**
For Unified.to the callbacks are one per data center; confirm the current list with the platform owner rather than
assuming, because data centers get added:
```
https://api.unified.to/oauth/code # us (default)
https://api-eu.unified.to/oauth/code # eu
https://api-au.unified.to/oauth/code # au
https://api-dev.unified.to/oauth/code # dev
```
Four hosts, four consumers, four Key/Secret pairs — and the credential store must be able to hold them separately.
Say so explicitly in your handoff. (There is one alternative, and it is a platform change rather than a console
setting: a single callback host that fans out internally. Do not assume it exists.)
Other notes:
- Send `redirect_uri` explicitly on the authorize request anyway, and send the identical value on the token
exchange. Relying on the consumer's default is what makes a region mix-up silent instead of loud.
- A mismatch surfaces at connect time, not at save time.
- The callback is your platform's URL. Nothing about it varies per customer or per workspace.
## 6. Permissions are checkboxes — consent is all-or-nothing
**This is the single biggest conceptual difference from every other portal in this collection.** Bitbucket states
it twice:
> *"Scopes are defined on the client/consumer instance. Bitbucket Cloud does not currently support the use of the
> optional scope parameter on the individual grant requests."*
>
> *"When the scope parameter is provided, Bitbucket will validate that it contains no scopes that were not already
> present on the client/consumer and fail if additional scopes are requested, but asking for fewer scopes will not
> affect the resulting access token."*
Read that second sentence carefully, because it has three separate consequences:
1. **Sending `scope` can only fail you, never help you.** A scope on the authorize URL that is not ticked on the
consumer **fails the request**. A subset succeeds — and is ignored.
2. **Every token carries the consumer's entire permission set.** There is no per-customer, per-object or
least-privilege authorization. A customer who only wants repository reads still grants everything ticked.
3. **Changing the checkboxes changes the deal for everyone.** Every subsequent authorization carries the new set,
and a connector that adds a permission is asking all future customers for more. Treat a permission change as a
customer-visible decision, not a config tweak — and re-run the consent dialog yourself to see what it now says.
The consumer form groups permissions per resource, with read/write ticks inside each group — Atlassian's Pipelines
walkthrough instructs *"Under Permissions, go to Repositories. Tick both Read and Write."* Its older support
walkthrough describes the coarse shape as **Email** (*"Permission to read your account's primary email address"*),
**Read**, **Write** and **Admin** across account, workspace membership and repositories. The live form is
finer-grained than that older page and maps onto the scope strings below; **read the actual checkboxes in the UI
and map them to the table** rather than trusting either description. Tick what the connector calls, and nothing
more.
### The scope strings, and what implies what
These are the OAuth 2.0 scope strings Bitbucket publishes. The implication rules are the non-obvious part: some
scopes grant others for free, and — importantly — **the admin scopes do not**.
| Scope | Grants | Implies |
| --- | --- | --- |
| `repository` | Read a repo: source, clone over HTTPS, file-browsing API, zip archives | — |
| `repository:write` | Push over HTTPS, fork | **implies `repository`** |
| `repository:admin` | Repo admin features only — deploy keys, permissions, branch permissions, delete the repo | **does *not* imply `repository` or `repository:write`** |
| `repository:delete` | Delete repositories | — |
| `pullrequest` | See, list and comment on PRs; create/resolve tasks | **implies `repository`** (read on the destination repo) |
| `pullrequest:write` | Create, merge, decline, approve PRs | **implies `pullrequest` and `repository:write`** |
| `project` | View projects | **implies `repository`** across the project's repos |
| `project:write` | **Deprecated**, superseded by `project:admin` | — |
| `project:admin` | Create, update, delete projects | **does *not* imply `project` or `repository:write`** |
| `issue` | View, create, comment, watch, vote on issues | nothing, and **no implicit repo access** |
| `issue:write` | Transition and delete issues | **implies `issue`**, still no repo access |
| `wiki` | Wikis, read *and* write — *"no distinction is made"* | nothing |
| `snippet` / `snippet:write` | Read / create, edit, delete snippets | `snippet:write` **implies `snippet`** |
| `webhook` | Any webhook operation; **reads existing subscriptions on anything the token can reach, without the resource's own scope** | — |
| `email` | The user's primary email address | — |
| `account` | Read account info; on workspace APIs, view users, permissions and projects | — |
| `account:write` | Change account properties — **including delete the authorizing user's account** | — |
| `pipeline`, `pipeline:write`, `pipeline:variable` | Read pipelines / control runs / create variables | — |
| `runner`, `runner:write` | Read / manage pipeline runners | — |
Two traps in that table:
- **The admin scopes are not supersets.** `repository:admin` gives you branch permissions and deletion but not the
source; a connector that needs to read code *and* administer must tick both. Atlassian notes the sharp edge:
`repository:admin` *"can be used or misused to grant read access to other users, who can then clone the repo"* —
so it is a heavier ask than it looks on the dialog.
- **`webhook` is quietly broad on reads.** It *"gives read access to existing webhook subscriptions on all
resources the authorization mechanism can access, without needing further scopes."* Creating a webhook, though,
needs the resource scope too — `issue:created` needs `webhook` **and** `issue`.
### Scopes never exceed the user's own permissions
Atlassian puts it bluntly: *"Anything you could do when logged into Bitbucket, your application can do also. So for
example, if they have read/write access to all of the workspace, your application does as well."* That cuts both
ways, and both directions produce support tickets:
- A token with `repository` sees **only the repositories the authorizing user can see** — so two customers on the
same consumer get wildly different views, and "the connector is missing repos" is usually an account-permissions
question, not a scope question.
- Conversely there is **no repository picker**. Unlike an installation-style model, the customer cannot narrow the
grant to three repositories. Whatever the user can reach, the consumer can reach. Customer security reviews
notice this; have an answer ready, and note that **access tokens (§10) are the per-repository answer** when a
customer insists.
## 7. Capture the credentials
From **Workspace settings → OAuth consumers**, expand the consumer row: *"Toggle the consumer name to see the
generated Key and Secret value for your consumer."*
- **Key** — the OAuth `client_id`.
- **Secret** — the OAuth `client_secret`. Re-readable by any workspace admin, forever (§3).
- **Authorization endpoint** — `https://bitbucket.org/site/oauth2/authorize`
- **Token endpoint** — `https://bitbucket.org/site/oauth2/access_token`
- **API base** — `https://api.bitbucket.org/2.0`, Bearer token in the `Authorization` header (required since
4 May 2026).
- Which data center this consumer's single callback serves (§5).
The authorize request Atlassian documents is minimal:
```
https://bitbucket.org/site/oauth2/authorize?client_id={client_id}&response_type=code
```
No `audience`, no `prompt`, no `offline_access`. Add `state` — Bitbucket does not require it and does not document
it, but you need it, and you need to cope if it does not come back (see the symptom table in §12). The exchange
passes the client credentials as **HTTP Basic**, not in the body:
```
curl -X POST -u "client_id:secret" \
https://bitbucket.org/site/oauth2/access_token \
-d grant_type=authorization_code -d code={code}
```
**PKCE is not mentioned anywhere in Atlassian's Bitbucket Cloud OAuth documentation** — not in the developer
reference, not in the support article. Do not assume `code_challenge` is honoured, and do not rely on it as a
security control here; the confidential-client path (private consumer + Basic auth secret) is the documented one.
Rotating the Secret invalidates the old one for new exchanges, so deploy the new value before you rely on it.
Report the secret once so the user can paste it into their secret store, say plainly that it is now in the
transcript and can be rotated, then move on.
## 8. Token lifetimes and rotating refresh tokens
| Thing | Value | Source |
| --- | --- | --- |
| Access token lifetime | **One hour** per the developer reference, **two hours** per the support article — **read `expires_in`** | Both Atlassian pages, in conflict |
| Expired access token | 401 responses | Both |
| Refresh token issued | With `authorization_code` and with each `refresh_token` response | Developer reference |
| Refresh token behavior | **Rotating** — *"a new refresh token will be issued… The existing refresh token will expire shortly after and should not be used again"* | Developer reference |
| Unused refresh token | **Expires after 3 months**, then the user must redo the full authorization_code flow | Developer reference |
| Absolute maximum lifetime | Not documented | — |
The refresh call, with credentials again as Basic auth:
```
curl -X POST -u "client_id:secret" \
https://bitbucket.org/site/oauth2/access_token \
-d grant_type=refresh_token -d refresh_token={refresh_token}
```
**The failure mode that passes your smoke test.** A client that does not store the *new* refresh token refreshes
successfully the first time — it still holds a valid token — and fails the second time, hours later. So ask two
questions, and note a platform can answer yes to the first and no to the second:
1. Does the client read `refresh_token` out of the refresh response at all?
2. Does it **persist** it, atomically, before the next refresh, including under concurrent refreshes of the same
connection?
Note the phrase *"will expire shortly after"* — the old token is not killed instantly, which gives a racing client
a small undocumented window of apparent success. Do not design around it.
The quieter killer is **idleness**: a connection nobody refreshes for three months is dead, and the customer must
re-authorize from scratch. With a one-to-two-hour access token, any live connector refreshes constantly — but
*paused*, *disabled* and *trial* connections do not, and those are exactly the ones that break on resumption.
## 9. `client_credentials` — the two-legged flow, and what it actually reaches
Bitbucket supports the Client Credentials grant (RFC 6749 §4.4):
```
curl -X POST -u "client_id:secret" \
https://bitbucket.org/site/oauth2/access_token \
-d grant_type=client_credentials
```
What it gives you is specific: a token that *"represents not an end user, but the owner of the client/consumer"* —
that is, the workspace the consumer lives in, as the consumer's owner sees it. Practically:
- **It is useless for multi-tenant customer access.** It cannot reach a customer's workspace; it reaches yours. It
is the right tool for your own automation against your own workspace (CI pushing back to a repo is Atlassian's
own worked example), and the wrong tool for a connector.
- **The consumer must be marked private.** A consumer marked public is rejected for this grant; Atlassian's
worked example ticks *"This is a private consumer"* as a prerequisite.
- It inherits the same ceiling as everything else: the consumer's ticked permissions, no more.
- Atlassian's example passes `-d scopes="repository"` alongside the grant. Given §6, treat that as cosmetic — the
consumer's checkboxes decide the token.
If someone proposes `client_credentials` as a way to avoid asking customers to authorize, that is a
misunderstanding worth correcting on the spot.
## 10. The alternatives: access tokens, API tokens, and the app-password removal
An OAuth consumer is not always the right credential. Bitbucket offers three non-OAuth options and one dead one,
and the differences are about *what the credential is attached to*:
- **Repository / Project / Workspace access tokens.** *"Access tokens are linked to a repository, project, or
workspace, not a user account."* They survive the employee who created them leaving, they are the only way to
hand a customer a genuinely repository-scoped credential, and they are the only credential that qualifies for
scaled rate limits (§11). Key properties: created by an admin of that resource with a chosen scope set; **cannot
be viewed or edited after creation** (replace, don't recover); can carry an expiry, and workspaces can be made
to *require* one; can be **rotated** (refresh the secret and expiry without redefining scopes); appear in the UI
as a pseudo-user named after the token; and are **deactivated when the resource is deleted** (repository tokens
also die when the repo is transferred). Their scope lists are narrower than OAuth's — workspace tokens get
`project`/`project:admin`, `repository*`, `pullrequest*`, `webhook`, `account`, `pipeline*`, `runner*`; repo
tokens drop the project scopes. They cannot manage permissions, cannot log into the website, and a few deploy-key
endpoints are closed to them. **Workspace access tokens are a Premium feature.**
- **API tokens** (Atlassian-account level): *"personal access tokens that users can create to authenticate with
Bitbucket's REST APIs or interact with Git… designed as a long term replacement for app passwords."* Basic auth
with the Atlassian email as username, or Bearer since 18 August 2026. **Expiry is mandatory, maximum one year**,
scopes are chosen at creation and cannot be edited afterwards. Tied to an individual, so they inherit the
offboarding problem OAuth also has.
- **App passwords: deprecated, and being removed.** No new ones since 9 September 2025; brownouts from 9 June 2026
(401 on the API, 410 on Git-over-HTTPS); fully removed 28 July 2026. If a platform still offers "username + app
password" as a connection method, that is a migration item with a deadline, not a supported alternative.
**Choose the OAuth consumer when** the platform must act *as each customer's user*, across whatever that user can
see, with a browser consent step — the normal multi-tenant connector. **Point a customer at an access token when**
they refuse a workspace-wide user-delegated grant and want the credential pinned to one repository or workspace,
or when what you are connecting is really CI automation rather than a person.
## 11. Rate limits — counted per user, and OAuth cannot buy more
Atlassian's request-limits page is explicit about the counter: *"Unauthenticated calls: measured against a specific
IP address. Authenticated calls: measured against the user ID."* So a connector's budget is **per authorizing
customer user**, which is friendlier than a per-app cap — until one customer runs a heavy sync.
| Limit | Value |
| --- | --- |
| Anonymous | **60 requests/hour** across all API resources |
| Repository data (`/2.0/repositories/*`) | **1,000–10,000 per hour** (1,000 default; scaled tier below) |
| Git operations (HTTPS and SSH) | 60,000/hour |
| Raw file downloads | 5,000/hour |
| Archive (.zip/.gz) downloads | 1,500 files/hour |
| Webhook list/add/remove | 1,000/hour |
| Application properties | 2,000/hour |
| Invitations | 100/minute |
The window is *"a one-hour rolling window"*, not a fixed reset.
**The scaled tier is closed to OAuth.** Qualifying for more than 1,000/hour on repository data requires a Standard
or Premium plan, 100+ paid users in the workspace, **and** that you *"must use workspace, project, repository
access tokens for authentication or make requests through programmatic access via a Forge app."* The formula is
`1,000 + (paid users − 100) × 10`, capped at **10,000/hour**. A user-delegated OAuth token does not qualify, at any
customer size. If a large customer is throttling, the answer is a change of credential type (§10), not a support
ticket — say that plainly rather than promising headroom you cannot get.
When the scaled limits apply, Bitbucket returns `X-RateLimit-Limit` (total permitted per hour — *not* remaining),
`X-RateLimit-Resource`, and `X-RateLimit-NearLimit` (boolean, true under 20% remaining). Those headers are only
documented for scaled-limit requests, so an OAuth client cannot count on seeing them and must handle throttling
from the status code alone.
## Product state — Unified.to (verified 2026-09-20; confirm with the connector's owner)
Dated observation of how the Bitbucket connector behaves today, not contract:
- **It is an OAuth 2.0 consumer integration** against `https://bitbucket.org/site/oauth2/authorize` and
`.../access_token`, with the API at `https://api.bitbucket.org/2.0` — the correct hosts, including the post-May-2026
API host requirement. It also offers a non-OAuth option taking an **email address plus an API token**, which is the
right successor to app passwords (§10).
- **It sends `scope` on the authorize URL**, space-delimited, built per object type from a map: `repository`
(+ `repository:write`, `repository:delete`) for repository, branch, commit and file objects; `pullrequest`
(+ `pullrequest:write`); `issue`/`issue:write` for task objects; `project`/`project:admin`; and
`account`/`account:write`/`email` for the people and organization objects. `account` and `email` are the login
scopes. Given §6, this only matters in one direction: **any scope in that map that is not ticked on the consumer
will fail the authorize request**, so the consumer must be ticked for the union of everything the workspace might
enable — and every customer's token then carries that union regardless.
- **It exchanges the code with the client credentials as HTTP Basic**, which matches Atlassian's documented
`-u "client_id:secret"` form, and uses the standard refresh grant. **No PKCE parameters are sent** — consistent
with Atlassian documenting none (§7).
- **It flags Bitbucket as not returning `state`** on the callback and compensates internally. Worth knowing when
debugging a connect flow, and worth confirming against current Bitbucket behaviour rather than assuming.
- **It picks the customer's workspace automatically at connect time by taking the first entry of a
cross-workspace workspace listing.** Two problems, both real (§12): the cross-workspace collection endpoint is
the deprecated one — the connector's own most recent read test recorded an error naming that deprecation — and
"first workspace" is arbitrary for any customer who belongs to more than one. Flag both to the connector's owner.
- **Its task objects target the native Bitbucket issue tracker**, whose API endpoints Atlassian recorded as fully
removed on 20 August 2026. Those objects, and the `issue`/`issue:write` scopes backing them, should be expected
to fail; confirm before ticking those permissions on a new consumer.
- **Platform-shared OAuth credentials appear to be configured for this connector**, meaning workspaces may not each
need their own Key and Secret — confirm which mode is live before registering anything, because it changes whether
this run is needed at all.
## 12. Verify end-to-end
Authorizing as the workspace admin who owns the consumer proves almost nothing — that account can see everything
anyway. Test the path a customer takes.
1. Run a real **authorize → callback** round trip through the platform's connect flow, from a **different**
Bitbucket account in a **different** workspace, sending `redirect_uri` explicitly.
2. Read the **consent dialog** as that customer would and check it against §6 — it shows the consumer's whole
permission set, and that is what you are actually asking every customer for.
3. Confirm the token response's **`expires_in`** and that a **`refresh_token`** is present.
4. Make one real read against **`https://api.bitbucket.org/2.0/…`** with a Bearer header.
5. Check what the token can *see*: list the user's workspaces via `/user/workspaces` and confirm the connector
picks the intended one rather than the first (§10, Product state).
6. Force a **refresh**, then force a **second refresh using the token the first returned**. This is the step that
catches a client ignoring rotation, and it is the step most often skipped.
7. If the consumer will serve more than one region, repeat against each region's consumer — they are separate
credentials with separate callbacks (§5).
| Symptom | Cause |
| --- | --- |
| Authorize request rejected over scopes | A scope in the request is not ticked on the consumer — the request cannot widen the set (§6) |
| Requested fewer scopes, token came back with more | Expected: *"asking for fewer scopes will not affect the resulting access token"* (§6) |
| Redirect rejected / lands somewhere unexpected | `redirect_uri` is not the registered callback or a deeper path under it; a different host never matches (§5) |
| EU/AU customers land on the US callback | Wrong consumer's Key in play, or `redirect_uri` omitted so the consumer default was used (§5) |
| `unauthorized_client` / invalid client credentials | Wrong Key/Secret pair, or credentials sent in the body instead of HTTP Basic; check for stray whitespace or newlines in the stored values (§7) |
| `client_credentials` rejected | The consumer is not marked private (§9) |
| Everything 401s after about an hour | Normal expiry — read `expires_in`, do not hardcode (§8) |
| First refresh works, later ones fail | Rotated refresh token not persisted (§8) |
| Connection dead after a quiet few months | Three-month idle refresh-token expiry; the customer must re-authorize (§8) |
| Customer sees fewer repos than expected | The token is bounded by the authorizing user's own access — a permissions question, not a scope one (§6) |
| Customer wants only some repositories connected | Not possible with an OAuth consumer; access tokens are the per-resource credential (§10) |
| Repo admin calls fail although `repository:admin` is ticked | `repository:admin` does not imply `repository`/`repository:write` — tick them too (§6) |
| Webhook creation fails although `webhook` is ticked | Creating a subscription also needs the resource's own scope (§6) |
| Issue-tracker calls 404 | The native issue tracker API was removed on 20 Aug 2026 (Platform state) |
| Cross-workspace workspace listing errors | The cross-workspace collection is deprecated; use `/user/workspaces` (Platform state) |
| Large customer constantly throttled | OAuth cannot reach the scaled tier — it needs an access token or Forge (§11) |
| Auth suddenly broke for every customer at once | The consumer was deleted (revokes all its tokens) or the Secret was rotated without a deploy (§4, §7) |
| Git/API auth broke for a customer using "username + app password" | App-password brownout/removal — 401 on API, 410 on Git (Platform state) |
| Nothing resembles this document; you are on `auth.atlassian.com` | That is Atlassian 3LO, not Bitbucket Cloud (§1) |
| The instance is not `bitbucket.org` | Bitbucket Data Center — different product, different OAuth provider (§1) |
## 13. Hand off — never commit the secret
- **Do not** write the consumer Secret into source control, a test, a fixture, a committed `.env`, a ticket, a PR
body, or a chat channel. Values go to the user, for the secret store or the console.
- Remember the Secret is **permanently re-readable by every admin of the owning workspace** (§3). If that admin
list is wrong, fixing it is part of this job, not a follow-up.
- If a code change is needed (a callback host, a permission, workspace selection), keep it credential-free and say
what the human must set out of band.
- Close with: consumer name and the **owning workspace**; the **Key**; where the Secret was delivered; the
authorize/token endpoints and API base; the single callback URL and which data center it serves, plus how many
further consumers the remaining regions need (§5); the exact permission set ticked and the fact that every
customer grants all of it (§6); whether the consumer is marked private; the observed `expires_in`; the state of
rotated-refresh-token persistence and who owns any remaining work; and anything left for the user to do.
## Stop and ask
Hand back to a human rather than guessing when: the platform needs more callback hosts than one consumer allows
and nobody has decided how many consumers to create (§5); the workspace that would own the consumer has an admin
list broader than the people who should hold the secret (§3); a permission change would alter what every future
customer grants (§6); the client does not persist rotated refresh tokens — report it, do not register and hope
(§8); someone proposes `client_credentials` as a way to reach customers' workspaces (§9); a customer's security
review requires per-repository scoping that an OAuth consumer cannot give (§6, §10); a customer is still on app
passwords and the removal date is close (§10); a large customer needs rate-limit headroom OAuth cannot reach
(§11); the target is Bitbucket Data Center rather than Cloud (§1); or the workspace settings pages do not match
the **Platform state** section above.
**No browser automation:** if the session cannot drive a browser, do not simulate clicks or claim a step was done.
Produce the exact click path from §4 and the literal values for the user, and resume when they report back.
## References
Atlassian-owned pages only. Every link verified to return HTTP 200 on 2026-09-20.
- Authentication methods — OAuth 2.0, grants, token and refresh lifetimes, access tokens, API tokens, the full
scope list — https://developer.atlassian.com/cloud/bitbucket/oauth-2/
- Bitbucket Cloud REST API scopes (per-scope detail and implication rules) — https://developer.atlassian.com/cloud/bitbucket/bitbucket-cloud-rest-api-scopes/
- The Bitbucket Cloud REST API (intro, base URL) — https://developer.atlassian.com/cloud/bitbucket/rest/intro/
- Bitbucket Cloud changelog (app-password brownouts, issue-tracker removal, Bearer for API tokens) — https://developer.atlassian.com/cloud/bitbucket/changelog/
- Workspaces REST reference (`/user/workspaces`, `/workspaces/{workspace}`) — https://developer.atlassian.com/cloud/bitbucket/rest/api-group-workspaces/
- Use OAuth on Bitbucket Cloud (create a consumer, callback rules, delete a consumer) — https://support.atlassian.com/bitbucket-cloud/docs/use-oauth-on-bitbucket-cloud/
- Integrate another application through OAuth (the click path, the Permissions checkboxes) — https://support.atlassian.com/bitbucket-cloud/docs/integrate-another-application-through-oauth/
- OAuth consumer examples — https://support.atlassian.com/bitbucket-cloud/docs/oauth-consumer-examples/
- Push back to your repository (private-consumer checkbox, `client_credentials` worked example) — https://support.atlassian.com/bitbucket-cloud/docs/push-back-to-your-repository/
- API request limits (per-user counting, scaled tier, rate-limit headers) — https://support.atlassian.com/bitbucket-cloud/docs/api-request-limits/
- Access tokens for a workspace (Premium; features and limitations) — https://support.atlassian.com/bitbucket-cloud/docs/workspace-access-tokens/
- Access tokens for a project — https://support.atlassian.com/bitbucket-cloud/docs/project-access-tokens/
- Access tokens for a repository — https://support.atlassian.com/bitbucket-cloud/docs/repository-access-tokens/
- Rotate an access token for a workspace — https://support.atlassian.com/bitbucket-cloud/docs/rotate-an-access-token-for-a-workspace/
- Require access token expiry — https://support.atlassian.com/bitbucket-cloud/docs/require-access-token-expiry/
- API tokens — https://support.atlassian.com/bitbucket-cloud/docs/api-tokens/
- Bitbucket Cloud transitions to API tokens (app-password deprecation rationale and phases) — https://www.atlassian.com/blog/bitbucket/bitbucket-cloud-transitions-to-api-tokens-enhancing-security-with-app-password-deprecation
- 'Invalid OAuth client credentials' troubleshooting — https://support.atlassian.com/bitbucket-cloud/kb/invalid-oauth-client-credentials-while-setting-up-autoscaler-for-runners-on-kubernetes/
- Grant access to a workspace (workspace membership, groups, and Read/Write/Admin permissions) — https://support.atlassian.com/bitbucket-cloud/docs/grant-access-to-a-workspace/
## box-oauth-app
URL: https://docs.unified.to/skills/box-oauth-app/SKILL.md
# Box OAuth2 App Registration
Get a working Box OAuth2 client — a developer account, a Platform App configured for **User Authentication
(OAuth 2.0)**, redirect URIs, scopes, client ID and client secret — for a platform that connects many customers' Box
accounts on their behalf.
Three things are expensive to get wrong here, and only one of them is in the app form. First, **the app type is
permanent**: a User app cannot be converted to a Server app, or the reverse, so picking the wrong authentication
method means starting over with a new client ID. Second, **a customer's own Box admin may have to authorize your app
inside their Admin Console before any user in that enterprise can connect** — this is the classic Box trap, it is
customer-side, and no amount of re-registering fixes it (§4). Third, **Box refresh tokens are single-use**: every
refresh returns a *new* refresh token and invalidates the old one, so a client that stores the original will work
exactly once and then break (§8).
## Inputs to collect before you start
Ask in one batch. Never invent.
| Input | Notes |
| --- | --- |
| **App name**, description, contact email | Shown to users on the Box consent screen |
| **Which Box account owns the app** | A free developer account, or an existing Box enterprise (§2) |
| **Is the owning account an enterprise?** | Decides whether you can self-authorize or must ask an admin (§4) |
| **Redirect URIs** | Every callback host your platform serves (§5) |
| **Scope set** | What the connector actually calls (§6) |
| **Does the client store the rotated refresh token on every refresh?** | Blocking — see §8 |
| **New app, or an edit to an existing one?** | Decides §1 |
| **Will this be listed in Box Integrations?** | Separate review path (§9) |
## Quick Start
1. Confirm a **new app** is needed — existing customer connections are bound to the current client ID (§1).
2. Sign in to, or create, the Box account that will own the app (§2).
3. Developer Console → **New App** → app type **User** → **Create** (§3).
4. Understand who must authorize the app in each customer enterprise — do this before you promise a launch date (§4).
5. Add **every** redirect URI, exactly (§5).
6. Select the console scopes the connector actually calls, and no more (§6).
7. Copy the client ID and client secret from the Configuration tab (§7).
8. Confirm the client stores rotated refresh tokens and refreshes inside 60 days (§8).
9. Verify with a real authorize → callback → refresh → refresh-again round trip on a *second* account (§10).
10. Hand the credentials over — never commit them (§11).
## Platform state (verified 2026-09-20 — re-verify before trusting)
- Apps are created in the **Box Developer Console** at `https://app.box.com/developers/console`. The flow is
**New App → choose app type → Create**. The two app types are **User** (users sign in with their own Box accounts —
this is OAuth 2.0) and **Server** (backend services — Client Credentials Grant or JWT).
- **A customer-authorizes-us connector needs a User app with OAuth 2.0.** CCG and JWT authenticate the *application*
against a single enterprise using credentials you hold; they do not produce a per-customer consent flow, and they
require an explicit Box Admin authorization in every enterprise before they work at all. Do not reach for them
because the OAuth flow looks like more work.
- **The choice is permanent.** Box's own wording: "You can't convert a User app into a Server app, or a Server app
into a User app. To move between them, create a new app."
- **Authorization differs by account type.** On a **free developer account**, apps are authorized automatically at
creation. In an **enterprise**, JWT/CCG apps must be authorized by a Box Admin or Co-Admin, and **unpublished
OAuth 2.0 apps also require enablement by an admin if the enterprise has "Disable unpublished apps by default"
turned on**. See §4 — this applies to *your customers' enterprises*, not just yours.
- Redirect URIs have required strict exact matching for OAuth 2.0 apps created since **29 November 2021**, and
multiple URIs per app are supported.
- Token lifetimes: authorization code **30 seconds**, access token **60 minutes**, refresh token **60 days or one
use**, whichever comes first.
- An enterprise can authorize up to **10,000** custom apps before it has to ask Box Support for an increase.
- Listing in **Box Integrations** (the directory at `https://app.box.com/services`, formerly called App Center) is a
separate Box Partner review, submitted from the app's **Publishing** tab, and it only accepts OAuth 2.0 apps (§9).
If the Developer Console does not look like this, stop and report what you actually see rather than clicking on.
## 1. Decide: reuse the existing app, or register a new one
A new app means a **new client ID, and every existing customer connection is bound to the old one** — every customer
would have to re-authorize, and in enterprises that gate apps, every customer's admin would have to authorize the new
client ID too (§4). That is a migration project, not a config change.
Reuse the existing app for: adding a redirect URI, adding a scope, rotating a compromised secret, or diagnosing an
authorization failure. Note that **adding a scope is not free either** — changing an app's scopes requires
re-authorization in every enterprise that authorized it (§4, §6).
Register a **new** app only when the user explicitly wants one: a first-time setup, a replacement for a compromised
app, a separate app for a different product, or a deliberate move off a Server app. Say which path you are taking
before you touch the console.
## 2. Account: sign in or sign up
- **Free developer account** — sign up at `https://account.box.com/signup/n/developer`. This is the simplest home for
an integration's OAuth app when you do not already have a Box enterprise. Apps created here are authorized
automatically, which conveniently hides the §4 problem from you and not from your customers.
- **An existing Box enterprise** — normal for an established platform. You need Developer Console access; if you are
not an Admin or Co-Admin you will have to submit the app for approval rather than self-authorize (§4).
- **Developer sandbox** — a separate Box enterprise with its own Enterprise ID, created by an enterprise **admin or
co-admin** from the Admin Console; up to ten per customer, no expiry, and it starts empty rather than inheriting
parent settings. This is the right place to reproduce the enterprise authorization gate before a customer hits it.
Sandbox API calls count against the normal allocation.
Hand control back to the user for anything only a human can do: signup email verification, 2FA enrollment, accepting
terms, or an admin action inside a Box Admin Console you do not control. Do not retry a blocked step in a loop.
**If this session has no browser automation** (the usual case for a CLI or cloud run), do not pretend to click and do
not describe a screen you have not seen. Hand the user an exact, ordered click path with the literal values to paste
(§5 redirect URIs, §6 scope list), then continue once they report back with the client ID.
## 3. Create the app and pick the authentication method
1. Log in to Box and open the **Developer Console** (`https://app.box.com/developers/console`).
2. Select **New App**.
3. Select **User** as the app type — this is the User Authentication (OAuth 2.0) path. Do **not** select **Server**.
4. Select **Create**.
Box asks server apps to choose between Client Credentials Grant and JWT; a User app has no such choice, because
OAuth 2.0 is the method. Reference of what you are declining:
| Method | App type | What it is | Fits a customer-authorizes-us connector? |
| --- | --- | --- | --- |
| **OAuth 2.0** | User | Customer signs in to Box and grants your app access; token represents that user | **Yes** |
| **Client Credentials Grant** | Server | App authenticates itself with client ID + secret; unattended; Service Account and App Users | No — no per-customer consent, needs admin authorization in every enterprise |
| **JWT** | Server | Same as CCG but the app signs assertions with a keypair | No — same reason, plus key management |
After creation, the settings screen exposes the fields that matter: **App Name**, **Description**, **Contact Email**,
a **Purpose** selector (pick the one that describes an integration and say whether it is built by a customer or a
partner — an admin reading an authorization request sees this), **Authentication Method**, **Application Scopes**
(§6), **CORS Domains**, and **Advanced Features**. CORS domains only matter if browser JavaScript calls the Box API
directly; a server-side connector can skip that section entirely.
A **Developer Token** is generated automatically. It is a short-lived token for your own poking around — it is not
part of the customer flow, and it is a credential. Do not paste it anywhere durable.
## 4. Enterprise app authorization — the thing that blocks customers
This is the section that decides whether customers can actually connect, and almost none of it happens in your
account.
**The shape of it.** Box lets each enterprise decide whether *published* and *unpublished* platform apps are enabled
by default for its users. Your app, until it is listed in Box Integrations (§9), is **unpublished**. If a customer's
enterprise has **"Disable unpublished apps by default"** turned on, then a Box Admin or Co-Admin in *that* enterprise
must explicitly enable your app by **client ID** before any of their users can complete the OAuth flow. Box's own
authorization guide puts it plainly: unpublished OAuth 2.0 apps "may require enablement by a Box Admin or Co-Admin if
they are inactive by default."
**Who does it, and where.** The customer's admin, in *their* Admin Console:
1. Admin Console → **Platform** in the left navigation (`https://app.box.com/master/settings/custom`).
2. **Platform Apps** tab → **User Authentication Apps**.
3. **Add +** in the top-right, and paste **your app's client ID**.
4. Review the scopes the app requests, then enable it. (Or hover the app's row → **...** → authorize and enable.)
So the only thing you can hand a customer is **the client ID and a plain-language justification of each scope**. Box
shows the admin the scope names and nothing about your use case — the developer is expected to justify them. Write
that justification once, keep it with the credentials, and give it to every customer whose admin asks.
**Your own account.** In the Developer Console, the **Configuration** tab prompts an enterprise developer to submit
the app for admin approval, and prompts an enterprise Admin/Co-Admin to authorize it directly. User-authentication
apps also have an **Enablement** tab, which sends an approval request by email to the enterprise's Primary Admin;
both the developer and the admin get an email with the decision. On a free developer account this is automatic — which
is exactly why testing only there proves nothing about customers (§10).
**Re-authorization after changes.** Authorization is a snapshot in time. **When an app's scopes or access level
change, the app must be re-authorized for the change to take effect** — per enterprise. Free developer accounts
re-authorize automatically on save; enterprise developers must re-submit; admins can re-authorize from Admin Console
→ Platform → the app's menu → **Reauthorize App**. Practically: adding a scope to a live connector means going back
to every gated customer. Plan the scope set once (§6) rather than growing it.
**Caps and known errors.** A new enterprise can authorize up to **10,000** custom apps; beyond that the customer
contacts Box Support. Three errors show up on the admin side and are worth naming when you help a customer: *"Unable
to retrieve service of enterprise app authorization"* means the pasted client ID is wrong or carries trailing
characters; *"Something went wrong with adding the app authorization"* means the co-admin has view-but-not-edit rights
on enterprise settings; *"Disabled by Administrator"* means the authorization requirements are not all satisfied.
## 5. Redirect URIs
Set these under **OAuth 2.0 Redirect URI** on the app's **Configuration** tab. Register **every** callback host your
platform serves. For Unified.to these are one per data center; confirm the current list with the platform owner
rather than assuming:
```
https://api.unified.to/oauth/code # us (default)
https://api-eu.unified.to/oauth/code # eu
https://api-au.unified.to/oauth/code # au
https://api-dev.unified.to/oauth/code # dev
```
The rules, exactly as Box enforces them:
- **Exact match.** No subdirectory matching, no trailing-slash forgiveness. A mismatch shows the user a
`redirect_uri_mismatch` error page instead of the grant screen.
- **HTTPS required**, except plain HTTP for `localhost` or a loopback address. Localhost and loopback may redirect to
any port, but scheme, domain, path and query parameters must still match a configured URI.
- **Multiple URIs are allowed**, and duplicates cannot be saved.
- **With more than one URI configured, the authorize URL must carry a `redirect_uri` parameter** matching one of
them. Omit it and the user sees `redirect_uri_missing` — *after* granting access, so the consent looks like it
worked and the connection still fails. A single-URI app can omit the parameter; a multi-data-center platform never
can. Send it always.
- Use the current authorization host, `https://account.box.com/api/oauth2/authorize`. Apps built before March 2016
used a legacy host that does not redirect Box Verified Enterprise customers to their own subdomain.
## 6. Scopes
Scopes are chosen in the Developer Console under **Application Scopes**, not requested freely at runtime. The
authorize URL's `scope` parameter is space-separated and **defaults to every scope configured for the app**; sending
it can only narrow the set, never widen it. Anything not ticked in the console is unavailable no matter what the
authorize URL asks for.
Scopes cap a token; they never exceed what the authorizing user may do. An app with write scope does not get access
to content the user cannot reach, and a call outside the app's scopes returns **403** even when the user owns the
object.
The self-service console scopes most relevant to a content connector:
| Scope | Grants |
| --- | --- |
| `root_readonly` | Read all files and folders the authenticated user can reach |
| `root_readwrite` | Read *and* write files and folders — upload, download, create folders, update collaborations, comments, tasks |
| `manage_webhook` | Create and manage webhooks (limit 1000 webhooks per application, per user) |
| `manage_enterprise_properties` | Enterprise event streams, enterprise attributes, reports, device pins |
| `manage_managed_users` | Manage managed users — logins, password resets, role assignment |
| `manage_groups` | Create, update, delete groups and memberships |
| `manage_app_users` | Manage App User accounts — Box documents this as **server-side JWT applications only** |
Other scopes exist (`manage_data_retention`, `sign_requests.readwrite`, `ai.readwrite`, `manage_triggers`, and
request-only ones such as `manage_legal_holds` and `enterprise_content`). Do not tick anything the connector does not
call: every scope is something a customer's admin reads before enabling the app, and `root_readwrite` plus user
management is a combination security teams push back on.
**Product fact — confirm before relying on it.** As of 2026-09-20, Unified.to's Box connector requests, by capability:
`root_readwrite` for both reading and writing storage files; `root_readonly`, `root_readwrite`,
`manage_enterprise_properties` and `manage_webhook` for webhook support; and `manage_app_users` for reading HRIS
employees (carrying an open question about whether `manage_managed_users` is also needed). It authorizes against
`https://account.box.com/api/oauth2/authorize` with a space-delimited `scope` parameter plus `client_id`,
`redirect_uri`, `response_type` and `state`; exchanges and refreshes at `https://api.box.com/oauth2/token` as a
form-encoded POST with `client_id` and `client_secret` in the body; calls the API at `https://api.box.com/2.0` with a
bearer token; **does not use PKCE**; treats access tokens as ~60-minute and refresh tokens as just under 60 days; and
ships with Unified.to-owned shared OAuth credentials available as a default. Two of these deserve a question rather
than a copy-paste: requesting `root_readwrite` for read-only use removes the customer's option to grant read-only,
and `manage_app_users` is documented by Box as a JWT-app scope. **Confirm the current scope set and these two points
with the connector's owner before ticking boxes in the console.**
## 7. Capture the credentials
On the app's **Configuration** tab, in the OAuth 2.0 credentials section, copy:
- **Client ID** (the OAuth `client_id`) — also what every customer's admin needs in §4, so it is not a secret, but it
is worth recording precisely. The Developer Console has a copy button; a hand-typed client ID with a trailing
character is a real and common failure.
- **Client secret** (`client_secret`).
- Endpoints in play: authorize `https://account.box.com/api/oauth2/authorize`, token and refresh
`https://api.box.com/oauth2/token`, API base `https://api.box.com/2.0`.
- Whether the owning account is a free developer account, a sandbox, or a production enterprise — a sandbox is a
*different* enterprise, so its client ID is a different app.
Rotating the client secret invalidates the old one. Existing access tokens live out their hour, but every code
exchange and every refresh fails until the new secret is deployed — and because Box refresh tokens are single-use
(§8), a failed refresh window can burn connections rather than just pausing them. Never rotate without explicit
go-ahead and a cutover plan.
Report the secret once so the user can paste it into their secret store, say plainly that it is now in the transcript
and can be rotated, then move on.
## 8. Token lifetimes and single-use refresh rotation
| Thing | Lifetime |
| --- | --- |
| Authorization code | **30 seconds** — exchange it immediately |
| Access token | **60 minutes** |
| Refresh token | **60 days or one use**, whichever comes first |
| Download URL | 15 minutes |
**The rotation rule, in Box's words:** "Every time an application uses the Refresh Token to get a new Access Token the
Refresh Token is invalidated and a new Refresh Token is returned with the new Access Token. This new Refresh Token is
then again only valid for 1 use within 60 days."
What that means for a connector storing credentials for thousands of customers:
- **The refresh response's `refresh_token` must be persisted every single time.** A client that keeps the original
refresh token succeeds once and fails forever after. This is the single most common way a Box connector rots.
- **A dropped or un-persisted refresh response kills the connection.** If the new token is issued but the write fails,
the stored token is already invalid. Persist before you discard the old one, and treat a failed persist as an
incident, not a retry.
- **Concurrent refreshes race.** Two workers refreshing the same connection at once means one of them holds a token
that the other just invalidated. Serialize refreshes per connection. Box's docs describe no grace period for reuse.
- **Idle connections die.** No refresh within 60 days and the customer must re-authorize. A connector that only
refreshes on demand will quietly lose seasonal or low-traffic customers.
- Box's current official SDKs handle renewal automatically. A hand-rolled HTTP client does not.
- Access tokens can be revoked early via the revoke endpoint if you need to invalidate a connection deliberately.
**Ask up front whether the client stores the rotated refresh token.** If the answer is no or unknown, say so plainly —
the app will register fine and then fail in production. That is a finding to report, not a step to work around.
## 9. Rate limits, and publishing to Box Integrations
**Rate limits** (per user unless stated), worth knowing before a backfill design review:
- 1000 API requests per minute, per user
- 240 file upload requests per minute, per user
- 6 searches per second and 60 searches per minute, per user; 12 searches per second, per enterprise
- Box Sign: 100 create/resend per minute, 1000 get per minute, per user
Exceeding a limit returns **429 `rate_limit_exceeded`** with a `retry-after` header in seconds. Honour the header,
then back off exponentially. Current Box SDKs retry 429s for you; direct HTTP clients and community SDKs do not.
**Publishing is a separate path from authorization.** Listing your app in **Box Integrations**
(`https://app.box.com/services`) is a Box Partner review, not a technical gate, and it is optional. It matters here
for one reason: an enterprise that blocks *unpublished* apps by default (§4) may still allow *published* ones, so a
listing can remove the per-customer admin step for some customers. It does not remove it for enterprises that gate
published apps too.
To submit: Developer Console → **My Platform Apps** → the app → **Publishing** tab → read the submission checklist and
tick the confirmation → fill in the listing form → **Preview** → **Submit for Approval**. The Box Partner team is
notified and reviews the request; questions go to `integrate@box.com`. An app can be unpublished from the same tab.
Box's stated prerequisites: the app is finished and production-ready, **it uses OAuth 2.0** (Integrations support no
other authentication method), and you have Developer Console access to it.
Everything the listing form asks about positioning, support commitments, partner status or security posture is a
business decision. Collect the answers from the user; do not compose them.
## 10. Verify end-to-end
Testing in the account that owns the app proves very little, and testing on a free developer account proves less —
apps there are authorized automatically. Test the path a customer takes.
1. Authorize from a **second** Box account, ideally a **developer sandbox** with **"Disable unpublished apps by
default"** turned on, through your platform's real connect flow. That is the only way to see the §4 gate before a
customer does.
2. Confirm the authorize URL carries `redirect_uri` explicitly (§5) and that the consent screen lists the scopes you
expect — not more.
3. Exchange the code within its **30-second** life and confirm the response carries a refresh token.
4. Force a refresh. Then force a **second** refresh using the token returned by the first. That is what catches a
client ignoring rotation — the failure never appears on the first one.
5. Make one real read call against `https://api.box.com/2.0` with the resulting access token.
6. If the connector creates webhooks, confirm those scopes are actually ticked; webhook failures look like
permissions bugs.
| Symptom | Cause |
| --- | --- |
| `redirect_uri_mismatch` error page instead of the grant screen | Redirect URI not registered character-for-character (§5) |
| `redirect_uri_missing` *after* the user grants access | Multiple URIs configured, authorize URL omitted `redirect_uri` (§5) |
| "Disabled by Administrator" | App not enabled/authorized in that enterprise, or another authorization requirement unmet (§4) |
| Works for you, fails for one customer's whole enterprise | "Disable unpublished apps by default" is on there; their admin must enable it by client ID (§4) |
| Worked, then stopped after adding a scope | Scope change requires re-authorization per enterprise (§4, §6) |
| Second refresh fails, first succeeded | Client is not storing the rotated refresh token (§8) |
| Connection dies after a quiet month or two | 60-day refresh-token expiry; nothing refreshed it (§8) |
| Intermittent `invalid_grant` under load | Concurrent refreshes racing on one connection (§8) |
| Code exchange fails with a valid-looking code | Authorization code older than 30 seconds (§8) |
| 403 on an object the user owns | App scopes too narrow — scopes cap the token independently of user permission (§6) |
| Admin: "Unable to retrieve service of enterprise app authorization" | Wrong client ID, or trailing characters pasted (§4) |
| Admin: "Something went wrong with adding the app authorization" | Co-admin has view-only rights on enterprise settings (§4) |
| 429 `rate_limit_exceeded` | Over a per-user or per-enterprise limit; honour `retry-after` (§9) |
## 11. Hand off — never commit the secret
- **Do not** write the client secret or a developer token into source control, a test, a fixture, a committed `.env`,
a ticket, a PR body, or a chat channel. Values go to the user, for their secret store or console.
- If a code change is needed (a redirect host, a scope, refresh-token persistence), keep it secret-free and say what
the human must set out of band.
- Close with: app name and type (Platform App, User Authentication / OAuth 2.0); the owning account and whether it is
a free developer account, sandbox, or production enterprise; the **client ID** (customers' admins will need it);
where the secret was delivered; authorize, token and API base URLs; the exact scope strings and a one-line
justification for each, ready to forward to a customer's admin; whether the client persists rotated refresh tokens;
the customer authorization story (§4); and anything left for the user to do.
## Stop and ask
Hand back to a human rather than guessing when: the client does not persist rotated refresh tokens, or nobody can say
whether it does (report it — do not register and hope); someone proposes a Server app (JWT or CCG) for a
customer-authorizes-us connector, or proposes converting an existing app's type; the scope set would need
`root_readwrite`, user management, or enterprise-properties access that nobody has justified; a customer's connection
problem turns out to need *their* admin to enable or re-authorize the app; someone wants to rotate the client secret
on a live app; the Box Integrations listing form asks for partner, support, security or volume claims; or the
Developer Console does not match the **Platform state** section above.
Do not use browser automation to click through the Box Developer Console or a customer's Admin Console on someone's
behalf. Produce the exact click path and the literal values to paste, and let the human drive.
## References
Verified 2026-09-20; every link resolved.
- OAuth 2.0 authentication — https://developer.box.com/guides/authentication/oauth2/
- Setup with OAuth 2.0 — https://developer.box.com/guides/authentication/oauth2/oauth2-setup/
- OAuth 2.0 without SDKs — https://developer.box.com/guides/authentication/oauth2/without-sdk/
- Select an authentication method — https://developer.box.com/guides/authentication/select/
- Create a Platform App — https://developer.box.com/guides/applications/platform-apps/create/
- Authorization overview — https://developer.box.com/guides/authorization/
- Platform App Approval — https://developer.box.com/guides/authorization/platform-app-approval/
- Authorization common errors — https://developer.box.com/guides/authorization/common-errors/
- Security: scopes, application access, enterprise settings — https://developer.box.com/guides/security/
- Scopes — https://developer.box.com/guides/api-calls/permissions-and-errors/scopes/
- Token and code expiration — https://developer.box.com/guides/api-calls/permissions-and-errors/expiration/
- Refresh a token — https://developer.box.com/guides/authentication/tokens/refresh/
- Tokens overview — https://developer.box.com/guides/authentication/tokens/
- Rate limits — https://developer.box.com/guides/api-calls/permissions-and-errors/rate-limits/
- Authorize user (endpoint reference) — https://developer.box.com/reference/get-authorize/
- Request access token (endpoint reference) — https://developer.box.com/reference/post-oauth2-token/
- Revoke token (endpoint reference) — https://developer.box.com/reference/post-oauth2-revoke/
- Integrations: publishing a platform app — https://developer.box.com/guides/applications/integrations/
- Developer Console — https://app.box.com/developers/console
- Developer account signup — https://account.box.com/signup/n/developer
- Box Integrations directory — https://app.box.com/services
- Managing platform apps (admin) — https://support.box.com/hc/en-us/articles/360044196653-Managing-platform-apps
- Authorizing platform applications in sandbox and production — https://support.box.com/hc/en-us/articles/360043697014-Authorizing-Apps-in-the-Box-App-Approval-Process
- Understanding requests to authorize or allow applications — https://support.box.com/hc/en-us/articles/360044193933-Understanding-Requests-to-Authorize-or-Allow-Applications
- Developer sandbox management FAQ — https://support.box.com/hc/en-us/articles/360044196313-Developer-sandbox-management-FAQ
- Box Verified Enterprise & supported apps — https://support.box.com/hc/en-us/articles/360043693554-Box-Verified-Enterprise-Supported-Apps
- Box Partner Programs — https://support.box.com/hc/en-us/sections/21356597387539-Box-Partner-Programs
## brex-oauth-app
URL: https://docs.unified.to/skills/brex-oauth-app/SKILL.md
# Brex OAuth2 App Registration
Get working Brex credentials for a platform that reads and writes data in *other companies'* Brex accounts — and
decide, before anything else, whether that is even the credential you can have.
**Brex has no self-serve OAuth app registration.** There is no developer portal page where you create an app,
paste redirect URIs and receive a client ID. Brex's own partner authentication guide says to "contact our
developer support team to be issued a client ID and client secret", and the redirect URIs are ones you supply to
Brex "when the credentials were set up". OAuth on Brex is a **partner programme with a signed agreement, a
staging build, a demo review and human-delivered credentials** — measured in weeks, not minutes.
That shapes the whole task. If the partnership is not in place, the only credential a customer can give you today
is a **user API token** that they generate themselves in their own Brex dashboard. In that case the deliverable is
not an app registration at all: it is a **per-customer admin runbook** (§9), and you should say so plainly rather
than looking for a registration page that does not exist.
## Inputs to collect before you start
Ask in one batch. Never invent.
| Input | Notes |
| --- | --- |
| **Is there already a Brex partnership / issued client ID?** | Decides the whole run — see §1 |
| **Company legal name, counterparty address** | Brex asks for these to draft the API access agreement (§2) |
| **Name, email and title of the person who will sign** | Brex's agreement is signed by a human at your company (§2) |
| **A staging account email** | Brex provisions a staging Brex account and invites this address (§2, §7) |
| **Redirect URIs** | Every callback host; supplied to Brex at credential setup, not self-edited later (§3) |
| **Which Brex data the connector reads and writes** | Drives the scope list Brex issues for your client (§4) |
| **Read-only or read/write?** | Write scopes reach cards, transfers and users — a different conversation (§4) |
| **A demo you can record** | Brex generates production credentials after you show a working staging demo (§2) |
| **If no partnership: which customer, and who is their Brex account admin?** | The user-token runbook needs a named admin (§9) |
## Quick Start
1. Decide the route: partner OAuth, or per-customer user tokens (§1). **Do this first.**
2. If partner OAuth: start the partner conversation and work the onboarding sequence (§2).
3. Hand Brex every redirect URI at credential-setup time (§3).
4. Agree the exact scope strings your client will be issued (§4).
5. Capture client ID, client secret and the auth-server URLs, per environment (§5).
6. Build for 1-hour access tokens and **rotating** 90-day refresh tokens (§6).
7. Test in staging, and understand what staging is *not* (§7).
8. Design around rate limits, idempotency and the single-webhook-endpoint rule (§8).
9. If there is no partnership: deliver the per-customer admin runbook instead (§9).
10. Verify a real authorize → callback → token → refresh → read round trip (§10).
11. Hand the credentials over — never commit them (§11).
## Platform state (verified 2026-09-20 — re-verify before trusting)
Five facts decide this task. Check the linked pages before following any older runbook:
- **OAuth credentials are issued by humans, not by a portal.** Brex's partner authentication guide: "Please
contact our developer support team to be issued a client ID and client secret for partner authentication."
Developer support is `developer-support@brex.com`. There is no app-creation screen anywhere in Brex's developer
documentation, and the developer area of the Brex dashboard creates **user tokens**, not OAuth apps.
- **Partner onboarding is a sequence with an agreement and a demo in it.** Brex's partner onboarding page: once
your application is approved you receive **staging** credentials over SendSafely, which "expire in 7 days"; you
provide company name, counterparty address and the signer's name, email and title; you then receive a
**Unilateral API Access Agreement** from Brex; and "once you've built your demo, share it with us in a video and
we'll generate production credentials for you."
- **Redirect URIs are a field you give Brex, not one you edit.** "Partners must supply one or more redirect URIs
that Brex will use to post the authorization code", and the `redirect_uri` on the authorize call "must match
exactly one of the addresses that was provided to Brex when the credentials were set up." Plan the full list up
front; adding one later is a support request.
- **Base URLs moved on 2026-01-01, and the old ones still work.** Brex: "As of January 1, 2026, we are
transitioning base URLs to `api.brex.com` and `api-staging.brex.com` respectively, but the former URLs
(`platform.brexapis.com` and `platform.staging.brexapps.com`) will continue to be available for the forseeable
future." Auth servers are separate hosts and did **not** move: `accounts-api.brex.com/oauth2/default` and
`accounts-api.staging.brexapps.com/oauth2/default`.
- **There is no public sandbox.** Staging is partner-only, it is handed out as part of onboarding, it carries no
availability guarantee — "data stored in staging environments may be purged at any time" — and Brex's own API
references label the staging server "Note: This is not a sandbox. It will not work with customer tokens."
Brex also publishes live OpenID Connect discovery documents for both environments, and tells you to treat them as
authoritative: "This may change in the future without notice. Always use the well-known OpenID configuration
document as the source of truth for the base URL." Read them before you trust this page (§References).
If the documentation does not look like this, stop and report what you actually see rather than clicking on.
## 1. The route decision — read this first
Brex's own FAQ draws the line in one sentence: "The user token is used to authenticate your own Brex account. The
OAuth token is used when building partner applications to authenticate other Brex accounts."
So for a multi-tenant platform, **OAuth is the correct model and the user token is the fallback.** But the
correct model is gated and the fallback is not, and that asymmetry is the whole decision:
| | Partner OAuth | Per-customer user API token |
| --- | --- | --- |
| Who issues it | Brex developer support, after partner onboarding (§2) | The customer's own Brex admin, self-serve in their dashboard |
| Lead time | Weeks: application, agreement, staging build, demo review | Minutes |
| Onboarding UX | Redirect-based consent from your product | Customer copies a secret and pastes it into your product |
| Credential held | One client ID/secret, plus a token pair per customer | One long-lived bearer token per customer |
| Token shape | `access_token` (1 hour) + rotating `refresh_token` (90 days) | `bxt_…` bearer token, no refresh |
| Expiry | Access hourly; refresh must be exchanged inside 90 days | Expires after **90 days of no API calls**; dies if the user is deactivated |
| Scope control | The scope list Brex issues for your client; customer consents per scope | Whatever the customer happens to tick when creating the token |
| Scales to self-serve signup | Yes | No — every customer is a manual handoff |
**Pick partner OAuth if the platform will connect Brex accounts as a product feature.** It is the only route that
gives redirect-based onboarding, revocable per-customer grants and a credential your customer never has to handle.
Start §2 today, because the lead time is the long pole.
**Pick user tokens if you need to connect a handful of named customers now**, or while the partnership is in
flight. It works, it is documented, and it is the customer's own account admin authorizing their own account —
which is exactly what Brex intends it for. What you owe the customer in that case is §9's runbook, and what you owe
your own team is the knowledge that this does not scale and that each token is a long-lived secret with no
rotation story built in.
**Do not mix the two silently.** A connection made with a user token and a connection made with OAuth have
different expiry behaviour, different revocation paths and different scope granularity. Whatever stores the
credential must know which kind it holds.
## 2. Getting in: the partner programme
There are two doors and they lead to the same room.
- **Developer support** — `developer-support@brex.com` — is the technical door, and the one Brex's partner
authentication guide points at for client ID and secret. Brex asks that you include the request trace ID from
the `X-Brex-Trace-Id` response header on any API-error report, and warns you not to send tokens or
authorization headers in support mail.
- **The partner team** — via the "Become a partner" form on Brex's partners page — is the business door. Brex
groups partners as embedded finance, **technology partners** ("Integrate your software natively with Brex"),
accounting firms, PE/VC and service partners. A multi-tenant data connector is a technology partner.
Brex also runs a developer Slack community, linked from its contact page; useful for questions, not for
credentials.
**The documented onboarding sequence**, in order:
1. **Application and approval.** Brex approves the application before anything is issued.
2. **Staging credentials arrive over SendSafely, and expire in 7 days.** Treat the SendSafely link as perishable:
whoever receives it must be ready to move the values straight into the secret store. If it lapses, you ask
again.
3. **Agreement paperwork.** You supply company name, counterparty address, and the signer's name, email and
title; Brex sends a **Unilateral API Access Agreement**.
4. **A staging Brex account, on request.** "If you need access to an account on staging, provide us with an email
address and we'll provision a staging account for you and invite you to it." Ask for this explicitly — without
it you have credentials but no data to authorize against.
5. **Build the demo.**
6. **Share the demo as a video.** "Once you've built your demo, share it with us in a video and we'll generate
production credentials for you" — also delivered via SendSafely.
**What this means for planning.** Production access is gated on a working integration, so the sequencing is
staging-first: you cannot get production credentials, then build. Budget for the agreement's legal review on your
side, and for the fact that the demo is a real deliverable.
**What is *not* documented**, and therefore what you must not promise: Brex publishes no security questionnaire,
no penetration-test requirement, no connection cap, no listing or marketplace review, and no stated turnaround
time for any step. If the user needs those answers — because procurement, security review or a launch date
depends on them — that is a question for the Brex partner team, not something to infer (§Stop and ask).
## 3. Redirect URIs
Give Brex **every** callback host your platform serves, in the same message as the rest of the setup details.
There is no self-service editor: the addresses are "provided to Brex when the credentials were set up", and the
`redirect_uri` you send on the authorize call must match one of them **exactly**.
For Unified.to these are one per data center; confirm the current list with the platform owner rather than
assuming:
```
https://api.unified.to/oauth/code # us (default)
https://api-eu.unified.to/oauth/code # eu
https://api-au.unified.to/oauth/code # au
https://api-dev.unified.to/oauth/code # dev
```
Notes:
- **Register all four on day one**, including `api-dev`. Adding a data center later is an email and a wait, not a
form submission — and a region that launches without its callback registered is a region that cannot connect.
- **Exact match means exact**: scheme, host, path, case and trailing slash. A URI that is "obviously the same" is
not the same.
- Ask Brex to confirm, in writing, the exact list they stored, and keep that reply. It is the only copy of that
configuration you control.
- **Staging and production credentials are separate**, so confirm the redirect list is attached to both sets.
## 4. Scopes
Scopes are **space-delimited** on the authorize URL, and Brex states that "the scopes for your client will be
provided to you" once you are a registered partner — that is, the catalogue below is what exists, and what your
client may request is what Brex enables for it. Agree the list explicitly during onboarding.
Two scopes are structural rather than data-bearing, and a connector needs both:
| Scope | Why |
| --- | --- |
| `openid` | Required to make an OpenID Connect request |
| `offline_access` | **Required to obtain a refresh token** — omit it and every connection dies in an hour |
The OIDC discovery document also advertises the standard identity scopes `profile`, `email`, `address` and
`phone`. They return claims about the signed-in user; they return no business data.
### The catalogue, exactly as Brex spells it
| API | Read | Write |
| --- | --- | --- |
| **Transactions** | `accounts.card.readonly`, `accounts.cash.readonly`, `transactions.card.readonly`, `transactions.cash.readonly`, `statements.card.readonly`, `statements.cash.readonly` | *(none — this API is read-only)* |
| **Expenses** | `expenses.card.readonly` | `expenses.card` |
| **Budgets** | `budgets.readonly` | `budgets` |
| **Team** | `cards.readonly`, `companies.readonly`, `departments.readonly`, `legal_entities.readonly`, `locations.readonly`, `titles.readonly`, `users.readonly` | `cards`, `departments`, `legal_entities`, `locations`, `titles`, `users`; plus `cards.pan` for card numbers |
| **Payments** | `transfers.readonly`, `vendors.readonly`, `linked_accounts.readonly` | `transfers`, `vendors`, `incoming_transfers` |
| **Accounting** | `accounting.integration.read`, `accounting.record.read` | `accounting.integration.write`, `accounting.record.write` |
| **Fields** | `fields.read`, `field_values.read` | `fields.write`, `field_values.write` |
| **Travel** | `travel.trips.readonly` | `travel.trips` |
| **Onboarding** | — | `https://onboarding.brexapis.com/referrals` |
Traps worth more than the table:
1. **The naming convention is not uniform.** Most pairs are `x.readonly` / `x` (cards, users, budgets, transfers,
vendors, travel). But **Accounting and Fields use `.read` / `.write`** instead. Guessing `accounting.record.readonly`
or `fields.readonly` produces a scope that does not exist.
2. **Expenses is spelled `expenses.card`, not `expenses`** — even though the current list endpoint is the
un-suffixed `/v1/expenses` path, its published OpenAPI requires `expenses.card.readonly` or `expenses.card`.
This is the single easiest scope in the catalogue to get wrong, because the endpoint name and the scope name
disagree.
3. **The Onboarding scope is a URL.** `https://onboarding.brexapis.com/referrals` is the literal scope string.
That API is also the one exception to the grant type: onboarding uses the **client credentials grant**, with no
Brex user involved; every other API uses the authorization code grant.
4. **`cards.pan` is the one that reads actual card numbers.** Brex separates it from `cards` deliberately. Request
it only if the platform genuinely needs the PAN, and expect it to change the compliance conversation with both
Brex and your customers.
5. **Scopes are additive, per user.** Brex: adding functionality later means requesting the new scopes, "which
will send the user through the authentication flow again and add those scopes to their previously consented
scopes." Adding a scope does **not** upgrade tokens already issued.
6. **Consent is partial by design — this is the multi-tenant gotcha.** Brex: the client "may accept 0 to all of
the requested scopes which your application will then have access to", and the callback returns
`scope=` listing what was actually granted, which "can be a subset of what was requested." A connector
that assumes it got what it asked for will 403 on individual endpoints for individual customers, with nothing
wrong at the app level. **Read the granted scope list off the callback, store it with the connection, and let
it drive which objects you expose for that customer.**
### Who can consent
"Most Brex APIs require a Brex admin to grant access. In these cases, only users with the account admin role can
be authenticated." **Bookkeepers** may access the **accounting API** only. So the person who clicks Connect in
your product must be an account admin, or the flow fails for reasons your UI cannot explain — say so in the
connect screen.
If your users are accountants or bookkeepers who hold several Brex logins, Brex supports forcing a fresh login by
appending **`prompt=login`** to the authorize request. Without it, a servicer silently reconnects the same Brex
account they last signed into.
### Extra approval
Brex's published documentation does **not** describe a per-scope approval step: the approval gate is the
partnership itself, and the scope list is settled with Brex when your client is created. Treat "which of these
will Brex actually enable for us, and under what conditions" as a question for the partner conversation — not as
something to assume from the catalogue (§Stop and ask).
## 5. Capture the credentials
What you receive from Brex: a **client ID** and **client secret**, per environment, delivered over SendSafely
(staging first, production after the demo). Nothing self-serve regenerates them, so store them carefully the first
time — and remember the staging link expires in 7 days.
Endpoints, from Brex's partner guide and confirmed against the live OIDC discovery documents on 2026-09-20:
| | Production | Staging |
| --- | --- | --- |
| Auth server base | `https://accounts-api.brex.com/oauth2/default` | `https://accounts-api.staging.brexapps.com/oauth2/default` |
| Authorize | `…/v1/authorize` | `…/v1/authorize` |
| Token | `…/v1/token` | `…/v1/token` |
| Revoke | `…/v1/revoke` | `…/v1/revoke` |
| Userinfo | `…/v1/userinfo` | `…/v1/userinfo` |
| Discovery | `…/.well-known/openid-configuration` | `…/.well-known/openid-configuration` |
| API base | `https://api.brex.com` (formerly `https://platform.brexapis.com`) | `https://api-staging.brex.com` (formerly `https://platform.staging.brexapps.com`) |
The authorize request takes `client_id`, `response_type=code`, `redirect_uri`, `scope` (space-delimited) and
`state`. **`state` is required and "must be longer than 8 characters"** — Brex enforces a length, not just a
presence. Verify it on the way back.
**PKCE is supported but not required.** Discovery advertises `code_challenge_methods_supported: ["S256"]`. If the
client can send a code challenge, send one; it costs nothing and closes the code-interception hole.
The token exchange is `application/x-www-form-urlencoded` with `grant_type=authorization_code`, `code`,
`redirect_uri`, `client_id` and `client_secret` **in the body** — `client_secret_post`. Discovery also advertises
`client_secret_basic`, so HTTP Basic works if your HTTP client prefers it; pick one and be consistent.
The response carries `access_token`, `refresh_token` and `token_type: "bearer"`. Calls then send
`Authorization: Bearer `.
Report the secret once so the user can paste it into their secret store, say plainly that it is now in the
transcript and that replacing it means going back to Brex, then move on.
## 6. Token lifetimes and rotation
Four facts, and a connector that misses any one of them breaks later rather than now.
| Fact | Consequence |
| --- | --- |
| **Access token: 3600 seconds (1 hour)** | Refresh proactively; a stale token is a 401 on every call |
| **Refresh returns a new refresh token as well as a new access token** | Persist the new refresh token from *every* exchange, or the connection dies at the next refresh |
| **Refresh tokens "expire every 90 days"** | A connection nobody syncs for three months requires the customer to re-authorize |
| **Revocation is `POST {auth base}/v1/revoke`** with `token`, `client_id`, `client_secret` | This is how you cleanly disconnect a customer — use it on disconnect rather than dropping the row |
More on each:
- **Rotation is the silent killer.** Brex is explicit that the refresh response "will contain a new
`` as well as a new `REFRESH_TOKEN`". A client that stores only the value it got at connect works
until the first refresh and then fails permanently, with no user-visible event. Treat "we store the token we got
at connect" as a defect, not a design.
- **The 90-day clock is about exchange, not idle time per se.** Brex: refresh tokens "should be exchanged for a
new one before then. Failure to do so will require the user to re-authenticate." An actively-synced connection
stays alive indefinitely; a dormant one does not. If the platform has a pause/disable feature, make sure it does
not also pause refreshes.
- **Client credentials tokens do not refresh.** The onboarding API's client-credentials flow returns a 1-hour
token and no refresh token — Brex's advice there is simply to request a new one when it expires.
- **User tokens are a different clock entirely** (§9): they expire after **90 days without an API call**, and they
stop working the moment the underlying Brex user is deactivated.
## 7. Staging is not a sandbox
This matters more here than for most vendors, because the alternative to a test environment is experimenting
against real company money.
- **Staging is partner-only.** It arrives with your onboarding credentials; there is no public signup.
- **Brex labels it explicitly**: "Note: This is not a sandbox. It will not work with customer tokens." Staging is
a separate Brex world with separate credentials and a separately provisioned Brex account — not a mode of the
production one.
- **No availability guarantee, and data can vanish**: "We can remove data from the staging environment at any
time, so please do not use this in anything that's critical or a production use-case… Use staging for
point-in-time testing only." Do not build regression fixtures that assume a staging record still exists.
- **Ask for a staging Brex account explicitly** (§2, step 4). Credentials without an account to authorize against
prove only that the token endpoint answers.
- **Production is the only place your customers live**, and every read there is real financial data. Scope
minimally (§4), and treat any write path — transfers especially — as needing a deliberate, separate sign-off.
## 8. Limits, idempotency and webhooks
None of this is fixed by re-registering; design for it.
- **Rate limits, per client ID *and* Brex account**: up to **1,000 requests in 60 seconds**, **1,000 transfers in
24 hours**, **100 international wires in 24 hours**, **5,000 cards created in 24 hours**. Exceeding one returns
**HTTP 429**. Brex's guidance: prefer webhooks over polling, back off exponentially "with some randomness", and
throttle client-side with a token bucket per client ID. Contact support for higher limits. Note the scoping —
one noisy customer cannot exhaust another customer's budget, but your client ID is one half of the key.
- **Page sizes are not uniform, and they change.** The Expenses list endpoints had their **maximum `limit`
reduced from 1000 to 100 in February 2026**. A connector with one global page-size constant will start getting
400s from exactly one API. Cap per endpoint, from each API's own reference.
- **Idempotency keys are required on the dangerous endpoints.** `Idempotency-Key` is optional on most POST/PUT
calls and **required** on Create transfer and Create card. Brex's rules: keys must be "random strings with
sufficient entropy to avoid collisions like V4 UUIDs"; your application "must not provide identical idempotency
keys for different requests"; and it "should store these keys so that semantically identical requests are sent
with the same idempotency keys." **A key regenerated on each retry defeats the entire mechanism** — the retry of
a timed-out transfer becomes a second transfer. GET and DELETE ignore the header.
- **Webhooks exist but cover very little.** The published catalogue is six events: `REFERRAL_CREATED`,
`REFERRAL_ACTIVATED`, `REFERRAL_APPLICATION_STATUS_CHANGED` (Onboarding), `TRANSFER_PROCESSED`,
`TRANSFER_FAILED` (Payments), `USER_UPDATED` (Team); an `ACCOUNTING_RECORD_READY_FOR_EXPORT` event was added in
March 2026. There is **no** webhook for expenses or for card/cash transactions — those must be polled.
- **One webhook endpoint per customer per client ID.** Brex: "Currently only one webhook endpoint can be
registered per customer / `client_id`" — though one endpoint may subscribe to many event types. Registration is
by API (`POST /v1/webhooks`), and you must verify the signature on receipt.
- **Transactions lag, so poll with an overlap.** Brex documented in July and August 2026 that card and cash
transaction lists "may reflect a small lag" and recommended "a lookback window of at least one day when syncing
transactions so delayed transactions are not missed", and an overlapping `posted_at_start` when polling. A
poller whose high-water mark advances to "now" with no overlap **will silently drop late-posting transactions** —
and because the API returns only settled transactions, late posting is normal, not exceptional.
- **Pending transactions are not available at all.** Brex's FAQ: "Only settled transactions are returned from the
API." Do not promise real-time spend visibility.
## 9. No partnership yet? Ship the admin runbook
When the answer to §1 is user tokens, the deliverable per customer is this. Send it to the customer's **Brex
account admin or card admin** — nobody else can do it.
> **Connecting your Brex account**
>
> 1. Sign in to `https://dashboard.brex.com/` as an **account admin** or **card admin**.
> 2. Go to **Developer → Settings** (`https://dashboard.brex.com/settings/developer`).
> *If your company has not yet accepted the developer API agreement, you will be asked to review and accept the
> terms first. This is a one-time, company-level step and it requires someone empowered to accept it.*
> 3. Click **Create Token**.
> 4. Name the token something you will recognise later — include our platform's name, so it is obvious what it is
> for when someone audits your tokens.
> 5. **Select exactly these scopes** — no more: *(list the exact strings from §4 that the connector needs, and
> nothing else)*.
> 6. Confirm the summary screen, then select **Allow Access**.
> 7. **Copy the token immediately.** It begins `bxt_` and **you will not be able to see it again**; the dashboard
> shows only a partially obfuscated version afterwards. If you lose it, create a new one and replace it.
> 8. Send it to us through *(your secure channel — never email, chat or a ticket)*.
Tell them the three things that will otherwise surprise them later:
- **The token expires after 90 days without an API call.** Regular syncing keeps it alive; a paused connection
quietly dies.
- **The token is tied to a Brex user.** If that person is deactivated, the token stops working — so create it
under a durable admin, not someone's personal account that offboarding will close.
- **They can revoke it any time** from the same developer page, and calls "will immediately begin to fail".
And tell your own side: this is a long-lived bearer secret with no refresh and no rotation protocol. It needs the
same handling as any other customer credential, plus a plan for what happens when it expires (§11).
## 10. Verify end-to-end
1. **Read the discovery document** for the environment you are targeting and confirm the endpoints match what the
client is configured with. Brex says to treat it as the source of truth.
2. Run a full **authorize → consent → callback** against a staging Brex account. Confirm the consent screen lists
exactly the scopes you expect, and that `state` comes back matching what you sent.
3. **Read `scope` off the callback** and compare it to what you requested. Deliberately deselect one scope at
consent time and confirm the connector degrades gracefully instead of 403-ing at random later (§4).
4. Exchange the code and confirm you received both an `access_token` and a `refresh_token`. If there is no refresh
token, `offline_access` was missing.
5. Make one real read call with `Authorization: Bearer …`.
6. **Force a refresh, then force a second refresh using the token the first one returned.** Nothing else catches a
client that ignores rotation before production does.
7. Call `/v1/revoke` with the refresh token and confirm the connection is cleanly torn down.
8. Repeat 2–6 in production, authorized by a real account admin who is not you.
| Symptom | Cause |
| --- | --- |
| No app-registration page anywhere in the Brex dashboard | Correct — OAuth apps are issued by Brex, not self-registered (§1, §2) |
| Authorize request rejected on `redirect_uri` | Not byte-identical to an address supplied to Brex at credential setup, or registered against the other environment (§3) |
| Authorize rejected with a `state` complaint | `state` is required and must be **longer than 8 characters** (§5) |
| Token exchange succeeds, no `refresh_token` in the response | `offline_access` was not requested or not granted (§4, §6) |
| Consent completes, then some endpoints 403 for some customers | Partial consent — the customer granted a subset; read the granted `scope` off the callback (§4) |
| Every endpoint 403 for one customer | Consent given by a non-admin, or a bookkeeper outside the accounting API (§4) |
| All calls 401 after an hour | Access token expired; refresh not wired up (§6) |
| Works once, then every refresh fails | Rotated refresh token not persisted (§6) |
| Connection dies after a quiet few months | Refresh token passed its 90-day window; customer must re-authorize (§6) |
| A `bxt_` token stops working with no change | 90 days without a call, or the Brex user behind it was deactivated (§9) |
| `403`/`401` in staging with a customer-supplied token | Staging "will not work with customer tokens" — it is not a sandbox (§7) |
| Staging data disappeared | Expected — staging data may be purged at any time (§7) |
| HTTP 429 | Rate limit: 1,000 req/60s per client ID and account; back off with jitter, poll less (§8) |
| Expenses list 400s on page size | Expenses `limit` max was reduced from 1000 to 100 in Feb 2026 (§8) |
| A retried transfer went out twice | Idempotency key regenerated on retry instead of reused (§8) |
| Transactions missing from a sync | No lookback overlap; late-posting settled transactions fell behind the high-water mark (§8) |
| A servicer keeps reconnecting the same Brex account | Add `prompt=login` to the authorize request (§4) |
When reporting any API error to Brex, include the **`X-Brex-Trace-Id`** response header — and strip tokens and
authorization headers from whatever you paste.
## 11. Hand off — never commit the secret
- **Do not** write the client secret, an access token, a refresh token, or a customer's `bxt_` user token into
source control, a test, a fixture, a committed `.env`, a ticket, a PR body, or a chat channel. Brex says the
same about user tokens: "Never check it into version control or save it somewhere publicly accessible."
- **Brex secrets are self-identifying.** A value beginning `bxt_` is a live Brex user token with whatever scopes
its creator ticked, and on a production account that reaches real card, transaction and transfer data. If you
ever see one in a diff, a log or a paste, treat it as compromised, say so, and tell the customer to revoke it
from their developer dashboard immediately — revocation is instant and self-serve, so there is no reason to wait.
- **SendSafely links are perishable and single-purpose.** Move the values into the secret store on receipt; do not
forward the link around.
- **Replacing a client secret means going back to Brex.** There is no self-serve rotation, so plan a rotation the
way you would a migration, not a click.
- If a code change is needed (a redirect host, a scope, refresh-token persistence, per-endpoint page-size caps),
keep it secret-free and say what the human must set out of band.
- Close with: which route was taken (partner OAuth or user tokens) and why; the partner onboarding stage reached
and what is outstanding; client ID per environment and where each secret was delivered; the authorize, token and
revoke URLs; the API base URL per environment; the exact scope strings agreed; the redirect URIs supplied to
Brex and Brex's written confirmation of them; and anything left for the user to do.
## Stop and ask
Hand back to a human rather than guessing when: nobody has decided between partner OAuth and per-customer user
tokens (§1 — it changes the product, not just the config); the Unilateral API Access Agreement needs signing, or
its terms need review; Brex asks for company details, a signer, or anything contractual (§2); someone needs a
committed answer on partner review timelines, security requirements, connection caps or listing — Brex publishes
none of these (§2); the scope list would include `cards.pan`, `transfers`, `incoming_transfers` or any write scope
that moves money or changes users (§4); the platform cannot store rotated refresh tokens (§6 — report it, do not
register and hope); a customer's production Brex account is about to be used as a test environment because staging
was not provisioned (§7); replacing a live client secret is on the table (§11); or the documentation does not
match the **Platform state** section above.
Never attempt to create Brex credentials through a logged-in dashboard session on the user's behalf, and never ask
a customer to send a `bxt_` token over an insecure channel.
## References
Verified 2026-09-20. `developer.brex.com` returns real HTTP 404s for paths that do not exist (checked), so the
status of these links is meaningful; each was also read on that date. Appending `.md` to a `/guides/…` path
returns the same page as Markdown, which is the fastest way to re-verify a quote.
- Brex API documentation home — https://developer.brex.com/
- Quickstart — https://developer.brex.com/guides/quickstart
- Authentication (user API tokens) — https://developer.brex.com/guides/authentication
- **Partner authentication (OAuth: endpoints, grants, PKCE, state, token lifetimes, revoke, redirect URIs)** — https://developer.brex.com/guides/partner_authentication
- **Partner onboarding (SendSafely, 7-day staging credentials, API access agreement, demo → production)** — https://developer.brex.com/docs/partner_onboarding/
- User roles, permissions and the full scope catalogue — https://developer.brex.com/guides/roles_permissions_scopes
- Rate limits — https://developer.brex.com/guides/rate_limits
- Idempotency — https://developer.brex.com/guides/idempotency
- Webhooks (event catalogue, one endpoint per customer/client ID) — https://developer.brex.com/guides/webhooks
- Changelog — https://developer.brex.com/changelog
- Contact us (developer-support@brex.com, `X-Brex-Trace-Id`, Slack community) — https://developer.brex.com/docs/support
- Brex API FAQ (user token vs OAuth token, settled-only transactions) — https://developer.brex.com/docs/faq
- OIDC discovery, production — https://accounts-api.brex.com/oauth2/default/.well-known/openid-configuration
- OIDC discovery, staging — https://accounts-api.staging.brexapps.com/oauth2/default/.well-known/openid-configuration
- Expenses API reference — https://developer.brex.com/openapi/expenses_api/
- Expenses API OpenAPI bundle (per-endpoint scopes) — https://developer.brex.com/_bundle/openapi/expenses_api.yaml
- Team API reference — https://developer.brex.com/openapi/team_api/
- Transactions API reference — https://developer.brex.com/openapi/transactions_api/
- Payments API reference — https://developer.brex.com/openapi/payments_api/
- Budgets API reference — https://developer.brex.com/openapi/budgets_api/
- Accounting API reference — https://developer.brex.com/openapi/accounting_api/
- Fields API reference — https://developer.brex.com/openapi/fields_api/
- Travel API reference — https://developer.brex.com/openapi/travel_api/
- Onboarding API reference — https://developer.brex.com/openapi/onboarding_api/
- Webhooks API reference — https://developer.brex.com/openapi/webhooks_api/
- Brex MCP server (OAuth and API-key auth; beta since April 2026) — https://developer.brex.com/docs/mcp
- Partner with Brex (technology partners, "Become a partner" form) — https://www.brex.com/partners
- Brex API help-centre article — https://www.brex.com/support/brex-api
- Brex dashboard — developer settings (where customers create user tokens) — https://dashboard.brex.com/settings/developer
- Brex status — https://status.brex.com/
## Product facts: the connector, as of 2026-09-20
A dated snapshot of how this platform's Brex connector behaves. Treat it as a starting point for a conversation
with the connector's owner, not as a specification.
**Authorization.** It authorizes against `https://accounts-api.brex.com/oauth2/default/v1/authorize` and exchanges
at `…/v1/token`, sending `client_id`, `response_type`, `redirect_uri`, `scope` and `state` on the authorize URL.
The exchange is a form POST carrying `client_id`, `client_secret`, `redirect_uri`, `code` and `grant_type` in the
body (`client_secret_post`); refresh sends `client_id`, `client_secret`, `redirect_uri`, `refresh_token` and
`grant_type`. Access tokens are presented as `Bearer`. **PKCE is not sent**, and no `prompt` parameter is sent —
both are optional on Brex's side (§5, §4), but `prompt=login` would matter for accountant/bookkeeper users.
**Environments.** It carries two host profiles: production on the legacy `https://platform.brexapis.com` API
hostname, and a Staging profile on `https://platform.staging.brexapps.com` with the staging auth server. Both
legacy hostnames remain served (§Platform state), but the connector has not moved to `api.brex.com` /
`api-staging.brex.com`.
**Second auth mode.** Besides OAuth, it accepts a customer-supplied API token presented as a bearer token, and its
customer-facing instructions point at the Brex dashboard's developer settings page — i.e. it already implements
§9's user-token route.
**Scopes.** Every capability's scope set begins with `offline_access openid profile email`, and a login-only set of
`openid profile email` is used for the identity flow. Per capability it then adds: `users.readonly`/`users`,
`locations.readonly`/`locations`, `departments.readonly`/`departments`, `transfers.readonly`, `cards.readonly`,
`transactions.card.readonly`, `companies.readonly`, `vendors.readonly`, `accounts.cash.readonly` and
`transactions.cash.readonly`. All of those match Brex's published per-endpoint requirements.
**Three things worth checking with the owner:**
1. **The expense capability requests no expense scope.** Its scope set is the `offline_access openid profile email`
baseline and nothing else, while Brex's published OpenAPI for the expenses list and get endpoints requires
`expenses.card.readonly` or `expenses.card`. Any customer authorized through this path would be granted no
expense access, and expense calls should 403 — the read path appears to work today only for connections made
with a user API token whose creator happened to tick the expense scope.
2. **The page-size ceiling is 1000 for all objects.** Brex reduced the Expenses list maximum from 1000 to 100 in
February 2026 (§8), so a large page request against expenses is expected to fail.
3. **Two write-path details on Brex's dangerous endpoints.** The `Idempotency-Key` it sends on create and update is
generated from the current millisecond-of-second plus a random number, freshly computed per attempt. That is
both low-entropy against Brex's "V4 UUID"-grade guidance and, more importantly, **not stable across retries** —
Brex's stated purpose for the header (§8). Separately, the cash-transaction poller advances its per-account
high-water mark to the current timestamp with **no lookback overlap**, against Brex's July/August 2026 guidance
to use at least a one-day overlapping window because settled transactions can post late.
**Credentials in source:** none found. No client ID, client secret or API token value appears in the connector's
Brex sources; the only credential-shaped strings are parameter names.
## bullhorn-oauth-app
URL: https://docs.unified.to/skills/bullhorn-oauth-app/SKILL.md
# Bullhorn API Credentials
**Read this first, because it may end the run: Bullhorn has no developer portal, and Bullhorn's published policy
forbids the exact shape of platform this skill is usually invoked for.** There is no console, no "create app" button,
no self-service registration of any kind. Every Bullhorn OAuth credential is created by a human at Bullhorn — Support
for a customer's own key, the Alliances team for a contracted integrator — and delivered by email through a support
case. And Bullhorn's own API Access FAQ answers the middleware question directly and in the negative:
> "Q: Can I leverage a third party to build my integration? A: **We do not permit third-party 'connector' or
> 'middleware' companies to build integrations with Bullhorn.** Integrators are required to leverage in-house
> developers to build a direct, platform-to-platform integration to the Bullhorn API."
and, on the obvious workaround of just collecting each customer's own key:
> "Q: Can I just get access to my customer's instance and build directly to them? A: We do not offer free access to
> anybody, and **customers will not be provided with their API Key if they intend to provide it to a third party
> vendor who is not contracted with Bullhorn.**"
The Fair Use Policy says the same thing from the legal side: a third-party service provider accessing the API on a
customer's behalf "is subject to all terms of this policy, including … registering with Bullhorn," access happens only
"at such customer's specific written instruction identifying the third party," and there must be "No Access on Behalf
of Others … without Bullhorn's explicit written permission."
So there are exactly two honest answers to "get me Bullhorn OAuth credentials for our multi-tenant platform":
1. **The platform contracts with Bullhorn** under the API Access Program — annual platform fee, no redlines on the
agreement, a security assessment, and only then a sandbox (§3). Note that even a contracted integrator is told to
build "a direct, platform-to-platform integration," so whether a unified-API layer qualifies is a **commercial
conversation with Bullhorn, not a technical one**. Get it in writing before building.
2. **Each customer holds their own credential**, requested from Bullhorn Support under their own contract, with
Bullhorn's knowledge that a named third party will use it (§4). This is the path most platforms are actually on,
and the one the FAQ above constrains. It is workable only where the customer has told Bullhorn who you are.
Do not start a registration that cannot complete. Establish which of the two applies (§1) before anything technical.
Once you do hold credentials, four things cost real time, and three of them have nothing to do with registration: the
**per-customer data-centre swimlane** that makes the auth host itself different for every tenant and must be
discovered at runtime (§5) — the single most common Bullhorn integration failure; the **two-step token dance**, where
the OAuth access token is not an API credential at all but a ticket you trade for a short-lived REST session (§6);
**refresh tokens that are single-use and are not enabled on every key** (§6); and **the absence of scopes entirely**,
because Bullhorn's access control is the authorizing user's entitlements, which your consent screen cannot request
and your token response cannot report (§7).
## Inputs to collect before you start
Ask in one batch. Never invent.
| Input | Notes |
| --- | --- |
| **Which credential model** | Platform-level API Access contract, or per-customer keys? (§1) |
| **Contract status** | Is there a signed Bullhorn API Access Agreement? A sandbox? A named Alliances contact? (§3) |
| **For per-customer keys: who is the customer's authorized support contact** | Only they can open the ticket (§4) |
| **Owner's email for the key request** | Bullhorn sends the credentials to this address, and only this address (§4) |
| **Redirect URI(s)** | Every callback host, final, up front — changing them is another support ticket (§4, §5) |
| **Environment** | Sandbox and production are separate keys on separate swimlanes; request each separately (§4) |
| **Whether refresh tokens are required** | Must be explicitly requested — a key can be issued without them (§6) |
| **The customer's API username** | Needed at *authorize* time to find their data centre, not just at call time (§5) |
| **The Bullhorn edition / cluster** | Some editions have no API access at all; the cluster ID fixes the swimlane (§5, §8) |
| **Expected monthly call volume** | Limits are per client ID and shared across all your customers (§8) |
## Quick Start
1. Establish which **credential model** is legitimately available here, and whether the middleware prohibition ends
the run (§1). Most wrong turns — and every wasted month — start here.
2. Confirm whether credentials already exist worth reusing; re-issuing orphans every existing authorization (§2).
3. If platform-level: contract through Bullhorn Alliances, pass the security assessment, get the sandbox (§3).
4. Request the key by support ticket, with the redirect URI and refresh-token requirement stated explicitly (§4).
5. Build **data-centre discovery** before you build anything else — the auth host is per customer (§5).
6. Implement the **two-step token dance** and the single-use refresh rotation (§6).
7. Stop looking for scopes. Pin down the authorizing user's **entitlements** instead (§7).
8. Check rate limits, call caps and edition gates before promising a launch date (§8).
9. Verify with a real authorize → callback → login → refresh → refresh-again round trip on a *second* swimlane (§9).
10. Hand the secret to a human, never to source control (§10).
## Platform state (verified 2026-09-20 — re-verify before trusting)
- **There is no Bullhorn developer portal.** Bullhorn's developer FAQ and Getting Started page both say the same
thing: "Bullhorn customers can obtain OAuth keys for developing applications with the Bullhorn REST API by creating
a support ticket via the Bullhorn Resource Center." Bullhorn's knowledge base restates it flatly for the one
credential-request workflow it documents step by step: "These credentials are not self-service."
- **Partner keys come from a different door.** Bullhorn's FAQ: "Partner keys are only available directly from
Bullhorn. If you are interested in becoming a partner, send an email message to `partners@bullhorn.com` or fill out
the form available on the Bullhorn Marketplace."
- **Middleware/connector companies are prohibited** from building Bullhorn integrations per the API Access FAQ, and
customers are told they will not receive an API key intended for an uncontracted third party. This is current as of
this verification and is the single most important fact on this page.
- **The API Access Program is paid and non-negotiable.** Annual platform fee (amount **not published** — do not quote
a figure), including "a sandbox, technical resources, and 200,000 API calls per month," overage charges beyond that,
fee "must be paid in full at the beginning of each annual term," and "we do not accept redlines to the API Access
Agreement." Onboarding order: Alliances sends the contract → Finance invoices → **security assessment** → sandbox
access once the assessment passes and the invoice clears.
- **Listing is a separate paid engagement.** "Promotion of your integration is not allowed unless you decide to go
through our validation process. This is a paid engagement with our Technical Services team." The platform-partner
page adds that "All integrations must undergo a Technical Services-assisted validation engagement to ensure they
meet our security, data privacy, and technical performance standards."
- **The published data-centre list is out of date.** `Data-Center-URLs` is bylined **April 9, 2018** and does not
list an Australian lane at all, yet `auth-aus.bullhornstaffing.com` and `rest-aus.bullhornstaffing.com` both
resolve in DNS today, and a live `loginInfo` response for an AU cluster returns `auth-aus`/`rest-aus` with
`superClusterId: 66`. The page also lists APAC as CLS61/CLS62 on `auth-syd`, which does not cover every APAC
cluster seen in the wild. **Treat the published list as documentation of the idea, never as a lookup table.**
- **`loginInfo` fails open, which is dangerous.** On 2026-09-20 a GET of
`https://rest.bullhornstaffing.com/rest-services/loginInfo?username=` returned
**HTTP 200** with a complete, plausible response body pointing at a default US-West lane (`cls31`, `auth-west`,
`rest-west`). It does **not** 404 on an unknown user. A typo in the API username therefore produces a confidently
wrong data centre rather than an error.
- **Rate limits are scoped to the client ID, not the tenant.** Bullhorn's knowledge base: "Rate limits are scoped to
your OAuth Client ID, not to individual tenants or sessions. This means all API calls made under the same OAuth
Client ID share a single rate limit." For a platform with one shared client ID across many customers this is the
defining capacity constraint (§8).
- **The Fair Use Policy was last bylined 17 December 2025** and now carries explicit AI/LLM clauses: no connecting the
API "to any 3rd party AI or LLM tools for viewing or updating data without Bullhorn's explicit written permission,"
and no export/import/update/delete "by any unauthorized solutions or models, like Model Context Protocols (i.e.
MCPs), without Bullhorn's explicit written permission." If the platform exposes Bullhorn data to an AI feature,
that is a **contract question to raise before shipping**, not a footnote.
- **No PKCE anywhere in Bullhorn's documented flow**, and no scope parameter. Neither appears in the OAuth overview
or the Getting Started walkthrough. Absence of documentation is not proof of absence; it is proof you should not
build on it.
- **Two API generations coexist.** Bullhorn documents both a REST API and a legacy SOAP ("web services") API, and
recommends REST. SOAP keys are self-serve in the customer's own account (Tools → BH Connect → Web Services API);
**REST OAuth keys are not**. A customer who says "I generated an API key myself" has almost certainly generated the
wrong one.
- **Support-forum answers are not documentation.** `supportforums.bullhorn.com` was unreachable from this run; where
it is reachable, treat it as community folklore and confirm anything load-bearing against a Bullhorn-owned page.
If the developer pages or the knowledge base do not look like this, stop and report what you actually see.
## 1. Which credential, and who is allowed to hold it
| Surface | Credential | Hosts | Who gets it |
| --- | --- | --- | --- |
| **REST API** (core ATS/CRM read/write) via **OAuth 2.0** | Client ID + secret, authorization code grant, plus an API username and a password set on that API user | authorize/token on `auth-{lane}.bullhornstaffing.com/oauth`; REST on `rest-{lane}.bullhornstaffing.com/rest-services` | Bullhorn Support, by ticket, for a contracted customer; Bullhorn Alliances for a contracted integrator |
| **REST API** as a contracted **integrator** | Same shape, issued under the API Access Program with a sandbox | Same | Companies with a signed API Access Agreement (§3) |
| **SOAP / "web services" API** (legacy) | API key generated by the customer's own admin in Tools → BH Connect → Web Services API | `api-{lane}.bullhornstaffing.com` | Any customer admin, self-serve — **not** a REST credential |
Consequences worth saying out loud before anyone starts work:
- **"Bullhorn API key" is ambiguous and the ambiguity costs a week.** A customer admin can self-serve a SOAP key in
about a minute, and will cheerfully send it to you. It will not work against REST. Ask for the **REST OAuth Client
ID, Client Secret, API Username** by those exact names, separately.
- **There is no client-credentials or service-account grant.** Bullhorn's documented OAuth is authorization-code only.
A human user's login is required at least once per credential, even for an unattended integration — Bullhorn's own
guidance for "OAuth 2 clients without user agents" is to perform the authorization step **outside** normal
operation and then live on refresh tokens.
- **The credential is bound to a Bullhorn *user*, and therefore to that user's permissions.** There is no app
identity with its own permission set. See §7.
- **Sandbox and production are different clusters with different hosts and different keys.** Bullhorn's knowledge
base is explicit for the one documented request workflow: "Each environment requires its own Client ID and Client
Secret. Submit a separate support ticket for each environment you plan to deploy to."
> **Product fact — dated.** As of **2026-09-20**, this platform's Bullhorn connector uses **OAuth 2.0 only**, and
> ships **no shared credentials**: every workspace must supply its own, which in practice means its own relationship
> with Bullhorn. It asks each workspace for **four** values, in this order — **OAuth2 Client ID, OAuth2 Client
> Secret, API Username, API Password** — which matches exactly the four values Bullhorn's knowledge base says Support
> issues. Its on-file default hosts are `https://auth.bullhornstaffing.com/oauth/authorize`,
> `https://auth.bullhornstaffing.com/oauth/token` and `https://rest.bullhornstaffing.com`, with a long list of
> per-data-centre alternatives recorded but **disabled**, because the hosts are resolved at runtime instead (below).
> **Data-centre discovery happens at authorize time:** before building the consent URL it takes the **API Username**
> the workspace supplied, calls `https://rest.bullhornstaffing.com/rest-services/loginInfo?username=`,
> and rewrites the authorize URL, the token URL and the API base from the `oauthUrl` and `restUrl` the response
> returns, persisting them for that connection. On the authorize request it sends `client_id`, `state`,
> `response_type` and the literal `action=login`; it sends **no `scope`**, **no PKCE challenge**, and — deliberately —
> **no `redirect_uri`**, relying on the callback registered on the key. At the token endpoint it POSTs `grant_type`,
> `code`, `client_id` and `client_secret` as **parameters**, not as an HTTP Basic header; refreshes send `client_id`,
> `client_secret`, `refresh_token` and `grant_type`. **Immediately after a successful token exchange, and again after
> every refresh, it performs the second step**: a call to `/rest-services/login` with the OAuth
> access token and `version=*`, takes the `BhRestToken` and the `restUrl` from the response, **replaces the stored
> access token with the `BhRestToken`**, and normalizes the REST base to a trailing slash. REST calls then carry the
> session key in a **`BHRestToken` header**, not an `Authorization: Bearer` header. Its recorded guidance to
> customers is the Bullhorn support-ticket route plus "Make sure that the redirect URL is …/oauth/code", and its
> recorded rate-limit handling is Bullhorn's own advice: wait one second and retry until successful. **Confirm all of
> this with the connector's owner before acting on it** — connector configuration changes independently of this
> skill.
## 2. Reuse the existing credentials, or request new ones
New credentials mean a **new client ID, and every existing customer authorization is bound to the old one** — every
customer re-authorizes, and on Bullhorn that means every customer files a ticket or clicks through consent again.
Reuse what exists for: adding or changing a redirect URI, enabling refresh tokens on a key that lacks them, rotating a
compromised secret, or diagnosing a failure. All four are handled on the existing key, by support ticket (§4).
Request a **new** key only when the user explicitly wants one: a separate product, a replacement for a compromised
client, or a new environment — which *is* a new key by Bullhorn's design, not a setting.
One Bullhorn-specific wrinkle that pushes the other way: because rate limits are **per client ID and shared across
every tenant using it** (§8), a platform at scale may legitimately want more than one client ID purely for capacity.
That is a conversation with Bullhorn Alliances, not something to engineer around quietly.
## 3. The contract gate: the API Access Program
This section applies when the **platform** is getting credentials, rather than each customer.
Entry point: `partners@bullhorn.com`, or the form on the Bullhorn Marketplace / "Integrate with Bullhorn" page.
Bullhorn's published onboarding sequence:
1. **Bullhorn Alliances sends the contract for signature.** The FAQ states plainly that redlines are not accepted:
"we do not require that same level of access to the integrator solution … The terms set out in the contract, in
particular in the Limitations of Liability and Indemnification sections, are meant to mitigate our risk and may not
be made mutual."
2. **Finance issues an invoice for the annual platform fee**, payable in full at the start of each annual term, with
no discounts and no monthly or quarterly plan.
3. **A Security Assessment** must be completed and passed by Bullhorn's compliance team **before** sandbox access.
4. **Sandbox access** arrives once the assessment passes and the invoice clears.
5. **Validation** — needed before you may promote or list the integration — is a *separate* paid engagement with
Bullhorn's Technical Services team.
What the fee buys, per Bullhorn: a sandbox, technical resources, and **200,000 API calls per month**, with overage
charges beyond that and the option to pre-commit to more volume at a higher annual cost.
Things this section deliberately does not tell you, because Bullhorn does not publish them: the fee amount, the
turnaround time for each step, the contents of the security assessment, and whether a unified-API platform is
eligible at all given the middleware prohibition in §1. **All four are questions for Bullhorn, and all four are
business decisions.** Do not fill in security, compliance or commercial claims on the user's behalf — collect the
questions and hand them back.
**If this session has no browser automation** (the usual case for a CLI or cloud run), do not pretend to click. Give
the user an exact, ordered path with the literal values to paste — the callbacks from §4 — or a ready-to-send message
to `partners@bullhorn.com`, then continue once they report back.
## 4. Requesting the credential from Bullhorn Support
This is the per-customer path, and it is also the mechanics of how any Bullhorn REST key gets made. Bullhorn's
knowledge base documents the request workflow step by step for one specific developer scenario; the shape generalizes,
but **note the scoping honestly** when you quote it — Bullhorn has not published an equivalent article for the
general partner case.
**Who files it:** the customer's authorized support contact, through the Bullhorn Resource Center. A third party may
be named: Bullhorn's FAQ on that article says "Can a third-party developer or partner request credentials on behalf
of a client? Yes. Include your developer contact information in the ticket. The credentials will be sent to the
contact listed as the Owner's Email on the key request."
**What the ticket must contain** — put all of it in the first message, because each round trip is business days:
- That you are requesting **REST API OAuth credentials** (say REST explicitly; see the SOAP trap in §1).
- The **developer contact name and email** the credentials should be sent to (the Owner's Email).
- The **purpose** of the credentials and the name of the integration.
- The **target environment** (sandbox/staging or production) — one ticket per environment.
- The **redirect URI(s)**, exactly, character for character (§5). Bullhorn's FAQ calls the redirect URI "a required
part of the OAuth key configuration."
- **That the key must be configured to issue refresh tokens.** Bullhorn's OAuth overview says "An OAuth API key *can
be configured* to return long-lived refresh tokens in addition to access tokens," and the Getting Started page
hedges the same way: "*If* Bullhorn has provided you with the ability to generate refresh tokens…". A key without
them forces a full re-authorization every ten minutes. **Ask for them by name.**
**What comes back, and what does not.** Bullhorn Support delivers the **Client ID, Client Secret and API Username**
through the support case. The **API user's password is not issued** — per Bullhorn, "Before passing the credentials
to your developer, you will need to generate a password for the API user." Somebody on the customer side must set it
in the Bullhorn front end. Allow "a few business days" for processing, and expect an internal configuration step on
Bullhorn's side that can silently be incomplete — Bullhorn's own troubleshooting advice for a key that will not work
is to "follow up on your original support ticket to confirm that all processing steps have been completed on your
key."
**There is no console to re-read the secret in.** Treat it as shown once and store it immediately. Rotation is
another ticket: "Contact Bullhorn Support to request a new Client Secret."
**The flow itself**, once you hold credentials. Hosts are per customer — `{lane}` comes from §5, and there is no
correct value to hardcode:
- Authorize: `GET https://auth-{lane}.bullhornstaffing.com/oauth/authorize` with `client_id`, `response_type=code`,
`action=Login`, `state` (recommended by Bullhorn, and your CSRF defence) and an optional `redirect_uri`. Bullhorn
documents an optional `username`/`password` pair on this URL that skips the login page — **do not use it for a
multi-tenant flow**; let the customer type their own credentials on Bullhorn's page. Without them the user gets a
Bullhorn login page, then a Terms of Service page which, per Bullhorn, "is only displayed the first time a user's
credentials are provided for the specified clientId."
- Exchange: `POST https://auth-{lane}.bullhornstaffing.com/oauth/token` with `grant_type=authorization_code`, `code`,
`client_id`, `client_secret` and — only if you sent one on authorize — the **same** `redirect_uri`.
- Then, and this is the part people miss, **log in** (§6). The access token is not an API credential.
## 5. Redirect URIs, and the swimlane that is not yours to choose
### The callbacks
Register **every** callback host in the same ticket. Bullhorn's OAuth overview refers to "the redirect URI(s) that you
provide to Bullhorn for your OAuth API key," so more than one is possible, but there is no self-service editor: each
change is another ticket and another wait. For this platform these are one per data centre; confirm the current list
with the platform owner rather than assuming:
```
https://api.unified.to/oauth/code # us (default)
https://api-eu.unified.to/oauth/code # eu
https://api-au.unified.to/oauth/code # au
https://api-dev.unified.to/oauth/code # dev
```
**A trap specific to this connector.** It deliberately does **not** send `redirect_uri` on the authorize request,
which is legal — Bullhorn documents the parameter as optional and falls back to what is registered on the key. But
Bullhorn does **not** document how it chooses when a key carries *several* registered callbacks and the request names
none. Do not guess. Either register **one callback per client ID** — a separate Bullhorn key per data centre, which
is the safe reading — or get Bullhorn to state the selection rule in writing and test it. A key registered with all
four callbacks and a flow that names none is the kind of thing that works in the US and silently misroutes the EU.
Note also that Bullhorn's `redirect_uri` rule is symmetric: if you send one on authorize you **must** send the
identical value on the token exchange. Sending on one and not the other is a classic `invalid_grant`.
### The swimlane
**This is the fact that sinks most Bullhorn integrations, and it has no analogue at most ATS vendors.** Every Bullhorn
customer lives on a numbered cluster, and **the authorization host, the token host and the REST host are all
different per cluster**. `auth.bullhornstaffing.com` is not a universal front door you can point every tenant at.
Bullhorn's instruction is to discover it, per user, at runtime:
> "Run the following GET rest-services/loginInfo request with your API_Username to return the list of correct URLs
> for that user: `https://rest.bullhornstaffing.com/rest-services/loginInfo?username={API_Username}`. **If you do not
> use the correct URLs for a user, you will receive a 307 redirect to the correct data center. Your code must be
> written to handle that 307 redirect.**"
A live response (US West, abridged) looks like this — the two fields that matter are `oauthUrl` and `restUrl`:
```json
{
"oauthUrl": "https://auth-west.bullhornstaffing.com/oauth",
"restUrl": "https://rest-west.bullhornstaffing.com/rest-services",
"atsUrl": "https://cls31.bullhornstaffing.com",
"dataCenterId": 3,
"superClusterId": 31
}
```
Five things follow, and each of them is a bug somebody has shipped:
1. **Discovery must happen before the authorize redirect, not after the callback.** You need `oauthUrl` to build the
consent URL at all. That in turn means you need the customer's **API username before** they click Connect — which
is why it is an input on the connect form rather than something you learn from the token.
2. **`loginInfo` fails open.** An unknown username returned HTTP 200 and a full US-West payload on 2026-09-20 — not a
404. A typo does not fail; it silently authorizes against the wrong lane, and the failure surfaces much later as
307s or an unexplained 401. **Validate the username with the customer, and treat a lane that does not match their
browser URL as a red flag.**
3. **Never hardcode the lane list.** Bullhorn publishes one, bylined 2018, which today omits at least the Australian
lane (`auth-aus` / `rest-aus`, `superClusterId: 66`) while listing APAC only as `auth-syd`. Both `auth-aus` and
`rest-aus` resolve in DNS. The published page is a useful sanity check and a terrible source of truth.
4. **Handle the 307.** Bullhorn says your code must. Many HTTP clients do not follow 307 for POST bodies by default,
and a silently-dropped POST body is a maddening failure mode.
5. **The cluster is stable per customer.** Bullhorn: "cluster IDs do not change for a customer, so identifying the
correct cluster ID for all users for a given customer is a one-time exercise." Cache the discovered hosts per
connection — but re-discover on a 307 rather than trusting the cache forever.
If a customer is unsure of their cluster, it is in their own browser URL once logged in (`cls21.bullhornstaffing.com`
→ CLS21 → the UK data centre). Sandbox clusters are their own lanes again (`…-west9`, `…-east9`, `…-emea9`).
## 6. The two-step token dance, and the refresh token that is not what you think
**A Bullhorn access token is not an API credential.** It is a ten-minute ticket whose only purpose is to be traded
for a REST session. Getting this wrong produces the most confusing Bullhorn symptom there is: a textbook-clean OAuth
exchange followed by a 401 on every single API call.
The full sequence, per Bullhorn:
| Step | Call | You get | Lifetime |
| --- | --- | --- | --- |
| 1 | `GET .../oauth/authorize` | authorization code | seconds |
| 2 | `POST .../oauth/token` | `access_token`, and `refresh_token` **if the key is configured for it** | access token **10 minutes** |
| 3 | `POST https://rest-{lane}.bullhornstaffing.com/rest-services/login?version=*&access_token=…` | **`BhRestToken`** (the session key) **and a `restUrl`** | until the session expires |
| 4 | every API call | data | — |
| 5 | on `401` | back to step 2 via refresh, then step 3 again | — |
Details that matter:
- **Use the `restUrl` the login response gives you.** It is not the same string as the `restUrl` from `loginInfo` — it
carries the customer's `corpToken`: `https://rest{swimlane#}.bullhornstaffing.com/rest-services/{corpToken}/`.
Every subsequent entity call hangs off it. Building paths from the discovery URL instead of the login URL produces
404s that look like missing entities.
- **The session key travels in `BhRestToken`.** Bullhorn documents three carriers — "The session key can be provided
in the BhRestToken query string, a cookie, or an HTTP header." A header is the sane choice; a query string puts a
live session key into every access log you and Bullhorn keep.
- **Do not log in per request.** Bullhorn is unusually emphatic: "For performance and load reasons you must **NOT**
perform a fresh REST API login before every API request… Note that Bullhorn will apply strict limits to login
rates, and may block login requests that occur too frequently." A platform that re-logs-in on every call will be
throttled, and the failure will look like an auth bug.
- **The REST session's lifetime is not a published number.** Bullhorn says only "until the session expires" and gives
you `GET /ping`, which returns `{"sessionExpires": }` and is the documented way to test whether a session
is still valid. **Do not hardcode a session TTL from a forum post.** Drive re-authentication off the 401, and use
`/ping` when you need to check without spending a real call.
- **Refresh tokens are single-use and rotate.** Bullhorn's OAuth overview: "A refresh token expires after it is used
once to successfully obtain a new access token and refresh token." The Getting Started page says the same from the
other side: "A new refresh token is returned with every new access token. The refresh token has no expiration
date/time, but it does expire when a new access token and refresh token are generated." **Persist the new refresh
token from every refresh response, transactionally.** A client that replays the original works exactly once. A
crash between "refresh succeeded" and "new token saved" permanently bricks that connection.
- **Refresh tokens are an option on the key, not a guarantee.** If a key was issued without them, the connection
cannot survive ten minutes unattended and no amount of client code will fix it. That is a support ticket (§4).
- **Plan for unrecoverable refresh failures.** Bullhorn explicitly puts this on the integrator: "the partner must
provide a means to get a new refresh token to account for situations where a refresh token encounters an
unrecoverable error. The resource owner may be notified of the failure by email, sms, or another means to inform
them go through the full authorization process." A re-consent path is a product requirement here, not a nicety.
- **Client credentials go in the request, not an `Authorization` header.** Bullhorn's documented token and refresh
calls carry `client_id` and `client_secret` as parameters. HTTP Basic is not documented.
- **PKCE and `scope` do not appear.** Do not send them on the strength of habit (§7, Platform state).
## 7. There are no scopes — entitlements are the access control
Bullhorn's OAuth has no `scope` parameter, no consent checklist, and no per-app permission model. **What your
integration can do is exactly what the authorizing Bullhorn user can do**, decided inside the customer's Bullhorn
configuration, invisible to you at authorize time, and unreportable in the token response. This is the second-biggest
source of "it works for us and 403s for them."
The model, as Bullhorn documents it:
- `GET /entitlements/{entityType}` returns the current user's entitlements for an entity, e.g.
`["CREATE","READ","READ_DEPARTMENT","UPDATE","DELETE"]`. **This is your pre-flight check** — call it at connection
time and tell the customer what is missing, rather than discovering it as a 403 during a sync.
- Read, update and delete each come in **owned / department / corporate** flavours: `READ` (own records only),
`READ_DEPARTMENT`, `READ_CORPORATE`, and the matching `UPDATE*` / `DELETE*`. `CREATE` is flat. A user with only
`READ` sees their own records and an *empty list* for everyone else's — **not an error**. An integration that
reports "this customer has 4 candidates" when they have 40,000 is almost always looking at an owned-only
entitlement.
- `UPDATE_OWNER` is separate, and applies to Candidate, ClientContact, JobOrder, JobSubmission, Lead and Opportunity.
Update rights do not imply the right to change an owner.
- **Private records need `READ_PRIVATE`.** Without it a user "cannot read private entities owned by other users."
- **Private file attachments** need the "View All Private Attachments" entitlement, or ownership, or an explicit
share, or department membership. Attachment rights follow the entitlements of the **parent entity**.
- **Confidential fields have their own gates**: editing them "as part of a POST /entity call" requires the "Edit
Confidential Data" user action entitlement, and the set of confidential fields is a per-customer private-label
attribute.
- **The silent one.** Bullhorn: "For nested to-many associations for which the user does not have read entitlements,
only data for predefined fields is returned. The other fields are returned with a value of 'null'." Missing
permissions can arrive as `null`s in a `200`, with no error anywhere. Any mapping that treats `null` as "the
customer has no data" will quietly lie.
Practical consequences:
- **Ask the customer which Bullhorn user will authorize, and get corporate-level entitlements on the entities you
need.** The right answer is usually a dedicated API user, which is why Bullhorn Support issues an API Username
alongside the key.
- **User types are not readable over REST.** If you need to know which user type a mutual customer's API user sits in,
the customer has to ask Bullhorn. Do not build a feature that depends on reading it.
- Because there are no scopes, **adding a feature never requires re-consent** — it requires the customer's admin to
widen a user's entitlements. That is a support conversation you own, and it should be in your setup docs.
## 8. Limits, editions, and what does not count
From Bullhorn's knowledge base, for all ATS editions that have API access:
| Limit | Value |
| --- | --- |
| Calls per minute | **1,500**, scoped to the **OAuth Client ID** — shared by every tenant on that client ID |
| Total calls per month | **100,000** for a customer key, "unless otherwise agreed upon with Bullhorn" |
| Concurrent API sessions | **50** active |
| API subscriptions (event subscriptions) | **50** active; unused subscriptions and un-retrieved events have a **30-day TTL** |
| Contracted integrator allowance | **200,000 calls/month** included in the API Access Program, overage charged |
And the parts that change the arithmetic:
- **"API usage associated with validated Bullhorn partners does not count toward your API call limits. API users
created by Bullhorn Support for partner integrations also do not count against your API user limit."** Validation
is therefore not only a marketing badge — it materially changes whether your traffic eats the customer's budget.
- **The per-client-ID rate limit is the multi-tenant killer.** One shared client ID means one shared 1,500/min across
every customer you connect. Model this before promising throughput, and raise it with Alliances early.
- **Two different 429s.** "Too Many Requests, API rate limit exceeded" means you exceeded 1,500/min for your client
ID; "Server API Capacity Exceeded" means the server is loaded and is "unrelated to your call volume." Both are
handled the same way: wait one second, retry, repeat — Bullhorn says most clear within ten retries, and warns
"Ensure that there are no retry limits for 429 responses in your integration, or your application may not recover
correctly." Usefully, **calls that return 429 do not count against your usage limits**.
- **Some editions have no API at all.** Bullhorn's limits page: the limits apply to all ATS editions "except ATS
Growth (formerly Team Edition). ATS Growth edition does not include access to the Bullhorn API for custom
integrations." A separate knowledge-base page lists the requirement as "Front Office Growth or Enterprise edition
of Bullhorn." **These two pages use different product names and do not obviously agree** — if edition eligibility
is load-bearing for a deal, confirm it with Bullhorn rather than quoting either page.
- **Versioning:** older API versions are supported for at least three years after a successor ships, with at least
six months' end-of-life notice on the Bullhorn Resource Center. Build against the latest version.
- **Listing** happens on the Bullhorn Marketplace, after the paid Technical Services validation engagement (§3).
- **Branding:** the Fair Use Policy forbids using Bullhorn's name, trademarks or logos without a written agreement —
which includes the connect button and the marketing page, not just the logo file.
## 9. Verify end-to-end
Do not stop at "the token came back." On Bullhorn, the token coming back proves almost nothing.
1. Run `loginInfo` for the customer's API username and **read the result out loud to the customer**: does the
`atsUrl` cluster match the `cls##` in their own browser URL? If not, the username is wrong (the endpoint will not
tell you).
2. Authorize through the platform's real connect flow against a **second** Bullhorn tenant — ideally on a **different
swimlane** from the first. A single-lane test proves nothing about discovery, which is the thing most likely to be
broken.
3. Confirm the token response actually contains a **`refresh_token`**. If it does not, the key was issued without
them (§4) and everything after this is wasted effort.
4. Perform the **login step** and confirm you get both a `BhRestToken` and a `restUrl`, and that your first entity
call is built from **that** `restUrl` (with its `corpToken`), not from the discovery URL.
5. **Refresh, then refresh again using the token returned by the first refresh.** Two minutes of work for a failure
that otherwise appears ten minutes after the customer walks away.
6. Kill the session deliberately (or wait one out), confirm you get a `401`, and confirm the client recovers by
refreshing and re-logging-in rather than by hammering `/login`.
7. Call `GET /entitlements/{entityType}` for every entity the integration touches, as the user who will actually
authorize, and compare it against what you need. Then repeat step 4 as a **deliberately under-privileged** user
and confirm your code reports a permission problem instead of reporting "no data."
8. Point the client at a deliberately wrong lane and confirm it survives the **307** with its POST body intact.
9. Exercise pagination past the first page, and confirm your 429 handling has **no retry cap**.
| Symptom | Cause |
| --- | --- |
| OAuth exchange succeeds, every API call 401s | The access token was used as an API credential; the `/rest-services/login` step was skipped (§6) |
| 307 redirects, or POST bodies vanishing | Wrong data-centre host; client not handling 307 on POST (§5) |
| Works for US customers, fails for EU/AU | Hardcoded auth/REST hosts instead of per-user `loginInfo` discovery (§5) |
| `loginInfo` returns a plausible US-West lane for a customer who is plainly in the UK | The API username is wrong — the endpoint fails open with a default (§5) |
| Entity calls 404 on paths that should exist | REST base built from the discovery `restUrl` rather than the login `restUrl` with its `corpToken` (§6) |
| Second refresh fails, first succeeded (`invalid_grant`) | Refresh tokens are single-use; the rotated token was not persisted (§6) |
| Connection dies exactly ten minutes after connecting | Key issued without refresh-token capability (§4, §6) |
| Connection bricked after a crash mid-refresh | Rotated refresh token lost between "issued" and "saved" — needs a re-consent path (§6) |
| `invalid_grant` on the initial exchange | `redirect_uri` sent on authorize but not on token, or vice versa, or not matching the registered value (§4, §5) |
| Callback lands on the wrong data centre's host | Several callbacks registered on one key while the flow sends no `redirect_uri` (§5) |
| Throttled on `/login` specifically | Logging in before every request; Bullhorn applies strict login-rate limits (§6) |
| 403 on one customer only | Authorizing user's entitlements, not a scope or a key problem (§7) |
| List returns far fewer records than the customer expects, no error | Owned-only entitlement (`READ` without `READ_DEPARTMENT`/`READ_CORPORATE`) (§7) |
| Nested association fields arrive as `null` in a `200` | No read entitlement on the association — Bullhorn returns nulls, not errors (§7) |
| Private notes or attachments missing with no error | `READ_PRIVATE` / "View All Private Attachments" not granted (§7) |
| `429 Too Many Requests, API rate limit exceeded` under modest per-customer load | 1,500/min is shared across every tenant on that client ID (§8) |
| `429 Server API Capacity Exceeded` | Bullhorn-side load, unrelated to your volume; same retry (§8) |
| Integration stops recovering from 429s | A retry cap in the client — Bullhorn says there must not be one (§8) |
| Customer "already generated an API key" and it does not work | They generated a SOAP/web-services key, not a REST OAuth key (§1) |
| Event subscriptions silently stop delivering | 50-subscription cap, or the 30-day TTL on unused subscriptions/un-retrieved events (§8) |
| Customer cannot get a key at all | Their edition may not include API access, or Bullhorn declined because an uncontracted third party was named (§1, §8) |
## 10. Hand off — never commit the secret
- **Do not** write a client secret, API-user password or session key into source control, a test, a fixture, a
committed `.env`, a ticket, a PR body or a chat channel. Bullhorn says so itself on its own credential-request
page: "Do not commit credentials to source control or share them outside your team." The Fair Use Policy goes
further and makes API keys **contractually confidential**, and forbids resharing or transferring them.
- A `BhRestToken` is a **live session key**, not a derived value. Treat it as a secret with the same care as the
client secret, keep it out of URLs and logs, and do not persist it anywhere a support transcript could reach.
- If a code change is needed (a callback host, the discovery step, retry behaviour), keep it secret-free and say
plainly what the human must set out of band.
- Report a secret once so it can be pasted into the secret store, say clearly that it is now in the transcript and
can be rotated by ticket, then move on.
- Close with: which credential model you ended on and whether Bullhorn has agreed to it in writing; the client ID (or
which customer holds which key); where the secret was delivered; the environment and its swimlane; how the hosts
are discovered at runtime; whether the key was confirmed to issue refresh tokens; the entitlements the authorizing
user needs, in words the customer's Bullhorn admin can act on; the shared per-client-ID rate-limit budget; and
whatever is still waiting on Bullhorn.
## Stop and ask
Hand back to a human rather than guessing when: **the platform is a connector, middleware or unified-API layer and
has no signed Bullhorn agreement** — say so in the first reply, quote the FAQ, and do not start a request that
Bullhorn's published policy says will be refused; the API Access Agreement, security assessment or validation
engagement needs business, security or compliance claims; someone proposes re-issuing credentials on a live
integration (that re-authorizes every customer); a customer's support ticket comes back refused or asks who the third
party is; the **data centre cannot be determined** for a customer, or `loginInfo` disagrees with the cluster in their
browser URL; a key turns out not to issue refresh tokens and the customer will not re-ticket; the integration will
expose Bullhorn data to an AI or LLM feature, or to an MCP server (the Fair Use Policy requires explicit written
permission); expected volume approaches the per-client-ID rate limit or the monthly call cap; or the developer pages
and knowledge base no longer match the Platform state section above.
Note also that this skill was written without browser automation: every fact here came from fetching Bullhorn's
public documentation and probing its hosts and its `loginInfo` endpoint directly. Nothing here was read from a
logged-in portal, and Bullhorn's documentation is thinner and older than most vendors' — where a fact could not be
found on a Bullhorn-owned page, this skill says so rather than filling the gap. A run that also has no browser should
hand click paths and ticket text to the user rather than simulating a session.
## References
Verified to return HTTP 200 on 2026-09-20.
- Get Started with the Bullhorn REST API (data-centre discovery, authorize/token/login calls, 10-minute access token, refresh rotation, login-rate warning) — https://bullhorn.github.io/Getting-Started-with-REST/
- Bullhorn OAuth Authorization (client registration, refresh-token configuration, single-use refresh, terms-of-service screen, clients with and without user agents) — https://bullhorn.github.io/docs/oauth/
- Data-center-specific API URLs (the published lane list — bylined 2018; see Platform state) — https://bullhorn.github.io/Data-Center-URLs/
- API Fair Use Policy (registration requirement, third-party access, credential sharing, AI/LLM and MCP clauses, branding) — https://bullhorn.github.io/api-fair-use-policy/
- Developer FAQ (customer keys by support ticket; partner keys only from Bullhorn; `partners@bullhorn.com`; SOAP key self-service) — https://bullhorn.github.io/FAQ/
- REST API Reference (error codes, `/entitlements`, `/ping` and `sessionExpires`, `BhRestToken` carriers, null-on-no-entitlement behaviour) — https://bullhorn.github.io/rest-api-docs/index.html
- REST API Reference (index) — https://bullhorn.github.io/rest-api-docs/
- Entity Reference — https://bullhorn.github.io/rest-api-docs/entityref.html
- Bullhorn developer documentation home — https://bullhorn.github.io/
- Bullhorn developer docs index — https://bullhorn.github.io/docs/
- Bullhorn developer guides — https://bullhorn.github.io/guides/
- API Usage Limits, Versioning, and Backward Compatibility (1,500/min per client ID, 100k/month, 50 sessions, 50 subscriptions, the two 429s, edition exclusion, validated-partner exemption) — https://kb.bullhorn.com/ats/Content/BHATS/Topics/understandingBHAPIUsageLimitsVersioningBackwardCompatibility.htm
- Request REST API Credentials (the four credential values, "not self-service", what the ticket must contain, API-user password, per-environment keys, secret rotation) — https://kb.bullhorn.com/ats/Content/BHATS/Topics/BHExtensionConfigStarter.htm
- Customizing Bullhorn with Third Party Solutions (Marketplace vs custom API build, edition requirement) — https://kb.bullhorn.com/ats/Content/BHATS/Topics/customizingBHWithThirdPartySolutions.htm
- Bullhorn knowledge base home — https://kb.bullhorn.com/
- Bullhorn API Access FAQs (the middleware prohibition, annual platform fee, 200k calls, no redlines, onboarding order, validation as a paid engagement) — https://www.bullhorn.com/bullhorn-partner-program-faqs/
- Integrate with Bullhorn (the API Access application form) — https://www.bullhorn.com/become-a-partner/
- Bullhorn Partner Program Guide — https://www.bullhorn.com/partner-program-guide/
- Bullhorn Platform Partner Program (Technical Services-assisted validation engagement; `partners@bullhorn.com`) — https://www.bullhorn.com/partner-program-guide/bullhorn-platform-partner-program/
- Bullhorn Marketplace Partner Engagement Hub — https://www.bullhorn.com/partner-engagement-hub/
- Bullhorn Marketplace (marketing) — https://www.bullhorn.com/marketplace/
- Bullhorn Marketplace: Understanding the Ecosystem — https://www.bullhorn.com/marketplace/understanding-the-partner-ecosystem/
- Bullhorn Marketplace listings — https://marketplace.bullhorn.com/
- Bullhorn support (route to the Resource Center for credential tickets) — https://www.bullhorn.com/support/
- Bullhorn developer articles — https://developer.bullhorn.com/articles
- Bullhorn developer documentation — https://developer.bullhorn.com/documentation
## calendly-oauth-app
URL: https://docs.unified.to/skills/calendly-oauth-app/SKILL.md
# Calendly OAuth2 App Registration
Get a working Calendly OAuth client — a developer account, an OAuth application, redirect URIs, a scope set, a client
ID, a client secret and a webhook signing key — for a platform that connects many customers' Calendly accounts.
The form itself takes two minutes. Four things around it cost a release:
1. **Scopes are new, and new apps start with nothing.** Calendly shipped authorization scopes on **3 March 2026**.
Calendly's rule is blunt: *"For newly created OAuth apps and new Personal Access Tokens, no API access is granted
until scopes are explicitly requested and approved"* — while *"Legacy OAuth apps and Personal Access Tokens issued
before the introduction of scoped permissions retain full access."* So an app registered today does **not** behave
like the app registered in 2024 that your connector may still be running on, and a client that sends no `scope`
parameter gets a token that authenticates perfectly and is authorised for nothing (§5).
2. **Three secrets, shown once, never again.** Client secret *and* webhook signing key are displayed only on the
creation screen. Calendly states plainly you cannot see them when editing the app afterwards. Losing the signing key
means emailing developer support (§6).
3. **Refresh tokens are now single-use and rotate.** Calendly moved to OAuth 2.1 rotation with an enforcement deadline
of **31 August 2026** — already past as of this writing. A client that reuses a refresh token gets `invalid_grant`
and drops the customer (§6).
4. **The customer's plan and role, not your app, decide what works.** The API runs on every plan including Free, but
**webhooks require a paid plan**, three endpoints are Enterprise-only, Notetaker/meeting-recap data needs **Standard
Plus or Teams Plus**, and organization-wide reads need the authorizing user to be an **owner or admin**. None of
this is registerable — it is a property of whoever connects (§7).
## Inputs to collect before you start
Ask in one batch. Never invent.
| Input | Notes |
| --- | --- |
| **App name** | Shown to users at consent; editable later (§3) |
| **GitHub or Google account** to own the developer account | Calendly's developer account is **not** a Calendly user account (§2) |
| **Web or native** app kind | Web = confidential client, Basic auth at the token endpoint (§3) |
| **Sandbox or Production**, or both | Two separate apps, two separate credential sets (§3) |
| **Redirect URIs** | Every callback host the platform serves — and confirm how many this app may hold (§4) |
| **Which objects the connector reads and writes** | Decides the scope list, which may not be editable later (§5) |
| **Whether webhooks are in scope** | Adds `webhooks:*`, a signing key to store, and a paid-plan requirement on the customer (§7) |
| **Existing app or new one?** | A new client ID orphans every existing customer connection (§1) |
## Quick Start
1. Confirm a **new** app is really needed — new credentials re-authorize every customer (§1).
2. Sign up for a **developer account** with GitHub or Google; it is separate from any Calendly account (§2).
3. Create the app: name, web/native, **Sandbox or Production**, redirect URI, **scopes** (§3).
4. Enter **every** redirect URI, and find out whether this app accepts more than one (§4).
5. Pick scopes from the catalogue deliberately — a new app has zero access until they are granted (§5).
6. On the creation screen, copy **client ID, client secret and webhook signing key**. They are not shown again (§6).
7. Confirm the client sends `scope`, handles **2-hour** access tokens and **rotating single-use** refresh tokens (§6).
8. Check plan/role gating before promising a customer anything (§7).
9. Authorize from a **second, unrelated Calendly account** on a realistic plan, then hand the credentials over (§8, §9).
## Platform state (verified 2026-09-20 — re-verify before trusting)
Calendly rewrote most of this surface between March and August 2026. Anything written before 2026 describes an
unscoped, non-rotating OAuth 2.0 and will be wrong in the two places that matter.
- **OAuth 2.1 with scopes.** Calendly's own docs now say "OAuth 2.1", and a scope catalogue shipped on **3 March 2026**
("Authorization scopes for API access"). `:write` **implicitly includes** the matching `:read` in the same domain.
Users **can decline** individual scopes at install.
- **Backward compatibility is explicit and asymmetric.** Pre-scopes apps and PATs keep full access; new ones get none
until scopes are granted. Calendly also states that *"When a legacy token is refreshed, it is automatically migrated
to the scoped token format,"* transparently and without re-authorization — the docs do not say which scopes such a
migrated token ends up with. Treat that as an open question, not a guarantee.
- **Refresh token rotation.** Single-use rotating refresh tokens, per OAuth 2.1. Enforcement deadline **31 August
2026**; reusing a spent refresh token returns HTTP 400/401 with `invalid_grant`. The older reference page still
carries the pre-rotation sentence "Refresh Tokens don't expire until they are used" — that line is consistent with
rotation, not an exemption from it.
- **Access tokens last 2 hours** (`expires_in: 7200`), and **only 8 OAuth tokens per user may be requested per minute**.
- **PKCE is required for native apps and recommended, not enforced, for web apps.** Calendly: *"While we will not
enforce PKCE for web applications, we recommend using PKCE conforming to the RFC 7636 specification for both web and
native applications."* `S256` is the documented method.
- **Sandbox and Production are app-level environment settings**, chosen at creation and editable afterwards. The only
difference Calendly documents is the redirect-URI rule: Sandbox permits `http://localhost:PORT`, Production requires
HTTPS. Calendly does **not** document a separate sandbox API host, a separate auth host, or a pool of disposable test
accounts — both environments use `auth.calendly.com` and `api.calendly.com`. Do not assume Sandbox is isolated from
real data; confirm before pointing it at anything live.
- **No documented app review or approval gate.** Creating a Production OAuth app is self-serve; Calendly's docs
describe no submission, security review or listing requirement before other organizations can authorize it. A
*partner* relationship (`calendly.com/partners`) is a separate, sales-led conversation, not a prerequisite.
- **Recent API surface, in case someone assumes it is missing:** Contacts API and webhooks (27 May 2026), Notetaker /
meeting recaps API and webhooks (22 July 2026), Contact custom fields (25 August 2026), Scheduling API "Create Event
Invitee" (Oct 2025, rate limits revised 15 April 2026).
- **Two different OAuth surfaces exist, and they are not interchangeable.** Classic apps use `auth.calendly.com`.
Separately, `https://calendly.com/.well-known/oauth-authorization-server` advertises `calendly.com/oauth/authorize`,
`calendly.com/oauth/token`, a dynamic-registration endpoint, `token_endpoint_auth_methods_supported: ["none"]` and
S256 — that is the authorization server for Calendly's **MCP** server (`mcp.calendly.com`, scopes
`mcp:scheduling:read` / `mcp:scheduling:write`). Do not wire a connector to those hosts by following the well-known
document.
If the developer portal does not look like this, stop and report what you actually see rather than clicking on.
## 1. Decide: reuse the existing app, or register a new one
A new app means a **new client ID and secret**, and every existing customer token is bound to the old one — every
customer re-authorizes. Reuse the existing app for: adding a redirect URI, renaming, switching environment, or
diagnosing an authorization failure.
Register a **new** app only when the user explicitly wants one: a replacement for a compromised app, a separate app
for a different product, a Sandbox counterpart to a Production app, or — the Calendly-specific case — because the
existing app is a **legacy pre-scopes app** and someone wants a scoped one. That last migration is not a config tweak:
the legacy app has full access by grandfathering, and a scoped replacement starts with nothing until every scope is
requested and every customer re-consents. Say which path you are taking before you touch the portal.
There is one more Calendly-specific reason to think twice: if the app's scope set turns out **not to be editable after
creation** (§5), registering the wrong scopes is a new-app problem, not an edit.
## 2. The developer account is not a Calendly account
- Sign up at the developer portal (`https://developer.calendly.com`) using the **Sign Up** control, **with a GitHub or
Google account**. Calendly's instruction is explicit: *"Note: This is not your Calendly user account and is not
associated with your Calendly user account."* The FAQ repeats it: *"For the v2 API, the developer's account is not
connected to their Calendly account even if the same email address is utilized."*
- Practical consequence: the person who owns the OAuth app need not be, and is not automatically, a Calendly user.
Use a team-controlled GitHub/Google identity, not a person who might leave. Record whose it is.
- You still need at least one **real Calendly account** to test against (§8) — and, for anything organization-scoped,
one whose user is an **owner or admin** (§7).
- Personal access tokens are generated from the *Calendly* side instead (`calendly.com/integrations/api_webhooks`),
are not retrievable after creation, and now take a scope list of their own. They are the right answer for one
company's internal use and the wrong answer for a multi-tenant connector — every action would be attributed to one
person, and the token dies when their password or login email changes (§7).
Hand control back for anything only a human can do: OAuth sign-up with GitHub/Google, email verification, 2FA,
accepting terms. Do not retry a blocked step in a loop.
**If this session has no browser automation** (the usual case for a CLI or cloud run), do not pretend to click. Give
the user an exact, ordered click path with the literal values to paste — the redirect URIs from §4 and the scope list
from §5 — plus the warning that the secret and signing key appear exactly once, and continue once they report back.
## 3. Create the app
Developer portal → create a new OAuth application. The form, in Calendly's own order:
| Field | What it decides |
| --- | --- |
| **Name of your application** | What users see. Editable later |
| **Kind of application** — web or native | **Web** is a confidential client: client ID + secret, Basic auth at the token endpoint. **Native** is a public client: `client_id` in the body, PKCE with a `code_verifier`. A server-side multi-tenant connector is **web**. Editable later |
| **Environment** — Sandbox or Production | Sandbox allows `http://localhost:…` redirect URIs; Production requires HTTPS. Editable later |
| **Redirect URI** | §4 |
| **Scopes** | §5 — **not** listed among the attributes Calendly documents as editable later |
Calendly's guidance: *"We recommend starting with Sandbox for development and creating a second application for
Production when ready to go live with customer data."* Two apps means two client IDs, two secrets and two signing keys
— keep them clearly labelled, because the hosts are identical and nothing in a token tells you which app minted it
except the client ID.
The documented **editable** attributes after creation are: name of app, kind of app, environment type, redirect URI.
Scopes are absent from that list. Before you submit the form, check the portal for a scope editor on an existing app
and **report what you actually see** — if scopes really are fixed at creation, the scope decision in §5 is
irreversible without a new app and a customer-wide re-authorization.
## 4. Redirect URIs
Register **every** callback host the platform serves. For Unified.to these are one per data center; confirm the
current list with the platform owner rather than assuming:
```
https://api.unified.to/oauth/code # us (default)
https://api-eu.unified.to/oauth/code # eu
https://api-au.unified.to/oauth/code # au
https://api-dev.unified.to/oauth/code # dev
```
What to watch:
- **Production requires HTTPS.** Only the Sandbox environment permits `http://` with a `localhost` domain
(`http://localhost:1234` is Calendly's own example). A production app cannot hold a localhost dev callback.
- **Calendly does not document how many redirect URIs one app may hold.** The creation form and the edit list both
name "Redirect URI" in the singular, and no doc states a maximum. For a four-region platform that is the single most
consequential unknown on this page: if the field takes one value only, the choices are one app per data center
(four client IDs, four secrets, four signing keys) or a single shared callback host that forwards. **Look at the
field, report what it is, and do not invent a fan-out.**
- **`redirect_uri` is required in the token-exchange body** for the authorization-code grant, and Calendly says it
*"must be the same as the `redirect_uri` passed in the authorization request."* A mismatch fails at the exchange, not
at save time. Treat matching as exact — no trailing-slash or subpath forgiveness is documented.
- Native apps use a custom scheme (Calendly's example is `com.site.app://auth/calendly`). Irrelevant to a server-side
connector; do not copy it in.
## 5. Scopes
Space-delimited on the authorize URL, exactly as Calendly's sample shows:
```
https://auth.calendly.com/oauth/authorize
?client_id=CLIENT_ID
&redirect_uri=REDIRECT_URI
&response_type=code
&scope=scheduled_events:read webhooks:write
```
Rules that actually bite:
1. **`:write` implicitly includes `:read`** within the same domain. Requesting both is harmless but redundant.
2. **Users can decline scopes at install.** A granted token can therefore carry less than you asked for. The token
response includes a `scope` field, and the introspection endpoint returns `scope` for a live token — check what you
were actually given rather than what you requested.
3. **Requests are not additive.** Calendly: *"For existing installs, you may need to reauthorize the app to request
additional scopes."* Adding an object to the connector later is a customer-visible re-consent event.
4. **Webhooks need two things**: `webhooks:write` to create the subscription, *and* the read scope for the event
family you subscribe to. Missing the second is the classic "subscription created, nothing ever arrives".
### The catalogue (as published 2026-09-20)
| Category | Scope | Covers |
| --- | --- | --- |
| Scheduling | `availability:read` | `/user_busy_times`, user and event-type availability schedules |
| | `availability:write` | `PATCH /event_type_availability_schedules/{uuid}` |
| | `event_types:read` | `/event_types`, available times, event type memberships |
| | `event_types:write` | create/update event types, one-off event types |
| | `locations:read` | `/locations` |
| | `routing_forms:read` | routing forms and submissions |
| | `shares:write` / `scheduling_links:write` | single-use scheduling links (with / without customization) |
| | `scheduled_events:read` | scheduled events, invitees, no-shows |
| | `scheduled_events:write` | create invitees, cancel events, mark no-shows |
| User management | `organizations:read` | organization, memberships, invitations |
| | `organizations:write` | invite/remove organization users |
| | `groups:read` | groups and group relationships |
| | `users:read` | `/users/{uuid}`, `/users/me` |
| Webhooks | `webhooks:read` / `webhooks:write` | list/inspect, create/delete subscriptions |
| Contacts | `contacts:read` / `contacts:write` | contacts and contact custom field values |
| Notetaker | `meeting_recaps:read` | recaps, highlights, transcripts |
| | `meeting_recaps:write` | update/delete recaps (includes read) |
| Security & compliance | `activity_log:read`, `data_compliance:write`, `outgoing_communications:read` | Enterprise-gated surfaces (§7) |
Every endpoint page in Calendly's reference carries a **"Required scopes"** callout. Derive the list from the
endpoints the connector actually calls; do not guess a scope name.
> **As of 2026-09-20, Unified.to's Calendly connector** points at `https://auth.calendly.com/oauth/authorize` and
> `https://auth.calendly.com/oauth/token` with API base `https://api.calendly.com`, and its object coverage implies
> this scope set: `availability:read`, `event_types:read`, `scheduled_events:read` + `scheduled_events:write`,
> `organizations:read`, `groups:read`, `users:read`, `contacts:read` + `contacts:write`, `meeting_recaps:read`, and
> `webhooks:read` + `webhooks:write`, with `users:read` and `organizations:read` as the minimum login pair. **But the
> authorize URL it builds carries only `client_id`, `response_type` and `redirect_uri` — it sends no `scope`
> parameter at all.** That is survivable against a legacy pre-scopes app, which is grandfathered to full access, and is
> a silent failure against any app registered after 3 March 2026, which starts with no access. If you are registering
> a *new* app for this connector, raise that with the connector's owner before anyone ships it: a new client ID
> without a `scope` parameter produces tokens that authenticate and then 403. Confirm all of this with the connector's
> owner rather than treating this paragraph as current.
## 6. Capture the credentials
The creation screen shows three values. Copy all three, now:
- **Client ID**
- **Client secret** — *"Be sure to copy these values as you will not be able to access the Client Secret or Webhook
signing key again."*
- **Webhook signing key** — for an OAuth app, Calendly generates **one signing key covering all webhooks created by
that application**. It produces the `Calendly-Webhook-Signature: t=…,v1=…` header, which carries a timestamp for
replay protection. If it is lost, the only documented recovery is emailing `support+developer@calendly.com`.
Endpoints, fixed for everyone:
| Purpose | URL |
| --- | --- |
| Authorize | `GET https://auth.calendly.com/oauth/authorize` |
| Token exchange and refresh | `POST https://auth.calendly.com/oauth/token` (form-encoded) |
| Introspect | `POST https://auth.calendly.com/oauth/introspect` |
| Revoke | `POST https://auth.calendly.com/oauth/revoke` |
| API base | `https://api.calendly.com` |
**How credentials travel.** Calendly splits this by app kind: *"Web clients: pass client_id and client_secret via Basic
HTTP Authorization header. Native clients: include client_id as a body param within the API call."* Introspect and
revoke are different again — both take `client_id` **and** `client_secret` in the form body.
**Token behaviour:**
- `token_type: Bearer`, **`expires_in: 7200`** — two hours. A connector must refresh, not re-authorize.
- The token response also carries **`owner`** (a user URI) and **`organization`** (that user's current organization
URI), plus `created_at` and `scope`. That is enough to key a connection without a separate `/users/me` call.
- **Refresh tokens are single-use and rotate.** Every successful `POST /oauth/token` returns a new access token *and*
a new refresh token; the one you just used is revoked immediately. Overwrite storage on every response and never
keep the old value. On 400/401 `invalid_grant`, clear the tokens and send the user back through authorization —
do not retry.
- **Rate limit on token issuance: 8 OAuth tokens per user per minute.** A retry storm or a fan-out that refreshes per
request will hit it.
- **Tokens are revoked by ordinary account maintenance.** Calendly lists three conditions that revoke both OAuth and
personal access tokens: the account's **login email**, **password**, or **login method** changes. A customer
changing their password silently kills your connection; that is not a bug in your client.
Rotating the client secret breaks every exchange and refresh until the new value is deployed; live access tokens run
out their two hours. Never rotate without explicit go-ahead and a cutover plan.
Report the secret and signing key once so the user can paste them into their secret store, say plainly that they are
now in the transcript, and move on.
> **As of 2026-09-20, Unified.to's Calendly connector** exchanges and refreshes with a form-encoded POST using **HTTP
> Basic** client authentication (client ID as username, secret as password), keeping the credentials out of the body —
> the web-client pattern Calendly documents — and sends `redirect_uri` on both the exchange and the refresh. It uses
> the result as a `Bearer` token. It **does not send PKCE** (no `code_challenge`/`code_challenge_method`), which is
> permitted for web apps but means it forgoes the protection Calendly recommends. It is also configured on the
> assumption that **Calendly does not round-trip the `state` parameter**, and carries the flow's state out of band
> instead — consistent with Calendly's docs, which never list `state` among the authorize parameters, but worth
> re-testing at the consent screen rather than assuming. It additionally supports a **personal access token** as a
> non-OAuth alternative for single-account customers. Confirm all of this with the connector's owner.
## 7. Plans, roles, scoping and limits — what your app cannot fix
This is the section that decides whether customers think the connector works.
**Plan gating (customer-side, from Calendly's own help centre and FAQ, 2026-09-20):**
| Capability | Requirement |
| --- | --- |
| REST API reads and writes generally | **Any plan, including Free** |
| Webhook subscriptions | **Paid**: Professional, Standard, Standard Plus, Teams, Teams Plus or Enterprise |
| Scheduling API endpoints | Same paid tiers as webhooks |
| List activity log entries; delete invitee data; delete scheduled-event data | **Enterprise only** |
| Notetaker / meeting recaps (the data behind `meeting_recaps:*`) | **Standard Plus and Teams Plus** |
The trap: a Free-plan customer authorizes cleanly, reads event types and scheduled events fine, and then webhook
registration fails — so the connector looks broken only for real-time sync. A customer without Standard Plus/Teams Plus
gets no recaps at all, no matter what scopes were granted. **Your OAuth app cannot grant any of this**; it is the
connecting user's subscription. Calendly is also explicit that for a public OAuth integration the webhook capability
follows *the connecting user's* tier, not yours — so your own test account's plan tells you nothing about a customer's.
**Role gating.** A Calendly token sees what its user sees:
- **User role** — data linked to that user only, including user-scoped webhooks.
- **Owner/Admin** — organization-wide API calls and organization-scoped webhooks.
So "connect our Calendly" from a non-admin produces a connection that sees one person's calendar. Ask which role the
customer will connect as, and say it in the summary.
**User vs organization scoping, concretely.** Everything hangs off two URIs, both returned in the token response
(`owner`, `organization`) and by `GET /users/me`. Organization-scoped webhooks survive their creator being removed
from the organization or demoted from admin to user; **user-scoped webhooks stop working when that user is removed**.
A user removed from an organization becomes a solo account, and their historical events stay with the organization.
**Webhook subscription scopes are per event family, and not all of them allow `organization`.** From Calendly's
create-subscription reference:
| Event | Allowed subscription scopes | Required auth scope |
| --- | --- | --- |
| `invitee.created`, `invitee.canceled`, `invitee_no_show.*` | `organization`, `user`, `group` | `scheduled_events:read` |
| `event_type.created/updated/deleted` | `organization`, `user`, `group` | `event_types:read` |
| `contact.created/updated/deleted` | `organization`, `user`, `group` | `contacts:read` |
| `routing_form_submission.created` | `organization` **only** | `routing_forms:read` |
| `meeting_recap.created/updated/deleted` | **`user` only** | `meeting_recaps:read` |
`webhooks:write` is required on top, for all of them. The meeting-recap row is the one people get wrong: recap
webhooks cannot be registered at organization scope, so a connector that registers everything organization-wide will
fail on recaps — and at organization scale it needs one subscription per user, not one per tenant.
**Rate limits are per user, not per app:**
| Limit | Value |
| --- | --- |
| Paid plans | **500 requests per user per minute** |
| Free plan | **50 requests per user per minute** |
| OAuth token issuance | 8 tokens per user per minute |
| `Create Event Invitee` — Trial | 5 per user per day |
| `Create Event Invitee` — Paid, non-Enterprise | 10/min, 50/hour, 100/day |
| `Create Event Invitee` — Enterprise | 500 per user per minute |
Every response carries `X-RateLimit-Limit`, `X-RateLimit-Remaining` and `X-RateLimit-Reset` (seconds, typically 60);
429s should be handled with backoff. Per-user limits mean one noisy customer cannot throttle another — but a
connector that fans out across one admin's whole organization on that admin's token can throttle itself.
**Review and listing.** Calendly documents **no review or approval step** for a Production OAuth app: create it, and
other organizations can authorize it. That also means no security-review checklist exists to hide behind — the
scope set and the plan gating are the whole story. A commercial partnership or marketplace presence is a separate,
sales-led route via `calendly.com/partners`, not a technical prerequisite. If someone asserts an approval queue
exists, ask them for the Calendly page that says so.
## 8. Verify end-to-end
Testing with the developer account's own Calendly account, on whatever plan it happens to have, proves almost
nothing. Test the path a customer takes:
1. Authorize from a **second, unrelated Calendly account**, through the platform's real connect flow, on a plan that
matches your customers — and once as a **non-admin user**, to see how much smaller the world gets.
2. At the consent screen, read the permissions listed. Confirm they match the scopes you registered, and try
**declining** one to see what your client does with a partial grant.
3. Confirm the token response carries `access_token`, `refresh_token`, `expires_in: 7200`, `owner`, `organization`
and `scope`. Introspect the token and compare `scope` against what you asked for.
4. **Refresh twice in a row**, using the token returned by the first refresh for the second, and confirm the *first*
refresh token is now rejected. That is the only test that catches a client which ignores rotation.
5. Call one endpoint per object the connector maps, including `GET /users/me` and one organization-scoped list, so a
missing scope or a non-admin role surfaces now.
6. If webhooks are in play: create a subscription at the scope the event family actually allows, and verify the
`Calendly-Webhook-Signature` header against the signing key. Do this on a **paid** account — it cannot work on Free.
| Symptom | Cause |
| --- | --- |
| Token works, every call 403s "insufficient permissions" | New (post-March-2026) app with no scopes granted, or the client sends no `scope` parameter (§5) |
| One object 403s, the rest work | That endpoint's required scope was not requested, or the user declined it (§5) |
| `invalid_grant` on refresh, customer dropped | Refresh token reused — rotation is enforced; store the new one from every response (§6) |
| Everything 401s after two hours | Client is not refreshing; access tokens live 7200s (§6) |
| A working connection dies with no deploy | Customer changed login email, password or login method — all three revoke tokens (§6) |
| `invalid_client` / 401 at token exchange | Credentials not sent as HTTP Basic for a web app, or sent in the body instead (§6) |
| Exchange fails right after a clean consent | `redirect_uri` missing from the token body, or not byte-identical to the authorize value (§4) |
| Webhook creation fails for a customer | Free plan — webhooks need a paid tier; or `webhooks:write` not granted (§5, §7) |
| Subscription created, no events ever arrive | Missing the event family's read scope, or wrong subscription scope (§5, §7) |
| Meeting-recap webhook rejected at organization scope | Recap events allow `user` scope only (§7) |
| Recaps always empty | Customer is not on Standard Plus / Teams Plus (§7) |
| Connection sees only one person's data | Authorizing user has the User role, not owner/admin (§7) |
| 429 during onboarding backfill | 50/min on Free, 500/min on paid, per user; obey `X-RateLimit-Reset` (§7) |
| 429 at the token endpoint | 8 token requests per user per minute (§6) |
| Activity log or data-deletion endpoints 403 | Enterprise-only endpoints (§7) |
## 9. Hand off — never commit the secret
- **Do not** write the client secret, the webhook signing key or a personal access token into source control, a test,
a fixture, a committed `.env`, a ticket, a PR body, or a chat channel. Values go to the user, for the secret store
or console.
- Remember there are **two** one-shot secrets here, not one. A handoff that forgets the signing key means webhook
signature verification can never be added without emailing Calendly support.
- If a code change is needed (a redirect host, adding the `scope` parameter, refresh-token rotation, per-user recap
subscriptions), keep it secret-free and say what the human must set out of band.
- Close with: app name, the GitHub/Google identity that owns the developer account, **Sandbox or Production**, web or
native, the client ID, where the secret and signing key were delivered, the redirect URIs registered and how many
the app accepts, **the exact scope strings requested**, whether scopes proved editable after creation, the plan and
role a customer needs for the objects in play, and anything left for the user to do.
## Stop and ask
Hand back to a human rather than guessing when: the app's scope set cannot be edited after creation and the right list
is unclear (it becomes a new-app, re-authorize-everyone decision); the redirect-URI field turns out to accept only one
value, so a multi-region platform needs several apps; an existing **legacy pre-scopes** app is in play and someone
proposes replacing it with a scoped one; the connector would need its authorize call changed to send `scope` before a
new app can work; Sandbox is about to be pointed at real customer data; a customer's plan or role blocks the objects
they were sold (Free-plan webhooks, non-Standard-Plus recaps, non-admin organization reads); someone proposes personal
access tokens in place of OAuth for a multi-tenant connector; the webhook signing key is already lost and support must
be emailed; or the developer portal does not match the **Platform state** section above.
## References
Calendly-owned pages only; every URL below returned HTTP 200 on 2026-09-20. The developer portal and the OAuth app
form require sign-in.
- Developer portal — https://developer.calendly.com/
- Build with Calendly (getting started) — https://developer.calendly.com/docs/getting-started/overview
- Introduction to the API (auth choice, permissions) — https://developer.calendly.com/docs/getting-started/introduction
- Frequently asked questions (plan gating, token revocation, webhook scoping) — https://developer.calendly.com/docs/getting-started/frequently-asked-questions
- Authentication overview (OAuth 2.1 vs personal access tokens) — https://developer.calendly.com/docs/authentication/overview
- Creating an OAuth app — https://developer.calendly.com/docs/authentication/creating-an-oauth-app
- Authorization scopes (the catalogue, backward compatibility, troubleshooting) — https://developer.calendly.com/docs/authentication/scopes
- How to handle single-use refresh tokens — https://developer.calendly.com/docs/authentication/refresh-token-rotation-guide
- Personal access tokens — https://developer.calendly.com/docs/authentication/how-to-authenticate-with-personal-access-tokens
- Get Authorization Code — https://developer.calendly.com/api-docs/calendly-o-auth/o-auth/get-oauth-authorize
- Get Access Token (exchange and refresh, Basic auth, 2-hour tokens) — https://developer.calendly.com/api-docs/calendly-o-auth/o-auth/post-oauth-refresh-token
- Introspect access/refresh token — https://developer.calendly.com/api-docs/calendly-o-auth/o-auth/post-oauth-introspect
- Revoke access/refresh token — https://developer.calendly.com/api-docs/calendly-o-auth/o-auth/post-oauth-revoke
- Create webhook subscription (allowed scopes per event) — https://developer.calendly.com/api-docs/calendly-api/webhooks/create-webhook-subscription
- Webhook signatures — https://developer.calendly.com/api-docs/overview/webhooks/webhook-signatures
- Create a webhook subscription (guide) — https://developer.calendly.com/docs/api-guides/receive-data-from-scheduled-events-in-real-time-with-webhook-subscriptions
- Rate limits — https://developer.calendly.com/api-docs/overview/rate-limits
- API conventions — https://developer.calendly.com/api-docs/overview/api/api-conventions
- Changelog — https://developer.calendly.com/release-notes
- Authorization scopes for API access (3 March 2026) — https://developer.calendly.com/release-notes/2026/3/3
- Contacts API and webhooks (27 May 2026) — https://developer.calendly.com/release-notes/2026/5/27
- Notetaker API and webhooks (22 July 2026) — https://developer.calendly.com/release-notes/2026/7/22
- Contact custom fields API and webhooks (25 August 2026) — https://developer.calendly.com/release-notes/2026/8/25
- OAuth authorization server metadata (MCP surface — not the app OAuth host) — https://calendly.com/.well-known/oauth-authorization-server
- Help: Calendly API overview (plans, user vs admin scopes) — https://calendly.com/help/calendly-api-overview
- Help: Notetaker overview (Standard Plus / Teams Plus) — https://calendly.com/help/notetaker-overview
- Help: Contacts overview — https://calendly.com/help/contacts-overview
- Pricing and plan names — https://calendly.com/pricing
- API & webhooks page (personal access tokens) — https://calendly.com/integrations/api_webhooks
- Partner with Calendly — https://calendly.com/partners
- Developer community — https://community.calendly.com/developer-community-60
## clickup-oauth-app
URL: https://docs.unified.to/skills/clickup-oauth-app/SKILL.md
# ClickUp OAuth2 App Registration
Get a working ClickUp OAuth2 client — an app, redirect URLs, a client ID and a secret — for a platform that connects
many customers' ClickUp Workspaces.
ClickUp's registration form is the smallest in this whole skill collection: a name and a redirect URL. Everything
expensive here is downstream of that form, and four things are not obvious:
1. **ClickUp has no OAuth scopes.** None. There is no `scope` parameter, no consent checkboxes, no scope catalogue.
The token inherits the authorizing user's permissions **wholesale**. Least privilege is therefore a *which human
authorizes* problem, not a scope problem (§5).
2. **The user picks Workspaces at consent, and can pick fewer than you expect.** A token that authenticates perfectly
can be blind to the exact Workspace your customer cares about, and the error says "Team not authorized" — a phrase
that appears nowhere in your code (§6).
3. **Tokens do not expire and there is no refresh token.** The token response is a single field. That removes an
entire class of bugs and creates a different one: a long-lived bearer credential with no documented server-side
revocation endpoint (§7).
4. **The app lives inside one customer-facing Workspace's settings**, created by an owner or admin of that Workspace.
There is no separate developer portal, no app review and no listing gate — and no obvious owner if that employee
leaves (§2, §3).
## Inputs to collect before you start
Ask in one batch. Never invent.
| Input | Notes |
| --- | --- |
| **App name** | Shown to users at the consent screen; this is the whole branding surface |
| **ClickUp account** that will own the app, and **which Workspace** it is created in | Must be that Workspace's owner or admin (§2) |
| **Redirect URLs** | Every callback host your platform serves (§4) |
| **Which ClickUp plan** the app's home Workspace and your customers are on | Decides rate limits and which endpoints exist at all (§8) |
| **Whether customers will authorize as an admin or as a limited member** | The only lever you have on access breadth (§5) |
| **Whether webhooks are in scope** | Changes the verification you must do (§8, §9) |
| **New app, or an edit to an existing one?** | A new client ID re-authorizes every customer (§1) |
## Quick Start
1. Confirm a **new** app is needed — existing customer connections are bound to the current client ID (§1).
2. Sign in as an **owner or admin** of the Workspace that will host the app (§2).
3. **Settings → Apps → Create new app**; name it and add a redirect URL (§3).
4. Add **every** redirect URL, exactly, https only (§4).
5. Skip the scope step — there isn't one. Read §5 anyway; it is the security answer you will be asked for.
6. Understand Workspace selection before you write a connect flow (§6).
7. Capture the client ID and secret; note that the token never expires and there is no refresh token (§7).
8. Check the rate-limit tier and the Enterprise-only endpoint list against what the connector calls (§8).
9. Verify from a **second account in an unrelated Workspace**, on a non-Enterprise plan (§9).
10. Hand the credentials over — never commit them (§10).
## Platform state (verified 2026-09-20 — re-verify before trusting)
- **The docs live at `developer.clickup.com`.** The old `clickup.com/api` documentation host now redirects there.
Anything that still describes a "team settings → Integrations → ClickUp API" click path is stale; the current path
is **avatar → Settings → Apps**, and ClickUp's own deep link is `https://app.clickup.com/settings/apps`.
- **Only Workspace owners or admins can create OAuth apps.** ClickUp states this plainly on the authentication page.
- **There are no OAuth scopes.** The published v2 OpenAPI specification contains no `scope`, no `code_challenge` and
no `refresh_token` anywhere. The only occurrences of the word "scope" in it are about Custom Fields.
- **Authorization URL is `https://app.clickup.com/api`** — a consent page, despite looking like an API route. The
token endpoint is the differently-hosted `https://api.clickup.com/api/v2/oauth/token`. Mixing the two hosts up is
the single most common first-day mistake.
- **`state` is documented as an optional extra parameter** on the authorize URL.
- **The token response is documented as `{ "access_token": "..." }`** — `access_token` is the only required
property. No `refresh_token`, no `expires_in`, no `token_type`, no `scope`.
- **"The access token currently does not expire. This is subject to change."** ClickUp says this twice, on the
authentication page and in the FAQ. The hedge is theirs; treat expiry as something that could appear.
- **Rate limits are per token, per minute, and changed shape from the older published numbers.** Current table:
Free Forever / Unlimited / Business **100**, Business Plus **1,000**, Enterprise and Enterprise Plus **10,000**.
`429` responses carry `X-RateLimit-Limit`, `X-RateLimit-Remaining` and `X-RateLimit-Reset`.
- **Both v2 and v3 are live and authenticate identically** — same host, same `Authorization` header, one credential.
v3 is not a migration you must do; it is where the newer surfaces (Docs, Chat, audit logs, attachments, ACLs) are.
- **There is no app review, no directory submission gate and no install cap** documented for using the API. The App
Center and the partner program are marketing surfaces, not a prerequisite for serving customers.
- **No OAuth revocation endpoint is documented.** There is no `/revoke`, no `/introspect`, no refresh route — the
only OAuth route in the v2 specification is the token exchange.
If Settings → Apps does not look like this, stop and report what you actually see rather than clicking on.
## 1. Decide: reuse the existing app, or register a new one
A new app means a **new client ID, and every existing customer token is bound to the old one** — every customer
re-authorizes and re-picks their Workspaces. Reuse the existing app for: adding a redirect URL, replacing a leaked
secret, or diagnosing an authorization failure.
Register a **new** app only when the user explicitly wants one: a replacement for a compromised app, a separate app
for a different product, a deliberate environment split, or — the ClickUp-specific case — because the existing app
was created inside a Workspace the company no longer controls (§2). Say which path you are taking before you touch
anything.
One consolation specific to ClickUp: because there are no scopes and no consent-time capability list, **you never
have to re-authorize customers just to widen what the connector reads**. Adding a new object type to the integration
changes nothing about the grant. That is unusual, and it is worth saying out loud when someone assumes otherwise.
## 2. Account, and the ownership problem nobody plans for
- Sign in at `https://app.clickup.com`. Settings live under your avatar in the upper-right corner → **Settings** →
**Apps** in the sidebar, or go straight to `https://app.clickup.com/settings/apps`.
- **You must be an owner or admin of the Workspace** you create the app in. A plain Member cannot.
- **There is no separate developer account and no developer portal.** The app is an object inside an ordinary
customer-facing ClickUp Workspace's settings, alongside that Workspace's personal API token generator.
That last point is the trap. The credential your whole multi-tenant integration depends on is administered from one
company Workspace, by whoever has owner or admin there. Before you create anything, settle:
- **Which Workspace hosts the app.** Prefer a company-controlled Workspace whose admin list is managed, not a
personal or trial Workspace someone spun up.
- **Who can see and reset the secret.** Anyone who is an owner/admin of that Workspace and can reach Settings → Apps.
- **What happens when the creating employee leaves.** ClickUp does not document a transfer-ownership flow for an
OAuth app. Make sure at least two people who will still be there hold owner/admin on the host Workspace, and record
the app name, client ID and host Workspace somewhere outside ClickUp.
Hand control back to the user for anything only they can do: signup, email verification, 2FA, accepting terms, being
promoted to admin. Do not retry a blocked step in a loop.
**If this session has no browser automation** (the usual case for a CLI or cloud run), do not pretend to click. Give
the user the exact ordered click path and the literal redirect URLs from §4 to paste, and continue once they report
back with the client ID.
## 3. Create the app
**Settings → Apps → Create new app.** ClickUp asks for two things:
1. **App name.** This is what the user sees when they land on the consent page. There is no logo, no description, no
privacy-policy field and no support URL in the OAuth app form — so the name is your entire trust surface. Use the
product name a customer will recognise, not an internal codename.
2. **Redirect URL** — see §4.
On save you are shown a **`client_id`** and a **`secret`**. That is the whole registration. There is no app type to
pick (public vs confidential), no distribution setting, no environment toggle, no capability list and no submission
step. Anything a runbook tells you to configure beyond these two fields does not exist in this portal.
ClickUp does not publish how many apps a Workspace may hold, whether the secret can be re-read after creation, or
what editing and deleting an app does to issued tokens. **Treat the secret as shown once**: capture it into the
secret store at creation rather than assuming you can come back for it, and if the portal does let you re-read it,
note that as a finding rather than relying on it.
## 4. Redirect URLs
Register **every** callback host your platform serves. For Unified.to these are one per data center; confirm the
current list with the platform owner rather than assuming:
```
https://api.unified.to/oauth/code # us (default)
https://api-eu.unified.to/oauth/code # eu
https://api-au.unified.to/oauth/code # au
https://api-dev.unified.to/oauth/code # dev
```
What ClickUp documents about them:
- **Multiple are supported.** The create-app step says "a redirect URL" (singular), but the error for a mismatch is
*"Redirect URI does not match the redirect **uris** of this application"* (`OAUTH_007`), and the app holds a set. If
the form only ever accepts one value, stop and report that rather than registering four separate apps.
- **The `redirect_uri` you send must match a registered value.** A mismatch is `OAUTH_007`; omitting it entirely is
`OAUTH_017` *"Redirect URI not passed"*. Treat matching as exact — do not rely on trailing-slash or subpath
forgiveness.
- **Use https.** ClickUp's note is *"Non-SSL redirect URIs may not be supported in the future."* Do not register a
plaintext callback for a production platform.
- **`redirect_uri` is not part of the token exchange.** ClickUp's token request schema requires exactly `client_id`,
`client_secret` and `code` — no `redirect_uri`, no `grant_type`. If your HTTP client insists on sending
`grant_type=authorization_code`, that is your client's habit, not ClickUp's requirement.
## 5. Scopes — there are none, and that is the thing to explain
**ClickUp's OAuth flow has no `scope` parameter and no scope catalogue.** The documented authorize URL is:
```
https://app.clickup.com/api?client_id={client_id}&redirect_uri={redirect_uri}&state={state}
```
and that is the complete parameter list. No `scope`, no `response_type`, no PKCE (`code_challenge` appears nowhere in
ClickUp's published specification). The consent screen offers the user a Workspace picker, not a permission list.
**What the token can therefore do:** everything the authorizing user can do, in the Workspaces they granted. Read and
write. Tasks, Lists, Folders, Spaces, Docs, comments, attachments, time tracking, users, groups — the connector's own
code is the only thing narrowing it. Two consequences worth stating in a security review before someone else does:
- **Least privilege is a choice about *who* authorizes, not *what* you request.** If a customer wants the integration
confined to one Space, the answer is a ClickUp user account whose own access is confined to that Space, doing the
authorizing — commonly a dedicated service user invited as a Member or a Guest with access to just that hierarchy.
There is no API-side configuration that achieves it. Say this plainly; "we request minimal scopes" is not available
as an answer here.
- **Role is enforced server-side, per endpoint, at call time.** ClickUp's role model (1 owner, 2 admin, 3 member,
4 guest) is what the token carries. The clearest illustration lives in the v3 audit-log endpoint, which ClickUp
documents as *"Only the Workspace owner can create audit logs"* **and** Enterprise-only. A token from an admin,
through a correctly registered app, simply cannot call it. When a customer reports "permission denied" on one
endpoint while everything else works, check the authorizing user's role before you check anything else.
> **As of 2026-09-20, this platform's ClickUp connector sends no scopes** (correct — ClickUp has none) and its
> authorize call carries exactly `client_id`, `redirect_uri` and a signed `state`. It does **not** use PKCE, which
> matches ClickUp's documented flow. Because there is no scope to widen, adding object types to the connector never
> re-authorizes existing customers. Confirm with the connector's owner before reporting this as settled.
## 6. Workspace selection — where "it authenticated but sees nothing" comes from
This is ClickUp's equivalent of a permission model, and it is invisible from your side.
When the user lands on `https://app.clickup.com/api?...`, they are asked **which of their Workspaces to grant your
app**. They may select one, several, or — in a hurry, on a shared screen, on mobile — not the one your customer
actually meant. The resulting token is silently narrower than everyone assumed.
What to build around it:
- **`GET /api/v2/team` (Get Authorized Workspaces) is the source of truth.** It returns the Workspaces *this token*
may reach. Call it immediately after the exchange and store the result; never infer Workspace coverage from
anything the customer told you. (In v2, `team` means Workspace — see §8.)
- **Calling into a Workspace that was not granted returns "Team not authorized"** with error codes `OAUTH_023`,
`OAUTH_026`, `OAUTH_027`, and `OAUTH_029` through `OAUTH_045`. That wide, unmemorable code range is the single
highest-value thing to map to a human-readable message in your connector: *"This ClickUp user did not grant access
to that Workspace — send them back through the connect flow and ask them to tick it."*
- **Re-authorization is the fix, and it is non-destructive.** ClickUp's own instruction is to redirect the user to
the same authorization URL again to modify Workspace permissions. There is no separate management endpoint.
- **Authorization is per user, not per company.** Each colleague who connects gets their own token, their own
Workspace selection and their own effective permissions. Two users in the same Workspace can legitimately produce
two connections that see different data.
- **A user can revoke from their side at any time**, with no notification to you. It surfaces as *"Token not found"* —
`OAUTH_019`, `OAUTH_021`, `OAUTH_025`, `OAUTH_077`.
> **As of 2026-09-20, this platform's ClickUp connector resolves a single Workspace at connect time and pins the
> connection to it** — it reads the authorizing user's identity, looks through the Workspaces the token can reach,
> picks the one that user is a member of, and stores that one id. Every downstream call that needs a Workspace,
> including webhook registration and the people/group objects, uses that stored id. **A customer who authorizes
> several Workspaces therefore gets one connection covering one of them**, and which one is decided by ordering
> rather than by the customer. If a customer needs two Workspaces, they need two connections. Confirm the current
> behaviour with the connector's owner; it is worth an explicit product decision rather than an implicit one.
## 7. Capture the credentials, and the token model
From **Settings → Apps → your app**: the **`client_id`** and the **`secret`**.
Record:
- **Client ID** and **client secret**, plus the **Workspace that hosts the app** and who administers it (§2)
- Authorize (a consent page, not an API): `https://app.clickup.com/api`
- Token exchange: `POST https://api.clickup.com/api/v2/oauth/token`
- API base: `https://api.clickup.com/api` — one host for everyone, no per-customer domain to discover
- The registered redirect URLs, verbatim
**The exchange.** Body carries exactly `client_id`, `client_secret` and `code`. ClickUp's specification lists both
`application/json` and `application/x-www-form-urlencoded` as accepted content types. The response is documented as a
single required field:
```json
{ "access_token": "..." }
```
**Token behaviour, and why it is unusual:**
- **No expiry.** ClickUp: *"The access token currently does not expire. This is subject to change."* There is nothing
to refresh and no clock to watch.
- **No refresh token.** `refresh_token` does not appear anywhere in ClickUp's published v2 specification. A connector
that assumes OAuth always returns one will store `undefined` and be fine — until someone writes a refresh path that
can never succeed. Do not build one.
- **No documented revoke or introspect endpoint.** The only OAuth route ClickUp publishes is the token exchange. You
cannot programmatically kill a token you issued; the user revokes from their side, and you find out through
`OAUTH_019` / `OAUTH_021` / `OAUTH_025` / `OAUTH_077`.
- **So a leaked ClickUp access token is a permanent, unscoped, unrevocable-by-you bearer credential** for everything
the authorizing user can reach. That is the sentence to put in the security section. Encrypt at rest, never log it,
and treat a suspected leak as a customer-side revocation request, not something you can clean up yourself.
- **Header format.** ClickUp documents `Authorization: Bearer {access_token}` for OAuth tokens and
`Authorization: {personal_token}` (bare, `pk_`-prefixed) for personal tokens. Two different shapes on the same
header; if you support both credential types, do not share one formatter between them without checking.
**The personal-token alternative, and why it is not the answer here.** The same Settings → Apps page generates a
personal API token: `pk_`-prefixed, never expires, no OAuth flow. ClickUp's own guidance is that it is for
"individual or testing purposes," and that for apps others use you implement OAuth. It is genuinely useful for
getting a connector's read path working on day one, and for the docs' own Try-It feature (which explicitly does not
accept OAuth tokens). It is not a multi-tenant answer: it is one person's credential, carries their full access,
every action is attributed to them, it dies when they leave, and regenerating it breaks every app using the old one.
If someone proposes personal tokens to skip registration, say this.
Resetting the client secret: ClickUp does not document what happens to already-issued access tokens. Assume the
worst, never reset without explicit go-ahead and a cutover plan, and verify the effect on one test connection before
telling customers anything.
Report the secret once so the user can paste it into their secret store, say plainly that it is now in the transcript
and can be regenerated, then move on.
> **As of 2026-09-20, this platform's ClickUp connector** exchanges the code by POSTing `client_id`, `client_secret`
> and `code` as **query parameters** rather than in the request body — ClickUp's specification documents a JSON or
> form-encoded body, and this has historically worked anyway, but it is a divergence to re-check whenever the
> exchange starts failing. It stores no refresh token and has no refresh path (correct for ClickUp). It sends the
> token in the `Authorization` header **bare, with no `Bearer` prefix**, for both OAuth and personal tokens —
> ClickUp's current documentation specifies `Bearer` for OAuth tokens and bare only for personal ones, so this is a
> second divergence worth confirming against a live call rather than assuming. It also accepts a **personal API
> token** as an alternative credential for single-user setups. Confirm all of this with the connector's owner.
## 8. Plans, versions and rate limits — what actually bites at scale
**Rate limits are per token, per minute, set by the plan of the Workspace hosting the token:**
| Plan | Requests/minute/token |
| --- | --- |
| Free Forever | **100** |
| Unlimited | **100** |
| Business | **100** |
| Business Plus | **1,000** |
| Enterprise / Enterprise Plus | **10,000** |
This is the number that decides whether your product works, and it is brutal at the bottom: **three of the five tiers
share the same 100/minute budget**, and that budget covers everything the connector does for that customer — initial
sync, incremental polls, per-task attachment lookups, webhook-triggered re-fetches. A full-hierarchy crawl of a
mid-sized Workspace (Spaces → Folders → Lists → tasks → subtasks → attachments) exceeds 100 requests in seconds.
Design for it deliberately:
- **Read the plan, don't guess it.** `GET /api/v2/team/{team_id}/plan` (Get Workspace Plan) tells you which tier this
connection is on. Tier your sync cadence and concurrency off that, not off a global constant.
- **The budget is per token, so one noisy customer cannot throttle another** — but a single connector fanning out
across one customer's whole Workspace throttles *itself*.
- **Obey the headers.** `429` responses carry `X-RateLimit-Limit`, `X-RateLimit-Remaining` and a Unix-timestamp
`X-RateLimit-Reset`. Back off to the reset rather than retrying blind.
- **Webhooks are the cheap path.** ClickUp's webhooks exist precisely so you do not poll a 100/minute budget.
**Endpoints that only exist on Enterprise.** The API itself is on every plan, but a documented set of endpoints is
not: Invite User To Workspace, **Get User**, Edit User On Workspace, Remove User From Workspace, and the whole guest
management family. Plus `admin_can_manage` on Update Space, some time-tracking parameters on Business Plus and above,
and the v3 audit-log endpoint (Enterprise **and** Workspace-owner-only).
This matters at connect time. **Get User** is the natural way to enrich the authorizing identity — and it is
Enterprise-only, so on the plan most customers are on it simply fails. **Get Authorized User** (`GET /api/v2/user`)
is not restricted and returns the authorizing user's `id`, `username` and `email` directly. Prefer it for identity.
> **As of 2026-09-20, this platform's ClickUp connector enriches the authorizing user's identity through the
> Enterprise-only per-Workspace user endpoint, inside a swallowed try/catch** — so on Free, Unlimited, Business and
> Business Plus the enrichment silently returns nothing and the connection is created without a captured name or
> email, with no error surfaced. It already calls the unrestricted authorized-user endpoint moments earlier in the
> same flow, and that response carries the email. Worth raising with the connector's owner as a concrete fix rather
> than a documentation note.
**v2 vs v3.** Both are current, and **there is no authentication difference** — same host, same `Authorization`
header, one credential, one rate-limit budget. The difference is vocabulary and coverage:
| | API v2 | API v3 |
| --- | --- | --- |
| Path | `https://api.clickup.com/api/v2/...` | `https://api.clickup.com/api/v3/...` |
| Top-level container | **`team`** — legacy word for Workspace | **`workspaces`** |
| `group` | A user group inside a Workspace | Same meaning |
| Covers | Tasks, Lists, Folders, Spaces, comments, custom fields, views, time tracking, users, **webhooks**, the OAuth token exchange | Docs and pages, Chat, audit logs, attachments, ACLs, a few task operations |
The `team` = Workspace collision is the documentation trap: in v2, `team_id` is a **Workspace** id, while `group_id`
is a user group — and ClickUp's product UI calls user groups "Teams". Three meanings, one word. Name your variables
after the concept, not after the path segment.
> **As of 2026-09-20, this platform's ClickUp connector mixes both versions against a single credential** — v2 for
> tasks, projects, people, groups, comments, attachments and webhooks, and v3 for the Docs/pages objects. That is
> supported and correct; there is no second app, second secret or second header to configure.
## 9. Webhooks — and the two ways they die quietly
Webhooks are registered through the API, not the app settings, with `POST /api/v2/team/{team_id}/webhook` carrying an
`endpoint`, an `events` array (or `"*"` for everything) and optionally one location filter. Read these before
shipping:
- **A webhook belongs to the user whose token created it**, not to your app. ClickUp: *"If the user who created a
webhook is disabled, the webhook remains but stops triggering"* — it checks the creating user is still in the
relevant hierarchy before each delivery. A customer offboarding one employee can therefore stop your sync for their
whole company, with no error anywhere on your side. **Get Webhooks** (`GET /api/v2/team/{team_id}/webhook`)
likewise returns only the webhooks created by the authenticated user.
- **Signing.** Creating a webhook returns a `secret` unique to that webhook, **in the create response and nowhere
else**. Every delivery carries `X-Signature`: a hex HMAC-SHA256 of the raw request body under that secret. If you
discard the secret at creation you can never verify a delivery again without deleting and recreating the webhook.
Verify against the **raw** body — re-serializing a parsed JSON object changes the bytes and the digest.
- **Health, and automatic disabling.** A non-2xx response, or any response slower than **7 seconds**, marks the
webhook *failing*. ClickUp retries an event up to five times, then increments `fail_count` and drops that event
permanently — **failed events are never resent**. Recovery resets `fail_count` automatically. But at
`fail_count` **100** the webhook is **suspended** and deliveries stop. Two responses suspend it *immediately*:
**`410`** and — the one that catches platforms — **`401`**. An endpoint that answers `401` to an unrecognised or
expired webhook id kills its own subscription on the first bad delivery.
- **No notification is sent when the health status changes.** Poll the webhook object's `health.status` and
`fail_count` yourself; reactivate with `PUT /api/v2/webhook/{webhook_id}` setting status back to active.
- **One location per hierarchy level per webhook**, and the most specific wins. Registering the same configuration
and location twice returns `OAUTH_171` *"Webhook configuration already exists"*.
- **Use `{{webhook_id}}:{{history_item_id}}` as the idempotency key.** ClickUp says so explicitly; deliveries repeat.
- **No fixed source IPs.** ClickUp states it has no dedicated webhook IP range and uses dynamic addressing, so an
IP allow-list is not an available control. Signature verification is the control.
- **Deleting is `DELETE /api/v2/webhook/{webhook_id}`.** Singular `webhook`, with the `/v2` segment. Worth
double-checking in any client: a delete that quietly 404s leaves a live webhook hammering a dead endpoint until it
accrues 100 failures.
> **As of 2026-09-20, this platform's ClickUp connector registers native webhooks for task and project
> create/update/delete, scoped to the Workspace it pinned at connect time (§6) and optionally to a Space, Folder or
> List.** Two gaps to raise with its owner: it **keeps only the webhook id from the create response and discards the
> per-webhook signing secret**, so incoming deliveries cannot be signature-verified and are not; and its
> **unsubscribe call targets a path that does not match ClickUp's documented delete route** (it omits the `/v2`
> segment and pluralises the resource), which would make webhook teardown a silent no-op and leave orphaned
> subscriptions failing against a retired endpoint. Both are verifiable against a live connection in minutes.
## 10. Verify end-to-end
Authorizing in the Workspace that hosts the app, as its owner, on whatever plan your company is on, proves almost
nothing. Test the path a customer takes:
1. Authorize as a **different user in an unrelated Workspace**, on a **non-Enterprise plan**, through your platform's
real connect flow.
2. At the consent screen, deliberately grant **one** Workspace while the account has more than one. Confirm your
connector notices, and that a call into an ungranted Workspace produces a message a support agent can act on —
not a raw `OAUTH_031`.
3. Immediately after the exchange, call `GET /api/v2/team` and store the authorized Workspace list.
4. Confirm the token response has **no** `refresh_token` and **no** `expires_in`, and that nothing in your code path
waits for either.
5. Confirm the identity enrichment works on that non-Enterprise plan — this is where an Enterprise-only endpoint
fails silently.
6. Authorize again as a **limited Member or Guest** and confirm the connector degrades sensibly rather than throwing:
with no scopes, role is the only access control, and a guest's token is a legitimate customer configuration.
7. If webhooks are in play: create one, capture and store the `secret`, verify one real `X-Signature` against the raw
body, then **delete it and confirm it is actually gone** via Get Webhooks.
8. Run a realistic initial sync against a Workspace on a 100/minute plan and watch for `429`.
| Symptom | Cause |
| --- | --- |
| `OAUTH_010` "Client Not Found" | Wrong `client_id`, or the app was not created/saved properly (§3) |
| `OAUTH_007` "Redirect URI does not match…" | The `redirect_uri` sent is not one of the app's registered values (§4) |
| `OAUTH_017` "Redirect URI not passed" / "Authorization Header Required" | `redirect_uri` missing from the authorize call, or no `Authorization` header on an API call (§4, §7) |
| `OAUTH_023` / `OAUTH_026` / `OAUTH_027` / `OAUTH_029`–`OAUTH_045` "Team not authorized" | The user did not grant that Workspace. Re-send them to the authorize URL (§6) |
| `OAUTH_019` / `OAUTH_021` / `OAUTH_025` / `OAUTH_077` "Token not found" | The user revoked, or a personal token was regenerated (§7) |
| Authorizes fine, then reaches the wrong Workspace | Multi-Workspace grant collapsed to one connection (§6) |
| Auth works, one endpoint 403s at one customer | Authorizing user's role, or an Enterprise-only endpoint (§5, §8) |
| Identity/email is blank on connect, no error logged | Enterprise-only user endpoint failing silently on a lower plan (§8) |
| `429` at modest volume | 100/minute tier. Read the plan and the `X-RateLimit-*` headers (§8) |
| Webhook stopped firing, nothing in your logs | Creating user disabled or removed from the hierarchy (§9) |
| Webhook suspended after one bad deploy | Your endpoint answered `401` or `410` — both suspend immediately (§9) |
| Webhooks degrade over days, then stop | `fail_count` climbing to 100 from slow (>7s) or non-2xx responses (§9) |
| `OAUTH_171` | A webhook with that configuration and location already exists (§9) |
| Signature never matches | Digest taken over a re-serialized body instead of the raw bytes, or the wrong secret (§9) |
| `401` on every call with a token you know is good | Header shape: OAuth wants `Bearer `, personal tokens are sent bare (§7) |
## 11. Hand off — never commit the secret
- **Do not** write the client secret or any access/personal token into source control, a test, a fixture, a committed
`.env`, a ticket, a PR body, or a chat channel. Values go to the user, for the secret store or console. ClickUp
tokens do not expire, so a leaked one stays valid until a human revokes it (§7) — the blast radius is larger than
for vendors with short-lived tokens.
- If a code change is needed (a redirect host, a rate-limit tier, a webhook path), keep it secret-free and say what
the human must set out of band.
- Close with: app name; **the Workspace that hosts the app and who administers it**; the client ID; where the secret
was delivered; the authorize page and token endpoint; the registered redirect URLs; **explicitly, that ClickUp has
no scopes and the token carries the authorizing user's full permissions**; the Workspace-selection behaviour you
observed at consent; the rate-limit tier of the Workspaces you tested; whether webhooks were registered and whether
their secrets are stored; and anything left for the user to do.
## Stop and ask
Hand back to a human rather than guessing when: the Workspace that would host the app is personal, a trial, or
administered by one person (§2); a customer's security review asks for scope restriction and the honest answer is
"use a restricted ClickUp user" (§5); a customer needs more than one Workspace from a single connection (§6);
regenerating the client secret is proposed and nobody knows what it does to live tokens (§7); a customer reports a
permanent `429` and the fix is a plan upgrade they must pay for (§8); a suspected token leak needs customer-side
revocation because you have no revoke endpoint (§7); or Settings → Apps does not match the **Platform state** section
above.
## References
Official ClickUp pages only; every URL below returned HTTP 200 on 2026-09-20. The app settings themselves live at
`https://app.clickup.com/settings/apps` and require sign-in. ClickUp help-centre articles are served behind a
challenge that refuses non-browser clients, so none are cited here — read them in a browser if you need the
product-side view.
- Authentication: personal token, OAuth flow, app creation, Workspace selection — https://developer.clickup.com/docs/authentication
- Get Access Token (the token endpoint's full schema) — https://developer.clickup.com/reference/getaccesstoken
- Get Authorized Workspaces (`GET /v2/team`) — https://developer.clickup.com/reference/getauthorizedteams
- Get Authorized User (`GET /v2/user`) — https://developer.clickup.com/reference/getauthorizeduser
- Get User (Enterprise-only) — https://developer.clickup.com/reference/getuser
- Get Workspace Plan — https://developer.clickup.com/reference/getworkspaceplan
- Rate limits by plan, and the `X-RateLimit-*` headers — https://developer.clickup.com/docs/rate-limits
- API availability by plan (the Enterprise-only endpoint list) — https://developer.clickup.com/docs/apis-available-by-plan
- ClickUp API v2 and v3 terminology (team vs Workspace vs group) — https://developer.clickup.com/docs/general-v2-v3-api
- Common errors and the `OAUTH_*` codes — https://developer.clickup.com/docs/common_errors
- FAQ (token expiry, `Content-Type`, subtasks, user roles) — https://developer.clickup.com/docs/faq
- Webhooks: scope, locations, events, delivery contract — https://developer.clickup.com/docs/webhooks
- Webhook signature (`X-Signature`, HMAC-SHA256) — https://developer.clickup.com/docs/webhooksignature
- Webhook health status (failing, suspended, `fail_count`) — https://developer.clickup.com/docs/webhookhealth
- Task webhook payload examples — https://developer.clickup.com/docs/webhooktaskpayloads
- Create Webhook — https://developer.clickup.com/reference/createwebhook
- Get Webhooks — https://developer.clickup.com/reference/getwebhooks
- Update Webhook (reactivate a suspended one) — https://developer.clickup.com/reference/updatewebhook
- Delete Webhook — https://developer.clickup.com/reference/deletewebhook
- OpenAPI specifications page — https://developer.clickup.com/docs/open-api-spec
- v2 OpenAPI specification (raw) — https://developer.clickup.com/openapi/clickup-api-v2-reference.json
- v3 OpenAPI specification (raw) — https://developer.clickup.com/openapi/ClickUp_PUBLIC_API_V3.yaml
- Try the API in your web browser (personal tokens only) — https://developer.clickup.com/docs/trytheapi
- Documentation index for machine readers — https://developer.clickup.com/llms.txt
- Developer docs home (the old `clickup.com/api` redirects here) — https://developer.clickup.com/
- ClickUp plans and pricing — https://clickup.com/pricing
- ClickUp integrations / App Center — https://clickup.com/integrations
## discord-oauth-app
URL: https://docs.unified.to/skills/discord-oauth-app/SKILL.md
# Discord OAuth2 App Registration
Get a working Discord application — client ID, client secret, bot token, redirect URIs, scopes, a permissions
bitfield and whatever intents you actually need — for a platform that connects *other organizations'* Discord servers
on behalf of many customers.
Discord's portal is free and instant, and that is the trap: the expensive decisions are invisible in it. Three of
them. First, **a Discord app hands you two unrelated credentials** — a long-lived **bot token** that acts as the app
inside every server the bot was installed into, and a short-lived **OAuth2 access token** that acts as one signed-in
user (§5). They reach different data, and most connectors need both. Second, the **`bot` scope plus a `permissions`
bitfield** is a different install than a plain user authorization, and that bitfield is a *permissions* bitfield, not
an *intents* bitfield — two different numbering schemes that look identical and are constantly confused (§7).
Third, **privileged gateway intents** are the wall: `MESSAGE_CONTENT` and `GUILD_MEMBERS` are portal toggles that
stop being self-serve once the app can reach **10,000 users**, and a wrong intent bitfield does not degrade, it
closes the gateway connection with code `4014` (§8).
## Inputs to collect before you start
Ask in one batch. Never invent.
| Input | Notes |
| --- | --- |
| **App name**, icon, description | Shown on the install/consent screen and in every server's member list |
| **Discord account, and ideally a Team** | Teams need 2FA; ownership transfer to a team is one-way (§2) |
| **A test server you own** | You need `MANAGE_GUILD` in it to install the bot (§2) |
| **Redirect URIs** | Every callback host your platform serves (§4) |
| **Does the connector need a bot token, a user token, or both?** | The decisive question (§5) |
| **Exact scope strings** | Must match what the authorize URL sends (§6) |
| **Bot permissions** | The `permissions` bitfield — pick the minimum, not `ADMINISTRATOR` (§7) |
| **Which gateway intents, if any** | Only if you run a gateway/WebSocket bot; privileged ones gate growth (§8) |
| **Privacy policy URL, terms of service URL** | Needed for App Directory discovery (§11) |
## Quick Start
1. Confirm a **new app** is needed — existing installs and tokens are bound to the current app (§1).
2. Sign in, enable 2FA, create or join a **Team**, and pick a **test server** you control (§2).
3. Create the app at `https://discord.com/developers/applications`; add a **bot user** (§3).
4. Add **every** redirect URI under **OAuth2 → Redirects** (§4).
5. Decide **bot token, user token, or both** — this drives everything below (§5).
6. Set the **scope strings**; remember there is no `openid` scope on Discord (§6).
7. Compute the **`permissions` bitfield** for the `bot` scope — permissions, not intents (§7).
8. Toggle only the **privileged gateway intents** you truly need, and read the 10,000-user rule (§8).
9. Copy **Application ID**, **client secret** (OAuth2 page) and **bot token** (Bot page — shown once) (§9).
10. Install into the test server through the real flow and make one call with **each** credential (§12).
11. Hand the credentials over — never commit them (§13).
## Platform state (verified 2026-09-20 — re-verify before trusting)
- **The docs moved.** Discord's **10 February 2026** "Next Generation Docs" change migrated the developer
documentation to Mintlify. `discord.com/developers/docs/...` now **301s to `docs.discord.com/developers/...`**.
The portal itself is still at `discord.com/developers/applications`. Older runbooks linking the old paths are not
wrong, just redirected.
- **Privileged intent access changed on 10 June 2026, and the old number everyone quotes is dead.** The threshold
used to be **100 servers**. It is now **10,000 users** — the number of unique users your app can reach across every
server it is installed in. Below that, you toggle privileged intents yourself in the portal. At or above it you get
a system DM and/or email, have **90 days** to apply for review, and must **reapply annually** once granted. Apps
are **no longer blocked from joining new servers** while a submission is pending — that block was part of the old
regime. Privileged intent review and **App Verification are now separate processes** (§8).
- **App Verification is the *other* threshold and it is still 100 servers.** Discord's developer help center states
that verification is required for an app to scale past 100 servers, that the checklist lives under an **App
Verification** tab in the portal, and that the **development team's owner must verify their identity through
Stripe**. Do not merge these two gates in your head: 100 servers = verification to keep growing; 10,000 users =
review to keep privileged intents (§11).
- **There is no `openid` scope.** Discord's scope table has `identify` and `email`; it does not document an `openid`
scope and Discord is not documented as an OpenID Connect provider. Anything asking for `openid` on Discord is
carrying over a habit from another vendor.
- **PKCE is not documented anywhere in Discord's OAuth2 docs.** This is a confidential-client flow with a client
secret. Do not add `code_challenge` expecting it to be honoured.
- **Access tokens are short; refresh tokens are the mechanism.** The documented example response carries
`expires_in: 604800` — seven days. Token exchange and refresh are `application/x-www-form-urlencoded` POSTs;
**JSON bodies are rejected**, and the docs pass client credentials via **HTTP Basic** (client ID as username,
client secret as password).
- **`shard` became required on `GET /users/@me/guilds` for large-bot-sharding apps on 15 September 2026.** The
endpoint also caps at **200 guilds** (`limit` 1–200). Non-sharding apps are unaffected, but a connector that
enumerates a bot's servers through this route needs to know both facts.
- **`PIN_MESSAGES` split out of `MANAGE_MESSAGES`** — announced 24 November 2025, effective February 2026. If you
copied a permissions bitfield from an older runbook, re-derive it.
If the portal or the docs do not look like this, stop and report what you actually see rather than clicking on.
## 1. Decide: reuse the existing app, or register a new one
A new app means a **new Application ID, a new client secret and a new bot user**. Every existing install is bound to
the old app: customers would have to remove the old bot from their server and re-install the new one, and every
stored access token and refresh token becomes worthless. That is a customer-visible migration, not a config change.
Reuse the existing app for: adding a redirect URI, adding a scope, changing the permissions bitfield, toggling an
intent, rotating a secret, or diagnosing an install failure.
Register a **new** app only when the user explicitly wants one: a replacement for a compromised app, a separate app
for a different product surface, or a deliberate split of environments. Say which path you are taking before you
touch anything.
Note that even on the same app, **changing scopes or the permissions bitfield does not upgrade existing installs.**
A token carries the scopes granted when it was issued, and a bot's role in a server carries the permissions granted
when it was added. Broadening either is a re-authorization / re-install event per customer.
## 2. Account, 2FA, Team, and a test server
There is no separate developer account and no approval gate to create an app. You need:
- **A Discord account** with **2FA enabled**. 2FA is not optional in practice: Discord requires it to create or join
a Team, and several powerful permissions — including `ADMINISTRATOR`, `MANAGE_GUILD`, `MANAGE_ROLES`,
`MANAGE_WEBHOOKS`, `MANAGE_CHANNELS`, `MANAGE_MESSAGES`, `KICK_MEMBERS`, `BAN_MEMBERS`, `MODERATE_MEMBERS` —
"require the owner account to use two-factor authentication when used on a guild that has server-wide 2FA enabled."
A connector that requests those permissions will hit this at customers who enforce server-wide 2FA.
- **A Team, not a person.** Teams are "groups of developers (or other Discord users) who want to collaborate and
share access to an app's configuration, management, and payout settings," with roles **Owner** (one per team, can
delete apps and the team), **Admin**, **Developer** and **Read-only**. For a platform integration the app should
be owned by a team the company controls, not by whoever happened to click *New Application*. **Transfer is
one-way**: "Once an app has been transferred to a team, it *cannot* be transferred back." Do it deliberately, and
record who the team Owner is — that person is also who will have to complete identity verification at 100 servers
(§11).
- **A test server you own,** so you can install the bot. Installing to a server requires `MANAGE_GUILD` in it.
Create a fresh free server rather than installing a half-configured bot into anything real.
Hand control back to the user for anything only they can do: sign-in, email/phone verification, enabling 2FA,
accepting terms, Stripe identity verification, or approving an install in a server where they are not an admin. Do
not retry a blocked step in a loop.
**If this session has no browser automation** (the usual case for a CLI or cloud run), do not pretend to click. Hand
the user an exact, ordered click path with the literal values to paste — the redirect URIs from §4, the scope strings
from §6, the computed bitfield from §7, the intent toggles from §8 — then continue once they report back with the
Application ID.
## 3. Create the app
At **`https://discord.com/developers/applications`** → **New Application**. Then, on the app's pages:
| Page | Holds |
| --- | --- |
| **General Information** | **Application ID**, **Public Key**, **Interaction Endpoint URL**, app name/icon/description, transfer-to-team |
| **Bot** | The **bot token** (via **Reset Token**), **Public Bot**, **Requires OAuth2 Code Grant**, **Privileged Gateway Intents** |
| **OAuth2** | **Client secret** (**Reset Secret**), **Redirects**, the URL generator |
| **Installation** | Install Link and **Default Install Settings** — the scopes and bot permissions a Discord-provided link uses |
| **App Verification** | The checklist that gates growth past 100 servers (§11) |
| **Discovery** | **Discovery Status** checklist and **Enable Discovery** for the App Directory (§11) |
Two settings on the **Bot** page decide whether anyone but you can install it:
- **Public Bot** — "If unchecked, only you can add the bot to guilds. If marked as public, anyone with your bot's
URL can add it to guilds in which they have proper permissions." A multi-tenant connector **must** have this on.
Leaving it off is the cause of *"Only the application owner can add this bot"* at every customer.
- **Requires OAuth2 Code Grant** — when enabled it "requires anyone adding your bot to a server to go through a full
OAuth2 authorization code grant flow." Turn this on only if your platform genuinely completes the code exchange on
the callback. If your flow is a bare install link with no exchange, this setting strands every install.
The **bot token is shown once.** Discord's own guidance: "You won't be able to view your token again unless you
regenerate it, so make sure to keep it somewhere safe." Capture it the moment it appears (§9).
Discord's reference documentation describes the API, not the portal UI, so treat the page names above as a map to
confirm on screen rather than a contract — if a page is missing or renamed, say so instead of guessing.
## 4. Redirect URIs
Add **every** callback host your platform serves under **OAuth2 → Redirects**. For Unified.to these are one per data
center; confirm the current list with the platform owner rather than assuming:
```
https://api.unified.to/oauth/code # us (default)
https://api-eu.unified.to/oauth/code # eu
https://api-au.unified.to/oauth/code # au
https://api-dev.unified.to/oauth/code # dev
```
Discord's rule, stated plainly in the OAuth2 docs, is that the `redirect_uri` you send is "whatever URL you
registered when creating your application, **url-encoded**" — and the same value must be sent again in the token
exchange, where it is one of the documented POST fields. Register all four before you test, because the first thing
a missing entry produces is an error page the user sees instead of a consent screen, with no callback fired and
nothing in your logs.
A bot-only install link (`scope=bot`, no `response_type`) does not use a redirect URI at all. The moment you add any
other scope, `response_type=code` becomes mandatory and the redirect URI is back in play (§7). This is why an install
link that "worked" can break the day someone adds `identify` to it.
## 5. The decisive choice: bot token or OAuth2 access token
One Discord app can issue **two credentials with different reach**. Choosing wrong is the expensive mistake here,
because the wrong one does not fail at install — it fails later with a 401 or an empty list.
| | **Bot token** | **OAuth2 access token** |
| --- | --- | --- |
| Where it comes from | The **Bot** page in the portal, once, by hand | The authorization code exchange, per customer |
| Header | `Authorization: Bot ` | `Authorization: Bearer ` |
| Acts as | The application, inside every server the bot was installed into | The one user who authorized, across what *they* can see |
| Lifetime | Long-lived until reset | `expires_in: 604800` (7 days), refreshed with `grant_type=refresh_token` |
| Multi-tenant shape | **One token for all customers** | One token per customer connection |
| Reaches server content | Yes, subject to its role's permissions in each server | Only through user-scoped endpoints and the scopes granted |
| Returned by the OAuth exchange? | **No.** The token response never contains the bot token | Yes |
That last row is the single most common misunderstanding. Completing a `bot`-scope authorization **installs** the
bot into the chosen server; it does not hand you the bot's token. The bot token is a separate, manually copied
secret, and it is the same value for every customer — which also means it is the single credential whose compromise
affects all of them at once.
Most real connectors are **hybrid**: they use the bot token to read and write server content, and the user's OAuth
token only to establish *which* servers that particular customer is entitled to see (otherwise every customer of the
platform would see every server the bot is in). If you are building that shape, you need **both** credentials
configured, and your scope list must include `bot` *and* the user scopes.
> **As of 2026-09-20, the Unified.to Discord connector is exactly this hybrid.** It requires an OAuth2 client ID and
> secret **and** a separately supplied bot token, and it sends the **bot token** on essentially every API call
> (`Authorization: Bot …` against `https://discord.com/api/v10/`). The customer's OAuth access token is used almost
> solely as a visibility filter: the connector lists the servers the *bot* is in, lists the servers the *user* is in,
> and intersects the two. So the OAuth app and the bot must be **the same Discord application**, the bot must be
> installed in a customer's server *and* the authorizing user must be a member of it, or that server simply will not
> appear. Confirm the current design with the connector's owner before registering anything.
## 6. Scopes
Scopes are **space-delimited** in the authorize URL and must be URL-encoded. Discord's documented catalogue, with
the strings exactly as Discord spells them:
| Scope | Grants |
| --- | --- |
| `identify` | "allows `/users/@me` without `email`" |
| `email` | "enables `/users/@me` to return an `email`" |
| `guilds` | "allows `/users/@me/guilds` to return basic information about all of a user's guilds" |
| `guilds.members.read` | "allows `/users/@me/guilds/{guild.id}/member` to return a user's member information in a guild" |
| `guilds.join` | "allows `/guilds/{guild.id}/members/{user.id}` to be used for joining users to a guild" |
| `gdm.join` | join users to a group DM |
| `bot` | "for oauth2 bots, this puts the bot in the user's selected guild by default" — see §7 |
| `applications.commands` | "allows your app to add commands to a guild — included by default with the `bot` scope" |
| `applications.commands.update` | update its own commands with a Bearer token — client credentials grant only |
| `applications.commands.permissions.update` | update command permissions in a guild the user has permissions in |
| `connections` | "allows `/users/@me/connections` to return linked third-party accounts" |
| `role_connections.write` | update a user's connection and metadata for the app |
| `webhook.incoming` | "generates a webhook that is returned in the oauth token response for authorization code grants" |
| `applications.builds.read`, `applications.entitlements`, `applications.store.update` | app build/store/entitlement data |
| `messages.read` | local RPC server access only — not a REST scope |
**`guilds` and `guilds.members.read` are not the same thing, and the difference bites.** `guilds` gets you the
*list* of servers the user is in — id, name, icon, whether they own it, and their permissions in it. It tells you
nothing about who else is in those servers. `guilds.members.read` gets you **one** member object: the authorizing
user's own membership (nickname, roles, joined date) in **one specific server**, one server at a time. Neither is a
membership roster. Enumerating a server's members is a **bot-token** operation, and pulling it over the gateway
needs the privileged `GUILD_MEMBERS` intent (§8). A connector that maps "employees" or "members" from Discord is
doing bot-token work, and no amount of user scopes substitutes.
**Scopes Discord gates behind approval.** The catalogue marks these "only available to approved partners" or
otherwise needing Discord's approval: `activities.read`, `activities.write`, `applications.builds.upload`,
`dm_channels.read`, `identify.premium`, `relationships.read`, `voice`, and every `rpc*` scope (`rpc`,
`rpc.activities.write`, `rpc.notifications.read`, `rpc.voice.read`, `rpc.voice.write`). Do not put any of these in a
scope list on the assumption you can request them; if the connector needs one, that is a partnership conversation
with Discord, not a portal toggle. (One recent movement: **21 January 2026**, `relationships.read` was opened to
Activities under the Social SDK terms without requiring approval — evidence this list moves, so re-check it.)
**There is no `openid` scope.** Use `identify` and `email` for sign-in.
> **As of 2026-09-20, the Unified.to Discord connector requests `bot`, `identify`, `email` and `guilds` for its
> messaging objects, and adds `guilds.members.read` for the people/employee object.** Its sign-in-only flow requests
> `identify`, `email` and **`openid`** — and `openid` is not in Discord's documented catalogue, so that entry should
> be reviewed with the connector's owner rather than replicated. The connector does **not** send PKCE.
## 7. The `bot` scope, the permissions bitfield, and how a server install actually works
Adding `bot` to the scope list turns the authorization into a **server install**. The extra query parameters:
| Parameter | Meaning |
| --- | --- |
| `permissions` | "an integer corresponding to the permission calculations for the bot" — the role the bot gets in that server |
| `guild_id` | pre-selects a server: "that guild will be preselected in the dialog if that user has permission to add the bot to that guild" |
| `disable_guild_select` | `true` "disallow[s] the user from picking a different guild" |
| `prompt` | `consent` re-approves the authorization; `none` skips the screen for an existing authorization. **Those are the two documented values** |
| `integration_type` | `0` = GUILD_INSTALL (server), `1` = USER_INSTALL (the authorizing user only) |
`response_type` is optional for a bare `bot` (+ `applications.commands`) install link. **Request any scope outside
those two and `response_type=code` becomes mandatory**, the flow becomes a full authorization code grant, and the
token response additionally contains a `guild` object describing the server the bot was just added to — useful for
recording the install without a second call. The bot token is still not in there (§5).
**The trap: `permissions` and intents are different bitfields with colliding bit numbers.** Both are integers, both
are built from `1 << n`, and they mean completely unrelated things. `1 << 15` is:
- **`ATTACH_FILES`** (`0x0000000000008000`, 32768) in the **permissions** bitfield — "Allows for uploading images
and files";
- **`MESSAGE_CONTENT`** in the **gateway intents** bitfield (§8).
Putting the `MESSAGE_CONTENT` bit into the `permissions` parameter does **not** grant message content. It silently
asks for `ATTACH_FILES` and moves on. Message content is a portal toggle plus an intents value sent on the gateway
identify — nothing in the authorize URL can turn it on. If you inherit a bitfield with a comment that does not match
the permission at that bit, re-derive it from the permissions table rather than trusting the comment.
Values worth having at hand: `ADMINISTRATOR` = `1 << 3` (8), `MANAGE_GUILD` = `1 << 5` (32), `VIEW_CHANNEL` =
`1 << 10` (1024), `SEND_MESSAGES` = `1 << 11` (2048), `ATTACH_FILES` = `1 << 15` (32768), `READ_MESSAGE_HISTORY` =
`1 << 16` (65536), `MANAGE_WEBHOOKS` = `1 << 29` (536870912).
**Do not reach for `ADMINISTRATOR`.** It "allows all permissions and bypasses channel permission overwrites" — it is
the whole server, including channels the installing admin never intended to share, and it "overrides any potential
permission overwrites," so a customer cannot scope it down afterwards with channel settings. It also drags in the
server-wide-2FA requirement (§2). Every customer security review asks about it, and "it was easier" is a bad answer.
For a read-and-post messaging connector the honest minimum is closer to `VIEW_CHANNEL | READ_MESSAGE_HISTORY |
SEND_MESSAGES` (1024 + 65536 + 2048 = 68608), plus `ATTACH_FILES` if you upload and `MANAGE_WEBHOOKS` if you create
webhooks. Compute it from the table, write down which bits you chose and why, and hand that list over.
> **As of 2026-09-20, the Unified.to Discord connector's authorize URL hard-codes `permissions=32776`** — that is
> `ADMINISTRATOR` (8) plus the `1 << 15` bit (32768), which in a permissions bitfield is `ATTACH_FILES`, not
> `MESSAGE_CONTENT`. It also sends `prompt=select_account`, which is not one of Discord's two documented `prompt`
> values, and it does not send `guild_id`, `disable_guild_select` or `integration_type`. Raise all three with the
> connector's owner rather than copying them into a new app's install link.
## 8. Privileged gateway intents — the wall
Intents only matter if you open a **gateway (WebSocket) connection**. A REST-only integration can skip this section
entirely. If you do connect to the gateway, this is where Discord integrations most often stall.
Three intents are **privileged**:
| Intent | Bit | Needed for |
| --- | --- | --- |
| `GUILD_MEMBERS` | `1 << 1` | Member list and member add/update/remove events |
| `GUILD_PRESENCES` | `1 << 8` | Presence / online status |
| `MESSAGE_CONTENT` | `1 << 15` | The **text** of messages your app was not directly mentioned in |
Non-privileged ones you will pair with them include `GUILDS` (`1 << 0`) and `GUILD_MESSAGES` (`1 << 9`) — note that
`GUILD_MESSAGES` gives you message *events*, and without `MESSAGE_CONTENT` those events arrive with empty content
fields. That is the failure people describe as "the bot sees messages but they're blank."
How it works now:
1. **Toggle them in the portal** — on the **Bot** page, under **Privileged Gateway Intents**. Discord: you must
"toggle the privileged intents on the Bot page under the Privileged Gateway Intents section" before using them.
`GUILD_PRESENCES` and `GUILD_MEMBERS` events "are turned off by default on all API versions."
2. **Send the matching bitfield on identify.** If you pass a privileged intent your app is not configured or
approved for, "your Gateway connection will be closed with a **4014** close code." It does not degrade to a
partial feed — it disconnects.
3. **At 10,000 users, it stops being self-serve.** Once the app can reach 10,000 unique users across its servers,
the app or team owner gets a system DM and/or email and has **90 days** to submit a privileged intent review.
Miss the window and "your app's current Privileged Intents access will be removed" — you can reapply later.
Approved apps must **reapply annually**.
4. **You keep growing during review.** The app "will continue to function with the intents you are requesting
access to" while the submission is pending, and — unlike the pre-June-2026 regime — it is no longer blocked from
joining new servers.
The review asks you to "be specific about your use case" with concrete examples, request only the intents you
genuinely need, and explain data handling, retention and security. A request is rejected when "the information
provided in your submission does not demonstrate that the stated use case requires access." Resubmission is allowed.
**Plan for this at design time, not at 10,000 users.** If the connector's value proposition depends on reading
message bodies across customers' servers, `MESSAGE_CONTENT` is a business dependency with an annual renewal and a
human reviewer attached. Say so out loud in the summary. If the feature can be built on data the app is directly
addressed with (mentions, slash commands, interactions) the intent is not needed at all, and that is worth an hour
of design conversation before it is worth a submission.
Note one documentation inconsistency to expect: the application-object flags still describe
`GATEWAY_MESSAGE_CONTENT_LIMITED` / `GATEWAY_GUILD_MEMBERS_LIMITED` in terms of a **100-server** split, which is the
pre-June-2026 framing. The gateway and review pages carry the current 10,000-user rule. Trust the newer pages and
flag the discrepancy rather than reasoning from the stale one.
## 9. Capture the credentials
| Credential | Where | Re-readable? |
| --- | --- | --- |
| **Application ID** (= OAuth2 client ID) | General Information | Yes |
| **Public Key** | General Information — verifies inbound interaction request signatures (Ed25519) | Yes |
| **Client secret** | OAuth2 page, **Reset Secret** | Treat as reset-only |
| **Bot token** | Bot page, **Reset Token** | **No — shown once** |
Endpoints to record alongside them:
- Authorize: `https://discord.com/oauth2/authorize`
- Token exchange **and** refresh: `POST https://discord.com/api/oauth2/token`
- Revoke: `POST https://discord.com/api/oauth2/token/revoke`
- API base: `https://discord.com/api`, current version **v10** (`https://discord.com/api/v10/`)
**Token mechanics:**
- Exchange and refresh are `Content-Type: application/x-www-form-urlencoded` POSTs. **JSON is rejected.** Exchange
sends `grant_type=authorization_code`, `code`, `redirect_uri`; refresh sends `grant_type=refresh_token`,
`refresh_token`.
- Discord documents client credentials on the OAuth2 token endpoints via **HTTP Basic authentication** — client ID
as the username, client secret as the password. (Many clients instead put `client_id`/`client_secret` in the form
body; if yours does, note it as a deviation from the documented form and verify it against a live exchange rather
than assuming.)
- The documented response is `access_token`, `token_type: "Bearer"`, `expires_in: 604800`, `refresh_token`, `scope`
— and, for a `bot`-scope authorization combined with other scopes, a `guild` object.
- **`state` is not required by Discord but is strongly recommended**: Discord calls out CSRF and clickjacking and
says `state` "should be a value that binds the user's request to their authenticated state." Send it; validate it.
- **Revocation is authorization-wide.** `POST .../token/revoke` takes `token` and an optional `token_type_hint`, and
"when you revoke a token, any active access or refresh tokens associated with that authorization will be revoked,
regardless of the `token` and `token_type_hint` values you pass in." There is no revoke-just-this-one.
- **The client credentials grant** (`grant_type=client_credentials`, Basic auth) returns "an access token for the
bot owner" — it is a testing convenience for your own account, not a multi-tenant mechanism. Discord's own warning
about keeping the secret out of source code is unusually emphatic here; take the hint.
**Rotation.** Resetting the **client secret** invalidates the old one immediately: existing access tokens live out
their remaining time, but every future exchange and refresh fails until the new secret is deployed. Resetting the
**bot token** is worse — it is the credential doing the actual work, so every server's reads and writes stop the
instant it is reset, across all customers at once, until the new token is deployed. Never reset either without
explicit go-ahead and a cutover plan.
Report each secret once so the user can paste it into their secret store, say plainly that it is now in the
transcript and can be reset, then move on.
## 10. Rate limits, and the Cloudflare ban nobody plans for
- **Global:** "All bots can make up to **50 requests per second** to our API," independent of per-route limits.
- **Per route, per top-level resource.** Limits are bucketed by route *and* by the top-level resource in the path
(channel, guild, webhook), so "an endpoint with two different top-level resources may calculate limits
independently." One busy server does not have to throttle another — unless your client shares a bucket by
accident.
- **Headers on every response:** `X-RateLimit-Limit`, `X-RateLimit-Remaining`, `X-RateLimit-Reset` (epoch seconds),
`X-RateLimit-Reset-After` (seconds), `X-RateLimit-Bucket` (the bucket's opaque id), and on a 429
`X-RateLimit-Scope` with value `user`, `global` or `shared`. Honour `X-RateLimit-Reset-After` and `X-RateLimit-
Bucket`; a client that only reacts to 429s is already late.
- **429 body** carries `retry_after` (seconds to wait), `global` (whether it is the global limit) and `message`.
- **The one that takes you off the air: Cloudflare bans.** "IP addresses that make too many invalid HTTP requests
are automatically and temporarily restricted from accessing the Discord API," with the threshold at **10,000
responses of 401, 403 or 429 per 10 minutes**. Note what counts: **expired tokens (401) and missing permissions
(403) count as invalid**, not just rate-limit hits. A connector looping over thousands of connections with stale
tokens, or retrying 403s from servers where the bot lacks a permission, can ban the *platform's own egress IP* for
every customer — a multi-tenant outage caused by single-tenant misconfiguration. Back off on 401/403 and stop
re-trying them.
- **Send a real User-Agent.** Discord requires the form `User-Agent: DiscordBot ($url, $versionNumber)` and warns
that "client requests that do not have a valid User Agent specified may be blocked and return a Cloudflare error."
Confirm your HTTP client actually sets one rather than shipping a library default.
## 11. Verification, App Directory, and growth gates
Two separate gates, now decoupled (they were one process before June 2026):
- **App Verification — required to grow past 100 servers.** The portal has an **App Verification** tab with a
checklist; the headline requirement is that the **owner of the development team must verify their identity through
Stripe**, Discord's identity provider. Until verified, the app cannot join its 101st server. Start this early:
it depends on a specific human completing an identity check, which is exactly the kind of thing that blocks a
launch for a week.
- **Discovery / App Directory listing — optional.** Enabling Discovery requires "your team owner to complete
identity and application verification"; you then work the **Discovery → Discovery Status** checklist in the portal
and click **Enable Discovery**, after which "it may take up to 24 hours for your app to appear in the App Directory
and App Launcher." Discord's inclusion guidelines additionally require a **publicly hosted privacy policy and
terms of service**, compliance with the Discord Terms of Service, Community Guidelines, Developer Terms of Service
and Developer Policy, no age-restricted content, a configured **install link**, implemented **slash commands**,
and **2FA on your own account**. A listing is a go-to-market decision; it is not needed to serve customers.
**Stop and ask** before answering anything you would have to invent on a verification or Discovery submission:
company identity details, data-retention periods, subprocessors, security questionnaires, support SLAs, or user
counts.
## 12. Verify end-to-end
A half-working registration surfaces later as a customer who cannot connect. Prove it, and prove **each credential
separately** — this is the step that catches the §5 mistake:
1. **Install into your test server through the real flow** — your platform's connect button or the real install
link, not a hand-built URL, so the redirect URI matching is actually exercised.
2. **Read the consent screen.** Confirm it names the server, lists the permissions you expect, and does not mention
permissions you did not intend (`ADMINISTRATOR` shows up as "Administrator" and is unmistakable).
3. **Complete the token exchange**, confirm you got `access_token`, `refresh_token`, `expires_in` and the `scope`
string you asked for — and, for a `bot` install with extra scopes, the `guild` object.
4. **Make one call with the Bearer token** (e.g. the current user, or the user's guild list) and **one call with the
`Bot` token** (e.g. a guild's channels). Both must work if your connector is a hybrid. Passing one and failing
the other is the whole failure mode.
5. **Force a refresh** before the 7 days are up and confirm the connection survives it.
6. **If you use the gateway**, connect and confirm you receive a message event *with non-empty content* from a
channel the bot was not mentioned in. That is the only real test of `MESSAGE_CONTENT`.
7. **Test from a second account in a server you do not own**, where the installer is an admin but not you. That is
the path a customer takes.
| Symptom | Cause |
| --- | --- |
| "Only the application owner can add this bot" | **Public Bot** is off on the Bot page (§3) |
| Error page instead of a consent screen; no callback fired | `redirect_uri` not registered, or not url-encoded / not identical (§4) |
| Install link works until someone adds a scope, then breaks | Any scope beyond `bot`/`applications.commands` makes `response_type=code` mandatory (§7) |
| `invalid_scope` | Scope string not in Discord's catalogue (e.g. `openid`), or a scope that needs Discord's approval (§6) |
| Install "succeeds" but every API call 401s | Using the OAuth access token where the bot token is required, or vice versa (§5) |
| Waiting for a bot token in the token exchange response | It is never returned there — copy it from the Bot page (§5, §9) |
| Bot is in the server but sees no channels | Permissions bitfield too narrow, or channel-level overwrites exclude the bot's role (§7) |
| Message events arrive with empty content | `MESSAGE_CONTENT` intent not toggled / not approved (§8) |
| Gateway closes with **4014** | A privileged intent was sent that the app is not configured or approved for (§8) |
| Member list is empty or partial | `GUILD_MEMBERS` privileged intent, or a bot-token endpoint being called with a Bearer token (§6, §8) |
| Everything dies ~7 days after connecting | Client is not refreshing; access tokens are `expires_in: 604800` (§9) |
| `invalid_grant` on refresh | Authorization revoked, bot removed from the server, or the user revoked the app (§9) |
| Bot stops joining new servers at exactly 100 | App Verification not completed (§11) |
| Privileged intents silently removed | 90-day review window elapsed, or the annual reapplication was missed (§8) |
| Whole platform gets Cloudflare-blocked from the API | 10,000+ 401/403/429 responses in 10 minutes from one IP (§10) |
| Random requests blocked with a Cloudflare error | No valid `User-Agent: DiscordBot (...)` header (§10) |
| Customer's admin cannot install despite being an admin | Installing requires `MANAGE_GUILD`; server-wide 2FA also gates powerful permissions (§2) |
## 13. Hand off — never commit the secret
- **Do not** write the client secret, the bot token or the public key into source control, a test, a fixture, a
committed `.env`, a ticket, a PR body, or a chat channel. Values go to the user, for the secret store or console.
The bot token deserves extra care: it is one credential shared across every customer, and it cannot be re-read
after it is reset.
- If a code change is needed (a new callback host, a scope list, a permissions bitfield), keep it secret-free and
say what the human must set out of band.
- Close with: app name, Application ID, and the **Team** that owns it; where the client secret and bot token were
delivered; the authorize / token / revoke URLs and the API base; **the exact scope strings**; **the permissions
bitfield and which bits it is made of**; which gateway intents are toggled and whether any are privileged;
Public Bot and Requires OAuth2 Code Grant states; verification and Discovery status; and anything left for the
user to do.
## Stop and ask
Hand back to a human rather than guessing when: someone proposes `ADMINISTRATOR` in the permissions bitfield;
resetting a bot token or client secret that live connections depend on; enabling **Requires OAuth2 Code Grant** on
an app whose install flow does not complete an exchange; a privileged intent review or App Verification form asks
for identity, compliance, retention or volume claims; a scope on the list is one Discord gates behind partner
approval; the app is approaching 100 servers or 10,000 users and nobody owns the submission; transferring an app to
a Team (one-way); installing into a server you were not told to touch; or the portal and docs do not match the
**Platform state** section above.
## References
Official Discord documentation only; every URL below returned HTTP 200 on 2026-09-20. Discord's developer help
center (`support-dev.discord.com`) carries the App Verification and privileged-intent policy articles but is
Cloudflare-protected and not machine-fetchable — open those from the portal or a browser. Note that old
`discord.com/developers/docs/...` links 301 to `docs.discord.com/developers/...`.
- OAuth2 (scopes, flows, bot authorization, token exchange, revocation) — https://docs.discord.com/developers/topics/oauth2
- Permissions and the bitwise permission flags table — https://docs.discord.com/developers/topics/permissions
- Gateway, intents and privileged intents (close code 4014) — https://docs.discord.com/developers/events/gateway
- Getting started with privileged intent review (10,000 users, 90 days, annual renewal) — https://docs.discord.com/developers/gateway/getting-started-with-privileged-intent-review
- Gateway events — https://docs.discord.com/developers/topics/gateway-events
- API reference (auth headers, base URL, API v10, User-Agent) — https://docs.discord.com/developers/reference
- Rate limits, `X-RateLimit-*` headers and the invalid-request/Cloudflare ban — https://docs.discord.com/developers/topics/rate-limits
- Opcodes and status codes — https://docs.discord.com/developers/topics/opcodes-and-status-codes
- Application resource (installation contexts, install params, application flags) — https://docs.discord.com/developers/resources/application
- User resource (`/users/@me/guilds`, `shard`, the 200 cap, `/users/@me/guilds/{id}/member`) — https://docs.discord.com/developers/resources/user
- Guild resource — https://docs.discord.com/developers/resources/guild
- Channel resource — https://docs.discord.com/developers/resources/channel
- Message resource — https://docs.discord.com/developers/resources/message
- Teams (roles, 2FA, one-way transfer) — https://docs.discord.com/developers/topics/teams
- Getting started (portal walkthrough, bot token shown once) — https://docs.discord.com/developers/getting-started
- Enabling Discovery / App Directory — https://docs.discord.com/developers/discovery/enabling-discovery
- Webhook events — https://docs.discord.com/developers/events/webhook-events
- Change log (docs migration, privileged intent change, `shard` requirement) — https://docs.discord.com/developers/change-log
- Developer platform documentation index — https://docs.discord.com/developers/intro
- Developer portal — applications — https://discord.com/developers/applications
- Developer portal — teams — https://discord.com/developers/teams
- Discord Terms of Service — https://discord.com/terms
## dropbox-oauth-app
URL: https://docs.unified.to/skills/dropbox-oauth-app/SKILL.md
# Dropbox OAuth2 App Registration
Get a working Dropbox OAuth2 client — a Dropbox account, an app in the App Console, redirect URIs, scopes, and the
**app key** and **app secret** (Dropbox's names for `client_id` and `client_secret`) — for a platform that connects
many customers' Dropbox accounts.
Three things in this portal are expensive to get wrong, and two of them are silent:
1. **The access type — App folder vs Full Dropbox — cannot be changed after the app is created.** Dropbox's own
documented remedy is to delete the app and create a new one, which means a new app key and every existing customer
re-authorizing. This is the single most costly mistake available here. Read §3 before clicking Create app.
2. **You only get a refresh token if the authorize URL carries `token_access_type=offline`.** Omit it and everything
looks fine: the flow succeeds, you get an access token, you make a call. About four hours later the connection is
dead and there is nothing to refresh with. §8.
3. **Development apps freeze at 50 linked users**, and the production review is not even looked at before you reach
50. Plan the approval before you need it, not the week the freeze lands. §6.
## Inputs to collect before you start
Ask in one batch. Never invent.
| Input | Notes |
| --- | --- |
| **App name**, publisher, description, website, icons | Shown on the consent screen and used in production review (§6) |
| **Which Dropbox account owns the app** | An existing one, or a new sign-up (§2) |
| **Access type: App folder or Full Dropbox** | Irreversible — decide deliberately (§3) |
| **Personal/user app or team (Business API) app** | A different app type with different scopes (§3) |
| **Redirect URIs** | Every callback host your platform serves (§4) |
| **Scope set** | Exactly what the connector calls (§5) |
| **Does the client send `token_access_type=offline` and store the refresh token?** | Blocking — see §8 |
| **Expected user count and timeline** | Decides how urgent production approval is (§6) |
## Quick Start
1. Confirm a **new app** is needed — existing connections are bound to the current app key (§1).
2. Sign in to, or create, the Dropbox account that will own the app (§2).
3. Choose the access type **deliberately**, then create the app in the App Console (§3).
4. Register **every** redirect URI, exactly (§4).
5. Enable only the scopes the connector calls, on the Permissions tab (§5).
6. Decide when to apply for production status, and what the form will need (§6).
7. Copy the app key and app secret from the Settings tab (§7).
8. Confirm the client sends `token_access_type=offline` and stores the refresh token (§8).
9. Verify end-to-end with a second account, including a refresh after expiry (§9).
10. Hand the credentials over — never commit them (§10).
## Platform state (verified 2026-09-20 — re-verify before trusting)
- The developer portal is **www.dropbox.com/developers**, and apps are managed in the **App Console** at
`https://www.dropbox.com/developers/apps`. The documentation now lives under **docs.dropboxapi.com**;
`developers.dropbox.com/oauth-guide` still resolves and redirects there.
- The App Console app page has **four tabs: Settings, Permissions, Branding, Analytics.** App key and app secret,
redirect URIs, status and the access type all live on **Settings**; scopes live on **Permissions**.
- Apps are **scoped apps**. Scopes are selected in the Permissions tab; the access-type choice (App folder / Full
Dropbox) is separate from and orthogonal to scopes.
- **Access type cannot be edited.** The App Console documentation states plainly that to change it "you'll need to
delete the existing app and create a new one with the desired access type."
- **Long-lived access tokens are deprecated.** Access tokens are short-lived; the documented examples return
`"expires_in": 14400` — four hours. Refresh tokens require `token_access_type=offline` at authorize time.
- **PKCE is supported** (`code_challenge_method` of `S256` or `plain`), and is Dropbox's recommendation for clients
that cannot keep a secret. Implicit grant still exists as a legacy option and should be disabled if unused.
- **Development mode caps at 500 total linked users, with a hard checkpoint at 50** (§6). Team/Business apps cap at
one team plus up to 5 additional development teams.
- The OIDC discovery document at `https://www.dropbox.com/.well-known/openid-configuration` reports
`authorization_endpoint` `https://www.dropbox.com/oauth2/authorize`, `token_endpoint`
`https://api.dropboxapi.com/oauth2/token`, and token endpoint auth methods `client_secret_basic` and
`client_secret_post`.
If the App Console does not look like this, stop and report what you actually see rather than clicking on.
## 1. Decide: reuse the existing app, or register a new one
A new app means a **new app key, and every existing customer connection is bound to the old one** — all of them would
have to re-authorize. Reuse the existing app for: adding a redirect URI, adding or removing a scope, rotating a
compromised secret, uploading branding, or applying for production status.
Register a **new** app only when the user explicitly wants one: a replacement for a compromised app, a separate app
for a different product, a team/Business app alongside a user app, or — the common forced case — **the access type is
wrong and cannot be changed** (§3). Note that Dropbox's own guidance is one app key per distinct app, and that
re-registering is a customer-visible re-authorization event, not a config change. Say which path you are taking first.
## 2. Account: sign in or sign up
Any Dropbox account can create apps — there is no separate "developer account" tier to apply for. Sign in at
`https://www.dropbox.com/developers` and go to the App Console.
- Use an account the **company** controls, not a personal one belonging to whoever happened to set it up. The account
owns the app, the credentials, the production approval and the analytics.
- For **team/Business API** testing, Dropbox grants free Business development accounts by request; the request form is
linked from the Business API overview and approval is discretionary. Start that early if you need it (§3).
- The **same account is also the first linked user** while the app is in development mode (§6).
Hand control back to the user for anything only they can do: sign-up email verification, two-step verification,
accepting the developer terms and conditions, or requesting a Business development account. Do not retry a blocked
step in a loop.
**If this session has no browser automation** (the usual case for a CLI or cloud run), do not pretend to click. Hand
the user an exact, ordered click path with the literal values to paste — the redirect URIs from §4 and the scope list
from §5 — then continue once they report back with the app key.
## 3. Create the app — and the access-type decision you cannot undo
**Settings → App Console → Create app.** The wizard asks three things, and the third is permanent.
1. **Choose an API** — the Dropbox API (user-facing) or the Business/team API path (see below).
2. **Choose the type of access you need** — **App folder** or **Full Dropbox**. See the box below.
3. **Name your app** — must satisfy the Branding Guide; names can be edited while the app is in development, but
**once the app has production status the name is frozen** and only a support request can change it.
### The access type is permanent
| Access type | What the app can reach |
| --- | --- |
| **App folder** | A single dedicated folder created for your app inside the user's `Apps` folder. Read and write **that folder only**. Users hand you content by moving files into it. |
| **Full Dropbox** | All files and folders in the user's Dropbox, to the extent the scopes allow. |
Scopes and access type are two different limits that both apply. A `files.content.read` scope on an App folder app
reads *inside the app folder*, and nothing else — no error, just an empty or tiny view of the user's Dropbox. That is
what an under-chosen access type looks like in production: not a failure, a silence.
**It cannot be edited afterwards.** Dropbox's documented remedy is to delete the app and create a new one with the
desired access type — a new app key, and every customer re-authorizing.
So decide against the connector's actual job, not against what feels polite:
- **A connector that syncs, lists, searches or reads a customer's pre-existing Dropbox content needs Full Dropbox.**
App folder cannot see content the app did not put there.
- **App folder is right** when the app only ever manages its own output — exports, generated documents, backups — and
it is what Dropbox's review prefers, because it is the least privileged option.
- **Extensions require Full Dropbox**, with no App folder alternative.
If the user cannot answer this confidently, **stop and ask**. Two minutes of clarification here is worth more than
every other step in this skill combined. Also note the **App folder name** setting on the Settings tab: for App folder
apps it defaults to the app name and can be changed, but it must not be misleading to end users.
### Team / Business apps are a separate app type
An app built on the **Dropbox Business API** is created the same way but is a different animal:
- Authorization is performed by a **team administrator**, and the resulting token is associated with the **team**, not
with the admin who clicked approve. The OAuth response carries an extra `team_id`.
- Acting as an individual member is **impersonation via headers**: `Dropbox-API-Select-User` with a `team_member_id`
for member operations, `Dropbox-API-Select-Admin` for team-owned content. Both require the **`team_data.member`**
scope on the token — a dependency Dropbox enforces in the Permissions tab and in the OAuth flow.
- Teams on the **team space** configuration need the `Dropbox-API-Path-Root` header to reach team content; without it,
calls are rooted to the member's home namespace and team folders simply are not there.
- Development mode for a team app means **one team**, plus up to 5 additional development teams enabled from the app's
page.
A team token and a user token are not interchangeable. If the platform needs both personal Dropbox accounts and
Dropbox Business teams, that is a design question for the connector's owner — surface it, do not decide it.
## 4. Redirect URIs
Register **every** callback host your platform serves, on the Settings tab under **OAuth 2 → Redirect URIs**. Dropbox
checks the `redirect_uri` you send against the registered values **at authorization time**, and the match is exact.
For Unified.to these are one per data center; confirm the current list with the platform owner rather than assuming:
```
https://api.unified.to/oauth/code # us (default)
https://api-eu.unified.to/oauth/code # eu
https://api-au.unified.to/oauth/code # au
https://api-dev.unified.to/oauth/code # dev
```
Notes:
- **All redirect URIs must be HTTPS**, except `localhost` URIs.
- Matching is exact — no subdirectory matching, no trailing-slash forgiveness, no wildcards. A mismatch fails at
connect time, not at save time, so a bad entry survives review and breaks customers.
- The `redirect_uri` is technically *optional* for the code flow: with none, Dropbox shows the authorization code on
screen for the user to copy. That is a manual-testing convenience, never a product flow.
- **Disable "Allow implicit grant"** unless something genuinely uses it. Leaving a legacy `response_type=token` flow
enabled on a server-side app is free attack surface.
- The **Generated access token** button on the same tab mints a token for the owning account only. Useful for a smoke
test; not an authorization mechanism.
## 5. Scopes — the Permissions tab
Scopes are enabled per app on the **Permissions** tab, and requested per authorization via the space-delimited `scope`
parameter on the authorize URL. The `scope` parameter can only request a **subset of what the Permissions tab has
enabled**; it cannot exceed it. Omit `scope` entirely and Dropbox requests everything enabled on the tab — which is
how an app ends up showing customers a consent screen far broader than it needs.
Each API endpoint documents its required scope. The ones a storage connector typically needs:
| Scope | Why |
| --- | --- |
| `account_info.read` | Read the authorizing account's profile (`/2/users/get_current_account`) |
| `files.metadata.read` | List and read file/folder metadata (`/2/files/list_folder`) |
| `files.content.read` | Download file contents |
| `files.metadata.write` | Write file properties and tags |
| `files.content.write` | Upload, create folders, move, delete |
| `sharing.read` | Read sharing settings and shared links |
| `openid` `profile` `email` | OIDC identity only — required for the `id_token`; `profile` for first/last name, `email` for email |
| `team_data.member` | Team apps only — required to use the Select-User / Select-Admin headers |
**Changing scopes after customers have authorized requires re-authorization.** A token carries the permission set it
was granted; enabling a new scope on the Permissions tab does **not** upgrade tokens already issued, and a refresh can
only return a subset of what was originally granted. Existing customers keep working with their old, narrower token
until they run the authorize flow again — at which point the missing calls start returning 401 with the required scope
named. If you widen the scope set, plan a re-authorization campaign, and look at `include_granted_scopes` (`user` or
`team`) so a re-auth adds to previously granted scopes instead of replacing them.
Ask for the least you need. Dropbox reviews scope breadth against actual functionality at production approval (§6),
and an over-broad consent screen costs conversions before it ever costs a review cycle.
### Product fact — Unified.to's Dropbox connector
**As of 2026-09-20, Unified.to's Dropbox connector requests:** `openid`, `profile` and `email` on every authorization,
plus — for reading files — `files.metadata.read`, `files.content.read` and `sharing.read`; for writing files —
`files.metadata.write`, `files.content.write` and `sharing.read`; and `account_info.read` for the account/employee
object. Scopes are space-delimited.
Also as of 2026-09-20, that connector: **appends `token_access_type=offline` to the authorize URL**, so it does
receive a refresh token; **does not use PKCE** for Dropbox, sending the app secret in the token request body
(`client_secret_post`, which Dropbox supports); authorizes at `https://www.dropbox.com/oauth2/authorize` and exchanges
at `https://api.dropboxapi.com/oauth2/token`; refreshes with `grant_type=refresh_token` plus the app key and secret;
and can run on Unified.to's **shared** Dropbox credentials rather than a customer-supplied app.
Two consequences worth raising before you create anything. That scope set reads pre-existing user content and sharing
state, which **App folder access cannot serve** (§3) — Full Dropbox is the likely correct choice, but confirm it.
And no team scope is in that list, so this is a **user app, not a Business/team app**. Confirm both, and the current
scope set, with the connector's owner before registering — this is a dated snapshot, not a contract.
## 6. Development vs production status
Every new app is created in **development** status. It works exactly like a production app; it just cannot link many
users. The numbers are specific, and the second one is the one that bites:
- **500 total linked users** is the development ceiling. Additional users beyond your own account are enabled from the
app's page with **Enable additional users**.
- **At 50 linked users, a two-week clock starts.** You have two weeks to apply for *and receive* production approval.
Miss it and the app's ability to link additional users is **frozen** — regardless of whether you are at 51 users or
400.
- **A frozen app is only unfrozen by production approval.** Unlinking users does not help. Dropbox says this
explicitly.
- **Dropbox will not review a production application until the app has linked at least 50 users**, unless you make a
case in the **Request early review** field of the form. So the naive plan — apply early, be safe — does not work;
you apply early and wait, or you make the early-review argument.
For a multi-tenant connector, treat 50 linked customers as a launch gate, and file the application (with the
early-review justification if the timeline demands it) well before you approach it.
**What the production application asks for**, from the app's page in the App Console via **Apply for Production**:
- How your app uses the API — be descriptive; Dropbox says explicitly that more detail means faster approval.
- An **app icon** (small and large), plus the Branding tab's publisher, description and app website.
- Adherence to the **developer branding guidelines** and the **developer terms and conditions** — the application is
rejected outright if it does not comply. Notably: do not imply Dropbox endorsed, built or partnered on the app.
- A **privacy policy** specific to your app, describing what you do and do not do with user data.
- Scope and access-type justification: review checks that the app does not request a broader permission than its
functionality warrants. If a broader permission is for planned-but-unbuilt functionality, **say so in the request**.
A denial comes with feedback and you can resubmit. **Once approved, the app name is frozen** — changing it afterwards
requires a support request.
Compliance attestations, legal claims, volume projections and security-questionnaire answers are business decisions.
**Do not invent them** — collect them from the user or hand back.
## 7. Capture the credentials
**App Console → your app → Settings tab.** The **App key** and **App secret** sit together; the secret is behind a
**Show** control. Dropbox calls them app key and app secret; the OAuth spec calls them `client_id` and
`client_secret`, and they are the same values.
Unlike some portals, **the app secret can be re-read later** from this page by anyone with access to the owning
account — which is convenient and also means account access equals credential access. Protect the owning account
accordingly.
Capture, for the handoff:
- **App key** (`client_id`) and **app secret** (`client_secret`)
- Authorize endpoint: `https://www.dropbox.com/oauth2/authorize`
- Token endpoint: `https://api.dropboxapi.com/oauth2/token`
- API base: `https://api.dropboxapi.com/` (content endpoints live on `https://content.dropboxapi.com/`)
- The **access type** (App folder or Full Dropbox) and, for App folder apps, the app folder name
- The exact **scope list** enabled on the Permissions tab
- Current **status** (development or production) and the linked-user count
Report the secret once so the user can paste it into their secret store, say plainly that it is now in the transcript
and can be regenerated, then move on.
Regenerating the app secret invalidates the old one. Existing access tokens keep working until they expire (about four
hours), but every token exchange and every refresh fails until the new secret is deployed — which for a connector with
stored refresh tokens means every customer breaks within hours, not gradually. Never regenerate without explicit
go-ahead and a cutover plan.
## 8. Token lifetimes and offline access
This is the failure that looks like success.
- Access tokens are **short-lived**. The documented token responses show `"expires_in": 14400` — four hours. Do not
hardcode it; read `expires_in` from the response.
- `token_access_type` on the **authorize** URL controls what you get back, and it **defaults to `online`**:
- `online` (default) → a short-lived access token, **and no refresh token at all**.
- `offline` → a short-lived access token **plus** a long-lived `refresh_token`.
- The refresh token does not expire automatically and is reusable. (An optional
`refresh_token_expiration_seconds` on the code exchange can give it an expiry; omit it for an indefinite token.)
- Refreshing: POST `https://api.dropboxapi.com/oauth2/token` with `grant_type=refresh_token`, the `refresh_token`, and
the app key and secret. You get a new access token and a new expiry. The refresh token itself is not rotated.
- A user's approval stays valid until they revoke it from their Dropbox account's connected-apps settings. Revocation
surfaces as a 401 — indistinguishable at the HTTP layer from an expired token, so handle both.
**The trap, precisely:** forget `token_access_type=offline` and nothing complains. Authorization succeeds, the token
response contains no `refresh_token`, and the connector works perfectly for one afternoon. Roughly four hours later
every call returns 401 and there is no way back without dragging the customer through the authorize flow again. If the
client is already deployed with `online`, fixing it is not a config change on the Dropbox side — **every affected
customer must re-authorize**, because the missing refresh token was never issued.
So before registering anything, confirm two separate things: that the client **sends `token_access_type=offline`**,
and that it **persists the `refresh_token`** from the exchange response. Either one missing produces the same symptom.
**PKCE** is available and recommended for clients that cannot keep the secret secure (desktop, mobile, single-page,
open-source). Send `code_challenge` and `code_challenge_method=S256` on authorize, and the `code_verifier` (43–128
characters from `[0-9a-zA-Z\-\.\_\~]`) on the exchange in place of the secret. A confidential server-side connector may
legitimately use the secret instead — but it is a choice to make knowingly, not by omission.
## 9. Verify end-to-end
Testing with the owning account proves less than it appears — it is already a linked development user, and the
Generated access token button bypasses the flow entirely. Test the path a customer takes.
1. Authorize from a **second Dropbox account** (enabled via **Enable additional users**) through your platform's real
connect flow.
2. Inspect the raw token response: confirm a **`refresh_token`** is present, and note `expires_in` and the returned
`scope` string. The `scope` string is the ground truth for what the token can do.
3. Make a read call against content the app should see. For a **Full Dropbox** app, list something the user created
*before* installing the app — that is the check App folder access silently fails.
4. **Force a refresh** with `grant_type=refresh_token` and make the same call with the new access token.
5. If the account is a **Dropbox Business team**, repeat with the Select-User header and, for team-space teams, the
Path-Root header.
| Symptom | Cause |
| --- | --- |
| No `refresh_token` in the token response | `token_access_type=offline` missing from the authorize URL (§8) |
| Works for ~4 hours, then every call 401s | Same — nothing to refresh with, token expired (§8) |
| Redirect fails before consent, or the URI is rejected | Redirect URI not registered exactly, or not HTTPS (§4) |
| Auth succeeds; user's existing files are invisible or the listing is nearly empty | App folder access type — cannot be changed, only replaced (§3) |
| 401 naming a required scope | Scope not enabled on Permissions, or the token predates it and needs re-authorization (§5) |
| Consent screen asks for far more than expected | `scope` parameter omitted, so all enabled scopes are requested (§5) |
| No `id_token` in the response | OIDC scopes not explicitly requested, or not using `response_type=code` (§5) |
| New users stop being able to link; existing ones fine | Development app frozen at the 50-user checkpoint (§6) |
| Team app cannot see team folders | Missing `Dropbox-API-Path-Root` on a team-space team (§3) |
| Team app 401s on a member call | Missing `team_data.member` scope, or a member ID not on the team (§3) |
| Every customer breaks within hours of a credential change | App secret regenerated without a cutover (§7) |
## 10. Hand off — never commit the secret
- **Do not** write the app secret into source control, a test, a fixture, a committed `.env`, a ticket, a PR body, or
a chat channel. Values go to the user, for the secret store or console.
- If a code change is needed (a redirect host, a scope, `token_access_type=offline`), keep it secret-free and say what
the human must set out of band.
- Close with: app name and owning account; **access type, and the fact that it is permanent**; app key; where the
secret was delivered; authorize and token endpoints; the exact scope strings enabled; whether the client sends
`token_access_type=offline` and stores the refresh token; current status (development or production), the linked-user
count, and the plan for the 50-user checkpoint; and anything left for the user to do.
## Stop and ask
Hand back to a human rather than guessing when: the user cannot say confidently whether the connector needs **App
folder or Full Dropbox** (§3 — this is unrecoverable, and worth blocking on); the client does not send
`token_access_type=offline` or does not store the refresh token (report it — do not register and hope); the app needs
to serve both personal accounts and Dropbox Business teams; the fix requires deleting and recreating an app that
customers already use; regenerating the app secret is on the table; the production application asks for compliance,
legal, privacy-policy or volume claims; branding, naming or icons must be invented; a Business development account is
needed; or the App Console does not match the **Platform state** section above.
## References
- OAuth Guide — https://developers.dropbox.com/oauth-guide
- OAuth Guide (canonical) — https://docs.dropboxapi.com/dropbox-api/docs/oauth
- Authorization reference (`/oauth2/authorize`, `/oauth2/token`, `token_access_type`, PKCE) — https://docs.dropboxapi.com/dropbox-api/docs/get-started/authorization
- App Console tutorial (tabs, app key/secret, redirect URIs, access type is not editable) — https://docs.dropboxapi.com/dropbox-api/docs/get-started/tutorial/app-console
- DBX Platform developer guide (App folder vs Full Dropbox, production approval, 50/500 users) — https://docs.dropboxapi.com/dropbox-api/docs/developer-resources/developer-guide
- Developer branding guidelines — https://docs.dropboxapi.com/dropbox-api/docs/developer-resources/branding-guide
- Developer terms and conditions — https://www.dropbox.com/developers/reference/tos
- Authentication types (Select-User, Select-Admin, app auth) — https://docs.dropboxapi.com/dropbox-api/docs/auth-types
- Dropbox Business API overview (team apps, development teams, `team_data.member`) — https://docs.dropboxapi.com/dropbox-api/api-reference/business-endpoints/overview
- Team Files guide (namespaces, Path-Root, team space) — https://docs.dropboxapi.com/dropbox-api/docs/team-files
- OpenID Connect guide — https://developers.dropbox.com/oidc-guide
- Error handling (401/403 semantics, revocation) — https://docs.dropboxapi.com/dropbox-api/docs/error-handling
- OIDC discovery document — https://www.dropbox.com/.well-known/openid-configuration
- App Console — https://www.dropbox.com/developers/apps
- Create an app — https://www.dropbox.com/developers/apps/create
- Developer support / contact — https://www.dropbox.com/developers/contact
- Users revoking third-party app access — https://help.dropbox.com/installs-integrations/third-party/third-party-apps
- Team space overview — https://help.dropbox.com/organize/team-space-overview
## facebook-oauth-app
URL: https://docs.unified.to/skills/facebook-oauth-app/SKILL.md
# Facebook (Pages) OAuth2 App Registration
Get a working Facebook OAuth2 client — a Meta app with the Pages use case, redirect URIs, `pages_*` permissions and
an App ID and App Secret — for a platform that connects many customers' Facebook Pages on their behalf.
The registration mechanics are not here; they are the same for every Meta product and live in the base skill. Three
things are specific to Facebook Pages, and each one produces a failure that looks like something else.
**First, the token you finish OAuth with is not the token most calls need.** Facebook Login hands you a *user*
access token. Meta's own summary: "Most endpoints require Page access tokens." A user token has to be exchanged,
per Page, for one of those — the documented route is `/{user-id}/accounts`, and reading the `access_token` field on
a Page node works too — and a Page token minted from a short-lived user token is itself short-lived. A connector
that stores the OAuth token and calls Page endpoints with it works in the Graph API Explorer and fails in
production.
**Second, permissions are only half of the authorization check.** Facebook has a second, per-Page axis called
**tasks**. Meta: "When a User uses an app to interact with a Page, depending on the attempted action, we will first
check if the User has been approved for a task that permits that type of action." A customer can grant every
permission you asked for and still fail on one Page, because they hold `ANALYZE` on it and not `CREATE_CONTENT`.
Nothing in your dashboard or your token shows this.
**Third, the Pages use case adds a permission you did not ask for.** Selecting **Manage everything on your Page**
adds `business_management`, `pages_show_list` and `public_profile` by default, and required ones "can't be removed."
`business_management` is on the Access Verification list, so a read-only Page connector inherits the Tech Provider
gate on day one.
## Built on: `meta-graph-app`
**Read `meta-graph-app` first, in full, then come back here.** It owns:
- **The Meta developer account, the business portfolio, and the app** — the creation wizard, and the fact that
neither the app type nor any use case you add can be undone afterwards. The use case in §3 is one of those.
- **Redirect-URI mechanics** — exact matching, HTTPS only, the dashboard's silently appended trailing slash, the
requirement that authorize and token exchange send the same value, and this platform's callback list. §3 names
only *which panel* on this product holds them.
- **Access levels and the four review regimes** — Standard vs Advanced Access and why only app-role users can
connect without it, App Review submission contents, Business Verification, Access Verification / Tech Provider
and the `(#100)` that only customers see, Ongoing Review and the annual Data Use Checkup. §5 adds only which
`pages_*` strings appear on the Access Verification list.
- **The App ID and App Secret**, `appsecret_proof` and the "Require App Secret" switch, what rotating a secret
breaks, and the rule that Meta issues no OAuth refresh tokens on any surface.
- **Graph API versioning and the two-year rule**, the rate-limit headers and buckets, and the generic `#1` / `#4` /
`#10` / `#17` / `#100` / `#102` / `#190` / `#200`, `#32` / `#80001` and 80000-series error codes. Pages publishes
no shorter version clock of its own the way the Marketing API does, so the base's Graph API rule is the one that
governs every call here.
If you loaded only this file, you are missing all of the above, and nothing below substitutes for it — in
particular, creating the app, registering redirect URIs, getting Advanced Access, capturing the secret and reading
the generic error codes are base-skill steps.
## Inputs specific to Facebook Pages
The base skill's input table applies in full. Collect these on top of it, in the same batch.
| Input | Notes |
| --- | --- |
| **Which Page capabilities** the connector uses | Posts, reviews, insights, messaging — each maps to a different permission *and* a different task (§2, §4) |
| **Read-only or publishing?** | Decides whether `pages_manage_posts` and its review submission are in scope (§4) |
| **Login product**: classic Facebook Login or Facebook Login for Business | Changes the consent payload from `scope` to `config_id` and the panel the redirect URIs live in (§3) |
| **Token type**: user access token or Business Integration System User token | Decides whether re-authorization is a scheduled campaign (§6) |
| **A test Page you can perform every needed task on**, plus a second Page owned by someone with **no role on your app** | The only test that exercises both gates (§8) |
| **Will the connector consume Page webhooks?** | Needs an app-level subscription *and* a per-Page install (§7) |
## Quick Start
1. Read **Platform state** below — the permissions reference is currently unreachable and the Pages guides contain
permission-string typos, so where you copy strings from matters.
2. Create the app per the base skill and add the **Manage everything on your Page** use case (§3).
3. Decide classic Facebook Login vs Facebook Login for Business, and register the redirect URIs in that product's
settings panel (§3).
4. Prune the use case's default permissions to what the connector calls, and know each one's task requirement (§4).
5. Run the base skill's four review regimes; note which `pages_*` strings are also on the Access Verification
list (§5).
6. Wire the user token → `/me/accounts` → Page token exchange, and decide the token term *before* launch (§6).
7. If you need webhooks, subscribe the Page object at app level **and** install the app on each Page (§7).
8. Verify with a Page whose owner has no role on your app, and with a person who holds only some tasks (§8).
9. Hand off with the token term, the task requirements and the review status recorded (§9).
## Platform state (verified 2026-09-20 — re-verify before trusting)
Read this alongside the base skill's Platform state; these are the Pages-specific facts.
- **Meta's permissions reference is broken today.** `developers.facebook.com/docs/permissions` returns **HTTP 500**,
and the `/documentation/permissions` twin returns HTTP 200 with a "Page Not Found" body. Meta's own Pages pages
link to it. Until it is back, take exact permission strings from the Facebook Login for Business supported-
permissions table or from each endpoint's Graph API reference, not from a guide.
- **The Pages guides contain permission-string typos.** The Pages API Get Started page lists
`pages_manage_read_engagement`; the Manage a Page and Posts guides list `pages_read_user_engagement`. Neither
string appears in the Facebook Login for Business supported-permissions table, which lists `pages_read_engagement`
and `pages_read_user_content`. Do not paste a permission out of a guide into an authorize URL.
- **The Pages use case force-adds permissions.** Customizing **Manage everything on your Page**: "The following
permissions are required for this use case and added by default: `business_management`, `pages_show_list`,
`public_profile`," and "If a permission or feature is required for a use case, it can't be removed."
- **Page Insights metrics have been deprecated in waves, for all API versions at once.** 14 March 2024,
15 June 2025 and 15 November 2025. `page_fans` → `page_follows`, `page_impressions` → `page_media_view`,
`page_impressions_unique` → `page_total_media_view_unique`, `post_impressions` → `post_media_view`. Meta: "The API
will return an invalid metric error when calling any of these metrics." Pinning an old Graph version does **not**
protect you — these are version-independent.
- **Meta's two Insights pages disagree by a year.** The Page Insights reference carries a banner reading "By
June 15, **2026**, a number of the Page Insights metrics will be deprecated for all API versions," while the
deprecated-metrics list dates that same wave "By June 15, **2025**." Trust the dated list, and say in your handoff
which you followed.
- **Page Insights has hard data limits** that read as bugs: "Page Insights data is only available on Pages with 100
or more likes," "Only the last two years of insights data is available," and "Only 90 days of insights can be
viewed at one time when using the `since` and `until` parameters."
- **`pages_manage_metadata` and `pages_messaging` are *not* on the Access Verification list**, while
`pages_show_list`, `pages_read_engagement`, `pages_read_user_content`, `pages_manage_posts`,
`pages_manage_engagement`, `pages_manage_ads`, `pages_manage_cta`, `pages_manage_instant_articles`,
`page_events`, `pages_utility_messaging` and `read_insights` all are (§5).
- **Every `pages_*` permission is available to both token types** under Facebook Login for Business — the supported-
permissions table marks all of them ✓ for user access tokens *and* for Business Integration System User tokens.
- **Switching an existing app to Facebook Login for Business is reversible for 30 days**, and the switch is not
free: "If you request permissions or features from business clients that Facebook Login for Business doesn't
support, those permissions and features will be **revoked immediately** once you switch." Newly created Business
type apps cannot switch back at all.
If the App Dashboard does not look like this, stop and report what you actually see rather than clicking on.
## 1. Reuse the existing app, or register a new one
The base skill's reuse-versus-new decision applies unchanged. One Pages-specific addition: because the Pages use
case cannot be removed once added (base §3) and it force-adds `business_management` (§ Platform state), an app
created "just to try Pages" carries a permission on the Access Verification list forever. If a ticket proposes
adding the Pages use case to an app that deliberately avoids Tech Provider review, that is a new-app decision, not
a config change. Say which path you are taking before you touch anything.
## 2. The Page, its roles, and its tasks
This is the concept with no equivalent on the other Meta surfaces, and the one that produces "it works for me."
Permissions say what *your app* may attempt. **Tasks** say what *this person* may do *on this Page*. Meta checks
the task first. The full set:
| Task | Permitted actions (Meta's wording, abridged) |
| --- | --- |
| `ADVERTISE` | Create ads; create unpublished Page posts; create ads for a connected Instagram account |
| `ANALYZE` | View Insights of the Page; view which Page admin published a post or comment |
| `CREATE_CONTENT` | Publish content as the Page on the Page |
| `MANAGE` | Assign and manage Page tasks |
| `MANAGE_LEADS` | View and manage leads |
| `MESSAGING` | Send messages as the Page |
| `MODERATE` | Respond to and delete comments on Page posts; for a connected Instagram account, publish, moderate, message, sync contact info and create ads |
| `VIEW_MONETIZATION_INSIGHTS` | View monetization insights |
"If a person is given Admin access to a Page in the UI, that person is able to perform all tasks on that Page" —
which is why testing with your own admin account never surfaces a task problem.
What each Page capability actually demands, from the endpoint references:
| Capability | Permissions | Page task the person must hold |
| --- | --- | --- |
| List the Pages a person manages | `pages_show_list` | — (the response's `tasks` array tells you what they hold) |
| Read a Page's feed | `pages_read_engagement` + `pages_read_user_content` | `CREATE_CONTENT`, `MANAGE` **or** `MODERATE` |
| Publish to a Page's feed | `pages_manage_posts` | `CREATE_CONTENT` |
| Read a Page's recommendations/ratings | `pages_read_user_content` | `CREATE_CONTENT`, `MANAGE` **or** `MODERATE` |
| Read Page Insights | `read_insights` + `pages_read_engagement` | `ANALYZE` |
| Read or write a Page's webhook subscription | `pages_manage_metadata` + `pages_show_list` | `CREATE_CONTENT`, `MANAGE` **or** `MODERATE` |
Two further traps here:
- **Pages the customer does not own or manage are a different product.** Meta, on reading a Page's feed: "If you do
not own or manage the Page, you will need the Page Public Content Access Feature" — a Feature reviewed separately
from every permission, and Meta adds "use a system user access token to avoid rate limiting issues."
- **You cannot fully enumerate who holds what.** `GET /{page-id}/roles` needs `MANAGE`, and "This edge only returns
people who do not belong to a business. To find business users, query the Page Assigned Users edge." For a
business-managed Page — i.e. most customers — the roles edge will look emptier than reality.
Fixing a missing task is the Page owner's job in Page settings. Hand it back; do not loop.
## 3. The use case, the login product, and the redirect URIs
**Add the use case.** In the creation wizard (base §3), pick **Manage everything on your Page**. Then **Dashboard →
Customize the Manage everything on your Page use case** to add and remove permissions. Per the base skill this use
case cannot be removed later, and its required permissions cannot be removed at all (§ Platform state).
**Pick the login product, deliberately.** Meta ships two and the Pages API overview is explicit about which it
prefers: "Facebook Login for Business is the preferred authentication and authorization solution for Tech Providers
and business app developers who need access to their business clients' assets," while classic Facebook Login "is
recommended for consumer authentication."
| | **Classic Facebook Login** | **Facebook Login for Business** |
| --- | --- | --- |
| App type | Any | **Business** type only |
| Consent payload | `scope` | `config_id` — a saved configuration; "`config_id` has replaced `scope` (which should not be used)" |
| Partial grants | A user can decline individual permissions | All-or-nothing across the configuration |
| Token types offered | User access token | User access token **or** Business Integration System User token (§6) |
| Rollback | — | Allowed within **30 days** of switching; unsupported permissions are revoked immediately on switch |
The configuration's own mechanics — creating one, the all-or-nothing grant, `response_type=code` for system-user
tokens — are the same as on the ads surface and are documented in `meta-ads-oauth-app` §1; read them there rather
than re-deriving them. What matters here is that the choice is visible to customers and, if you later roll back,
"Facebook Login does not support the `config_id` parameter and you need to replace the `config_id` parameter with
the `scope` parameter instead" — a client change, not a dashboard toggle.
**Redirect URIs** live in that product's settings panel: **App Dashboard → Facebook Login (for Business) →
Settings → Redirect URI**, with a **Check URI** button that validates the value before you save. Use it — the base
skill's exact-match and trailing-slash rules are precisely what it checks for you. The same panel holds the
**Deauthorize Callback URL** and the **Data Deletion Request URL**, both of which App Review asks about.
**Product facts about the connector, as of 2026-09-20.** Recorded from one day's configuration; confirm with the
connector's owner before relying on any of it.
- It uses the **classic Facebook Login flow with `scope`**, not a Facebook Login for Business `config_id`. It sends
`client_id`, `redirect_uri`, `state` and `scope` to the authorize dialog, and exchanges the code against the
Graph host's token endpoint with `client_id`, `redirect_uri`, `client_secret` and `code` carried as a **JSON POST
body** — the client secret travels in the request body, not in a Basic auth header and not in the query string.
- Both its authorize URL and its token URL are **unversioned**. Per base §8 that means they resolve against
whatever version the app dashboard's upgrade card is set to, and will drift when that changes.
- Its Page-object calls are pinned to **Graph v21.0**, hard-coded into the request path of every object it
implements — so the pin is a multi-file change, not a config edit. Per the base's version table v21.0 is in the
last months of its life; calendar the re-pin.
- It presents the access token as a **URL query parameter**, not an `Authorization: Bearer` header. Meta accepts
both; the query-parameter form is the one that ends up in proxy and access logs.
- Its login/identity scopes are `email` and `public_profile`, and on connect it reads the authorizing person's name
and email from the Graph `/me` node.
- **This platform ships shared default OAuth credentials for Facebook**, unlike its Instagram connector, which ships
none. That means one shared Meta app's App Review, Advanced Access and Tech Provider status govern every customer
who does not bring their own App ID and Secret — so the review work in §5 is not optional for it, and a single
app-level restriction takes down every customer at once.
- Two sibling connectors exist on the same Graph host, and each needs **different things registered**, so do not
assume one app covers all three: the Messenger connector needs the **Messenger product** added plus an app-level
webhook callback URL and verify token configured once per Meta app, and it stores an **App Secret per connection**
for signature checking; the Marketplace connector is not a Pages product at all — it runs on Commerce/Catalog
endpoints with `catalog_management` and `business_management` and depends on approved Marketplace Partner status.
The Pages connector needs none of those, and they need none of the `pages_*` permissions below.
## 4. Permissions
Request only what the connector calls; the base skill explains what an unused permission costs at review time.
These are the strings as the Facebook Login for Business supported-permissions table spells them.
| Permission | Grants | Add it when |
| --- | --- | --- |
| `pages_show_list` | Listing the Pages a person can perform a task on, with their tasks and Page tokens | Always — it is how you reach any Page at all (§6) |
| `pages_read_engagement` | Reading a Page's own content and metadata | Always, for any read |
| `pages_read_user_content` | Reading user-generated content on a Page: feed posts, comments, recommendations | Reading a feed or reviews |
| `pages_manage_posts` | Publishing and scheduling Page posts | Only if the connector publishes |
| `pages_manage_engagement` | Moderating comments and reactions as the Page | Only if the connector moderates |
| `pages_manage_metadata` | Page settings — and the webhook subscription edge | Only if the connector manages settings or webhooks (§7) |
| `read_insights` | Page and post Insights | Only if the connector reads metrics |
| `pages_messaging` | Messaging as the Page | A different product — see the Messenger surface, not this one |
Two Facebook-only properties of this family:
- **They are exempt from the 90-day data-access expiry.** Meta's data-access rule is that "The expiration period for
data access is 90 days, based on when the user was last active," after which "your app can't access their data"
until re-authorization — but every permission in the table above appears on Meta's list of permissions that "do
not expire." Your Pages permissions therefore survive an inactive customer; the *token* still does not (§6). Note
the separate rule that does still bite: "if your app does not use a permission for 90 days, that permission may
expire," even one approved through App Review.
- **A grant can be partial by Page, not just by permission.** Debugging a token shows `granular_scopes` with a
`target_ids` array — the specific Pages a scope was granted for. A customer who ticks two of their six Pages in
the consent dialog produces a token that legitimately holds `pages_show_list` and legitimately cannot see four of
their Pages. Read `granular_scopes` from the debug endpoint before treating a short Page list as a bug.
**As of 2026-09-20, this platform's Facebook connector requests** `pages_show_list` and `pages_read_engagement` as
its base Page-reading set, adds `pages_read_user_content` for Page posts and for reviews/recommendations, adds
`pages_manage_posts` for publishing, and adds `read_insights` for Page metrics. That set lines up with the endpoint
requirements in §2. It does **not** request `pages_manage_metadata`, which means it cannot manage Page webhook
subscriptions (§7). Confirm the current set with the connector's owner before you register anything.
## 5. What the base skill's gates mean here
All four review regimes in the base apply unchanged. Four Pages-specific consequences:
**Nothing is grantable to a stranger without App Review.** Meta, on the Pages API: "All permissions require App
Review before an app user can grant them to your app after it is live. For Business apps, which do not have app
modes, permissions must be approved for Advanced access before they can be granted to your app by an app user
without a role on the app itself or a role in a Business that has claimed it."
**Most of this family is on the Access Verification list**, so a multi-tenant Page connector needs Tech Provider
status for the claiming business on top of App Review and Business Verification, and will show the base skill's
`(#100)` symptom until it has it. Covered: `pages_show_list`, `pages_read_engagement`, `pages_read_user_content`,
`pages_manage_posts`, `pages_manage_engagement`, `pages_manage_ads`, `pages_manage_cta`,
`pages_manage_instant_articles`, `page_events`, `pages_utility_messaging`, `read_insights` — and
`business_management`, which the use case adds for you. Not covered: `pages_manage_metadata`, `pages_messaging`.
**The use case pre-commits you.** Because `business_management` is required by the Pages use case and is on the
list, there is no read-only Pages configuration that escapes Access Verification. Budget for it from the start
rather than discovering it when the first customer cannot connect.
**Features are a separate approval from permissions.** Meta: "Some endpoints require a Feature which must be
approved through the App Review process before your app can use them when your app goes live. Features allow you to
access public Page data without a permission or the ability to perform a task on the Page." Page Public Content
Access is the one a Pages connector most often discovers it needs (§2), and asking for it changes the review
conversation.
## 6. Tokens: the third rung the other Meta surfaces do not have
The user-token ladder itself — the short-lived token from the code exchange, the server-side exchange into a
~60-day long-lived token, and the fact that an expired token cannot be exchanged — is identical to the ads surface
and is documented in `meta-ads-oauth-app` §5. Read it there. What Pages adds is a **third rung**, and its term is
inherited rather than chosen:
| Rung | How you get it | Term |
| --- | --- | --- |
| User access token | The code exchange (base §7; `meta-ads-oauth-app` §5) | Short-lived, then long-lived if you exchange it |
| **Page access token from a short-lived user token** | `GET /{user-id}/accounts` with that token | Meta calls what comes back "a **short-lived** Page access token" |
| **Page access token from a long-lived user token** | `GET /{user-id}/accounts` with the long-lived token; "The person requesting the token must have a role on the Page" | Meta: long-lived Page access tokens "do not have an expiration date and only expire or are invalidated under certain conditions" |
| Business Integration System User token | A Facebook Login for Business configuration (§3) | Defaults to never expire |
The consequences that decide whether Page connections survive:
- **The Page token's term is decided upstream, not at `/me/accounts`.** The same call returns a token that dies in
an hour or a token that does not expire, depending entirely on which user token you called it with. This is the
single highest-leverage fact on this surface: doing the user-token exchange *before* enumerating Pages converts a
connector from hourly breakage to indefinite operation.
- **Page tokens are per person, per Page, per app.** "Page access tokens are unique to each Page, admin, and app
combination." Caching them is fine; caching them without tying the entry to all three, and without an expiry, is
how a stale token outlives the user token that minted it.
- **The Business Integration System User token is the alternative that removes re-authorization**, and the FLB
supported-permissions table marks every `pages_*` permission available to it. Its general mechanics are in
`meta-ads-oauth-app` §5; the Pages-relevant prerequisites Meta states are that logins can only come from **web
surfaces**, the customer must have or create a business portfolio, and **your app must be associated with a
business portfolio you have full control of, separate from the client's**. To test the flow "the tester must have
a role on the app and full control of the client business" — so this path cannot be smoke-tested with a stranger's
Page the way §8 tests the user-token path.
- **Either token type can be revoked by the customer, in two different places.** Business Integration System User
tokens: **Business Manager → Settings → Business Settings → Integrations → Connected apps**. User tokens:
**Settings & privacy → Settings → Security and login → Business Integrations**. Neither revocation notifies you;
you learn about it from a `(#190)`.
**Product facts about the connector, as of 2026-09-20.** Confirm with the connector's owner before relying on them.
- **It performs no short-lived → long-lived exchange at all**, and neither does any other connector on this
platform: Meta's token-extension parameter appears nowhere in the product, so no Facebook, Messenger or
Marketplace connection ever gets a long-lived user token. Given that Meta's code-grant user token is good for
about one to two hours and Meta issues no refresh
token on any surface (base §7), a Facebook connection is expected to stop working within about two hours of being
created, and the customer must re-authorize to restore it. This is the single most consequential gap on this
surface and should be raised with the connector's owner before any registration work is treated as finished.
- **The same gap compounds at the Page rung.** Because Page tokens are minted from that short-lived user token,
every Page token the connector obtains is itself short-lived, and no long-lived Page token — the one Meta says has
no expiration date — is ever created. Fixing the user-token exchange fixes both rungs at once; fixing neither
means the connector never reaches the "never expires" state that this surface makes available.
- It resolves Page tokens on demand and **caches them in an in-process cache that evicts only on capacity, with no
time-to-live**, so an entry can be served after the user token behind it has expired. It also keys the cache by
the connection when it has one and by the *workspace* when it does not, so two connections in one workspace can
read each other's cached Page token.
- It obtains the Page token by reading the `access_token` field on the Page node rather than from the accounts
listing, and then **mutates the in-flight connection's stored credential in place** to swap the user token for the
Page token — an approach its own notes describe as deliberate. It is worth confirming with the connector's owner
that the mutated object cannot outlive the request or be persisted, because a Page token written back onto a
connection record would be a silent, hard-to-diagnose credential substitution.
## 7. Webhooks: two subscriptions, not one
Page webhooks fail silently for a reason that is not a permission problem, and this is the Facebook-specific shape
of it: **there are two independent subscriptions and you need both.**
1. **App level.** Configure the callback URL and verify token once per Meta app, choose the **Page** object, and
subscribe to the fields you want — `feed` for posts, reactions and shares; `messages` for Messenger.
2. **Page level.** "Webhook notifications will only be sent if your Page has installed your Webhooks configured-app,
and if the Page has not disabled the App platform in its App Settings." You install it by posting to the Page's
`subscribed_apps` edge **with that Page's access token**.
And the rule that turns a half-finished setup into silence rather than an error: "It is possible to subscribe to
more fields at the page level than the app level. However, **only fields with subscriptions at both the page and app
levels will get Webhooks**."
Requirements for the Page-level install: a Page access token from a person who can perform `CREATE_CONTENT`,
`MANAGE` or `MODERATE` on that Page, plus `pages_manage_metadata` and `pages_show_list`. Messaging fields need the
`MESSAGING` task and `pages_messaging` instead.
**Product facts about the connector, as of 2026-09-20.** The Facebook Pages connector implements **no webhook
handling and does not request `pages_manage_metadata`**, so Page events are not available through it today; reads
are poll-only. The separate Messenger connector does implement the two-level pattern — an app-level callback
configured by hand and a programmatic per-Page install — which is a working reference for what adding Page webhooks
here would involve, and a reminder that the app-level half is a dashboard task a human must do.
## 8. Capture the credentials, and verify
The App ID and App Secret, and where they live, are in the base skill. Unlike the Instagram surface there is **no
second, separately-displayed pair** here — if someone hands you an "Instagram App ID" for a Pages connector, they
are on the wrong product.
Record these Pages-specific values alongside the base skill's list: the use case you added and the permissions it
force-added; the login product and, if Facebook Login for Business, the configuration ID and token type; the task
each capability requires; whether Page Public Content Access is in scope; and the pinned Graph version.
Verification follows the base skill's round trip, with these layered on:
1. Run authorize → callback → code exchange, then **exchange the user token for a long-lived one and confirm the
connector stored the new value** before doing anything else. Everything below inherits that decision (§6).
2. Call `/me/accounts` and read the `tasks` array that comes back for each Page. That array, not your permission
list, is what predicts which calls will succeed.
3. Make one real read with a **Page** token — a feed read or an Insights read — at the pinned version.
4. Repeat against a Page owned by someone with **no role on your app**. Base §10 explains what the two failures at
this step mean and which gate each one points at; this is the only test that reaches either.
5. Repeat once more as a person who holds only `ANALYZE` on the Page. Insights should work and publishing should
not. If publishing succeeds, you tested with an admin account by mistake.
| Symptom | Cause |
| --- | --- |
| Works in the Graph API Explorer, fails from the connector | The Explorer's Page-token dropdown was used; the connector is still sending the user token (§6) |
| Every Page call dies about an hour or two after each connect | The short-lived user token was never exchanged, so the Page tokens minted from it are short-lived too (§6) |
| `(#283)` *That action requires the extended permission `pages_read_engagement` and/or `pages_read_user_content` and/or `pages_manage_ads` and/or `pages_manage_metadata`* | The named permission was not granted — Facebook's own hint at which one (§4) |
| `(#210)` *User not visible* | The call needs a Page access token and is being made with a user token, or the Page/user pair is not visible to this token (§6) |
| `(#190)` subcode `463` / `460` / `458` | Session expired / user logged out or changed password / user de-authorized the app — three different remediations, all requiring the subcode to tell apart |
| `(#459)` or `(#483)` | The person is checkpointed, or in consent-app blocking — customer-side, unfixable by you |
| `(#368)` | The action "has been deemed abusive or is otherwise disallowed" — publishing volume or content, not auth |
| One customer succeeds on some Pages and fails on others | Either a missing **task** on those Pages (§2), or a granular grant that covered only some Pages — check `granular_scopes.target_ids` (§4) |
| Publishing fails for a customer who can read fine | They hold `ANALYZE`/`MODERATE` but not `CREATE_CONTENT` on that Page (§2) |
| Reading a Page the customer does not manage fails | Needs the **Page Public Content Access** Feature, reviewed separately from permissions (§2, §5) |
| Insights returns an invalid-metric error | A deprecated Page Insights metric is in the request; one bad name fails the whole call, and pinning an old version does not help (§ Platform state) |
| `(#3001)` subcode `1504028` | No metric was specified on an Insights call |
| Insights returns nothing for a small Page | Page Insights needs 100 or more likes (§ Platform state) |
| Insights range silently truncated | More than 90 days requested at once with `since`/`until` (§ Platform state) |
| Webhooks never arrive, no error anywhere | The field is subscribed at only one of the two levels, or the Page never installed the app, or the Page disabled the App platform (§7) |
| The roles list looks emptier than the customer says | `/{page-id}/roles` omits people who belong to a business; query Page Assigned Users (§2) |
| A permission approved in review stops working after a quiet quarter | Unused permissions may expire after 90 days (§4) |
## 9. Hand off
Follow the base skill's handoff rules and add, to its closing list: the use case added and the permissions it
force-added; the login product and, if Facebook Login for Business, the configuration ID, token type and the date
the 30-day rollback window closes; the exact `pages_*` strings and the Page task each capability requires; whether
Page Public Content Access is needed; the token term the platform ends up with at both the user and Page rungs, and
the re-authorization cadence that implies; the pinned Graph version; and, if webhooks are in scope, which fields are
subscribed at app level and how Pages get installed.
## Stop and ask
The base skill's stop-and-ask list applies. Additionally, hand back to a human when: the connector calls Page
endpoints with a user access token and there is no plan to mint Page tokens, since that is a code change and not a
registration one; there is no short-lived → long-lived exchange, which makes every connection and every Page token
derived from it short-lived; the choice between user access tokens and Business Integration System User tokens has
not been made, since it decides whether re-authorization is a recurring campaign; adding the Pages use case would
force `business_management` onto an app whose owner does not want Tech Provider review; customers' Pages are
business-managed and you cannot confirm who holds which task; the connector needs to read Pages the customer does
not manage, which is a Feature review rather than a permission; or an Insights implementation hard-codes metric
names with no plan to track Meta's deprecation waves.
## References
Facebook Pages specific. The generic Meta developer-account, app-creation, review, credential, token-ladder and
Graph API references are in `meta-graph-app` and `meta-ads-oauth-app`. Every link below verified to return HTTP 200
on 2026-09-20.
- Pages API overview (tasks, Features, Page access tokens, permissions, the `/me/accounts` flow) — https://developers.facebook.com/docs/pages-api/overview
- Customize the "Manage everything on your Page" use case (forced permissions, redirect URI panel, Tech Provider) — https://developers.facebook.com/docs/pages-api/create-an-app
- Pages API get started (short-lived Page tokens, composite post IDs) — https://developers.facebook.com/docs/pages-api/getting-started
- Manage a Page (tasks and tokens from `/user_id/accounts`, `/page_id/roles`) — https://developers.facebook.com/docs/pages-api/manage-pages
- Pages API posts (publishing, scheduling, Page Public Content Access) — https://developers.facebook.com/docs/pages-api/posts
- `/{user-id}/accounts` reference (the `tasks` field, error codes `283`, `459`, `483`, `368`) — https://developers.facebook.com/docs/graph-api/reference/user/accounts/
- Page feed reference (read/publish tasks and permissions, Page Public Content Access) — https://developers.facebook.com/docs/graph-api/reference/page/feed/
- Page ratings reference (recommendations: `pages_read_user_content`, error `210`) — https://developers.facebook.com/docs/graph-api/reference/page/ratings/
- Page insights reference (`read_insights` + `ANALYZE`, the 100-like and 90-day limits, error `3001`/`1504028`) — https://developers.facebook.com/docs/graph-api/reference/page/insights/
- Page roles reference (business users are not returned) — https://developers.facebook.com/docs/graph-api/reference/page/roles/
- Page `subscribed_apps` reference (the both-levels rule, install permissions) — https://developers.facebook.com/docs/graph-api/reference/page/subscribed_apps/
- Webhooks for Pages (app-level fields, per-Page install, messaging requirements) — https://developers.facebook.com/docs/graph-api/webhooks/getting-started/webhooks-for-pages
- Authentication versus data access (the 90-day data-access expiry and the permissions exempt from it) — https://developers.facebook.com/docs/facebook-login/auth-vs-data
- Access token debugging and error handling (`granular_scopes`, subcodes `458` / `460` / `463`) — https://developers.facebook.com/docs/facebook-login/access-tokens/debugging-and-error-handling
- Deprecated Facebook Page Insights metrics (the 2024, 2025 waves and their replacements) — https://developers.facebook.com/docs/platforminsights/page/deprecated-metrics/
- Page Insights API updates, 15 August 2025 (the `impressions` and `page fans` deprecation notice) — https://developers.facebook.com/blog/post/2025/08/15/page-insights-api-updates/
## fathom-oauth-app
URL: https://docs.unified.to/skills/fathom-oauth-app/SKILL.md
# Fathom OAuth2 App Registration
**Which Fathom this is:** the **AI meeting notetaker** — `fathom.video` / `fathom.ai`, developer docs at
`developers.fathom.ai`, API at `https://api.fathom.ai/external/v1`, objects called *meetings*, *recordings*,
*transcripts*, *teams*. It is **not Fathom Analytics (`usefathom.com`)**, the privacy-first website analytics product
whose API talks about *sites*, *pageviews* and site-scoped API tokens. If the page in front of you says "sites", close
it — you are on the wrong Fathom.
Get a working Fathom OAuth2 client — a Fathom account, a registered marketplace application, redirect URIs, the
`public_api` scope, and a client ID and secret — for a platform that connects many customers' Fathom accounts.
Four things here cost more than they look.
1. **One production redirect URI per app.** Fathom's FAQ is explicit: multiple *development* redirect URIs are
supported, and "for multiple production URIs, use separate OAuth apps." A platform with four regional callbacks
therefore needs **four apps and four credential pairs**, not one app with four URIs (§4).
2. **OAuth tokens cannot ask `/meetings` for content.** `include_summary` and `include_transcript` are documented as
"Unavailable for OAuth connected apps." Summaries and transcripts must be fetched one recording at a time from the
`/recordings` endpoints — which are the *heavy* rate-limit class, 30 calls per 60 seconds and reducible to 5 (§8).
3. **There is exactly one scope, `public_api`.** There is no read/write split and no per-object scope. What a
credential can see is decided entirely by the Fathom user's own view permissions — which is also the single most
common support ticket in this category (§6).
4. **Refresh tokens are one-time-use and rotate.** Two workers refreshing the same connection concurrently means one
succeeds and the other gets **HTTP 400** (§7).
## Inputs to collect before you start
Ask in one batch. Never invent.
| Input | Notes |
| --- | --- |
| **App name**, description, logo | Shown to the customer at install and on any listing |
| **Which Fathom account registers the app** | Registration is behind a normal Fathom login (§2) |
| **Route: OAuth app, or per-customer API keys** | Decides everything downstream (§1) |
| **Every production callback URL** | One per app — count them, that is your app count (§4) |
| **Development callback URLs** | Multiple are allowed on one app (§4) |
| **Whether customers need org-wide coverage** | Drives the admin view-access conversation (§6) |
| **Whether you need webhooks** | Secret and webhook ID are returned **once**, at creation (§7, §8) |
| **Whether you need media downloads** | Separate rate class, signed URLs expire ~24h (§8) |
| **Support/contact address for launch** | Fathom routes partner questions through `help@fathom.video` |
## Quick Start
1. Confirm the route — OAuth app for a multi-tenant connector, API keys for one customer's own tooling (§1).
2. Count production callbacks; that is how many apps you will register (§4).
3. Sign in to Fathom with the account that will own the app (§2).
4. Register at `https://fathom.video/marketplace_applications/new` — a ~2-minute self-serve form (§3).
5. Enter redirect URIs; HTTPS is required (§4).
6. Use the only scope there is: `public_api` (§5).
7. Read §6 before promising any customer "all our meetings" — that is not what a credential gets by default.
8. Capture client ID and secret; store rotated refresh tokens and take a lock around refresh (§7).
9. Verify from a **second, unrelated** Fathom account, then hand the credentials over (§9, §10).
## Platform state (verified 2026-09-20 — re-verify before trusting)
- **OAuth registration is self-serve, not partner-gated.** Fathom's OAuth guide points at
`https://fathom.video/marketplace_applications/new` with the caption "Configure your redirects and receive your
OAuth credentials. (2 mins)". Nothing in the documented flow makes credentials wait on a partnership call.
- **The "review" in Fathom's OAuth page is about promotion, not permission.** The page says OAuth apps "are eligible
for promotion by Fathom and can unlock visibility in our App Marketplace… They are subject to review to ensure the
best experience for all users," and then describes the mechanism: a **quarterly** review of app usage, and at
**20+ users** Fathom reaches out about their integrations listing, Crossbeam and co-marketing. No documented
pre-launch approval gate blocks installs. If the registration form tells you otherwise, stop and report that.
- **API access is on every plan.** "API access—keys and webhooks—are included on all plans." There is no API tier to
buy, and recordings/transcripts/summaries are not separately licensed add-ons.
- **One scope exists: `public_api`.** "Currently, the only available scope is: `public_api` — Access to the Fathom API."
- **Documented token endpoint:** `https://api.fathom.ai/external/v1/oauth2/token`, `application/x-www-form-urlencoded`,
grant types `authorization_code` and `refresh_token`, with `client_id` and `client_secret` **in the body** — no HTTP
Basic variant is documented. Fathom's own partner example (Pylon) posts to the same URL the same way.
- **The literal authorize URL is not printed in the docs** — the SDKs build it from client ID, redirect URI, scope and
state. Observed on 2026-09-20: an unauthenticated `GET /external/v1/oauth2/authorize` returns **302 to that host's
sign-in page** on both `api.fathom.ai` and `fathom.video`, while an unknown path under the same prefix returns 404.
Treat the exact host as **confirmed by behaviour, not by documentation**, and take the value the registration form
or SDK gives you over any value you inherited.
- **Refresh tokens are single-use and rotate.** Each refresh returns a new access token *and* a new refresh token and
invalidates the old one; an unused refresh token "stays valid until the user revokes access." Concurrent refresh of
one connection returns **HTTP 400** to the loser — "wrap refreshes in a lock if you run them concurrently."
- **Redirect URIs must be HTTPS**, multiple **development** URIs are supported, and **multiple production URIs are
not** — use separate apps.
- **API shape:** base `https://api.fathom.ai/external/v1`; cursor pagination via `next_cursor` → `cursor`; **default
page size 10 and no parameter to raise it**; no bulk endpoint; no `GET /meetings/{id}` — you list with filters, and
the numeric ID in a Fathom call URL is **not** the `recording_id` the API uses.
- **Rate limits:** 60 requests per 60 seconds globally, **per account** (per API key or OAuth token); **heavy
requests** — the `/recordings` summary and transcript endpoints, plus `/meetings` with `include_summary` or
`include_transcript` — 30 per 60 seconds, "during periods of elevated activity this limit may be adjusted down to 5
every 60 seconds"; recording downloads 30 per 60 seconds; the OAuth token endpoint 60 per 60 seconds **per OAuth
app**. Responses carry `RateLimit-Limit`, `RateLimit-Remaining`, `RateLimit-Reset`, and `Retry-After` on 429.
- **Recently added** (Fathom changelog): API + SDKs + webhooks October 2025; MCP April 2026; `meeting_url`,
`meeting_type`, `include_highlights`, `shared_with`, and webhook `id` in June 2026; the **download** endpoint and
the **users-and-permissions** endpoint in July 2026. Anything written before mid-2026 will not know about the last
two.
- **No real-time transcripts.** "Transcripts are available only after post-call processing completes."
If the portal or the docs do not look like this, stop and report what you actually see rather than clicking on.
## 1. Decide: OAuth app, or per-customer API keys
Fathom supports two credentials, and its own FAQ draws the line: use an **API key** "if you only need access to your
own (or your team's) meetings—for internal tools or personal automation"; use **OAuth** "if you're building an app that
other Fathom users will install so they can connect their own accounts." A platform connecting other organizations'
accounts is the OAuth case.
| | OAuth app | Per-customer API key |
| --- | --- | --- |
| Who creates it | You, once per callback host | Each customer, in their own settings |
| How it is sent | `Authorization: Bearer ` | `X-Api-Key: ` header |
| Customer effort | Click Allow | Generate a key and paste it to you |
| `include_summary` / `include_transcript` on `/meetings` | **Not available** | Available (heavy rate class) |
| Expiry | Short-lived access token + rotating refresh token | No documented expiry; dies when the user is deactivated |
| Revocation | User revokes access | Only by deactivating/removing that user — "Admins can't directly revoke another user's API key" |
A key detail for the API-key route: keys keep working if the user leaves a team or downgrades — only *what they can
see* changes. And when a user is deactivated, their key "stops working and will return **4xx**."
**Registering a new OAuth app mints a new client ID, and every existing customer authorization is bound to the old
one.** Reuse the existing app for changing a redirect, rotating a compromised secret, or diagnosing a failure.
Register a new one only for a new callback host (§4), a replacement for a compromised app, or a deliberately separate
product. Say which path you are taking before you touch anything.
## 2. Account: sign in or sign up
Sign in at `https://fathom.video/`. Observed 2026-09-20: both
`https://fathom.video/marketplace_applications/new` and the settings page at `https://fathom.video/customize` redirect
an unauthenticated request to `https://fathom.video/users/sign_in` — so a Fathom login is a prerequisite for both the
OAuth form and the API-key screen. API access is included on all plans, so a free account is enough to *register*;
what a test account can *see* is a separate question (§6).
Hand control back to a human for anything only they can do: account signup, email verification, accepting terms, or
any SSO/2FA step. Do not retry a blocked step in a loop.
**If this session has no browser automation**, do not pretend to click. Hand the user an ordered click path and the
literal values to paste — the redirect URIs from §4 and the scope from §5 — and continue when they come back with the
client ID.
## 3. Register the app
`https://fathom.video/marketplace_applications/new`, described by Fathom as "Configure your redirects and receive your
OAuth credentials. (2 mins)". The form is behind the login, so **do not narrate fields you cannot see** — read what is
on screen and report it. Expect, at minimum, an app name, redirect configuration, and the issued client ID and secret.
Launch-side expectations Fathom documents, none of which block credentials:
- Before sharing the app, review Fathom's About Us page for boilerplate language, logos and brand guidelines.
- `help@fathom.video` is the documented channel for launch support, listing copy, and API/product feedback.
- Quarterly, Fathom reviews OAuth app usage; at **20+ users** they reach out about the integrations listing,
a Crossbeam connection and co-marketing.
## 4. Redirect URIs
**This is the section that changes your architecture.** Fathom's FAQ:
> Can a single OAuth app register multiple redirect URIs? **Only multiple development redirect URIs are supported. For
> multiple production URIs, use separate OAuth apps.**
and
> Is HTTPS required for redirect URIs? **Yes.**
So a platform that serves several data centers registers **one app per production callback** and stores a separate
client ID and secret per region. For Unified.to those callbacks are one per data center — confirm the live list with
the platform owner rather than assuming:
```
https://api.unified.to/oauth/code # us (default)
https://api-eu.unified.to/oauth/code # eu
https://api-au.unified.to/oauth/code # au
https://api-dev.unified.to/oauth/code # dev
```
Practical consequences to decide *before* registering:
- **Four apps means four consent screens and four listings.** Agree the naming with the owner ("Acme (EU)" or one name
reused), because customers see it.
- **The dev callback may be able to ride along** as a development redirect URI on an existing app rather than needing
its own app. Confirm against the form; the FAQ allows multiple *development* URIs but does not define which of the
form's fields is "development."
- **A credential pair is bound to its region.** The commonest self-inflicted failure on a multi-app vendor is a
token exchange sending region A's secret to an authorization issued for region B's client ID.
## 5. Scopes
One scope exists, and the SDK examples pass it literally:
```
public_api
```
Fathom: "Currently, the only available scope is: `public_api` — Access to the Fathom API."
What that means in practice:
- **No least-privilege lever exists at the app level.** You cannot ask for read-only, and you cannot ask for meetings
without also being able to reach teams and team members. If a customer's security review wants narrowing, the only
real control is the Fathom user's own view access and sharing settings (§6) — say so plainly rather than promising a
scope you cannot request.
- **Send `scope=public_api` on the authorize request** and keep sending it; there is nothing to add later, so there is
no incremental-consent step to design around.
## 6. What a credential can actually see — the classic failure
A valid Fathom credential that returns "only one person's meetings" is almost never broken. It is working exactly as
documented.
**The documented model, for API keys:**
- "API keys are scoped to the user who creates them. Your key can only access meetings you've recorded or that have
been shared with you or your Team." And: "Whatever a user can view in Fathom, their API key can access."
- "**API keys are per user, not per org, and there are no org-level keys.** For org-wide access, grant one or more
**Admins view access to all shared calls**; that Admin's key can then read everything shared across teams."
- "**API keys *never* grant access to other users' private meetings**" — admin or not. "Private calls stay host-only."
**The permission dimensions**, which Fathom exposes on its users endpoint (added July 2026, `GET /users`,
**admin only** — it returns 403 unless the caller's `settings_access` is `account_admin`):
| Dimension | Values |
| --- | --- |
| `settings_access.level` | `none`, `team_admin`, `account_admin` |
| `view_access.level` | `own_meetings`, `team`, `multiple_teams`, `all_teams` |
The two are independent — Fathom's help centre spells out that "someone can be a Team Admin and still not see team
calls if View Access is restricted." **`view_access` is the field that predicts what the customer's connection will
return.** When a customer reports missing meetings, reading that value (from an admin credential) ends the argument in
one call.
**For OAuth tokens:** Fathom describes OAuth as other users installing your app "so they can connect their own
accounts," and states that rate limits apply "per account (per API key or OAuth token)." It does **not** publish a
separate visibility rule for OAuth tokens, and there is **no documented admin-consent or org-wide install**. Plan for
a token seeing what the authorizing user sees, confirm it empirically on a multi-user test account (§9), and do not
tell a customer an OAuth install covers their whole organization until you have watched it do so.
**What to tell a customer who wants org-wide coverage:** have an Account Admin be the person who connects, and have
that admin's **view access set to all teams' calls**. Their private, unshared calls still will not appear — nothing
you configure changes that.
**Team-plan caveats** worth knowing before a small customer files a bug: the webhook trigger scopes
`my_shared_with_team_recordings` and `shared_team_recordings` are documented as **Team Plans only**, and
`my_recordings` on a Team Plan "excludes recordings you've shared with any teams."
## 7. Capture the credentials
From the registration form, capture and label:
- **Client ID** and **client secret** — one pair per app, i.e. one per production callback (§4)
- **Token endpoint** — `https://api.fathom.ai/external/v1/oauth2/token`
- **Authorize endpoint** — as given by the form/SDK (see the Platform state note; do not paste an inherited value
without checking it)
- **Scope** — `public_api`
- **API base URL** — `https://api.fathom.ai/external/v1`
Fathom does not publish a secret-rotation or secret-re-read procedure. **Treat the secret as capture-once**: if it is
lost or believed compromised, `help@fathom.video` is the documented channel, and rotation is a cutover — every code
exchange and refresh fails until the new value is deployed. Never rotate without explicit go-ahead.
**Refresh handling is a correctness requirement, not a nicety:**
- Each refresh returns a **new** access token and a **new** refresh token; the old refresh token is invalidated.
- An unused refresh token stays valid until the user revokes access — so idle connections do not silently die, but a
client that replays the *original* refresh token fails on the **second** refresh.
- Concurrent refreshes of the same connection: one wins, the other gets **400**. Take a per-connection lock.
**Webhook credentials are separate, and returned exactly once.** Creating a webhook returns its `id` and a `secret`
(prefixed `whsec_`). Fathom: a webhook's ID "is returned only when you create it and can't be retrieved afterward via
the API—and it isn't included in delivered payloads," and deleting via the API requires it (otherwise delete it in the
UI). **Persist both the ID and the secret at creation**; without the secret you cannot verify deliveries at all.
Report secrets once so the user can paste them into their secret store, say plainly that they are now in the
transcript, then move on.
## 8. Content, webhooks and limits — the operational shape
**Getting transcripts and summaries.** For OAuth connections, `/meetings` will not carry them; use
`GET /recordings/{recording_id}/transcript` and `GET /recordings/{recording_id}/summary`. Both endpoints have two
modes: **omit** `destination_url` and the data comes back in the response; **pass** `destination_url` and the response
is just that URL while Fathom POSTs the payload to it asynchronously. That field is *your* callback, not a download
link — a client that fetches the URL it sent is a bug waiting for the async path to be enabled.
Combined with a **fixed page size of 10** and a heavy-request budget of **30/minute (reducible to 5)**, a backfill of
transcripts is dominated by the per-recording calls, not the listing. Size it that way, honour `Retry-After` on 429,
and never re-authorize on a 429.
**Summaries:** one per recording, always the account's **default** template, always Markdown, not selectable via the
API.
**Downloads:** `POST /recordings/{recording_id}/download` starts async generation; poll the status endpoint or supply a
`destination_url`. Signed URLs expire **~24 hours** after generation, downloads are private to the API client that
created them, and "limited-access shares get **403 Forbidden**" — downloading needs more than view access.
**Webhooks.** Create with `POST /webhooks`: `destination_url` plus `triggered_for` (at least one of `my_recordings`,
`shared_external_recordings`, `my_shared_with_team_recordings`, `shared_team_recordings`), and **at least one** of
`include_transcript`, `include_crm_matches`, `include_summary`, `include_action_items` must be true. Behaviour worth
designing for:
- **Webhooks are tied to summary generation** — "no post-call summary means no webhook," which is why a 30-second test
call never fires one. Fathom's own test advice is to record a brief ~2-minute meeting.
- **One event per new meeting, fired when content is first ready.** No later event if the transcript, summary or the
call's visibility changes afterwards — "Poll the API if you need later updates." Visibility is evaluated at the
moment the call finalizes.
- **Retries happen on non-2xx or timeout**, with the same `webhook-id` header — dedupe on it. There is no manual
re-send.
- **Verification:** headers `webhook-id`, `webhook-timestamp`, `webhook-signature`. Sign `${id}.${timestamp}.${body}`
over the **raw** body with HMAC-SHA256, keyed by the base64-decoded portion of the secret **after** the `whsec_`
prefix, base64 the result, compare constant-time against each space-delimited signature with its `v1,` prefix
stripped, and reject timestamps outside ~5 minutes.
- **No custom headers** can be added to outgoing deliveries, and **the payload does not say which user it belongs to**
— Fathom's guidance is to "route each user's webhooks to a separate, user-specific destination URL rather than a
shared endpoint." A per-connection callback path is the design that works.
**Retention.** By default Fathom keeps recordings until someone deletes them. **Retention policies are Enterprise-only,
are not self-serve** (arranged through `help@fathom.video`), and are **one policy per team, applied to all calls**;
once active, "any recording older than the set period will be permanently deleted." So transcripts do not expire on a
universal schedule — but on an Enterprise customer with a policy, history silently truncates, and a resync will not
bring it back. Ask before promising a customer a permanent archive.
> ### Product note — how this platform's connector uses Fathom (as of 2026-09-20)
>
> Dated facts, not a live reading. Confirm with the connector's owner before acting on them.
>
> - The connector supports **both** credential types: an API key sent as `X-Api-Key`, and OAuth2 bearer tokens. Its
> customer-facing instruction for the key route points at the API Access area of Fathom user settings.
> - API base `https://api.fathom.ai/external`, cursor pagination on `next_cursor` over an `items` array, page size 10 —
> matching Fathom's documented maximum.
> - It requests the `public_api` scope for its meeting and directory reads, exchanges and refreshes with
> `client_id`/`client_secret` in a form-encoded body (no Basic auth), and stores a bearer token.
> - Its configured authorize **and token** hosts are on `fathom.video`, while Fathom documents the token endpoint on
> `api.fathom.ai`. Both hosts answered on 2026-09-20 — raise it with the owner rather than assuming either is wrong.
> - It reads meetings (surfaced both as calendar events and as recordings), teams and team members. Because Fathom has
> no single-meeting GET, it re-lists a ±2-minute `created_at` window to resolve one record — which spends the global
> limit on every single-record read.
> - It fetches transcripts per recording from the recordings transcript endpoint — the heavy class (§8).
> - It subscribes one webhook per connection with **all four** trigger scopes and summary+transcript included, and
> deletes by the ID returned at creation.
>
> **Raise with the owner before registering anything:**
>
> 1. **One production redirect per app** (§4) versus four regional callbacks — this is an app-count decision, not a
> form field.
> 2. The **webhook secret returned at creation is not retained**, so deliveries cannot be HMAC-verified; the callback
> is effectively an open ingest endpoint (§7, §8).
> 3. Two of the four trigger scopes are **Team Plans only** (§6) — a solo customer's subscription may be rejected.
> 4. **Summaries never arrive on list reads** (the list call does not request them, and OAuth connections could not get
> them there anyway), and the dedicated summary endpoint is not called — so summary data appears only in webhook
> payloads (§8).
> 5. The transcript path treats a returned `destination_url` as something to GET, whereas that field is the callback
> URL Fathom posts to when you supply one (§8).
## 9. Verify end-to-end
Authorizing on the account that registered the app proves very little here. Test the path a customer takes:
1. Authorize from a **second, unrelated** Fathom account through the platform's real connect flow, using the region
whose client ID you configured.
2. Confirm the token response carries **both** an access token and a refresh token.
3. Force a refresh, then force a **second** refresh using the token the first one returned. That is what catches a
client that ignores rotation.
4. Fire **two refreshes concurrently** if the platform has multiple workers — one should 400. Confirm the lock.
5. List meetings, then fetch **one** transcript from `/recordings/{id}/transcript`. On an OAuth connection, confirm you
never rely on `include_transcript`/`include_summary`.
6. On a **multi-user** test account: connect as a plain user, count the meetings; change that user's view access to all
teams' calls; re-run and compare. That is the empirical answer to §6 for OAuth.
7. Record a ~2-minute real meeting and confirm the webhook arrives, the signature verifies, and the `webhook-id`
deduplicates a retry.
| Symptom | Cause |
| --- | --- |
| Connection returns only the connecting user's meetings | Working as documented — that user's `view_access` is `own_meetings`; org-wide needs an admin with view access to all shared calls (§6) |
| Some meetings never appear, even for an admin | Private, unshared calls are host-only and no credential reaches them (§6) |
| Second refresh fails, first one worked | Client replayed the original refresh token instead of the rotated one (§7) |
| `400` on refresh under load | Two workers refreshed one connection concurrently; take a per-connection lock (§7) |
| Transcript/summary empty on an OAuth connection | `include_transcript`/`include_summary` are unavailable to OAuth apps — use the `/recordings` endpoints (§8) |
| `429` that clears then returns quickly | Heavy-request budget (30/60s, reducible to 5/60s) on the recordings endpoints, not the global limit (§8) |
| `403` on the users/permissions endpoint | Caller is not an `account_admin` (§6) |
| `403` on a download | Limited-access share; downloading needs more than view access (§8) |
| Download URL stops working overnight | Signed URLs expire ~24h; request a new download (§8) |
| Webhook never fires after a short test call | No post-call summary was generated, so no webhook — record ~2 minutes (§8) |
| Webhook fires once, later edits never arrive | By design; content changes and visibility changes do not re-fire — poll (§8) |
| Webhook subscription rejected for a small customer | Team-Plan-only trigger scopes requested on a non-team plan (§6) |
| Authorization succeeds but the callback is rejected | Wrong region's app: a production redirect lives on exactly one app (§4) |
| A recording ID from a Fathom call URL 404s | The number in a call URL is not the API's `recording_id`; find it via the meetings list (Platform state) |
| Key that worked yesterday now 4xx | The Fathom user was deactivated or removed from the team (§1) |
## 10. Hand off — never commit the secret
- **Do not** write the client secret or a webhook secret into source control, a test, a fixture, a committed `.env`, a
ticket, a PR body or a chat channel. Values go to the user, for their secret store.
- If a code change is needed (a callback host, refresh-token rotation, a refresh lock, webhook signature verification),
keep it secret-free and say what the human must set out of band.
- Close with: app name(s); which Fathom account owns them; **each** client ID labelled with the callback it serves;
where each secret was delivered; the authorize/token endpoints and the API base; the scope (`public_api`); the
refresh-rotation and locking requirement; where webhook IDs and secrets are stored; and anything left for the user.
## Stop and ask
Hand back to a human rather than guessing when: the platform serves more than one production callback and nobody has
agreed to **multiple apps** (§4); the client does not store **rotated** refresh tokens or has no refresh lock (§7); a
customer has been promised **org-wide** meeting coverage and nobody has confirmed an admin with all-teams view access
will be the connecting user (§6); webhook deliveries are being accepted **without signature verification** (§7); the
customer is on Enterprise with a **retention policy** and expects a permanent archive (§8); the registration form does
not match §3; or anything in **Platform state** no longer holds.
## References
Official Fathom pages only. Every URL verified to return HTTP 200 on 2026-09-20.
- Developer docs home — https://developers.fathom.ai/
- Quickstart (API key, key scoping, pagination, filters) — https://developers.fathom.ai/quickstart
- Building with OAuth (registration, review, featured at 20+ users) — https://developers.fathom.ai/oauth
- SDK OAuth guide (token endpoint, grants, rotation, scope, token-endpoint rate limit) — https://developers.fathom.ai/sdks/oauth
- API overview and rate limiting (global, heavy, download, OAuth) — https://developers.fathom.ai/api-overview
- Webhooks (creation, verification algorithm, headers) — https://developers.fathom.ai/webhooks
- FAQ (redirect URIs, refresh tokens, permissions, org access, webhook behaviour) — https://developers.fathom.ai/faq
- Changelog — https://developers.fathom.ai/changelog
- Documentation index — https://developers.fathom.ai/llms.txt
- OpenAPI specification — https://developers.fathom.ai/api-reference/openapi.yaml
- List meetings (filters, `include_*`, OAuth restriction) — https://developers.fathom.ai/api-reference/meetings/list-meetings
- Get transcript — https://developers.fathom.ai/api-reference/recordings/get-transcript
- Get summary — https://developers.fathom.ai/api-reference/recordings/get-summary
- Request a download (access rules, ~24h URLs) — https://developers.fathom.ai/api-reference/recordings/request-a-download
- Get download status — https://developers.fathom.ai/api-reference/recordings/get-download-status
- List users and their permissions (admin-only; `view_access` levels) — https://developers.fathom.ai/api-reference/users/list-users-and-their-permissions
- List teams — https://developers.fathom.ai/api-reference/teams/list-teams
- List team members — https://developers.fathom.ai/api-reference/team-members/list-team-members
- Create a webhook (trigger scopes, secret, ID) — https://developers.fathom.ai/api-reference/webhooks/create-a-webhook
- Delete a webhook — https://developers.fathom.ai/api-reference/webhooks/delete-a-webhook
- New meeting content ready (webhook payload) — https://developers.fathom.ai/api-reference/webhook-payloads/new-meeting-content-ready
- Partner example: Pylon's OAuth and webhook wiring — https://developers.fathom.ai/inspiration/pylon
- OAuth app registration form (sign-in required) — https://fathom.video/marketplace_applications/new
- User settings, API Access section (API keys, webhooks) — https://fathom.video/customize
- Help centre: Public API (user-level keys, 60 calls/minute) — https://help.fathom.video/en/articles/8368641
- Help centre: understanding permissions (settings access vs view access) — https://help.fathom.video/en/articles/10783489
- Help centre: retention policies (Enterprise-only, not self-serve) — https://help.fathom.video/en/articles/6057089
- Fathom integrations listing page — https://www.fathom.ai/integrations
- Fathom About Us (brand assets and boilerplate for launch) — https://www.fathom.ai/about-us
## freshbooks-oauth-app
URL: https://docs.unified.to/skills/freshbooks-oauth-app/SKILL.md
# FreshBooks OAuth2 App Registration
Get a working FreshBooks OAuth2 client — a FreshBooks account, an app on the developer page, redirect URIs, scopes,
a client ID and secret — for a platform that connects many customers' FreshBooks businesses.
Three things decide whether this works, and only one of them is on the registration form.
**A FreshBooks token does not name an account.** After the flow you call the identity endpoint to discover which
businesses the user belongs to — and each one carries *three* different identifiers. Invoices, expenses, taxes and
payments are addressed by a short alphanumeric **account id**; projects, services and time tracking by a numeric
**business id**; the chart of accounts, journal entries and the ledger reports by a **business UUID**. Swap two of
them and FreshBooks returns 404, which reads like "this customer has no data". That is §7.
**Scopes are ticked on the app, not sent on the authorize URL.** FreshBooks' authorize URL takes no `scope`
parameter. Whatever is checked on the app is what every user consents to, and adding a scope later means every
existing user must re-authorize. That is §5.
**Refresh tokens are single-use and there is only ever one alive.** Every token response invalidates the previous
refresh token immediately. A client that keeps reusing the original one works once and then strands the customer.
That is §9.
## Inputs to collect before you start
Ask in one batch. Never invent.
| Input | Notes |
| --- | --- |
| **App name** and description | Shown to the user on the FreshBooks consent screen (§3) |
| **FreshBooks account email** | Any FreshBooks account — trial or paid — can own apps (§2) |
| **Redirect URIs** | Every callback host your platform serves; HTTPS only, no query strings (§4) |
| **Scope set** | Exactly the `user: