

Build a simple Javascript app that calls the Unified.to API
In this tutorial, you’ll build a simple Javascript application that calls the Unified API to list candidates from Lever, an applicant tracking system (ATS). It assumes you have basic knowledge of:
- HTML
- Javascript
- Web development
By the end of this tutorial, you’ll be able to:
- Activate integrations in Unified.to
- Create connections to third-party API providers
- Embed Unified.to's Authorization component to display integrations in your app
- Call the Unified API and display the results
Background
Unified.to is a platform that provides a unified (i.e. single) API for integrating various software applications. In this tutorial, we'll connect to Lever, an Applicant Tracking System (ATS) used by recruiters and talent teams. An ATS like Lever helps companies manage their hiring process by organizing candidate information, job postings, and application workflows.
However, oftentimes app developers will want to integrate with multiple vendors. Integrating directly with multiple platforms can be challenging due to differences in APIs and data models. This is where Unified.to comes in. It provides a standardized way to interact with multiple platforms through a unified API. This means you can write code once and integrate with multiple systems without having to learn each individual API.
Prerequisites
Before we begin, make sure you have:
- Signed up for a Unified.to account
- Completed our Get Started guide in the app (optional, but recommended)
- Downloaded a code editor of your choice, like VS Code
- Installed NPM and Node.js on your system
Project setup
We've prepared a simple JavaScript and HTML application for you to build upon, which can find here. This will serve as the foundation for our tutorial and we recommend that you download it and follow along. Run the commands below:
// inside the folder where you want to download the repo
git clone git@github.com:unified-to/unified-javascript-tutorial.git
cd unified-javascript-tutorial
npm i
The app should now be available on localhost:1234.
This repository contains a basic structure for a single-page application that we'll develop with Unified.to. Take a moment to familiarize yourself with the files we’ll be working with:
index.html: The main HTML file for our application.app.js: Where we'll add our JavaScript code. It contains placeholders and predefined variables for your convenience..env: Where you’ll add sensitive information, like your API token.
Open the folder in your preferred code editor.
Step 1: Retrieve your workspace ID and API token from Unified.to
You can find these values in your developer account under Settings > API Keys. Record your Workspace ID and API Token in the .env file.
UNIFIED_WORKSPACE_ID = your_workspace_id_here;
UNIFIED_API_KEY = your_api_token_here;
Now that you've updated .env, we can start our app. Run the following from the command line:
npm run start
You can view your app on localhost:1234.
Step 2: Activate an integration in the Sandbox environment
The Sandbox environment is where you can activate, explore, and try out integrations in a safe and non-destructive environment. We're going to call the ATS endpoint by the end of this tutorial, so let's activate an ATS integration.
Check that you are in the Sandbox environment
- Navigate to Integrations
- Look for the environment selector near the top of the page. Click on it and select 'Sandbox'. Any subsequent actions you take will happen in the sandbox environment.
Activate Lever
- On the same page (Active Integrations), search for 'Lever' by typing it into the search box.
- Click on the Lever card to open its details page.
- Leave the default settings as-is. Notice that since we’re in the Sandbox environment, the credentials are pre-filled with mock values. Lever uses OAuth 2 by default for authorization.
- At the bottom of the page, click 'Activate’.
The Lever integration is now activated in your Sandbox environment. This allows you to make test API calls and get a feel for the Unified API without needing to connect to a real Lever account.
Step 3: Add the Authorization embedded component to your app
The Authorization embedded component displays a list of your activated integrations. Your customers can use it to authorize access to third-party vendors for your app. We'll dynamically inject the widget script into the DOM using JavaScript, which allows us to use the environment variables we defined earlier.
- Open
app.jsand add the following code:
function embedAuthorizationComponent() {
    const script = document.createElement('script');
    script.src = `https://api.unified.to/docs/unified.js?wid=${UNIFIED_WORKSPACE_ID}&did=unified_widget&env=Sandbox`;
    script.async = true;
    script.onload = () => {
        console.log('Unified.to component script loaded successfully');
    };
    script.onerror = () => {
        console.error('Failed to load Unified.to component script');
    };
    // The script will search the DOM for a div with the id "unified_widget"
    document.body.appendChild(script);
}

// Inject the widget on page load
document.addEventListener('DOMContentLoaded', () => {
    embedAuthorizationComponent();
});
- In
index.html, add the following under<section class="integrations-section">e.g:
<section class="integrations-section">
    <div id="unified_widget" class="integrations-container"></div>
</section>
Now, when your application loads, it will dynamically inject the Unified.to widget into the DOM. Refresh the page, you should see the widget will appear displaying a list of activated integrations.
Step 4: Handle and store the connection ID
When a user clicks on the Lever integration in the Unified.to widget, a new page will open where they will be asked to grant access to Lever before being redirected back to your app.
The redirect URL contains important parameters, including id , which represents the Connection ID. We need to store this ID for making subsequent calls to the Unified API.
Add the following code to app.js to handle the connection process:
function handleConnectionCallback() {
    const urlParams = new URLSearchParams(window.location.search);
    const connectionId = urlParams.get('id');

    if (connectionId) {
        console.log('New connection created:', connectionId);

        // Store the connectionId for later use
        localStorage.setItem('unifiedConnectionId', connectionId);
    } else {
        console.log('No connection ID found in URL parameters');
    }
}

// Execute the handler when the page loads
window.addEventListener('load', handleConnectionCallback);
Warning: Storing the Connection ID in localStorage is used here for simplicity and learning purposes only. In a production environment, you should securely store this information server-side, associated with the user's account. Refer to our guide on How to Associate a Connection ID with your End-User for best practices.
Step 5: Create and verify the connection
Let’s walk through creating a connection to confirm that it works.
Create the Connection
- In the widget, click on the Lever integration.
- Authorization Flow:
- A new page will open with a disclaimer that you are on the Tester plan.
- Click Continue to grant access to Lever. Note: The authorization flow is simplified in the Sandbox environment. In Production, your user will be shown the scopes you are requesting and asked to grant you access.
- After granting access, you'll be automatically redirected back to your app.
Verify the Connection
Let's verify that the connection was created successfully:
- Check the URL:
- Look at the URL in your browser's address bar.
- You should see a parameter
idin the URL. This is your Connection ID. - For example, the URL might look like:
http://localhost:1234?id=abc123...
- Console Output:
- Open your browser's developer tools.
- Go to the Console tab.
- You should see a message similar to:
New connection created: abc123... - This confirms that our
handleConnectionCallbackfunction has captured the Connection ID.
- Verify Local Storage (Optional):
- In the developer tools, go to the Application tab.
- Under Storage, select Local Storage and your domain.
- You should see an item named
unifiedConnectionIdwith the value matching the ID from the URL.
Step 6: Set up API call to the Unified ATS Endpoint
In this step, we'll implement the API call to fetch candidate data from the Unified ATS endpoint.
Implement the API call function
In app.js, add the following function to fetch ATS candidate data from the ATS endpoint:
async function fetchATSCandidates(connectionId) {
    const options = {
        method: 'GET',
        url: `https://api.unified.to/ats/${connectionId}/candidate`,
        headers: {
            authorization: `bearer ${UNIFIED_API_KEY}`,
        },
        params: {
            limit: 20,
            offset: 0,
        },
    };

    try {
        const response = await axios.request(options);
        return response.data;
    } catch (error) {
        console.error('Error fetching ATS candidates:', error);
        return null;
    }
}
API Reference: List all candidates
Notice that we don't need to specify Sandbox as an environment parameter in the API call - the connection we created is part of the Sandbox environment, so any data that comes back from it will be synthetic.
Fetch and display candidates in the UI
In index.html, add the following under <section class="candidates-section"> e.g:
<section class="candidates-section">
    <button id="fetchCandidatesBtn" class="fetch-button">Fetch candidates</button>
    <ul id="candidates-list" class="candidates-list"></ul>
</section>
Implement the click handler
Add the following code to your app.js file to handle the button click and display the results:
function displayCandidates(candidates) {
    const candidatesList = document.getElementById('candidates-list');
    candidatesList.innerHTML = '<h2 class="section-title">Candidates:</h2>';

    candidates.forEach((candidate) => {
        const candidateElement = document.createElement('li');
        candidateElement.className = 'candidate-item';
        candidateElement.innerHTML = `
            <div class="candidate-avatar-container">
                <img class="candidate-avatar" src="https://ui-avatars.com/api/?name=${encodeURIComponent(
                    candidate.name || 'na'
                )}&background=random" alt="${candidate.name || 'Candidate'} avatar">
                <div class="candidate-info">
                    <p class="candidate-name">${candidate.name || 'N/A'}</p>
                    <p class="candidate-email">${
                        candidate.emails?.[0]?.email || 'No email provided'
                    }</p>
                </div>
            </div>
        `;
        candidatesList.appendChild(candidateElement);
    });
}

document.getElementById('fetchCandidatesBtn').addEventListener('click', async () => {
    const connectionId = localStorage.getItem('unifiedConnectionId');

    if (!connectionId) {
        console.error('No connection ID found. Please connect to Lever first.');
        return;
    }

    const candidates = await fetchATSCandidates(connectionId);

    if (candidates) {
        displayCandidates(candidates);
    } else {
        console.log('No candidates found or error occurred');
        document.getElementById('candidatesList').innerHTML =
            '<p>No candidates found or an error occurred.</p>';
    }
});
Step 7: Call the Unified API
Now, let's test our application to ensure everything is working correctly.
Click Fetch Candidates. You should see a list of candidates appear on your screen. Since we're working in the Sandbox environment, these will be mock candidates generated by Unified.to.
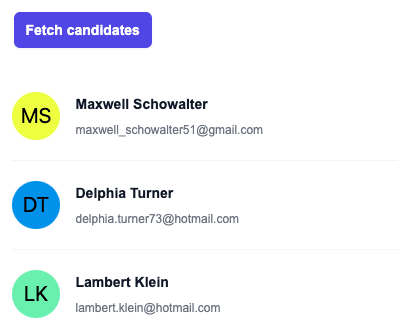
Troubleshooting: If you don't see any candidates or encounter an error, check the browser console for any error messages or verify that your Unified API Key is correctly set in the .env file.
Summary
Congratulations! You've built a Javascript app that can call the Unified.to API and fetch candidates from Lever. In this tutorial, you saw how to:
- Activate integrations in Unified.to
- Create connections by granting access to third-party vendors
- Add the Unified.to Embedded Widget to your app
- Make API calls to our unified API
Next Steps
From here, you can start adding integrations from Unified.to into your own project. The following resources can help you on your way:
- Use one of our SDKs
- Get familiar with webhooks
- See how to customize the auth flow with our Customize your authorization flow with the Unified API tutorial
Happy building!
- Background
- Prerequisites
- Project setup
- Step 1: Retrieve your workspace ID and API token from Unified.to
- Step 2: Activate an integration in the Sandbox environment
- Step 3: Add the Authorization embedded component to your app
- Step 4: Handle and store the connection ID
- Step 5: Create and verify the connection
- Step 6: Set up API call to the Unified ATS Endpoint
- Step 7: Call the Unified API
- Summary
- Next Steps